manuals.online logo
Brands
  1. Home
  2. •
  3. Brands
  4. •
  5. Vimar
  6. •
  7. Intercom System
  8. •
  9. Vimar ELVOX 0930/000.04 User manual

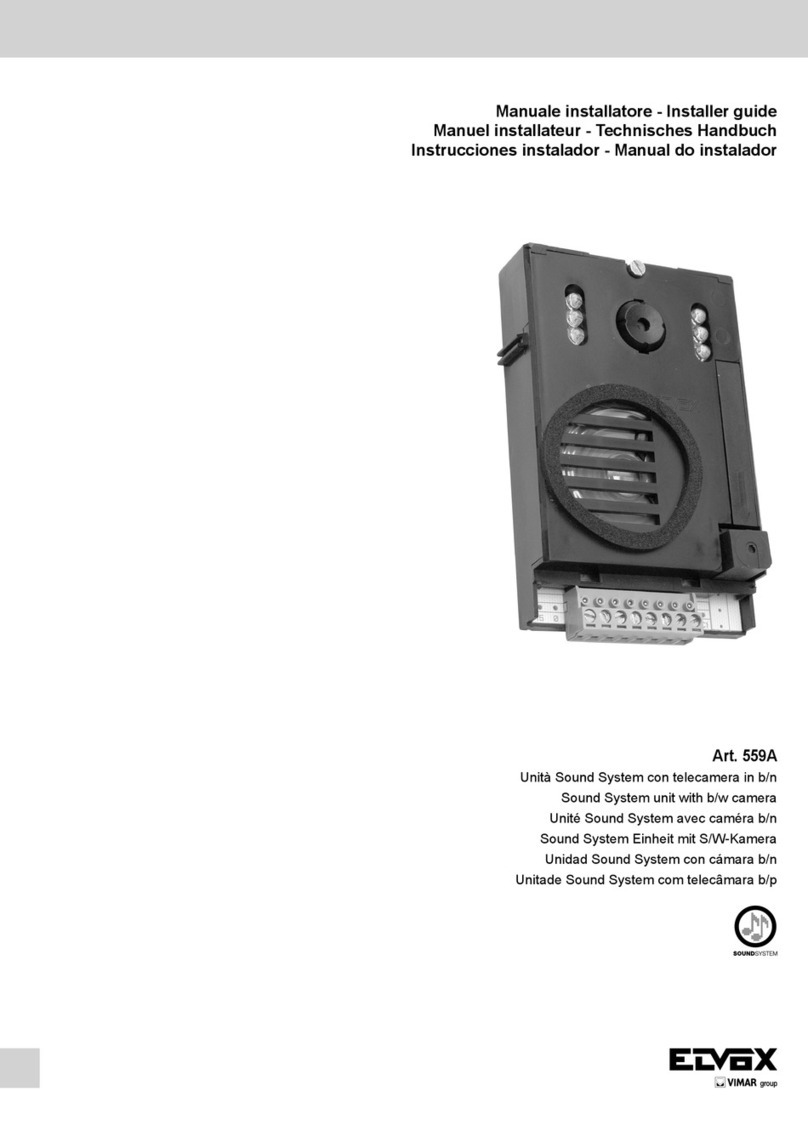
Vimar ELVOX 0930/000.04 User manual

Istruzioni - Instruction sheet - Notice technique
Anleitungen - Instrucciones - Instruções
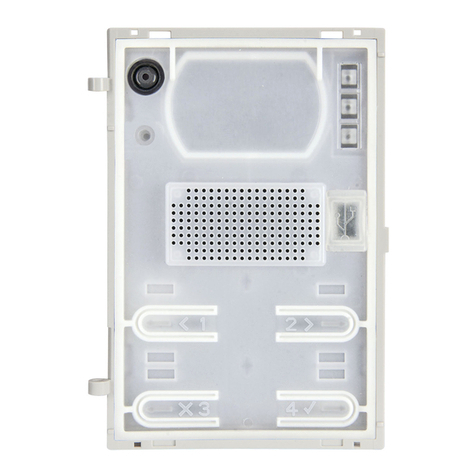
Art. 0930/000.04, Art. 930A
Posto esterno - Speech unit - Poste externe
Außenstelle - Aparato externo - Posto externo
S6I.930.000 05 16 04
VIMAR - Marostica - Italy
Vimar SpA: Viale Vicenza, 14
36063 Marostica VI - Italy
Tel. +39 0424 488 600 - Fax (Italia) 0424 488 188
Fax (Export) 0424 488 709
www.vimar.com
Regolazione guadagno microfono
Microphone gain adjustment
Réglage du gain du microphone
Einstellung Mikrofonverstärkung
Regulador ganancia micrófono
Regulação do ganho do microfone
Morsettiera
Terminal block
Boîte de raccordement
Klemmenleiste
Regleta conexiones
Bornes
Pulsante luminoso
Luminous push-button
Poussoir lumineux
Leuchttaste
Pulsador luminoso
Botão luminoso
Microfono
Microphone
Mikrofon
Micrófono
Microfone
Altoparlante
Loudspeaker
Haut-parleur
Lautsprecher
Altavoz
Altifalante
Art. 0930/000.04
Fig. 2
Altoparlante
Loudspeaker
Haut-parleur
Lautsprecher
Altavoz
Altifalante
Microfono
Microphone
Mikrofon
Micrófono
Microfone
Morsettiera
Terminal block
Boîte de raccordement
Klemmenleiste
Regleta conexiones
Bornes
Regolazione guadagno microfono
Microphone gain adjustment
Réglage du gain du microphone
Einstellung Mikrofonverstärkung
Regulador ganancia micrófono
Regulação do ganho do microfone
Pulsante luminoso
Luminous push-button
Poussoir lumineux
Leuchttaste
Pulsador luminoso
Botão luminoso
Fig. 1
Art. 930A
930A - Allontanamento del micro-
fono dall’altoparlante
Quando si utilizza il posto esterno 930A
nei sistemi bicanali a viva voce o si
richieda di aumentare notevolmente il
volume è possibile allontanare il micro-
fono dall’altoparlante per evitare l’effetto
LARSEN (fischio).
Per spostare il microfono eseguire
quanto segue:
- Aprire lo sportello con la freccia
dell’Art. 930A (Fig. 1)
- Sfilare il microfono dalla sue sede.
- Inserire il microfono nel lato destro
della testata inferiore del telaio serie
8000. Nella testata sono ricavate due
lamelle dove inserire il microfono.
930A - Averting the microphone
from the loudspeaker
When the speech unit Art. 930A is used
in two-channel open voice systems or
the volume is to be increased consid-
erably it is possible to install the micro-
phone far away from the lousdspeaker
to avoid the LARSEN effect (buzzing
sound).
To displace the microphone operate as
it follows:
- Open the door with the arrow of Art.
930A (Fig. 1)
- Remove the microphone from its seat.
- Insert the microphone on the right
hand side of the frame (8000 Series)
lower head. On the head there are two
locks where to insert the microphone.
930A - Éloignement du micro-
phone dès haut-parleur
Wenn die Sprechstelle Art. 930A in
Freisprech-Systemen verwendet wird,
oder die Lautstärke beträchtlich zu
erhöhen ist, kann das Mikrofon entfernt
vom Lautsprecher eingebaut werden,
um dem LARSEN Effekt (Pfeifen) zu
vermeiden.
- Die Abdeckung mit dem Pfeil des Art.
930A öffnen (Fig. 1).
- Das Mikrofon aus seiner Halterung
herausnehmen
- Das Mikrofon in die Aufnahme rechts
unten des Montagerahmens der Serie
8000 einstecken. Dort sind zwei
Lamellen zum Einfügen des Mikrofons
vorhanden.
930A - Entfernung des Mikrofons
vom Lautsprecher
Lorqu’on utilise le poste externe Art.
930A dans des systèmes bicanaux à
vive voix ou lorsqu’on demande d’aug-
menter considérablement le volume il
est possible d’éloigner le microphone du
haut-parleur pour éviter l’effet LARSEN
(bourdonnement).
Pour déplacer le microphone effectuer
les opérations suivantes:
- Ouvrir la porte avec la flèche de l’Art.
930A. (Fig. 1).
- Défiler le microphone de son siège.
- Insérer le microphone dans le côté
droit de la tête inférieure du châssis
série 8000. Dans la tête il y a deux
lamelles où insérer le microphone.
930A - Alejamiento del micrófono
del altavoz
Cuando se utiliza el aparato externo Art.
930A en sistemas bicanales a viva voz
o hay que aumentar notablemente el
volumen se puede instalar el micrófono
lejos del altavoz para evitar el efecto
LARSEN (silbido).
Par desplazar el micrófono efectuar las
siguients operaciones:
- Abrir la puerta con la flecha del Art.
930A (Fig. 1).
- Desfilar el micrófono de su asiento.
- Insertar el micrófono en el lado dere-
cho de la cabeza del marco serie
8000. En la cabeza se encuentran
dos laminillas donde insertar el micró-
fono.
930A - Afastamento do microfone
do altifalante
Nos casos em que se utiliza o posto
externo 930A para sistemas alta-voz
bicanal ou é necessário aumentar o
volume, é possível afastar o microfo-
ne do altifalante para evitar o efeito
LARSEN (ruído).
Para afastar o microfone proceder do
seguinte modo:
- Abrir a tampa do art. 930A (Fig. 1), de
acordo com a seta.
- Retirar o microfone da sua sede.
- Inserir o microfone no lado direito do
topo inferior do caixilho série 8000.
Neste topo existem duas tiras para
aplicar o microfone.
GUIDAFILO11236GUIDAFILO11236
CN2MP2.54
CHIODINOD1.3 CHIODINO D1.3
LED2
MOR6P5MEB
R2
MR1
DZ1
R7
Q2
R6
Q1
R4
C2
P2
R3
R5
CN2
CN1 CN3
R1
D1
C1
C3
CN4
CN5
DL1
33
15V 1W
4.7
BC547
10K
BC547
2M2
47nF 100V
4K7 PT10 RV-C
3K3
560K
074
1N4004
22UF 50V-H
22nF 100V
876543
M-
+M
A- A+
INTERNO
VOLUME
L1
Utilizzo del pulsante luminoso per
illuminazione targa
Il pulsante luminoso collegato ai morset-
ti 3-4 può essere utilizzato per accen-
dere momentaneamente il modulo LED
per illuminazione targa. Si può usare
un temporizzatore per accensione pro-
lungata o luce scale. Carico massimo
0,5A-24V c.a.
N.B. Eseguire il ponticello fra i morsetti
5 e 6.
Use of luminous push-button for
panel lighting
Luminous push-button connected to ter-
minal 3 and 4 may be used to switch on
Led module for panel lighting when it is
pressed. A timer may be used for pro-
longing panel or stair-lighting. Charge
0,5A - 24V A.C. max.
N.B. Bridge terminals 5 and 6.
Emploi du poussoir lumineux pour
l’éclairage de la plaque de rue
Le poussoir lumineux connecté aux
bornes 3 et 4 peut être utilisé pour
allumer momentanéament les modules
LED de la plaque. On peut employer
une minuterie pour éclairage prolongé
ou pour lumière-escaliers.
Charge de 0,5 -24V c.a. au maximum.
N.B. Raccorder le pont entre les bornes
5 et 6.
Verwendung der Beleuchteten
Taste für Die Klingeltableau-
Beleuchtung
Die mit Klemme 3 und 4 verbunde-
ne Leuchtaste kann LED-Modul
für die kurze Beleuchtung des
Klingeltableaus eingesetzt werden.
Man kann einen Zeitregler für ver-
längerte Beleuchtungsdauer oder für
Treppenhauslicht verwenden. Max Last
0,5A - 24V~.
N.B. Die Brücken zwischen den
Klemmen 5 und 6 einsetzen.
Utilización del pulsador luminoso
para iluminación de la placa
El pulsador luminoso conectado en los
terminales 3 - 4 puede ser utilizado para
el encendido momentáneo de Módulo
Led que ilumina la placa. Se puede
utilizar un temporizador para el encen-
dido prolongado o luz escalera. Carga
máxima 0,5 - 2V c.a.
N.B. Efectuar el puente entre los termi-
nales 5 y 6.
Utilização do botão luminoso para
iluminação de botoneiras
O botão luminoso ligado aos bornes
3 - 4 pode ser utilizado para acen-
der momentaneamente a módulo LED
para iluminação da botoneira. Pode ser
usado um temporizador para prolongar
o acendimento ou para comandar a
luz das escadas. Carga máxima 0,5A
- 24V c.a.
N.B. Executar um shunt entre os bornes
5 e 6.
GUIDAFILO11236GUIDAFILO11236
CN2MP2.54
CHIODINOD1.3 CHIODINO D1.3
LED2
MOR6P5MEB
R2
MR1
DZ1
R7
Q2
R6
Q1
R4
C2
P2
R3
R5
CN2
CN1 CN3
R1
D1
C1
C3
CN4
CN5
DL1
33
15V 1W
4.7
BC547
10K
BC547
2M2
47nF 100V
4K7 PT10 RV-C
3K3
560K
074
1N4004
22UF 50V-H
22nF 100V
876543
M-
+M
A- A+
INTERNO
VOLUME
L1
Art. 0930/000.04
Art. 930A
N° C1988
123S
C
D
B
A
CH
L1
R
7
6
5
8
3
4
7
8
4
5
3
1
2
6
B
PRI
27631O1O158
7
5
3
1
2
6
B
6
5
3
2
1
B
7
8
4
4
4
Rete-Mains
Réseau-Netz
Red-Rede
Alimentatore
Power supply
Alimentation
Netzgerät
Alimentador
Art. 0831
Citofono - Phone
Poste - Haustelefon
Teléfono- Telefone
Art. 620R
Citofono - Phone
Poste - Haustelefon
Teléfono - Telefone
Art. 8870 - 8871
Citofono - phone
Poste - Haustelefon
Teléfono -Telefone
Art. 710R
A- Targa con posto esterno
Entrance panel
Plaque de rue avec poste externe
Klingeltableau mit Sprechstelle
Placa con aparato externo
Botoneira com posto externo
Serie-série 8000 - PATAVIUM
3300 - 8100 - 1200 - 1300
B- Pulsante supplementare serratura
Additional push-button for lock
Poussoir supplémentaire gâche
zusätzliche Türöffnertaste
Pulsador suplementario cerradura
Botão suplementar de trinco
C- Serratura elettrica
Electric lock
Gâche électrique
Elektrischer Türöffner
Cerradura eléctrica
Trinco eléctrico 12V~
D- Posto esterno
Outdoor unit
Poste externe
Sprechstelle
Aparato externo
Posto esterno
Art.0930/000.04 - 930A
L1 - Modulo LED targa
Led module for entrance panel.
Module LED pour plaque de rue
LED-Modul für Klingeltableau.
Módulo Led para placa.
Módulo LED para botoneira.
(10 moduli LED max.)
30 moduli LED con Art. M832
40 moduli LED con Art. 0832/030
Sezione conduttori - Conductor section
Sections des conducteurs-Leiterqueschnitt
Secciones conductores-Secção condutores
Conduttori
Conductors
Conductors
Leitungslänge
Conductores
Condutores
fino a 50m
up to 50m
jusqu’à 50m
bis 50m
hasta 50m
até 50m
fino a 100m
up to 100m
jusqu’à 100m
bis 100m
hasta 100m
até 100m
fino a 200m
up to 200m
jusqu’à 200m
bis 200m
hasta 200m
até 200m
Comune e serratura
Common and lock
Commun et gâche
Gemeinsame und Türöffner
Común y cerradura
Commun e trinco
0,5 mm2 0,75 mm2 1,5 mm2
Altri-Others-Autres
Andere-Otros-Outros
0,25 mm2 0,5 mm2 1 mm2
Schema di collegamento portiere elettrico.
Wiring diagram for electric door-opener system.
Schéma des connexions pour portier électrique.
Schaltplan für Türsprechanlage.
Esquema de conexionado para portero eléctrico.
Esquema de ligação para portero eléctrico.
Montante citofonico
Aideo door entry cable riser
Montant de portier-audio
Steigleitung der Aideo-Türsprechanlage
Coluna montante audio
Montante de audioportero
PRI
27C23-1C18
321
615ASO
7
8
4/5
3
1
2
6
S
B
7
6
5
8
3
4
D
C
A
CH
R
C
A
6S
7
6P
6E
5
3
2
1
AU
6
L1
Schema di collegamento portiere elettrico con sistema di chiamata “Sound System”.
Wiring diagram of electric door opener with “Sound System” call.
Schéma des connexions pour portier électrique avec appel “Sound System”.
Shaltplan für Türsprechanlage mit “Sound System” Ruf.
Esquema de conexionado portero eléctrico con sistema de llamada “Sound System”
Esquema de ligação do portero eléctrico com chamada “Sound System”
Alimentatore
Power supply
Alimentation
Netzgerät
Alimentador
Art. 0931 (30VA)
Rete-Mains
Réseau-Netz
Red-Rede
Citofono - Phone
Poste - Haustelefon
Teléfono - Telefone
Art. 8875 - (Art. 0875/100)
A- Targa con posto esterno
Entrance panel
Plaque de rue avec poste externe
Klingeltableau mit Sprechstelle
Placa con aparato externo
Botoneira com posto externo
Serie-série Patavium
3300 - 8000 - 8100 - 1200 - 1300
B- Pulsante supplementare serratura
Additional push-button for lock
Poussoir supplémentaire gâche
zusätzliche Türöffnertaste
Pulsador suplementario cerradura
Botão suplementar de trinco
C- Serratura elettrica
Electric lock
Gâche électrique
Elektrischer Türöffner
Cerradura eléctrica
Trinco eléctrico 12V~
D- Posto esterno - Outdoor unit
Poste externe - Sprechstelle
Aparato externo - Posto esterno
Art. 0930/000.04 - 930A
L1- Modulo LED targa
Led module for entrance panel.
Module LED pour plaque de rue
LED-Modul für Klingeltableau.
Módulo Led para placa.
Módulo LED para botoneira.
(10 moduli LED max.)
30 moduli LED con Art. M832
40 moduli LED con Art. 0832/030
Citofono - Phone
Poste - Haustelefon
Teléfono - Telefone
Art. 6200 (7100)
Art. 62K0
Art. 62K0/2
N° C2180_1 R7
Sezione conduttori - Conductor section
Sections des conducteurs-Leiterqueschnitt
Secciones conductores-Secção condutores
Conduttori
Conductors
Conductors
Leitungslänge
Conductores
Condutores
fino a 50m
up to 50m
jusqu’à 50m
bis 50m
hasta 50m
até 50m
fino a 100m
up to 100m
jusqu’à 100m
bis 100m
hasta 100m
até 100m
fino a 200m
up to 200m
jusqu’à 200m
bis 200m
hasta 200m
até 200m
Comune e serratura
Common and lock
Commun et gâche
Gemeinsame und Türöffner
Común y cerradura
Commun e trinco
0,5 mm2 0,75 mm2 1,5 mm2
Altri-Others-Autres
Andere-Otros-Outros
0,25 mm2 0,5 mm2 1 mm2
Montante citofonico
Aideo door entry cable riser
Montant de portier-audio
Steigleitung der Aideo-Türsprechanlage
Coluna montante audio
Montante de audioportero
AC
C
AS
BL
BI
RO
A+
A-
R
PRI
27C23-1C18
B
3
21
615ASO
6E
3
2
1
AU
C
A
7
6
5
8
3
4
D
C
6S
S
7
3
1
2
6
6E
8
E
7
6P
6E
6
3
2
1
AU
A
5
Art.8878
CH
L1
Schema di collegamento portiere elettrico con sistema di chiamata “Sound System” e segreto di conversazione
Wiring diagram of electric door-opener system with call system “Sound System” and conversation privacy
Schéma des connexions pour portier électrique avec appel “Sound System” et secret de conversation
Schaltplan für Türsprechanlage mit “Sound System” Ruf und Mithörsperre
Esquema de conexionado portero eléctrico con llamada “Sound System” y secreto de conversación
Esquema de ligação do portero eléctrico com chamada “Sound System” e segredo de conversação
Rete-Mains
Réseau-Netz
Red-Rede
Citofono - Phone
Poste - Haustelefon
Teléfono - Telefone
Art. 6200 + 6155
(Art. 7100 + 7155)
Alimentatore
Power supply
Alimentation
Netzgerät
Alimentador
Art. 0931 (30VA)
Citofono - Phone
Poste - Haustelefon
Teléfono - Telefone
Art. 8878 (0875/081)
*2
*1
N° C2180 R7
Nel citofono Art. 8878 e 0875/081
lasciare il ponticellosui terminali
C-AS.
On interphone Art. 8878 and
0875/081 leave the jumperon ter-
minals C-AS.
Dans le poste d’apparte-ment Art.
8878 et 0875/081 laisser le pontaje
sur lesbornes C-AS.
Beim Haustelefon Art. 8878 und
0875/081 die Brücke auf den
Klemmen C-AS eingesteckt lassen.
En el interfono Art. 8878 y 0875/081
dejar el puente enlos bornes C-AS.
No telefone Art. 8878 e 0875/081
manter a ponte nosterminais C-AS.
AC
C
AS
BL
BI
RO
A+
A-
R
PRI
27C23-1C18
B
3
21
615ASO
6E
3
2
1
AU
C
A
7
6
5
8
3
4
D
C
6S
S
7
3
1
2
6
6E
8
E
7
6P
6E
6
3
2
1
AU
A
5
Art.8878
CH
L1
*1
Art. 0875/081, 8878 *2
Il citofono serie PETRARCA Art. 6200 è predisposto per azionamento diretto della serratura. Per azio-
nare la serratura solo dopo la chiamata dalla targa occorre spostare il filo della serratura (collegato
al morsetto 7) su un pulsante supplementare e collegare il filo della scheda Art. 6155 all’altro capo e
utilizzare un relè Art. 0170/001 come da schema.
Interphone Art. 6200 from the PETRARCA series is designed to operate the door lock directly. To
activate the lock release only after the call from entrance panel displace the door lock wire (connected
to terminal 7) to an additional push-button and connect wire of card Art. 6155 on the other end of
push-button and use a relay Art. 0170/001 according to diagram.
Le poste de la série PETRARCA Art.6200 est prévu pour l’actionnement direct de la gâche. Pour acti-
ver la gâche seulement après l’appel de la plaque de rue il faut déplacer le fil de la gâche (connecté à
la borne 7) sur un bouton-poussoir supplémentaire et connecter le fil SR de la carte Art. 6155 à l’autre
côté du bouton-poussoir et utiliser un relais Art. 0170/001 selon le schéma.
Das Haustelefon der Baureihe PETRACA Art.6200 ist zur direkten Betätigung des Türöffners vorbe-
reitet. Um den Türöffner nur nach dem Klingeltableauruf zu betätigen, den Türöffnerdraht (an Klemme
7 angeschlossen) auf eine Zusatztaste umklemmen, den Draht der Karte Art. 6155 auf den anderen
Anschluss der Taste anschließen und ein Relais Art. 0170/001 gemäß dem Schaltplan verwenden.
El interfono serie PETRARCA Art. 6200 viene suministrado con predisposición para el accionamiento
directo de la cerradura. Para activar la cerradura solamente después de haber llamado de la placa
hay que desplazar el hilo de la cerradura (conectado al borne 7) en un pulsador suplementario y
conectar el hilo de la ficha Art. 6155 a la otra extremidad del pulsador y utilizar el relé Art. 0170/001
según el esquema.
O telefone sa série PETRARCA Art. 6200 está preparado para accionar directamente o trinco. Para
accionar o trinco, após a chamada da botoneira, deve-se ligar o fio do trinco (ligado ao borne 7) a
um botão suplementar e ligar o fio da placa Art. 6155 na outra extremidade do botão e utilizar um
relé Art. 0170/001 conforme o esquema.
SR
o
CN1
Art. 0931 (30VA)
Alimentatore
Power supply
Alimentation
Netzgerät
Alimentador
Relè
Relay
Relais
Art. 0170/001
A- Targa con posto esterno
Entrance panel
Plaque de rue avec poste externe
Klingeltableau mit Sprechstelle
Placa con aparato externo
Botoneira com posto externo
Serie-série Patavium
8000 - 1200 - 3300 - 8100 - 1300
B- Pulsante supplementare serratura
Additional push-button for lock
Poussoir supplémentaire gâche
zusätzliche Türöffnertaste
Pulsador suplementario cerradura
Botão suplementar de trinco
C- Serratura elettrica
Electric lock
Gâche électrique
Elektrischer Türöffner
Cerradura eléctrica
Trinco eléctrico 12V~
D- Posto esterno
Outdoor unit
Poste externe
Sprechstelle
Aparato externo
Posto esterno
Art. 0930/000.04 - 930A
E- Scheda segreto di conversazione
Conversation privacy card
Carte secret de conversation
Karte Mithörsperre
Ficha secreto de conversación
Placa de conversação em segredo
Art. 6155
L1 - Modulo LED targa
Led module for entrance panel.
Module LED pour plaque de rue
LED-Modul für Klingeltableau.
Módulo Led para placa.
Módulo LED para botoneira.
(10 moduli LED max.)
30 moduli LED con Art. M832
40 moduli LED con Art. 0832/030
Il manuale istruzioni è scaricabile dal
sito www.vimar.com
REGOLE DI INSTALLAZIONE.
L’installazione deve essere effettuata
con l’osservanza delle disposizioni re-
golanti l’installazione del materiale elet-
trico in vigore nel Paese dove i prodotti
sono installati.
CONFORMITÀ NORMATIVA.
Direttiva EMC
Norme EN 60065, EN 61000-6-1 e EN
61000-6-3.
INFORMAZIONE AGLI UTENTI
AI SENSI DELLA DIRETTIVA
2012/19/UE (RAEE)
Al ne di evitare danni all’ambien-
te e alla salute umana oltre che di incor-
rere in sanzioni amministrative, l’appa-
recchiatura che riporta questo simbolo
dovrà essere smaltita separatamente
dai riuti urbani ovvero riconsegnata al
distributore all’atto dell’acquisto di una
nuova. La raccolta dell’apparecchiatura
contrassegnata con il simbolo del bido-
ne barrato dovrà avvenire in conformità
alle istruzioni emanate dagli enti territo-
rialmente preposti allo smaltimento dei
riuti. Per maggiori informazioni contat-
tare il numero verde 800-862307.
The instruction manual is downloada-
ble from the site www.vimar.com
INSTALLATION RULES.
Installation should be carried out ob-
serving current installation regulations
for electrical systems in the Country
where the products are installed.
CONFORMITY.
EMC directive
Standards EN 60065, EN 61000-6-1
and EN 61000-6-3.
INFORMATION FOR USERS
UNDER DIRECTIVE 2012/19/
UE (WEEE)
In order to avoid damage to the
environment and human health as well
as any administrative sanctions, any ap-
pliance marked with this symbol must be
disposed of separately from municipal
waste, that is it must be reconsigned to
the dealer upon purchase of a new one.
Appliances marked with the crossed out
wheelie bin symbol must be collected in
accordance with the instructions issued
by the local authorities responsible for
waste disposal.
Télécharger le manuel d’instructions
sur le site www.vimar.com
RÈGLES D’INSTALLATION.
L’installation doit être effectuée dans
le respect des dispositions régulant
l’installation du matériel électrique en
vigueur dans le Pays d’installation des
produits.
CONFORMITÉ AUX NORMES.
Directive EMC
Normes EN 60065, EN 61000-6-1 et EN
61000-6-3.
COMMUNICATION AUX UTILI-
SATEURS CONFORMÉMENT
À LA DIRECTIVE 2012/19/UE
(DEEE)
Pour protéger l’environnement et la san-
té des personnes et éviter toute sanc-
tion administrative, l’appareil portant ce
symbole ne devra pas être éliminé avec
les ordures ménagères mais devra être
coné au distributeur lors de l’achat d’un
nouveau modèle. La récolte de l’appa-
reil portant le symbole de la poubelle
barrée devra avoir lieu conformément
aux instructions divulguées par les or-
ganisms régionaux préposés à l’élimi-
nation des déchets.
Die Bedienungsanleitung ist auf der
Website www.vimar.com zum Down-
load verfügbar
INSTALLATIONSVORSCHRIFTEN.
Die Installation hat gemäß den im jewei-
ligen Verwendungsland der Produkte
geltenden Vorschriften zur Installation
elektrischer Ausrüstungen zu erfolgen.
NORMKONFORMITÄT.
EMC-Richtlinie
Normen DIN EN 60065, EN 61000-6-1
und EN 61000-6-3.
VERBRAUCHERINFORMA-
TION GEMÄSS RICHTLINIE
2012/19/UE (WEEE)
Zum Schutz von Umwelt und
Gesundheit, sowie um Bußgelder zu
vermeiden, muss das Gerät mit die-
sem Symbol getrennt vom Hausmüll
entsorgt oder bei Kauf eines Neugeräts
dem Händler zurückgegeben werden.
Die mit dem Symbol der durchgestri-
chenen Mülltonne gekennzeichneten
Geräte müssen gemäß den Vorschriften
der örtlichen Behörden, die für die Mül-
lentsorgung zuständig sind, gesammelt
warden.
El manual de instrucciones se puede
descargar en la página web www.vi-
mar.com
NORMAS DE INSTALACIÓN.
El aparato se ha de instalar en conformi-
dad con las disposiciones sobre mate-
rial eléctrico vigentes en el País.
CONFORMIDAD NORMATIVA.
Directiva EMC
Normas EN 60065, EN 61000-6-1 y EN
61000-6-3.
INFORMACIÓN A LOS USUA-
RIOS DE CONFORMIDAD CON
LA DIRECTIVA 2012/19/UE
(RAEE)
Para evitar perjudicar el medio ambien-
te y la salud de las personas, así como
posibles sanciones administrativas, el
aparato marcado con este símbolo no
deberá eliminarse junto con los residuos
urbanos y podrá entregarse en la tien-
da al comprar uno nuevo. La recogida
del aparato marcado con el símbolo del
contendedor de basura tachado deberá
realizarse de conformidad con las ins-
trucciones emitidas por las entidades
encargadas de la eliminación de los re-
siduos a nivel local.
É possível descarregar o manual de
instruções no site www.vimar.com
REGRAS DE INSTALAÇÃO
A instalacao deve ser efectuada de
acordo com as disposicoes que regu-
lam a instalacao de material electrico,
vigentes no Pais em que os produtos
sao instalados.
CUMPRIMENTO DE REGULAMENTA-
ÇÃO
Directiva EMC
Normas EN 60065, EN 61000-6-1 e EN
61000-6-3.
INFORMAÇÃO AOS UTILIZA-
DORES NOS TERMOS DA DI-
RECTIVA 2012/19/UE (REEE)
Para evitar danos ao meio am-
biente e à saúde humana, e evitar incor-
rer em sanções administrativas, o equi-
pamento que apresenta este símbolo
deverá ser eliminado separatamente
dos resíduos urbanos ou entregue ao
distribuidor aquando da aquisição de
um novo. A recolha do equipamento
assinalado com o símbolo do contentor
de lixo barrado com uma cruz deverá
ser feita de acordo com as instruções
fornecidas pelas entidades territorial-
mente previstas para a eliminação de
resíduos.

This manual suits for next models

2

Other Vimar Intercom System manuals

Vimar Elvox 3300 Series Assembly instructions

Vimar

Vimar Elvox 3300 Series Assembly instructions

Vimar ELVOX 8000 Series Assembly instructions

Vimar

Vimar ELVOX 8000 Series Assembly instructions

Vimar Elvox Petrarca Series User manual

Vimar

Vimar Elvox Petrarca Series User manual

Vimar ELVOX TAB 40507 User manual

Vimar

Vimar ELVOX TAB 40507 User manual

Vimar ELVOX Pixel Up 40404 User manual

Vimar

Vimar ELVOX Pixel Up 40404 User manual

Vimar ELVOX 69MX Assembly instructions

Vimar

Vimar ELVOX 69MX Assembly instructions

Vimar ELVOX K40917 User manual

Vimar

Vimar ELVOX K40917 User manual

Vimar Elvox 0554 User manual

Vimar

Vimar Elvox 0554 User manual

Vimar ELVOX Giotto 6328 Assembly instructions

Vimar

Vimar ELVOX Giotto 6328 Assembly instructions

Vimar Elvox 875G/S Assembly instructions

Vimar

Vimar Elvox 875G/S Assembly instructions

Vimar ELVOX Videocitofonia 1100 User manual

Vimar

Vimar ELVOX Videocitofonia 1100 User manual

Vimar Elvox 12TS Assembly instructions

Vimar

Vimar Elvox 12TS Assembly instructions

Vimar Elvox Giotto 6344 Assembly instructions

Vimar

Vimar Elvox Giotto 6344 Assembly instructions

Vimar ELVOX K40980 User manual

Vimar

Vimar ELVOX K40980 User manual

Vimar K40916 User manual

Vimar

Vimar K40916 User manual

Vimar ELVOX Petrarca Digibus 6204 User manual

Vimar

Vimar ELVOX Petrarca Digibus 6204 User manual

Vimar ELVOX 69RH Assembly instructions

Vimar

Vimar ELVOX 69RH Assembly instructions

Vimar ELVOX 0002/841.05 Assembly instructions

Vimar

Vimar ELVOX 0002/841.05 Assembly instructions

Vimar Eikon 20296 User manual

Vimar

Vimar Eikon 20296 User manual

Vimar Elvax 885E Assembly instructions

Vimar

Vimar Elvax 885E Assembly instructions

Vimar 1955 User manual

Vimar

Vimar 1955 User manual

Vimar Elvox Petrarca 6209/D User guide

Vimar

Vimar Elvox Petrarca 6209/D User guide

Vimar elvox Due Fili Plus User manual

Vimar

Vimar elvox Due Fili Plus User manual

Vimar ELVOX 8000 Series User manual

Vimar

Vimar ELVOX 8000 Series User manual

Popular Intercom System manuals by other brands

Clear-Com HME DX210 operating instructions

Clear-Com

Clear-Com HME DX210 operating instructions

Bitron Video GVM3000 instruction manual

Bitron Video

Bitron Video GVM3000 instruction manual

HIK VISION DS-KD8002-VM user manual

HIK VISION

HIK VISION DS-KD8002-VM user manual

Timeguard DoorCom DCEX3 Installation & operating instructions

Timeguard

Timeguard DoorCom DCEX3 Installation & operating instructions

basIP AV-04SD user manual

basIP

basIP AV-04SD user manual

Cellularline Interphone EDGE user manual

Cellularline

Cellularline Interphone EDGE user manual

Bitron Video AV1423/15 instruction manual

Bitron Video

Bitron Video AV1423/15 instruction manual

HIK VISION DS-1350HM user manual

HIK VISION

HIK VISION DS-1350HM user manual

ICRealtime VTO installation guide

ICRealtime

ICRealtime VTO installation guide

HIK VISION DS-KH9510-WTE1 Configuration guide

HIK VISION

HIK VISION DS-KH9510-WTE1 Configuration guide

ProX XV-NE user manual

ProX

ProX XV-NE user manual

HIK VISION DS-KH6320-WTDE1 Configuration guide

HIK VISION

HIK VISION DS-KH6320-WTDE1 Configuration guide

Data Video ITC-100SL instruction manual

Data Video

Data Video ITC-100SL instruction manual

HIK VISION DS-KH6320-WTDE1 manual

HIK VISION

HIK VISION DS-KH6320-WTDE1 manual

HIK VISION ADS-24S-12 1224GPCN user manual

HIK VISION

HIK VISION ADS-24S-12 1224GPCN user manual

HIK VISION DS-KIS603-P(B) user manual

HIK VISION

HIK VISION DS-KIS603-P(B) user manual

Clear-Com Eclipse HX-Median user guide

Clear-Com

Clear-Com Eclipse HX-Median user guide

basIP AV-05FD user manual

basIP

basIP AV-05FD user manual

manuals.online logo
manuals.online logoBrands
  • About & Mission
  • Contact us
  • Privacy Policy
  • Terms and Conditions

Copyright 2025 Manuals.Online. All Rights Reserved.