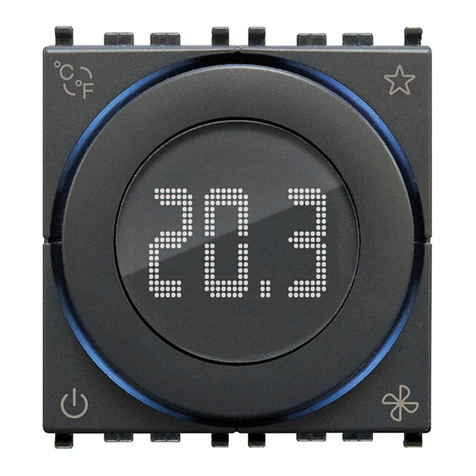
Vimar 2906 User manual

Viale Vicenza, 14
36063 Marostica VI - Italy
www.vimar.com
49400594C0 02 1910
02906
GUIDA RAPIDA INSTALLATORE/UTENTE
Termostato elettronico touch screen con GSM integrato per controllo locale o da
remoto (con app dedicata) della temperatura ambiente (riscaldamento e condi-
zionamento), dispositivo di controllo della temperatura di classe I (contributo 1%)
in modalità ON/OFF, di classe IV (contributo 2%) in modalità PID,1 ingresso per
sensore di temperatura esterna, uscita a relè in scambio 5(2) A 230 V~, alimen-
tazione 230 V~ 50/60 Hz retroilluminazione a LED bianca, installazione a parete.
CARATTERISTICHE.
• Tensione nominale di alimentazione: 230 V~, 50-60Hz
• Max potenza assorbita da rete: 3 VA
• Range di temperatura di utilizzo: 0-40°C (-T40)
• Precisione misura temp. (sonda integrata): 0,5°C tra +15°C e 30°C, 0,8°C agli estremi.
• Uscita a relè con contatti puliti in scambio: 5(2) A 230 V~
N.B. In mancanza di alimentazione, il relè si porta in posizione C-NC.
• Morsetti: L fase, N neutro, Relè C, Relè NC, Relè NO, 2 sonda temp. esterna (art. 02965.1)
• Configurabile in modo Riscaldamento/Condizionamento (inverno/estate)
• Algoritmi di termoregolazione: ON/OFF o PID selezionabili da interfaccia utente.
• Modalità operative di funzionamento: Off, Antigelo (solo in riscaldamento), Assenza, Manuale e
Riduzione notturna.
• 4 set-point/offset di temperatura impostabili (manuale, assenza, antigelo, riduzione) e 1 soglia di
limitazione (sonda esterna).
• Le modalità di funzionamento sono impostabili dall’utente anche via GSM con App By-clima.
• Restrizione accesso interfaccia locale tramite PIN.
• Grado di protezione: IP40.
• Tipo di azione: 1.C. Grado di polluzione: 2 (normale).
• Tensione impulsiva nominale: 4000 V.
• Classificazione ErP (Reg. UE 811/2013): ON/OFF: classe I, contributo 1%; PID: classe IV,
contributo 2%.
• Range di frequenza: 900 MHz e 1800 MHz
• Potenza RF trasmessa: < 2 W (33 dBm)
• Apparecchio di classe II:
ACCENSIONE E RESET PARAMETRI
Durante l’accensione, nel corso dei primi 3 s da quando viene alimentato, il termostato visualiz-
zerà, la versione del firmware e l’icona ; toccare entro i 3 s confermare con
l’opzione rSEt. TUTTI i parametri del dispositivo e TUTTE le impostazioni relative alle funzioni GSM
saranno riportati ai valori di fabbrica. ATTENZIONE: Questa operazione non è annullabile.
PRINCIPALI IMPOSTAZIONI
Dopo aver acceso il termostato, attendere che siano trascorsi i 3 s; toccare e succes-
sivamente, mediante e , selezionare il menù desiderato (icona lampeggiante) e
confermare con .
Selezione modalità di funzionamento
Mediante e selezionare ON o OFF oppure e confermare con .
Spegnimento
Selezionando OFF il termostato non effettua più nessuna regolazione.
Impostazione funzionamento ON
Mediante e impostare la temperatura e confermare con .
Antigelo
Selezionando viene impostata la temperatura di Antigelo (per proteggere le condutture).
Selezione riscaldamento/condizionamento
Mediante e selezionare oppure e confermare con .
Impostazione temperature
Mediante e e confermando con impostare:
1. e : temperatura di Assenza (T assenza)
2. e : temperatura della modalità “antigelo” (solo se in modalità “riscaldamento”)
3. e : delta termico in modalità riduzione notturna
4. : delta termico con termostato inibito da PIN
5. : differenziale termico del dispositivo (solo se in modalità di regolazione ON/OFF)
6. e : temperatura di allarme e limitazione sonda esterna (se presente e configurata)
Impostazione unità di misura
Mediante e selezionare °C oppure °F e confermare con .
Impostazione del buzzer
Mediante e selezionare ON oppure OFF e confermare con .
Impostazione luminosità del display in Standby
Mediante e , selezionare OFF (luminosità disattivata) oppure 1, 2, 3, 4, 5, 6, 7 a
seconda del livello desiderato (1=luminosità minima, 7= luminosità massima) e confermare con
.
Accensione spegnimento radiotrasmettitore GSM
Tutte le impostazioni relative alle funzionalità GSM vengono effettuate via SMS attraverso
uno smartphone nel quale va installata l’apposita App By-clima; attraverso il display del
termostato è possibile soltanto accendere o spegnere il radiotrasmettitore GSM (ad esempio, per
accertarsi che il termostato sia impostato solo da locale e non sia attivabile/modificabile da remoto
da un altro cellulare eventualmente configurato).
Mediante e selezionare ON o OFF e confermare con .
Impostazione della password
Mediante e impostare una alla volta le cifre del PIN confermando con ogni cifra.
Impostando il PIN a “000” si ha libero accesso al dispositivo (equivale a non impostare la password).
IMPORTANTE: Si abbia cura di annotare la password in modo che un’eventuale dimenti-
canza non precluda l’utilizzo del dispositivo.
PER L’INSTALLATORE
Per ulteriori approfondimenti e per i dettagli relativi a tutti gli altri menù del termostato
GSM si veda il manuale installatore scaricabile dal sito www.vimar.com.
PER L’UTENTE
Prima di utilizzare il termostato GSM consultare il manuale utente scaricabile dal sito
www.vimar.com. Conservare la presente documentazione per consultazioni future.
REGOLE DI INSTALLAZIONE.
L’installazione deve essere effettuata da personale qualificato con l’osservanza delle disposizioni
regolanti l’installazione del materiale elettrico in vigore nel paese dove i prodotti sono installati.
SOSTITUZIONE DELLA SCHEDA SIM.
Il termostato può essere utilizzato con scheda SIM (formato ID-000) tradizionale per traffico
voce/SMS; le SIM dati non possono essere utilizzate per il funzionamento del dispositivo.
Per effettuare l’installazione della SIM:
• Disabilitare il codice PIN dalla SIM (installare la SIM in un telefono cellulare e disabilitare la
richiesta del codice PIN).
• Togliere l’alimentazione al termostato 02906.
• Smontare il frontale inserendo un cacciavite nell’apposita fessura posta nel lato inferiore spin-
gendo verso l’alto l’apposita linguetta di sgancio lì presente e, contemporaneamente, tirare
verso l’esterno la parte frontale stessa del prodotto (si veda la relativa figura).
• Nel lato posteriore della parte frontale appena rimossa, inserire la SIM nell’apposito porta-SIM.
• Rimontare il frontale nella posizione iniziale agganciandolo alle alette di fissaggio poste sul lato
superiore della parte a muro andando poi a chiudere sulla parte inferiore. Infine, alimentare il
termostato.
• L’icona fornirà l’indicazione della corretta installazione e della qualità della rete GSM:
lampeggiante: fase di accensione (se dopo alcuni minuti l’icona rimane lampeggiante
significa che si è verificato un ERRORE per cui è necessario verificare la scheda SIM)
: segnale GSM non presente o insufficiente
: segnale GSM appena sufficiente (fino a 20%)
: segnale GSM da 20% fino a 50%
: segnale GSM da 50% fino a 80%
: segnale GSM ottimale (oltre 80%)
CONFORMITA’ NORMATIVA.
Direttiva RED.
Norme EN 60730-2-9, EN 301 489-52, EN 301 511, EN 62311.
Vimar SpA dichiara che l’apparecchiatura radio è conforme alla direttiva 2014/53/UE. Il testo
completo della dichiarazione di conformità UE è disponibile nella scheda di prodotto al seguente
indirizzo Internet: www.vimar.com.
Regolamento REACh (UE) n. 1907/2006 – art.33. Il prodotto potrebbe contenere tracce di
piombo.
RAEE - Informazione agli utilizzatori
Il simbolo del cassonetto barrato riportato sull’apparecchiatura o sulla sua confezione indica che il
prodotto alla fine della propria vita utile deve essere raccolto separatamente dagli altri rifiuti. L’utente
dovrà, pertanto, conferire l’apparecchiatura giunta a fine vita agli idonei centri comunali di raccolta dif-
ferenziata dei rifiuti elettrotecnici ed elettronici. In alternativa alla gestione autonoma, è possibile con-
segnare gratuitamente l’apparecchiatura che si desidera smaltire al distributore, al momento dell’ac-
quisto di una nuova apparecchiatura di tipo equivalente. Presso i distributori di prodotti elettronici con
superficie di vendita di almeno 400 m2è inoltre possibile consegnare gratuitamente, senza obbligo
di acquisto, i prodotti elettronici da smaltire con dimensioni inferiori a 25 cm. L’adeguata raccolta
differenziata per l’avvio successivo dell’apparecchiatura dismessa al riciclaggio, al trattamento e allo
smaltimento ambientalmente compatibile contribuisce ad evitare possibili effetti negativi sull’ambien-
te e sulla salute e favorisce il reimpiego e/o riciclo dei materiali di cui è composta l’apparecchiatura.

Viale Vicenza, 14
36063 Marostica VI - Italy
www.vimar.com
49400594C0 02 1910
02906
INSTALLER/USER QUICK GUIDE
Electronic touchscreen thermostat with built-in GSM for local or remote control (with
dedicated app) of ambient temperature (heating and air-conditioning), class I tem-
perature control device (contribution 1%) in ON/OFF mode, class IV (contribution
2%) in PID mode, 1 input for external temperature sensor, change-over relay output
5(2) A 230 V~, power supply 230 V~ 50/60 Hz, white LED backlighting, wall mounting.
FEATURES.
• Rated supply voltage: 230 V~, 50-60Hz
• Max power drawn from the grid: 3 VA
• Operating temperature range: 0-40°C (-T40)
• Temp. measurement accuracy (built-in probe): 0.5°C between +15°C and 30°C, 0.8°C at the
ends.
• Relay output with clean change-over contacts: 5(2) A 230 V~
N.B. With no power supply, the relay moves into position C-NC.
• Terminals: L live, N neutral, C relay, NC relay, N/O relay, 2 external temp. probe (art. 02965.1)
• Configurable in Heating/Air-Conditioning mode (winter/summer)
• Temperature control algorithms: ON/OFF or PID selectable via user interface.
• Operating modes: Off, Antifreeze (heating only), Away, Manual and Nighttime reduction.
• 4 set-points/settable temperature offsets (manual, away, anti-freeze, reduction) and 1 limiting
threshold (external probe).
• The operating modes can be set by the user also via GSM with the By-clima app.
• Restriction on local interface access via PIN and configurable multi-function input.
• Protection class: IP40.
• Action type: 1.C. Degree of pollution: 2 (normal).
• Rated pulse voltage: 4000 V.
• ErP classification (Reg. EU 811/2013): ON/OFF: class I, contribution 1%; PID: class IV, contribu-
tion 2%.
• Frequency range: 900 MHz and 1800 MHz
• RF transmission power: < 2 W (33 dBm)
• Appliances of class II:
SWITCHING ON AND RESETTING PARAMETERS
During power up, in the first 3 s from when powered, the thermostat will display the firmware ver-
sion and the icon; touch within 3 s and use to confirm the rSEt option. ALL
the parameters of the device and ALL the settings for the GSM functions will be reset to factory
defaults. CAUTION: This operation is not undoable.
MAIN SETTINGS
After switching on the thermostat, wait for the 3 seconds to elapse; touch and subsequent-
ly, using and , select the desired menu (blinking icon) and confirm with ..
Operating mode selection
Using and select ON or OFF or and confirm with .
Off
Select OFF and the thermostat will no longer make any adjustments.
ON operation setting
Using and set the temperature and confirm with .
Antifreeze
Select to set the Antifreeze temperature (to protect the pipes).
Selecting heating/air-conditioning
Using and select or and confirm with .
Temperature settings
Using and and confirming with set:
1. and : Away temperature (T away)
2. and : “antifreeze” mode temperature (only if in “heating” mode)
3. and : thermal delta in nighttime reduction mode
4. : thermal delta with thermostat controlled remotely or inhibited by PIN
5. : temperature differential of the device (only if in OnOff adjustment mode)
6. and : external probe alarm temperature (if fitted)
Setting units of measurement
Using and select °C or °F and confirm with .
Setting the buzzer
Using and , select ON or OFF and confirm with .
Setting the brightness of the display on Standby
Using and , select OFF (brightness off) or 1, 2, 3, 4, 5, 6, 7 depending on the
desired level (1 = minimum brightness, 7 = maximum brightness) and confirm with .
Switching the GSM radio transmitter on and off
All the settings for the GSM functions are made via SMS using a smartphone on which
the By-clima app has been installed; with the display of the thermostat you can only switch
the GSM radio transmitter on or off (for example, to make sure the thermostat is set only locally
and cannot be activated / changed remotely by another mobile phone that has been configured).
Using and select ON or OFF and confirm with .
Setting the password
Using and set the PIN digits one at a time confirming each digitwith .
Setting the PIN to “000” gives free access to the device (equivalent to not setting the password).
IMPORTANT: Take care to note down the password so that you can use it again for the
device when needed.
FOR THE INSTALLER
For further information and for details on all the other thermostat menus please refer to
the installer manual that can be downloaded from the website www.vimar.com.
FOR THE USER
Before using the thermostat please consult the user manual that can be downloaded from
the website www.vimar.com. Keep this documentation for future reference.
INSTALLATION RULES.
Installation should be carried out by qualified personnel in compliance with the current regula-
tions regarding the installation of electrical equipment in the country where the products are
installed.
CHANGING THE SIM CARD.
The thermostat can be used with a traditional SIM card (ID-000 format) for voice / SMS traffic;
data SIMs cannot be used for operating the device .
To install the SIM card:
• Disable the PIN code from the SIM card (install the SIM in a mobile phone and disable the
PIN code prompt).
• Turn off the power supply to the thermostat 02906.
• Remove the front panel by inserting a screwdriver into the slot in the bottom and pushing the
release tab upwards and, at the same time, pull out the front of the product (see the relevant figure).
• Insert the SIM card into the SIM holder in the rear of the front panel you have just removed.
• Fit the front panel back into its original position by hooking it onto the mounting tabs located
on the upper side of the part on the wall and then closing the lower part. Finally, power up
the thermostat.
• The icon will show the correct installation and the quality of the GSM network:
blinking: switch-on phase (if the icon is still flashing after a few minutes, it means that
there is an ERROR so it is necessary to check the SIM card)
: GSM signal not present or insufficient
: GSM signal barely sufficient (up to 20%)
: GSM signal from 20% up to 50%
: GSM signal from 50% up to 80%
: optimum GSM signal (over 80%)
REGULATORY COMPLIANCE.
RED Directive.
Standards EN 60730-2-9, EN 301 489-52, EN 301 511, EN 62311.
Vimar SpA declares that the radio equipment complies with Directive 2014/53/EU. The full text
of the EU declaration of conformity is on the product sheet available at the following Internet
address: www.vimar.com.
REACH (EU) Regulation no. 1907/2006 – Art.33. The product may contain traces of lead.
WEEE - Information for users
If the crossed-out bin symbol appears on the equipment or packaging, this means the product must
not be included with other general waste at the end of its working life. The user must take the worn
product to a sorted waste center, or return it to the retailer when purchasing a new one. Products for
disposal can be consigned free of charge (without any new purchase obligation) to retailers with a
sales area of at least 400 m2, if they measure less than 25 cm. An efficient sorted waste collection for
the environmentally friendly disposal of the used device, or its subsequent recycling, helps avoid the
potential negative effects on the environment and people’s health, and encourages the re-use and/
or recycling of the construction materials.

Viale Vicenza, 14
36063 Marostica VI - Italy
www.vimar.com
49400594C0 02 1910
02906
GUIDE RAPIDE INSTALLATEUR/UTILISATEUR
Thermostat électronique à écran tactile avec GSM intégré pour contrôle local ou
à distance (appli dédiée) de la température ambiante (chauffage et clima-
tisation), dispositif de contrôle de la température classe I (contribution 1%) en
mode ON/OFF, classe IV (contribution 2%) en mode PID, 1 entrée pour capteur
de température extérieure, sortie à relais avec contact inverseur 5(2) A 230 V~,
alimentation 230 V~ 50/60 Hz, rétroéclairage à led blanc, installation en saillie.
CARACTÉRISTIQUES
• Tension nominale d’alimentation: 230 V~, 50/60Hz
• Puissance max absorbée par le réseau: 3 VA
• Plage de température de service: 0-40°C (-T40)
• Précision mesure temp. (sonde intégrée): 0,5° C entre + 15° C et 30° C, 0,8° C aux extrêmes.
• Sortie à relai avec contacts secs inverseur: 5(2) A 230 V~
N.B. En l’absence d’alimentation, le relai se positionne sur F-NF.
• Bornes: L phase, N neutre, Relai F, Relai NF, Relai NO, 2 sonde temp. externe (art. 02965.1)
• Configurable en mode chauffage/climatisation (Hiver/Été)
• Algorithmes de régulation thermique: ON/OFF ou PID à sélectionner par l’interface utilisateur.
• Modes de fonctionnement opérationnels: Off, Antigel (uniquement en mode chauffage),
Absence, Manuel, réglage Nuit.
• 4 points de consigne/écarts de température possibles (manuel, absence, antigel, nuit) et 1
seuil de limitation (sonde externe).
• L’utilisateur peut sélectionner les modes de fonctionnement par GSM avec l’application App
By-clima.
• Restriction d’accès à l’interface locale par PIN et entrée multifonction configurable.
• Indice de protection: IP40.
• Type d’action: 1.C. Indice de pollution: 2 (normal).
• Tension d’amorçage nominale: 4000 V.
• Classification ErP (Règ. UE 811/2013): ON/OFF: classe I, contribution 1%; PID: classe IV,
contribution 2%.
• Gamme de fréquence : 900 MHz et 1800 MHz
• Puissance RF transmise : < 2 W (33 dBm)
• Appareil de classe II:
MISE EN MARCHE ET RÉINITIALISATION DES PARAMÈTRES
Au démarrage, dans les 3 secondes qui suivent la mise sous tension, le thermostat affiche la
version du microprogramme et l’icône ; effleurer et, dans les 3 secondes qui suivent,
confirmer avec l’option rSEt. TOUS les paramètres du dispositif et TOUTES les program-
mations des fonctions GSM sont ramenés aux valeurs d’usine. ATTENTION Cette opération
ne peut pas être annulée.
PRINCIPAUX PARAMÈTRES
Après avoir allumé le thermostat, attendre 3 secondes ; toucher puis, avec et
, sélectionner le menu (icône clignotante) puis confirmer avec .
Sélection du mode de fonctionnement
Utiliser et pour sélectionner ON ou OFF ou puis valider avec .
Extinction
Sélectionner OFF pour que le thermostat n’effectue plus aucun réglage.
Réglage du fonctionnement ON
Utiliser et pour définir la température puis valider avec .
Antigel
Sélectionner pour paramétrer la température Antigel (et protéger les conduits).
Sélection chauffage/climatisation
Utiliser et pour sélectionner ou et valider avec .
Réglage de la température
Utiliser et et valider avec pour définir :
1. et : température d’Absence (T Absence)
2. et : température du mode Antigel (uniquement en mode Chauffage)
3. et : delta thermique en mode Nuit
4. : delta thermique avec thermostat commandé à distance ou inhibé par PIN
5. : différentiel thermique du dispositif (uniquement en mode Réglage OnOff)
6. et : température d’alarme sonde externe (selon l’installation)
Définition unité de mesure
Utiliser et pour sélectionner °C ou °F et valider avec .
Paramètres du vibreur
Avec et , sélectionner ON ou OFF , puis confirmer avec .
Paramètres de luminosité de l’afficheur en standby
Avec et , sélectionner OFF (luminosité désactivée) ou 1, 2, 3, 4, 5, 6, 7 selon
le niveau souhaité (1 = luminosité minimale, 7 = luminosité maximale), confirmer avec .
Mise en marche et arrêt du radiotransmetteur GSM
Les paramétrages relatifs aux fonctions GSM sont effectués par SMS, avec un smart-
phone équipé de l’application App By-clima ; l’afficheur du thermostat permet uniquement
de mettre en marche ou d’éteindre le radiotransmetteur GSM (par exemple, pour s’assurer que
le thermostat est réglé sur le mode local et qu’il ne peut pas être activé/modifié à distance par
un autre téléphone portable précédemment configuré).
Avec et , sélectionner ON ou OFF puis confirmer avec .
Saisie du mot de passe
Utiliser et pour saisir un par un les chiffres du PIN puis utiliser pour valider
chaque chiffre.
Si on sélectionne 000 pour définir le PIN, l’accès au dispositif est libre (il n’y a pas de
mot de passe).
IMPORTANT Prendre note du mot de passe pour s’assurer de toujours pouvoir utiliser le
dispositif en cas d’oubli.
POUR L’INSTALLATEUR
Pour en savoir plus et pour connaître en détails les autres menus du thermostat, voir le
manuel installateur à télécharger sur le site www.vimar.com.
POUR L’UTILISATEUR
Avant d’utiliser le thermostat, consulter le manuel à télécharger sur le site www.vimar.
com. Conserver cette documentation pour pouvoir la consulter ultérieurement.
RÈGLES D’INSTALLATION
L’installation doit être confiée à des personnel qualifiés et exécutée conformément aux disposi-
tions qui régissent l’installation du matériel électrique en vigueur dans le pays concerné.
REMPLACEMENT DE LA CARTE SIM.
Le thermostat peut être utilisé avec une carte SIM (format ID-000) classique pour communications
voix/SMS ; les SIM données ne peuvent pas être utilisées pour faire fonctionner le dispositif.
Pour installer la carte SIM :
• désactiver le code PIN de la carte SIM (installer la carte SIM dans un téléphone portable et
désactiver la demande de code PIN)
• couper l’alimentation du thermostat 02906
• démonter la façade en introduisant un tournevis dans la fente spéciale située sur le bas ;
pousser la languette de fixation vers le haut et tirer en même temps la façade de l’appareil
vers l’extérieur (voir figure)
• à l’arrière de la façade qu’on vient d’enlever, introduire la carte SIM dans le support spécial
• remonter la façade dans sa position initiale et l’accrocher aux ailettes de fixation situées à
l’arrière de la partie murale puis refermer le bas. Mettre le thermostat sous tension.
• L’icône confirme que l’installation est réalisée correctement ainsi que la qualité du réseau GSM.
clignotante : mise en marche (si l’icône continue à clignoter après quelques minutes, une
ERREUR s’est produite, il est donc nécessaire de vérifier la carte SIM).
: signal GSM absent ou insuffisant.
: signal GSM limite (jusqu’à 20 %).
: signal GSM entre 20 % et 50 %.
: signal GSM entre 50 % et 80 %.
: signal GSM optimal (plus de 80 80%)
CONFORMITÉ AUX NORMES
Directive RED.
Normes EN 60730-2-9, EN 301 489-52, EN 301 511, EN 62311.
Vimar S.p.A. déclare que l’équipement radio est conforme à la directive 2014/53/UE. Le texte
complet de la déclaration de conformité UE est disponible sur la fiche du produit à l’adresse
Internet suivante : www.vimar.com.
Règlement REACH (EU) n° 1907/2006 – art.33. Le produit pourrait contenir des traces de plomb.
DEEE - Informations pour les utilisateurs
Le symbole du caisson barré, là où il est reporté sur l’appareil ou l’emballage, indique que le produit
en fin de vie doit être collecté séparément des autres déchets. Au terme de la durée de vie du
produit, l’utilisateur devra se charger de le remettre à un centre de collecte séparée ou bien au reven-
deur lors de l’achat d’un nouveau produit. Il est possible de remettre gratuitement, sans obligation
d’achat, les produits à éliminer de dimensions inférieures à 25 cm aux revendeurs dont la surface de
vente est d’au moins 400 m2. La collecte séparée appropriée pour l’envoi successif de l’appareil en
fin de vie au recyclage, au traitement et à l’élimination dans le respect de l’environnement contribue
à éviter les effets négatifs sur l’environnement et sur la santé et favorise le réemploi et/ou le recyclage
des matériaux dont l’appareil est composé.
Viale Vicenza, 14
36063 Marostica VI - Italy
www.vimar.com
49400594C0 02 1910
L
N
N
T
C
U1
V I M A R SpA
e
2Pb
CNC NO N L
COLLEGAMENTI - CONNECTIONS - BRANCHEMENTS
Pompe di circolazione, bruciatori, elettrovalvole
Circulation pumps, burners, solenoid valves
Pompes de circulation, brûleurs, électrovannes
Valvole motorizzate - Motorized valves - Vannes motorisées
L
N
U1
N
T
C
V I M A R SpA
e
2
Pb
CNC NO N L
Installazione della scheda SIM - Installing the SIM card - Installation de la carte SIM
DISPLAY - DISPLAY - ÉCRAN
A: Segnale rete GSM - GSM network signal - Signal réseau GSM
B: Modalità di funzionamento - Operating mode - Mode de fonctionnement
C: Assenza - Away - Absence
D: Conferma - Confirm - Confirmer
E-F: Navigazione menù e impostazione parametri
Menu navigation and setting parameters
Navigation dans le menu et réglage des paramètres
G: Indietro - Back - Précédent
H: Riduzione notturna - Nighttime reduction - Réduction nocturne
I: Menù Impostazioni - Settings menu - Menu Paramètres
L: Ghiera livello di consumo e indicatore risparmio energetico
Ring indicating consumption level and energy savings indicator
Bague de niveau de consommation et indicateur d’économie d’énergie
L
I H G F E D C
BA
Accesso ai morsetti - Accessing the terminals - Accès aux bornes
MADE IN ITALY
02906
–T40
5(2)A
230V~
230V~
50/60Hz
1.C C N LNC NO
6 mm
MADE IN ITALY
02906
–T40
5(2)A
230V~
230V~
50/60Hz
1.C C N LNC NO
6 mm
V I M A R Sp A
e
2
Pb
OPEN
LOCK
OPEN
LOCK
OPEN
LOCK
1 2
3 4
1 2
3 4
02965.1
02965.1
APRE
OPENS
OUVERTE
CHIUDE
CLOSES
FERMÉE
Other manuals for 2906
2
Table of contents
Languages:
Other Vimar Thermostat manuals

Vimar
Vimar 2905 User manual

Vimar
Vimar 02913 User manual

Vimar
Vimar RADIOCLIMA 01910 User guide

Vimar
Vimar 01911 User manual

Vimar
Vimar 2905 User manual

Vimar
Vimar Idea 16577 Manual

Vimar
Vimar 02905 User manual

Vimar
Vimar 2950 User manual

Vimar
Vimar Eikon 20441 manual

Vimar
Vimar SMART CLIMA 02912 User manual

Vimar
Vimar 02907 User manual

Vimar
Vimar Eikon TACTIL 21814.F User manual

Vimar
Vimar RADIOCLIMA 01910 manual

Vimar
Vimar BY-ME PLUS User manual

Vimar
Vimar 2950 User manual

Vimar
Vimar 2905 User guide

Vimar
Vimar 02907 User manual

Vimar
Vimar 30810 Series User manual

Vimar
Vimar 2950 User manual

Vimar
Vimar 01913 User manual