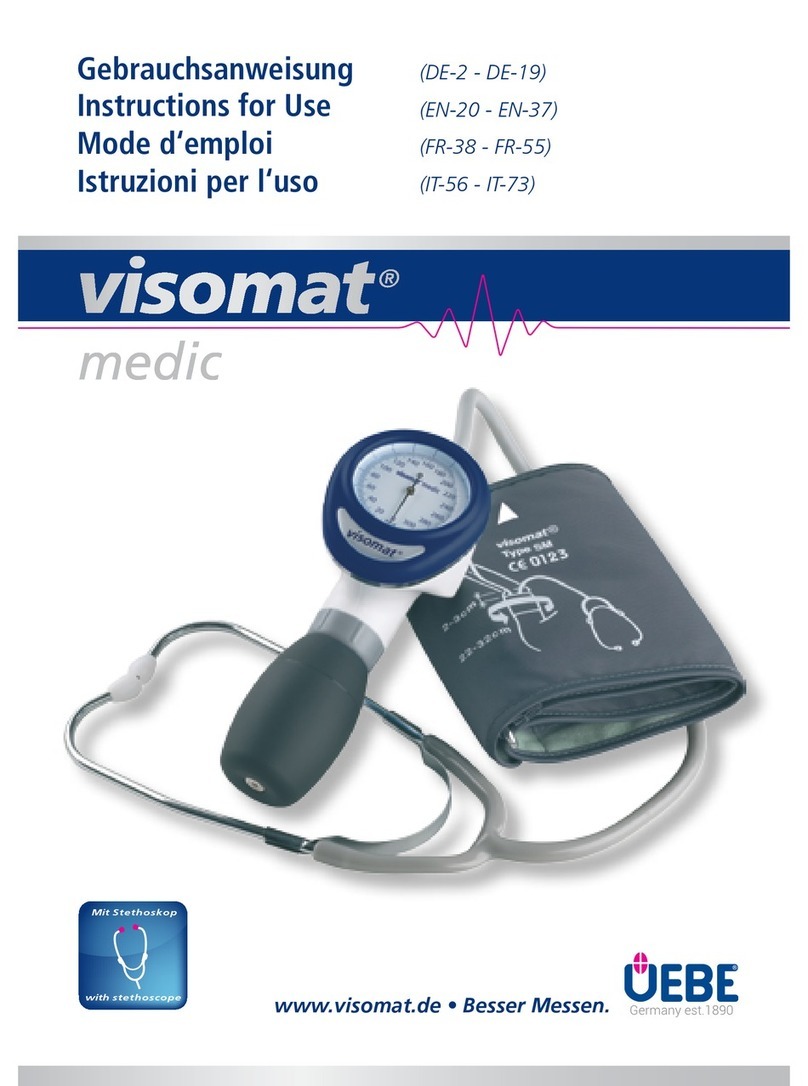
visomat Medic User manual

Gebrauchsanleitung
Instructions for use
Mode d’emploi
Istruzioni per l’uso
www.visomat.de • Besser Messen.
(DE-2 - DE-19)
(EN-20 - EN-37)
(FR-38 - FR-55)
(IT-56 - IT-72)
medicmedic
K
L
I
N
I
S
C
H
V
A
L
I
D
I
E
R
T
C
L
I
N
I
C
A
L
L
Y
V
A
L
I
D
A
T
E
D

deutsch
DE-2
DE-3
deutsch
Durch das Aufpumpen der Manschette mittels Pumpball wird der Blutfluss in der
Oberarmarterie abgestellt.Während des Entlüftungsvorgangs werden mit Beginn
des Blutflusses in der Arterie pochende Geräusche mittels Stethoskop hörbar. Bei
Beginn der Geräusche wird die Systole festgestellt, mit dem letzten hörbaren Ton
wird die Diastole erkannt. Nach Feststellung beider Werte kann die Manschette
komplett entlüftet werden.
Inhaltsverzeichnis
Wichtige Hinweise
A
Einführung
Vielen Dank, dass Sie sich für das Oberarmblutdruckmessgerät
visomat®medic (nachfolgend auch als Gerät bezeichnet) entschieden haben.
Dieses Produkt ist vorgesehen zur auskultatorischen Bestimmung des Blutdrucks.
Funktionsweise:
Diese Anleitung soll dem Benutzer helfen, das Blutdruckmessen mit Stethoskop
sicher und effizient anzuwenden. Sie muss mit dem Produkt aufbewahrt und ggf.
weitergegeben werden.
Das Gerät muss entsprechend den in dieser Anleitung enthaltenen Verfahren
verwendet werden und darf nicht für andere Zwecke eingesetzt/benutzt werden.
Lesen Sie diese Anleitung sorgfältig durch, bevor Sie das Gerät verwenden.
Pflege des Gerätes
Garantie
C
Der systolische und diastolische Blutdruckwert
Warum regelmäßig Blutdruck messen?
EAllgemeine Bestimmungen
Zeichenerklärung
1.
2.
3.
4.
5.
6.
Technische Informationen
D
Messfehler und ihre Ursachen
Kundendienst
Technische Daten
Angewandte Normen
Messtechnische Kontrolle
1.
Was sind normale Blutdruckwerte?
Was Sie über Blutdruck wissen sollten
Warum Sie unterschiedliche Werte messen
1.
2.
3.
4.
G
F
Dieses Gerät wird Patienten mit labilem Blutdruck oder bekannter Hypertonie zur
häuslichen Blutdruckkontrolle und Therapieunterstützung empfohlen.
1.
2.
3.
4.
5.
6.
B
Anlegen des Stethoskops
Blutdruck messen
Bedienung des Gerätes
Gerätebeschreibung
Anlegen der Manschette
Wichtige Anwendungshinweise
Manschette aufpumpen
4
5
5
6
7
8
8
9
10
10
10
10
10
11
11
12
12
14
14
15
16
16
17
18
Original-Ersatzteile und Zubehör

deutsch
A
DE-4
Wichtige Hinweise
DE-5
deutsch
B
Bedienung des Gerätes
Das Gerät ist auf die auskultatorische Messung des systolischen und diasto-
lischen Blutdrucks am Oberarm ausgerichtet.
•
Die mitgelieferte Standardmanschette ist auf einen Oberarmumfang von
22–32 cm ausgelegt. Für größere und kleinere Armumfänge stehen spezielle
Manschetten zur Verfügung, (Seite DE-14 Zubehör).
•
Selbstmessung bedeutet noch keine Therapie. Verändern Sie auf keinen Fall
von sich aus die vom Arzt verschriebene Dosierung der Arzneimittel.
•
Auf keinen Fall darf die Manschette auf oder über einer kritischen Stelle, z.B.
Wunde, Aneurysma etc. angelegt werden, Verletzungsgefahr! Eine Versorgung
durch einen intravaskularen Zugang (Infusion) könnte unter Umständen
unterbrochen werden.
•
Beachten Sie vor Ihren Selbstmessungen das Kapitel „Wichtige Anwendungs-
hinweise“ Seite DE-6.
•
Das Gerät darf nur mit Originalersatzteilen betrieben werden. Bei Schäden
durch fremdes Zubehör erlischt die Garantie!
•
Die Manschette darf nur am Arm aufgepumpt werden.•
Bitte halten Sie die vorgesehenen Umgebungsbedingungen zur Messung ein.
Siehe Technische Daten Seite DE-12.
•
Blutdruckmessungen an Kindern und Schwangeren bedürfen besonderer
Kenntnisse! Konsultieren Sie Ihren Arzt, wenn Sie den Blutdruck eines Kindes
oder einer Schwangeren messen möchten.
•
7
4
5
6
3
2
Gerätebeschreibung1.
Pumpball
Luftablassschalter
Manometer mit Anzeigeskala
Ohroliven
1
Stethoskopmembran
Luftanschluss
Ohrbügel
11
10
9
8
Arterienmarkierung
Manschette
Markierung für Armumfang
Kontrollmesspfeil für den Armumfang
Arterienmarkierung
Das Gerät verfügt über keine Druckbegrenzung bei 150 mmHg und sollte
deshalb nicht bei Säuglingen angewendet werden!
•
Blutdruck ist keine feste Größe. Dieser kann sich bei Patienten innerhalb
weniger Minuten um mehr als 20 mmHg nach oben oder unten verändern.
•
3
1
6
5
2
4
7
9
8
10
Stethoskopmembran
12
12
11
Luftschlauch

deutsch
B
DE-6
Bedienung des Gerätes
DE-7
deutsch
B
Bedienung des Gerätes
Vor der Messung mindestens 5 Minuten Ruhepause. Je nach Schwere der voran
gegangenen Anstrengung kann dies sogar bis zu einer Stunde erfordern.
•
Alkohol-, Nikotin- oder Koffeingenuss mindestens eine Stunde vor dem
Messen einstellen.
•
Oberarm frei machen, auf keinen Fall darf die Kleidung den Blutfluss in
oder aus dem Arm behindern, da dies den Blutdruck an der Messstelle
beeinträchtigt.
•
Wichtige Anwendungshinweise2.
Setzen Sie sich dazu ganz an den Tisch (möglichste Höhe eines Esstisches,
kein Couchtisch!) heran.
–
Die Körperhaltung muss entspannt sein:•
Lehnen Sie Ihren Rücken an der Stuhllehne an.–
Legen Sie Ihren kompletten Unterarm auf, Handinnenfläche nach oben.–
Füße auf den Boden aufstellen, Beine nicht überkreuzen.–
Anlegen der Manschette3.
Oberarm freimachen.•
Schieben Sie die Manschette über den Arm, bis
die Unterkante der Manschette 2-3 cm oberhalb
der Armbeuge liegt (Bild 1).
•
Bei Anwendung am linken Arm läuft der Luft-
schlauch in der Mitte der Armbeuge zum Gerät,
damit ist die 4 cm lange Arterienmarkierung
mittig über der Pulsstelle platziert (Bild 2).
•
Bei Anwendung am rechten Arm, muss die Man-
schette so weit nach links verdreht werden, bis
die Arterienmarkierung auf der Pulsstelle liegt.
Der Luftschlauch verläuft dann an der Innenseite
des Oberarms.
•
Die Manschette soll so fest anliegen, dass noch
2 Finger zwischen Arm und Manschette passen.
Tipp:
•
winkeln Sie den Arm leicht an–
der Oberarmmuskel wird leicht angespannt–
dadurch nimmt der Umfang des Armes leicht zu–
Prüfen Sie, ob der Pfeil auf der Manschette inner-
halb der weißen Markierung für den Armumfang
liegt.
•
Ziehen Sie jetzt das freie Manschettenende straff
und schlagen es fest über den Klettverschluss.
•
Bild 1
Bild 2: Pulsstelle
Blutdruck ist keine feste Größe. Dieser kann sich bei Patienten innerhalb
weniger Minuten um mehr als 20 mmHg nach oben oder unten verändern.
•
Die Manschettengröße ist passend zum Oberarm auszuwählen. Zu kleine
Manschetten führen zur überhöhten Anzeige der Blutdruckwerte. Armumfang
messen, Vergleich mit Angabe auf der Manschette!
•

deutsch
B
DE-8
Bedienung des Gerätes
DE-9
deutsch
B
Bedienung des Gerätes
Legen Sie den Ohrbügel des Stethoskops so an,
dass die Ohroliven fest in den Ohren sitzen. Für
den einwandfreien Sitz des Stethoskops lassen
sich die Rohre des Ohrbügels drehen. Drehen Sie
am besten die Ohroliven leicht nach vorn.
•
Mittels Pumpball die Manschette aufpumpen,
bis der Zeiger auf der Skala einen Wert anzeigt,
der etwa 30 mmHg oberhalb des zu erwartenden
systolischen Blutdruckwertes liegt.
•
Pumpen Sie bei unbekannten Blutdruckwerten
bis ca. 250 mmHg auf. Sollten Sie dennoch
deutlich pochende Geräusche im Stethoskop
hören, pumpen Sie weiter, bis keine Töne mehr
wahrzunehmen sind.
•
Manschette aufpumpen5.
Drücken Sie mit dem Zeigefinger leicht den
Luftablassschalter und lassen Sie dadurch lang-
sam die Luft aus der Manschette.
•
Der Zeiger des Manometers läuft langsam zurück.
Durch die Veränderung des Luftablassschalters
kann die Luftablassgeschwindigkeit variert
werden.
•
Hören Sie auf das rhythmische Klopfen in
Ihrem Stethoskop. Beim Verschwinden der Töne
bzw. beim letzten hörbaren Ton lesen Sie den
diastolischen Blutdruckwert auf der Skala ab und
merken sich diesen ebenfalls (Bild 2).
•
Drücken Sie nach dem Ablesen der Diastole den
Luftablassschalter ganz durch. Sie betätigen
dadurch die Schnellentlüftung, der Schalter rastet
dazu ein. Nehmen Sie die Manschette nach
kompletter Entlüftung ab.
•
Blutdruck messen6.
Führen Sie den Luftstecker der Manschette in den
Luftanschluss am Gerät ein.
•
Legen Sie den Arm mit der Manschette locker
ausgestreckt auf einen Esstisch und halten ihn
während der Messung unbedingt ruhig, sprechen
Sie nicht. Die Handinnenfläche weist nach oben.
•
Anlegen des Stethoskops4.
Beim ersten deutlich pochenden Ton lesen Sie
den systolischen Blutdruckwert auf der Skala ab
und merken sich den Wert (Bild 1).
•
(Empfehlung der WHO: 2-3 mmHg/Sekunde)
Beobachten Sie jetzt genau den Zeigerlauf auf
der Skala und achten Sie auf die Geräusche, die
Sie mit dem Stethoskop hören.
Verschließen Sie das Luftablassventil indem Sie
den Luftablassschalter nach oben drücken.
•
Bild 1
Bild 2

deutsch
C
DE-10
Was Sie über Blutdruck wissen sollten
DE-11
deutsch
D
Technische Informationen
Normalwert Grenzwert Hochdruck
systolischer Druck
≤ 119
diastolischer Druck
≤ 79
systolischer Druck
120 –139
diastolischer Druck
80–89
systolischer Druck
≥ 140
und / oder*
diastolischer Druck
≥ 90
Was sind normale Blutdruckwerte?4.
Die Weltgesundheitsorganisation (WHO) hat folgende Grenzwerte in mmHg (Millimeter
Hydrargyrum / Quecksilber) für die Einordnung der Blutdruckwerte zusammengestellt.
WHO 2003
* Es genügt, wenn
bereits einer der
Werte erhöht ist.
Warum regelmäßig Blutdruck messen?3.
Auch die Tageszeit hat einen Einfluss auf die Höhe des Blutdruckes. Tagsüber sind
die Werte meist höher als während der Ruhephasen in der Nacht.
Einmalige und unregelmäßige Messungen sagen daher kaum etwas über den
tatsächlichen Blutdruck aus. Eine zuverlässige Beurteilung ist nur möglich, wenn
regelmäßig Einzelmessungen durchgeführt werden. Besprechen Sie die Messwerte
mit Ihrem Arzt.
Der systolische und diastolische Blutdruckwert1.
Herz- und Blutkreislauf haben die wichtige Aufgabe, alle Organe und Gewebe des Kör-
pers ausreichend mit Blut zu versorgen und Stoffwechselprodukte abzutransportieren.
Das Herz zieht sich dazu in regelmäßigem Rhythmus etwa 60-80 mal pro Minute
zusammen und dehnt sich wieder aus.
Der Druck des strömenden Blutes, der beim Zusammenziehen des Herzens auf die
Arterienwände entsteht, wird als Systole bezeichnet.
Der Druck in der darauf folgenden Erschlaffungsphase, wenn sich das Herz wieder
mit Blut füllt, wird als Diastole bezeichnet. Bei Ihrer täglichen Messung ermitteln
Sie beide Werte.
Warum Sie unterschiedliche Werte messen2.
Unser Blutdruck reagiert wie ein empfindliches Messinstrument auf äußere und
innere Einflüsse. Schon geringfügige Änderungen können auf ihn einwirken.
Das macht verständlich, dass häufig beim Arzt oder Apotheker gemessene Werte
höher sind als jene, die Sie zu Hause in gewohnter Umgebung erhalten. Aber auch
Wetterumschwung, Klimawechsel, körperliche und seelische Belastungen können
sich auswirken.
Messfehler und ihre Ursachen1.
Aufgetretener
Fehler
Mögliche Ursache Abhilfe
Leise Pulstöne Stethoskopmembran liegt nicht
auf der Pulsstelle.
Stethoskopmembran neu platzie-
ren, evtl. durch Fachhändler oder
Arzt einweisen lassen.
Y-Schlauch geknickt. Y-Schlauch prüfen.
Ohroliven verstopft. Ohroliven reinigen.
Störgeräusche im
Stethoskop
Bewegen des Armes oder des
Körpers während der Messung
Bewegen Sie den Arm nicht
Sprechen Sie nicht.
Manschette wird
nicht aufgepumpt
Ablassventil wurde nicht
verschlossen
Luftablassschalter zurückstellen.
Falsche Mess-
werte
Falsche Manschettengröße Stellen Sie sicher dass Sie eine
Manschette verwenden, die Ihrem
Oberarmumfang entspricht.
Ungewöhnliche
Messwerte
Falsche Manschettengröße. Be-
wegen bzw. Sprechen während
der Messung. Ruhezeit nicht
eingehalten.
Bedingungen prüfen und Messung
nach 3 Minuten wiederholen.
Falls Sie keine Messergebnisse erhalten, überprüfen Sie bitte ob folgende Ursachen
zugrunde liegen könnten.
Wiederholen Sie gegebenenfalls die Messung nach einer kurzen Erholung des Blut-
kreislaufs im Arm, ruhen Sie dazu ca. 3-5 Minuten.
DE-10
deutsch
D
DE-12
Technische Informationen
DE-13
deutsch
D
Technische Informationen
Kundendienst2.
Eine Reparatur des Gerätes darf nur durch den Hersteller oder eine ausdrücklich
dazu ermächtigte Stelle erfolgen.
Bitte wenden Sie sich an:
UEBE Medical GmbH
Zum Ottersberg 9
97877 Wertheim, Germany
Tel.-Nr.: +49 (0) 93 42 / 92 40 40
Fax-Nr.: +49 (0) 93 42 / 92 40 80
E-mail: info@uebe.com
Internet: www.uebe.com
Technische Daten3.
Fehlergrenzen: Blutdruckmessung: entspricht EN 1060 Teil 1
Druckmessung: ± 3 mmHg
Seriennummer: Auf dem Gerät befindet sich eine Seriennummer
SN welche das Gerät eindeutig identifiziert.
Manschetten: Manschette Type SM (für Armumfang 22-32 cm)
Oder optional zusätzlich
Manschette Type SL (für Armumfang 32-42 cm)
Manschette Type SS (für Armumfang 14-21 cm)
Betriebsbedingungen: Umgebungstemperatur 10 bis 40 °C
Rel. Luftfeuchtigkeit bis 85% nicht kondensierend
Lager- und Transportbe-
dingungen:
Umgebungstemperatur -20 bis +70 °C
Rel. Luftfeuchtigkeit bis 85% nicht kondensierend
Druckablass Manuell
Gerätetyp: Aneriod-Blutdruckmessgerät mit Zugbügel-
manschette und integriertem Stethoskop
Gewicht: ca. 160 g ohne Manschette
Messverfahren: Auskultatorische Messung
Mess- und Druckanzeigen-
bereich
0-300 mmHg

deutsch
D
DE-14
Technische Informationen
DE-15
deutsch
D
Technische Informationen
Original-Ersatzteile und Zubehör:4.
Folgende Original-Ersatzteile bzw. Zubehör können Sie über den Fachhandel
erhalten:
Manschette SM (für Armumfang 22-32 cm)
Art.Nr. 2703001
PZN 5861184
•
Manschette SS (für Armumfang 14-21 cm)
Art.Nr. 2703005
PZN 5861244
•
Technische Änderungen vorbehalten.
Angewandte Normen5.
EN 1060-1:1995/prA1:2008 Nichtinvasive Blutdruckmessgeräte Teil 1:
Allgemeine Anforderungen
•
Manschette SL (für Armumfang 32-42 cm)
Art.Nr. 2703002
PZN 5861209
•
UEBE Medical GmbH
Zum Ottersberg 9
D-97877 Wertheim
Hersteller:
Messtechnische Kontrolle6.
Zuständige Behörden oder autorisierte Wartungsdienste erhalten auf Anforderung
eine „Prüfanweisung zur messtechnischen Kontrolle“ vom Hersteller.
(vormals Eichung)
Generell wird eine messtechnische Kontrolle im Abstand von 2 Jahren empfohlen.
Fachliche Benutzer sind in Deutschland allerdings gemäß „Medizinprodukte-Betrei-
berverordnung“ dazu angehalten.
Diese kann entweder durch die UEBE Medical GmbH, eine für das Messwesen zu-
ständige Behörde oder durch autorisierte Wartungsdienste erfolgen. Bitte beachten
Sie dazu Ihre nationalen Vorgaben.
Achtung: Ohne Erlaubnis des Herstellers dürfen an diesem Gerät keine Verände-
rungen, z.B. Öffnen des Gerätes vorgenommen werden.
Für weitere Ersatzteile wenden Sie sich bitte an den Kundendienst (siehe Seite
DE-12).
EN 1060-2:1997/prA1:2008 Nichtinvasive Blutdruckmessgeräte - Teil 2:
Ergänzende Anforderungen für mechanische Blutdruckmessgeräte
•

deutsch
E
DE-16
Allgemeine Bestimmungen
DE-17
deutsch
F
Pflege des Gerätes
Zeichenerklärung1.
Dieses Produkt hält die Richtlinie 93/42/EWG des Rates vom 5.
September 2007 über Medizinprodukte ein, die am 21. März
2010 in Kraft getreten ist und trägt das Zeichen CE 0123 (TÜV
SÜD Product Service GmbH). Geräte mit CE-Kennzeichen werden
nach dieser Richtlinie qualitätskontrolliert und weisen eine höhere
Genauigkeit als die vormalige Eichung aus.
Gebrauchsanweisung beachten
Lager- und Transportbedingungen
Umgebungstemperatur -20 bis +70 °C
vor Feuchtigkeit schützen
Rel. Luftfeuchtigkeit bis 85%
Trocken halten
Das Gerät enthält empfindliche Teile und muss vor starken Temperaturschwan-
kungen, Luftfeuchtigkeit, Staub und direktem Sonnenlicht geschützt werden.
•
Wir empfehlen nach größeren Stürzen oder Schlägen die Unversehrtheit und
Genauigkeit überprüfen zu lassen.
•
Das Gerät ist nicht wasserdicht.•
Verwenden Sie nur ein weiches, trockenes Tuch, um das Gerät zu reinigen.
Verwenden Sie kein Benzin, Verdünner oder andere starke Lösungsmittel.
•
Manschette nicht schrubben oder in der Maschine waschen.Verwenden Sie
ein synthetisches Reinigungsmittel und reiben Sie die Oberfläche sanft.
•
Wenn das Gerät geöffnet war, muss es einer messtechnischen Kontrolle durch
eine autorisierte Institution unterzogen werden.
•
Vergewissern Sie sich, dass keine Flüssigkeit in den Luftschlauch gelangt.
Gründlich trocknen lassen.
•
0123

deutsch
G
DE-18
Garantie
DE-19
deutsch
Garantieleistungen
Das Blutdruckmessgerät wurde mit aller Sorgfalt hergestellt und geprüft.
Für den Fall, dass es trotzdem bei Auslieferung Mängel aufweisen sollte, geben wir
eine Garantie zu den nachfolgenden Konditionen:
Während der Garantiezeit von 3 Jahren ab Kaufdatum beheben wir solche
Mängel nach unserer Wahl und auf unsere Kosten durch Reparatur (nach
Rücksendung in unserem Werk) oder Ersatzlieferung eines mangelfreien
Gerätes.
1.
Garantieansprüche können nur in der Garantiezeit und durch Vorlage des
Kaufbeleges geltend gemacht werden. Im Garantiefall ist das Gerät zusam-
men mit dem Kaufbeleg und Beschreibung der Reklamation zu senden an
3.
Die gesetzlichen Mängelansprüche des Käufers gegen den Verkäufer gemäß §
437 BGB werden durch die Garantie nicht eingeschränkt.
4.
UEBE Medical GmbH
Service-Center
Zum Ottersberg 9
97877 Wertheim
Bitte beachten Sie: Im Garantiefall unbedingt den Kaufbeleg beilegen.
Nicht unter die Garantie fällt die normale Abnutzung von Verschleißteilen
sowie Schäden, die durch Nichtbeachtung der Gebrauchsanleitung, unsach-
gemäße Handhabung und/oder Demontage des Gerätes durch den Käufer
entstehen.
2.
Ferner werden durch die Garantie keine Schadenersatzansprüche gegen uns
begründet.

EN-20
english
EN-21
english
The process of inflating the cuff using the pump ball cuts off the blood flow in the
upper-arm artery.
Table of contents
Safety instructions
A
Introduction
Thank you for choosing the visomat®medic upper-arm blood pressure monitor
(also referred to in the following as the unit).
This product is designed to determine blood pressure using the auscultatory
method (i.e. with a stethoscope)
Mode of operation:
During the deflation process thumping sounds can be heard through the stetho-
scope when the blood starts flowing in the artery again.
Systole is determined when the noises begin, and diastole is determined with the
last audible sound. The cuff can be fully deflated when both values have been
determined.
These instructions are intended to help the user to use the blood pressure monitor
and stethoscope safely and efficiently. They must be kept with the product and
forwarded, if applicable.
The unit must be used in accordance with the procedures contained in these
instructions and must not be used for other purposes.
Please read these instructions carefully before using the unit.
Maintaining the unit
Warranty
C
Systolic and diastolic blood pressure values
Why you should measure blood pressure regularly
EGeneral provisions
Explanation of symbols
1.
2.
3.
4.
5.
6.
Technical information
D
Measuring errors and their causes
Customer service
Technical data
Applicable standards
Metrological inspection
1.
What are normal values for blood pressure?
What you should know about blood pressure
Reasons for measuring different values
1.
2.
3.
4.
G
F
This unit is recommended to patients with unstable blood pressure or known
hypertension for measuring their blood pressure at home and for therapy support.
1.
2.
3.
4.
5.
6.
B
Fitting the stethoscope
Measuring blood pressure
Operating the unit
Unit description
Attaching the cuff
Important instructions for use
Inflating the cuff
22
23
23
24
25
26
26
27
28
28
28
28
28
29
29
30
30
32
32
33
34
34
35
36
Original spare parts and accessories

english
A
EN-22
Safety instructions
EN-23
B
Operating the unit
english
The unit is designed for auscultatory measurement of the systolic and diastolic
blood pressure on the upper arm.
•
The supplied standard cuff is designed for an upper-arm circumference of 22-
32 cm. Special cuffs are available for larger and smaller arm circumferences
(Page EN-32).
•
Measuring your own blood pressure does not constitute treatment.Do not modify
of your own accord the dosage of drugs/medication prescribed by your doctor.
•
Do not under any circumstances place the cuff on or over any critical point,
e.g. wound, aneurysm, etc. Risk of injuries! The supply via an intravascular
access (infusion) could possibly be interrupted.
•
Please refer to the chapter “Important instructions for use” (Page EN-24)
before conducting any measurements yourself.
•
The unit may only be operated with original spare parts. The warranty will be
invalidated if the unit is damaged by non-approved accessories!
•
The cuff may be inflated on the arm only.•
Please comply with the specified ambient conditions for measurement. See
Technical data, Page EN-30.
•
Blood-pressure measurements on children and pregnant women require
specialist knowledge! Please consult your doctor if you wish to measure the
blood pressure of a child or a pregnant woman.
•
7
4
5
6
3
2
Unit description1.
Pump ball
Deflating button
Pressure gauge with display dial
Earpieces
1
Artery marking
Air socket
Ear clip
11
10
9
8
Artery marking
Cuff
Check measurement arrow for arm
circumference
Air hose
Marking for arm circumference
The unit does not have a pressure-limiting facility at 150 mmHg and must
therefore not be used on babies/infants!
•
Blood pressure is not a fixed value. It may fluctuate upwards or downwards by
more than 20 mmHg on patients within a few minutes.
•
Stethoscope diaphragm
3
1
6
5
2
4
7
9
8
10
12 11
12 Stethoscope diaphragm

B
EN-24
Operating the unit
english
EN-25
B
Operating the unit
english
Please rest at least 5 minutes before measuring. Depending on the previous
degree of stress/exertion, this can even require up to one hour.
•
Refrain from drinking alcoholic or caffeinated beverages and smoking at least
one hour before measuring.
•
Expose the upper arm, the clothes must not impair the blood flow in or from
the arm as this influences the blood pressure at the measurement point.
•
Important instructions for use2.
For this purpose, sit at a table (if possible the height of a dining table, not
a coffee table!).
–
Body posture must be relaxed:•
Rest your back against the backrest of the chair.–
Lay down your lower arm completely, with the palm of your hand facing
upwards.
–
Place your feet on the floor and do not cross your legs.–
Attaching the cuff3.
Expose the upper arm.•
Push the cuff onto the arm until the lower edge
of the cuff is 2-3 cm above the crook of the arm
(Fig. 1).
•
When using the unit on the left arm the air hose
runs to the unit through the middle of the crook
of the arm so that the 4 cm long artery marking
is located centrally above the pulse position (Fig.
2).
•
When using the unit on the right arm the cuff
must be rotated to the left until the artery mark-
ing is on the pulse position. The air hose then
runs along the inner side of the upper arm.
•
The cuff should be tightened to such an extent
that 2 fingers can still be inserted between arm
and cuff. Tip:
•
Angle the arm slightly–
The upper arm muscle is tensioned slightly–
This increases the circumference of the arm
slightly
–
Check whether the arrow on the cuff is within the
white marking for the arm circumference.
•
Now pull the free cuff end tight and flip it back
tightly above the Velcro fastener.
•
Fig. 1
Fig. 2: Pulse position
Blood pressure is not a fixed value. It may fluctuate upwards or downwards by
more than 20 mmHg on patients within a few minutes.
•
The cuff size has to be selected in accordance with the upper arm. Cuffs that
are too small result in excessive blood pressure values. Measure the arm
circumference and compare value to data on cuff!
•

B
EN-26
Operating the unit
english
EN-27
B
Operating the unit
english
Fit the ear clip of the stethoscope so that the
earpieces are firmly positioned in the ears. For
a perfect stethoscope fit, turn the arms of the
ear clip. It is recommended to turn the earpieces
forwards slightly.
•
Using the pump ball, inflate the cuff until the
needle on the dial indicates a value which is ap-
prox. 30 mmHg above the systolic blood-pressure
value to be expected.
•
If blood-pressure values are not know, inflate the
cuff to approx. 250 mmHg. However, if you can
clearly hear thumping sounds in the stethoscope,
continue inflating until no more sounds can be
heard.
•
Inflating the cuff5.
Using your index finger, gently press the air de-
flating switch and allow the air to escape slowly
from the cuff.
•
The pressure-gauge needle moves back slowly.
You can vary the air deflation rate by adjusting
the air deflating switch.
•
Listen out for rhythmic knocking in your stetho-
scope. When the sounds stop or at the moment
of the last audible sound, read off the diastolic
blood-pressure value on the dial and make a note
of this reading too (Fig. 2).
•
Press down the air deflating switch fully after
taking the diastole reading. This initiates rapid
deflation, the switch locking into place for this
purpose. Remove the cuff after it has deflated
fully.
•
Measuring blood pressure6.
Insert the air connector of the cuff into the air
socket on the unit.
•
Relax and lay your extended arm with the cuff on
the dining table and do not move it during the
measurement; do not talk. Make sure the palm of
your hand is facing upwards.
•
Fitting the stethoscope4.
On hearing the first clearly thumping sound, read
off the systolic blood-pressure value on the dial
and make a note of the reading (Fig. 1).
•
(Recommendation of the WHO: 2-3 mmHg/sec-
ond)
Now observe exactly the needle excursion on the
dial and listen out for the noises which you can
year through the stethoscope.
Close the air deflating valve by pressing the air
deflating switch upwards.
•
Fig. 1
Fig. 2: Pulse position

C
EN-28
What you should know about blood pressure
english
EN-29
D
Technical information
english
Normal value Limit High pressure
systolic pressure
≤ 119
diastolic pressure
≤ 79
systolic pressure
120–139
diastolic pressure
80–89
systolic pressure
≥ 140
and/or*
diastolic pressure
≥ 90
What are normal values for blood pressure?4.
The World Health Organisation (WHO) established the following limits in mmHg
(millimetre hydrargyrum / mercury) to classify the blood pressure values.
WHO 2003
* It is sufficient if one
of the values is too
high.
Why you should measure blood pressure regularly3.
Even the time of day has an influence on your blood pressure. During the day the
values are generally higher than during the periods of rest at night.
One-off and irregular measurements therefore say little about your actual blood
pressure. A reliable assessment is possible only when measurements are taken
regularly. Discuss the measurement values with your doctor.
Systolic and diastolic blood pressure values1.
The cardiovascular system has the important function of supplying all organs and tis-
sues in the body with sufficient amounts of blood and of transporting metabolites.
For this, the heart contracts and expands at a regular rate of about 60 to 80 times
per minute.
The pressure of the flowing blood on the artery walls caused by the heart contract-
ing is termed systolic.
The pressure in the ensuing relaxation phase, when the heart refills with blood, is
termed diastolic. During daily measurement you determine both values.
Reasons for measuring different values2.
Our blood pressure responds to internal and external influences like a sensitive
measuring instrument. It can be affected by even slight changes.
This explains why often values measured with the doctor or pharmacist are higher
than those measured at home in the environment you are used to. Changes in the
weather, climate changes, or physical or psychological stress can have effects as
well.
Measuring errors and their causes1.
Failure encoun-
tered
Possible cause Corrective action
Quiet pulse
sounds
Stethoscope diaphragm not
lying on the pulse position.
Reposition the stethoscope
diaphragm; if necessary, have your
specialised dealer or doctor show
you how to do this.
Y-tube kinked. Check Y-tube.
Earpieces clogged. Clean earpieces.
Interference noise
in the stethoscope
Movement of arm or body dur-
ing measurement.
Do not move your arm, do not
talk.
Cuff is not
inflated
Deflating valve was not closed. Reset the air deflating switch.
Incorrect meas-
ured values
Incorrect cuff size. Make sure that you use a cuff
which matches your upper-arm
circumference.
Unusual meas-
ured values
Incorrect cuff size. Movement
or talking during measurement.
Resting time not observed.
Check conditions and repeat
measurement after 3 minutes.
If you fail to get any measurement results, please check for the following possible
causes.
If necessary, repeat measurement after the circulation in the arm has been allowed to
recover for a brief period; rest approx. 3-5 minutes for this purpose.

D
EN-30
Technical information
english
EN-31
D
Technical information
english
Customer service2.
The unit may only be repaired by the manufacturer or by an expressly authorised
organisation.
Please contact:
UEBE Medical GmbH
Zum Ottersberg 9
D-97877 Wertheim, Germany
Phone: +49 (0) 9342/924040
Fax: +49 (0) 9342/924080
E-mail: info@uebe.com
Internet: www.uebe.com
Technical data3.
Error limits: Blood pressure measurement: corresponds to
EN 1060 Part 1
Pressure measurement: ± 3 mmHg
Serial number: The unit bears a serial number SN which pro-
vides clear identification.
Cuff: Cuff type SM (for arm circumference 22-32 cm)
Or optionally also
Cuff type SL (for arm circumference 32-42 cm)
Cuff type SS (for arm circumference 14-21 cm)
Operating conditions: Ambient temperature 10 to 40 °C
Relative humidity up to 85%, non-condensing
Storage and transportation
conditions:
Ambient temperature -20 to +70 °C
Relative humidity up to 85%, non-condensing
Deflation Manual
Unit type: Aneroid blood pressure monitor with pull-clip cuff
and integrated stethoscope
Weight: approx. 160 g without cuff
Measurement procedure: Auscultatory measurement
Measurement and pres-
sure-display range
0-300 mmHg

D
EN-32
Technical information
english
EN-33
D
Technical information
english
Original spare parts and accessories4.
The following original spare parts and accessories are available from specialist
dealers:
Cuff SM (for arm circumference 22-32 cm)
Part no. 2703001
PZN 5861184
•
Cuff SS (for arm circumference 14-21 cm)
Part no. 2703005
PZN 5861244
•
Subject to technical modifications.
Applicable standards5.
EN 1060-1:1995/prA1:2008 Non-invasive sphygmomanometers - Part 1:
General requirements
•
Cuff SL (for arm circumference 32-42 cm)
Part no. 2703002
PZN 5861209
•
UEBE Medical GmbH
Zum Ottersberg 9
D-97877 Wertheim, Germany
Manufacturer:
Metrological inspection6.
Upon request, responsible authorities or authorised maintenance services receive a
“Test instruction for metrological inspection” from the manufacturer.
(previously calibration)
Basically, a metrological inspection is recommended at intervals of 2 years.
However, professional users in Germany have to comply with the aforementioned
according to the „Regulation for Operators of Medical Devices“.
This can be implemented either by UEBE Medical GmbH, an authority responsible
for metrology, or authorised maintenance services. For this, please observe your
national provisions.
Important: No modifications, e.g. opening the unit, may be made to this unit
without the manufacturer‘s prior permission.
For further spare parts, please contact Customer Service (see Page EN-30).
EN 1060-2:1997/prA1:2008 Non-invasive sphygmomanometers - Part 2: Sup-
plementary requirements for mechanical sphygmomanometers
•

E
EN-34
General provisions
english
EN-35
F
Maintaining the unit
english
Explanation of symbols1.
This product complies with the Council Directive 93/42/EC from 5
September 2007 regarding medical devices, which became effec-
tive on 21 March 2010 and bears the mark CE 0123 (TÜV SÜD
Product Service GmbH). Units with CE marks are subject to quality
inspections in accordance with this Directive and provide a higher
level of accuracy than previous calibration.
Please observe instructions for use
Storage and transportation conditions
Ambient temperature -20 to +70 °C
Protect against moisture/humidity
Rel. air humidity up to 85%
Keep dry
The unit contains sensitive parts and must be protected against strong vari-
ations in temperature, air humidity, dust and direct sunlight.
•
We recommend that you have the intactness and accuracy of the unit checked
after heavier falls or impacts.
•
The unit is not water-proof.•
Please use a soft, dry cloth to clean the unit only. Do not use benzene, thin-
ners or other strong solvents.
•
Do not scrub or machine-wash the cuff. Please use synthetic cleaners and
softly rub the surface.
•
If the unit has been opened, it must be subjected to a metrological inspection
conducted by an authorised organisation.
•
Make sure that liquid cannot get into the air hose. Dry thoroughly.•
0123

G
EN-36
Warranty
english
EN-37
english
Warranty furnished
The blood pressure monitor has been manufactured and tested with great care.
However, in the unlikely event of a defect being detected after delivery, we provide
warranty in accordance with the following terms and conditions:
During the warranty period of 3 years from the date of purchase we reserve
the right either to repair any such defect at our expense (upon return of the
unit to our factory) or to supply a perfect replacement unit.
1.
Warranty claims can only be advanced in the warranty period and by present-
ing proof of purchase. In the event of a warranty claim, the unit must be sent
to the following address together with the proof of purchase and a descrip-
tion of the complaint:
3.
In the case of defectiveness of the goods, the statutory rights of the purchaser
to claim against the seller in accordance with § 437 German Civil Code are
not limited by the warranty.
4.
UEBE Medical GmbH
Service-Center
Zum Ottersberg 9
D-97877 Wertheim
Please note:
In the event of a warranty claim it is essential to attach the proof of
purchase.
Excluded from the warranty are parts subject to normal wear and tear as well
as damage caused by non-compliance with the instructions for use, improper
handling and/or disassembly of the unit by the purchaser.
2.
Furthermore, no claims for damages against us are substantiated by the
warranty.

FR-38
français
FR-39
français
Le brassard est gonflé à l’aide de la poire et comprime l’artère brachiale.
Sommaire
Consignes de sécurité
A
Introduction
Nous vous remercions d‘avoir choisi le tensiomètre à bras visomat®medic (nommé
appareil dans le présent mode d‘emploi).
Cet appareil est conçu pour la mesure de la pression artérielle par méthode
auscultatoire.
Mode de fonctionnement :
Pendant la décompression, le pouls émet dans l’artère des bruits perceptibles au
stéthoscope.
La valeur systolique est déterminée à l’apparition des bruits et la valeur diastolique
à la disparition des bruits perceptibles. Une fois ces deux valeurs déterminées, on
peut dégonfler entièrement le brassard.
Ce mode d’emploi a pour objectif d’aider l’utilisateur à mesurer la tension
artérielle avec stéthoscope de façon sûre et efficace. Il doit être conservé avec le
produit et transmis le cas échéant.
L‘appareil doit être utilisé conformément au processus décrit dans le mode d‘em-
ploi et ne doit pas être utilisé à d‘autres fins.
Veuillez lire attentivement le mode d‘emploi avant d‘utiliser l‘appareil.
Entretien de l‘appareil
Garantie
C
La valeur systolique et diastolique de la pression artérielle
Pourquoi mesurer régulièrement la pression artérielle ?
EGénéralités
Explication des symboles
1.
2.
3.
4.
5.
6.
Informations techniques
D
Causes des mesures erronées
Service après-vente
Caractéristiques techniques
Normes appliquées
Contrôles métrologique
1.
Quelles sont les valeurs normales de la pression artérielle ?
Ce qu‘il faut savoir sur la pression artérielle
Pourquoi mesurer deux valeurs différentes ?
1.
2.
3.
4.
G
F
Cet appareil est conseillé aux patients souffrant de pression artérielle instable
ou d‘hypertonie désireux d‘autocontrôler leur tension à domicile et est conseillé
comme soutien thérapeutique.
1.
2.
3.
4.
5.
6.
B
Pose du stéthoscope
Mesurer la pression artérielle
Utilisation de l‘appareil
Description de l‘appareil
Pose du brassard
Conseils importants d’utilisation
Gonflage du brassard
Pièces de rechange authentiques et accessoires
40
41
41
42
43
44
44
45
46
46
46
46
46
47
47
48
48
50
50
51
52
52
53
54
Other manuals for Medic
1
Table of contents
Languages:
Other visomat Blood Pressure Monitor manuals

visomat
visomat comfort soft BT User manual

visomat
visomat handy User manual

visomat
visomat double comfort User manual

visomat
visomat comfort II User manual

visomat
visomat comfort eco User manual

visomat
visomat comfort eco User manual

visomat
visomat comfort eco User manual

visomat
visomat comfort 20 User manual

visomat
visomat comfort III User manual

visomat
visomat Medic User manual