manuals.online logo
Brands
  1. Home
  2. •
  3. Brands
  4. •
  5. Visonic
  6. •
  7. Security Sensor
  8. •
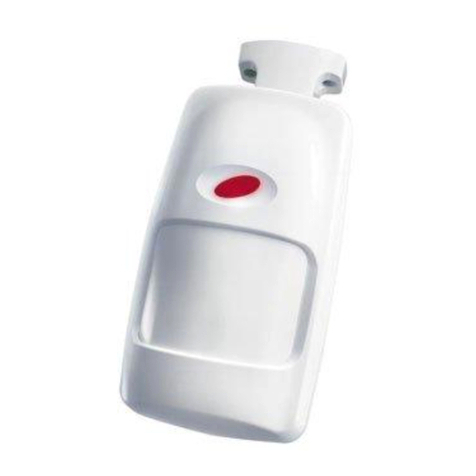
  9. Visonic MP-840 User manual

Visonic MP-840 User manual

D-306082 MP-840 PIR ZB 1

ZigBee Home Automation 1.2
Wireless Digital Pet Immune PIR Detector

Installation Instructions

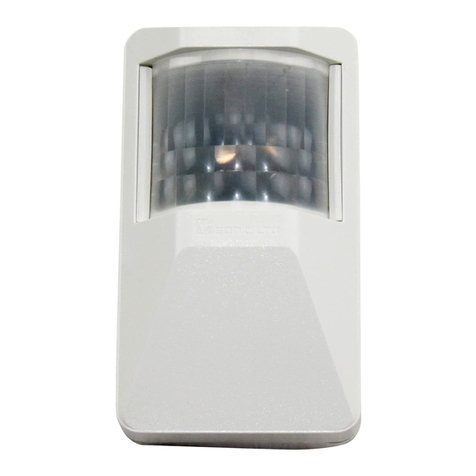
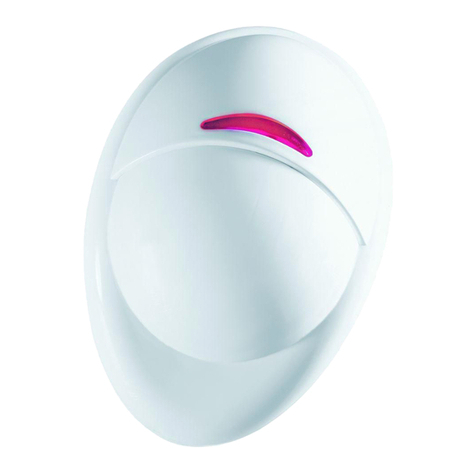
The MP-840 (pet immune) is a microprocessor-controlled wireless digital PIR detector supported by H.A 1.2
panels using ZigBee Home Automation.
The detector’s features are as follows:
Fresnel and cylindrical lenses with uniform detection sensitivity throughout its operating range, up to 12
meters (39 ft).
Target Specific Imaging™ (TSI) technology is used for distinction between humans and pets weighing
up to 38 kg (85lb).
The advanced True Motion Recognition™ algorithm (patented) allows distinguishing between the true
motion of an intruder and any other disturbances which may cause false alarms.
No vertical adjustment is needed.
An on-board motion event jumper determines whether 1 or 2 consecutive motion events trigger an
alarm.
After detection, the detector disarms itself to save battery power. It rearms (reverts to the ready state) if
there is no subsequent detection throughout the following 2-minute period.
Very low current consumption.
Microprocessor-controlled temperature compensation.
White light protection.
Front and back tamper protection.
Elegantly styled, sturdy case.
The device support on temperature’s report according to HA1.2’s panel.
For UL installations: The detector is for use with UL listed control unit only. Pet immunity has not been
evaluated by UL.
Figure 1: MP-840

Detector Type
Dual element low
-
noise pyroelectric sensor
OPTICAL
Lens Data
Max. Coverage
Pet Immunity (pet version)
27 Fresnel “far” lenses (54 sensitivity “beams”)
18 cylinder “mid” curtain lenses (36 sensitivity “curtains”)
10 cylinder “close” curtain lenses (20 sensitivity “creep curtains”)
12 x 12 m, (39 x 39 ft) / 90°
Up to 38 kg (85 lb)
ELECTRICAL
Internal Battery
3V Lithium battery, type CR
-
123A. For UL installations, use
Panasonic
and GP only
Nominal Battery Capacity
1450 mAh
Battery Life (with LED on)
Battery Power Test
FUNCTIONAL
Typically over 5 years
Note: Inability to connect with wireless network, or wireless link quality no higher than 20% may
significantly reduce the expected battery life.
Performed immediately upon battery insertion and periodically after every several hours
True Motion Event
Verification
2 position selector - 1 (OFF) or 2 (ON) motion events
Alarm Period 2 seconds
LED Switch LED Enable (red LED lights for 2 sec. upon Alarm detection)
LED Disable: No indication. (LED is always enabled during Walk-Test mode)
Rearm Timer Rearms the detector 2 minutes after the last alarm. Timer disabled in the walk test mode
2 D-306082 MP-840 PIR ZB
WIRELESS
Supported Network
Frequency
ZigBee H.A 1.2
2.405 – 2.480 Ghz as per IEEE 802.15.4
Tamper Alert Reported when a tamper event occurs and in any subsequent message, until the tamper switch is
restored

MOUNTING
Height
Installation Options
1.8-2.4 m (6 - 8 ft). For pet rejection, the optimal height is 2.1 m (7 ft)
Surface or corner

ENVIRONMENTAL
RFI Protection
Operating Temperatures
>20 V/m up to 1000 MHz
-10°C to 50°C (14°F to 122°F
Storage Temperatures
Humidity
-20°C to 60°C (-4°F to 140°F)
Average relative humidity of up to approximately 75% non-condensing. For 30 days per year the relative
humidity may vary between 85% and 95% non-condensing.

PHYSICAL
Size (H x W x D)
Weight (with battery)
83 x 61 x 42 mm (3.27 x 2.4 x 1.66”)
90 g (3.17 oz)
Color
PATENTS
White
U.S. Patents 5,693,943 6,211,522



 !"
1. Keep away from heat sources.
2. Do not expose to air drafts.
3. Do not install outdoors.
4. Avoid direct sunshine.
5. Do not install near high-voltage electrical lines.
6. Do not install behind partitions.
7. Mount on solid stable surface.
Warning! Do not obscure partially or completely the detector’s field of
view.
Figure 2. General Guidelines
Important! The pet detector is tolerant to 38 kg (85 lb) animals moving on the floor or climbing on furniture as long as the
activity takes place below 1 m (3 ft). Above the 1 m (3 ft) height limit, the detector is tolerant to 19 kg (42 lb) pets,
but the pet immunity will decrease as the pet gets closer to the detector. It is therefore recommended to select a
mounting location that minimizes potential close proximity of animals.
D-306082 MP-840 PIR ZB 3


#$$ %%"!
1. Mount the bracket on the wall
2. Press in the point marked “F” in the drawing and separate the cover from the base
3. Insert the battery while observing polarity.
-OR-
If battery is already installed, pull the activation strip that protrudes from the front of the detector.
4. Return the cover to the base until a click is heard (the snap is closed).
5. Secure detector with screw (optional).
6. Align the detector with the bracket.
7. Slide the detector upward until a click is heard.
Note: It is recommended to wait about 1 minute after battery removal, before inserting the new battery.
Caution! Risk of explosion if battery is replaced by an incorrect type. Dispose of used battery according to the manufacturer's instructions

 ! "#$%&
Figure 3 – Bracket Mounting Figure 4 – Opening the Unit Figure 5a – Battery Insertion
Figure 5b – Battery Activation Figure 6 – Replacing Cover
Figure 7 – Securing with Screw
Figure 8 – Mounting Detector on Bracket
A. Surface mounting
B. Corner mounting
C. For back tamper
D. Cover
E. Base
F. Press in this point
4 D-306082 MP-840 PIR ZB




&%' ($)$#*
Remove the plastic (pet mask) in case of no need for pet immunity


1. Place your thumb at the base of the Pet Mask.
2. Place your fingers at the top of the Pet Mask..
3. Lift the Pet Mask to remove.

Figure 9 – Removing the Pet Mask


 ###&+,-%&."*$











1. Release screw (optional).
2. Separate the cover from the base.
3. Remove battery.
4. Press on the stopper snap to release the base from the bracket.
5. Slide the base downward to remove.
Figure 10 – Disassembly from Bracket

D-306082 MP-840 PIR ZB 5
/"$ '$ (!  ($)$"$%
To pair the detector to the control panel, you must set it to pairing mode.
1. First set the panel to pairing mode and then the detector.
2. To activate, pull the activation strip that protrudes from the back of the detector (see Figure 5). The device power-up stabilization procedure
begins.
3 The red LED blinks every 5 seconds followed by the green LED which blinks 3 times to indicate that the detector is searching for a control
panel.
Note: If detector pairing is not successful during the searching process – by tripping the motion detector or by pressing the tamper switch – the
searching process will restart.
4. Complete the pairing procedure on the control panel (see the pairing instructions in the control panel’s installation guide).
Note: Pairing should be performed before installation.

0+%%$ ($)$"$%
You can reboot the detector, as follows.
1. Remove the cover.
2. Close the battery cover.
1-$ ($)$"$%

CAUTION! The defaulting process removes the device from the network and enables re-pairing.
Separate the cover from the base to remove the battery (see Figure 7).
1. Press and hold down the detector’s tamper switch (see Figure 10).
2. Insert the battery into the detector while observing battery polarity.
3. Release the tamper switch within 4 seconds (the red LED blinks once every 5 seconds followed by three blinks of the green LED).
4. To re-pair the detector, follow the instructions in section 3.5.

2&3$$ (#




Figure 11 - Jumper Settings









6 D-306082 MP-840 PIR ZB
45*#$ (

Walk-test the coverage area (see Figure 11) by walking across the far end of the coverage
pattern in both directions. The red LED lights each time your motion is detected followed by
steady LED signal strength indication.
LED response
Reception
3 Green LED blinks
No network
Green LED blinks once
Strong
Orange LED blinks once
Good
Red LED blinks once
Poor
No blinks
No communication
Important! Instruct the user to walk test at least once a week to verify proper function of the
detector.
Note: Upon battery insertion or closing the cover (which results in closing the tamper switch)
the LED flashes for 2 minutes and the detector goes into walk-test mode for 15
minutes. In walk-test mode, regardless of the LED jumper position, the LED lights
upon every motion detection. After 15 minutes the detector automatically enters
normal mode in which the LED functions according to the LED control jumper
position.
Figure 12 - Coverage Pattern Walk-Test

.6
If you encounter one of the following problems with the MP-840, perform the suggested remedy:

Problem
Remedy
Attempt to pair the sensor is unsuccessful.
Make sure that the sensor has been defaulted and is set to pairing
mode (see section 3.5)
The sensor and the panel do not communicate.
Perform the signal strength testing procedure described in the control
panel installation manual. Make sure that the signal is sufficient. If
necessary, replace the sensor’s battery.
The sensor sends a Low Battery indication.
To ensure continuous proper operation, replace the battery within two
weeks of the first Low Battery indication.
Panel does not arm because of an unrecognized sensor malfunction
Consult with your installer or system provider before you disable
a zone.
Disable the sensor zone (see the control panel user manual). Note that
disabling a sensor zone lowers the overall security level of your
system.

















D-306082 MP-840 PIR ZB 7
56
The MP-840
complies with
the following standards:
Europe : EN 300328, EN 301489, EN 60950-1, EN 50130-4, EN 50131-1, EN 50131-2-2 Grade 2 Class II.
The MP-840 is compatible with the RTTE requirements - Directive 1999/5/EC of the European Parliament and of
the Council of 9 March 1999
USA: FCC-CFR 47 Part 15, UL- UL 639
Canada: IC-RSS 247, ULC – S306
This device complies with Part 15 of the FCC Rules and RSS-247 of Industry and Science Canada. Operation is subject to the following two
conditions: (1) This device may not cause harmful interference, and (2) this device must accept any interference received, including interference
that may cause undesired operation.
Le présent appareil est conforme aux CNR d'Industrie Canada applicables aux appareils radio exempts de licence. L'exploitation est autorisée
aux deux conditions suivantes : (1) l'appareil ne doit pas produire de brouillage, et (2) l'utilisateur de l'appareil doit accepter tout brouillage
radioélectrique subi, même si le brouillage est susceptible d'en compromettre le fonctionnement.
WARNING! Changes or modifications to this unit not expressly approved by the party responsible for compliance (Visonic Ltd.) could void the
user’s authority to operate the equipment.
To comply with FCC Section 1.1310 for human exposure to radio frequency fields and IC requirements, implement the following instruction: A
distance of at least 20cm. between the equipment and all persons should be maintained during the operation of the equipment.
Le dispositif doit être placé à une distance d'au moins 20 cm à partir de toutes les personnes au cours de son fonctionnement normal. Les
antennes utilisées pour ce produit ne doivent pas être situés ou exploités conjointement avec une autre antenne ou transmetteur.
NOTE: This equipment has been tested and found to comply with the limits for a Class B digital device, pursuant to part 15 of the FCC Rules.
These limits are designed to provide reasonable protection against harmful interference in a residential installation. This equipment generates,
uses and can radiate radio frequency energy and, if not installed and used in accordance with the instructions, may cause harmful interference to
radio communications. However, there is no guarantee that interference will not occur in a particular installation. If this equipment does cause
harmful interference to radio or television reception, which can be determined by turning the equipment off and on, the user is encouraged to try
to correct the interference by one or more of the following measures:
-Reorient or relocate the receiving antenna.
-Increase the separation between the equipment and receiver.
-Connect the equipment into an outlet on a circuit different from that to which the receiver is connected.
-Consult the dealer or an experienced radio/TV technician for help.
Cet équipement a été testé et jugé conforme aux limites s’appliquant à un appareil numérique de classe B, conformém ent à
la Partie 15 des réglementations de la F CC. Ces limites ont été élaborées pour off rir une protection raisonnable contre les
interferences nuisibles dans une installation résidentille.
Cet équipement génère, utilize et peut émettre de l’ énergie de fréquence radio et, s’il n’est pas installé et utilize
conformément aux inst ructions du fabricant, peut provoquer des interférences dangereuses pour les com munications radio.
Toutefois, rien ne garantit l’absence d’interférences dans une installation particuliére. Si cet équi pement provoque des
interférences nuisibles au niveau de la réception radio ou television, ce qui peut ét re determine par la mise hors, puis sous
tension de l’ équipment, vous étes invit e à essayer de c orriger les interferences en pregnant les mesures sui vantes:
Réorientez ou déplaces l’ant enne réceptrice.
Augmentez la distance qui sépare l’équi pement et le récepteur.
Branchez l’équipem ent à une prise d’ un circuit different de celui auquel est branc hé le récepteur.
Consultez le revendeur ou un technician radio/television expérimenté pour obtenir de l’aide
/
Even the most sophisticated detectors can sometimes be defeated or may fail to warn due to: DC power failure / improper connection, malicious
masking of the lens, tampering with the optical system, decreased sensitivity in ambient temperatures close to that of the human body and
unexpected failure of a component part.
The above list includes the most common reasons for failure to detect intrusion, but is by no means comprehensive. It is therefore recommended
that the detector and the entire alarm system be checked weekly, to ensure proper performance.
An alarm system should not be regarded as a substitute for insurance. Home and property owners or renters should be prudent enough to
continue insuring their lives and property, even though they are protected by an alarm system.
8 D-306082 MP-840 PIR ZB

W.E.E.E. Product Recycling Declaration
For information regarding the recycling of this product you must contact the company from which you orignially purchased it. If you are discarding this product and not
returning it for repair then you must ensure that it is returned as identified by your supplier. This product is not to be thrown away with everyday waste.
Directive 2002/96/EC Waste Electrical and Electronic Equipment.



























EMAIL: info@visonic.com
INTERNET: www.visonic.com
VISONIC LTD. 2016 MP-840 PIR ZB D-306082 (Rev 0, 04/16)

Other Visonic Security Sensor manuals

Visonic K-980D User manual

Visonic

Visonic K-980D User manual

Visonic POWERMAX - User manual

Visonic

Visonic POWERMAX - User manual

Visonic MP-862 User manual

Visonic

Visonic MP-862 User manual

Visonic CLIP PG2 User manual

Visonic

Visonic CLIP PG2 User manual

Visonic MCT-550 User manual

Visonic

Visonic MCT-550 User manual

Visonic GB-502 PG2 User manual

Visonic

Visonic GB-502 PG2 User manual

Visonic K-940MCW User manual

Visonic

Visonic K-940MCW User manual

Visonic MR-4000 User manual

Visonic

Visonic MR-4000 User manual

Visonic MCPIR-2000 User manual

Visonic

Visonic MCPIR-2000 User manual

Visonic MCT-442 User manual

Visonic

Visonic MCT-442 User manual

Visonic SPD-1000 User manual

Visonic

Visonic SPD-1000 User manual

Visonic SRN-2000 User manual

Visonic

Visonic SRN-2000 User manual

Visonic DISC User manual

Visonic

Visonic DISC User manual

Visonic NEXT PLUS PIR / K9-85 User manual

Visonic

Visonic NEXT PLUS PIR / K9-85 User manual

Visonic DISCOVERY K9-80 User manual

Visonic

Visonic DISCOVERY K9-80 User manual

Visonic SRN-2000E User manual

Visonic

Visonic SRN-2000E User manual

Visonic TOWER-20AM PG2 User manual

Visonic

Visonic TOWER-20AM PG2 User manual

Visonic DISC MCW User manual

Visonic

Visonic DISC MCW User manual

Visonic MCM-140 User manual

Visonic

Visonic MCM-140 User manual

Visonic V-MOTION MCW User manual

Visonic

Visonic V-MOTION MCW User manual

Visonic Logica User manual

Visonic

Visonic Logica User manual

Visonic DUET-AM User manual

Visonic

Visonic DUET-AM User manual

Visonic NEXT CAM PG2 User manual

Visonic

Visonic NEXT CAM PG2 User manual

Visonic DISCOVERY PIR MCW User manual

Visonic

Visonic DISCOVERY PIR MCW User manual

Popular Security Sensor manuals by other brands

Federal Signal Corporation 191XL Series Installation and maintenance manual

Federal Signal Corporation

Federal Signal Corporation 191XL Series Installation and maintenance manual

Baumer URDK 10P8914/S35A quick start guide

Baumer

Baumer URDK 10P8914/S35A quick start guide

Lince JOLLY Programming and operating manual

Lince

Lince JOLLY Programming and operating manual

Korno GT-1000 SERIES user manual

Korno

Korno GT-1000 SERIES user manual

Risco Industrial LuNAR RK200DTG3 installation guide

Risco

Risco Industrial LuNAR RK200DTG3 installation guide

BFT RIP installation manual

BFT

BFT RIP installation manual

DSC WLS912L-900 installation instructions

DSC

DSC WLS912L-900 installation instructions

Leica DIGICAT 500i quick start

Leica

Leica DIGICAT 500i quick start

ELTEX ETM Solo Viewer manual

ELTEX

ELTEX ETM Solo Viewer manual

MICRO-EPSILON capaNCDT 6228 operating instructions

MICRO-EPSILON

MICRO-EPSILON capaNCDT 6228 operating instructions

IntelliSense FG-1508 installation instructions

IntelliSense

IntelliSense FG-1508 installation instructions

Larson Electronics EXP-MS-N4X-AT-HV instruction manual

Larson Electronics

Larson Electronics EXP-MS-N4X-AT-HV instruction manual

Sensear SM1P manual

Sensear

Sensear SM1P manual

Tyco Visonic SD-304C PG2 installation instructions

Tyco

Tyco Visonic SD-304C PG2 installation instructions

Det-Tronics X9800 Addendum

Det-Tronics

Det-Tronics X9800 Addendum

LynRus Aut-O-Loc 3 installation instructions

LynRus

LynRus Aut-O-Loc 3 installation instructions

PORTOR INDUSTRY PORTOR LIGHTING PT-MSH-PR quick start guide

PORTOR INDUSTRY

PORTOR INDUSTRY PORTOR LIGHTING PT-MSH-PR quick start guide

Edwards SIGA2-HRS Installation and operation

Edwards

Edwards SIGA2-HRS Installation and operation

manuals.online logo
manuals.online logoBrands
  • About & Mission
  • Contact us
  • Privacy Policy
  • Terms and Conditions

Copyright 2025 Manuals.Online. All Rights Reserved.