Waykar PDGT701BA User manual

Commercial Dehumidifier
www.waykar.com
PDGT701BA
Please read the manual carefully
before using the unit
USER MANUAL


Thank you for purchasing our dehumidifier.
Waykar wishes our products and services can bring convenience to your work and life.
We highly recommend you to keep the manual for reference, in case you encounter
unexpected issues using this unit.
Please read the manual carefully to ensure proper use of the dehumidifier.
Our dehumidifiers are widely used in family bedrooms, bathrooms, basements, offices and
storage rooms, etc.
It can be operated quickly and efficiently to reduce the room's humidity and bring you a
healthy and comfortable life.
If there is any problems of the product, please contact Waykar Customer Service at
support@waykar.com with your Purchase Order ID, we will dedicate our efforts to help you
address the problems.

12
01
02
03
04
13
15
16
17
Warranty & Contact Information
The graphics and functions provided in this manual may not be the same as
the actual product. Please always refer to the actual product.
The model of the machine on the manual is for reference only. Please operate
the machine based on the actual product.
The right to interpret the relevant terms belongs to the company.
Common Faults & Solutions
&

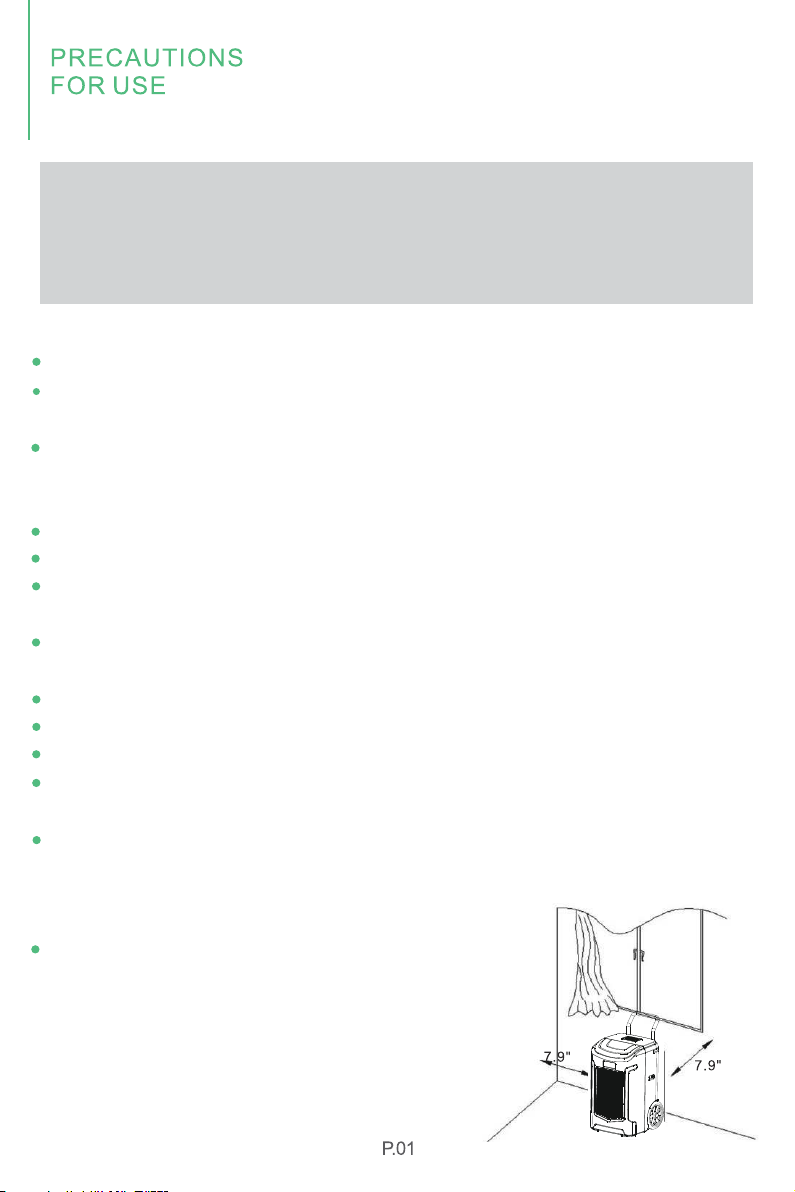
Install the dehumidifier on flat surface to minimize vibration and/or noise.
Inspect the power cord before use. Never operate the dehumidifier when the
power cord or plug is damaged.
Insert the three-prong plug on the power cord into a matching electrically
grounded outlet (120V/60Hz, 15A at least). Do not use an adapter. Never cut off
the third prong. Do not use an extension cord.
Do not operate the dehumidifier in standing water. Keep motor and wiring dry.
Never immerse the dehumidifier into water or other liquids.
Do not put the dehumidifier close to heat-generating devices, including flamma-
ble or dangerous materials.
Unplug the power supply before cleaning or storing the dehumidifier. Always
grasp the plug (not the cord) to unplug.
Do not put fingers or other items into air inlet or air outlet.
Never insert any other objects into the dehumidifier body.
Do not sit, stand or put heavy objects on the dehumidifier.
This dehumidifier should only be used by adults who have read the manual and
understand the operating procedure of the dehumidifier.
The dehumidifier is not to be used by persons (including children) with reduced
physical, sensory or mental capabilities, or lack of experience and knowledge,
unless they have been given supervision or instruction
by an adult.
Never repair or remove plug and or power cord.
Any repairs should be completed by qualified
electrician or distributor.
Safety Notes:
For your safety, please read the manual carefully and keep the manual before
you use the product for reference. Please use this product according to the
installation and operation instructions of this manual.

1.Handle Bar 2.Handle 3.Wheels
4.Control Panel 5.Air Inlet 6.Air Filter
1.Air Outlet 2.Pump Drain Outlet 3.Cord Winder
4.Power Cord Port 5.Pump Reservoir 6.Emergency Drain Outlet

Defrost Indicator
Pump Working
Indicator
Timer Indicator
Humidity Reading
Running Indicator
Pump Up Down Timer Power
1.Understand the Control Panel
Up Button
Setting the humidity up.
DOWN Button
Press to decrease the set-point of
humidity level or timer.
TIMER Button
Press to enable the timer function
or confirm the timer settings.
PUMP Button
Press and hold the PUMP button
for 3-5 seconds to empty water from
the pump reservoir manually.
POWER Button
Press to turn ON or OFF.
TIM ER
T IM ER P OW E RD OW NU PP UMP
R UN NI N GP U M P
DE F R OS T

OPERATION
INSTRUCTION
When water tank is full, the PUMP will automatically start pumping water, and
the indicator light will flash.
When the water level in the water tank is too low, the PUMP will automatically
stop pumping water, and the indicator light goes out.
In the power-on state, long press the "PUMP” button for 3 seconds, the
PUMP function is forced to open, the indicator PUMP will flash.
In the power on or standby state, press the "Timer" button once to enter the
timer setting state: Timing indicator light up and the digital number " " flashes
to show the time.
In the timing setting state, press the "Up" or "Down" button to set the desired
time (setting range: 01-24h, can be cycled).
Press the button once again or no button operation for a few seconds, the
timing setting state will automatically be exited.
If the time is set to be 00, the time setting is invalid.
The humidity level can be set within a range of 10%RH to 98%RH in 1%
increments.
When it starts work, it will first automatically detect and show the room's
humidity. Press the "UP" button to change the humidity selection in 1%
increments.Press "DOWN" to make it decrease by 1%RH. " " Flash and
show the setting humidity.
When the humidity level is set at 30%RH, the dehumidifier will work at
continuous dehumidifying mode.
Press the "function" button once or no button operation for a few seconds will
automatically exit the humidity setting state.

When the frost builds up on the evaporator coils, the compressor will cycle off
and the fan will continue to run until the frost disappears.
If the dehumidifier shuts off unexpectedly due to power being cut, the dehu-
midifier will restart with the previous function setting automatically when the
power resumes.
Thanks to the built-in pump, the dehumidifier will drain the condensation
water automatically.
To avoid any damage to the dehumidifier, the dehumidifier will not start
operation following a complete cycle until after 3 minutes. Operation will
automatically start after 3 minutes.
Note: If the dehumidifier has been turned off before power outage, the
dehumidifier will not auto restart after the power resumes.

When the machine is defrosting, the defrost indicator will be flashing,
defrosting end the light goes out.
When the pump is draining, PUMP Indicator will be flashing.
When set or check the timer, the timer indicator will be flashing.
When the timer is setup properly the indicator will light up, light goes
out when timer function is not activated.
1. Digital number will be flashing when the target humidity is setting or the
room humidity is lower than the set humidity.
2. When the setting value is read out to be lower than the room humidity, the
digital number will remain illuminated.
DEFROST
PUMP
TIMER
TIMER
When the fan delays to start, running indicator will be flashing; it will
light up when the fan is running.
RUNNING

4.Error & Protection Code
E11
2
3
4
5
Humidity Sensor
Failure
E2 Defrost Temperature
Sensor Failure
The compressor and the fan
keep running. Unplug the
dehumidifier and then re-plug,
the dehumidifier may restart
again.
E4 Temperature Sensor
failure
EP Water pump failure
EC Control Panel Failure The dehumifidier will not be
ready for operation.
1.Turn off the dehumidifier
and unplug it;
2. Find the gravity drain
outlet at the bottom of the
dehumidifier and connect
the emergency hose to
drain;
3.After emptying the reser-
voir, close the gravity drain
outlet;
4.Connect the pump drain
hose;
Re-plug and start the
dehumidifier to check the
pump function.
Number Error Code Name of The Fault Note

support@waykar.com
When the machine signals the alarm, it will flash or display the alarm, in case
there are multiple errors on the unit, it will display the errors in turn.
When one of above malfunctions occurs, the buzzer will alarm for a few
seconds, press any key during the alarm to release the alarm sound.

5.Installing the Handle
1. Take out 4 screws and a handle from the accessories, and put the handle
into the groove at the back of the humidifier, making the screws correspond
to the screw holes.
2. Tighten all the four screws on the hands respectively, the installation is
finished.
Handle
Screws
Tighten all the four hand screws,complete the installation.
Put the handle into the groove
at the back of the dehumidifier,
making the 4 screws correspond
to the screw hole.

6.Continuous Drainage
This dehumidifier has an internal pump that will automatically drain the
condensate out via the long drain hose. Before turning on the dehumidifier,
make sure the hose has been connected to the drain outlet properly.
1. Uncoil the entire hose;
2. Attach the hose to the drain outlet;
3. Place the unattached end of the hose in a sink, drain bucket or outdoors:
Anywhere that the water can drain out safely (Please ensure that no kinks or
other obstructions will stop the water to flow).
NOTE:
• Ensure that water which runs to outdoors does NOT create a slip hazard.
• If you use a bucket or other container for water collection, check it regularly
to prevent overflows.
• The drain hose for the water pump can drain up to 15ft vertically. More than
15ft may cause water back up to the pump resulting in leakage.
• When turning off the dehumidifier, please take the hose out from the water
collection container to avoid the water back-flow and cause water leakage.

7.Manual Drainage
In power-disconnected status, tilt the dehumidifier as the figure shown, pull
out the rubber plug and put the dehumifier straight to drain the sewage in the
water tank.
Rubber plug
Inclination≥45°

Turn the dehumidifier off and remove the plug from the wall outlet before clean-
ing
A-Cleaning the Dehumidifier
Clean the dehumidifier housing with a soft damp cloth. Do not submerge or
place water on the dehumidifier or control panel. Water may damage the
electronic components of the dehumidifier. Do not use chemical solvents
such as benzene, alcohol, gasoline or other heavy-duty cleaners. The
surface may become damaged or deformed.
B-Cleaning the Air Filter
The working performance of the dehumidifier will be greatly reduced if the filters
become blocked. Please check and clean the filter regularly.
To Clean the Filter
1) Slide the filter out.
2)Vacuum any dirt from the filter using the vacuum cleaner and air gun attach-
ment.
3) Immerse the filter into lukewarm water (about 104°F) with a mild detergent,
and then wash it and allow it to dry.
4) Once dry, re-install the filter into the dehumidifier.
C-Dehumidifier Storage & Transportation
When you want to store the dehumidifier because you don't use it for a long
time. Please pay attention to the following steps:
1)Press and hold the PUMP button for 3-5 seconds to empty the water in the
pump reservoir before transportation or storage.
2)Transport and store the dehumidifier upright.

Lack of electrical power
Not turned on
Unit has ever been turned
off in 3 minutes
Target humidity setting is
higher than room humidity
Check the power supply
Turn it on
Wait for about 3 minutes till
the unit auto start
Set a lower target humidity
value
Dehumidifier does not
operate
Insufficient working time
Filter is blocked
Low room temperature
Airflow has been blocked
Allow more working time
Clean filter
Heat up the room
Make sure the air inlet and
outlet is away from objects
Dehumidifier removes
little water
Dehumidifier operating
but room not dry Doors and windows are open Seal room from external
areas
Check the information below for troubleshooting steps that will save you
time to resolve issues that may happen with the unit.
The list includes most issues but not the results of defective unit, crafts
or materials in the unit. If all the troubleshooting steps have been
exhausted and isse is stilling occuring, feel free to get in touch with
Waykar Customer Service to get further assistance.

The dehumidifier is titled.
Drain hose connection is
not tight
The drain hose is blocked
The dehumidifier is titled
Place the dehumidifier on
flat surface.
Make sure the drain hose
connection is tight
Check hose for restrictions
Install the dehumidifier on
flat surface to minimize
vibration and noise
Leaking
The filter is blocked
The pump reservoir is not
in place
The pump is defective
The pump reservoir gets
dirty
Clean the filter
Place the pump reservoir
at the correct position
Replace the pump
Clean the pump reservoir
Noise
The pump does not drain
If the dehumidifier is still not working properly as expected and the
troubleshooting steps or solutions above may not resolve the issues,
please unplug the power and shut down the dehumidifier, then contact

Please clean the filter every
two weeks (do not use hot
water above 104℉,
gasoline or toluene).

MODEL NO.
P0WER SOURCE
REFRIGERANT
MAXIMUM ALLOWABLE PRESSURE
HIGH PRESSURE
RATED POWER (95°F, 90%RH)
RATED CURRENT (95°F, 90%RH)
LOW PRESSURE
INPUT POWER (65°F, 60%RH)
INPUT CURRENT ( , 60%RH)65°F
PDDT701BA
120V 60Hz~
1150W
10.3A
610W
5.5A
R410a (20.11oz.) (570g)
6.2MPa
4.0MPa
1.7M
P
a
MOISTURE REMOVAL (65°F, 60%RH) 50 Pints/Day
MOISTURE REMOVAL (80℉, 60%RH)
MOISTURE REMOVAL (86℉, 80%RH)
MOISTURE REMOVAL (95℉, 90%RH)
90 Pints/Day
150 Pints/Day
180 Pints/Day
This product can expose you to chemicals including Styrene and its compounds,
which is known to the State of California to cause cancer and birth defects or
other reproductive harm.
For more information, please visit: www. P65Warnings.ca.gov
Table of contents
Other Waykar Dehumidifier manuals

Waykar
Waykar PD253B User manual

Waykar
Waykar YDA-858E User manual

Waykar
Waykar PD09B User manual

Waykar
Waykar PD160B User manual

Waykar
Waykar YDA-858E User manual

Waykar
Waykar PD100A User manual

Waykar
Waykar JD026C-150 User manual

Waykar
Waykar PD08E User manual

Waykar
Waykar PD606B User manual

Waykar
Waykar CFD2.5D User manual