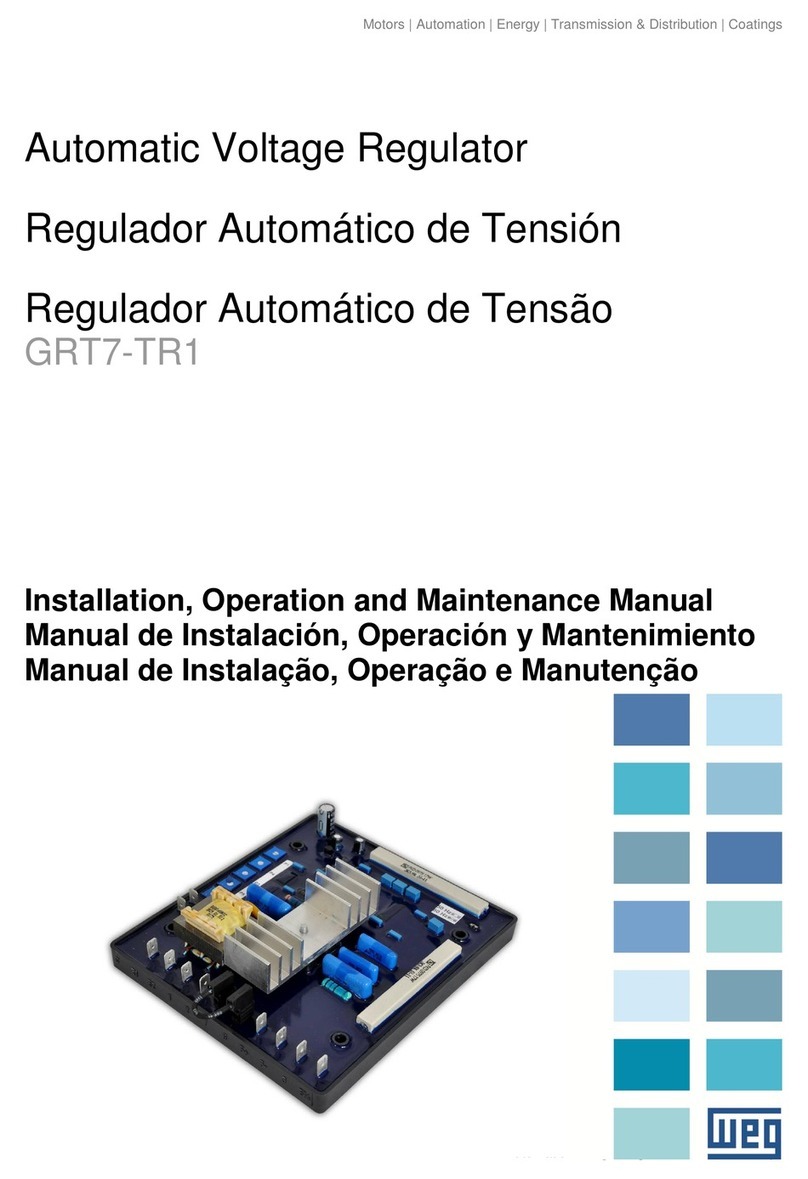
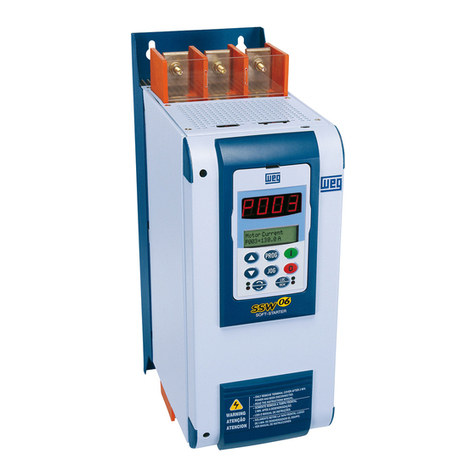
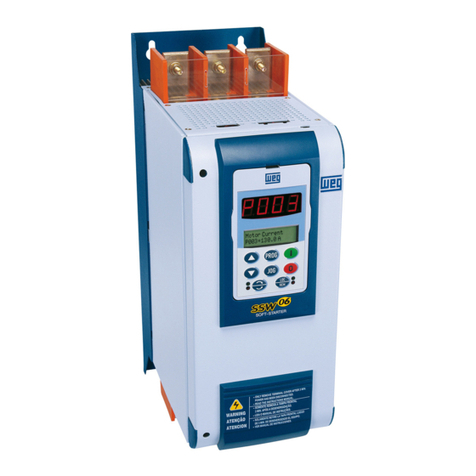
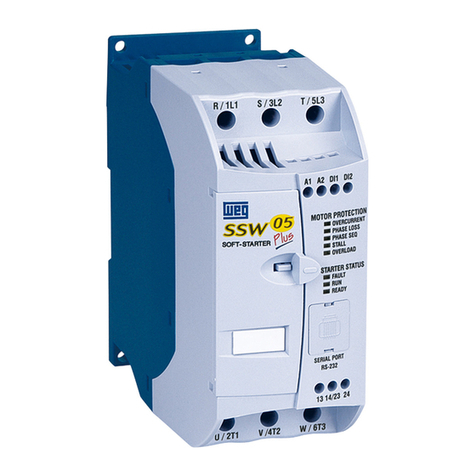
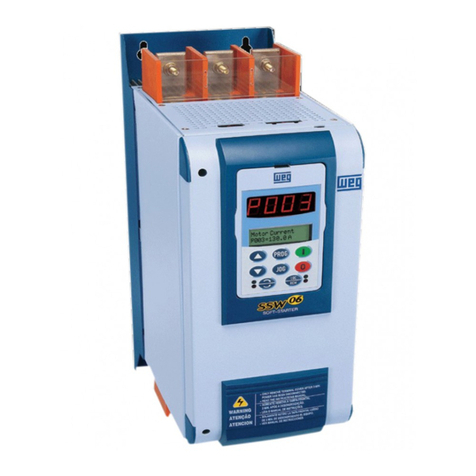
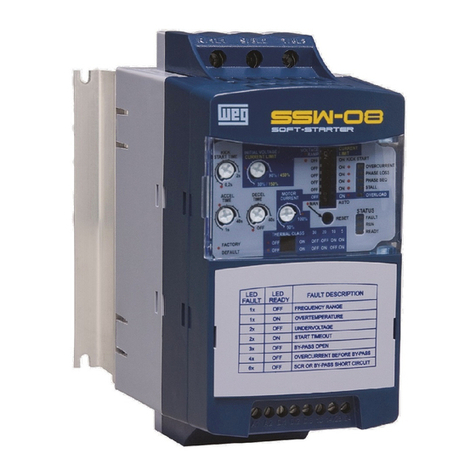
WEG SSW-03 Plus Series User manual

User´s
Guide
Guia del
Usuario
Manual
do usuário
Soft-Starter
Arrancador Suave
Chave de Partida Soft-Starter

SOFT-STARTER
MANUAL
SOFT-STARTER
MANUAL
SSW-03 Plus Series
Software: version 5.XX
0899.5518 E/8
SOFT-STARTER
MANUAL
NOTE!
It is very important to check if
the Soft-Starter Software is the
same as the above.

2
ATTENTION!
Please check which type of connection is used to connect the
SSW-03 Plus to the motor: standard connection or SSW-03
Plus is connected within the motor Delta connection.
Standard connection with three cables: the line current of
the Soft-Starter is equal to the motor current.
SSW-03 Plus is connected within the motor Delta con-
nection with six leads: the line current of the Soft-Starter
is approximately 58% of the motor current.
ATTENTION!
To connect the SSW-03 Plus within the Motor Delta connec-
tion, the motor must permit the Delta connection in the de-
sired voltage.
R
S
T
N
PE
R
S
U
S
V
RW
T
T
R
S
T
N
PE
R S T
U V W
During the start of the motor the current relation of the motor
in relation of the Soft-Starter is 1.50. However in full voltage
condition (after the start time of the motor) the current relation
is 1.73.
1/U1
4/U2 2/V1
5/V2
6/W2
3/W1
1/U1
4/U2
2/V1
5/V2
6/W2
3/W1

SUMMARY
SUMMARY
1 Parameters .................................................... 07
2 Error Messages.............................................. 10
3 Soft-Starter Status ........................................ 10
1.1 Safety Notices in the Manual ....................... 11
1.2 Safety Notices on the Product ..................... 11
1.3 Preliminary Recommendations .................... 11
2.1 About this Manual ........................................ 13
2.2 Version of Software ....................................... 13
2.3 Abbreviations Used....................................... 14
2.4 About the SSW-03 Plus ................................. 14
2.4.1 Introduction ....................................... 14
2.4.2 Simplified Block Diagram of the
SSW-03 Plus ....................................... 16
2.4.3 Description of the control
board - CCS 3.0 X ............................... 17
2.5 Product identification ................................... 18
2.6 Receiving ...................................................... 18
3.1 Mechanical Installation ............................... 19
3.1.1 Environment ....................................... 19
3.1.2 Location/Mounting ............................ 20
3.1.3 Kit IP20 .............................................. 22
3.1.4 Connections within the Motor Delta
Connection ......................................... 24
3.2 Electrical Installation ................................... 25
3.2.1 Power/grounding connections ........... 25
3.2.2 Location of the power/grounding/
fans connection ................................. 32
3.2.3 Signal and control connections ........ 32
3.2.3.1 Description of the X2 Connector 33
3.2.4 Fan connections ................................. 34
3.2.5 Combination drive "A" Operation
by HMI, Standard Connection........... 35
3.2.6 Combination Drive "B" operation
through terminals, Standard Connection 37
3.2.7 Combination Drive "C" operation
through terminals, connection within
the motor delta connection ............... 38
3.3 Installation of Optional Devices .................. 40
3.3.1 HMI-3P on the Panel Door................. 40
3.3.1.1 Mechanical Installation ........ 40
3.3.1.2 Electrical Installation ............ 41
4.1 Power-up preparation ................................... 42
4.2 Power-up ....................................................... 43
QUICK PARAMETER REFER-
ENCES, ERROR MESSAGES
AND STATUS MESSAGES
1
SAFETY NOTICE
2
INTRODUCTION
3
INSTALLATION
4
POWER UP/
COMMISSIONING

SUMMARY
SUMMARY
4.3 Commissioning ............................................. 43
4.3.1 Preparation ........................................ 44
4.3.2 Commissioning and Operation via
HMI-3P ............................................... 44
4.3.3 Commissioning and Operation via
Terminals ............................................ 45
4.4 Settings during the Commissioning ............. 46
5.1 Description of the HMI-3P Interface ......... ... 48
5.2 Use of the HMI-3P ........................................ 49
5.2.1 Use of the HMI-3P for operation ....... 49
5.2.2 Signaling / Indications of the HMI-3P
(display) ............................................. 50
5.3 Parameter changing ..................................... 53
5.3.1 Selection/changing parameters ........ 54
6.1 Standard parameter set at factory .............. 56
6.2 Read Parameters - P71...P77, P82, P96...P99 57
6.2.1 P71 - Software Version ........................ 57
6.2.2 P72 - Motor Current %IN .......................... 57
6.2.3 P73 - Motor Current (A) ...................... 57
6.2.4 P74 - Active Power .............................. 57
6.2.5 P75 - Apparent Power ......................... 57
6.2.6 P76 - Load power factor ..................... 57
6.2.7 P77 - Output voltage........................... 57
6.2.8 P82 - Motor thermal protection status.. 57
6.2.9 Last errors ............................................ 58
6.3 Regulation Parameters P00...P15,
P22...P42,P45, P47 ....................................... 58
6.3.1 P00 - Parameter Access ....................... 58
6.3.2 P01 - Initial Voltage ............................ 58
6.3.3 P02 - Time of the Acceleration Ramp . 59
6.3.4 P03 - Voltage fall step during
deceleration ....................................... 59
6.3.5 P04 - Time of the deceleration ramp .. 60
6.3.6 P11 - Current limitation ...................... 60
6.3.7 P12 - Immediate overcurrent .............. 62
6.3.8 P14 - Immediate undercurrent............ 63
6.3.9 P13 - Immediate overcurrent time...... 64
6.3.10P15 - Immediate undercurrent time... 64
6.3.11P22 - Rated current of the Soft-Starter 64
6.3.12P23 - Rated voltage of the Soft-Starter 65
6.3.13P31 - Phase rotation .......................... 65
6.3.14P33 - Voltage level of the JOG function 66
6.3.15P34 - DC breaking time....................... 66
6.3.16P35 - DC-Braking voltage level (%UN) 67
6.3.17P36 - Time interval between starts 67
6.3.18P41 - Voltage pulse time at the start 68
6.3.19 P42 - Voltage pulse level at the start 69
6.3.20 P45 - Pump control ........................... 69
6.3.21 P47 - Auto-reset time ........................ 71
5
USE OF THE HMI
6
DETAILED
PARAMETER
DESCRIPTION

SUMMARY
SUMMARY
6.4 Configuration parameters P28, P43, P44,
P46, P50...P57, P61...P64 ............................. 71
6.4.1 P28 - Operation Mode ......................... 71
6.4.2 P43 - By-pass relay ............................. 74
6.4.3 P44 - Energy save................................ 75
6.4.4 P46 - Default values (it loads factory
parameters) ......................................... 75
6.4.5 P50 - Function of the relay RL3............ 76
6.4.6 P51 - Function of the relay RL1 .......... 76
6.4.7 P52 - Function of the Relay RL2 ......... 77
6.4.8 P53 - Programming of the digital
input 2 ................................................. 78
6.4.9 P54 - Programming of the digital
input 3 ................................................. 79
6.4.10 P55 - Programming of the digital
input 4 ................................................. 79
6.4.11 P56 - Programming of the analog
output .................................................. 80
6.4.12 P57 - Scaling of the analog output .. 80
6.4.13 P61 - Control enabling ...................... 81
6.4.14 P62 - Address of the Soft-Starter at
the communication network ............... 82
6.4.15 P63 - Watch dog time of the serial
communication ................................... 83
6.4.16 P64 - Action after watch dog time is
elapsed ................................................ 83
6.5 Motor Parameters P21, P25, P26, P27 ......... 84
6.5.1 P21 - Motor Current Setting
(% INof the switch) .............................. 84
6.5.2 P25 - Thermal Class of the Motor
Protection ............................................ 85
6.5.3 P26 - Motor service factor................... 89
6.5.4 P27 - Auto-reset of the Thermal
motor image ........................................ 90
7.1 Errors and possible causes ........................... 91
7.1.1 Programming error (E24) .................... 91
7.1.2 Serial.................................................... 91
7.1.3 Hardware errors (E0X)......................... 91
7.2 Preventive maintenance ............................... 95
7.2.1 Cleaning instructions .......................... 96
7.3 Changing supply fuse ................................... 96
7.4 Spare part list ............................................... 97
8.1 Power Data ................................................... 99
8.2 Power / current table .................................... 99
8.2.1 Table of Power and Currents for
Three Cable Standard Connection
(Ambient Temperature of 40°C (104°F)) 99
8.2.2 Table of Power and Currents for
Three Cable Standard Connection
(Ambient Temperature of 55°C (131°F)) 99
7
MAINTENANCE
8
TECHNICAL
CHARACTERISTICS

SUMMARY
SUMMARY
8.2.3 Table of Power and Currents for
6 Cable Connection within motor
Delta Connection (Ambient Temperature
of 40°C (104°F)) ................................. 100
8.2.4 Table of Power and Currents for
6 Cable Connection with in motor
Delta Connection (Ambient Temperature
of 55°C (131°F)) ................................. 100
8.3 Mechanical data ........................................... 101
8.4 Electronics data ............................................ 101
8.5 Electronics data/general .............................. 101
9.1 Comformity ................................................... 103
9.1.1 EMC and LVD directives ..................... 103
9.1.2 Requirements for conforming
installations ....................................... 104
9.2 Recommended application with terminals for
two wire control ........................................... 105
9.3 Recommended application with terminals for
three wire control ......................................... 106
9.4 Recommended application with terminals for
three wire control and power isolation
contactor ...................................................... 107
9.5 Recommended application with terminals for
three wire control and by-pass contactor ... 108
9.6 Recommended application with terminals for
three wire control and DC braking ............... 109
9.7 Recommended application with terminals for
three wire control and motor speed reversal 110
9.8 Recommended applications with PC or PLC
command ...................................................... 111
9.9 Recommended application with control by
three wire digital inputs and power isolation
contactor and connection within the motor
delta connection of the 6 cable Motor ........ 112
9.10 Recommended drive with control by three-wire
digital inputs, with by-pass contactor and
connection within the motor delta connection
of the motor with 6 cables ........................... 114
9.11 Recommended application with terminals for
three wire control for several motors ........... 115
9.12 Symbols ........................................................ 117
10.1 Recommended drive with control by digital
inputs with three wires and bypass
contactor + MAC-0x .............................. 120
10.2 Fieldbus communication .............................. 121
10.3 SuperDrive .................................................... 121
10
OPTINAL DEVICES
9
APPENDIX

7
QUICK PARAMETER REFERENCES,
ERROR MESSAGES AND STATUS MESSAGES
Software: V5.XX
Application: _______________________________________________________
Type: _____________________________________________________________
Serial Number: ____________________________________________________
Responsable: _____________________________ Date: _____/_____/_____.
1. Parameters
Para- Function Adjustable Factory User's Page
meter Range Setting Setting
Permits parameter
changing
P00
P01
P02
P03
P04
P11
P12
P13
P14
P15
P21
P25
P26
P27
OFF, ON
25...90% UN
1...240 s
100... 40%UN
OFF,2...240s
OFF,150...500%IN
32...200%IN
OFF, 1...20s
20...190%IN
OFF, 1...200s
OFF, 30.0...200.0%IN
5, 10, 15, 20, 25, 30
0.80...1.50
OFF, 1...600s
OFF
30%UN
20s
100%UN
OFF
OFF
120%IN
OFF
70%IN
OFF
OFF
30
1.00
OFF
58
58
59
59
60
60
62
64
63
64
84
85
89
90
Overload class
Service factor
Auto-reset of the
thermal memory
Regulation Parameter
Motor Parameter
Initial Voltage
Acceleration ramp
time
Voltage fall step
during deceleration
Ramp time during
deceleration
Current limit during
starting
Immediate overcurrent
time
Immediate undercur-
rent
Immediate undercur-
rent time
Motor current setting

8
QUICK PARAMETER REFERENCES,
ERROR MESSAGES AND STATUS MESSAGES
Para- Function Adjustable Factory User's Page
meter Range Setting Setting
P22
P23
P31
P34
P35
P36
P41
P42
P45
P47
P28
P43
P44
P46
P50
P51
P52
P53
P54
Rated current
Rated mains voltage
Phase rotation
Voltage jog level
P33
64
65
65
66
66
67
67
68
69
69
71
71
74
75
75
76
76
77
78
79
DC braking time
DC braking voltage
level
Voltage pulse at start
(kick start)
Pump control
Voltage pulse level
during starting
Errors auto-reset
Configuration Parameter
By-Pass relay
Energy save
Default values
OFF, ON
OFF, ON
Regulation Parameter
Function of the RL1 relay
Digital input 2 program
Digital input 3 program
OFF, ON
According to
the Model
380V
OFF
25%UN
OFF
30%UN
2s
OFF
70%UN
OFF
OFF
OFF
OFF
OFF
2
1
2
120, 170, 205, 255, 290, 340, 410,
475, 580, 670, 800, 950, 1100, 1400A
220, 230, 240, 380, 400, 415, 440,
460, 480, 525, 575V
OFF, ON
25...50%UN
OFF, 1...10s
30...50%UN
OFF, 1...999s
OFF, 0.2...2s
70...90%UN
OFF, ON
OFF, 10...600s
Function of the RL2 relay
Function of the RL3 relay 1- disables with fault
2- enables with fault
1 - Operation
2 - Full Voltage
3 - Direction of Rotation
1
1
Operation mode OFF, ON OFF
1 - Operation
2 - Full Voltage
3 - DC Braking
OFF - Without Function
1 - Error Reset
2 - Extern Error
3 - General Enabling
4 - Three Wire Control
OFF - Without Function
1 - Error Reset
2 - Extern Error
3 - General Enabling
4 - Direction of Rotation
Time interval between
starts

9
QUICK PARAMETER REFERENCES,
ERROR MESSAGES AND STATUS MESSAGES
Para- Function Adjustable Factory User's Page
meter Range Setting Setting
Indication of the %IN
motor current of the
switch
P72 57
XXX %IN
Motor current indica-
tion (A)
P73
P74
P75
P76
P77
P82
P96
Active power indication
supplied to the load
(kW)
Apparent power indica-
tion supplied to the
load (kVA)
0...9999A
0...9999kW
0...9999kVA
Load power factor 0.00...0.99
Soft-Starter output
voltage indication % UN0...100% UN
Indication of motor
Thermal Protection
Status
0...250%
Last hardware error 1...8
57
57
57
57
57
57
58
Digital input 4 program
Analog output program
Analog output gain 0.01...9.99
Set the command
through HMI/Serial or
digital inputs
OFF, ON
OFF
OFF
1.00
ON
Soft-Starter address in
the comunication NET 1...30 1
Reading Parameters
Software version 57
P55
P56
P57
P61
P62
P63
P64
79
80
80
81
82
83
83
OFF - Without Function
1 - Error Reset
2 - Extern Error
3 - General Enabling
4 - JOG Function
OFF - Without Function
1 - Current %IN
2 - Voltage %UN
3 - Power Factor
4 - Thermal Protection
Watch Dog Time of
Serial Communication OFF, 1...5s OFF
Action after watch Dog
Time is elapsed 1
1 - E29 Indication only
2 - Disable by Ramp E29
3 - General Disabling E29
P71

10
QUICK PARAMETER REFERENCES,
ERROR MESSAGES AND STATUS MESSAGES
2. Error Messages
3. Soft-Starter Status
Phase failure or thyristor fault or motor not connected
At the end of time of the programmed acceleration time, the voltage does
not reach 100% UNdue to the current limit.
Overtemperature at the thyristors and in the heatsink
Motor overload
Undercurrent (applicable to pumps)
Immediate overcurrent
Phase rotation
External fault
Programming error
Serial communication error
Display Meaning
E01
E02
E03
E04
E05
E06
E07
E08
E24
E2X
E29
Soft-Starter is ready to be enabled
Loading pump control parameters
Loading "Default" values
Function enabled
Function disabled
Display Definition
rdy
PuP
EEP
on
oFF
Second hardware error 1...8
Third hardware error 1...8
Fourth hardware error 1...8
P97
P98
P99
58
58
58
Para- Function Adjustable Factory User's Page
meter Range Setting Setting

11
SAFETY NOTICE
1
This Manual contains all necessary information for the correct installation and operation
of the SSW-03 Plus Soft-Starter.
This Manual has been written for qualified personnel with suitable training or technical
qualifications to operate this type of equipment.
The following Safety Notices will be used in this Manual:
DANGER!
If the recommended Safety Instructions are not strictly
observed, it can lead to serious or fatal injuries of personnel
and/or equipment damage.
ATTENTION!
Failure to observe the recommended Safety Procedures can
lead to material damage.
NOTE!
The content of this Manual supplies important information
for the correct understanding of operation and proper
performance of the equipment.
The following symbols may be attached to the product, serving
as Safety Notice:
High Voltages
Components are sensitive to electrostatic discharge. Do not
touch them without following proper grounding procedures.
Mandatory connection to ground protection (PE)
Shield connection to ground
DANGER!
Onlyqualifiedpersonnelshould planorimplementtheinstallation,
startup, operation and maintenance of this equipment.
1.3 PRELIMINARY
RECOMMENDATIONS
1.2 SAFETY NOTICES
ON THE PRODUCT
1.1 SAFETY NOTICES
IN THE MANUAL

12
1SAFETY NOTICE
Personnel must review this entire Manual before attempting
to install, operate or troubleshoot the SSW-03 Plus. These
personnel must follow all safety instructions included in this
Manual and/or defined by local regulations.
Failure to comply with these instructions may result in
personnel injury and/or equipment damage.
NOTE!
In this Manual, qualified personnel are defined as people that
are trained to:
1. Install, ground, power up and operate the SSW-03 Plus
according to this manual and the local required safety
procedures;
2. Use of safety equipment according to the local regulations;
3. Administer Cardio Pulmonary Resuscitation (CPR) and
First Aid.
DANGER!
Always disconnect the supply voltage before touching any
electrical component inside the Soft-Starter.
Many components are charged with high voltages, even after
the incoming AC power supply has been disconnected or
switched OFF. Wait at least 3 minutes for the total discharge
of the power capacitors.
Always connect the frame of the equipment to the ground
(PE) at the suitable connection point.
ATTENTION!
All electronic boards have components that are sensitive to
electrostatic discharges. Never touch any of the electrical
components or connectors without following proper
grounding procedures. If necessary to do so, touch the
properly grounded metallic frame or use a suitable ground
strap.
NOTE!
Read this entire Manual carefully and completely before
installing or operating the SSW-03 Plus.
Do not apply High Voltage (High Pot) Test on the Soft-Starter!
If this test is necessary, contact the Manufacturer.

13
2INTRODUCTION
2.1 - ABOUT THIS
MANUAL
This Manual describes how to install, start-up, operate and
identify the problems of the SSW-03 Plus Soft-Starters series.
Should you require any training or further info, please contact
WEG.
This Manual is divided into 10 Chapters, providing
information to the user on how to receive, install, start-up
and operate the SSW-03 Plus:
Chapter 1- Safety Notices;
Chapter 2 - Introduction;
Chapter 3 - Installation;
Chapter 4 - Power-up / Commissioning;
Chapter 5 - Use of the HMI;
Chapter 6 - Detailed Parameter Description;
Chapter 7 - Maintenance;
Chapter 8 - Technical Characteristics;
Chapter 9 - Appendix;
Chapter 10- Optional Devices.
This Manual provides information for the correct use of the
SSW-03 Plus. The SSW-03 Plus is very flexible and allows for
the operation in many different modes as described in this
manual.
As the SSW-03 Plus can be applied in several ways, it is
impossible to describe here all of the application possibilities.
WEG does not accept any responsibility when the SSW-03 Plus
is not used according to this Manual.
No part of this Manual may be reproduced in any form,
without the written permission of WEG.
It is important to note the Software Version installed in the
Version SSW-03 Plus, since it defines the functions and the
programming parameters of the Soft-Starter.
This Manual refers to the Software version indicated on the
inside cover. For example, the Version 1.XX applies to versions
1.00 to 1.99, where “X” is a variable that will change due to
minor software revisions. The operation of the SSW-03 Plus
with these software revisions are still covered by this version
of the Manual.
The Software Version can be read in the Parameter P71.
2.2 VERSION OF
SOFTWARE

14
2INTRODUCTION
2.3 - ABBREVIATIONS
USED
HMI - Human machine interface (keypad + display)
HMI-3P - Keypad + Display interface - Linked via parallel
cable
RLX - Relay output No X
DIX - Digital input No X
IN-Soft-Starter nominal output current
UN-Rated mains voltage
LED - Light Emitting Diode
2.4 - ABOUT THE
SSW-03 PLUS
The SSW-03 Plus series is a totally microprocessor controlled
Soft-Starter series which controls the starting current of three-
phase induction motors. In this way mechanical inmpacts on
the load and current peaks on the supply network are
prevented.
2.4.1 - Introduction This series includes models from 120 to 1400A, being
supplied from 220V, 230V, 240V, 380V, 400V, 415V, 440V,
460V, 480V, 525V or 575V. (The available types are listed in
Section 8).
The models up to 205A are fitted with forced cooling and
isolated heatsink (thyristor-thyristor modules). The models
from 255A up to 1400A have forced cooling and energized
heatsink. (Disc thyristors).
The electronic control circuit uses a 16 bit microprocessor with
high performance, allowing settings and displaying by means
of the interface (keypad + display) of all needed parameters.
Depending on the power, this series (SSW-03 Plus) has 8
different construction forms, as shown in Figure 2.1.

15
2INTRODUCTION
Width Depth Height Weight
MEC Rated L P H Kg
Current mm (in) mm (in) mm (in) (Lb)
224 244 365 16.8
0 120A (8.82) (9.61) (14.37) (37.04)
170A 224 257 480 20.2
1 205A (8.82) (10.12) (18.9) (44.53)
255A
2 290A 521 315 530 41.8
340A (20.51) (12.4) (20.86) (92.15)
410A 521 325 605 50
3 (20.51) (12.79) (23.81) (110.20)
475A 521 325 655 58.8
4 580A (20.51) (12.79) (25.78) (129.60)
670A 521 325 705 64
5 (20.51) (12.79) (27.75) (141.06)
800A 521 345 855 71.8
6 950A (20.51) (13.82) (33.66) (158.25)
7 1100A 679 431 1210 180
1400A (26.73) (16.97) (47.63) (396.72)
Figure 2.1 -Construction forms
FRONT VIEW SIDE VIEW

16
2INTRODUCTION
2.4.2 - Simplified Block Diagram of the SSW-03 Plus
In the power stage, the line voltage is controlled by means of
6 SCR’s that allow the variation of the conduction angle of
the voltage supplied to the motor.
For the internal supply of the electronics, a linear source is
used with several voltages, fed independently of the power
supply.
The control board contains the circuits responsible for the
control, monitoring and protection of the power components.
This board also contains the control and signalling circuit to
be used by the user according to its application as a relay
output.
All parameters or controls for the operation of the Soft-Starter
can be displayed or changed through the HMI.
Figure 2.2 - Simplified Block Diagram of the SSW-03 Plus

17
2INTRODUCTION
2.4.3 - Description of the control board - CCS 3.0X
Figure 2.3 - Layout of the electronic control board CCS 300 or CCS 3.01

18
2INTRODUCTION
2.5 - PRODUCT
IDENTIFICATION
EXTERN HMI
HMI-3P.1: HMI with LEDs, 1 m (3.28ft) cable
HMI-3P.2: HMI with LEDs, 2 m (6.56ft) cable
HMI-3P.3: HMI with LEDs, 3 m (9.84ft) cable
2.6 - RECEIVING
Max. Cont.: It's the maximum current that the Soft-Starter can
have in continuous duty. For this current the Soft-Starter can
only have 1 start per hour.
The SSW-03 Plus is supplied in cardboard boxes up to 205A,
current sizes from 255 to 1400A are supplied in wood crates.
The outside of the packing container has a nameplate that is
the identical to that on the SSW-03 Plus. Please check if the
SSW-03 Plus is the one you ordered.
Open the box, remove the foam and then remove the SSW-03
Plus.
For sizes above 255 A, open the wooden crate on the floor,
remove the fastening bolts on the base and remove the SSW-
03 Plus with the aid of a hoist.
Check if:
SSW-03 Plus nameplate data matches the purchase order;
The equipment has not been damaged during transport.
If any problem is detected, contact the carrier immediately.
If the SSW-03 Plus is not to be installed immediately, store it
in a clean and dry room (Storage temperatures between -
25°C and 60°C). Cover it to prevent dust, dirt or other
contamination.
Rated output current (A)
Three-phase supply voltage (220 - 440, 460 - 575)
Options : + I with remote HMI
+
Voltage of the electronics 1- 110/120 V
2- 220/230 V
Soft-Starter Type
{
SSW-03
SERIAL NUMBER
WEG ITEM
FABRICATION DATE
ELECTRONIC/FAN DATA
OUTPUT DATA/MAXIMUM CURRENTRATING FOR
CONTINUOUS DUTY
INPUT DATA
SOFT-STARTER MODEL
- PL
- PL

19
INSTALLATION
3
3.1 - MECHANICAL
INSTALLATION
3.1.1 - Environment
The location of the installation is a determinaning factor for
obtaining a good performance and a normal useful life of its
components.
Regarding the installation of the Soft-Starter we make the
following recommendations:
All dimensions in mm (inches)
SSW-03 Panel Dimensions Blower
Type Width Height Depth CFM
(m3/min)
120A 600 (23.62) 1500 (59.05) 400 (15.75) 226 (6.4)
170/205A 600 (23.62) 1500 (59.05) 400 (15.75) 885 (25.08)
255 to 580A 800 (31.50) 2000 (78.74) 600 (23.62) 885 (25.08)
670/950A 800 (31.50) 2000 (78.74) 600 (23.62) 1,757.30 (49.80)
1100A 800 (31.50) 2000 (78.74) 600 (23.62) 1,757.30 (49.80)
1400A 800 (31.50) 2000 (78.74) 600 (23.62) 2,648.44 (75.0)
Avoid direct exposure to sunlight, rain, high moisture and sea air.
Avoid exposure to gases or explosive or corrosive liquids;
Avoid exposure to excessive vibration, dust, oil or any
(conductive particles or materials).
Environmental Conditions:
Temperature: 32...104º F (0 ... 40º C) - nominal conditions.
104...131º F (40 ... 55º C) - current see table 8.2.
Relative Air Humidity: 5% to 90%, non-condensing.
Maximum Altitude: 3,300 ft (1000m) - nominal conditions.
3,300 ... 13,200 ft (1000 ... 4000m) - with 10% current
reduction for each 3,300 ft (1000m) above 3,300 ft (1000m).
Pollution Degree: 2 (according to EN50178 and UL508)
(It is not allowed to have water,
condensation or conductive dust/
particles in the air)
NOTE!
When Soft-Starter is installed in panels or closed metallic bo-
xes, adequate cooling is required to ensure that the
temperature around the Soft-Starter will not exceed the
maximum allowed temperature. See Dissipated Power in
Section 8.2.
Please meet the minimum recommended panel dimensions
and its cooling requirements:
This manual suits for next models
1
Table of contents
Other WEG Controllers manuals

WEG
WEG AVR-A-OPT-06 User manual

WEG
WEG AVR-A-OPT-04E Installation and operating instructions

WEG
WEG AVR-A-OPT-07 User manual

WEG
WEG Anybus Modbus TCP User manual

WEG
WEG SSW7000 User manual

WEG
WEG SSW900 Series User manual

WEG
WEG SSW06 Use and care manual

WEG
WEG PDWCA User manual

WEG
WEG PLC500 Installation and operating instructions

WEG
WEG SSW06 User manual