Westfalia 99 45 58 User manual

Bedienungsanleitung
A
rtikel Nr. 99 45 58
A
rticle No. 99 45 58
Instruction Manual
USB-Endoskop
USB Snake Scope

II
Instruction manuals provide valuable hints for using your new device. They
enable you to use all functions, and they help you avoid misunderstandings
and prevent damage.
Please take the time to read this manual carefully and keep it for future
reference.
Bedienungsanleitungen enthalten wichtige Hinweise für den Umgang mit
Ihrem neuen Produkt. Sie ermöglichen Ihnen, alle Funktionen zu nutzen, und
sie helfen Ihnen, Missverständnisse zu vermeiden und Schäden vorzubeugen.
Bitte nehmen Sie sich die Zeit, diese Bedienungsanleitung in Ruhe
durchzulesen und bewahren Sie diese für späteres Nachlesen gut auf.
Sehr
g
eehrte Damen und Herren
Dear Customers

III
Übersicht
|
Overvie
w
1
2
3
4
5
7
6

IV
1 Kamerakopf mit LED Camera Head with LED Light
2 Schwanenhals Gooseneck
3 Handgriff Handle
4 USB-Anschlussstecker USB Plug
5 Schnappschuss-Taste Snapshot Button
6 LED-Helligkeitsregler LED Brightness Dial
7 Magnetaufsatz Magnetic Attachment
8 CD (ohne Abbildung) CD (without Figure)
Übersicht
|
Overvie
w

1
Safety Notes...........................................................................................Page 9
Before first Use.......................................................................................Page 10
Installation of the USB Driver .................................................................Page 10
Hardware Installation of the Snake Scope.............................................Page 11
Snapshot Function .................................................................................Page 11
Adjusting the Brightness.........................................................................Page 11
Using the Magnetic Attachment .............................................................Page 11
Editing Pictures and Videos ...................................................................Page 12
Cleaning and Storing..............................................................................Page 13
Technical Data .......................................................................................Page 14
Sicherheitshinweise................................................................................Seite 2
Vor der ersten Benutzung ......................................................................Seite 3
Softwareinstallation des USB-Treibers ..................................................Seite 3
Hardwareinstallation des Endoskops .....................................................Seite 4
Schnappschussfunktion .........................................................................Seite 4
Helligkeitseinstellung..............................................................................Seite 4
Benutzung des Magnetaufsatzes...........................................................Seite 4
Bearbeitung von Bildern und Videos......................................................Seite 5
Reinigung und Lagerung........................................................................Seite 7
Technische Daten ..................................................................................Seite 8
Table of Contents
Inhaltsverzeichnis

2
Sicherheitshinweise
Beachten Sie bitte zur Vermeidung von Fehlfunktionen, Schäden
und gesundheitlichen Beeinträchtigungen folgende Hinweise:
Lassen Sie Verpackungsmaterial nicht achtlos herumliegen. Plastiktüten etc.
können zu einem gefährlichen Spielzeug für Kinder werden.
Das Endoskop ist kein Spielzeug. Halten Sie das Gerät von Kindern fern.
Schauen Sie nicht direkt in die LEDs und richten Sie den Lichtstrahl nicht
direkt gegen die Augen von Menschen oder Tieren.
Es dürfen keine optisch stark bündelnden Instrumente zur Betrachtung des
Lichtstrahls verwendet werden.
Benutzen Sie das Endoskop nicht unter 0°C und nicht über +55°C.
Achten Sie darauf, dass der Handgriff des Endoskops nicht nass wird.
Setzen Sie das Gerät keinen hohen Temperaturen und starken Vibrationen
aus und vermeiden Sie eine starke mechanische Beanspruchung.
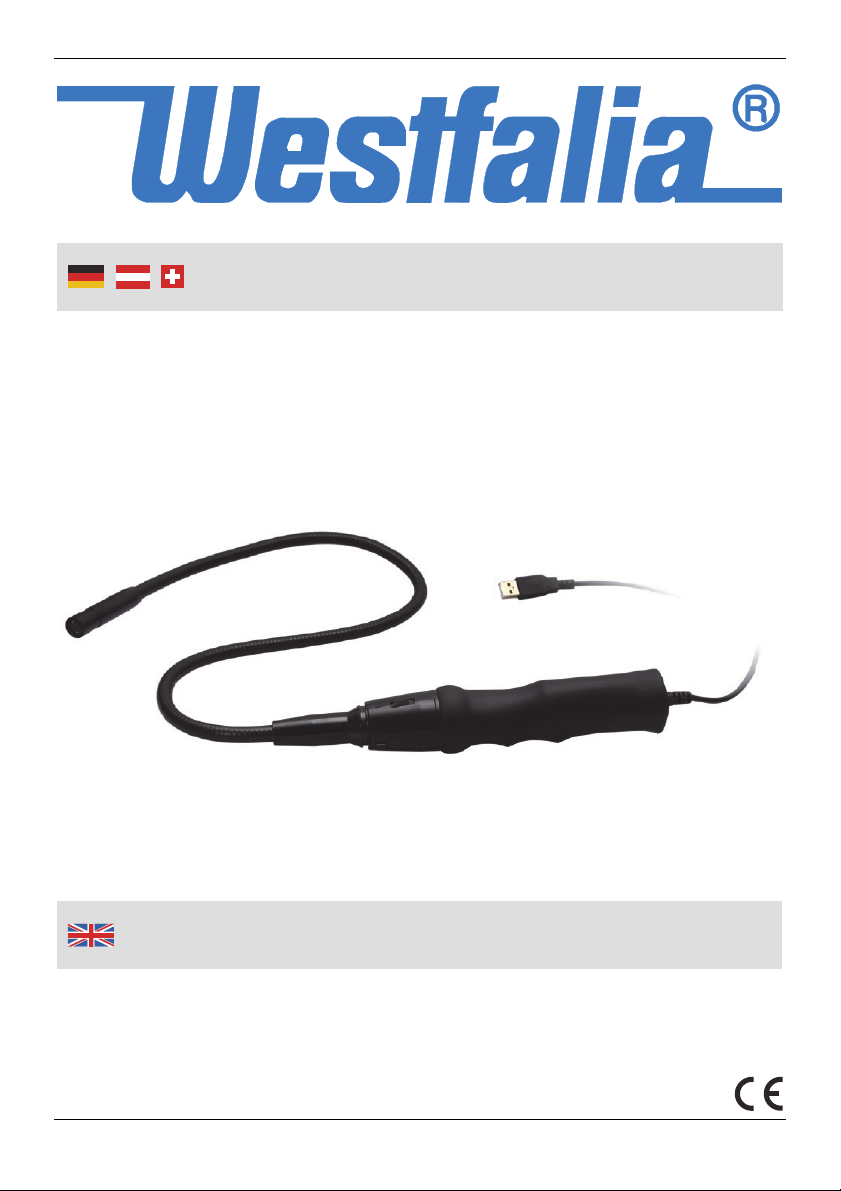
Das Endoskop ist zum Betreiben via USB 2.0-Anschluss zulässig.
Benutzen Sie das Endoskop bestimmungsgemäß nur zur Inspektion von
schlecht zu erreichende Stellen im Fahrzeugbereich oder in Maschinen. Das
Gerät ist nicht für medizinische Zwecke geeignet und darf nicht bei Menschen
und Tieren angewendet werden.
Benutzen Sie das Gerät auch nicht in Hochspannungsstromkreisen. Die zu
inspizierenden Objekte oder Anlagen müssen immer spannungslos sein.
Der Schwanenhals und der Kamerakopf sind wasserdicht und können in
wässrigen Flüssigkeiten bis zu 2 Stunden, außer in Säuren oder Laugen
eingetaucht werden. Der Griff des Endoskops darf nicht in Flüssigkeiten
eingetaucht werden.
Das Endoskop darf nicht in explosionsgefährdeten Bereichen eingesetzt
werden.
Knicken Sie den Schwanenhals nicht zu stark. Knicken Sie das Kabel nicht an
der Kabelverbindung zum Handgriff.
Legen Sie das Endoskop bei Nichtbenutzung am besten im Koffer ab. Somit
schützen Sie das Endoskop vor Staub und Schmutz.
Nehmen Sie keine technischen Veränderungen an dem Gerät vor. Zerlegen
Sie das Gerät nicht und unternehmen Sie keine Reparaturversuche. Das
Gerät enthält keine durch Sie auswechselbaren oder zu reparierenden Teile.
Wenden Sie sich bei Problemen an unseren Kundenservice.

3
Installation und Benutzun
g
Vor der ersten Benutzung
Nehmen Sie das Gerät aus der Verpackung. Halten Sie die Verpackungsmateria-
lien von Kleinkindern fern. Es besteht Erstickungsgefahr!
Sie können das Endoskop mithilfe eines PC oder eines Notebooks als visuelles
Hilfsmittel zur optischen Fehlersuche und Inspektion benutzen. Das Endoskop
unterstützt Windows®2000 und höher und kann über den USB 1.1 und 2.0
Anschluss angeschlossen werden. Die Systemvoraussetzungen für die
Benutzung des Endoskops sind:
Mindestes 32 MB RAM Arbeitsspeicher
Mindestens 40 MB freier Festplattenspeicher
USB-Anschluss 1.1 und 2.0
CD- oder DVD Laufwerk und
Betriebssystem Windows®2000 und höher
(Windows ist ein eingetragenes Warenzeichen der Microsoft ® Corporation)
Softwareinstallation des USB-Treibers
Installation bei Windows®XP
1. Starten Sie Ihren PC. Das Endoskop darf noch nicht eingesteckt sein. Legen
Sie die Treiber-CD in das CD- oder DVD-ROM Laufwerk und schließen Sie die
Schublade des Laufwerks.
2. Der PC erkennt die Treiber-CD automatisch nach einigen Sekunden und
beginnt mit der Installation der Datei Telescope_Driver.exe.
Sollte dies nicht der Fall sein, starten Sie die Datei von der CD bitte manuell.
3. Klicken Sie erst auf OK, dann auf Installation fortsetzen und danach auf
Fertig stellen. bzw. folgen Sie den Anweisungen am Bildschirm bis die
Installation abgeschlossen ist. Starten Sie den PC neu.

4
Installation und Benutzun
g
Hardwareinstallation des Endoskops
Um die Hardware mit Hilfe des Hardwareassistenten zu synchronisieren, befolgen
Sie die nachstehenden Schritte. Beachten Sie, dass der Hardwareassistent nur
erscheint, wenn das Endoskop mit einem USB-Anschluss verbunden wird.
1. Schließen Sie den USB-Anschlussstecker (4) des Endoskops an den USB-
Anschluss am Computer an. Die LEDs im Kamerakopf leuchten auf.
2. Der Hardwareassistent sucht automatisch nach installierter Software. Klicken
Sie erst auf Ja, danach auf Weiter, bei dem Hinweis Software automatisch
installieren auf Weiter, Installation fortsetzen, Fertig stellen. Somit ist die
Hardware erfolgreich installiert. Es kann evtl. ein Neustart des PCs erforder-
lich sein.
3. Gehen Sie auf „Start“ „Alle Programme“ und klicken Sie erst auf Telescope
Driver und danach auf AMcap. Das Endoskop ist nun zur Benutzung bereit
und zeigt auf dem Bildschirm das Bild, das vom Kamerakopf aufgezeichnet
wird. Mit dem Telescope Driver Programm können Sie nicht nur Bilder
sondern auch kurze Videos erstellen.
Schappschussfunktion
Um Bilder zu erstellen, drücken Sie auf die Schnappschuss-Taste (5). Es wird
das erste Bild erstellt. Um das erstellte Bild zu speichern oder wieder zu löschen,
können Sie unter dem Menü SnapShot Reader beim Menüpunkt File(F) das Bild
speichern mit dem Befehl Save oder löschen mit dem Befehl Exit(X).
Helligkeitseinstellung
Stellen Sie mit dem Helligkeitsregler (6) die Helligkeit der LEDs ein. Drehen Sie
hierzu den Helligkeitsregler zum Handgriff, wird das Licht schwächer, drehen Sie
den Regler in die entgegengesetzte Richtung, wird das Licht stärker.
Benutzung des Magnetaufsatzes
Stecken Sie den Magnetaufsatz (7) in die passende Aussparung auf den
Kamerakopf (1). Somit können Sie verlorengegangene, metallische Objekte an
schwerzugänglichen Stellen suchen und herausziehen.

5
Bearbeitun
g
von Bildern und Videos
In der Hauptmenüleiste finden Sie die Befehle:
File Devices Options Capture Help
Zum Einstellen, zum Speichern bzw. zur weiteren Bearbeitung der Bilder bzw. der
Videos befolgen Sie aus der Hauptmenüzeile die entsprechenden Befehle.
Hauptmenübefehl Untermenübefehl Funktion
File Set Capture File Speicherort für Videoaufnahmen im
avi-Format. Beachten Sie, dass die
Endung „…avi“ beim Speichern mit
angegeben werden muss.
Allocate File
Space
Zum Einstellen der Speicherplatz-
größe. Die verfügbare Größe wird
angezeigt. Bei der Zeile „Capture
File Size“ kann die Größe einge-
geben werden.
Save Captured
Video
Zum Speichern einer aufgenomme-
nen Videosequenz
Exit Zum Beenden des Programms
Hauptmenübefehl Untermenübefehl Funktion
Devices Telescope Driver
Anzeige des angeschlossenen
Gerätes
USB-Audiogerät Anzeige des Audiogerätes
... PC spezifische Anzeige der
Soundkarte
Hauptmenübefehl Untermenübefehl Funktion
Options Preview
Echtzeitbild-Darstellung im Haupt-
fenster
Audio Capture
Filter
Zum Eingeben der entsprechenden
Eigenschaften
Video Capture
Filter
Zum Eingeben der entsprechenden
Eigenschaften
Video Capture Pin Zum Eingeben der entsprechenden
Eigenschaften

6
Bearbeitun
g
von Bildern und Videos
Beachten Sie: Der Treiber auf der CD ist „TWAIN32-kompatibel“. Somit können
Sie das Endoskop mit jedem Programm auf Ihrem PC betreiben, welches diese
Schnittstelle unterstützt.
Hauptmenübefehl Untermenübefehl Funktion
Capture Start Capture
Zum Starten einer Videoaufnahme.
Bestätigen Sie den angezeigten
Speicherort mit OK
Stop Capture Zum Stoppen der Aufzeichnung
Set Frame Rate Zum Einstellen der Bildrate pro
Aufzeichnung (Bilder/s)
Set Time Limit Zum Eingeben der max. Aufzeich-
nungsdauer in Sekunden

7
Reini
g
un
g
und La
g
erun
g
Reinigung und Lagerung
Reinigen Sie das Gehäuse und den Kamerakopf nur mit einem trockenen,
oder feuchten Tuch. Reinigen Sie die Linse des Kamerakopfes am besten mit
einem fusselfreien Tuch, um das Glass sauber und fettfrei zu halten. Benut-
zen Sie keine aggressiven Chemikalien oder Scheuermittel zu Reinigung.
Wenn der Schwanenhals in Flüssigkeiten getauscht wurde, reinigen Sie das
Kabel nach jeder Benutzung und trocknen es gründlich ab.
Lagern Sie das Endoskop im Koffer zum Schutz vor Staub, Schmutz und
Feuchtigkeit.

8
Technische Daten
Schnittstelle USB 1.1 und 2.0
Betriebssystem
Windows®2000 und höher
Windows ist ein eingetragenes
Warenzeichen der Microsoft ®
Corporation
Bild 24 Bit RGB Farbe (1/6“ CMOS)
Auflösung 640 x 480 Pixel
Bildrate 30 fps (Bilder/s)
Weißabgleich automatisch
Belichtung automatisch
Videoformat AVI
Kamerakopfbeleuchtung 2 LED weiß
Spannungsversorgung 5 V über USB-Anschlussstecker
Gesamtlänge des Endoskops 88 cm
Kabellänge ca. 180 cm
Eintauchtiefes des Schwanenhalses 65 cm
Eintauchdauer des Schwanenhalses Max. 2 Stunden
Mind. Biegeradius des Schwanenhalses 6 cm
Kamerakopfdurchmesser 14 mm
Sichtfeld 54°
Fokus > 6 cm
Abmessungen: siehe Zeichnung

9
Safet
y
Notes
Do not leave about packaging materials lying around. Plastic bags may
become a dangerous toy for children.
The snake scope is not a toy. Keep it out of the reach of children.
Do not stare directly into the LEDs and do not direct the light beam towards
peoples or animals.
Do not use devices which can strongly focus light for viewing the light beam.
Do not expose the snake scope to excessive temperatures or strong
vibrations and avoid strong mechanical stresses.
Make sure the handle of the snake scope cannot become wet.
Do not operate the snake scope at temperatures below 0°C and over +55°C.
The snake scope supports connection via USB 2.0.
Use the snake scope for its designed purpose, to inspect hard to reach areas
in automotives and machines. The unit is not designed for medical purposes
and the scope may not be used on persons and animals!
Do not use the unit in high voltage circuits. Make sure the placed or objects to
be inspected are always voltage-free.
The gooseneck and the camera head are waterproof and can be inserted into
liquids of any kind, except of acids and bases for the max. duration of
2 hours. Make sure the handle of the snake scope does not become wet.
The snake scope may not be used in explosive areas.
Do not bend the goose neck too much. Do not bend the cable on the cable
connection at the handle.
If you do not use the snake scope for some time, store the scope in the
delivered box against dust and dirt.
Do not modify the device. Do not disassemble the unit or attempt to repair it
yourself. It does not contain parts serviceable by you. If there are any ques-
tions or problems, please feel free to contact our customer service.
Please mind the following safety notes to avoid malfunctions,
damages or physical injuries:

10
Installation and Usin
g
Before first Use
Remove all parts from the packaging. Keep packaging material out of reach of
children. There is risk of suffocation!
The snake scope is in connection with a PC or a notebook a visual means for
optical error diagnostics and inspection. The snake scope supports
Windows®2000 and higher via USB port 1.1 and 2.0. The system requirements
for operating the scope are:
At least 32 MB RAM
At least 40 MB free hard disc memory
USB Port 1.1 and 2.0
CD or DVD Drive
OS at least Windows®2000 and higher
(Windows is owned by the Microsoft ® Corporation)
Installation of the USB Driver
Installation for Windows®XP
1. Turn on your PC. Do not connect the snake scope to the computer. Now
insert the installation CD into the CD-ROM drive and close the tray.
2. After a few seconds the PC automatically starts installing the file Tele-
scope_Driver.exe
If this does not happen, activate / start this file manually.
3. Click on OK, then on Install and finally on Finish resp. follow the instructions
on the screen until installation is finished successfully. Now restart your PC.

11
Installation and Usin
g
Hardware Installation of the Snake Scope
Please follow the steps below to synch up the hardware with the software on the
computer. The hardware assistant will only come up if the snake scope is
connected to the USB port.
1. Connect the USB plug (4) of the snake scope to the computer. Both LEDs on
the camera head light up.
2. The new hardware assistant automatically searches for installed software.
Click on Yes and than on Next. When the information Install Software
automatically appears, click on Next, and finally on Finish. By doing this the
installation will be successfully installed. It may be necessary to restart your
computer.
3. Click to Start, “All Programs” and to the folder Telescope Driver. Finally
click to AMcap. The snake scope is now ready for operation and you will see
the life view image from the camera head on the PC screen. With the snake
scope you can shot pictures as well as making movies.
Snapshot Function
To make pictures, press the snap shot button (5). The first picture will be made
and displayed on the screen. To save or to delete the picture, follow the
instructions in the menu SnapShot Reader with the menu point File(F). For
saving the picture press Save and for discarding press Exit(X).
Brightness Adjustment
For adjusting the brightness of the LED, use the dial (6). Turn the brightness dial
in direction to the handle to lower the light and turn the dial in the opposite
direction to increase the light intensity.
Using the Magnetic Attachment
Attach the magnetic attachment (7) on the provided notch onto the camera head
(1). With this magnetic attachment you can search for lost metal parts on hard to
reach areas and pull upwards.

12
Editin
g
Pictures and Videos
In the main menu bar you will find the following menus:
File Devices Options Capture Help
Main Menu Submenu Function
File Set Capture File Selection of memory location for
video recordings in the format avi.
Please note that the ending „…avi“
has always to be indicated
Allocate File
Space
For setting the memory size. The
available size is displayed. Under
the menu point „Capture File Size“
the size can be entered.
Save Captured
Video
For saving a recorded video
sequence
Exit To quit the program
Main Menu Submenu Function
Devices Telescope Driver Shows the connected device type
USB-Audio
Device
Shows the audio device
... Shows the computer specific sound
card
Main Menu Submenu Function
Options Preview Life view on the screen
Audio Capture
Filter
To edit the resp. options
Video Capture
Filter
To edit the resp. options
Video Capture Pin To edit the resp. options

13
Cleanin
g
and Storin
g
Please note: The supplied driver on the CD is “TWAIN32 compatible“. Thus, the
snake scope can be operated with every program that supports this interface.
Cleaning and Storing
Clean the housing of the camera head with a dry or if necessary with a
moistened cloth. Wipe the lens of the camera head with a lint-free cloth to
keep the glass clean and grease. Do not use aggressive chemicals or
abrasive for cleaning.
If the goose neck was inserted into liquids, clean the cable after each use and
dry thoroughly.
Protect the snake scope from dust and dirt and store it in the delivered plastic
case.
Main Menu Submenu Function
Capture Start Capture
To start a video recording. Confirm
the displayed storage location with
OK
Stop Capture To stop the recording
Set Frame Rate To set the frame rate fort he recording
(pictures/sec)
Set Time Limit To adjust the max. recording time in
seconds

14
Technical Data
Interface USB 1.1 und 2.0
Operating System *Windows 2000 and higher
*Windows/Vista is owned by the
Microsoft ® Corporation
Picture 24 Bit RGB Colour (1/6“ CMOS)
Resolution 640 x 480 Pixel
Frame Rate 30 fps (pictures/sec)
White Balance automatically
Exposure to Light automatically
Video Format AVI
Camera Illumination 2 LED white
Power Supply 5 V via USB plug
Total Length of Snake Scope 88 cm
Cable Length approx. 180 cm
Depth of Immersion of the goose neck 65 cm
Immersion Duration of the goose neck Max. 2 Hours
Mind. Bending Radius of the goose neck 6 cm
Camera Head Diameter 14 mm
Field of View 54°
Focus > 6 cm
Dimensions See Drawing

15
Consi
g
nes de sécurité
Ne laissez pas les matériaux d'emballage sans surveillance. Les sacs en
plastique, etc. peuvent devenir un jouet dangereux pour les enfants.
L'endoscope n'est pas un jouet. Gardez hors de la portée des enfants.
Ne pas regarder directement dans le LED et ne dirigez pas le faisceau directe-
ment dans les yeux des personnes ou des animaux.
Des outils visuels à une concentration élevée ne doivent pas être utilisés pour
regarder dans le faisceau de lumière.
Ne pas utiliser l'endoscope à une température inférieure à 0 °C et supérieures
à +55 °C.
Assurez-vous que la poignée de l'endoscope ne se mouille pas.
Ne pas exposer le dispositif à des températures élevées et des fortes
vibrations et éviter toute contrainte mécanique.
L'endoscope est conçu pour fonctionner connecté à un port USB 2.0.
Utilisez l'endoscope pour son utilisation prévu, pour inspecter des endroits
difficiles à atteindre dans le véhicule ou de machines. Le dispositif ne convient
pas à des fins médicales et ne doit pas être utilisé chez l'homme et les
animaux.
Ne pas utiliser le dispositif dans des circuits à haute tension. Objets ou
systèmes à surveiller doit toujours être sous tension.
Le col de cygne et la tête de la caméra sont étanches et peuvent être
immergés dans un liquide aqueux pendant une période jusqu'à 2 heures, sauf
dans des solutions acides ou alcalines. La poignée de l'endoscope ne doit pas
être immergée dans liquides.
L'endoscope ne peut pas être utilisé dans des zones à risque d'explosion.
Ne pas plier le col de cygne. Ne pliez pas le câble à la connexion de la
poignée.
Lorsque vous n'utilisez pas l'endoscope, stocker-le dans le coffre. Cela vous
permet de protéger l'endoscope de la poussière et de la saleté.
Ne pas apporter des modifications techniques au dispositif. Ne démontez pas
le dispositif et ne cherchez pas de le réparer. Le dispositif ne contient parties
réparable ou remplaçable par l'utilisateur. En cas de questions ou de pro-
blèmes, contactez notre service à la clientèle.
S'il vous plaît noter afin d'éviter des dysfonctionnements, des
dommages et des effets néfastes sur la santé les informations
suivantes:

16
Informazioni sulla sicurezza
Non lasciare i materiali di imballaggio incustoditi. I sacchetti di plastica, ecc.
possono diventare un giocattolo pericoloso per i bambini.
L'endoscopio non è un giocattolo. Tenere il dispositivo lontano dalla portata
dei bambini.
Non guardare direttamente nei LED e non puntare il fascio direttamente verso
gli occhi di persone o animali.
Non devono essere utilizzati strumenti visivi ad alta concentrazione per
guardare nel fascio.
Non utilizzare l'endoscopio ad una temperatura inferiore a 0 °C e superiore a
+55 °C.
Assicurarsi che il manico dell'endoscopio non si bagni.
Non esporre il dispositivo a temperature alte ed forti vibrazioni ed evitare forti
sollecitazioni meccaniche.
L'endoscopio è concepito per funzionare attaccato ad una porta USB 2.0.
Utilizzare l'endoscopio per l’uso previsto per ispezionare luoghi difficili da
raggiungere nel veicolo o in macchinari. Il dispositivo non è adatto a scopi
medici e non deve essere usato per uomini e animali.
Non utilizzare il dispositivo in circuiti ad alta tensione. Gli oggetti o i sistemi da
controllare devono sempre essere senza tensione.
Il collo d’oca e la testa della telecamera sono impermeabili e possono essere
immersi in liquidi acquosi per una durata di fino a 2 ore, salvo in acidi o in
soluzioni alcaline. Il manico dell'endoscopio non deve essere immerso in
liquidi.
L'endoscopio non può essere utilizzato in aree a pericolo d’esplosione.
Non piegare eccessivamente il collo d'oca. Non piegare il cavo al collegamen-
to del cavo al manico.
Quando non viene utilizzare conservare l'endoscopio nel bagagliaio. Questo vi
consente di proteggere l'endoscopio da polvere e sporcizia.
Non effettuare modifiche tecniche al dispositivo. Non smontare il dispositivo e
non cercare di ripararlo. Il dispositivo non contiene parti sostituibili o riparabili
da parte dell'utente . In caso di domande o problemi, contattare il nostro
servizio clienti.
Si prega di notare in modo da evitare malfunzionamenti, danni e
effetti negativi sulla salute seguenti informazioni:
Table of contents
Languages:
Other Westfalia Analytical Instrument manuals