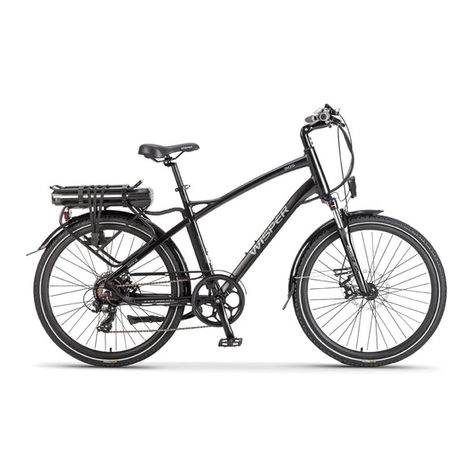
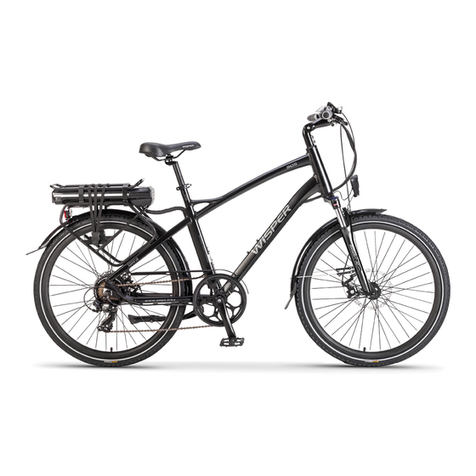
Wisper TAILWIND User manual

Tailwind
User Manual

My Wisper Tailwind
Use this section to store key information regarding your Wisper Tailwind
My Wisper Dealer ....................................................................................................................................
Wisper Tailwind Frame Number .................................................................................................
Wisper Tailwind Battery Serial Number...................................................................................

Table of Contents
Introduction
Warranty
Before Your First Ride
Before Every Ride
Intended Use
Battery Care
Tailwind Display Guide
Operating Your Wisper Tailwind
Turning on the Lights
Unit Settings
Adjusting Automatic Shutdown Times
Clearing Trip Data
Caring For Your Wisper Tailwind
Tailwind Trail Suspension Setup
Torque Settings and Maintenance
1.
2.
3.
4.
5.
6.
7.
8.
9.
10.
11.
12.
13.
14.
15.
Please ensure you have read and understood these pages before riding

1 . Introduction
Thank you for choosing a Wisper Tailwind!
Before you use your new Wisper Tailwind you must first read this manual carefully. If there is anything
you do not understand please contact your Dealer or Wisper directly.
Within this manual you will find not only instructions for using the bike but also important maintenance
tips that will help to ensure the longevity of your bike.
We hope you get many miles of enjoyment from your new Wisper Tailwind
All the best
The Wisper Team

2. Warranty
Before riding your Wisper bike please ensure that you have registered the warranty.
To register your warranty simply visit : https://wisperbikes.com/register-your-e-bike/
All Wisper bikes come with a 2 year warranty on all electrics and parts not including consumables (pads,
chain and tyres) Wisper frames have a 5 year warranty.
This warranty is the responsibility of the Wisper Dealer who sold you the bike.
If you have any queries regarding the warranty please visit: www.wisperbikes.com/extendedwarranty

3. Before your
first Ride
Have you ever ridden an eBike? - Set off for your first ride with the assistance level on zero to avoid.
surprise accelerations. Make yourself familiar with the sensation of riding an eBike in an area free of
traffic and other obstacles.
The different settings of your eBike are controlled with the buttons on the handlebars - read the
instruction manual on how to use and control the different assistance settings.
Are you familiar with the brake system? - In the UK our bikes are delivered with the right hand lever
operating the front brake. In the EU the right hand lever will operate the rear brake. Wisper electric
bikes are supplied with modern hydraulic disc brakes which are more powerful than you may be
used to. Practice using the brakes before riding on public roads.
Do you know how to use the gears and what their function is? - learn how to change gears and
practice riding in different gears in area free of traffic. Do not pedal with excessive force whilst
attempting to shift gears.
Check that all nuts, bolts and fixings are properly tightened to the correct torque values which can be
found on page 14.

4. Before Every
Ride
Are the quick release levers and thru axles on the seat post and front wheel correctly fixed?
Are the tyres in good condition and do both tyres have sufficient pressure? Check the tread for excessive wear and the
side walls for any sign of cracking. Low pressure tyres raise the risk of punctures and also put excessive strain on the
motor of your eBike. Maximum and minimum pressures can be found on the sides of the tyres.
Test the brake operation - Pull the brake levers towards the handlebar. The levers should come to a firm stop after
travelling only a short distance. THE LEVER MUST NOT TOUCH THE HANDLEBAR.
Check the electronic functions? Are there any error messages or warnings on the display?
Check the battery for any visible signs of damage
Check the lights are working
Take into consideration riding conditions. Be aware that in wet and icy conditions brake and tyre performance is
reduced.
Be sure to check the following points before every ride, not doing so could result in accidents or severe injuries.
If you have any doubts do not ride the bike and contact your Wisper Dealer or Wisper Support

5. Intended USE
Wisper have set out clear parameters for the intended use of these bicycles. The prupose of this
clarification is to define the test requirements we have used during the development of these bikes.
It is therefore of significant importance that the bikes are not used beyond their intended use as this
can potentially lead to bicycle damage and/or injury
Wisper Tailwind City and Comfort bikes are suitable for well maintained hard surface roads or
footpaths where the wheels remain in permanent contact with the ground.
These bikes have been designed as urban, city and trekking bikes.
Wisper Tailwind Trail bikes are suitable for moderately rough and unpaved terrains. Sporadically
wheels may leave the ground but to no greater height than 30cm.

6. Battery Care
Your Wisper Tailwind comes with a high quality lithium ion battery. All lithium batteries need to be looked after for
safety and to ensure the longevity of the battery.
IMPORTANT : Failing to follow any of this advice could cause serious injury or fire
Before charging your battery, make sure the charger is turned off before connecting to the battery and turning on the
charger.
Store and charge your battery in a dry room at temperatures between 10-20 degrees Celsius. Batteries should be stored
at 50-75% charge.
Recharge the battery every 4 weeks even if not in use. Failure to do so will void the battery warranty
Avoid discharging the battery completely. A full discharge will affect the lifespan of the battery
Do not expose the battery pack to fire, heat sources, acid or alkaline substances.
Only use a Wisper approved charger with your Wisper battery
Do not use a pressure washer to wash your bike.
Do not submerge the battery in water - MAY CAUSE EXPLOSION
Check with your insurers that your eBike and battery are covered by your household and fire insurance. Keep yourself
informed of any legislative changes to battery storage or transportation.
If a battery appears damaged or overheating, do not use the bike and leave the battery in a place where it cannot
cause fire. Immediately contact your retailer or Wisper directly for advice and possibly a safety check
7.Tailwind Display
Guide
Headlights: displayed when headlights are on.
USB Connected - (DEALER USE ONLY)
Bluetooth Connection - (DEALER USE ONLY)
Braking prompt (NOT IN USE)
Fault - Symbol will flash if a fault is found
Battery Percentage
Battery Capacity
Average Speed/Max Speed
(NOT IN USE)
Battery Voltage (DEALER USE ONLY)
Unit of measurement - either MPH or KM/H
Trip - trip distance
Odometer
Trip/ODO/Range unit of measurement
Trip/ODO/Range Numerical Display
Remaining mileage range
Motor Power in Watts
Trip Time/Watt Numerical Display
Trip Time - time riding since last data clear
Motor power being used / Current
Power Assistance Level
Current Speed
Walk Assist On
1.
2.
3.
4.
5.
6.
7.
8.
9.
10.
11.
12.
13.
14.
15.
16.
17.
18.
19.
20.
21.
22.
23.

8. OPerating Your
Wisper Tailwind
To turn on the bike press the the power button for 2 seconds. Repeat the process to turn
off the bike. If the screen is not used for 5 minutes and speed is zero the screen will
automatically turn off
Press the up and down arrow to switch between assistance levels. There are 5 modes and 4
levels of assistance.
When the display is turned on the assistance will be set to zero. When learning to ride it is
best to start riding without assistance off to avoid surprise acceleration

9. Turning on the
Lights
Hold down the up arrow to turn on the front and rear lights.
Light indicator will appear on the display. Display backlight
will dim to avoid glare whilst riding at night
Hold the up arrow again to turn off the front and rear lights
Light indicator will disappear on the display. Display
backlight will brighten for ease of viewing during the day

10. Unit Settings
Within 10 seconds of turning on the display, press and hold the M button for 3 seconds.
Press the up and down arrow to select the unit KM/H, MPH
Press and hold M button for 3 seconds to save and exit

11 . Adjusting Automatic
Shutdown Time
Within 10 seconds of turning on the display, press and hold the M button for 3 seconds.
Press the M button again to go to the automatic shutdown setting interface
Press the up and down arrows to select the minutes before the bike automatically shuts
down when not in use.
Press and hold M button for 3 seconds to save and exit
Number of Minutes

12 . Clearing the
Trip Data
Turn the bike on and wait 10 seconds, press and hold the M button for 3 seconds.
Short press the M button again to clear the Trip, Trip Time, Average speed and Maximum
Speed.
Press and hold the M button to return to the main screen.
Turning the bike off normally will not clear this data between each ride

13 . Caring for
your Wisper Bike
Safety Check
Wisper offers you a safety check free of charge. This should be carried out within the first month or 300 miles,
which ever comes first. As part of this check the gears and brakes will be checked as they will have now worn in
and gear cables can stretch. Spokes will also be checked as again these will have bedded in and may be slightly
loose
Cleaning your Wisper Tailwind
You should make a habit of cleaning our Tailwind bike regularly. Especially if riding in extremely wet, dirty or salty
conditions (coastal areas or gritted roads during winter).
You should not clean your Tailwind with a standard pressure washer as this pressure of water can penetrate seals
and bearings. Instead clean your Tailwind with a soft water jet and/or a bucket of water with a sponge or brush.
Avoid unnecessarily soaking the display or areas around the battery compartment. After cleaning you should dry
the bike and lubricate the chain if necessary to prevent corrosion.
IMPORTANT Avoid getting any cleaning agents other than specific brake disc cleaner on the brake discs or pads
As with all bikes your Wisper Tailwind should be cared for and serviced regularly to ensure the safety and increase
the longevity of the bike.

14 . Torque Settings
and Maintenance
All fixings should be checked regularly to ensure they are tightened to the correct level.
Failure to do so could result in bike damage and/or injury
The recommended torque of crucial fixings is as follows:
Other general torque settings depend on the thread size M4:25.-4Nm, M5: 4-6Nm. M6 6-7.5Nm.
Rear Axle Nuts - 35Nm
Handle Bar Stem bolts - 8-10Nm
Seat Clamp bolt - 15Nm
Crank Axle Allen bolt - 25Nm
Your Wisper bike has a mechanical rear derailleur that will automatically tension your chain.
If you find the chain is loose, frequently comes of or is skipping gears, please seek advice from your Wisper Dealer.
Front and Rear brake pads must be replaced if the pad material wears to less than 1mm.
Brakes should lock the wheels before the brake lever reaches the handlebar.
If the lever reaches the grip or feels spongy in its action please seek immediate advice from your Wisper dealer and do not ride the bike
Handlebar grips or handlebar end plugs must be replaced if damaged, bare handlebar ends can cause injury

15.Tailwind Trail
Suspension Setup
Tailwind Trail bikes come with a Rockshox Judy Suspension Fork. This fork can be tuned for the riders weight to give optimum
performance using the Rockshox Trailhead and a shock pump.
Simply visit : https://trailhead.rockshox.com/en/search/
Table of contents
Other Wisper Bicycle manuals

Wisper
Wisper 805FE User manual

Wisper
Wisper 705 Classic 2013 User manual

Wisper
Wisper 805FE User manual

Wisper
Wisper 806 Alpino Troubleshooting guide

Wisper
Wisper 906Alpino User manual

Wisper
Wisper 905 ECO User manual

Wisper
Wisper 806 Alpino User manual

Wisper
Wisper 905se City User manual

Wisper
Wisper 705se User manual

Wisper
Wisper 705se User manual