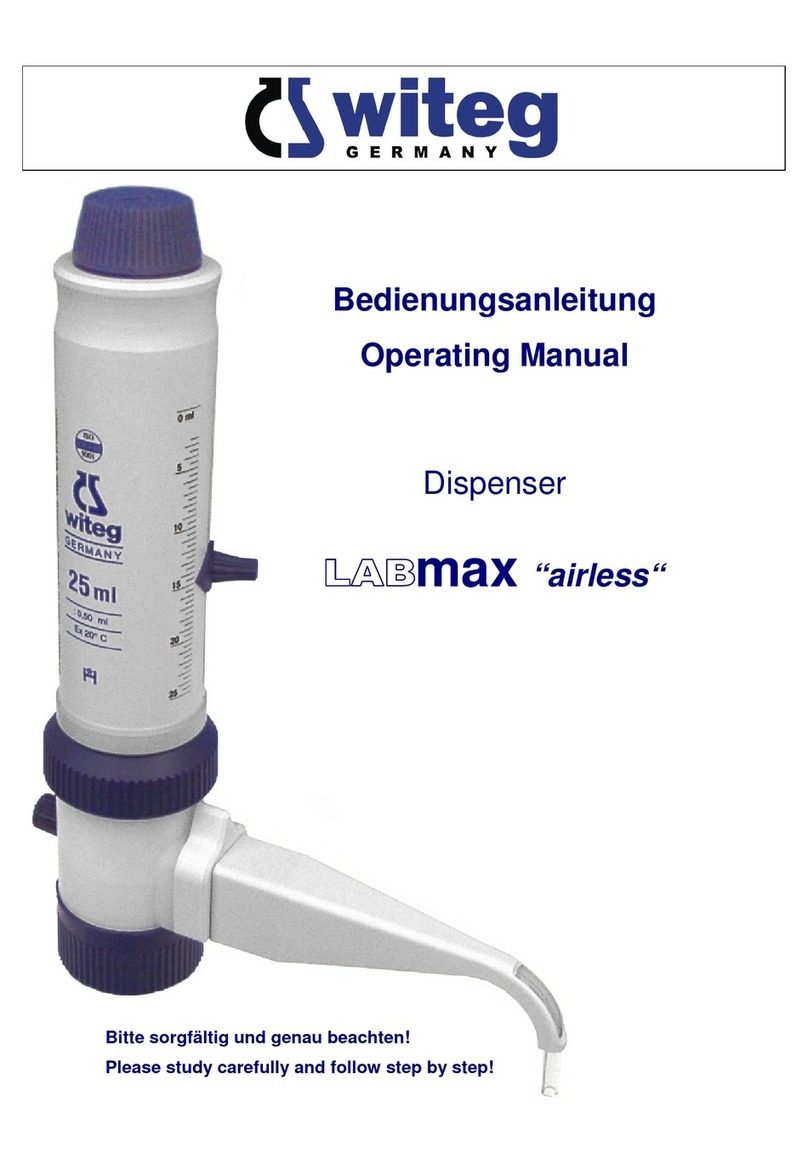
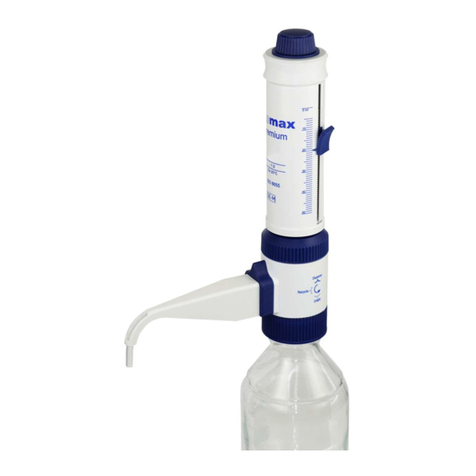
Witeg LABMAX airless User manual

witeg Labortechnik GmbH
Am Bildacker 16
D-97866 Wertheim/Main
Phone: +49 (0)9342 / 9301-0
Fax: +49 (0)9342 / 9301-77
www.witeg.de Version 230609
Operating Manual
for
max “airless“
Dispenser
Read this manual thoroughly before
operating the Labmax „airless“!

Table of Contents
1 Safety- and User Precautions .......................................1
1.1 General Safety Precautions............................................. 1
1.2 To be considered before initial Operation...................... 2
1.3 Warranty............................................................................ 2
1.4 Operating Limitations ...................................................... 2
2 General Product Description ........................................3
3 Preparation.....................................................................3
4 Functional Characteristics............................................4
4.1 Aerate ................................................................................ 4
4.2 Volume Adjustment.......................................................... 4
4.3 Dispensing........................................................................ 4
4.4 Draining the Ejection Cannula ........................................ 4
5 Cleaning and Maintenance............................................5
5.1 Description of the Components...................................... 5
5.2 Cleaning ............................................................................ 6
5.3 Sterilization....................................................................... 7
5.4 Disassembly ..................................................................... 7
5.5 Assembly........................................................................... 8
5.6 Avoid clogging.................................................................. 9
6 Common Spare Parts.....................................................9
7 Optional Accessoires...................................................11
1
1 Safety- and User Precautions
1.1 General Safety Precautions
In order to put the device into operation as quickly as possible and free from
defects, it is imperative that you read this manual carefully before using this
device.
Highest safety precautions should be used when dispensing corrosive,
poisonous, radioactive or hazardous chemicals.
- Observe the general safety regulations for handling chemicals (e.g.
protective clothing, protective goggles).
- Use the ”Labmax airless“ only with regard to resistance of material and
for the purpose for which is intended.
- Always check the device for leaks and a firm position of the plug and
socket connection (e.g. check hoses, cannulas etc. prior to operation)
- Never use force. Breakage of any part will lead to hazardous exposure for
the user as well as others.
- Clean the device every day.
- The user is responsible for checking that the device is suitable for his
application.
- The proper and secure function is only warranted in connection with the
supplied ejection cannula (6). Do not use any other ejection cannula.
- Never use damaged or deformed cannulas.
- The ejection cannula (6) should never face the user and a collection vessel
should be placed underneath.
- If the valve is faulty the cannula might drip.
- Check all screw fittings approximately one hour after each
assembly/disassembly if they are fitted tightly, because leakages might
occur due to material expansion conditional upon temperature.
- If unsure about dispensing a specific solution, please contact your dealer.

2
1.2 To be considered before initial Operation
- Check that the device has not been damaged in transit.
- Push cannula on tightly.
- Do not carry the device at the outer housing (2).
- Push ejection cannula (6) on tightly and slide the cannula holder (7)
into the formed grooves.
- When screwing on the bottle do not grip the device at its outer
housing (2) Hold the housing at the bottom screw cap (as well as
during unscrewing).
- Do not pump before the device has been assembled completely and
a collecting vessel has been placed underneath.
1.3 Warranty
Witeg warrantees the ”Labmax airless“ you have received to be free of
defects in material and workmanship for 12 months from the date of purchase.
Witeg´s responsibility shall be limited to the repair or replacement of the
”Labmax airless”.
This warranty is valid only if the ”Labmax airless“ is used in the manner
described in this manual and for the purpose for which it is designed.
Witeg shall not be responsible for consequential damages resulting from the
misuse of this equipment.
1.4 Operating Limitations
The ”Labmax airless“ is suitable for dispensing most liquids. Extra care should
be taken when dispensing dangerous or hazardous solutions.
The ”Labmax airless“ Dispenser should not be used for dispensing the
following :
- solutions of hydrofluoric acids
- solutions which contain any form solids
- solutions of substances catalysed by platinum and iridium alloys
The ”Labmax airless“ should be rinsed daily if used with the following:
- Solutions which form crystals
- Inorganic oxidation solutions (i.e. biuret reagent)
The temperature of the ”Labmax airless“ and reagent should not exceed 40°C
(104°F).
3
2 General Product Description
Our new dispenser-generation ”Labmax airless“ has an automatic air-purging
system which warrants a completely stress-free handling of the media.
Other than with conventional devices there is no feedback of the media in to the
bottle during air-purging, therefore, no air bubbles get into the media at reduced
filling level.
Through the newly designed canal system the downward moving plunger
always displaces the air first before dispensing the liquid. By that, the amount of
substance used for air-purging is drastically reduced.
The air-purging of the ”Labmax airless“ takes place automatically at normal
dispense setting so that no manual air-purging, such as opening and closing of
the valve cap is necessary. Another prominent feature is the patented cannula
reflux dispensing which prevents unnecessary loss of media and serves as an
additional safety lock. With that, the use of a closing cap is no longer needed.
With the adapter the device fits on a variety of bottles.
3 Preparation
First push the ejection cannula into the
valve and then slide the cannula holder
from above into the groove. Make sure it
fits tightly!
Push the return tube (21) into the big socket and the
suction tube (20) into the small socket. Now you can
screw the ”Labmax airless“ onto the bottle.
Control the length of the suction tube.
Make sure it fits tightly!

4
Draining position
Dispensing position
4 Functional Characteristics
4.1 Aerate
Before starting to pump, it is essential to place a collecting
vessel under the cannula. The valve axle has to be in the
dispensing position (arrow up).
Now perform short pumping movements until there are no
more air bubbles. Perform regular and smooth
movements and make sure that the outer housing (2) is
always pushed all the way down.
4.2 Volume Adjustment
The quick-volume-adjustment is performed with the volume rocker switch. This
assures a maximum of exact reproduction of liquid quantities. To set the
required dispensing quantity, turn the calibration screw counter clockwise until
the volume rocker switch can be moved easily. Tighten the calibration screw
clockwise after the indicator has been set to the required value.
4.3 Dispensing
Avoid personal injury from chemicals. To protect yourself wear eye protection
and use appropriate safety equipment and clothing.
Please follow all safety instructions and observe operating procedures.
Raise the plunger until it stops at the point set by the volume rocker switch. By
lowering the plunger to the lowest point the set quantity will be dispensed into
the collecting vessel. The plunger movements should be smooth and constant
to achieve an exact ejection volume.
4.4 Draining the Ejection Cannula
The ejection cannula of the ”Labmax airless“ can be drained
safely and easily. Turn the valve axle for 180° to the left until it
stops (arrow downward). This way it is possible to achieve a
dispensing blockage which prevents any further drop out. The
disturbing closure caps are no longer needed. If slightly tilted
backwards the ejection cannula drains into the bottle.
5
5 Cleaning and Maintenance
5.1 Description of the Components
Volume rocker
switch (3)
Fix screw (1)
Adaptor ring (4)
Outer housing (2)
Cap nut (5)
Cannula holder (7)
Ejection cannula (6)
Suction valve (8)
Ejection valve (11)
Calibration screw (3.1)
Indicator (3.2)
Counter nut (3.3)
Valve star (9)
Ceramic ball (10)
edges on top!
Closing cap (13)
O-Ring a (14 a)
Valve axle (12)
O-Ring b (14 b)

6
5.2 Cleaning
1. Follow the safety instructions!
2. Push the plunger downwards until it stops and then turn the valve axle
(12) into the draining position.
3. Let the remaining reagent in the ejection tube (6) flow back into the
reagent bottle.
4. Place the device with the bottle into a suitable sink.
5. Unscrew the device from the bottle and slightly tap the inside of the
bottle with the suction tube (20) in order to drain it.
Disassemble the ”Labmax airless“ until you can securely clean it from all
reagent build up.
The cleaning can be performed with distilled water and alcohol.
Glass plunger (17)
Seal nut (15)
PTFE seal ring (16)
PTFE Cylinder (18)
Valve head (19)
Return tube (21) Suction tube (20)
7
5.3 Sterilization
After removal of the return tube (21) and the suction tube (20) the ”Labmax
airless“ can be steam-sterilized (121 °C, 2 bar).
Place the device on a cloth and avoid any contacts with hot metal surfaces.
In order to prevent a de-adjustment due to the heat expansion of the different
materials, the volume rocker switch (3) has to be set to minimum 2/10 of its
maximum volume.
After sterilization let the device cool down to room temperature before you use it
again. After each sterilization check all parts for deformations or other changes.
After approximately one hour, check all screw fittings once again for a tight fit.
Do not use any deformed or leaking parts.
It is also possible to perform a chemical sterilization with alcohol, formaldehyde
etc.
In case of deformation return the device including the autoclave protocols.
5.4 Disassembly
1. Follow the safety instructions!
2. Push the glass plunger (17) downwards until it stops and then turn the
valve axle (12) to the draining position.
3. Let the remaining reagent in the ejection cannula (6) flow back into the
reagent bottle.
4. Place the device with the bottle into a suitable sink.
5. Unscrew the device from the bottle and carefully tap with the suction tube
(20) from the inside against the bottle, so that it is drained as well.
6. Rinse the ”Labmax airless“ with distilled water.
7. Remove the suction tube (20) and the return tube (21).
8. Remove the cannula holder (7) and then the cannula (6).
9. Loosen the fix screw (1).
10. Pull the glass plunger (17) out of the PTFE cylinder (18). Before this
make one pump movement, then the glass plunger can be handled
easier.
11. Unscrew the adaptor ring (4) from the outer housing (2).
12. Remove the calibration screw (3.1) and then the remaining parts of the
volume rocker switch (3.2 and 3.3).
13. Remove the outer housing (2).
14. Unscrew the seal nut (15) and place the PTFE seal ring (16) aside.
15. Pull off the adaptor ring (4) and loosen the cap nut (5).
16. Pull the PTFE cylinder (18) out of the valve head (19), keep in mind that
the valve star (9) and the ceramic ball (10) might drop out.
17. Take the valve star (9) and the ceramic ball (10) out of the suction valve.
18. Loosen the closing cap (13) and remove the O-ring (14 a).
19. Pull the valve axle (12) out of the valve head (19).

8
5.5 Assembly
For a problem-free functionality please observe the tight fit between valve head
(19) and cap nut (5). If necessary please retorque.
1. Push the valve axle (12) into the valve head (19).
2. Assemble the O-ring (14 a) and the closing cap (13).
3. Place the ceramic ball (10) and the valve star (9) into the suction valve.
Check that the spikes of the valve star (9) point upwards.
4. Assemble the PTFE cylinder (18) on the valve head (19). Check that
the notches of the PTFE cylinder (18) are placed exactly over the
domes of the valve head (19).
5. Tighten the PTFE cylinder (18) with the cap nut (5). Check that all
parts fit tightly.
6. Position the adaptor ring (4) with the thread upwards over the cap nut
(5).
7. Position the PTFE seal ring (16) with the groove upwards on the PTFE
cylinder (18) and screw the seal nut (15) tightly on the thread.
8. Place the device horizontally and perform the following steps
consecutively. Prior to that slide the outer housing (2) onto the PTFE
cylinder (18).
9. Erect the device and push the glass plunger (17) into the PTFE
cylinder (18) until it stops.
10. Screw the fix screw (1) into the outer housing (2).
11. Push the ejection cannula (6) into the valve axle (12) and fix it with the
cannula holder (7).
12. Push the return tube (21) and the suction tube (20) into the valve head
(19).
13. Screw the device onto the reagent bottle.
Step 1 Step 2 Step 3 Step 4 Step 5
9
5.6 Avoid clogging
When the ”Labmax airless“ is screwed open, make sure that the valves are
surrounded by liquid.
You can keep the dispenser smooth-running by rinsing it with distilled water or
alcohol.
In order to ensure that the device meets its accuracy, from time to time check-
ups can be done with (2x)-distilled water on semi-micro-scales. .Mind
temperature dependence (1 ml water at 20 °C ≈ 0,998g).
6 Common Spare Parts
Fix screw (1) 2,5 - 10 ml 5.370.251
25 - 100 ml 5.370.252
Outer housing (2) 2,5 ml 5.370.83001
5 ml 5.370.83002
10 ml 5.370.83003
25 ml 5.370.83004
50 ml 5.370.83005
100 ml 5.370.83006
Volume rocker switch (3) 2,5 - 10 ml 5.370.83300
25 - 100 ml 5.370.83301
Adaptor ring (4) 2,5 & 5 ml 5.370.83231
10 ml 5.370.83233
25 ml 5.370.83234
50 ml 5.370.83235
100 ml 5.370.83236
Cap nut (5) 2,5 ml 5.370.83241
5 ml 5.370.03242
10 ml 5.370.83253
25 ml 5.370.83244
50 ml 5.370.83245
100 ml 5.370.83246
Ejection cannula (6) + 2,5 - 10 ml 5.375.003
Cannula holder (7) -set- 25 - 100 ml 5.375.004
Valve star (9) 2,5 - 10 ml 5.370.377
25 - 100 ml 5.370.378
Ceramic ball (10) 2,5 - 10 ml 5.370.373
25 - 100 ml 5.370.374

10
V
alve axle (12) 2,5 - 10 ml 5.370.200
25 - 100 ml 5.370.201
Closing cap (13) 2,5 - 100 ml 5.370.380
O-Ring (14 a) 2,5 - 10 ml 5.370.381
O-Ring (14 b) 25 - 100 ml 5.370.387
Seal nut (15) 2,5 ml 5.370.83211
5 ml 5.370.83212
10 ml 5.370.83213
25 ml 5.370.83214
50 ml 5.370.83215
100 ml 5.370.83216
PTFE seal ring (16) 2,5 ml 5.370.83221
5 ml 5.370.83222
10 ml 5.370.83223
25 ml 5.370.83224
50 ml 5.370.83225
100 ml 5.370.83226
Glass plunger (17) 2,5 ml 5.370.83101
5 ml 5.370.83102
10 ml 5.370.83103
25 ml 5.370.83104
50 ml 5.370.83105
100 ml 5.370.83106
PTFE Cylinder (18) 2,5 ml 5.370.83251
5 ml 5.370.83252
10 ml 5.370.83253
25 ml 5.370.83254
50 ml 5.370.83255
100 ml 5.370.83256
Valve head (19) -set- 2,5 - 10 ml 5.370.360
(incl. 9, 10, 12, 13, 14 a+b) 25 - 100 ml 5.370.361
Suction tube (20) 310 mm 2,5 - 10 ml 5.375.000 N 310
25 - 100 ml 5.375.001 310
Suction tube (20) 390 mm 2,5 - 10 ml 5.375.000 N 390
25 - 100 ml 5.375.001 390
Return tube (21) 2,5 - 10 ml 5.375 000 N 40
25 - 100 ml 5.375.001 40
11
7 Optional Accessoires
The following optional accessories are available for the ”Labmax airless“
−Borosilicate Glass Check Valve.
This special, plastic-safety coated check valve is to be inserted into the
valve axle (10) on the side opposite to the cannula and prevents
volatile reagents from escaping through the ventilation canal. The
Glass Check Valve is recommended when using your dispenser for
bromine.
Art. No. 5.377.300 SE
−Borosilicate Glass Calcium Chloride Tube.
This safety coated tube can be filled with calcium chloride and will
protect siccatives (drying agents) from external humidity.
Art. No. 5.377.310
−Disposable Filters are available to protect against dust and bacteria. The
filters fit into the valve axle socket.
Art. No. 8.212.001 - 8.214.002
Other manuals for LABMAX airless
1
Table of contents
Other Witeg Dispenser manuals
Popular Dispenser manuals by other brands

Labelmate
Labelmate LD-100-U manual

IPG
IPG Better Pack 755e Series operating manual

Morphy Richards
Morphy Richards Redefine 131000 instruction manual

Bobrick
Bobrick Designer Series Instructions for installation, operation, maintenance

Stoelting
Stoelting Optima SO328 owner's manual

Tip Top Water
Tip Top Water SMART HC91L-UFD user guide