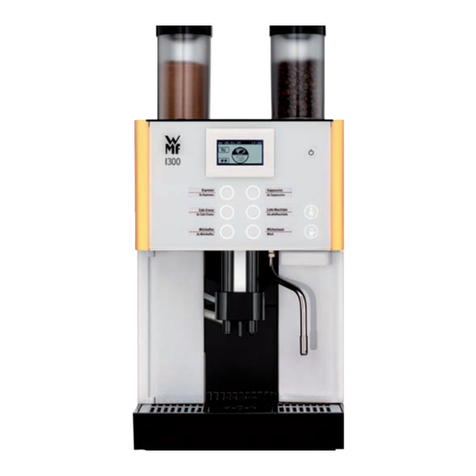
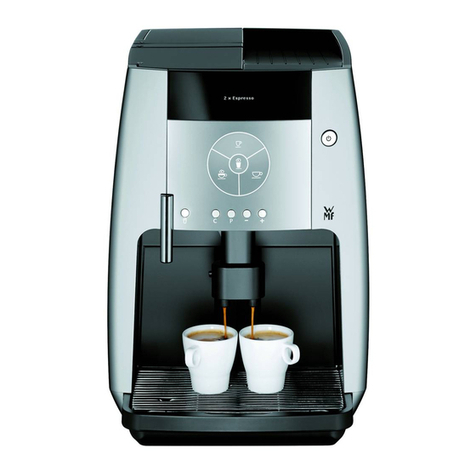
WMF combiNation S Series User manual

79
WMF COFFEE MACHINES
Operating instructions
WMF combiNation S / S4 / E
Series
8600
Edition 9 - Printed in 09.08
Item-No.
33 0914 2000

80
Congratulations on your purchase of a
WMF COFFEE MACHINE.
Its advanced technology, long service life,
economy and above all the quality of the cof-
fee will delight you.
No-one likes reading operating instructions.
Please do so anyway! You will get more
pleasure from your WMF COFFEE MA-
CHINE afterwards and will find it was worth
it after all!
In your own interest, please follow all
safety and cautionary instructions. This
will help to avoid accidents and technical
malfunctions.
Never entrust the machine to anyone who
is not familiar with the operating instruc-
tions.
Keep these operating instructions near the
machine. This will allow your operating per-
sonnel easy access to information at any time
and will enable them to take the appropriate
action should any technical malfunctions oc-
cur.

81
Contents
1Designation of machine parts..................................................................................................84
2General description..................................................................................................................85
3Warnings...................................................................................................................................86
3.1 Hazard to the operator........................................................................................................86
3.2 Hazard to the coffee machine.............................................................................................86
3.3 Duties of the owner/operator..............................................................................................87
3.4 Warranty claims..................................................................................................................87
4Technical data ..........................................................................................................................88
5Conditions of use and installation...........................................................................................89
6Operation..................................................................................................................................90
6.1 Starting the machine...........................................................................................................90
6.2 Filling the coffee beans hopper and/or ground coffee hopper............................................90
6.3 Preparing to dispense milk .................................................................................................91
6.4 Beverage key selection and labelling.................................................................................92
6.5 Adjusting the height of the combination spout and/or front door......................................94
6.6 Preparing coffee..................................................................................................................95
6.6.1 Coffee beverages (Espresso, Ristretto, Café Crème, Filter Coffee, etc.) ....................95
6.6.2 Coffee beverages with milk (White Coffee, Cappuccino, Latte Macchiato etc.)........96
6.6.3 Quantity pre-selection..................................................................................................97
6.6.4 Manual input................................................................................................................97
6.7 Hot water dispensing..........................................................................................................99
6.8 Steam dispensing..............................................................................................................100
6.9 Coffee grouts collector.....................................................................................................101
6.10Unit number accounting...................................................................................................102
6.11Waiter accounting system.................................................................................................103
6.12Vending units....................................................................................................................104
6.12.1Coin checker / token checker.....................................................................................104
6.12.2(Chip) card reader......................................................................................................107
6.12.3Coin changer..............................................................................................................108
6.13Switching off the machine................................................................................................111
7User guide ...............................................................................................................................112
7.1 Setting the milk froth quality............................................................................................113
7.2 Beverage settings..............................................................................................................114
7.2.1 Quantity of ground coffee..........................................................................................115
7.2.2 Quantity of water.......................................................................................................116
7.2.3 Coffee temperature ....................................................................................................117
7.2.4 Crema Quality............................................................................................................117
7.2.5 Quantity of milk or milk froth...................................................................................118
7.2.6 Addition of milk ........................................................................................................119
7.2.7 Beverage preparation sequence .................................................................................119
7.2.8 Beverage selection (acceptance of factory settings)..................................................120

82
7.2.9 Storing beverage settings...........................................................................................121
7.3 Machine settings...............................................................................................................121
7.4 Setting the date and time...................................................................................................122
7.5 Access authorisations (PIN numbers)...............................................................................123
7.5.1 System of access authorisations.................................................................................123
7.5.2 Changing access authorisations (PIN numbers) ........................................................124
7.6 Special unit: WMF combiNation S4.................................................................................126
7.6.1 General description....................................................................................................126
7.6.2 Technical data............................................................................................................127
7.6.3 Filling the coffee hoppers ..........................................................................................127
7.6.4 Four-grinder operating concept..................................................................................128
7.6.5 Beverage settings.......................................................................................................129
7.6.6 Special features..........................................................................................................129
7.7 Special unit: WMF combiNation E ..................................................................................130
7.7.1 General description....................................................................................................130
7.7.2 Technical Data...........................................................................................................130
7.7.3 Features......................................................................................................................131
8Timer program.......................................................................................................................131
8.1 Timerstatus .......................................................................................................................132
8.2 Set Timer ..........................................................................................................................132
8.3 Copy Day..........................................................................................................................133
8.4 Timer Overview................................................................................................................133
8.5 Timer Delete.....................................................................................................................133
8.6 Timer Info.........................................................................................................................133
9Care of the machine ...............................................................................................................134
9.1 Daily cleaning...................................................................................................................134
9.1.1 Cleaning the machine.................................................................................................135
9.1.2 Cleaning the combination spout.................................................................................137
9.1.3 Intermediate cleaning the combination spout............................................................141
9.1.4 Automatic frother rinsing...........................................................................................143
9.1.5 Cleaning the manual input.........................................................................................144
9.2 Forced intermediate cleaning of the combination spout (or chocolate dispenser) ...........145
9.3 General cleaning...............................................................................................................146
10 Error messages and remedial action ....................................................................................147
10.1Error messages..................................................................................................................147
10.2Remedial action................................................................................................................148
11 Maintenance and descaling ...................................................................................................149
12 HACCP cleaning concept ......................................................................................................149

83
2
3
5
6
7
8
9
10
11
17
15
4
12
13
1
16
14
18

84
1Designation of machine parts
1 Coffee beans hopper, optionally lockable
2 Ground coffee hopper, optionally lockable
3 Manual input/cleaning shaft
4 Display
5 Control panel
6 Rotary knob for steam dispensing
7 Combination spout
8 Steam nozzle
9 Drip tray
10 Hot water key
11 Hot water spout
12 Grouts collector
13 Clamping valve
14 Height-adjustable front door
15 On/off key switch
16 Milk intake hose
17 Beverage keys
18 Waiters lock (optional)

85
2General description
The WMF combiNation Scoffee machine is a fully
automatic single-cup machine for making Espresso, Café
Crème, Cappuccino, White Coffee and Latte Macchiato.
Hot water and/or steam dispensing and making filter cof-
fee are both available as options.
Both coffee beans and ground coffee can be used. The
manual input allows an additional coffee beverage to be
prepared.
All the coffee and milk drinks are dispensed via a spe-
cially designed combination spout which also enables per-
fect milk froth and hot milk to be prepared.
The height-adjustable spout can accommodate cup heights
from 70 to 140 mm. The front door is also height-
adjustable to enable jugs up to a height of 280 mm to be
filled without any difficulty.
Each portion is freshly brewed at the touch of a button to
guarantee high quality for your beverages.
The machine user guide is a graphic touch screen display.
By pressing lightly on particular soft keys in the display
you can activate certain machine functions or call up in-
formation.

86
3Warnings
3.1 Hazard to the operator
At WMF, safety is one of the most essential product features. The effectiveness of safety devices
can only be ensured if the following points are observed:
•Read the user manuals carefully prior to use.
•Do not touch hot machine components.
•Do not use the machine if it is not working properly or if it is damaged.
•Built-in safety devices must never be altered.
•This device is not designed for persons (including children) with limited physical, sensory or
mental capabilities or who lack the required experience and/or knowledge, unless they are su-
pervised by a person responsible for their safety or have received instructions from them about
how the device should be used.
•Children should be supervised to ensure that they do not play with the machine.
Despite safety devices, every machine poses numerous hazards if incorrectly used. Please observe
the following instructions when using the coffee machine so as to prevent injury and health haz-
ards:
Scald hazard!
When dispensing coffee, hot water and steam there is hazard of scalding. Ensure that there is al-
ways a receptacle under the outlet when dispensing drinks.
Bruising or crushing hazard!
There is a hazard of bruising or crushing when handling all moving parts! Do not reach into the
bean hopper or the brewing unit opening when the coffee machine is switched on.
Health hazard!
The product container (coffee beans) and manual insert may only be filled with materials for the
use intended!
Health hazard!
When handling special cleaners for the milk foamer and cleaning tablets, please observe the pro-
tective measures on the packaging. The special cleaners for the milk foamer and cleaning tablets
are irritants. Only put in cleaning tablets after instructions to do so are shown on the display.
Irritation and scald hazard!
Never reach under the spouts while cleaning! Cleaning fluid runs out of the combi spout when
cleaning.
3.2 Hazard to the coffee machine
Please observe the following points so as to prevent
problems with and damage to the coffee machine:
•For water with a carbonate hardness in excess of 5°dKH, a WMF anti-scale filter must be fitted
otherwise the coffee machine can be damaged due to build-up of scale.
•For insurance reasons always ensure that, at the end of operation, the mains water tap for the
water supply is turned off and the mains power is switched off or the machine is unplugged.
•We recommend damage prevention measures such as:
- installation of a suitable water monitor in the mains water supply
- installation of smoke detectors.

87
•After a company holiday we recommend running the cleaning mode at least twice before reusing
the machine.
•Do not expose the coffee machine to frost.
•This machine is not for use outdoors, do not spray the machine with water. The maximum rela-
tive humidity should not exceed 80%; do not allow dewing.
•Do not use a water hose, steam jets, steam cleaners or the like to clean the device.
•The device must be set on a flat, level and secure surface.
3.3 Duties of the owner/operator
The coffee machine fulfils the requirements of the EU Low Voltage Directive LVD (2006/95/EU)
and the EMC Directive EMC (2004/108/EU) and carries the CE symbol.
The pressure containers are not subject to the EC PED Directive (see Article 1 Paragraph 3.6)
since they conform with Article 3 Paragraph 3 of the PED. The hot water/steam boiler is neither
notifiable and does not require approval. Calculations conform to AD 2000. Every device was
subjected to a pressure test.
Currently valid national rules apply in countries outside of the European Union. The operator of
such equipment must ensure regular maintenance by WMF Service technicians, their agents or
other authorised persons and checking of safety devices.
The coffee machine must be set up by the operator such that care and maintenance are possible
unhindered.
In office/floor supply or similar self-service applications, only staff instructed in operation of the
machine should supervise the machine. Trained personal should carry out maintenance and be
available for questions regarding use.
The operator shall ensure that electrical equipment and operating facilities are in a fit state (e.g., to
BGV A3) [German Accident Prevention Association or equivalent].
In order to ensure the operating safety of your coffee machine, it is essential, to perform regularly
check safety valve(s) and the pressure containers(s), among other checks. These measures are
conducted by the WMF Service or by WMF authorised service personnel as part of the mainte-
nance work.
The manufacturer‘s specifications regarding maintenance cycles and frequency of maintenance
(see “Maintenance and descaling” chapter) are to be observed.
This device is subject of the directive on waste electrical and electronic equipment
(WEEE/EU directive) and may not be disposed of as domestic waste. Please contact your
WMF Customer Service for information on proper disposal of the device.
3.4 Warranty claims
During the warranty period of 12 months from transfer of risk, the purchaser has statutory war-
ranty entitlements.
The vendor should always be afforded the opportunity to rectify errors within an appropriate pe-
riod.
Claims that exceed the above terms, in particular damage claims as a result of consequential dam-
age, are excluded to the extent that this is legally permissible.
Material defects shall be reported to the vendor immediately and in writing.
No warranty is provided:
•On any parts subject to natural wear and tear. This includes, seals, mixers and brewing unit,
among other items.
•For malfunctions due to the effect of the weather, scale build-up, chemical, electrochemical or
electrical effects, unless attributable to a fault on the part of the vendor.
•If a scale filter is not fitted even though the local water supply requires use of an scale filter and
if malfunctions occur as a consequence.

88
•If malfunctions which occur as a result of failure to follow handling instructions and regulations,
maintenance and care of the unit (e.g., user manuals and maintenance instructions).
•If malfunctions which occur as the result of failure to use original WMF replacement parts or
incorrect assembly by the purchaser or by third parties or by faulty or negligent treatment.
•If improper modifications are made without our consent or by repair or reconditioning work on
the part of the purchaser or by third parties.
•If malfunctions are caused by inappropriate or improper use.
•Inappropriate use of the coffee machine shall be deemed to have taken place if the customer ex-
ceeds the annual number of coffee or choc mixer servings prescribed within the 12 month war-
ranty period (from the date of purchase). Annual maximum volume is 60,000 coffee servings.
The highest amounts are permissible for regular performance of maintenance work according to
the “Maintenance and Descaling” chapter.
4Technical data
Rated power 3.3 kW 6.3 kW
Hourly output *
Espresso
Café Crème
Filter coffee
300 cups
190 cups
190 cups
300 cups
240 cups
220 cups
Hot water output, total 24 l/h 48 l/h
Coffee beans hoppers each 1.05 kg
Ground coffee hopper 500 g
Electricity supply 1/N/PE 50 Hz/230 V 3/N/PE 50 Hz/400 V
External dimensions
Width
Height with coffee beans hopper
Depth
450 mm
764 mm
590 mm
Empty weight approx. 80 kg
Continuous sound pressure level
(Lpa)**
< 70 dB (A)
Subject to technical change without notice.
* The hourly outputs indicated are GUIDELINES and depend, among other things, on the quantity of ground
coffee, type of coffee, fineness, brewing temperature, brewing aperture size, brewing pressure, water hardness
and general condition of the machine (e.g. limescale, connections, power, water, sequence, wear, etc.)
** The A-weighted mean sound pressure level Lpa (slow) and Lpa (impulse) at the operator’s workplace is below
70 dB(A) in every operating mode.

89
5Conditions of use and installation
The machine operator must arrange for the site preparatory work. This should be carried out by
approved contractors in accordance with general and local regulations. WMF customer service
technicians are only permitted to connect up the machine to the prepared connections. They are
not authorised to carry out plumbing or wiring work on site and will not be responsible for such
work.
Rated power 3.3 kW 6.3 kW
Connecting cable, site supply* 3 x 1.52 5 x 2.52
Fuse, site supply 1 x 16 A 3 x 16 A
Mains voltage tolerance 230 V / 400 V + 6 % - 10 %
Power cut < 50 ms does not affect machine operation
Water feed line TW 15 (DN 15 min. DN 6 or 1/4") with main shutoff valve
and dirt filter installed by customer,
min. 0,2 MPa flow pressure at 2 l/min, max. 0,6 MPa
max. inlet temperature 35°C
Water quality If the local water has a carbonate hardness over 5° a
WMF water filter must be fitted in the supply line.
Water drain line Hose, DN 19, minimum gradient 2 cm/m
Ambient temperature + 5°C to + 35°C (drain water system in case of frost)
Max. humidity 80 % rel. humidity without dewing; do not spray ma-
chine with water; do not use machine out of doors
Installation clearance
When operating for service and safety reasons, the machine
should be installed with clearance of not less than 50 mm
from the back and sides from the building or non-WMF
components. A clear height of 1100 mm from the top of the
supporting surface should be ensured. The height of the sup-
porting surface from the floor surface should be not less than
700 mm and not more than 900 mm. Use of the area below
the machine for accessories (e.g. water filter or grouts sepa-
rator) requires a clear height of between 500 and 670 mm,
depending on the configuration and local installation condi-
tions. If the machine connections are to be routed down
through the counter, remember also to allow space for the
connections. These may restrict the available space below
the machine.
* The on-site electrical system must comply with IEC 364. An e.l.c.b. switch with 30 mA rated fault current to
EN 61008 should be installed upstream of the unit for increased safety. An earthed socket outlet must be in-
stalled near the unit for one-phase connection. A 5-pole CEE/CEKON socket outlet to EN 60309 must be in-
stalled for three-phase connection. If the mains power cable of this unit is damaged, it must be replaced by our
customer service engineer or a similarly qualified person. If the machine is permanently connected on site, a
disconnecting device (master switch) to EN 60947 acting on all poles and with a contact gap of at least 3 mm
must be installed upstream. The disconnecting device is also recommended for flexible connection. The mains
power cable must not be allowed to come into contact with hot parts of the machine. Master switch and socket
outlet are part of the on-site installation. The machine must not be installed with permanent on-site connection
when mounted on a trolley.

90
6Operation
6.1 Starting the machine
Before the machine is started up, the main shutoff valve in
the fresh water feed line must be opened and the main
electrical switch supplying the machine must be turned on.
Turn the key switch 15 to position “1” (On).
After switching on, the machine heats up to operating tem-
perature (about 12 minutes). During the heating-up phase
the display shows the following:
When the machine has warmed up, the display shows the
following:
If the coffee beans hopper and/or ground coffee hopper are
full (see chapter 6.2 on page 90) and the machine is ready
for operation, coffee and hot water can be dispensed by
pressing one of the beverage keys.
6.2 Filling the coffee beans hopper and/or ground coffee hopper
To fill the coffee beans hopper 1remove the hopper lid and
fill the hopper with coffee beans. Then replace the lid to
close the hopper. Each coffee beans hopper has a capacity
of approx. 1.05 kg.
Note:
Avoid cramming the coffee beans or ground coffee
into the hoppers as this can cause machine to
malfunction.
15
1

91
To fill the ground coffee hopper 2remove the hopper lid
and fill the hopper with ground coffee. Then replace the lid
to close the hopper. The ground coffee hopper 2has a ca-
pacity of approx. 500 g.
It is important to top up the coffee beans hopper and the
ground coffee hopper before they are completely empty to
ensure correct operation of the coffee machine.
6.3 Preparing to dispense milk
In order to dispense milk from the machine, the milk tank
supplied (e. g. in the WMF auxiliary cooler or, as shown
here, the Tetra Pak) has to be connected to the combination
spout 7of the machine by the milk intake hose 16.
If this is not the case, proceed as follows.
Slide the complete front door 14 upwards until the clamp-
ing valve 13 is easily accessible. Do this by grasping the
front door at both sides and sliding the front door upwards
with gentle pressure (see also chapter 6.5 on page 94).
The milk intake hose 16 has a plastic connector on one end
(bottom left in the picture) and a metal nozzle on the other
end (top right in the picture).
2
16
7
14
13
16

92
Insert the connector of milk intake hose 16 into the connec-
tion provided on the underside of the combination spout 7.
Then push the milk intake hose into the guide on the under-
side of the combination spout 7 to fasten the milk intake
hose 16 to the combination spout 7.
Next, feed the milk intake hose 16 through the clamping
valve 13 mounting. To do this, pull both ends of the milk
intake hose 16 forward and press down into the mounting.
Then guide the metal nozzle of the milk intake hose 16
through the hole which is on the left next to the clamping
valve 13. Finally, insert the metal nozzle of the milk intake
hose 16 into the milk tank supplied (e.g. in the
WMF auxiliary cooler or Tetra Pak).
Always make sure the milk tanks are topped up or replaced
in good time, to ensure correct operation of the coffee ma-
chine.
6.4 Beverage key selection and labelling
Depending on the machine version chosen, you have either
5 or 9 beverage keys and one hot water key at your dis-
posal (shown here: control panel 5with 9 beverage keys
17). You can assign each beverage key 17 individually
with your chosen coffee beverages. Around 40 pre-set
standard beverages are provided for you (see chapter 7.2.8,
page 120) or alternatively you can choose your own set-
tings.
You can label the individual beverage keys 17 with differ-
ent beverage symbols which your local WMF customer
service engineer can replace according to your require-
ments.
7
16
1313
16
16
13
5
17

93
The 2x key gives you access to a second level of keys.
By selecting this key before pressing one of the beverage
keys, you can either prepare an additional beverage alterna-
tive or call up the two-cup function automatically.
Example: additional beverage alternative
1 cup Espresso
+ 1 cup Ristretto
Your local WMF customer service engineer will set up one
of these alternatives for you at the time of installation of
the machine.
Example: two-cup function
1 cup Espresso
+ 2 cups Espresso are pre-
pared at the same time
Note:
We recommend to switch off the machine while
labelling in order to avoid pressing one of the bever-
age keys inadvertently.
You can also label the beverage keys 17 as you choose. To
do this, press on either the left-hand or right-hand side of
the key strip and, while still pressing, slide the key strip out
sideways until the key strip comes out of its holder.
Remove the key strip from its holder.
You can now replace the existing labels with the ready-
made labels supplied with the machine. Alternatively, you
can print your own labels on plastic, cut to size and use
these instead.
Note:
Ensure the black foil is always replaced correctly.
17
2x
2x

94
After changing the plastic labels, replace the key strip. To
do this, insert the left-hand (or right-hand) edge of the key
strip into the holder and press the opposite side of the key
strip into the holder as well until the key strip clicks into
place.
6.5 Adjusting the height of the combination spout and/or front door
You can adjust the height of the combination spout 7de-
pending on the size of the coffee cups you use.
Grasp the combination spout and slide it upwards or
downwards as required.
Caution!
Scalding hazard in the area of the combination
spout 7.
The clear height under the spout can be varied between
70 mm and 140 mm.
Caution!
Beware when adjusting the height of the combi-
nation spout 7 or the front door 14.
Danger of crushing!
To fill jugs over 140 mm high (e.g. thermos jugs) the com-
plete front door 14 can be slid upwards.
Grasp the front door at both sides and slide it upwards,
using gentle pressure. Also push the combination spout 7
upwards.
This enables the clear height to be adjusted up to 280 mm.
7
14

95
6.6 Preparing coffee
6.6.1 Coffee beverages (Espresso, Ristretto, Café Crème, Filter Coffee, etc.)
Caution!
Scalding hazard in the area of the combination
spout 7.
If the coffee beans hopper and/or ground coffee hopper are
full (see chapter 6.2 on page 90) and the machine is ready
for operation, coffee beverages can be dispensed by press-
ing one of the beverage keys. The following message ap-
pears in the display:
If, for example, you want to prepare two cups of espresso,
proceed as follows:
1. Place two espresso cups beneath the combination
spout 7. You may need to adjust the height of the com-
bination spout, depending on the size of cup used (see
chapter 6.5 on page 94).
2. Press the 2x key, then press the key labelled Espresso
on the control panel 5(to set the two-cup function,
see 6.4 on page 92).
3. While brewing is taking place, the green light around
the beverage key pressed flashes, and the other key
lights are not lit. The display shows the name of the
coffee beverage selected and the progress of brewing.
Quantity pre-selection is possible (see chapter 6.6.3 on
page 97).
7
5

96
4. At the end of the brewing process, the freshly prepared
coffee beverage is ready. The used coffee grouts are
collected in the built-in grouts collector 12. All the key
lights are reactivated again and the display shows the
“Ready” message. The machine is ready for the next
brewing operation.
6.6.2 Coffee beverages with milk (White Coffee, Cappuccino, Latte Macchiato etc.)
Caution!
Scalding hazard in the area of the combination
spout 7.
If the coffee beans hopper and/or ground coffee hopper are
full (see chapter 6.2 on page 90), milk dispensing has been
prepared (see chapter 6.3 on page 91) and the machine is
ready for operation, coffee beverages with milk can be dis-
pensed by pressing one of the beverage keys. The follow-
ing message appears in the display:
If, for example, you want to prepare two cups of cappuc-
cino, proceed as follows:
1. Place two cappuccino cups beneath the combination
spout 7. You may need to adjust the height of the com-
bination spout, depending on the size of cups used (see
chapter 6.5 on page 94).
2. Press the 2x key and then press the key labelled Cap-
puccino on the control panel 5(to set the two-cup func-
tion, see chapter 6.4 on page 92).
3. While brewing is taking place, the green light around
the beverage key pressed flashes, and the other key
lights are not lit. The display shows the name of the
coffee beverage selected and the progress of brewing.
Quantity pre-selection is possible (see chapter 6.6.3 on
page 97).
5
7

97
4. At the end of the brewing process, the freshly prepared
coffee beverage is ready. The used coffee grouts are
collected in the built-in grouts collector 12. All the key
lights are reactivated again and the display shows the
“Ready” message. The machine is ready for the next
brewing operation.
6.6.3 Quantity pre-selection
If you wish to prepare several cups one after the other, you
can repeat each beverage selection automatically up to 12
times. By using the two-cup function 2x and quantity
pre-selection you can, for example, prepare 12 x 2 = 24
beverages one after the other.
Once the first brewing has started, the quantity pre-
selection (number) of beverages to be dispensed can be
increased or decreased by pressing the or soft
key as appropriate.
In the example shown here, a Latte Macchiato was selected
and the quantity increased to 6 using quantity pre-selection.
The display shows the pre-selection and progress of brew-
ing (in this example: the first of six brews is taking place).
Six brewing cycles are now carried out, one after the other.
Remember to place a fresh cup under the combination
spout each time. The quantity pre-selection can be altered
while brewing is in progress. Once all the brews have been
completed, the “Ready” message appears again in the dis-
play.
6.6.4 Manual input
The machine is equipped with a manual input 3for ground
coffee to prepare additional coffee beverages (e.g. mild
coffee or decaffeinated coffee). To use the manual input,
proceed as follows:
1. The machine is ready and the following message ap-
pears in the display. Place the appropriate container be-
neath the combination spout. Then press the soft
key to unlock the manual input 3.

98
2. The display asks you to put in the ground coffee.
3. Open the manual input 3. Take the measuring spoon
(order no. 33.0724.4000) and pour in the appropriate
quantity of ground coffee (max. 25g) for the quantity to
be brewed. Then close the manual input 3.
4. After closing the manual input, press the appropriate
beverage key on the control panel.
5. The beverage selected is prepared using the ground
coffee put in. The display shows the name of the coffee
beverage selected and the progress of brewing in the
form of a filling cup. Quantity pre-selection is not pos-
sible in this mode.
6. At the end of the brewing process the freshly prepared
coffee beverage is ready. The used coffee grouts are
collected in the built-in coffee grouts collector 12. All
the key lights are reactivated again and the display
shows the “Ready” message. The machine is ready for
the next brewing operation.
7. If no beverage keys are pressed within 40 seconds of
unlocking the manual input 3, the ground coffee that
was put in is ejected into the grouts collector and the
machine is ready for operation again.
3
This manual suits for next models
2
Table of contents
Other WMF Coffee Maker manuals

WMF
WMF KUCHENminis Aroma User manual

WMF
WMF Presto User manual

WMF
WMF Skyline User manual

WMF
WMF Lumero User manual

WMF
WMF 950 S Instructions for use

WMF
WMF Lono 0412300011 User manual

WMF
WMF kuchenminis User manual

WMF
WMF 5 Coffee Grinder User manual

WMF
WMF AromaMaster User manual

WMF
WMF Filter Coffee Maker User manual