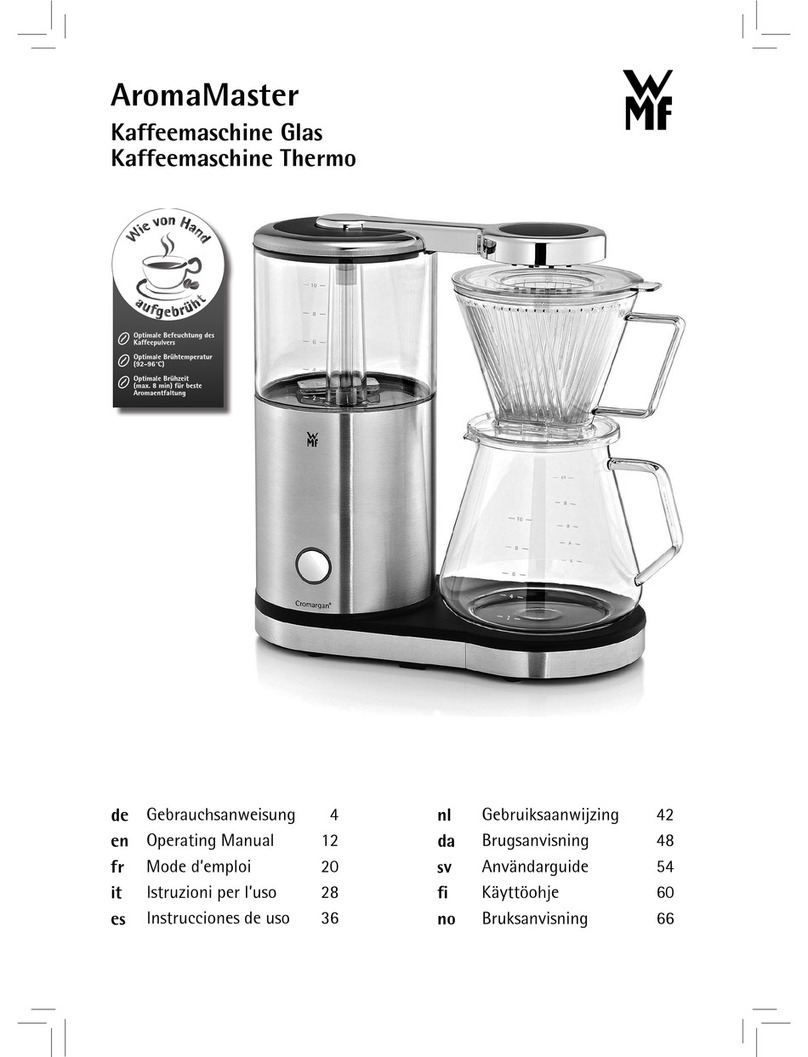
WMF Terra Coffee Machine User manual

Gebrauchsanweisung
Operating Manual
Mode d’emploi
Istruzioni per l’uso
Instrucciones de uso
Gebruiksaanwijzing
Brugsanvisning
Användarguide
Käyttöohje
Bruksanvisning
Kaffeemaschine Glas

2
Vor dem Benutzen
Wir gratulieren Ihnen zum Kauf des Kaffeeautomaten.
Der Kaffeeautomat darf nur für den vorgesehenen Zweck gemäß
dieser Gebrauchsanweisung verwendet werden. Lesen Sie deshalb
die Gebrauchsanweisung vor der Inbetriebnahme sorgfältig, sie gibt
Anweisungen für den Gebrauch, die Reinigung und die Pflege des
Gerätes. Bei Nichtbeachtung übernehmen wir keine Haftung für
eventuelle Schäden. Bewahren Sie die Gebrauchsanweisung sorgfältig
auf und geben Sie diese gemeinsam mit dem Gerät an Nachbenut-
zer weiter. Beachten Sie auch die Garantiehinweise am Ende der
Gebrauchsanweisung.
Dieses Gerät ist dafür bestimmt, im Haushalt und ähnlichen Anwen-
dungen verwendet zu werden, wie beispielsweise:
in Küchen für Mitarbeiter in Läden, Büros und anderen⋅gewerblichen Bereichen;
in landwirtschaftlichen Anwesen;⋅von Kunden in Hotels, Motels und anderen Wohneinrich-⋅tungen;
in Frühstückspensionen.⋅
Das Gerät ist nicht für den rein gewerblichen Gebrauch bestimmt.
Beim Gebrauch die Sicherheitshinweise beachten.
Für Glasbruch wird keine Garantie übernommen.
Technische Daten
Nennspannung: 230 V~ 50 Hz
Leistungsaufnahme: 900 W
Schutzklasse: I
Sicherheitshinweise
Gerät nur an eine vorschriftsmäßig installierte Schutzkontaktsteck-▪ dose anschließen. Zuleitung und Stecker müssen trocken sein.
Die Anschlussleitung nicht über scharfe Kanten ziehen oder▪ einklemmen, nicht herunterhängen lassen sowie vor Hitze und Öl
schützen.
Ein Verlängerungskabel nur in einwandfreiem Zustand einsetzen.▪ Den Netzstecker nicht an der Leitung oder mit nassen Händen aus▪ der Steckdose ziehen.
Das Gerät nicht an der Zuleitung tragen.▪ Den Kaffeeautomaten nicht auf heiße Oberflächen z.B. Herdplat-▪ ten o.Ä. oder in der Nähe der offenen Gasflamme abstellen, das
Gehäuse könnte dabei anschmelzen.
Das Gerät nicht auf wasserempfindliche Oberflächen abstellen.▪ Wasserspritzer könnten diese beschädigen.
Das Gerät nicht ohne Wasser einschalten. Den Frischwasserbehälter▪ höchstens bis zur maximal möglichen Tassenanzahl mit kaltem
Wasser füllen.
Kein Wasser in das eingeschaltete oder noch heiße Gerät einfüllen.▪

3
DEGBFRITESNLDASVFINO
Zuvor den Kaffeeautomaten ausschalten und 5 Minuten abkühlen
lassen.
Vorsicht▪ , das Gerät wird heiß. Verbrühungsgefahr durch austre-
tenden Dampf. Während des Durchlaufes niemals den Filter heraus
schwenken oder den Deckel öffnen.
Dieses Gerät ist nicht dafür bestimmt, durch Personen (einschließ-▪ lich Kinder) mit eingeschränkten physischen, sensorischen oder
geistigen Fähigkeiten oder mangels Erfahrung und/oder mangels
Wissen benutzt zu werden, es sei denn, sie werden durch eine für
ihre Sicherheit zuständige Person beaufsichtigt oder erhielten von
ihr Anweisungen, wie das Gerät zu benutzen ist.
Achten Sie darauf, dass Kinder keine Gelegenheit erhalten, mit dem▪ Gerät zu spielen.
Wenn das Gerät längere Zeit nicht benutzt wird, den Netzstecker▪ ziehen.
Das Gerät nicht in Betrieb nehmen bzw. sofort Netzstecker ziehen,▪ wenn:
Gerät oder Netzkabel beschädigt ist⋅der Verdacht auf einen Defekt nach einem Sturz oder Ähn-⋅lichem besteht.
In diesen Fällen das Gerät zur Reparatur geben.
Das Gerät regelmäßig entkalken.▪ Die Glaskanne ist nicht für die Mikrowelle geeignet.▪ Das Gerät nicht in Wasser tauchen.▪ Bei Zweckentfremdung, falscher Bedienung, Nichtbeachtung der▪ Entkalkungshinweise oder nicht fachgerechter Reparatur wird
keine Haftung für eventuelle Schäden übernommen. Ebenso sind
Garantieleistungen in solchen Fällen ausgeschlossen.
Wenn die Anschlussleitung dieses Gerätes beschädigt wird, muss sie▪ durch den zentralen Kundendienst des Herstellers oder eine ähnlich
qualifizierte Person ersetzt werden. Durch unsachgemäße Repara-
turen können erhebliche Gefahren für den Benutzer entstehen.
Inbetriebnahme
Vor der Erstbenutzung und nachdem das Gerät längere Zeit außer
Betrieb war, einen Kochvorgang mit maximaler Wasserfüllung ohne
Kaffeemehl durchführen und anschließend Filter und Kanne heiß
ausspülen.
Aktuelle Uhrzeit einstellen
Nach Anschließen des Netzsteckers an eine Steckdose blinkt im Display
12 00. Stellen Sie die aktuelle Uhrzeit durch Drücken der Tasten h
und min ein. Sobald der Doppelpunkt blinkt läuft die Uhr, eine Bestä-
tigung ist nicht erforderlich. Sie können die aktuelle Uhrzeit jederzeit
durch Drücken der Tasten hund min ändern.
Hinweis: Nach einem Stromausfall oder nachdem der Netzstecker
gezogen wurde, muss die Uhrzeit neu eingestellt werden.

4
Programmieren der Einschaltzeit
Die Einschaltautomatik des Gerätes startet den Brühvorgang selbst-
ständig zur gewünschten Uhrzeit. Die Einschaltzeit kann bis zu 24
Stunden im Voraus programmiert werden. Sie wird angezeigt, wenn
Sie die set-Taste drücken, im Display erscheint BREW. Stellen Sie bei
gedrückter set-Taste die gewünschte Einschaltzeit durch drücken der
Tasten hund min ein.
Hinweis: Nach einem Stromausfall oder nachdem der Netzstecker
gezogen wurde, muss die Einschaltzeit neu eingestellt werden.
Kaffeezubereitung
Öffnen Sie den hinteren Deckel am Gerät und gießen Sie kaltes Wasser
in den Tank. Die Wasserstandsanzeige am Tank gilt für die Frisch-
wassermenge, die zum Brühen der gewünschten Tassenzahl à 125 ml
Kaffee notwendig ist. Die Skala auf dem Griff des Glaskruges gilt für
den fertigen Kaffee à 125 ml je Tasse.
Hinweis: Sollten Sie aus Versehen zu viel Wasser eingefüllt haben,
können Sie es durch die hintere Überlauföffnung wieder ausgießen.
Kippen Sie das Gerät nicht nach vorn, um den Tank zu entleeren.
Öffnen Sie zum Einfüllen von Kaffeemehl den vorderen Deckel. Setzen
Sie einen Papierfilter der Größe 1 x 4 in den Filter ein, zuvor jedoch
den Prägerand umfalten. Der Papierfilter darf nicht über den Rand des
Filters hinausragen, er ist deshalb mit der Hand leicht anzudrücken.
Füllen Sie die erforderliche Menge Kaffeemehl ein. Pro Tasse rechnet
man je nach persönlichem Geschmack mit ca. 5-7 g mittelfein gemah-
lenem Kaffee. Ist er zu fein gemahlen, kann der Filter überlaufen.
Automatisches Einschalten
Soll die Zubereitung zur programmierten Einschaltzeit automatisch
starten, drücken Sie einmal die Start/Stopp-Taste, im Display erscheint
AUTO und die Kontrollleuchte leuchtet rot. Mit dem automa-
tischen Einschalten zur programmierten Zeit, erlischt die Kontroll-
leuchte , die Kontrollleuchte leuchtet grün und die Zubereitung
beginnt.
Sofortstart
Soll der Kaffee sofort zubereitet werden, drücken Sie (zweimal) die
Start/Stopp-Taste, bis die Kontrollleuchte grün leuchtet, die
Zubereitung beginnt. Sie können jederzeit ausschalten, indem Sie die
Start/Stopp-Taste erneut drücken.
Nach Beendigung des Durchlaufes kann der Glaskrug entnommen
werden. Ein TropfStopp-Ventil verhindert, dass Restkaffee auf die
Warmhalteplatte tropft.
Warmhalten des Kaffees
Auf der Warmhalteplatte wird der Kaffee bis zu 2 Stunden auf Servier-
temperatur gehalten. Sie können jederzeit ausschalten, indem Sie die
Start/Stopp-Taste erneut drücken.
Bevor erneut Kaffee zubereitet werden kann, sollte das Gerät
5 Minuten abkühlen.
5
DEGBFRITESNLDASVFINO
Reinigung
Ziehen Sie den Netzstecker und lassen Sie das Gerät abkühlen.
Das Gerät nicht in Wasser tauchen, sondern außen nur mit einem
feuchten Tuch, dem etwas Spülmittel beigegeben wird, abwischen.
Keine scharfen und scheuernden Reinigungsmittel verwenden.
Filter und Glaskanne werden unter fließendem Wasser oder in der
Spülmaschine gereinigt.
Entkalken
Kalkablagerungen führen zu Energieverlusten und beeinträchtigen die
Lebensdauer des Gerätes. Es schaltet vorzeitig ab, wenn die Kalkschicht
zu stark ist. Sie ist dann nur noch sehr schwer zu entfernen. Entkalken
Sie deshalb regelmäßig, spätestens jedoch bei wesentlich verlängerter
Brühzeit oder vermehrter Geräuschbildung.
Die folgenden Angaben sind Richtwerte, die sich auf einen täglichen
Gebrauch im Haushalt beziehen.
Härtebereich Härte Entkalkungsabstände
1 weich 0 - 7° dH alle 6 Monate
2 mittel >7- 14° dH alle 3 Monate
3 hart >14 - 21° dH alle 6 Wochen
4 sehr hart >21° dH monatlich
1° dH entspricht ca. 0,18 mmol/l Ca- und Mg-Ionen
Den Härtebereich in Ihrer Wohngegend können Sie beim zuständigen
Wasserwerk oder der kommunalen Verwaltung erfragen.
Wir empfehlen die Verwendung von durgol® universal. Dieses ist
hochwirksam und materialschonend ohne zusätzliche Einwirkzeit.
Sie bekommen es dort, wo das Gerät gekauft wurde, im ausgewählten
Fachhandel oder Sie bestellen direkt bei wmf consumer electric.
Papierfilter einlegen und Kanne in die Maschine stellen. 1-2 Tassen
durgol® universal in den Wasserbehälter füllen, mit Leitungswasser
bis zur max-Marke auffüllen und Gerät einschalten. Anschließend zum
Spülen eine volle Tankfüllung Leitungswasser durchlaufen lassen.
Keinesfalls Essig oder Essigessenz verwenden, da Materialien im Gerät
dadurch beschädigt werden könnten.
Bei der Verwendung von Entkalkern auf Basis von Zitronensäure
könnten sich beim Entkalken Niederschläge bilden, die den Kalkbelag
versiegeln oder die Leitungen im Gerät verstopfen. Zudem läuft die
Entkalkung mit Zitronensäure zu langsam ab – eine vollständige
Entkalkung kann deshalb nicht gewährleistet werden.
Achtung, für Schäden, die durch Nichtbeachtung der Entkalkungsvor-
schrift entstehen, besteht kein Garantieanspruch.

6
Garantie-Information
Für unsere Geräte übernehmen wir gegenüber dem Endkunden eine
24-monatige Haltbarkeitsgarantie. Sie beginnt mit dem Kauf des
Gerätes durch den Endkunden und gilt im Gebiet der Bundesrepublik
Deutschland.
Ansprüche aus dieser Garantie sind unter Vorlage des Kaufbelegs direkt
gegenüber unserem zentralen Kundendienst geltend zu machen.
Von der Garantie ausgeschlossen sind Schäden durch normalen
Verschleiß, unsachgemäßen Gebrauch, Nichteinhaltung der Entkal-
kungsanweisung sowie unterbliebene Pflege.
Der Endkunde besitzt zusätzlich zu den Ansprüchen aus dieser Garantie
gesetzliche Ansprüche wegen Mängeln des Gerätes gegenüber seinem
direkten Verkäufer/Händler, die durch diese Garantie nicht einge-
schränkt werden.
Das Gerät entspricht den Europäischen Richtlinien 2006/95/EG,
2004/108/EG und 2009/125/EG .
Dieses Produkt darf am Ende seiner Lebensdauer nicht über den
normalen Haushaltsabfall entsorgt werden, sondern muss an einem
Sammelpunkt für das Recycling von elektrischen und elektronischen
Geräten abgegeben werden.
Die Werkstoffe sind gemäß ihrer Kennzeichnung wiederverwertbar.
Mit der Wiederverwendung, der stofflichen Verwertung oder anderen
Formen der Verwertung von Altgeräten leisten Sie einen wichtigen
Beitrag zum Schutze unserer Umwelt.
Bitte erfragen Sie bei der Gemeindeverwaltung die zuständige Entsor-
gungsstelle.
Änderungen vorbehalten

7
DEGBFRITESNLDASVFINO
Universal-Schnell-Entkalker
durgol® universal
durgol®universal befreit alle Gegenstände im Haushalt schnell und
einfach von Kalk. Seine Formel steht für eine effiziente und gleichzei-
tig materialschonende, lebensmittelsichere und umweltverträgliche
Entkalkung.
durgol®universal ist im ausgewählten Fachhandel oder bei
wmf consumer electric in einer 500 ml-Flasche erhältlich.

8
Prior to use
We would like to congratulate you on purchasing the automatic coffee
maker.
The automatic coffee maker may only be used for its intended purpose
in compliance with this operating manual. Please read the operating
manual carefully prior to first use. It provides instructions for the use,
cleaning and care of the appliance. We will not accept any liability
for damages resulting from non-compliance. Keep the manual in a
safe place and pass it on to any future user. Please also observe the
warranty information at the end of the operating manual.
This appliance is intended for domestic use and similar applications,
such as: in staff kitchens in shops, offices and other commercial⋅establishments;
in agricultural establishments;⋅ by guests in hotels, motels and other accommodation⋅facilities;
in bed-and-breakfast facilities.⋅
The appliance is not intended for purely commercial use.
Be sure to follow the safety information when using the appliance.
Glass breakage is excluded from the warranty.
Technical data
Rated voltage: 230 V~ 50 Hz
Power consumption: 900 W
Protection class: I
Safety information
Connect the appliance only to a shockproof socket that has been▪ installed according to regulations. The power cable and power plug
must be dry.
Do not pull the power cable over sharp edges or jam, do not let it▪ hang down and protect from heat and oil.
Use an extension cable only if it is in good condition.▪ Do not pull out the plug by the cable or touch it with wet hands.▪ Do not carry the appliance by the power cable.▪ Do not place the automatic coffee maker on hot surfaces such▪ as stove tops or near an open gas flame, as this may cause the
housing to melt.
Do not place the appliance on water-sensitive surfaces. Water spray▪ may damage the appliance.
Do not switch on the appliance without water. Do not fill the▪ fresh water reservoir with more cold water than for the maximum
number of cups.
Do not fill water into the automatic coffee maker while the appli-▪ ance is switched on or still hot. Switch off the automatic coffee
maker first and let it cool down for five minutes.

9
DEGBFRITESNLDASVFINO
Caution▪ . The appliance becomes very hot. Risk of scalding due to
emerging steam. Never swing out the filter or open the cover while
brewing is in progress.
This appliance is not intended to be used by persons (including▪ children) with limited physical, sensory or intellectual faculties or
who lack experience and/or knowledge, unless they are supervised
by a person responsible for their safety or have received instruc-
tions on how to use the appliance.
Please make sure that children do not have an opportunity to play▪ with the appliance.
If you do not intend using the appliance for an extended period,▪ pull the power plug.
If the following happens, do not use the appliance and unplug it▪ immediately:
the appliance or power cable are damaged⋅ a defect is suspected after a fall or similar occurrence⋅
In these cases, have the appliance repaired.
The appliance must be decalcified regularly.▪ The glass pot is not suitable for use in microwave ovens.▪ Never immerse the appliance in water.▪ We will not accept any liability for damages resulting from misuse,▪ non-compliance with the decalcification instructions, or unquali-
fied repairs. Also, guarantee services are excluded in such cases.
If the power cable of the appliance is damaged, it must be replaced▪ by the manufacturer’s authorised service agent or a qualified
technician. Incorrect repairs may result in considerable hazards for
the user.
Start-up
Prior to initial use or when the automatic coffee maker has not been
operated over a long period, fill the appliance with the maximum
amount of water but without coffee powder, let the water boil and
finally rinse the filter and pot with hot water.
Setting the current time
After connecting the power plug to a socket the display will
flash 12 00. Set the current time by pressing the buttons hand min.
As soon as the colon starts flashing, the clock is set and running, a
further confirmation is not required. You can change the current time
at any time by pressing the hand min buttons.
Note: After a power failure or after the power plug has been discon-
nected, the time must be reset.

10
Programming the Auto-On time
The Auto-On system of the appliance automatically starts the brewing
process at the set time. The Auto-On time can be programmed up to
24 hours in advance. It is displayed when you press the set button and
BREW appears in the display. Keep the set button pressed and set the
required Auto-On time by pressing the buttons hand min.
Note: After a power failure or after the power plug has been discon-
nected, the Auto-On time must be reset.
Brewing coffee
Open the rear cover on the appliance and pour cold water into the
reservoir. The water level indicator on the reservoir shows the quantity
of fresh water required to brew the desired number of cups à 125
ml coffee. The scale on the handle of the glass pot refers to cups of
brewed coffee à 125 ml.
Note: If you have accidently filled in too much water, you can pour it
out through the rear overflow outlet. Do not tilt the appliance forward
to empty the reservoir.
To fill in coffee powder, open the front cover. Fold a paper filter size
1 x 4 along the fold lines and insert it into the filter. The paper filter
is not allowed to stick out beyond the rim of the filter and must
therefore be pressed slightly into place by hand.
Fill in the required quantity of coffee powder. Depending on your
personal taste, use approximately 5 to 7 grams of medium ground
coffee per cup. If the coffee powder is ground too finely, the filter may
overflow.
Auto-On function
If you want the brewing process to start up automatically at the pro-
grammed Auto-On time, press the Start/Stop button once. AUTO will
appear in the display and the indicator light lights up red. After
the appliance has switched on automatically at the programmed time,
the indicator light will go out, the indicator light will light up
green and the brewing process will start.
Instant start
If you want the coffee to brew instantly, press the Start/Stop button
twice until the indicator light lights up green. The brewing process
will then start. You can switch off the appliance at any time by pres-
sing the Start/Stop button again.
After the brewing process is completed, the glass pot can be removed.
A drip-stop valve prevents coffee residues from dripping onto the hot
plate.
Keeping coffee hot
On the hot plate the coffee is kept at serving temperature for up to
2 hours. You can switch off the appliance at any time by pressing the
Start/Stop button again.
Before brewing more coffee the appliance should be left to cool down
for 5 minutes.

11
DEGBFRITESNLDASVFINO
Cleaning
Disconnect the power plug and leave the appliance to cool down.
Never immerse the appliance in water; simply wipe the exterior using a
damp cloth with a drop of washing-up.
Do not use harsh or abrasive cleaning agents.
Clean the filter and glass pot under running water or in the dishwas-
her.
Decalcifying
Limescale and calcium deposits result in a loss of energy and impair
the service life of the appliance. The appliance will switch off prema-
turely if the deposit is too excessive. It is then very difficult to remove
the deposit. We therefore recommend you to decalcify the appliance
regularly, but at the latest when the brewing time increases signifi-
cantly or there is more noise during the brewing process.
The following values are offered for guidance and are based on daily
use in a household.
Hardness range Hardness Decalcification
1 soft 0 - 7° dH every 6 months
2 medium >7- 14° dH every 3 months
3 hard >14 - 21° dH every 6 weeks
4 very hard >21° dH every 4 weeks
1° dH corresponds to approximately 0.18 mmol/l Ca and Mg ions
You can obtain details of the water hardness range in your residential
area from your water works or community offices.
We recommend using durgol® universal. This decalcifier is highly
effective, protects the material and does not require any additional
exposure time.
You can obtain this decalcifier where you bought the appliance or
from select dealers, or you can order it directly from wmf consumer
electric.
Insert the paper filter and place the pot into the automatic coffee
maker. Fill 1-2 cups of durgol® universal into the water reservoir, fill
up the reservoir with tap water to the max. mark and switch on the
appliance. Then let a reservoir full of tap water run through to rinse
the appliance.
On no account use vinegar or vinegar essence, as the materials in the
appliance could be damaged.
When using decalcifiers based on citric acid. precipitates may form
during decalcification and seal the calcium deposits or block the pipe-
lines in the appliance. Furthermore, decalcification with citric acid is
too slow and therefore complete decalcification cannot be guaranteed.
Important. Warranty compensation does not cover damage that
occurs due to non-compliance with the decalcification instructions.

12
For UK use only
This product is supplied with a 13 A plug conforming to BS 1363▪ fitted to the mains lead. If the plug is unsuitable for your socket
outlets or needs to be replaced, please note the following. If the
plug is a non-rewireable one, cut it from the mains lead and imme-
diately dispose of it. Never insert it into a socket outlet as there is a
very great risk of an electric shock.
The replacement of the plug at the mains lead has to be done▪ according to the following instructions:
Warning - This appliance must be earthed
Important: The wires in this mains lead are coloured in accordance
with the following code:
green/yellow Earth
blue Neutral
brown Live
As the colours of the wires in the mains lead of this appliance may not
correspond with the coloured markings identifying the terminals in
your plug, proceed as follows:
the wire which is coloured green and yellow must be con-⋅nected to the terminal which is marked with the letter E or by
the earth symbol , or coloured green or green and yellow,
the wire which is coloured blue must be connected to the⋅terminal which is marked the letter N or coloured black,
the wire which is coloured brown must be connected to the⋅terminal which is marked with the letter L or coloured red.
If a 13 A (BS 1363) plug is used it must be fitted with a 13 A fuse▪ conforming to BS 1362 and be ASTA approved. If any other type of
plug is used, the appliance must be protected by a 15 A fuse either
in the plug or adapter or at the distribution board.
If in doubt - consult a qualified electrician.▪ Never use the plug without closing the fuse cover.▪
The appliance is compliant with European Directives 2006/95/EC,
2004/108/EC and 2009/125/EC.
This product may not be disposed of in normal household waste at the
end of its service life, but must be delivered to a collecting point for
recycling electrical and electronic appliances.
The materials are reusable in accordance with their identification. You
will make an important contribution to the protection of our environ-
ment by recycling used appliances.
Please ask about the responsible disposal point at your community
offices.
Subject to change

13
DEGBFRITESNLDASVFINO
Universal Express Decalcifier
durgol® universal
durgol® universal quickly and simply removes limescale and calcium
deposits from all household items. Its formula stands for efficient
decalcifying which is at the same gentle on materials, food-compatible
and environmentally friendly.
durgol® universal can be purchased at select dealers or directly from
wmf consumer electric in a 500 litre bottle.

14
Avant l‘utilisation
Nous vous félicitons pour l‘achat de cette machine à café.
La machine à café ne doit être utilisée qu‘aux fins prévues, conformé-
ment à ce mode d‘emploi. C’est pourquoi veuillez lire attentivement le
mode d‘emploi avant la mise en service. Elle vous donnera les instruc-
tions pour l’emploi, le nettoyage et l’entretien de l’appareil. En cas de
non-respect, nous ne prenons aucune responsabilité pour d‘éventuels
dommages. Conservez soigneusement le mode d’emploi et donnez-le
en même temps que l’appareil à son prochain utilisateur. Tenez aussi
compte des indications de garantie à la fin de ce mode d’emploi.
Cet appareil est conçu pour être utilisé dans le ménage et pour des
applications similaires, telles que
dans la cuisine pour les employés de boutiques, bureaux et⋅autres secteurs commerciaux ;
dans une exploitation agricole ;⋅ par des clients dans des hôtels, des motels et autres établis⋅sements ;
dans des pensions avec petit déjeuner.⋅
L‘appareil n‘est pas conçu pour un emploi purement commercial.
Respecter les consignes de sécurité durant l‘emploi.
Nous déclinons toute garantie pour bris de verre.
Caractéristiques techniques
Tension nominale : 230 V~ 50 Hz
Puissance absorbée : 900 W
Classe de protection : I
Consignes de sécurité
Ne raccorder l‘appareil qu‘à une prise de contact de sécurité▪ installée conformément aux prescriptions. Le cordon d‘alimentation
et la fiche doivent être secs.
Ne pas tirer sur le câble de branchement sur des arêtes vives ou le▪ coincer, ne pas le laisser pendre et le protéger contre la chaleur et
l‘huile.
N‘utiliser un câble de rallonge qu‘en parfait état de fonctionne-▪ ment.
Ne pas retirer la fiche de courant de la prise en tirant sur le câble▪ ou avec des mains mouillées.
Ne pas porter l‘appareil au cordon d‘alimentation.▪ Ne pas déposer la machine à café sur des surfaces chaudes, p. ex.▪ plaques de four ou autres ou à proximité de flammes de gaz nues,
le boîtier pourrait fondre.
Ne pas poser l’appareil sur des surfaces sensibles à l’eau. Les projec-▪ tions d’eau pourraient les endommager.
Ne pas brancher l’appareil sans eau. Remplir le réservoir d‘eau▪ fraîche jusqu‘au nombre de tasse maximal en eau froide.

15
DEGBFRITESNLDASVFINO
Ne pas remplir d‘eau dans l‘appareil branché ou encore chaud.▪ Débrancher au préalable la machine à café et laisser refroidir
durant 5 minutes.
Prudence▪ , l‘appareil devient chaud. Risque de brûlures dus à la
vapeur qui en sort. Pendant le passage du café, ne jamais faire
pivoter le filtre hors de la machine ou ouvrir le couvercle.
Cet appareil n’est pas destiné à un emploi par des personnes (y▪ compris des enfants) aux capacités physiques, sensorielles ou
mentales réduites ou manquant d’expérience et/ou de savoir, sauf
si elles sont sous surveillance d’une personne compétente pour
sa sécurité ou si elles reçoivent des instructions pour se servir de
l’appareil.
Veiller à ce que les enfants n’aient pas l’occasion de jouer avec▪ l’appareil.
Si l‘appareil n’est pas utilisé durant un certain temps, retirer la fiche▪ du secteur.
Ne pas mettre l’appareil en service ou bien retirer immédiatement▪ la fiche quand :
l’appareil ou le cordon d’alimentation est endommagé⋅ s’il y a un soupçon de défaillance après une chute ou autres.⋅
Dans ces cas, faire réparer l’appareil.
Détartrer l‘appareil régulièrement.▪ La cruche en verre n‘est pas appropriée pour les fours microondes.▪ L’appareil ne doit pas être plongé dans l’eau.▪ Si l’appareil est utilisé en détournement de sa destination,▪ incorrectement, sans respecter les instructions de détartrage ou
s’il n’est pas réparé en bonne et due forme, nous déclinons toute
responsabilité pour d‘éventuels dommages. De même les prestations
de garantie sont exclues dans de tels cas.
Si le cordon d‘alimentation de cet appareil est détérioré, il faut le▪ faire remplacer par le service après-vente central du fabricant ou
par une personne qualifiée pour le faire. Des dangers considérables
pourraient se produire pour l’utilisateur si les réparations ne sont
pas faites correctement.
Mise en service
Avant la première utilisation et après la mise hors service de l‘appareil
durant un certain temps, exécuter une opération de cuisson avec un
remplissage d‘eau maximal sans mouture de café et rincer ensuite le
filtre et la cruche à l‘eau bouillante.
Régler l‘heure actuelle
Après avoir raccordé la fiche secteur à une prise de courant, 12 00
clignote sur l‘écran. Régler l‘heure actuelle en appuyant sur les
touches het min. Dès que le double-point clignote, la montre marche,
une confirmation n‘est pas nécessaire. Vous pouvez modifier à tout
moment l‘heure actuelle en appuyant sur les touches het min.
Remarque : Après une panne de courant ou après avoir retiré la fiche
secteur, l‘heure doit être à nouveau réglée.

16
Programmation de l‘heure de branchement
Le système automatique de branchement de l‘appareil fait démarrer
l‘ébouillantage automatiquement à l‘heure souhaitée. L‘heure de bran-
chement peut être programmée jusqu‘à 24 heures à l‘avance. Elle est
affichée quand vous appuyez sur la touche set, BREW apparaît alors
sur l‘écran. Réglez l‘heure de branchement souhaitée en maintenant la
touche set enfoncée et en appuyant sur les touches het min.
Remarque : Après une panne de courant ou après avoir retiré la fiche
secteur, l‘heure de branchement doit être à nouveau réglée.
Préparation du café
Ouvrez le couvercle arrière de l‘appareil et versez de l‘eau froide dans
le réservoir. L‘indicateur du niveau d‘eau sur le réservoir est valable
pour la quantité d‘eau fraîche qui est nécessaire pour ébouillanter le
nombre de tasse souhaité à 125 ml de café. L‘échelle sur le manche de
la cruche en verre est valable pour le café fini à 125 ml par tasse.
Remarque : Si vous avez rempli par mégarde trop d‘eau, vous pouvez
la déverser par l‘ouverture de trop-plein arrière. Ne faites pas basculer
l‘appareil vers l‘avant pour vider le réservoir.
Ouvrez le couvercle avant pour remplir de mouture de café. Insérez un
filtre en papier de la taille 1 x 4 dans le filtre, tout en ayant replié le
bord de gaufrage auparavant. Le filtre en papier ne doit pas dépasser
du bord du filtre, c‘est pourquoi il faut l‘enfoncer légèrement à la
main.
Remplissez la quantité nécessaire de mouture de café. On calcule par
tasse et selon le goût personnel de 5 à 7 g env. de café moulu demi-
fin. Si le café est moulu trop fin, le filtre peut déborder.
Branchement automatique
Si la préparation doit démarrer automatiquement à l‘heure de
branchement programmée, appuyez une fois sur la touche Start/
Stop, AUTO apparaît sur l‘écran et le voyant de contrôle s‘allume
en rouge. Lorsque l‘appareil se branche automatiquement à l‘heure
programmée, le voyant de contrôle s‘éteint, le voyant de contrôle
s‘allume en vert et la préparation commence.
Départ immédiat
Si le café doit être préparé immédiatement, appuyez (deux fois) sur la
touche Start/Stop jusqu‘à ce que le voyant de contrôle s‘allume en
vert, la préparation commence. Vous pouvez débrancher le processus à
tout moment en appuyant à nouveau sur la touche Start/Stop.
La cruche en verre peut être retirée à la fin du passage du café. Une
valve d‘arrêt d‘égouttement empêche que le café restant goutte sur le
plateau chauffe-tasses.

17
DEGBFRITESNLDASVFINO
Maintenir le café au chaud
Sur le plateau chauffe-tasses, le café sera maintenu au chaud durant 2
heures maximum à la température de service. Vous pouvez débrancher
le processus à tout moment en appuyant à nouveau sur la touche
Start/Stop.
Avant de pouvoir préparer une nouvelle fois du café, il faut laisser
l‘appareil refroidir durant 5 minutes.
Nettoyage
Retirer la fiche secteur et laisser l‘appareil se refroidir.
Ne pas plonger l‘appareil dans l‘eau mais l‘essuyer uniquement à
l‘extérieur avec un chiffon humide auquel un peu de produit pour la
vaisselle a été ajouté.
Ne pas utiliser de produit nettoyant caustique et abrasif.
Le filtre et la cruche en verre seront nettoyés à l‘eau courante ou au
lave-vaisselle.
Détartrer
Les dépôts de tartre entraînent des pertes d’énergie et réduisent la
durée de vie de l’appareil. Il s‘éteint prématurément quand la couche
de tartre est trop épaisse. Il sera alors très difficile de l’éliminer.
C‘est pourquoi détartrez régulièrement, mais au plus tard si la durée
d‘ébouillantage dure beaucoup plus longtemps ou si l‘appareil fait
beaucoup de bruit.
Les données suivantes sont des valeurs de référence qui se réfèrent à
un emploi quotidien dans le ménage.
Zone de dureté Dureté Intervalles de détartrage
1 douce 0 - 7° dH tous les 6 mois
2 moyenne >7- 14° dH tous les 3 mois
3 dure >14 - 21° dH toutes les 6 semaine
4 très dure >21° dH chaque mois
1° dH correspond à env. 0,18 mmol/l d’ions Ca et Mg
Vous pouvez demander à votre usine de distribution des eaux ou votre
administration communale le degré de dureté de votre eau du robinet.
Nous conseillons d‘utiliser durgol® universal. Ce produit est très
efficace et doux pour le matériel sans durée d‘action supplémentaire.
Vous pouvez vous le procurer dans le magasin où vous avez acheté
l‘appareil, dans le commerce spécialisé ou commandez-le directement
auprès de wmf consumer electric.

18
Insérer le filtre en papier et placer la cruche dans la machine. Remplir
1 à 2 tasses de durgol® universal dans le réservoir d‘eau, remplir d‘eau
du robinet jusqu‘au repère max et brancher l‘appareil. Ensuite faire
passer un réservoir plein d‘eau du robinet pour le rinçage.
Ne jamais utiliser de vinaigre ou de vinaigre concentré, car ceci pour-
rait endommager les matériaux dans l’appareil.
Si vous utilisez des détartrants à base d‘acide citrique, des dépôts
pourraient se former lors du détartrage, qui colmateraient le dépôts de
tartre ou boucheraient les tuyaux à l‘intérieur de l‘appareil. En outre le
détartrage à l‘acide citrique se déroule plus lentement - c‘est la raison
pour laquelle le détartrage intégral ne pourra pas être garanti.
Attention, il n’y a aucun droit de garantie pour les dommages résul-
tant du non-respect de la prescription de détartrage.
L’appareil est conforme aux directives européennes
2006/95/CE, 2004/108/CE et 2009/125/CE.
Ce produit ne doit pas être éliminé à la fin de sa vie via les déchets
ménagers normaux mais il doit être remis à un point de collecte pour
le recyclage des appareils électriques et électroniques.
Les matériaux sont recyclables conformément à leur caractérisation.
Avec la réutilisation, le recyclage des matériaux ou d’autres formes
d’utilisation des vieux appareils, vous apportez une contribution
importante pour la protection de notre environnement.
Demandez à votre administration communale où se trouve le centre de
collecte compétent.
Sous réserve de modifications

19
DEGBFRITESNLDASVFINO
Détartant rapide universel
durgol® universal
durgol® universal libère tous les ustensiles du ménage rapidement et
simplement du tartre. Sa formule est garante d’un détartrage efficace
et doux pour les matériaux, alimentaire et écologique.
durgol® universal est disponible dans le commerce spécialisé de
qualité ou auprès de wmf consumer electric dans une bouteille de
500 ml.

20
Prima dell’utilizzo
Congratulazioni per aver acquistato questa macchina da caffè.
La macchina da caffè può essere utilizzata solo per lo scopo previsto
dal manuale di istruzioni. Pertanto prima della messa in funzione
leggere con attenzione il manuale di istruzioni che fornisce indicazi-
oni per l’uso, la pulizia e la manutenzione della macchina. In caso di
mancata osservanza delle stesse decliniamo qualsiasi responsabilità
per eventuali danni. Conservare con cura il manuale di istruzioni e
consegnarlo insieme alla macchina all’utilizzatore successivo. Attenersi
anche alle condizioni di garanzia riportate alla fine del manuale di
istruzioni.
L’apparecchio è indicato per l’uso domestico e per ambiti simili di
impiego, come ad esempio:
nelle cucine per dipendenti di negozi, uffici e di altri esercizi⋅professionali;
nelle tenute agricole;⋅ per i clienti di hotel, motel e di altre strutture abitative;⋅ nelle pensioni bed & breakfast.⋅
L’apparecchio non è adatto per l’uso puramente professionale.
Durante l‘uso osservare le avvertenze di sicurezza.
La garanzia non copre la rottura della caraffa in vetro.
Dati tecnici
Tensione nominale: 230 V~ 50 Hz
Assorbimento di potenza: 900 W
Classe di protezione: I
Avvertenze di sicurezza
Collegare l‘apparecchio solamente ad una presa Schuko corretta-▪ mente installata. Il cavo di alimentazione e la spina devono essere
asciutti.
Non tirare mai né far rimanere incastrato il filo di collegamento▪ lungo spigoli taglienti, non lasciarlo pendere e proteggerlo dal
calore e dall‘olio.
Utilizzare un cavo di prolunga solamente se questo è in perfette▪ condizioni.
Non estrarre la spina dalla presa con le mani bagnate, oppure▪ tirandola dal filo.
Non prendere l’apparecchio per il cavo di alimentazione.▪ Non collocare la macchina da caffè su superfici calde, ad esempio▪ piastre di cottura o simili, oppure in prossimità di fiamme libere, in
quanto l’involucro potrebbe fondersi.
Non appoggiare l’apparecchio su superfici sensibili all‘acqua. Gli▪ schizzi d’acqua potrebbero danneggiarlo.
Non accendere l’apparecchio senz‘acqua. Riempire il serbatoio▪ dell’acqua con acqua fredda non oltre il numero massimo consen-
tito di tazze.
Table of contents
Languages:
Other WMF Coffee Maker manuals

WMF
WMF LINEO User manual

WMF
WMF combiNation S/S4/ESeries 8600 User manual

WMF
WMF 1100S User manual

WMF
WMF 500 User manual

WMF
WMF Presto 1400 Series User manual

WMF
WMF cafemat! User manual

WMF
WMF 2000 S User manual

WMF
WMF 9420 series User manual

WMF
WMF 9000F Instructions for use

WMF
WMF PERFECTION 800L Series User manual

WMF
WMF KITCHENminis 0412270011 User manual

WMF
WMF AromaOne User manual

WMF
WMF BUENO Aroma User manual

WMF
WMF Lono 0412300011 User manual

WMF
WMF Series 1300 prestolino User manual

WMF
WMF Basic User manual

WMF
WMF STELIO User manual

WMF
WMF Series 8400 bistro User manual

WMF
WMF WMF 1000 S User manual

WMF
WMF Series 1300 prestolino User manual