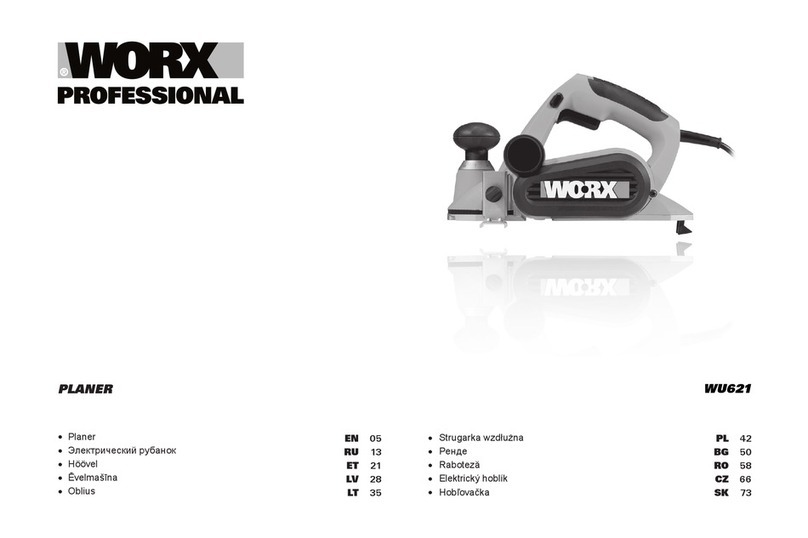
Worx WU621 User manual

WU621
Planer ENG
대패 KO
Pag 06
Pag 13
KO-WU621-M-060704.indd 1 2006-7-19 16:12:04

KO-WU621-M-060704.indd 2 2006-7-19 16:12:04

KO-WU621-M-060704.indd 3 2006-7-19 16:12:04

5
2
1
11
3
1
2
14 18
21
17
5
15
16
18
9
4
A B C
KO-WU621-M-060704.indd 4 2006-7-19 16:12:04

m
m
2
8
m
m
9
21
20
o
450
12
13
1
3
2
8
7
19
10
6
DEF.1
F.2 F.3 G
HIJ
K L
KO-WU621-M-060704.indd 5 2006-7-19 16:12:05

Planer ENG
1. ON/OFF SWITCH
2. LOCK-OFF SWITCH
3. HAND GRIP AREAS
4. CUTTING DEPTH ADJUSTMENT
5. DUST EXTRACTION
6. BASEPLATE STAND (See D)
7. BLADE CLAMP (See F.1)
8. BLADE (See F.2)
9. PLANING DEPTH SCALE
10. SCREW (See F.1)
11. BELT COVER
12. PINION (See H )
13. LARGE PULLEY (See H)
14. BASEPLATE
15. V-GROOVES
16. REBATE DEPTH GAUGE
17. REBATE PARALLEL GUIDE
18. FASTENING BOLT
19. SOCKET SPANNER (See F.1)
20. BRUSH CAPS (See J)
21. LOCKING SCREW(See K)
KO-WU621-M-060704.indd 6 2006-7-19 16:12:07

Planer ENG
TECHNICAL DATA
ACCESSORIES
We recommend that you buy all your accessories from the store where you purchased the tool.
Use good quality accessories marked with a well-known brand name. Refer to the accessory
packaging for further details. Store personnel can also help and advise.
NOISE AND VIBRATION DATA
07
A weighted sound pressure 84dB (A)
A weighted sound power 98dB (A)
Wear ear protection when sound pressure is over 85dB (A)
Typical weighted vibration 2.12m/s2
Rated voltage 220V-240V~ 50Hz/60Hz
Rated power 710W
Rated no-load speed 16000min-1
Double insulation
Planing depth 0-2mm
Rebate capacity 0-9mm
Planing width 82mm
Machine weight 2.8Kg
TCT blade (on machine) 1set
Socket spanner 1pc
Rebate & parallel guide 1pc
Only use reversible twin cutting blades that cannot be reground.
KO-WU621-M-060704.indd 7 2006-7-19 16:12:07

Planer ENG
SAFETY INSTRUCTIONS
WARNING!
Read all instructions. Failure to follow all
instructions listed below may result in electric
shock, fire and/or serious injury. The term“power
tool”in all of the warnings listed below refers
to your mains-operated (corded) power tool or
battery-operated (cordless) power tool.
SAVE THESE INSTRUCTIONS
1. WORK AREA
a) Keep work area clean and well lit.
Cluttered and dark areas invite
accidents.
b) Do not operate power tools in explosive
atmospheres, such as in the presence
of flammable liquids, gases or dust.
Power tools create sparks, which may ignite
the dust or fumes.
c) Keep children and bystanders away
while operating a power tool. Distractions
can cause you to lose control.
2. ELECTRICAL SAFETY
a) Power tool plugs must match the outlet.
Never modify the plug in any way. Do
not use any adapter plugs with earthed
(-grounded) power tools. Unmodified
plugs and matching outlets will reduce risk
of electric shock.
b) Avoid body contact with earthed or
grounded surfaces such as pipes,
radiators, ranges and refrigerators.
There is an increased risk of electric shock if
your body is earthed or grounded.
c) Do not expose power tools to rain or
wet conditions. Water entering a power
tool will increase the risk of electric shock.
d) Do not abuse the cord. Never use the
cord for carrying, pulling or unplugging
the power tool. Keep cord away from
heat, oil, sharp edges or moving parts.
Damaged or entangled cords increase the
risk of electric shock.
e) When operating a power tool outdoors,
use an extension cord suitable for
outdoor use. Use of a cord suitable for
outdoor use reduces the risk of electric
shock.
3. PERSONAL SAFETY
a) Stay alert, watch what you are
doing and use common sense when
operating a power tool. Do not use
a power tool while you are tired or
under the influence of drugs, alcohol or
medication. A moment of inattention while
operating power tools may result in serious
personal injury.
b) Use safety equipment. Always wear
eye protection. Safety equipment such as
dust mask, non-skid safety shoes, hard hat,
or hearing protection used for appropriate
conditions will reduce personal injuries.
c) Avoid accidental starting. Ensure the
switch is in the off-position before
plugging in. Carrying power tools with
your finger on the switch or plugging in
power tools that have the switch on invites
accidents.
d) Remove any adjusting key or wrench
before turning the power tool on. A
wrench or a key left attached to a rotating
part of the power tool may result in personal
injury.
e) Do not overreach. Keep proper
footing and balance at all times. This
enables better control of the power tool in
unexpected situations.
f) Dress properly. Do not wear loose
clothing or jewellery. Keep your hair,
clothing and gloves away from moving
parts. Loose clothes, jewellery or long hair
can be caught in moving parts.
g) If devices are provided for the
connection of dust extraction and
collection facilities, ensure these are
connected and properly used. Use
of these devices can reduce dust-related
hazards.
4. POWER TOOL USE AND CARE
a) Do not force the power tool. Use the
correct power tool for your application.
The correct power tool will do the job
better and safer at the rate for which it was
designed.
b) Do not use the power tool if the switch
does not turn it on and off. Any power
tool that cannot be controlled with the
switch is dangerous and must be repaired.
c) Disconnect the plug from the power
source before making any adjustments,
changing accessories, or storing power
tools. Such preventative safety measures
reduce the risk of starting the power tool
accidentally.
d) Store idle power tools out of the reach
of children and do not allow person
unfamiliar with the power tool or these
instructions to operate the power tool.
0908
KO-WU621-M-060704.indd 8 2006-7-19 16:12:08

Planer ENG
Power tools are dangerous in the hands of
untrained users.
e) Maintain power tools. Check for
misalignment or binding of moving
parts, breakage of parts and any other
condition that may affect the power
tools operation. If damaged, have the
power tool repaired before use. Many
accidents are caused by poorly maintained
power tools.
f) Keep cutting tools sharp and clean.
Properly maintained cutting tools with sharp
cutting edges are less likely to bind and are
easier to control.
g) Use the power tool, accessories and
tool bits etc., in accordance with
these instructions and in the manner
intended for the particular type of
power tool, taking into account the
working conditions and the work to
be performed. Use of the power tool for
operations different from intended could
result in a hazardous situation.
5. SERVICE
a) Have your power tool serviced by
a qualified repairperson using only
genuine replacement parts. This will
ensure that the safety of the power tool is
maintained.
6. SPECIFIC SAFETY RULES
a) Hold tool by insulated gripping
surfaces when performing an operation
where the cutting tool may contact
hidden wiring. Contact with a‘live’wire
will also make exposed metal parts of the
tool‘live’and shock the operator condition.
ADDITIONAL SAFETY
POINTS FOR YOUR PLANER
1. Remove the plug from the socket before
carrying out any adjustment, servicing or
maintenance.
2. When an extension cable is required you
must ensure it has the correct ampere
rating for your power tool and is in a safe
electrical condition. Fully unwind cable drum
extensions to avoid potential overheating.
3. Ensure your mains supply voltage is the
same as indicated on the rating plate.
4. Your tool is double insulated for additional
protection against a possible electrical
insulation failure within the tool.
5. Always check walls, floors and ceilings to
avoid hidden power cables and pipes.
6. After long working period’s external metal
parts and accessories could be hot.
7. Wear eye protection when operating this
tool.
8. The base plate must always be held firmly
against the material being cut to reduce
vibration and blade jumping.
9. If possible, ensure the workpiece is firmly
clamped to prevent movement.
10. Your Planer is a hand held tool; do not clamp
your planer.
11. Before cutting, check the cutting line is free
of nails, screws, etc.
12. Never stop the cutting blade by applying
pressure to the blade.
13. Only withdraw the planer from the cut when
the blade has stopped moving.
14. Only use blades in excellent cutting
condition.
15. Do not put your fingers into the sawdust dust
extraction. Use a wooden stick to unblock
any material.
16. Wait for the cutter to stop before setting the
tool down, an exposed cutter may engage
the surface leading to possible loss of
control and serious injury.
17. Always wear a dust mask. 0908
KO-WU621-M-060704.indd 9 2006-7-19 16:12:08

Planer ENG
SYMBOLS OPERATING INSTRUCTIONS
1. SAFETY ON/OFF SWITCH
The switch is locked off to prevent accidental
starting. Depress the lock off button (2) then
on/off switch (1) and release lock off button (2).
The machine is working now. To switch off just
release the on/off switch (See A)
2. CUTTING DEPTH ADJUSTMENT
Smaller cutting depth of 0-1mm (Max. 2.0mm)
is best for most surface planing or rebating.
Rotate the cutting depth adjustment(4) to
set the required cutting depth on the scale
,Scale graduation = 0.125mm) . The clockwise
rotation increases the planing depth; the
counterclockwise rotation reduces the planing
depth. (See B)
3. ADJUST DUST EXTRACTION AND CHIP
EJECTION
Dust extraction can be adjusted to the right or
left side by manually. Rotating one end of the
dust extraction (5) until it stops (See C). The
arrowhead on the dust extraction indicates the
dust extraction direction.
Note: Due to the size and material of some
wood shavings e.g. wet or hard wood it is
possible for the dust extraction to become
blocked. Remove the plug from the mains
power supply, then using a wooden stick clear
the blocked dust extraction.
4. BASEPLATE STAND
Uplift the rear of the planer, the baseplate
stand (6) can make the machine to be set down
directly and protect the cutting blades from any
damage and the blades from damaging the
surface(See D). When planing, the stand will be
pushed away by the end of the wood. Always
check the stand is free to move on the base
plate (See E).
5. BLADE FITTING AND CHANGING
Warning: Remove power cord from
the socket before carrying out any
adjustments or changing blades.
The blade has two cutting edges, which can
be reversed .When replacing or reversing the
plane blades, the guide groove guarantees
constant height adjustment.
Note: Dull and worn blade cannot be reground
and must be replaced.
Remove the plug from the mains socket. Using
the Socket spanner (19) provided loosen the
1110
Read the manual
Warning
Wear eye protection
Double insulation
Wear ear protection
Wear dust mask
KO-WU621-M-060704.indd 10 2006-7-19 16:12:09

Planer ENG
3 bolts approximately 1/2 rotation counter-
clockwise(See F.1).Holding the blade clamp (7)
in position, using a piece of wood slides the
blade (8) out of the blade clamp (7) to remove
the blade from the blade clamp(See F.2)Note:
there is no need to remove the blade clamp
(7) as this can change the factory settings for
cutting blade height control. Before reinserting
a new or reverse blade, always clean both the
blade and the blade seat if dirty. Slide the blade
into the blade clamp in the correct orientation.
Check the blade is equal with the clamp. When
tightening the screws(10) ensure the correct
tightening sequence(
1
,
2
,
3
). Before starting,
rotate by hand to check the roller is free to
rotate.
Rotate the blade head by a further 180o and
repeat the procedure disassembling the second
plane blade
6. REPLACING A DRIVE BELT
Warning: 1. Remove the plug from
the socket before carrying out any
adjustment, servicing or maintenance.
2. The cutting blades will be turning and
may cause injury.
Loosen screw and remove belt cover (11),
remove worn drive belt from large pulley (13)
and pinion (12) and clean them (See G).lace the
new drive belt on the top of pinion and turning
it manually, press it on the large pulley (13)
(See H).Make sure the drive belt runs exactly
along the length grooves of the pinion and the
pulley.
Note: Place the belt cover (11) back on
top and tighten it with screw.
7. FITTING A DUST BAG
This accessory can be fitted by sliding the dust
bag inlet over the planer dust extraction (5) as
far as possible. The dust bag will reduce the
efficiency of the exhaust system and the bag
must be emptied frequently to maintain the
efficiency. To empty, open the zip on the rear of
the dust bag.
Note: This accessory can be used for
smaller jobs.
8. EXTERNAL DUST EXTRACTION
The dust extraction (5) is best connected to a
suitable external dust extraction machine e.g.
vacuum cleaner.
9. REPLACING CARBON BRUSH
Warning: Always be sure that the
tool is switched off and unplugged
before attempting to perform inspection
or maintenance.The motor brush can be
easily accessed on either the front or
back of the motor housing.
ATTENTION:
When servicing a tool, ALWAYS use only
identical replacement parts.
STEP 1: Locate the plastic motor brush caps on
both the front and back of the motor housing.
STEP 2: Remove the threaded brush cap on
accessible carbon brush (20) with a flathead
screwdriver and turn the screw in a counter-
clockwise rotation to loosen.
STEP 3: Gently remove the old motor brush.
STEP 4: Carefully insert the replacement
brush. Ensure the brush is completely inserted
into the holder and is seated properly and is
free to move inside its holder.
STEP 5: Replace the brush cap with the flat-
head screwdriver, turning clockwise to tighten.
Do not apply excessive force as this may
damage the access brush caps.
WORKING HINTS FOR YOUR
PLANER
Warning: Danger of kickback! Apply
the machine to the work piece only
when switched on.
1. STANDARD SURFACE PLANING
Set the desired cutting depth. Position the
front part of the base plate flat onto the work
surface. Switch the machine on and push your
planer forward and it will start cutting, always
maintain all of the base plate flat on the work
surface to prevent the cutting blade jumping.
Move the plane evenly over the work surface.
For most applications 0-2mm max cutting
depth will produce a good surface finish. It is
best to use small depths of cut and repeat the
planing process.
2. EDGE CHAMFERING
Using the V-groove in the base plate (15) you
can make a chamfer on the work piece edge
(See I). Guide the planer along the edge and
maintain a constant angle and force to produce
a good finish. You can control the angle of the
1110
KO-WU621-M-060704.indd 11 2006-7-19 16:12:10

Planer ENG
1312
chamfer with your hands. Make a test chamfer
on a scrap piece of wood. Ensure your work
piece is clamped and supported near the edge.
3. REBATING
You use the Rebate Depth Gauge (16) and the
Rebate Parallel Guide (17) accessories (supplied
with your tool). Fit these accessories to your
planer. Set the required rebate depth using the
scale and the mark on the planer housing next
to the scale (See J)Loosen locking screw(21)
and adjust the required rebating width(max 82
mm). (See K)Tighten locking screw (21) Adjust
the desired rebating depth with the rebating
depth gauge (16) accordingly (max 9mm) (See
L).Plane as often as necessary to achieve the
desired rebating depth. Make sure the plane is
guided with a lateral supporting pressure.
MAINTENANCE
Warning: Remove the plug from
the socket before carrying out any
adjustment, servicing or maintenance.
Always keep the machine and the motor
ventilation slots clean for safe and proper
working.
If the machine should happen to fail
despite regular maintenance, please call
our customer helpline for advice.
Your power tool requires no additional
lubrication or maintenance. Never use water
or chemical cleanser to clean your power tool.
Wipe clean with a dry cloth. Always store your
power tool in a dry place. Keep the motor
ventilation slots clean. Keep all working controls
free of dust. If you see some sparks flashing in
the ventilation slots, this is normal and will not
damage your power tool.
ENVIRONMENTAL
PROTECTION
Waste electrical products should not be
disposed of with household waste. Please
recycle where facilities exist. Check with
your local authorities or retailer for recycling
advice.
1312
KO-WU621-M-060704.indd 12 2006-7-19 16:12:10

1312
대패 KO
1312
1. ON/OFF 스위치
2. 잠금 OFF 스위치
3. 손잡이 부분
4. 절단 깊이 조정
5. 먼지 추출
6. 베이스 플레이트 스탠드 (D 참조)
7. 톱날 클램프 (F.1 참조)
8. 톱날 (F.2 참조)
9. 평면 가공 깊이 스케일
10. 나사 (F.1 참조)
11. 벨트 커버
12. 피니언 (H 참조)
13. 대형 풀리 (H 참조)
14. 베이스 플레이트
15. V 홈
16. 리베이트 깊이 게이지
17. 리베이트 평행 가이드
18. 체결 볼트
19. 소켓 스패너 (F.1 참조)
20. 브러쉬 캡 (J 참조)
21. 잠금 나사 (K 참조)
KO-WU621-M-060704.indd 13 2006-7-19 16:12:11

1514
대패 KO
1514
기술 데이터
소음 및 진동 데이터
전동 공구를 구입한 곳에서 모든 액세서리를 사는 것이 좋다. 유명한 브랜드 이름이 표시된 품질 좋
은 액세서리를 사용한다. 자세한 내용은 액세서리 포장에 표시된 내용을 참조한다. 공구 매장 점원
이 조언을 해줄 수도 있다.
액세서리
정격 전압: 220V-240V~50Hz/60Hz
정격 전력: 710W
정격 무부하 속도: 16000min-1
이중 절연:
평면 가공 깊이: 0-2mm
리베이트 범위: 0-9mm
평면 가공 폭: 82mm
중량: 2.8Kg
가중 음압 84dB(A)
가중 음향 출력 98dB(A)
음압이 85dB(A) 이상일 때는 귀마개 착용
일반적인 가중 진동 2.12m/s2
TCT 톱날(기계 측) 1세트
소켓 스패너 1세트
리베이트 및 평행 가이드 1세트
마모된 경우 다시 쓸 수 없고 뒤집어 쓸 수 있는 트윈 절단 톱날만 사용한다.
KO-WU621-M-060704.indd 14 2006-7-19 16:12:11

1514
1514
대패 KO
안전 지침
경고! 모든 지침을 읽고 이해하도록 한다.
아래의 모든 지침을 준수하지 않은 경우 감
전, 화재 또는 심각한 부상을 초래할 수 있다. 아
래의 모든 경고에서 “전동 공구”라는 용어는 전
원 작동식(전원 코드 연결) 전동 공구 또는 배터
리 작동식(코드 없음) 전동 공구를 지칭한다.
지침서 보관
1. 작업 구역.
a) 작업 구역을 깨끗하게 관리하고 조명이 잘
들어오게 한다. 작업 구역이 어지럽고 어두우
면 사고를 유발하게 된다.
b) 인화성 액체, 가스 또는 먼지가 있는 곳과
같이 폭발 위험이 있는 곳에서는 전동 공구
를 조작하지 않는다. 전동 공구가 스파크를
일으켜 공기 중의 먼지나 인화성 기체를 발화
할 수 있기 때문이다.
c). 전동 공구를 조작하는 중에는 어린이와 방
문객이 근처에 오지 못하도록 한다. 타인으로
인해 산만해지면 통제력을 잃을 수 있다.
2. 전기 안전.
a) 전동 공구 플러그는 반드시 콘센트에 꽂아
야 한다. 플러그를 어떤 식으로든 절대 개조
하면 안 된다. 접지된 전동 공구와 함께 어댑
터 플러그를 사용하면 안 된다. 플러그를 개
조하지 않고 콘센트에 잘 꽂아서 쓰면 감전 위
험이 줄어든다.
b) 파이프, 라디에이터, 레인지 및 냉장고와 같
이 접지된 표면과의 신체 접촉을 피한다. 신
체가 접지되면 감전 위험이 높아진다.
c) 전동 공구를 빗물이나 습한 환경에 노출시키
지 않는다. 전동 공구에 물이 들어가면 감전
위험이 높아진다.
d) 코드를 함부로 다루지 않는다. 절대로 전동
공구를 옮기거나 당기거나 플러그를 뽑는 데
코드를 사용하면 안 된다. 코드는 열, 오일,
날카로운 모서리 또는 움직이는 기계 부품에
서 멀리 떨어뜨려 놓는다. 코드가 손상되거나
얽히면 감전 위험이 높아진다.
e) 전동 공구를 실외에서 조작할 때는 실외용
으로 적합한 연장 코드를 사용한다. 실외용
으로 적합한 코드를 사용하면 감전 위험이 줄
어든다.
3. 개인 안전.
a) 전동 공구를 조작할 때는 항상 방심하지 않
고 자신이 하는 작업에 집중하며 상식적으로
행동해야 한다. 피곤한 상태에서나 마약, 알
코올 또는 약물의 영향을 받는 상태에서 전동
공구를 사용하면 안 된다. 전동 공구를 조작
하는 중에 부주의한 순간에 심각한 인명 부상
을 초래할 수 있다.
b) 안전 장비를 사용한다. 항상 보안경을 착용
한다. 상황에 따라 적절히 방진 마스크, 미
끄럼 방지 안전화, 안전모 또는 귀마개와 같
은 안전 장비를 착용하면 인명 부상 위험이
줄어든다.
c) 우발적으로 전동 공구를 시동하지 않도록 한
다. 플러그를 연결하기 전 반드시 스위치가 꺼
진 상태인지 확인한다. 스위치에 손가락을 올
려둔 채 전동 공구를 들고 움직이거나 스위치
가 켜진 상태에서 전동 공구에 플러그를 연결
하면 사고가 발생할 수 있다.
d) 모든 조정 키나 렌치를 제거한 후 전동 공구
의 전원을 켠다. 전동 공구의 회전 부품에 부
착된 상태로 남겨진 렌치나 키로 인해 인명 부
상이 발생할 소지가 있다.
e) 무리하게 손발을 뻗지 않도록 한다. 발을 안
전하게 디디고 항상 균형을 유지한다. 이렇
게 하면 예상치 못한 상황에서도 전동 공구를
보다 잘 제어할 수 있다.
f) 알맞은 의복을 착용한다. 헐렁한 옷이나 보
석을 착용하지 않는다. 머리카락, 의복 및 장
갑이 움직이는 부품에 가까이 가지 않도록 한
다. 헐렁한 옷, 보석 또는 긴 머리카락이 움직
이는 부품에 낄 수 있기 때문이다.
g). 먼지 추출 및 집진 설비에 연결하기 위한 장
치가 제공되는 경우에는 이들이 제대로 연결
되어 있고 올바로 사용되는지 확인한다. 이
런 장치를 사용하면 먼지와 관련된 위험을 줄
일 수 있다.
4. 전동 공구 사용법과 주의 사항.
a) 전동 공구에 무리한 힘을 가하지 않는다. 해
당 작업에 알맞은 전동 공구를 사용한다. 알맞
은 전동 공구를 사용하면 설계 목적에 맞게 작
업을 보다 수월하고 안전하게 할 수 있다.
b) 스위치가 작동하지 않는 경우에는 전동 공
구를 사용하지 않는다. 스위치로 제어할 수
없는 전동 공구는 위험하므로 반드시 수리해
야 한다.
c) 조정 작업을 하거나 액세서리를 바꾸거나 전
동 공구를 보관할 때는 우선 전원 콘센트에
서 플러그를 빼야 한다. 이런 예방 안전 조치
를 취하면 전동 공구가 우발적으로 작동되기
시작할 위험이 줄어든다.
d) 사용하지 않는 전동 공구는 어린이의 손이
닿지 않는 곳에 보관하고 전동 공구 또는 여
KO-WU621-M-060704.indd 15 2006-7-19 16:12:12

1716
대패 KO
1716
기서 설명하는 지침에 숙달되지 않은 사람
이 전동 공구를 조작하는 일이 없도록 한다.
전동 공구는 훈련되지 않은 사용자가 사용하
면 위험하다.
e) 전동 공구를 잘 유지 관리한다. 움직이는 부
품의 부정확한 정렬 또는 잠김 상태, 부품 파
손 여부 그리고 전동 공구의 작동에 영향을
미칠 수 있는 기타 조건이 성립되는지 점검한
다. 전동 공구가 손상된 경우에는 수리한 후
에 사용한다. 많은 사고가 전동 공구를 잘못
관리하여 발생된다.
f) 절단 공구를 날카롭고 깨끗한 상태로 유지
한다. 절단 날을 날카롭게 하여 잘 관리한 절
단 공구를 사용하면 끼임의 염려가 덜하고 제
어하기 쉽다.
g) 본 지침과 특정 유형의 전동 공구에 대한
설명에 따라 작업 조건과 수행할 작업을 고
려하여 전동 공구, 액세서리, 공구 비트 등
을 사용한다. 설계 의도와 다른 작동을 위
해 전동 공구를 사용하면 위험한 상황이 일
어날 수 있다.
5. 정비.
a) 순정 교체 부품만을 사용하는 공인 수리업자
에게 전동 공구 정비를 맡긴다. 이렇게 해야
전동 공구를 안전하게 관리할 수 있다.
6. 구체적인 안전 규칙
a) 절단 공구가 숨겨진 배선에 닿을 수 있는 곳
에서 작업을 할 때는 공구의 절연 부분을 잡
고 작업한다. 전기가 흐르는 전선에 닿으면 공
구의 노출된 금속 부분에도 전기가 흘러 작업
자가 감전된다.
대패 대한 추가적인
전 요점
1. 소켓에서 플러그를 분리한 후에 조정, 정비 또
는 유지보수 작업을 수행한다.
2. 연장 케이블이 필요한 경우에는 정격 전류가
사용하려는 전동 공구에 알맞은지 그리고 전기
적으로 안전한 상태에 있는지 확인해야 한다.
케이블 드럼 연장선을 완전히 풀어 발생 가능
한 과열 문제를 피한다.
3. 주 전원 전압이 공구의 정격 플레이트에 표시
된 전압과 같은지 확인한다.
4. 공구 내에서 발생 가능한 전기 절연 문제를 방
지하기 위한 추가적인 보호 대책으로 공구는
이중 절연되어 있다.
5. 숨겨진 전원 케이블과 파이프를 피하도록 항상
벽, 바닥 및 천정을 점검한다.
6. 장시간 작업 후에는 외부에 노출된 금속 부품
과 액세서리가 뜨거울 수 있다.
7. 이 공구를 조작할 때는 보안경을 착용한다.
8. 항상 베이스 플레이트를 절단할 재료에 대고
단단히 고정시킴으로써 진동과 톱날이 튀는 현
상을 줄여야 한다.
9. 가능하면 가공물이 클램프로 단단히 죄어져
움직이지 않는지 확인한다.
10. 플레이너는 손에 들고 작업하는 공구이므로
플레이너를 클램프에 고정시키지 않는다.
11. 절단하기 전 절단 선에 못, 나사 등이 없는지
점검한다.
12. 절대로 톱날에 압력을 가하여 절단 톱날을 멈
추면 안 된다.
13. 톱날이 동작을 멈추었을 때만 절단 공구에서
플레이너를 빼낸다.
14. 절단 상태가 우수한 톱날만 사용한다.
15. 톱질로 발생하는 먼지를 추출하는 장치에 손가
락을 넣으면 안 된다. 나무 막대를 사용하여
재료에 방해가 되는 물질을 제거한다.
16. 절단기가 멈추기를 기다린 후 공구를 다운으
로 설정해야 한다. 그렇지 않으면 노출된 절단
기 부분이 표면과 맞물려 통제력을 잃고 심각
한 부상으로 이어질 수 있다.
17. 항상 방진 마스크를 착용한다.
KO-WU621-M-060704.indd 16 2006-7-19 16:12:13

1716
1716
대패 KO
기호 작동 지침
1. 안전 ON/OFF 스위치
우발적으로 시동되는 것을 막기 위해 스위치가
OFF 위치에 잠긴다. 잠금 OFF 버튼(2)을 누른
다음 ON/OFF 스위치(1)를 누르고 잠금 OFF 버
튼(2)을 놓는다. 그러면 기계가 작동한다. 스위
치를 끄려면 ON/OFF 스위치를 놓기만 하면 된다
(A 참조).
2. 절단 깊이 조정
0-1mm(최대 2.0mm)의 작은 절단 깊이가 대부분의
평면 가공 또는 리베이팅에 가장 적합하다. 절단
깊이 조정기(4)를 돌려 스케일에서 필요한 절단
깊이를 설정한다(스케일 눈금 = 0.125mm). 시계
방향으로 돌리면 평면 가공 깊이가 깊어지고 시
계 반대 방향으로 돌리면 평면 가공 깊이가 얕
아진다. (B 참조)
3. 먼지 추출 및 칩 배출 장치 조정
먼지 배출 장치를 수동으로 좌우로 조정할 수 있
다. 먼지 배출 장치(5)의 한쪽 끝이 멈출 때까지
돌린다(C 참조). 먼지 추출기의 화살표는 먼지 추
출 방향을 가리킨다.
참고: 일부 목재 절단 크기와 재료(예:
젖은 목재 또는 단단한 목재) 때문에 먼
지 추출기가 막힐 가능성이 있다. 주 전원 장치
에서 플러그를 분리한 다음 나무 막대를 이용해
막힌 먼지 배출구를 청소한다.
4. 베이스 플레이트 스탠드
플레이너 뒤쪽을 들어올리면 베이스 플레이트 스
탠드(6)가 직접 기계를 다운 상태로 설정하여 절
단 톱날 손상을 방지하고 톱날이 표면을 손상시키
는 것을 방지할 수 있다(D 참조). 평면 가공 시
스탠드는 목재 끝에서 바깥으로 밀리게 된다. 항
상 스탠드가 베이스 플레이트에서 자유롭게 움직
이는지 점검한다(E 참조).
5. 톱날 장착 및 교체
경고: 소켓에서 전원 코드를 분리한 후
에 조정 작업이나 톱날 교체 작업을 수
행한다.
톱날에는 절단 모서리가 두 개 있으며 뒤집을 수
있다. 평면 톱날을 교체하거나 뒤집을 때는 가이
드 홈이 있어 일정한 높이 조정이 보장된다.
참고: 무디거나 마모된 톱날을 다시 쓸 수는 없
으며 반드시 교체해야 한다.
주 전원 소켓에서 플러그를 분리한다. 함께 제
공되는 소켓 스패너(19)를 사용하여 3개의 볼트
를 시계 반대 방향으로 약 1/2회전하여 푼다(F.1
설명서를 읽을 것
경고
보안경 착용
이중 절연
귀마개 착용
방진 마스크 착용
KO-WU621-M-060704.indd 17 2006-7-19 16:12:13

1918
대패 KO
1918
참조). 톱날 클램프(7)를 제자리에 고정하고 목
재 조각을 사용하여 톱날(8)을 톱날 클램프(7)
밖으로 밀어 톱날 클램프에서 톱날을 분리한다
(F.2 참조).
참고: 톱날 클램프(7)를 분리하면 절단
톱날 높이 제어를 위해 공장에서 설정한
값이 바뀔 수 있으므로 톱날 클램프를 분리할
필요가 없다. 새 톱날이나 뒤집은 톱날을 다시
삽입하기 전에는 항상 톱날과 톱날 시트가 더러
운지 보고 더러우면 청소한다. 톱날을 올바른 방
향으로 톱날 클램프 안으로 밀어넣는다. 톱날이
클램프와 수평을 이루고 있는지 점검한다. 나사
(10)를 죌 때는 정확한 체결 순서(
1
,
2
,
3
)에 따
라 죈다. 작동을 시작하기 전 손으로 돌려서 롤
러가 자유롭게 회전하는지 점검한다.
톱날 헤드를 180o 더 돌리고 두 번째 평면 톱날을
분해하는 절차를 반복한다.
6. 구동 벨트 교체
경고: 1. 소켓에서 플러그를 분리한 후에
조정, 정비 또는 유지보수 작업을 수행한
다.
2. 절단 톱날이 회전하여
부상을 초래할 수 있다.
나사를 풀어 벨트 커버(11)를 분리하고 대형 풀리
(13) 및 피니언(12)에서 마모된 구동 벨트를 분리
하여 청소한다(G 참조). 새 구동 벨트를 피니언
위에 놓고 수동으로 돌리면서 대형 풀리(13)에 대
고 누른다(H 참조). 구동 벨트가 피니언과 풀리의
깊이 홈을 따라 정확히 작동하는지 확인한다.
참고: 벨트 커버(11)를 다시 위에 놓고
나사로 죈다.
7. 집진망 장착
이 액세서리는 플레이너 먼지 추출기(5)의 집진
망 입구를 최대한 멀리 밀어 장착할 수 있다. 집
진망에 먼지가 차면 배기 시스템 효율이 떨어지
므로 집진망을 자주 비워주어 효율을 유지해야
한다. 집진망을 비우려면 집진망 뒤에 있는 지
퍼를 연다.
참고: 이 액세서리는 작은 작업에 사용
할 수 있다.
8. 외부 먼지 추출기
먼지 추출기(5)는 적당한 외부 먼지 추출기(예:
진공 청소기)에 연결하는 것이 가장 좋다.
9. 카본 브러쉬 교체
경고: 항상 공구 전원이 꺼져 있고 플러
그가 분리된 것을 확인한 후 검사 또는
유지보수 작업을 수행한다. 모터 하우징 앞이나
뒤에서 모터 브러쉬에 쉽게 접근할 수 있다.
주의:
공구를 정비할 때는 항상 동일한 교체 부품만 사
용해야 한다.
1단계: 모터 하우징 앞쪽이나 뒤쪽에 있는 플라
스틱 모터 브러쉬 캡을 찾는다.
2단계: 일자 드라이버를 사용하여 접근 가능한
카본 브러쉬(20)에 있는 나사형 브러쉬 캡을 분리
하고 나사를 시계 반대 방향으로 돌려서 푼다.
3단계: 교체할 모터 브러쉬를 조심스럽게 분리
한다.
4단계: 교체용 브러쉬를 조심스럽게 삽입한다. 브
러쉬가 홀더에 완전히 삽입되어 올바르게 위치를
잡았는지 그리고 홀더 내에서 자유롭게 움직이는
지 확인한다.
5단계: 브러쉬 캡을 교체하고 일자 드라이버를
시계 방향으로 돌려서 죈다. 힘을 지나치게 주
면 브러쉬 캡이 손상되므로 힘을 너무 많이 주
지 않는다.
대패 작업 요령
경고: 반동 위험! 스위치가 켜져 있을 때만 가
공물에 기계를 갖다 댄다.
1. 기본 평면 가공
원하는 절단 깊이를 설정한다. 작업 표면에 베이
스 플레이트 평탄면의 앞 부분을 놓는다. 기계 스
위치를 켜고 플레이너를 앞으로 밀면 절단이 시작
된다. 항상 작업 표면에 베이스 플레이트 평탄면
을 유지해야 절단 톱날이 튀는 현상을 방지할 수
있다. 작업 표면 위로 플레이너를 고르게 이동한
다. 대부분의 경우 최대 절단 깊이를 0-2mm로 하
면 좋은 표면 마무리를 할 수 있다. 작은 절단
깊이를 사용하고 평면 가공 프로세스를 반복하는
것이 가장 좋다.
2. 모따기
베이스 플레이트(15)에 있는 V 홈을 사용하면 가
공물 모서리에서 모따기 작업을 할 수 있다(I 참
조). 모서리를 따라 플레이너를 움직이고 일정한
각도와 힘을 유지해야 깔끔하게 마무리할 수 있
다. 손으로 모따기 각도를 조정할 수 있다. 목재
스크랩 조각에서 시험적으로 모따기를 해본다. 가
공물이 클램프에 물려 고정되어 있고 모서리 부
근에서 지탱되는지 확인한다.
3. 리베이팅
리베이트 깊이 게이지(16)와 리베이트 평행 가이
드(17) 액세서리(공구와 함께 제공됨)를 사용한
다. 이 액세서리를 플레이너에 장착한다. 스케일
KO-WU621-M-060704.indd 18 2006-7-19 16:12:14

1918
1918
대패 KO
과 스케일 옆에 있는 플레이너 하우징의 표시를
이용해 필요한 리베이트 깊이를 설정한다(J 참조).
잠금 나사(21)를 풀고 필요한 리베이팅 폭(최대
82mm)을 조정한다. (K 참조) 잠금 나사(21)를 죈
다. 리베이팅 깊이 게이지(16)에 맞춰 원하는 리
베이팅 깊이(최대 9mm)를 조정한다(L 참조). 원하
는 리베이팅 깊이만큼 가공하려면 필요에 따라 여
러 번 평면 가공한다. 가로 방향의 지지 압력으
로 플레이너를 움직여야 한다.
유지 보수
경고: 소켓에서 플러그를 분리한 후에 조
정, 정비 또는 유지보수 작업을 수행한
다.
안전하고 올바른 작업을 위해 항상 기계와 모터
통풍 홈을 깨끗하게 관리한다.
정기적인 유지보수 작업에도 불구하고 기계가
고장나는 경우에는 당사의 고객 지원 부서에
문의한다.
이 전동 공구는 추가적으로 윤활 또는 유지보수
작업을 해줄 필요가 없다. 절대로 물이나 화학
클리너를 사용하여 전동 공구를 청소하면 안 된
다. 마른 천으로 닦아 청소한다. 전동 공구는 항
상 건조한 장소에 보관한다. 모터 통풍 홈을 깨
끗한 상태로 유지한다. 조작에 필요한 모든 컨트
롤에 먼지가 쌓이지 않도록 관리한다. 통풍 홈에
약간의 스파크가 발생하는 것이 관찰되더라도 이
는 일반적인 현상으로서 전동 공구에 손상을 주
지는 않는다.
환경 보호
못쓰는 전기 제품을 가정 폐기물로 처리하
면 안 된다. 재활용 시설에서 재활용한다.
재활용에 관해서는 지역 당국이나 판매업자
에게 문의한다.
KO-WU621-M-060704.indd 19 2006-7-19 16:12:15

KO-WU621-M-060704.indd 20 2006-7-19 16:12:15
Other manuals for WU621
2
Table of contents
Other Worx Planer manuals