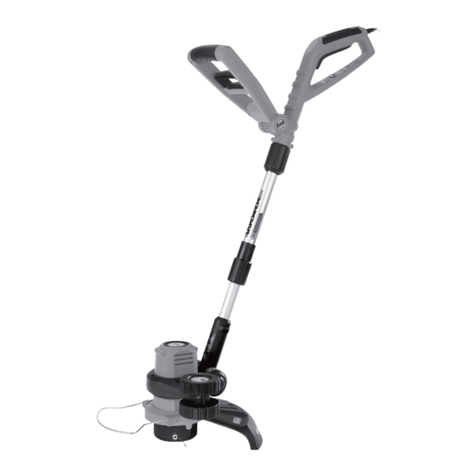
Worx WG117E User manual

WG117E
P06
P14
P23
P32
P40
P48
P56
P64
P72
P80
P88
P96
P104
P113
2-in-1 Grass Trimmer/Edger
2-in-1 Rasentrimmer/Kantenschneider
Coupe bordure/taille-haies 2 en 1
Tosaerba/tagliabordi 2-in-1
Cortacésped/recortadora de bordes 2 en 1
Aparador/corta-relvas 2 em 1
2-in-1 grasrandsnijder
2-i-1 græstrimmer/kantklipper
2-1:ssä-ruohtrimmeri/reunan viimeistelijä
2-i-1 grastrimmer/kantklipper
2-n-1 Grästrimmer/kantklippare
2’si 1 arada Çim Biçme Makinesi /Kenar kesici
EN
D
F
I
ES
PT
NL
DK
FIN
NOR
SV
TR
GR
RU

Original instructions EN
Originalbetriebsanleitung D
Notice originale F
Istruzioni originali I
Manual original ES
Manual original PT
Oorspronkelijke gebruiksaanwijzing NL
Original brugsanvisning DK
Alkuperäiset ohjeet FIN
Original driftsinstruks NOR
Bruksanvisning i original SV

3
2
4
5
71
6
9
8

b
a
14
RIGHT WRONG
10
11
12
13
14
A B C1
C2 D E1
E2 E3 E4
F G H1
H2 I J
L2
K L1
L3 L4

b
a
14
RIGHT WRONG
10
11
12
13
14
A B C1
C2 D E1
E2 E3 E4
F G H1
H2 I J
L2
K L1
L3 L4

2-in-1 Grass Trimmer/Edger EN
6
1. REAR HANDLE
2. POWER CORD
3. LOCKING COLLAR
4. SAFETY GUARD
5. FLOWER GUARD
6. TELESCOPIC SHAFT
7. AUXILIARY HANDLE
8. EDGER WHEEL
9. LINE CUTTER
10. CUTTING HEAD COVER (See Fig. K)
11. CAP RELEASE LATCH (See Fig. K)
12. SPOOL (See Fig. K)
13. CUTTING HEAD (See Fig. K)
14. EYELET (See Fig. K)
15. LINE FEED BUTTON (See Fig. J)
Not all the accessories illustrated or described are included in standard delivery.

2-in-1 Grass Trimmer/Edger EN
7
TECHNICAL DATA
Type WG117E (1-designation of machinery, representative of Grass Trimmer)
Rated Voltage 220-240V~50/60Hz
Power 500W
No Load Speed 9300/min
Cutting Diameter 25cm
Line Diameter 1.65mm
Line Length 2X5m
Machine Weight 2.8kg
NOISE DATA
A weighted sound pressure 83dB(A)
KpA 3dB(A)
A weighted sound power 96dB(A)
Wear ear protection
VIBRATION INFORMATION
Typical weighted vibration 5.7m/s2,
Uncertainty K=1.5m/s2
WARNING:The vibration emission value during actual use of the power tool can differ
from the declared value depending on the ways in which the tool is used dependant on the
following examples and other variations on how the tool is used:
How the tool is used and the materials being cut or drilled.
The tool being in good condition and well maintained
Using the correct accessory for the tool and ensuring it is sharp and in good condition.
The tightness of the grip on the handles and if any anti vibration accessories are used.
And the tool is being used as intended by its design and these instructions.
This tool may cause hand-arm vibration syndrome if its use is not adequately
managed
WARNING:To be accurate, an estimation of exposure level in the actual conditions of use
should also take account of all parts of the operating cycle such as the times when the tool
is switched off and when it is running idle but not actually doing the job.This may significantly
reduce the exposure level over the total working period.
Helping to minimise your vibration exposure risk.
ALWAYS use sharp chisels, drills and blades

2-in-1 Grass Trimmer/Edger EN
8
Maintain this tool in accordance with these instructions and keep well lubricated (where
appropriate)
If the tool is to be used regularly then invest in anti vibration accessories.
Avoid using tools in temperatures of 10ºC or less
Plan your work schedule to spread any high vibration tool use across a number of days.
ACCESSORIES
Safety Guard 1
Auxiliary Handle 1
Edger Wheel 1
Flower Guard 1
We recommend that you purchase your accessories from the same store that sold you the tool.
Use good quality accessories marked with a well-known brand name. Choose the type according
to the work you intend to undertake. Refer to the accessory packaging for further details. Store
personnel can assist you and offer advice.

2-in-1 Grass Trimmer/Edger EN
9
GENERAL POWER TOOL
SAFETY WARNINGS
WARNING! When using the machine
the safety rules must be followed. For
your own safety and bystanders please read
these instructions before operating the
machine. Please keep the instructions safe for
later use.
SAVE THESE INSTRUCTIONS
This appliance is not intended for use by
persons (including children) with reduced
physical, sensory or mental capabilities, or
lack of experience and knowledge, unless they
have been given supervision or instruction
concerning use of the appliance by a person
responsible for their safety.
Children should be supervised to ensure that
they do not play with the appliance.
If the supply cord is damaged, it must be
replaced by the manufacturer, its service
agent or similarly qualified persons in order to
avoid a hazard.
SAFETY WARNINGS FOR
LAWN TRIMMER
a) Wear protective glasses or goggles;
b) Never allow children or people unfamiliar
with the instructions to use the machine;
c) Stop using the machine while people,
especially children, or pets are nearby;
d) Only use the machine in daylight or good
artificial light;
e) Before using the machine and after any
impact, check for signs of wear or damage
and repair as necessary;
f) Never operate the machine with damaged
guards or without the guards in place;
g) Keep hands and feet away from the cutting
means at all times and especially
when switching on the motor;
h) Take care against injury from any device
fitted for trimming the filament line length.
After extending new cutter line always
return the machine to its normal operating
position before switching on;
i) Never fit metal cutting elements;
j) Never use replacement parts or accessories
not provided or recommended by the
manufacturer;
k) Disconnect the machine from the mains
before checking, cleaning or working on the
machine and when it is not in use;
I) Always ensure that ventilation openings
are kept clear of debris;
MAINTENANCE
a) After use, disconnect the machine from the
mains and check for damage;
b) When not in use store the machine out of
the reach of children;
c) Mains powered trimmers should only be
repaired by an authorised repairer;
d) Use only manufacturers recommended
replacement parts and accessories.
- Read the instructions carefully,
- Be familiar with the controls and proper
use of the equipment;
- Before use check the supply and extension
cord for signs of damage or ageing,
- If the cord becomes damaged during
use, disconnect the cord from the supply
immediately. DO
NOTTOUCHTHE CORD BEFORE
DISCONNECTINGTHE SUPPLY,
- Do not use the lawn trimmer (edge
trimmer), if the cords are damaged or
worn,
WARNING:
- Cutting elements continue to rotate after
the motor is switched off,
- Keep extension cords away from cutting
elements;
It is recommended that appliances should be
supplied via a residual current device (RCD)
with a tripping current of not more than 30mA.

2-in-1 Grass Trimmer/Edger EN
10
Read operator’s manual
Double insulation
Wear eye protection
Wear ear protection
Keep bystanders away
Switch off! Remove plug from
mains before adjusting, cleaning or
if cable is entangled or damaged.
Do not expose to moisture.
This product has been marked
with a symbol relating to removing
electric and electronic waste.This
means that this product shall not
be discarded with household waste
but that it shall be returned to a
collection system which conforms
to the European Directive 2002/96/
CE. It will then be recycled or
dismantled in order to reduce the
impact on the environment. Electric
and electronic equipment can be
hazardous for the environment
and for human health since they
contain hazardous substances.
Edging
Trimming
SYMBOLS ASSEMBLY
1. ASSEMBLY OF THE SAFETY GUARD
(See Fig. A)
Remove the screw from the Safety Guard (4)
and fit the guard to the trimmer head; align
the guard so it slides into the slots located
on the trimmer head.Turn the tool over and
secure the Safety Guard onto the trimmer
head with the screw (a) provided.
2. ASSEMBLY OF THE EDGER WHEEL
(See Fig. B)
With the tool right side up, slide the Edger
Wheel (8) assembly onto the metal plate
located on the side of the trimmer head.
Make sure the grooves of the Edger Wheel
assembly lock onto the metal plate; you will
hear it click into place.
To remove the wheel assembly, press the
release button (b) on the wheel and pull the
wheel assembly upward.
3. FITTING THE AUXILIARY HANDLE
(See Fig. C1, C2)
NOTE: THE AUXILIARY HANDLE MUST
BE ATTACHED to the trimmer shaft
before use.
WARNING: To avoid injury, ALWAYS
turn off and disconnect the
trimmer from the power outlet BEFORE
installing parts or cleaning the trimmer
or making any adjustments.
1) Disconnect the trimmer from the power
supply.
2) Unscrew the auxiliary handle’s tightening
knob (counter-clockwise) and remove from
handle.
3) Position auxiliary handle onto handle
bracket assembly located on trimmer’s
top-shaft (See Fig. C1).
4) Position the knob and screw through the
auxiliary handle and bracket, and tighten
knob (turn clockwise). (See Fig. C2) Do not
tighten completely until you have adjusted
the auxiliary handle to your desired
working position.

2-in-1 Grass Trimmer/Edger EN
11
OPERATING INSTRUCTIONS
INTENDED USE
The machine is intended for the cutting of
grass and weeds under bushes, as well as
on slopes and edges that can not be reached
with the lawn mower.
WARNING: The cutting head
continues to rotate after the
trimmer has been switched off. Wait
until it stops before laying the trimmer
down.
• Alwaysweareyeprotection.Neverlean
over the trimmer head. Rocks or debris
can ricochet or be thrown into the eyes
and face and cause blindness or other
serious injury.
• Holdfronthandlewithonehandand
auxiliary handle with the other hand. Keep
unit below waist level. Work only from
your right to your left to ensure debris is
thrown away from you. Without bending
over, keep line near and parallel to the
ground (perpendicular when edging) and
not crowded into material being cut.
• Beforeoperating,makesurebothtrimmer
lines are extended. When trimming, make
sure motor is running at full speed.
• Useonly1.65mmdiametercuttingline.
Other line sizes will not properly feed in
the trimmer head and could cause serious
injury. Never use other materials such as
wires, string or rope, as this may break off
during cutting and cause serious injury.
1. FLOWER GUARD (See Fig. D)
Push the Flower Guard (5) in when edging
and pull it out before trimming, as shown in
Fig D. Before trimming or edging make sure
the Flower Guard is locked firmly in position.
2. ADJUSTMENT OF THE TELESCOPIC
SHAFT (See Fig. E1, E2)
Unscrew the Locking Collar (3) clockwise to
unlock, as indicated. Adjust the length of the
Telescopic Shaft (6) to the most comfortable
length (See Fig. E1).Tighten the Locking
Collar counter-clockwise to lock, as indicated
(See Fig. E2).
3. MAIN HANDLE ROTATION
First, hold down the lower housing with your
foot and pull upward on theTelescopic Shaft
(6).Then rotate theTelescopic Shaft clockwise
90 degrees (See Fig.E3) and release; the Shaft
will be locked in position automatically (See
Fig. E4).
4. ADJUSTING AUXILIARY HANDLE (See
Fig. F)
1) The auxiliary handle’s bracket can be
moved up or down on the shaft and the
auxiliary handle itself can be moved
forward or backward into different locked
positions (See Fig. F).
2) When the handle is in desired position,
turn knob and tighten securely.
5. ELECTRICAL SUPPLY CABLE STRAIN
RELIEF (See Fig. G)
For strain relief of the cable, form a loop at
the end of the extension cable. Locate the
cable through the handle and secure by
placing the loop over the Cable Hook and pull
the cable back.
6. ADJUSTMENT OF TRIMMER HEAD
ANGLE
To adjust the trimmer head angle
downwards, put one foot on the motor
housing, then grip the Rear Auxiliary handles,
and apply adequate force to adjust, as shown
in Fig. H1.
To adjust the trimmer head angle upwards,
put one foot on the Safety Guard (4), then
grip the Rear and Auxiliary handles and apply
adequate force to adjust, as shown in Fig. H2.
7. USING THE ON/OFF TRIGGER
Press and hold the on/off trigger to start the
trimmer. Release to stop
8. TRIMMING
Hold the bottom of the trimmer head just
above the ground and at a slight angle. Allow
only the tip of line to make contact with the
grass. Let the trimmer line work at its own
pace; do not force the trimmer line into the
work area.
9. EDGING (See Fig. I)
First, rotate the Rear Handle (1) 90 degree
clockwise (See “Main Handle Rotation”,
Fig. E3 & E4).

2-in-1 Grass Trimmer/Edger EN
12
Adjust the trimmer head angle to be the
lowest horizontal setting (See “Adjust
the trimmer head angle to the lowest
horizontal setting”, Fig H1).Then position
the Edger Wheel (8) on the ground for edge
mode (See Fig. I).There are two white lines,
located on each end of the Safety Guard (4),
that show the cutting plane of the trimmer
line. Align these marks with the edge of your
lawn.
While edging, allow the tip of the line to make
contact. Do not force the line.The wheel helps
to prevent the unit from touching the ground.
Take extra caution while edging as objects
can be thrown from the trimmer line.
10. AUTOMATIC LINE FEED SYSTEM
When initially switching on the trimmer, a
small length of line is fed out.
A ‘clattering’ noise will be heard for a short
time.This is normal and is caused by the line
being cut by the line cutter. Once the line is
cut to the correct length, the ‘clattering’ noise
will stop and the trimmer motor will run at
full speed.
To feed more line, stop the trimmer
completely, then restart, allowing the motor
to reach full speed. Repeat this until you hear
the ‘clattering’ noise of the line cutting. (Do
not repeat this procedure more than 6 times)
11. MANUALLY FEEDING THE LINE (See
Fig. J)
Press and release the Line Feed Button (15)
(See Fig. J) whilst gently pulling out on one of
the lines until it has reached the line cutter.
When the required amount of line is fed out,
gently pull on the second line (there is no
need to press the Line Feed Button again). If
the line extends past the line cutter, too much
line has been fed out.
If too much line is fed out, remove the spool
cap and click the spool counter-clockwise until
the line is at the desired length.
12. REMOVING THE CAP
Press and hold in the two Cap Release
Latches (11) (See Fig. K).
Pull the Cutting Head Cover (10) away from
the Cutting Head (13). Keep the Cutting Head
Cover and the inside of the Cutting Head
clean from debris. To replace the Cutting
Head Cover, press it firmly onto the spool
holder. Ensure that it is correctly connected
by trying to remove it without depressing the
two Cap Release Latches.
13. CHANGING THE LINE SPOOL:
First take off the Cutting Head Cover (10) and
remove the old Spool (12). Place the new
Spool onto the Cutting Head (13). Feed one
line through the Eyelet (14), and then repeat
for the second line. Reattach the Cutting
Head Cover.
WARNING!YourTrimmer is designed
to only use line with a maximum
diameter of 1.65mm. Only use nylon line.
IMPORTANT - Always wind the line onto the
upper section of the spool first.
14. TO MANUALLY WIND LINE
Take approximately 5m of line and insert
15mm of line into one of the holes in the
upper section of the Spool (12) (See Fig L1).
Wind the line in the direction of the arrows
on the top of the Spool. Repeat process with
separate piece of line on lower section of
Spool (See Fig. L2 & L3).
Leave approximately 100mm of line unwound
and place it into the cleat. Repeat on the
lower section of the Spool.
Care should be taken to ensure that the line
is neatly coiled on the Spool (See Fig. L4).
Failure to do so will impair the efficiency of
the automatic line feed.
Then fit the Spool as described above in
“Changing the Line Spool”.
MAINTENANCE
After use, disconnect the machine from
the electrical outlet and check for damage.
Your trimmer requires no additional
lubrication or maintenance.There are no user
serviceable parts in your trimmer. Electric
powered trimmers should only be repaired
by an authorized repairer. Use only WORX
replacement parts and accessories.
Never use water or chemical cleaners to clean
your trimmer. Wipe clean with a dry cloth.
Always store your trimmer in a dry place
out of the reach of children. Keep the motor
ventilation slots clean. If you see some sparks
flashing in the ventilation slots, this is normal
and will not damage your trimmer.

2-in-1 Grass Trimmer/Edger EN
13
ENVIRONMENTAL
PROTECTION
Waste electrical products must not be
disposed of with household waste.
Please recycle where facilities exist.
Check with your local authorities or
retailer for recycling advice.
PLUG REPLACEMENT (ONLY
FOR REWIRABLE PLUG OF
UK & IRELAND)
If you need to replace the fitted plug then
follow the instructions below.
IMPORTANT
The wires in the mains lead are colored in
accordance with the following code:
BLUE =NEUTRAL
Brown = Live
As the colors of the wires in the mains lead of
this appliance may not correspond with the
colored markings identifying the terminals
in your plug, proceed as follows.The wire
which is colored blue must be connected to
the terminal which is marked with N.The wire
which is colored brown must be connected to
the terminal which is marked with L.
WARNING! Never connect live or neutral
wires to the earth terminal of the plug. Only
fit an approved 13ABS1363/A plug and the
correct rated fuse.
NOTE: If a moulded plug is fitted and has to
be removed take great care in disposing of the
plug and severed cable, it must be destroyed
to prevent engaging into a socket.
DECLARATION OF
CONFORMITY
We,
POSITEC Germany GmbH
Konrad-Adenauer-Ufer 37
50668 Köln
Declare that the product,
Description 2-in-1 Grass Trimmer/Edger
Type WG117E (1-designation of
machinery, representative of Grass
Trimmer)
Function Cutting grass and weeds
Complies with the following Directives,
Machinery Directive 2006/42/EC
Electromagnetic Compatibility Directive
2004/108/EC
RoHS Directive 2011/65/EU
Noise Emission in the Environment by
Equipment for Use Outdoors Directive
2000/14/EC amended by 2005/88/EC
- Conformity Assessment Procedure as per
Annex VI
- Measured Sound Power Level 95.2dB(A)
- Declared Guaranteed Sound Power Level
96dB(A)
The notified body involved
Name: IntertekTesting & Certification Ltd
Address: Davy Avenue, Knowlhill, Milton
Keynes, MK5 8NL
Standards conform to,
EN 60335-1 EN 60335-2-91
EN 62233 EN ISO 3744
EN 55014-1 EN 55014-2
EN 61000-3-2 EN 61000-3-3
The person authorized to compile the technical
file,
Name Russell Nicholson
Address Positec Power Tools (Europe)
Ltd, PO Box 152, Leeds, LS10 9DS, UK
2012/11/28
LeoYue
POSITEC Quality Manager
Connect
Blue to N
(neutral)
Outer sleeve
firmly clamped
Cable grip
Brown L (live)
13 Amp fuse approved
to BS1362

2-in-1 Rasentrimmer/Kantenschneider D
1514
1514
1. GRIFF HINTEN
2. STROMKABEL
3. SPANNRING
4. SICHERHEITSSCHUTZ
5. ABSTANDSSCHUTZ
6. TELESKOPSCHAFT
7. ZUSATZHANDGRIFF
8. KANTENRAD
9. SCHNEIDFADEN
10. SCHNEIDKOPFABDECKUNG (Siehe Abb. K )
11. KAPPENENTRIEGELUNG (Siehe Abb. K)
12. SPULE (Siehe Abb. K)
13. SCHNEIDKOPF (Siehe Abb. K)
14. ÖSE (Siehe Abb. K)
15. FADENZUFUHRKNOPF (Siehe Abb. J )
Abgebildetes oder beschriebenes Zubehör gehört teilweise nicht zum Lieferumfang.

1514
2-in-1 Rasentrimmer/Kantenschneider D
1514
TECHNISCHE DATEN
Typ WG117E (1- Bezeichnung der Maschine, Repräsentant der
Rasentrimmer)
Nennspannung 220-240V~50/60Hz
Nennaufnahme 500W
Leerlaufnenndrehzahl 9300/min
Schneidradius 25cm
Fadendurchmesser 1.65mm
Fadenlänge 2X5m
Gewicht 2.8kg
INFORMATIONEN ÜBER LÄRM
Gewichteter Schalldruck 83dB(A)
KpA 3dB(A)
Gewichtete Schallleistung 96dB(A)
Schutzbrille tragen
INFORMATIONEN ÜBER VIBRATIONEN
Typischer gewichteter Vibrationswert 5.7m/s2,
Unsicherheit K=1.5m/s2
WARNUNG: DerVibrationsemissionswert während des tatsächlichen Gebrauchs des
Elektrowerkzeugs kann vom angegebenen Wert abweichen, je nachdem, wie dasWerkzeug
gemäß folgender Beispiele und anderweitiger Verwendungsmöglichkeiten eingesetzt wird:
DasWerkzeug ist in gutem Zustand und gut gepflegt
Verwendung des richtigen Zubehörs für das Werkzeug und Gewährleistung seiner Schärfe und
seines guten Zustands.
Die Festigkeit der Handgriffe und ob Antivibrationszubehör verwendet wird.
Und ob das verwendete Werkzeug dem Design und diesen Anweisungen entsprechend
verwendet wird.
Wird dieses Werkzeug nicht anemessen gehandhabt, kann es ein Hand-Arm-
Vibrationssyndrom erzeugen
WARNUNG: Um genau zu sein, sollte ein Abschätzung des Belastungsgrades aller
Arbeitsabschnitte während tatsächlicherVerwendung berücksichtigt werden, z.B. die Zeiten,
wenn das Werkzeug ausgeschaltet ist, und wenn es sich im Leerlauf befindet und eigentlich nicht
eingesetzt wird. Auf diese Weise kann der Belastungsgrad während der gesamten Arbeitszeit
wesentlich gemindert werden.

2-in-1 Rasentrimmer/Kantenschneider D
1716
1716
Minimieren Sie Ihr Risiko, dem Sie bei Vibrationen ausgesetzt sind.
Pflegen Sie dieses Werkzeug diesen Anweisungen entsprechend und achten Sie auf eine gute
Einfettung (wo erforderlich).
Bei regelmäßiger Verwendung dieses Werkzeugs sollten Sie in Antivibrationszubehör investieren.
Vermeiden Sie den Einsatz von Werkzeugen beiTemperaturen von 10ºC oder darunter.
Machen Sie einen Arbeitsplan, um die Verwendung von hochvibrierenden Werkzeugen auf
mehrereTage zu verteilen.
ZUBEHÖRTEILE
Sicherheitsschutz 1
Zusatzhandgriff 1
Kantenrad 1
Abstandsschutz 1
Wir empfehlen Ihnen, sämtliche Zubehörteile beim selben Fachhändler zu beziehen, bei dem
Sie auch Ihr Elektrowerkzeug gekauft haben. Verwenden Sie nur hochwertige Zubehörteile von
namhaften Herstellern. Die Güteklasse muss entsprechend der Anwendung gewählt werden.
Weitere Informationen finden Sie auf derVerpackung der Zubehörteile. Auch Ihr Fachhändler
berät Sie gerne.

1716
2-in-1 Rasentrimmer/Kantenschneider D
1716
SICHERHEITSHINWEISE
WARNUNG! Beim Arbeiten mit dem
Gerät sind folgende
Sicherheitsvorschriften zu beachten. Zu Ihrer
eigenen und zur Sicherheit anderer lesen Sie
diese Sicherheitshinweise bitte aufmerksam
durch, ehe Sie das Gerät benutzen. Bewahren
Sie diese Anleitung gut auf, damit Sie sie bei
Bedarf schnell zur Hand haben.
BEWAHREN SIE DIESE ANLEITUNG AUF
Der Rasentrimmer ist zum Schneiden von Gras
und ähnlicher weicher Vegetation gedacht -
außerdem zumTrimmen von Rasenkannten
in privaten Gärten, die nicht mit einem
Rasenmäher erreicht werden können.
Das Gerät darf nicht in öffentlichen
Grünanlagen, Parkanlagen,
Sporteinrichtungen, auf Grünstreifen und in
Landwirtschaft und Forstwesen eingesetzt
werden.
Der Rasentrimmer darf nicht zum Schneiden
der folgenden Dinge eingesetzt werden:
- Hecken, Sträucher und Büsche
- Blumen
- Zum Kompostieren
Andernfalls besteht Verletzungsgefahr.
Dieses Gerät ist nicht zur Verwendung durch
Personen (einschließlich Kindern) vorgesehen,
die über reduzierte körperliche Eignung,
Wahrnehmung oder geistige Fähigkeiten,
Mangel an Erfahrung und Wissen verfügen,
sofern diese Personen nicht von einer
verantwortlichen Person beaufsichtigt oder
in derVerwendung des Gerätes unterwiesen
wurden.
Kinder sollten grundsätzlich beaufsichtigt
werden, damit sie nicht mit dem Gerät spielen.
Lassen Sie ein beschädigtes Netzkabel
vom Hersteller, von einem Fachhändler
oder von einer ähnlich qualifizierten Person
austauschen, um eine Gefährdung zu
vermeiden.
SICHERHEITSHINWEISE
FÜR RASENTRIMMER
a) Schutzbrille oder Augenschutz tragen.
b) Niemals Kindern oder nicht mit diesen
Anweisungen vertrauten Personen den
Umgang mit dem Gerät erlauben.
c) Niemals verwenden, während sich
Personen, insbesondere Kinder, oderTiere
in der Nähe aufhalten.
d) Nur beiTageslicht oder gutem künstlichen
Licht arbeiten.
e) Vor der Benutzung immer prüfen, ob
Teile oder Baugruppen beschädigt
oder abgenutzt sind und repariert
werden müssen. Den Rasentrimmer
nicht verwenden, wenn das Netzkabel
beschädigt oder abgenutzt ist.
f) Verwenden Sie das Gerät auf keinen Fall,
wenn eine Schutzvorrichtung beschädigt ist
oder fehlt.
g) Halten Sie Hände und Füße von der
Schneidvorrichtung fern, insbesondere
beim Starten des Motors.
h) Achten Sie darauf, dassVorrichtungen zum
Kürzen des Schneidfadens niemanden
verletzen können. Nach dem Verlängern
des Schneidfadens bringen Sie das Gerät
erst wieder in Betriebsposition, ehe Sie es
anschalten.
i) Niemals Schneidvorrichtungen aus Metall
anbauen.
j) Verwenden Sie ausschließlich vom
Hersteller empfohlene Ersatz- oder
Zubehörteile.
k) Ziehen Sie immer den Netzstecker aus der
Steckdose, wenn Sie das Gerät überprüfen,
reinigen, an ihm arbeiten oder nicht
benutzen.
l) Lüftungsöffnungen regelmäßig
kontrollieren und säubern.
WARTUNG
a) Nach dem Einsatz trennen Sie das Gerät
von der Stromversorgung und überprüfen
es auf Beschädigungen.
b) Lagern Sie das Gerät außerhalb der
Reichweite von Kindern, wenn es nicht
gebraucht wird.
c) NetzbetriebeneTrimmer sollten nur von
autorisierten Fachkräften repariert werden.
d) Verwenden Sie ausschließlich vom
Hersteller empfohlene Ersatzteile und
Zubehörteile. So bereiten Sie das Gerät auf

2-in-1 Rasentrimmer/Kantenschneider D
1918
1918
Bedienungsanleitung lesen
Schutzisolation
Augenschutz tragen
Gehörschutz tragen
Halten Sie einen
Sicherheitsabstand zu
Unbeteiligten ein.
Ausschalten! Vor Einstell- oder
Reinigungsarbeiten am Gerät,
wenn sich das Kabel verfangen
hat oder beschädigt ist, sofort den
Netzstecker aus der Steckdose
ziehen.
Vor Regen und Feuchtigkeit
schützen
Dieses Produkt wurde mit einem
Symbol markiert, das sich auf
Elektro- und Elektronikabfall
bezieht. Das bedeutet, dass
dieses Produkt nicht mit dem
normalen Haushaltsmüll entsorgt
werden soll, sondern einem
Sammelsystem zugeführt werden
soll, das der Europäischen
Richtlinie 2002/96/CE entspricht. Es
wird dann wiederverwertet oder
zerlegt, um die Umweltbelastung
zu reduzieren. Elektro-und
Elektronikgeräte können die
Umwelt und die Gesundheit
schädigen, da sie Schadstoffe
enthalten.
Trimmen
Kantenschneiden
SYMBOLE
den Einsatz oder auf die Wartung vor:
- Die Anweisungen aufmerksam durchlesen.
- Machen Sie sich mit den Bedienelementen
und dem vorschriftsmäßigen Gebrauch des
Trimmers vertraut.
- Kontrollieren Sie das Netzkabel und das
Verlängerungskabel auf Beschädigung oder
Abnutzung.
- Falls das Netzkabel im Gebrauch beschädigt
wird, sofort den Netzstecker aus der
Steckdose ziehen. DAS NETZKABEL NICHT
BERÜHREN EHE ES AUS DER STECKDOSE
GEZOGEN IST.
- Den Rasentrimmer 8Kantentrimmer9 nicht
verwenden, wenn das Netzkabel beschädigt
oder abgenutzt ist.
WARNUNG!
- Die Schneidvorrichtung dreht sich nach dem
Ausschalten des Motors weiter.
- Halten Sie das Netzkabel von der
Schneidvorrichtung fern.
Wir empfehlen, Elektrogeräte über eine
Fehlerstrom-Schutzschaltung mit einem
Auslösestrom von maximal 30mA zu
betreiben.

1918
2-in-1 Rasentrimmer/Kantenschneider D
1918
MONTAGEHINWEISE
1. MONTAGE DER SCHUTZHAUBE (Siehe
Abb. A)
Ziehen Sie die Schraube aus dem
Sicherheitsschutz (4) heraus und passen Sie
den Schutz an denTrimmerkopf an; richten Sie
den Sicherheitsschutz so aus, dass er an den
Schlitzen am Schneidkopf einrastet. Drehen
Sie das Werkzeug um und befestigen Sie
den Sicherheitsschutz mit der mitgelieferten
Schraube (a) amTrimmerkopf,
2. MONTAGE DES KANTENRADS
(Siehe Abb. B)
Kantenrad in die Nuten am Schneidkopf
einsetzen. Versichern Sie sich, dass die Nut
des Rades in der Metallplatte eingeklinkt ist.
Zum Ausbau des Rades auf die Freigabetaste
(b) am Rad drücken und das Rad
herausziehen.
3. ANBRINGEN DES ZUSATZGRIFFES
(Siehe Abb. C1, C2)
HINWEIS: DER ZUSATZGRIFF MUSS vor
Verwendung am Trimmerschaft FIXIERT
WERDEN.
WARNHINWEIS: Zur Vermeidung
von Verletzungen muss der Trimmer
STETS augeschaltet und der Stecker
gezogen werden, BEVOR der Trimmer
gereinigt wird bzw.Teile installiert oder
irgendwelche Einstellungen
vorgenommen werden.
1) Trennen Sie denTrimmer von der
Stromversorgung ab.
2) Lösen Sie den Feststellknopf des
Zusatzgriffs (gegen den Uhrzeigersinn
schrauben) und nehmen Sie ihn vom Griff
ab.
3) Geben Sie den Zusatzgriff auf die
Griffhalterung, die sich am oberen Schaft
desTrimmers befindet (Siehe Abb. C1).
4) Geben Sie den Knopf und die Schraube
durch Zusatzgriff und Halterung und
ziehen Sie den Knopf an (im Uhrzeigersinn
drehen). (Siehe Abb. C2) Ziehen Sie
den Knopf erst dann fest an, wenn
Sie den Zusatzgriff in die gewünschte
Arbeitsposition gebracht haben.
HINWEISE ZUM BETRIEB
BESTIMMUNGSGEMÄSSER GEBRAUCH
Das Gerät ist bestimmt für das Schneiden
von Gras und Unkraut unter Büschen sowie
an Böschungen und Kanten, die mit dem
Rasenmäher nicht erreicht werden können.
WARNUNG: Beim Ausschalten des
Trimmers dreht sich der
Schneidkopf noch weiter. Warten Sie mit
dem Niederlegen, bis er sich nicht mehr
dreht.
• TragenSieimmereinengeeigneten
Augenschutz. Lehnen Sie sich niemals über
denTrimmkopf. Wegfliegender Schmutz
oder Steine können schwereVerletzungen
im Gesicht verursachen oder dazu führen,
dass Sie Ihr Augenlicht verlieren, wenn Sie
das Gerät öffnen.
• DenFrontgriffineinerundden
Zusatzhandgriff in der anderen Hand
halten. Das Gerät maximal auf Hüfthöhe
halten. Arbeiten Sie von rechts nach links,
damit Schmutz und Steinchen nicht in Ihre
Richtung geschleudert werden. Führen
Sie das Gerät, ohne sich nach vorne über
zu beugen, gerade und parallel am Boden
entlang (beim Kantentrimmen senkrecht)
und fahren Sie nicht in das Erdreich hinein.
• StellenSievordemBetriebsicher,dass
beideTrimmerfäden verlängert sind.
Vergewissern Sie sich beimTrimmen , dass
der Motor auf vollenTouren läuft.
• Max.1,65mmSchneidfadendurchmesser
verwenden. Andere Größen werden
nicht einwandfrei zugeführt, was zu
Fehlfunktionen des Schneidkopfes und
schwerenVerletzungen führen kann.
Verwenden Sie niemals Drähte, Seile,
Schnüre usw. als Schneidfaden. Drähte
können z. B. abbrechen und sich in
lebensgefährliche Geschosse verwandeln.
1. ABSTANDSHALTER (Siehe Abb. D)
Drücken Sie den Blumenschutz (5) beim
Kanten hinein und ziehen Sie ihn vor dem
Trimmen wieder heraus, siehe Abb.D.
Vergewissern Sie sich vor demTrimmen und
Kanten, dass der Blumenschutz arretiert ist.

2-in-1 Rasentrimmer/Kantenschneider D
2120
2120
2. EINSTELLUNG DES
TELESKOPSCHAFTES (Siehe Abb. E1, E2)
Den Feststellknopf (4) unten in der
angegebenen Richtung lösen. Den
Teleskopschaft auf eine bequeme Länge
einstellen.(Siehe Abb. E1). Den Feststellknopf
unten wieder festziehen. (Siehe Abb. E2).
3. SCHWENKEN DES HAUPTGRIFFES
Gehäuseunterteil festhalten und den
Schaft nach oben ziehen, dann um 90 im
Uhrzeigersinn drehen (Siehe Abb..E3) und
loslassen. Der Schaft rastet automatisch in
dieser Position ein. (Siehe Abb. E4).
4. EINSTELLUNG DES
ZUSATZHANDGRIFFES (Siehe Abb. F)
1) Die Halterung des Zusatzgriffes kann
am Schaft auf und ab bewegt und der
Zusatzgriff selbst kann vorwärts oder
rückwärts bewegt und in verschiedene
Verriegelungspositionen gebracht werden.
(Siehe Abb. F).
2) Drehen Sie den Knopf und ziehen Sie
ihn fest an, wenn sich der Griff in der
gewünschten Position befindet.
5. NETZKABEL-ZUGENTLASTUNG (Siehe
Abb. G)
Damit nur wenig Zug auf das Kabel ausgeübt
wird, bilden Sie eine Schleife am Ende des
Verlängerungskabels, führen diese durch die
Öffnung am Griff und hängen sie in die
6. EINSTELLUNG DES
TRIMMKOPFWINKELS ZUM SCHAFT
Schaft schräg zum Schneidkopf einstellen;
Motorgehäuse mit dem Fuß fixieren, Handgriff
fassen und nach unten drücken, siehe
Abbildung H1.
Schaft gerade stellen; Schutzblech mit dem
Fuß fixieren, Handgriff fassen und nach oben
ziehen, siehe Abbildung H2.
7. EIN/AUS-SCHALTER
Zum Einschalten des Gerätes drücken Sie auf
den Schalter und halten ihn gedrückt. Zum
Stoppen lassen Sie den Schalter wieder los.
8. TRIMMEN
Halten Sie den unterenTeil desTrimmerkopfes
leicht angeschrägt knapp über den Boden.
Nur die Spitze des Fadens darf das Gras
berühren. Lassen Sie denTrimmerfaden in
seiner eigenen Geschwindigkeit arbeiten;
Beschleunigen Sie den Arbeitsvorgang nicht
mit Gewalt.
9. KANTENSCHNEIDEN (Siehe Abb. I)
Rotieren Sie zuerst den rückwärtigen Griff (1)
90 Grad im Uhrzeigersinn (siehe „Drehen
des Hauptgriffs“, Abb. E3 & E4).
Stellen Sie denWinkel desTrimmerkopfes auf
die niedrigste horizontale Stellung ein (siehe
“Einstellen des Trimmerkopfes auf die
niedrigste horizontale Stellung“, ABB. H1).
Stellen Sie dann das Kantenrad (8) am Boden
in die Position für den Kantenmodus (Siehe
Abb. I). Es gibt zwei weiße Fäden, die sich an
den beiden Enden des Sicherheitsschutzes
(4) befinden, welche die Schneidebene des
Trimmerfadens zeigen. Richten Sie diese
Markierungen an der Rasenkante aus.
Beim Kantenschneiden darf nur die Spitze
des Fadens das Gras berühren. Überlasten
Sie das Gerät nicht. Das Rad schützt das
Gerät und verhindert zugleich, dass es in den
Boden fährt. Seien Sie beim Kantenschneiden
besonders vorsichtig, und nehmen Sie sich vor
wegfliegenden Steinchen und Schmutz in Acht.
10. AUTOMATISCHE FADENZUFUHR
Wenn Sie denTrimmer zum ersten Mal
einschalten, wird der Faden automatisch ein
kleines Stück verlängert.
Sobald der Faden das Kappmesser berührt, ist
ein ‚klapperndes’ Geräusch zu hören. Das ist
normal und eine Folge davon, dass der Faden
vom Fadenschneider geschnitten wird. Sobald
der Faden zur korrekten Länge zugeschnitten
ist, hört das Klappergeräusch auf und der
Motor desTrimmers läuft auf vollenTouren.
Schalten Sie dazu denTrimmer ab, lassen
Sie ihn zum Stillstand kommen und schalten
Sie ihn dann wieder ein, bis er volle
Drehzahl erreicht.Wiederholen Sie diesen
Vorgang, bis Sie das klappernde Geräusch
hören, das entsteht, wenn der Faden gegen
das Kappmesser schlägt (max. 6 Mal
wiederholen).
Table of contents
Languages:
Other Worx Trimmer manuals
Popular Trimmer manuals by other brands

EINHELL
EINHELL GC-ET 2522 Original operating instructions

Black & Decker
Black & Decker LST522 instruction manual

Stiga
Stiga HT 20 Li S Operator's manual

Scheppach
Scheppach TRICORD PBC32TC4 Translation from the original instruction manual

Bosch
Bosch Art 23 Accutrim Original instructions

Draper
Draper 32319 instructions