WUNDER RA User manual

WUNDER SA.BI.SRL EN USER MANUAL
RA(WU150) REV. 02- 10/01/2017 1
www.wunder.it
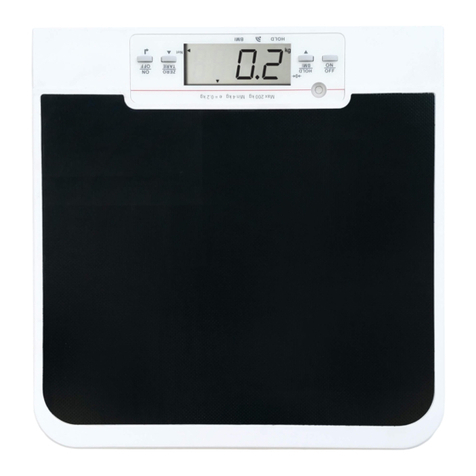
PROFESSIONAL ELECTRONIC MDD SCALE MOD. RA
USER MANUAL
Read this manual carefully before using the instrument
2. GENERAL RULES .........................................................................................................................2
3. SAFETY...........................................................................................................................................3
4. THECHNICAL SPECIFICATION ..................................................................................................6
5. INDICATOR ....................................................................................................................................6
6. INSTALLATION .............................................................................................................................7
7. INSTRUCTION FOR USE..............................................................................................................8
8. PRINTER FUNCTIONS................................................................................................................10
9. SETTING SETUP..........................................................................................................................12
10 .ERROR MESSAGE.....................................................................................................................12
11. MAINTENANCE AND ASSISTANCE ......................................................................................13
12. CONFORMITY ...........................................................................................................................13
13. IDENTIFICATION LABELS......................................................................................................13
14. SCRAPPING AND WASTE DISPOSAL....................................................................................13
15. WARRANTY...............................................................................................................................14
16. ASSEMBLY-USE MECHANICALTELESCOPIC HEIGHT METER (OPTIONAL) ..............15
17. THERMAL PRINTER (OPTIONAL) .........................................................................................18

WUNDER SA.BI.SRL EN USER MANUAL
RA(WU150) REV. 02- 10/01/2017 2
By choosing the WUNDER model RA professional electronic scale, you have purchased a high precision
instrument.
Since over 40 years WUNDER has placed its experience at the service of health. This instrument is
compliant with national standards in hospitals and clinics with medical class I with measurement function
and Is calibrated in conformity with accuracy class III.
The instrument is characterised by the possibility of fixing the electronic terminal to the weighing platform by
means of a column or else installing the terminal autonomously.
The instrument is equipped with a dual LCD electronic terminal with triple reading to simultaneously view
Weight, Height. and BMI
2. GENERAL RULES
Carefully read this manual before using the instrument as it supplies
important indications concerning OPERATING SAFETY AND MAINTENANCE.
The descriptions and illustrations supplied in this manual are not binding.
WUNDER reserves the right to modify its products as deemed convenient in order to approve them without
being committed to update this publication.
Conventions: The following symbols have been used in this manual:
0476 EC TYPE APROVAL FOR MEDICAL USE
METROLOGICAL CERTIFICATION AND APPROVAL
ACCURACY CLASS
ATTENTION!
PLACED BEFORE DETERMINING PROCEDURES. COMPLIANCE FAILURE CAN HARM THE
OPERATOR OR PATIENT OR DAMAGE THE PRODUCT
WASTE DISPOSAL
TYPE B PARTS SUPPLIED
BATTERY POWER
INDICATION OF WEIGHT FUNCTIONALITY
O
INDICATION OF STABLE WEIGHT
INTERFERENCE COULD OCCUR NEAR THE APPLIANCES
DUAL INSULATION (CLASS II)

WUNDER SA.BI.SRL EN USER MANUAL
RA(WU150) REV. 02- 10/01/2017 3
3. SAFETY
ATTENTION!
Operators must read this manual carefully, comply with the instructions it contains and become familiar with
the correct use and maintenance procedures of the instrument.
•Retain this manual for consultation and as a help in staff training.
•Do not overload the instrument beyond its maximum capacity.
•Do not apply loads abruptly.
•Do not press the keys with sharp or pointed objects.
•Do not try to open the instrument.
•Do not remove seals from the instrument.
•Do not short-circuit the battery terminals.
•Use only the power supply provided by Wunder. Before using it, make sure that the local mains voltage
is compatible with the voltage of the adapter shown on the identification plate.
•Regularly check the integrity of the instrument's power cord and make sure it does not come in contact
with hot appliances.
•Make sure that the power cord does not create obstruction hazards.
•Unplug the instrument before cleaning it.
•Do not place the instrument in water or other liquids.
•Perform maintenance and subsequent metric verifications regularly.
3.1 Manufacturer's guide and declaration –electromagnetic immunity
Guide and Statement of manufacturer –Electromagnetic emissions
The electronic scales RA model is scheduled for operation in the electromagnetic environment specified
below.
the customer and the user should ensure that it is used in that environment
Emission test
Conformity
Guide to electromagnetic environment
RF Emission CISPR11
Group 1 Class B
The scales RA model uses RF energy only for its internal
function. Therefore its RF emissions are very low and probably
not cause no interference in electrical equipment.
RF Emission CISPR11
Group 1, Class B
The scales RA is suitable for use in all sanitary and hospital
buildings, connected to the low voltage public power supply
network.
Harmonic emission
Class A
Voltage fluctuations/
flicker emission
Compliant

WUNDER SA.BI.SRL EN USER MANUAL
RA(WU150) REV. 02- 10/01/2017 4
Guide and Statement of manufacturer-Electromagnetic Immunity
The electronic scales RA model is scheduled for operation in the electromagnetic environment specified
below.
the customer and the user should ensure that it is used in that environment.
Immunity test
Compliance
Guide to electromagnetic environment
Electrostatic
discharges (ESD)
IEC/EN61000 - 4 -2
6kV in contact
8kV in air
The floors should be made of wood, concrete or ceramic. If
the floors are covered in synthetic material, the relative
humidity should be maximum 30%.
Rapid
transients/burst
IEC/EN61000 - 4 - 4
2kV power supply
The power supply should be of the type used typically in
commercial or hospital environments.
Surge
IEC/EN61000 - 4 - 5
1kV differential
mode
The power supply should be of the type used typically in
commercial or hospital environments.
Voltage dips, short
interruption and
voltage variation
IEC/EN61000 - 4 - 11
<5%UT for 0.5 cycle
40%UT for 05 cycle
70%UT for 25 cycle
<5%UT for 5 sec
The power supply should be of the type used typically in
commercial or hospital environments. Note=UT is the value
of the voltage of the feed.
Power frequency
Magnetic field
IEC/EN61000 - 4 - 8
3A/m
NOTE: UT is the value of the power supply voltage.
CAUTION
The medical device requires particular electromagnetic compatibility precautions and must be installed and
used according to the information provided in the accompanying documents.
Manufacturer's guide and declaration - Electromagnetic emissions
The electronic scales RA model can be used in the electromagnetic environment specified below. The
customer or the user of the seat must ensure that it is used in compliance with the specifications below.
Emissions test
Compliance
Guide to electromagnetic environment
Radiated/
conducted /
emissions
IEC/EN61000-4-6
3Vrms 150kHz to
80MHz(for
appliances that are
not life supporting)
Equipment in RF communications and mobile laptops should ot
be used near any part of the tooth, including cables, except
when they meet the recommended separation distance
calculated by the frequency applied to the transmitter.

WUNDER SA.BI.SRL EN USER MANUAL
RA(WU150) REV. 02- 10/01/2017 5
Radiated/
conducted
/emissions
IEC/EN61000-4-3
3Vrms 150kHz to
80MHz(for
appliances that are
not life equipment)
Recommended separation distance d = 1.2 √ P d = 1.2 √ P from
80 MHz to 800 MHz d = 2.3 √ P from 800 MHz to 2.5 GHz where
the P and maximum rated power output of the transmitter in
Watts (W) according to the manufacturer of the transmitter and
the recommended separation distance in meters (m).
The intensity of the field of a fixed RF transmitters, as
determined by an electromagnetic site, it could be lower than
the level of compliance of each range of frequency b. You can
check interference in proximity of equipment marked with the
following symbol:
With 80 MHz and 800 MHz is applied the higher frequency range. These guidelines may not apply in all
situations. Electromagnetic propagation is affected by absorption and reflection from structures, objects and
people.
a) The intensity of the field for fixed transmitters such as base stations for radiotelephone mobile and
cordless phones) and land radio mobile, amateur radio equipment, radio transmitters in the AM and FM and
TV transmitters cannot be made theoretically and with precision. To establish an electromagnetic
environment due to fixed RF transmitters, it should consider the electromagnetic survey of the site. If the
field strength measured at the place where you use the instrument exceeds the applicable level of
compliance of the above, it should be placed under observation normal operation of the tooth divice. If you
notice abnormal performance, it may take additional measures as a different orientation or position of
instrument.
of frequencies from 150 kHz to 80 MHz should be less than 3 V / m.
Recommended separation distances between portable radio equipment unity.
The scales RA model is expected to operate in an electromagnetic environment in which they control the
noise radiated RF. The customer or the tooth may be of help to prevent electromagnetic interference by
ensuring a minimum distance between mobile communication devices and portable RF (transmitters) and
unity, as recommended below, with respect to the maximum power output of equipment radio.
Output power rating
of the transmitter W
Distance separating the frequency of the transmitter m
150 kHz a 80 MHz d = 1,2
√P
80 MHz a 800 MHz d = 1,2
√P
800 MHz a 2,5 GHz d = 2,3
√P
0,01
0,12
0,12
0,23
0,1
0,38
0,38
0,73
1
1,2
1,2
2,3
10
3,8
3,8
7,3
100
12
12
23

WUNDER SA.BI.SRL EN USER MANUAL
RA(WU150) REV. 02- 10/01/2017 6
For transmitters with maximum rated power output not reported above, the recommended separation
distance d in meters (m) can be calculated using the equation applicable to the frequency of the transmitter,
where P and the maximum rated power output of the transmitter in Watt (W) according to the manufacturer
of the transmitter.
Note: With 80 MHz and 800 MHz is applied the higher frequency range.
These guidelines may not apply in all situations. Electromagnetic propagation is affected by absorption and
reflection from structures, objects and people.
4. THECHNICAL SPECIFICATION
Model
RA200- 300
Capacity
200- 300 kg
Division
50- 100 g
MDD OIML
Class III
Unit weight
kg
Display
Double LCD: 1 LCD 20mm weight with 5 active digits; 2 LCD height and
BMI 12mm
Function Key
ON / ZERO / OFF, HOLD / BMI, TARA, PRINT
Power
Adapter 12 V - 2 A Rechargeable Batteries Pack- (OPTIONAL)
Operation temperature
da 5°C a 35°C
5. INDICATOR
1. Key function
2. Weighing capacity and division
3. Second LCD automatically calculates BMI
4. Main LCD: Weight
5.Power display
1
4
5
2
3

WUNDER SA.BI.SRL EN USER MANUAL
RA(WU150) REV. 02- 10/01/2017 7
Function Keys
Key
Description
On/Off key. Pressed for 3 seconds it switches off the scale.
Indication reset (within ±2% of the capacity)
Lock of displayed weight/determination of the stable weight value.
Determine the body mass index (BMI)
Tare of unwanted weight.
To delete the incorrect entry during the entering of the digits.
To confirm the functions.
Print of data.
0-9
Digits entering keys.
Display Functions
Weight stable: Indicates the weight is stable.
Weight negative: Indicates weight below zero.
Zero: Indicates zero weight.
Flat battery: Indicates the need to recharge or replace the battery.
6. INSTALLATION
ATTENTION!
AFTER HAVING VERIFIED THE INTEGRITY OF THE EQUIPMENT AND OF ALL ITS COMPONENTS, CONNECT THE
INSTRUMENT WITH THE SUPPLIED POWER SUPPLY TO CORRECTLY RECHARGE THE BATTERIES
Position the instrument on a level and stable surface
The instrument must be placed away from heat sources, in an environment without excessive vibrations and
drafts.
Assembly (for column version only)
Weight stable
Weight negative
Zero
Flat battery
kg
Net weight
Weight
HOLD Function

WUNDER SA.BI.SRL EN USER MANUAL
RA(WU150) REV. 02- 10/01/2017 8
Figure A
Assembly is easy: fix scale's column to the weighing platform
(See Figure A)
ATTENTION!
FOLLOW THE INDICATIONS BELOW BEFORE INSERTING THE
COLUMN
Figure B
Figure C
•Overturn the weighing platform resting it onto a level
surface.
•Remove the display connector from inside the column
and connect it to the weighing platform connector,
making it pass through the hole indicated by the red
arrow (see Figure B).
•Fix the column to the weighing platform support using
the 4 supplied screws.
(see Figure C).
•Position the instrument on the floor and adjust the 5
feet to it.
•To use, connect the supplied external power supply to
the current (see battery operation)
7. INSTRUCTION FOR USE
7.1 Instruction for charging and connecting
If
prompt displays on the LCD, please charge the scale with exclusive adaptor.
Locate adaptor plug on the rear side of indicator.
The battery should be recharged at least every 3 months regardless if it is used or not. After a long period
in storage, e.g. over 3 months, the battery should run a full cycle (charge/discharge) to allow it to restore to
full capacity.
Ac Jack connector

WUNDER SA.BI.SRL EN USER MANUAL
RA(WU150) REV. 02- 10/01/2017 9
7.2 DATE AND TIME SETTING
Keep the HOLD key pressed for 3 seconds to access TIME SETTING programming.
Example: to program 25 December 2016, 8:00 a.m.
Year programming: use the number keys to enter the correct value, press HOLD to
access the next step once correctly set.
Date programming: Use the number keys to enter the correct value, press HOLD to
access the next step once correctly set.
Time programming: Use the number keys to enter the correct value, press HOLD
to confirm the entered date and time once correctly set.
Display format: YYYY → MM.DD → HH:MM
7.3 HOLD FUNCTION
The Hold function is used to accurately determine the average weight, also with unstable value (small
movements)
•switch-on the scale using the [ON/OFF] key. The display shows “0.0 kg” and the stable weight and zero
indications, after the self-test.
•Ask the patient to climb onto the weighing platform.
•Press HOLD. The display shows "HOLD" with a flashing triangle and then, after a few seconds, the average
weight value that remains permanently on.
•Press HOLD again to release the weight memorized on the display. The instrument goes back to normal
weighing mode.
•The HOLD function may be activated before or after the patient has climbed onto the platform.
7.1a RECHARGEABLE BATTERIES
ATTENTION!
For proper charging of the battery pack, connect the instrument to a power outlet for at least 8 hour
1. Open the battery cover, and take the battery
out.
2. Disconnect the rechargeable battery pack then
replace it by a new one. Put the battery back
then arrange the connector in place well.

WUNDER SA.BI.SRL EN USER MANUAL
RA(WU150) REV. 02- 10/01/2017 10
7.4 BMI FUNCTION
Press BMI in weighing mode. The secondary display shows the last set height, with
the left digit flashing.
Use the number keypad to enter the height (e.g.: 170 cm)
Confirm with
Press HOLD to lock the value. Climb onto the weighing platform when the display
shows "HOLD" and weigh yourself. The scale shows the weight, height and BMI
index.
Press BMI again to release the memorized weight and go back to normal operation
mode.
7.5 TARE FUNCTION
This function allows displaying two weights. Switch-on the instrument using the key .
When the display indicates and a beep is emitted, position the objects (clothing) constituting
the tare, onto the weighing platform.
With the weight stable and the appearance of the stable symbol (circle), press and the display shows
. Ask the patient to climb onto the platform. The indicated weight represents the tare's net
value. Delete the memorized tare value by climbing down from the instrument and press again.
8. PRINTER FUNCTIONS
Weight can be printed for records using RS232 interface cable. After weighing simply press PRINT key to
print out the results
The format presented below is the standard format of results print-out and cannot be changed.
More informations info@wunder.it or service@wunder.it

WUNDER SA.BI.SRL EN USER MANUAL
RA(WU150) REV. 02- 10/01/2017 11
Set parameters of the scale interface on the connected device. It is
not possible to change the scale parameters.
Baud rate: 9600 bps
Parity check: None
Data length: 8 bits
Stop bit: 1 bit
Handshake: RTS/CTS
Data code: ASCII
Serial RS232
Piedino
Segnale
2
TXD
3
RXD
5
GND
Connecting with PC
•Start Hyper Terminal
•Start Hyper Terminal program from clicking
•Start Menu → Programs → Accessories → Communication → Hyper Terminal.
•New Connection Description
•Give new connection a name then clicks OK.
•Select Your COM Port
•Click Connect to select your COM port. Usually there’s only one option for select. Then click OK.
•Port Settings
•Click Bits per second to set up rate at 9600, Data bits at 8, Parity at None, Stop bits at 1 and Flow
control at Hardware. Then click OK to complete your setting.
•Output Data
•When press the PRINT key to output data from scale to PC or an Optional Printer.
Connector RS232

WUNDER SA.BI.SRL EN USER MANUAL
RA(WU150) REV. 02- 10/01/2017 12
9. SETTING SETUP
Switch ON the scale and long press key for 3 seconds, first “SETUP” and then “A.OFF” will display
successively.
AUTO-OFF TIME SETUP
This enables operator to select the auto turn OFF time of the device.
BUZZER ON/OFF SETUP
This enables operator to select beep sound ON/OFF.
Note: To confirm the settings, please press when displays on the display.
10 .ERROR MESSAGE

WUNDER SA.BI.SRL EN USER MANUAL
RA(WU150) REV. 02- 10/01/2017 13
11. MAINTENANCE AND ASSISTANCE
For better and longer duration of the product it should receive thorough general cleaning periodically.
The instrument must be cleaned with a soft cloth moistened with water or neutral detergent, without using
solvents or abrasive substances. If the instrument remains idle for a long period, remove the batteries from
the terminal.
During shipping, make sure not to subject the instrument to blows or excessive mechanical stress.
In case of repairs or assistance, contact your dealer or an authorised service centre contacting
service2@wunder.it or sales@wunder.it.
12. CONFORMITY
WUNDER MODEL RA CABLE ELECTRONIC SCALE SERIAL N°...............................................................
We hereby certify that this instrument has been inspected and has successfully passed the functional test.
It complies with the following standards and directives:
EN 45501 / EN
60601
-
1
-
2 /
EN
60601
-
1
93/42/
EE
C
–
Med
i
ca
l
Dev
i
ces D
i
rect
i
ve
13. IDENTIFICATION LABELS
14. SCRAPPING AND WASTE DISPOSAL
If set aside for a long period, protect those parts which could be damaged due to dust build-up
Scrapping
When you decide to no longer use this item, we recommend making it unusable. We also recommend
making those parts which could be sources of danger harmless

WUNDER SA.BI.SRL EN USER MANUAL
RA(WU150) REV. 02- 10/01/2017 14
Waste disposal EU 2002/96/EC
This product complies with the EU Directive 2002/96/EC. The symbol of the crossed-out waste bin on the
appliance indicates that the product, needing to be treated separately from household waste, at the end of
its useful life must be completed in a separate collection facility for electric and electronic appliances or
returned to the dealer upon purchase of a new equivalent appliance. The user is responsible for bringing the
appliance to an appropriate collection structure at the end of its life. Appropriate separate collection and
sending the appliance for recycling, treatment and environmentally compatible waste disposal contributes to
avoid possible negative effects on the environment and health and favours the recycling of the materials the
product is made of.
For more detailed information regarding available collection systems, contact your local waste disposal
service or the shop where the product was purchased.
As consumers, you are obliged by law to return used or dead batteries. You may deposit old batteries at
public collection spots in your town or else with any battery dealer who has placed specific collectors for this
purpose. Even when scrapping electric and electronic appliances, they must be removed and deposited in
specific collectors.
NOTE: The following symbols indicate the presence of harmful substances
Pb Pb = batteries containing Lead
Cd Cd = batteries containing
Cadmium
Hg Hg = Batteries containing
Mercury
ATTENTION!
Do not throw electric parts and used batteries away with household waste. Dispose of the batteries by means
of your closest collection centres.
15. WARRANTY
This certificate must be kept until the warranty has expired.
It must be presented together with the invoice, tax receipt or delivery note providing the name of the dealer
and date of purchase whenever a technical intervention is required. Otherwise the user will lose any
warranty rights.
The warranty takes effect from the date of purchase and is valid during the entire period foreseen by the
current catalogue/pricelist.
By warranty we mean the replacement or repair free of charge of parts making up the appliance which, at
the discretion of the manufacturer, are deemed faulty from the origin; Wunder therefore has the faculty of
repairing or replacing the item.
The warranty does not cover:
•shipping faults, damage caused by falls, carelessness or tampering
•damage caused by incapability of using the appliance and of its improper use

WUNDER SA.BI.SRL EN USER MANUAL
RA(WU150) REV. 02- 10/01/2017 15
•damage caused by an insufficient or inadequate electrical system or alterations resulting from
environmental, climatic or other types of conditions
•damage due to incorrect installation of the appliance and repairs carried out by unauthorised personnel
•Interventions at home for convenience controls or presumed defects
•Routine maintenance and that which can be considered normal wear from use
•consumables such as: power supplies, batteries, keyboards, plates, wheels, heads, rolls, load cells faulty due
to blows or overloads
Service can also be refused when the appliance has been changed or transformed in any way.
In case of interventions at one's home, the customer must pay the fixed fee; if, however the appliance is
repaired at an authorised Wunder Service Centre, expenses and relative travel risk are borne by the user.
Wunder will not be held liable for damage of any nature caused directly or indirectly to persons, animals or
objects resulting from failure to comply with all the instructions indicated in this manual or anyway resulting
from improper use.
The Court of Bergamo has jurisdiction in case of any dispute
16. ASSEMBLY-USE MECHANICAL TELESCOPIC HEIGHT METER (OPTIONAL)
ONLY FOR COLUMN SCALE
MEASURING OVER 131 cm
MEASURING UNDER 130 cm
1
Pull up the height
meter rod
1
Press the black button and
measuring height and push
down
2
Position it
horizontally
2
Picture 1-1a: assemble the height rod on black abs support with screw supplied.
Picture 1b: The height rod s ready for use.
1
1a
1b

WUNDER SA.BI.SRL EN USER MANUAL
RA(WU150) REV. 02- 10/01/2017 16
3
Lower the rod up to
the point where the
leverrests head
touches the patient's
head.
The height can be
read at the point 'A'
3
Position it horizontally
4
Lower the rod up to the point
in which the blade rests head
touches the patient's head.
The height can be read at
point 'B'.
16.2. ASSEMBE ELECTRONIC HEIGHT METER (OPTIONAL)
STAGE 1: INSTALLATION ALKALINE BATTERY
a. Removing battery cover at the
rear of indicator
b. Installing code AAA batteries *
2
c. Reinstalling the battery cover
STAGE 2: CONNECTING CABLE DIGITAL TELESCOPIC HEIGHT METER
Plug power digital telescopic height
meter
Plug power indicator
Indicator connector
Height meter connector

WUNDER SA.BI.SRL EN USER MANUAL
RA(WU150) REV. 02- 10/01/2017 17
The indicator connection is under indicator
The height meter connection is under indicator height meter
STAGE 3: MEASURING HEIGHT
ATTENTION!
THE MEASUREMENT OF THE PATIENT MUST BE GETTING ON THE PLATFORM OF SCALE
17.3 USE DIGITAL TELESCOPIC HEIGHT ROD
Make indicator move to the end of measuring rod. Then switch ON and press reset key once to calibrate.
Steps to accurate measurement
1. Push the head stop far enough up the rod so that the person to be measured can stand underneath it
comfortably.
2. Ask the person to be measured to stand with his or her back to the rod.
3. Sliding the head stop down until it touches the head.
4. Read the height measured on the display unit.

WUNDER SA.BI.SRL EN USER MANUAL
RA(WU150) REV. 02- 10/01/2017 18
17. THERMAL PRINTER (OPTIONAL)
Read this manual carefully before using the instrument
17.1. HOW TO USE YOUR PRINTER
Connect the AC Adaptor and RS232 interface cable. Press the I/O button to power on the printer.
PlatenRollen
Tear Bar
Printer Button
Status Indicator
Roll Holder
RS 232 connect
Power
(Adattatore)
ON/OFF

WUNDER SA.BI.SRL EN USER MANUAL
RA(WU150) REV. 02- 10/01/2017 19
The PRINTER can be connected via the RS232 port and cable with the RA200 .
Press the PRINT key. Print double language
CHANGING THE PAPER ROLL
The paper print roll on a printer is changed as follows:
1. Open the upper cover and position the paper
roll so that it feeds in the right direction.
2. Feed the end of the paper roll through the printer
cover and close the cover. The printer is ready to
print.
17.2. PRINTER SPECIFICATION
ITEM
SPECIFICATION
Printing method
Thermal dot line printing
Number of dots
384 dot/line
Resolution (dots/mm)
8 dot/mm
Printing width (mm)
48 mm
Max. paper thickness (μm)
80μm
Paper
57.5±0.5 mm (W) x ψ30mm max
Paper loading
Easy loading

WUNDER SA.BI.SRL EN USER MANUAL
RA(WU150) REV. 02- 10/01/2017 20
Printing speed (mm/s)
75 mm/s
Dimensions (L x W x H )
120 x 80 x 50mm
Operating temperature (℃)
0℃to 50℃
Operating humidity (%)
20% to 85% (no condensation)
Interface
Conform to RS232
Voltage range (adaptor only)
12V 2A
SHOCK HAZARD WARNING
The printer and power supply should never be operated in a location where either one can get wet.
Personal injury could result.
MEDIA WARNING
Always use high quality approved paper print roll. The approved product can be ordered from your dealer.
RELOADING HINT
If printer runs out of paper roll while printing, switch the power off and reload paper roll. Power on and
print again.
17.3. ERROR MESSAGES
Problem
Solution or Reason
Status Indicator does not light when power switch is
turned to ON (I) position.
Check the power connections from AC outlet to the
printer power supply.
Status indicator illuminated (green light), but the
printer will not print.
Check interface cable connections from the scale to
printer.
Make sure the top cover is closed and locked.
Printer paper jammed.
Reset the paper roll. Please refer to “CHANGING
THE PAPER ROLL”.
Status Indicator is flashing green.
Paper roll is out. Reload a new source of paper roll
so the printer can continue printing. Please refer to
“CHANGING THE PAPER ROLL”.
Table of contents
Other WUNDER Scale manuals

WUNDER
WUNDER ECO User manual

WUNDER
WUNDER C201 Specification sheet

WUNDER
WUNDER AGS-1500 User manual

WUNDER
WUNDER RT 10 User manual

WUNDER
WUNDER BABY02 User manual

WUNDER
WUNDER C201 User manual

WUNDER
WUNDER ASEP-6 User manual

WUNDER
WUNDER RS User manual

WUNDER
WUNDER 960A User manual

WUNDER
WUNDER RS300 User manual