Xtreme X-560 User manual

X-Treme TM Electric Scooters
Model: X-560
Product Handbook
(Photosmayvary)
PLEASE BE SAFE WHEN RIDING
ALWAYS WEAR A HELMET AND OBEY ALL LAWS!
Page1

IMPORTANT
BATTERY MAINTENANCE and
CHARGING INSTRUCTIONS
1. You MUST charge completely prior to initial use. (Follow
charging instructions in your Product Handbook)
2. Charge immediately after each use.
3. Charge before storage. You must charge every 30 days if not
in use.
4. Charge the unit for 6-8 hours or until both lights on charger turn
green.
5. DO NOT allow this unit to deep discharge the battery.
6. For safety purposes, DO NOT charge for over 24 hours.
7. Turn the unit OFF when not in use.
Failure to follow these INSTRUCTIONS will
VOID YOUR WARRANTY!
This PRODUCT IS NOT INTENDED FOR EXTREME or
OFF-ROAD Use! Please take care of your X-560!
DO NOT JUMP or ABUSE THIS PRODUCT!
DO NOT RIDE IN WET/ICY CONDITIONS!
Failure to follow these instructions will
VOID YOUR WARRANTY!
Page2

WARNING
This product does not conform to Federal Motor Vehicle Standards and is not
intended for operation on public streets, roads or highways. Serious injury can
result from the unsafe operations of this product. Operator can minimize these
risks by using certain safety equipment such as: safety helmet, goggles, gloves,
elbow and kneepads and appropriate footwear.
DO NOT operate this product in traffic, on wet, frozen, oily or unpaved surfaces o
r
under the influence of drugs and/or alcohol. Avoid uneven surfaces, potholes,
surface cracks and obstacles.
DO NOT use a water hose to clean this product. See Product Handbook for more
information.
This product is recommended for riders 12 YEARS OF AGE and older.
SAFETY
Persons without excellent vision, balance, coordination, reflex, muscle and
bone strength and good decision-making capabilities should not use this
product.
Minors without adult supervision should not use this product.
Persons unwilling or unable to take responsibility for their own actions should
not use this product.
The user of this product assumes ALL risks associated with its use. To
minimize these RISKS, the user must wear safety helmet, goggles, gloves,
elbow and kneepads and appropriate footwear.
This product is ELECTRIC! DO NOT ride this product in wet conditions,
puddles or rainy weather.
IMPORTANT
PLEASE READ THIS BEFORE USING THIS PRODUCT
READ THIS FIRST!
Page3

SAFETY GUIDE
• The minimum recommended age for riding this scooter is 12 years old.
• To avoid damage to the motor and footplate, do not overload the scooter.
• Never ride with more than one person.
• Inspect your scooter thoroughly before each use for loose or missing parts.
• Avoid unintentional starts by turning the scooter off while not in use.
• To avoid the risk of a short circuit in the electrical parts, do not use your
X-Treme Electric scooter in the rain and never spray or wash off your scooter
with water.
• Do not place the battery near fire or heat.
• To avoid damage to the battery, do not use the charger if it has been damaged
in any way.
• Keep hands, face, feet and hair away from all moving parts.
• Do not touch the motor or wheels while they are rotating.
• Brakes are designed to control speed as well as stop the scooter. Practice
braking for proper slowing down and smooth stops.
• Maintain your X-Treme X-560 as recommended in this Product Handbook.
• Use only quality replacement parts as recommended by the manufacturer.
• Inspect the entire scooter prior to each use. Replace any part that is cracked,
chipped or damaged before use.
*NEVER ALLOW CHILDREN TO OPERATE THE SCOOTER WITHOUT ADULT
SUPERVISION.
*NEVER ATTEMPT TO OPERATE THE SCOOTER WHILE UNDER THE
INFLUENCE OF ALCOHOL.
If a situation arises that is not covered in the manual,
proceed with caution and use good judgment.
Contact your dealer or X-Treme (www.x-tremescooters.com/support/)
if you need further assistance
QUICK REFERENCE
SAFETY GUIDE
Page4

TABLE OF CONTENTS
IMPORTANT INFORMATION…………………………………….…2-3
QUICK REFERENCE………………………………………………….4
TABLE OF CONTENTS……………………………….……………….5
GETTING TO KNOW YOUR X-TREME X-560……………………..6
PACKING CONTENTS……………………………………………..….7
GETTING STARTED………………..………………….…………….7
ASSEMBLY………………………………………………………..7
FUSE INSTALLATION………………………….………………..8
CHARGING. ..……………………………………………………..8
RIDING/BRAKING………………………………………………..9
BRAKING SYSTEM………………………………………………9
ADJUSTING THE BRAKES………….…..………………..………..10
TIRES…………………………….………………………………….…10
MAINTENANCE………………………………………………………11
RECOMMENDED TOOLS……………………………………...11
ADJUSTING THE CHAIN………..………………………….….11
MAINTENANCE SCHEDULE………………………………….12
TROUBLESHOOTING GUIDE……………………………………..12
ADDITIONAL INFORMATION………………….…………………..13
GENERAL INFORMATION/TECH SUPPORT……………………14
Page5

GETTING TO KNOW YOUR X-TREME X-560
(Photo’s may vary)
Page6

PACKAGE CONTENTS
Your X-Treme X-560 comes with the following items in the box. Please locate
all of the following:
1. The X-Treme X-560 Scooter
2. Right & Left Side Fairings
3. 36V Battery Charger
4. Tool Kit & assorted nuts/bolts/washers
5. Seat & Seat Post
6. Trunk with Keys & mounting hardware
7. Trunk Rack & mounting nuts/bolts
8. Spare Fuse(s)
9. Product Handbook
10. Rear Tail Light
11. Footpad Mat
GETTING STARTED
Please read and understand these instructions and the OPERATING
PROCEDURES section, prior to starting or riding your X-560
A
ssembly
1. Carefully remove the X-560 from the box.
2. Slide the handlebars onto the fork. (Fig.
1)
3. Locate the Handlebar Lock Pin, and
insert it into the side of the handlebar,
ensuring it feeds thru the fork bracket.
Secure the lock pin using the attached
bolt. (Fig. 2).
Slide the handlebar clamp up and over the
base of the handlebar. Tighten the clamp
ensuring the front wheel is in prope
r
alignment with the handlebars. (Fig. 3)
A
fter the handlebar is securely attached,
slide the black rubber boot over the
connection.
Fig. 3
Fig. 1
Fig. 2
Page7
1. Attach Throttle and Brake Handle Grips
by Inserting the handle grips into the
handlebar posts.
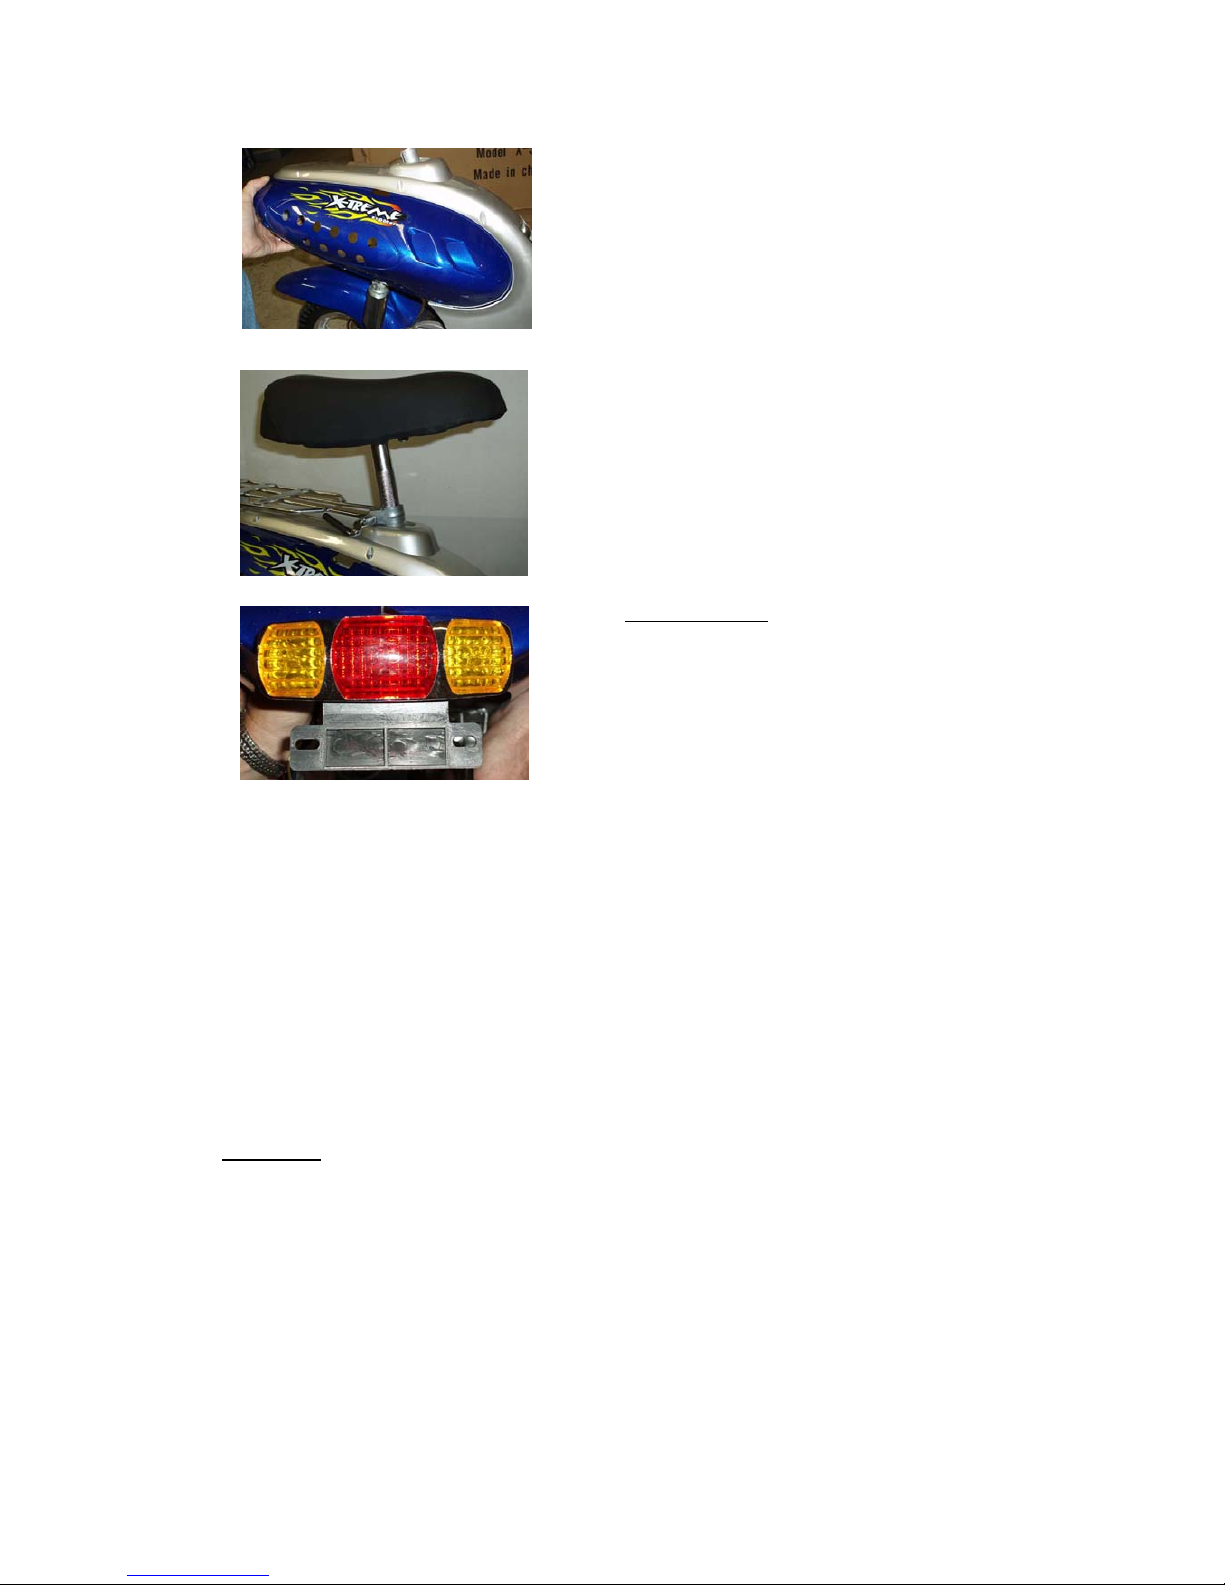
2. Attach Left & Right Side Fairings as shown
in figure 4.
3. Mount trunk/cargo rack
4. Mount the seat post to the bottom of the
seat, then insert seat post into the receive
r
and tighten the clamp
5. Install the rear taillight to the mounting
bracket being sure to attach the plug to
the scooter. (Fig. 6)
6. Install the enclosed 25amp glass fuse into
the fuse holder located on the right side o
f
your scooter.
Fuse Installation
Your scooter comes with a 25amp fuse that is
NOT installed at the factory.
1. Locate the 25amp glass fuse that came
with your scooter.
2. Locate the fuse holder on the right side o
f
the scooter
3. Remove the fuse holder cap and insert the
fuse into the cap first.
Then insert fuse/cap into fuse holder and gently
tighten. DO NOT OVER TIGHTEN THE CAP.
For more detailed assembly instructions go to:
http://www.x-tremescooters.com/electric_scoot
ers/x560/images/adobe/x-560-assembly-manu
al.pdf
Fig. 4
Fig. 5
Fig.6
Charging
Your scooter comes partially charged out of the carton. It is recommended
that you charge the unit for 6-8 hours prior to it’s first use. We also
recommend charging your scooter after each use and prior to storage.
WARNING: Do not allow your scooter to go into deep discharge, as this will
damage the batteries.
Page8

1. Open the charging socket cover located
on the left side of the scooter body.
(Fig. 7)
2. Locate your Battery Charger. (Fig. 8)
Find the charger socket end that has a
three-prong socket and plug it into the
scooter.
3. Next, plug the AC plug into a wall outlet.
When first plugged in, the charger has a
red light and green light that indicate the
charging process has begun. Once both
lights turn green, you may remove the
charger and close the safety cap.
Fig. 7
Fig. 8
Riding
1. Make sure that all of the exposed bolts and screws are tightened.
2. Raise the kickstand to its upright position.
3. Turn the Ignition key to the on position.
4. Gently rotate the THROTTLE GRIP, on the right side of the handlebars.
The X-560 will begin to move on its own power. Your scooter has a
variable speed hand throttle. You can control the speed of your scooter by
the amount of pressure you use when rotating the hand throttle. The more
you rotate, the faster you will go.
Stopping/Braking
To brake, release the THROTTLE GRIP and depress the BRAKE LEVER on
the left side of the handlebar. Depressing the brake will disengage power to
the motor. When the unit feels like it is loosing power or not accelerating to
full speed, the scooter is ready to be re-charged.
BRAKING SYSTEM
The X-560 uses a hub brake system on the front and rear wheel of the scooter
activated by a hand brake lever on the left & right side of the handlebar.
Make sure to release the HAND THROTTLE GRIP when engaging the brakes.
Practice braking on a smooth, dry surface to get used to the feel of the braking
system. Braking distance is affected by wet conditions and loose and uneven
riding surfaces.
Page9
Adjusting the Brakes
The Brakes on the X-560 should come fully adjusted from the factory.
However, it may be necessary to adjust the brakes from time to time.
To adjust brakes:
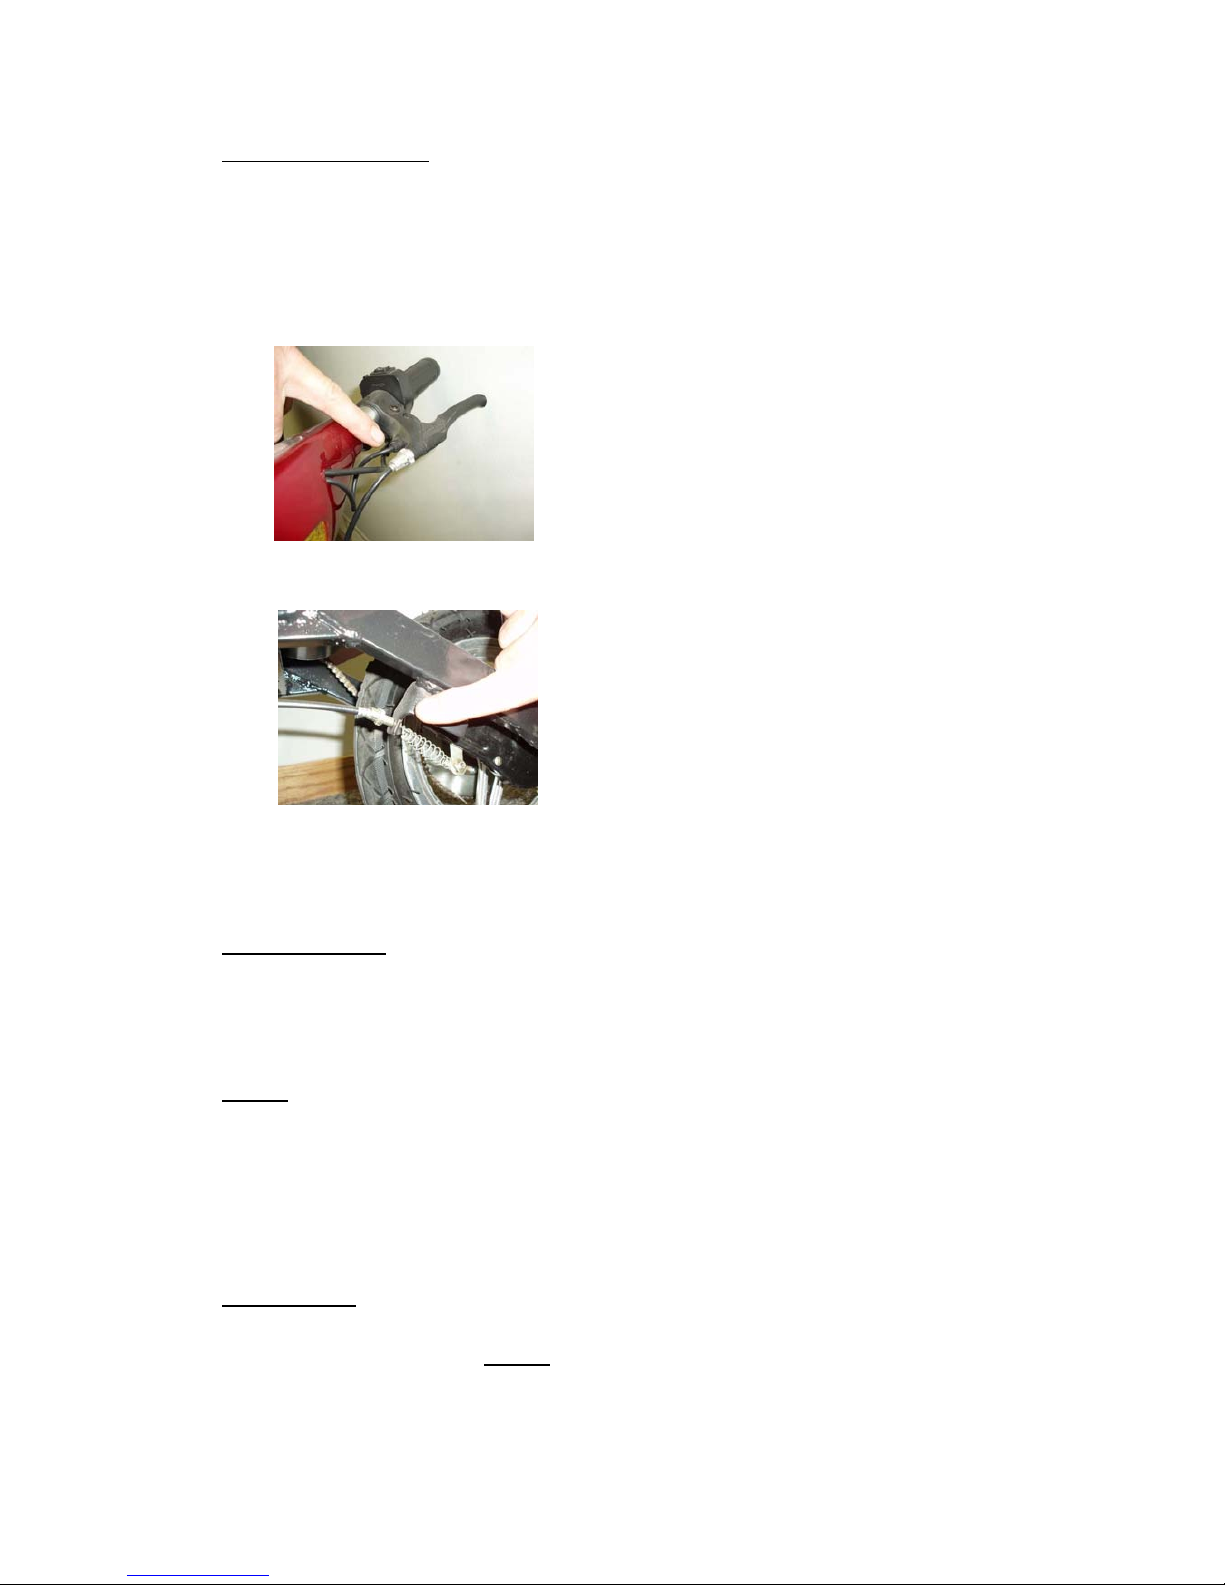
For brakes that are adjusted too tight:
1. Loosen the tension screw on the
left or right hand brake lever by
rotating it counter-clockwise until
the wheel spins freely. (Fig. 6)
For brakes that are adjusted too loose:
1. Tighten the tension screw on the
left or right hand brake lever by
rotating it clockwise until the wheel
has a slight drag. (Fig. 6)
For further adjustment, Locate the
adjustment screw on the front or rea
r
brake hub.
For brakes that are adjusted too tight:
1. Loosen the tension screw on the
brake hub by rotating it clockwise
until the wheel spins freely. (Fig. 7)
For brakes that are adjusted too loose:
1. Tighten the tension screw on the
brake hub by rotating i
t
counter-clockwise until the wheel
has a slight drag. (Fig. 7)
Fig. 6
Fig. 7
Squeaky Brakes
The brakes may squeak before they are broken in. This is normal and will not
affect the function or performance of the brakes. With continued use the
squeak should go away.
TIRES
The X-Treme X-560 uses 13” tires on the front and rear wheels. Tire wear will
differ based on rider weight, riding conditions and care. Replacement tires can
be obtained at your local X-Treme dealer, through motorcycle shops, or from
the X-Treme website at www.x-tremescooters.com
Tire Pressure
The tires must be inflated to a maximum of 36-40 P.S.I. It is also recommended
to use a tube additive like Slime, available from any motorcycle shop, to avoid
inconvenient punctures.
Page10

MAINTENANCE
RECOMMENDED TOOLS
To adjust and service the X-Treme X-560 you will need the following tools:
Allen Wrenches: 3/4/5/6 mm
Wrenches: 10/13/13 mm Open end wrench
Large Adjustable Crescent Wrench
Philips Head Screwdrivers
Oil, Grease or Lubricant
ADJUSTING THE CHAIN
The chain will come adjusted from the factory. However, it may be necessary
to adjust the chain from time to time. The chain must be well aligned onto the
sprockets in order to avoid uneven wear. This will result in shortened chain
life.
How tight should the chain be?
If the chain is skipping or jumping on the sprockets, this is too
loose and may be harmful.
If the chain is making a humming sound when the wheel is
turning, this is too tight and may cause the chain to snap.
The correct tension is achieved by adjusting the chain from its
loose position to when it becomes lightly tense.
To tighten the chains:
Slightly loosen the two axle bolts on both
sides of the rear wheel. (Fig.8). Then slowly
adjust the two adjusting screws on each side
of the rear tire (Fig.9) until chain reaches the
proper tension.
Rotate the rear wheel to make sure the chain
is aligned.
Finally, lock and tighten the rear axle bolts
prior to riding.
Fig. 8
Fig. 9
Page11

MAINTENANCE SCHEDULE
Proper care of your X-Treme X-560 will insure optimal performance and longer
life span. The following are a few maintenance suggestions that will keep your
X-Treme X-560 running in top condition:
Daily Maintenance
Perform each time you ride your X-560
Clean the exterior of the unit with a soft, damp rag. DO NOT
USE WATER TO CLEAN YOUR X-560.
Check that all nuts and bolts are securely tightened.
Lubricate the chain with any silicone spray, 3&1 oil or any good
clean motor oil.
Check battery charger for any frayed/cut wires.
TROUBLESHOOTING GUIDE
PROBLEM POSSIBLE CAUSE SOLUTION
Motor Does Not Start Batteries not connected Connect batteries
Power switch is off Turn on power/ke
y
Batteries are drained Char
g
e batteries
Electrical Fault Check all fuses
Rear wheel does not turn Brake too ti
g
ht
A
d
j
ust brakes
Motor Trouble Replace motor
Motor shuts off durin
g
use Fuse is blown Replace fuse
Electrical fault Check all connections
Low Performance Batteries not full
y
Char
g
e batteries
Low tire pressure Inflate tire to 36psi
Poppin
g
sound
A
d
j
ust chain drive
WARNING
This vehicle DOES NOT conform to federal safety standards and is not intended for
operation on public streets, roads or highways. Serious injuries can result from the
unsafe operation of this vehicle.
TO MINIMIZE RISK, the user of this vehicle must wear appropriate safety gear such as
helmet, gloves and knee and elbow pads.
DO NOT OPERATE THIE VEHCLE IN TRAFFIC, ON WET OR FROZEN SURFACES OR
OILY UNPAVED SURFACES.
To avoid damage to your wheels and/or wheel bearings, avoid uneven surfaces with
potholes, cracks or obstacles.
THIS ELECTRIC SCOOTER IS DESIGNED FOR AGES 10 AND UP. THE
MANUFACTURER WILL NOT BE RESPONSIBLE FOR ANY DAMAGE OR INJURY
THAT OCCURS WHILE RIDING.
Page12

ADDITIONAL INFORMATION
Scooter Specifications
Model X-560
Frame High Tensile Steel
Batteries 12 volt, 12amp X 3
Motor 36 volt, 500 watt
Drive Chain, rear drive
Net Weight 86lbs
Charging Time 6-8 hours
Distance per Charge Up to 22 miles**
Maximum Speed 17-21mph **
Climbing 6-10%
Capacity 300lbs Max Weight
Assembled Dimensions 49(L) X 29(W) X 39(H)
Carton Dimensions 46(L) X 14.5 (W) X 26(H)
**17-21mph speed is not always obtainable but can be reached when riding on a slope. Maximum speed depends on
terrain, the weight of the rider, tire pressure, battery power and weather conditions.
**Up to 22 miles Distance is also based on variables such as weight, terrain, tire pressure, battery power and weather.
Warranty
30-day LIMITED manufacturers warranty on all scooter parts and accessories. This warranty covers factory defects
and defaults only. It does not cover misuse or damage caused by the user or by any other event. Please contact the
manufacturer for a complete warranty listing. The manufacturer will cover shipping costs on the first warranted part
only. Shipping on any additional warranted parts that are needed after the first free shipment, will be the responsibility of
the customer. The manufacturer offers a full 6-month even trade warranty on defective batteries. If any battery should
become faulty within 6 months from the purchase date, the manufacturer will replace the battery free of charge. The
manufacturer may require that old batteries be returned to for exchange. If you have questions about our warranty,
please contact your dealer.
X-Treme Electric Scooters Manufacturers & Wholesale Distributors is not responsible for the proper or improper use of
merchandise sold. We care about our customers and urge you to exercise caution and take necessary safety
measures to protect yourself while engaging in cycling. X-Treme Electric Scooters encourages, begs, and asks that
you wear a helmet and use appropriate lighting while riding at night regardless of the legal requirements in your
particular state. Potential customers, you should check with your local law enforcement agency before purchasing
about age requirements for riding electric scooters. Some states may have laws restricting the use of scooters on
public streets. Generally all states allow them on private property such as campgrounds, parks etc....but many states
have age requirements and most states require helmets and protective equipment to be worn by certain age children.
Please always scoot safely and know your laws before you go riding. The manufacturer will not take back a scooter if
you find your laws do not permit the ridings of this scooter so please, check first.
Page13

For General Information or Parts Visit
www.x-tremescooters.com
For Technical Support or Assistance Visit
www.x-tremescooters.com/support/
Page14
Table of contents
Other Xtreme Scooter manuals

Xtreme
Xtreme X-400 User manual

Xtreme
Xtreme XG-565 A-Blaze Signature Series User manual

Xtreme
Xtreme XP-707 User manual

Xtreme
Xtreme XR-302 User manual

Xtreme
Xtreme X-600 User manual

Xtreme
Xtreme X-250 User manual

Xtreme
Xtreme XM-3500Li Troubleshooting guide

Xtreme
Xtreme XG-499 User manual

Xtreme
Xtreme X-10 User manual

Xtreme
Xtreme XM-5000Li Troubleshooting guide

Xtreme
Xtreme METRO EXPRESS User manual

Xtreme
Xtreme X-140 User manual

Xtreme
Xtreme Rubicon 48V User manual

Xtreme
Xtreme X-360 User manual

Xtreme
Xtreme X-250 User manual

Xtreme
Xtreme XG-550 User manual

Xtreme
Xtreme XR-301 User manual

Xtreme
Xtreme XR-101 User manual

Xtreme
Xtreme X-600 User manual

Xtreme
Xtreme XMB-320 User manual


