1035815B-5/13
13
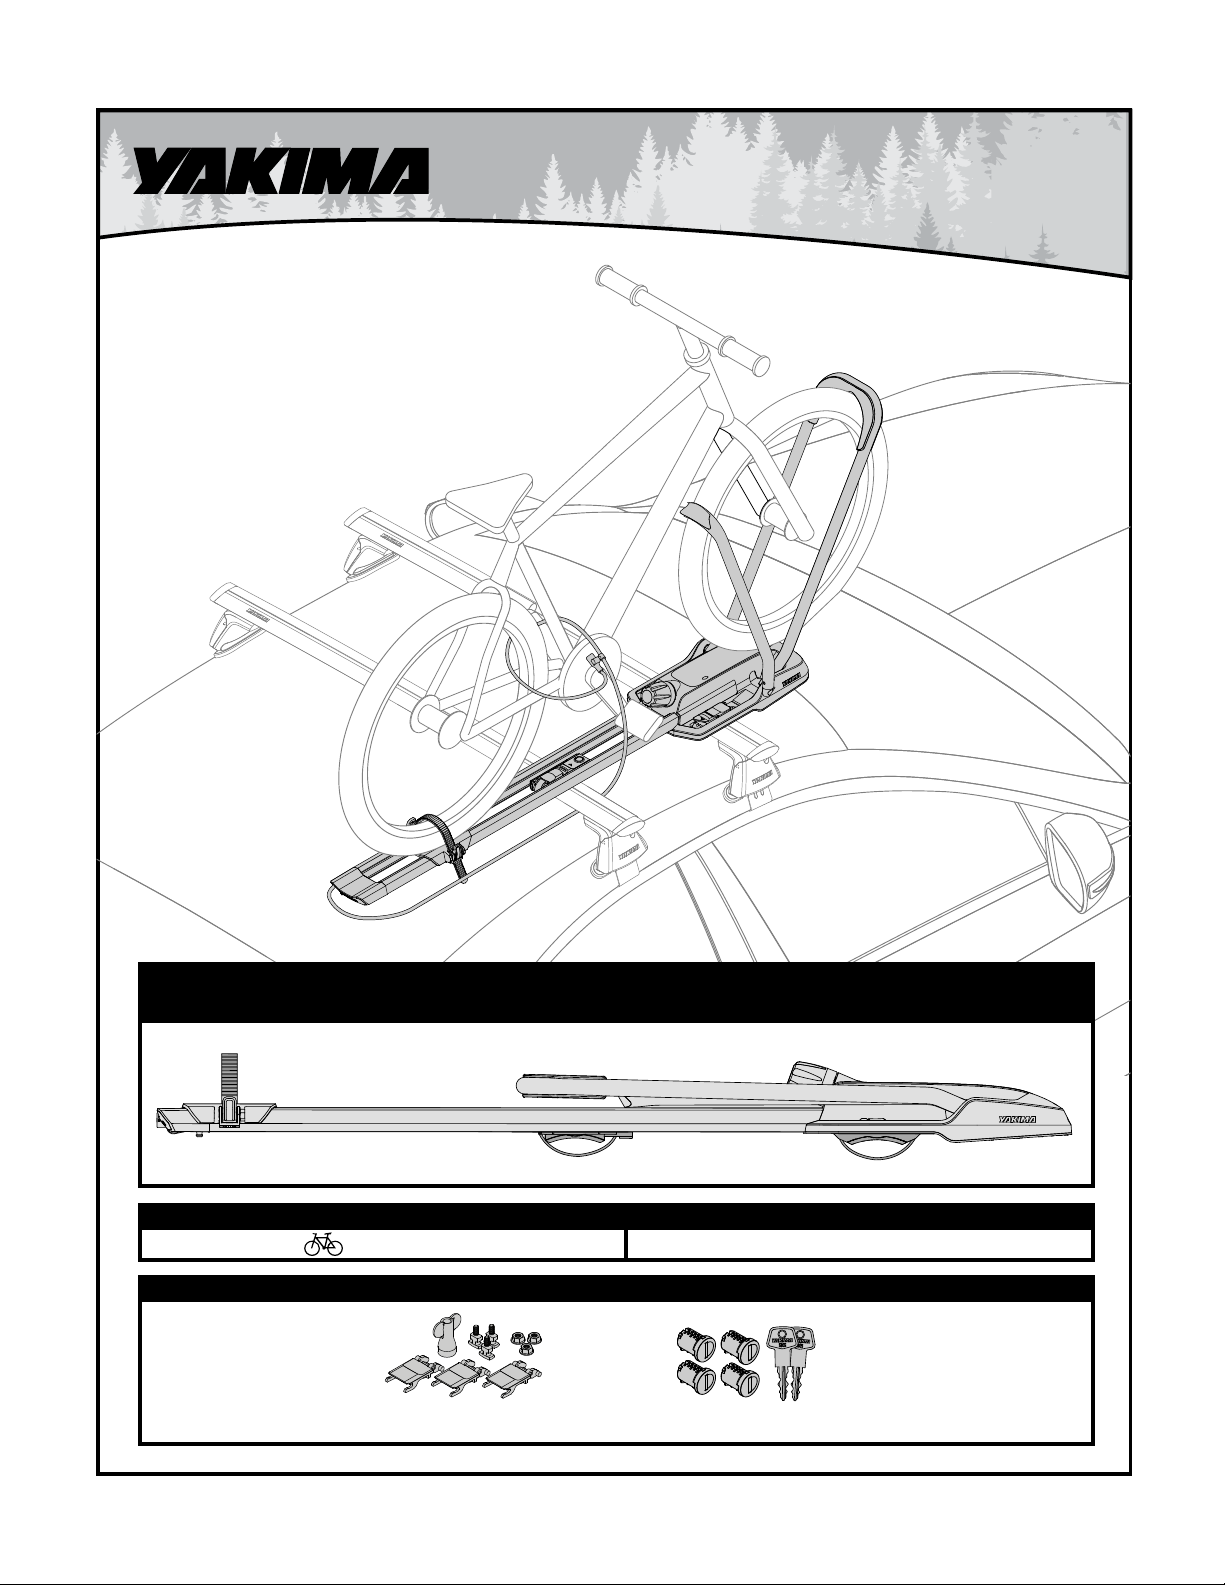
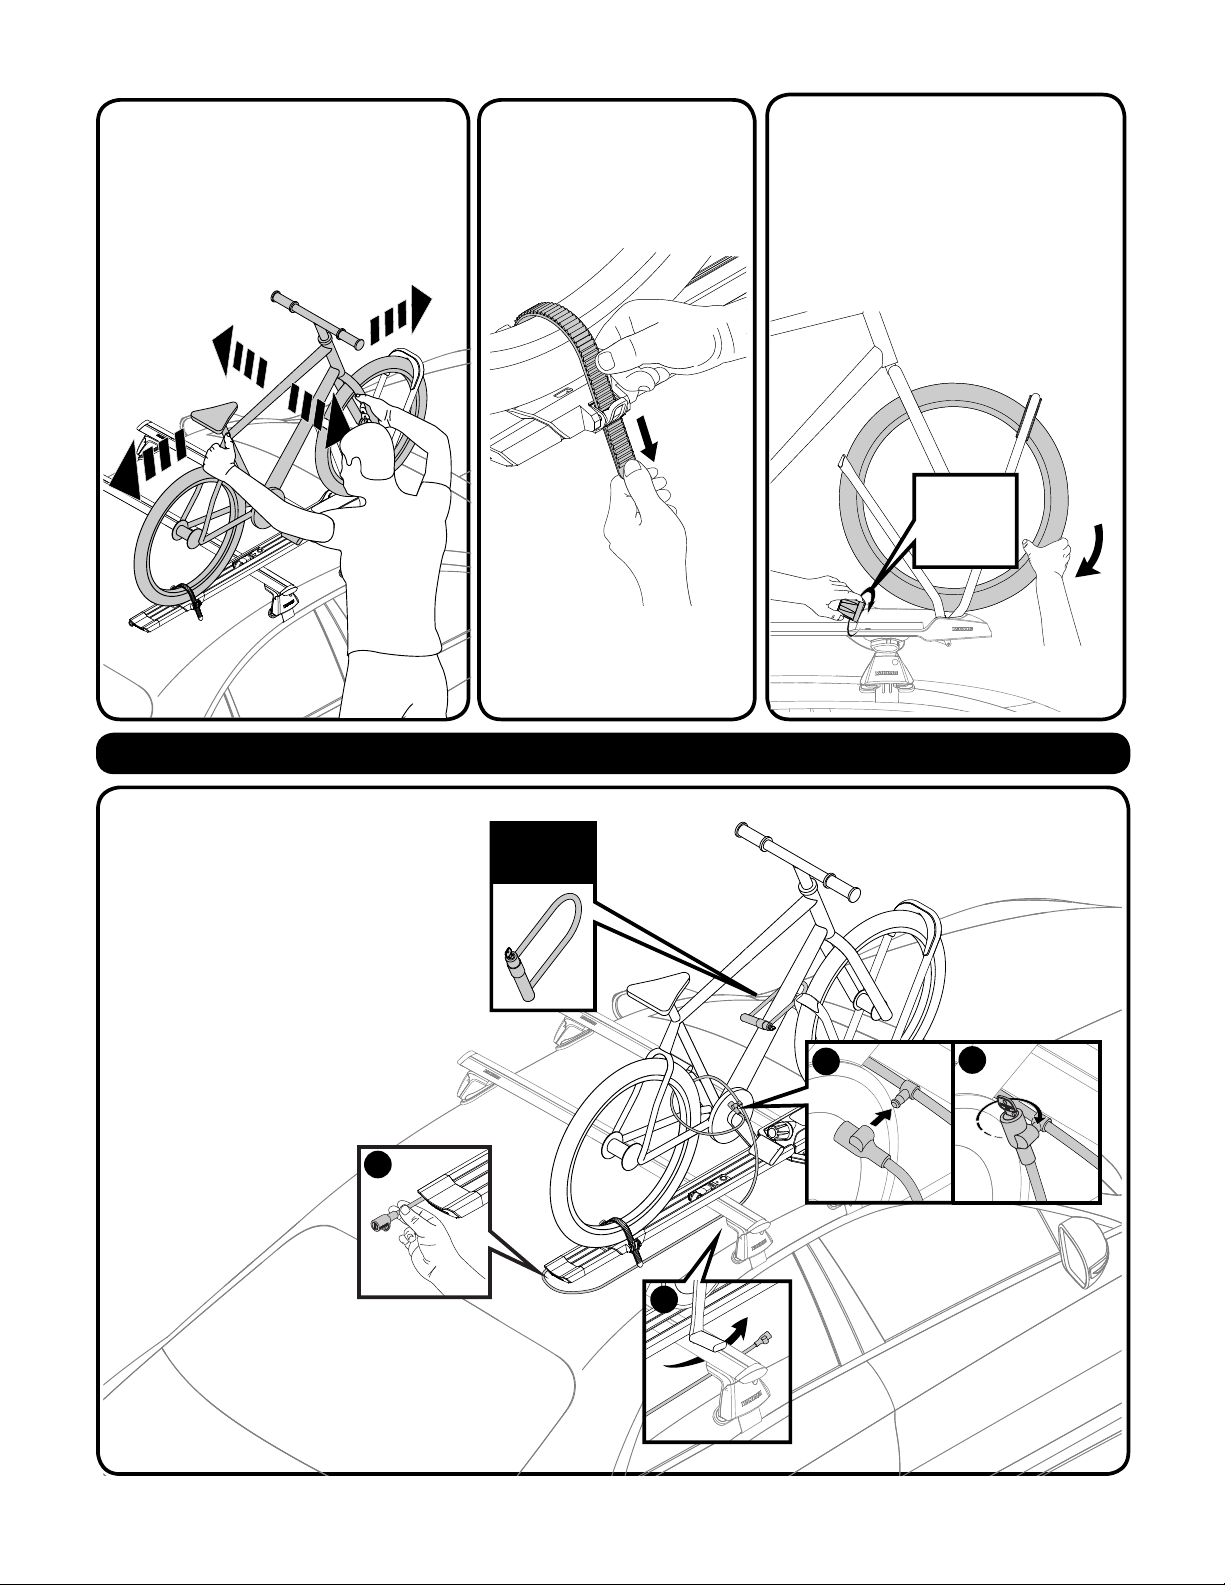
Pull the lever up through the frame.
Ramener les leviers à travers le cadre.
Tire de las palancas hacia
arriba a través del armazón.
Lift HighRoad to route the front strap under the front crossbar.
Soulever le porte-vélo pour faire passer les sangles sous la barre avant.
Levante el portabicicleta HighRoad de manera que las
correas pasen por debajo de la barra transversal delantera.
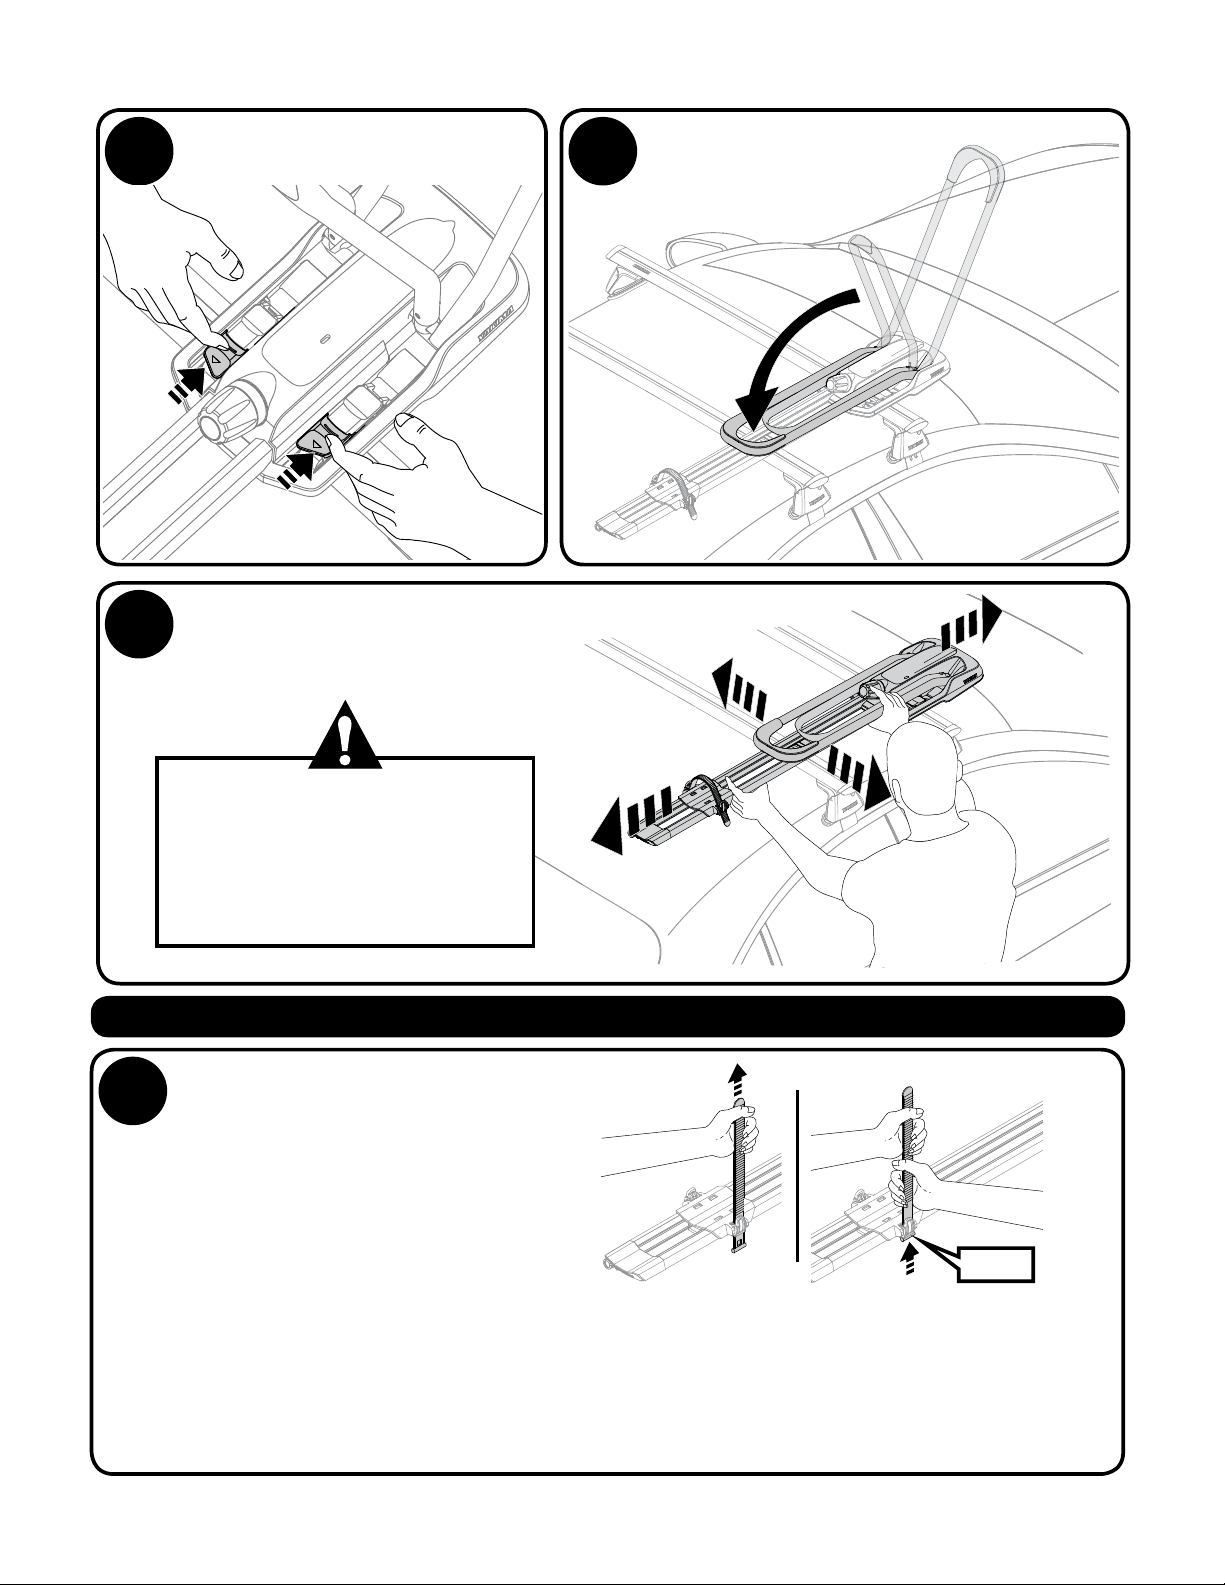
14
With the straps in place under
the front crossbar, hook the tabs
back into the detents.
Avec les sangles en place sous la barre
avant, raccrocher les ergots.
Con las correas colocadas debajo de la barra
transversal delantera, vuelva a enganchar las
lengüetas en los topes de bloqueo.
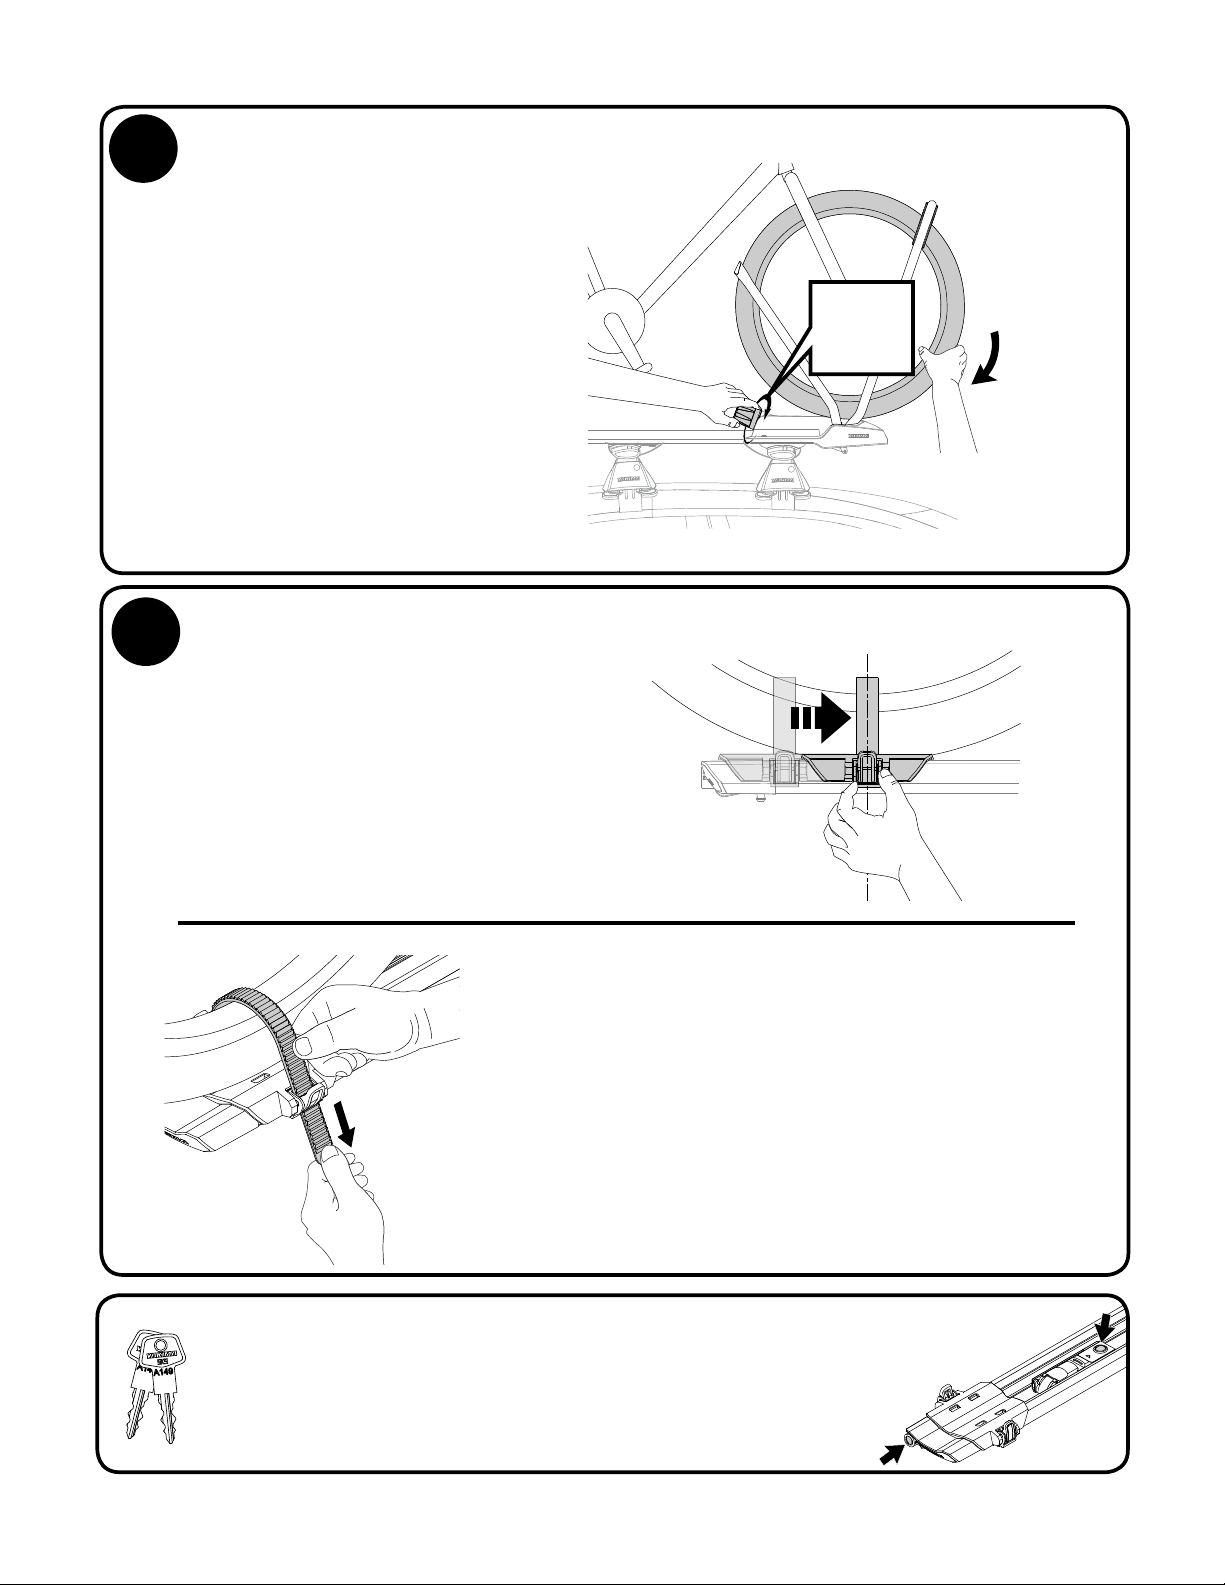
15 $MPTFUIFGSPOUMFWFSTBOEBEKVTUTUSBQUFOTJPO
3BCBUUSFMFTMFWJFSTFUSÏHMFSMBUFOTJPOEFTTBOHMFT
$JFSSFMBTQBMBODBTEFMBOUFSBTZBKVTUFMBUFOTJØOEFMBTDPSSFBT
t Strap tension can be adjusted by turning
the thumbwheel in both directions.
t Adjust the strap tension with the
thumbwheel so the strap is tight around
the crossbar when the lever is closed.
t La tension de la sangle se règle
en tournant l’écrou à main dans
un sens ou dans l’autre.
t Régler la tension de manière que
la sangle soit serrée autour de la
barre une fois le levier rabattu.
t Es posible ajustar la tensión de la
correa girando la ruedita moleteada
en ambas direcciones.
t Ajuste la tensión de las correas con
la ruedita moleteada de manera
que las correas queden ajustadas
alrededor de la barra transversal
cuando la palanca está cerrada.
t The strap should be tight enough
to prevent the HighRoad from
sliding on the crossbar.
t If it slides on the crossbar, repeat
step 15 to tighten strap tension.
t Les sangles doivent être suffisamment
tendues pour empêcher le porte-vélo de
glisser sur la barre transversale.
t Si le porte-vélo glisse, répéter l’opération
15 pour tendre les sangles un peu plus.
t Las correas deben quedar
suficientemente ajustadas para evitar
que el portabicicleta HighRoad deslice
sobre la barra transversal.
t En caso de que deslice, repita la etapa
15 para ajustar las correas.