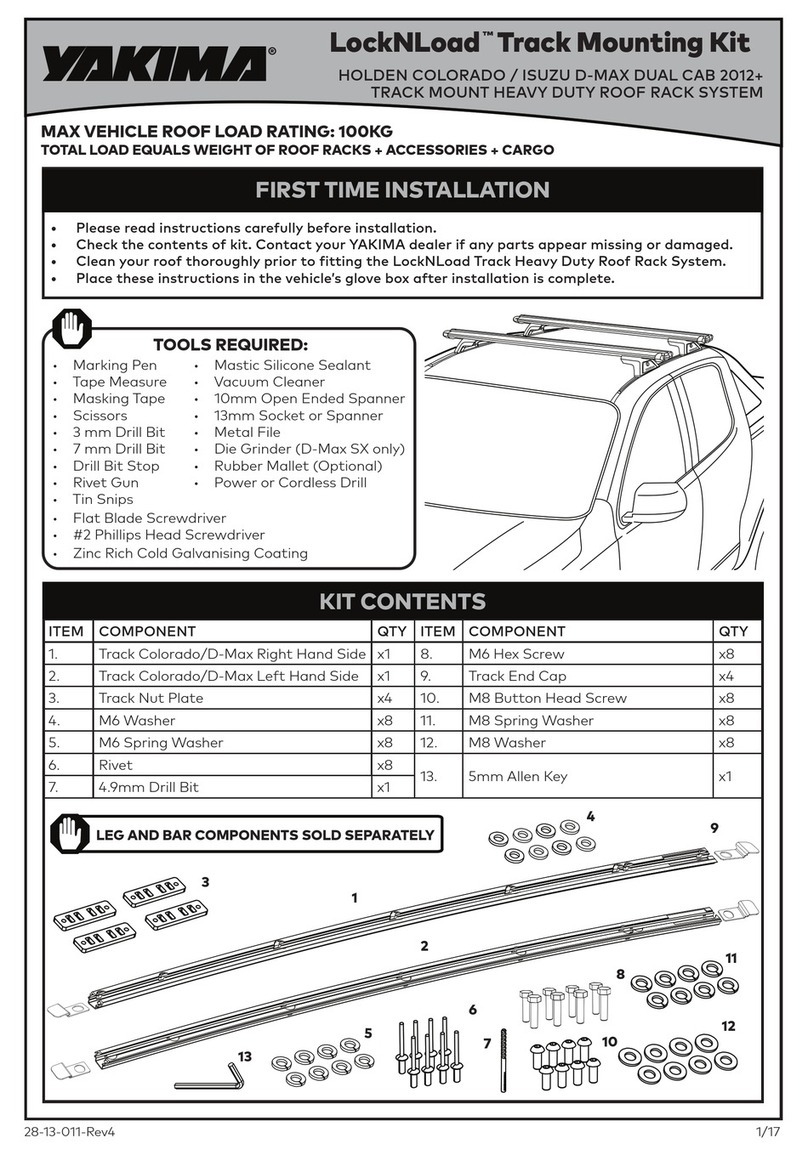
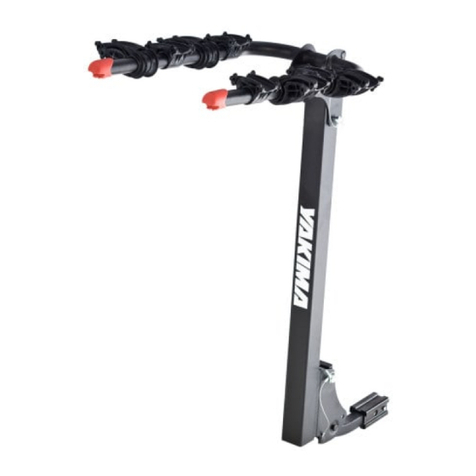
Yakima RimROC User manual

RimROC
1031832F-1/12
Part #1031832 Rev F
IMPORTANT WARNING!
IT IS CRITICAL THAT ALL YAKIMA
RACKS AND ACCESSORIES BE
PROPERLY AND SECURELY
ATTACHED TO YOUR VEHICLE.
IMPROPER ATTACHMENT COULD
RESULT IN AN AUTOMOBILE
ACCIDENT, AND COULD CAUSE
SERIOUS BODILY INJURY OR
DEATH TO YOU OR TO OTHERS.
YOU ARE RESPONSIBLE FOR
SECURING THE RACKS AND
ACCESSORIES TO YOUR CAR,
CHECKING THE ATTACHMENTS
PRIOR TO USE, AND
PERIODICALLY INSPECTING THE
PRODUCTS FOR ADJUSTMENT,
WEAR, AND DAMAGE.
THEREFORE, YOU MUST READ
AND UNDERSTAND ALL OF THE
INSTRUCTIONS AND CAUTIONS
SUPPLIED WITH YOUR YAKIMA
PRODUCT PRIOR TO
INSTALLATION OR USE. IF YOU DO
NOT UNDERSTAND ALL OF THE
INSTRUCTIONS AND CAUTIONS,
OR IF YOU HAVE NO
MECHANICAL EXPERIENCE AND
ARE NOT THOROUGHLY FAMILIAR
WITH THE INSTALLATION
PROCEDURES, YOU SHOULD
HAVE THE PRODUCT INSTALLED
BY A PROFESSIONAL INSTALLER
SUCH AS A QUALIFIED GARAGE
OR AUTO BODY SHOP.
This product is designed for a 2"
hitch receiver.
Some undersized receivers may
not accept this product.
A potential weak link is the hitch
receiver and the structure on
which it is mounted. Heavy bikes
or off-road driving could result in
damage to the hitch receiver. If
you do not know the capabilities
of your hitch receiver, seek a
professional to assess your
receiver and its mounting.
READ THESE
WARNINGS
• HITCH LOAD IS LIMITED TO THREE BIKES.
• OFF-ROAD DRIVING is not recommended
and could result in damage to your
vehicle or your bikes.
TOOLS RECOMMENDED:
• You may need either a 7/8"
OR a 15/16" Socket wrench.
• 2 adjustable-end wrenches or
9/16” wrenches

1031832F-2/12
Insert the pin into the
holes in the plates and
through the mast.
Secure the wire onto
the end of the hitch pin.
PUSH THE BASE ONTO
THE CARRIER MAST.
TIGHTEN with adjustable-end
wrenches or 9/16" wrenches. Insert second bolt into the
adjacent hole.
Position the clear sleeve so that
the bolt can pass through.
Attach nut.
TIGHTEN with adjustable-end
wrenches or 9/16" wrenches.
WARNING:
DO NOT
OVER-TIGHTEN
THIS BOLT!
ALIGN HOLES IN MAST AND BASE.
At center hole near end: Insert bolt and washer.
Attach another washer and nut to the bolt.
Install the
carrier into the
vehicle’s hitch.

1031832F-3/12
Install large HITCH-bolt and lock-washer.
Use a 7/8 or 15/16
inch socket wrench
and TIGHTEN.
Push the silver release
buttons and pivot the arms
down.
Attach the hitch lock. Lock the carrier to
the vehicle.
Insert the key, lock
the hitch lock.
Cover the lock
opening.
Remove the stop pins from both sides. Raise each arm and push it in toward
the mast until it stops.
Reset the pins into the upper
holes to secure the arms.
Hook a strap
onto each of the
six cradles.
Pull cable through frames and
back over top of first bike.
Connect the lock to the lock
post. Lock it with key.
To load bike set ONE tire
at a time into cradles.
Pull hard to close straps.
Position rubber pads to
protect bike finish.

1031832F-4/12
TO FOLD MAST DOWN AND ACCESS THE REAR, UNLOAD BIKES.
Release the
safety hook by
pulling outward
on the
untethered end.
Slide the pin
out while
supporting
the mast.
Don’t forget to replace the pin
AND secure the safety hook.
MAINTENANCE
Wash with mild detergent if
needed. Keep lubricant away
from plastic or rubber parts.
ATTACHMENT HARDWARE CAN LOOSEN
OVER TIME. CHECK AND TIGHTEN IF
NECESSARY, BEFORE EACH USE.
BEFORE DRIVING AWAY:
• Be sure the wheel straps are hooked securely.
• PERIODICALLY check the hitch bolt and tighten if necessary.
FAILURE TO PERFORM SAFETY CHECKS BEFORE DRIVING AWAY CAN RESULT IN
PROPERTY DAMAGE, PERSONAL INJURY, OR DEATH.
Install the ROC Solid
stabilizer.
• Be sure all stop pins
are securely in place.
• Cable locks to pin on
mast when not in use.
• Position stabilizer
vertically.
When travelling without bikes, the RimROC can be
collapsed partially or completely.
KEEP THESE INSTRUCTIONS!
IF YOU NEED FURTHER
TECHNICAL ASSISTANCE OR
REPLACEMENT PARTS:
Please contact your dealer or
call us at (888) 925-4621 or
(707) 826-8000, Monday
through Friday, 8:00am to
5:00pm Pacific time.
LIMITED WARRANTY
Yakima Products (“Yakima”) will repair or replace
merchandise which proves defective in materials and/
or workmanship. The limited warranty is effective for
three years from the date of purchase. The limited
warranty is applicable only if the Fit List and
instructions are followed and the products are used
properly. If a customer believes that a Yakima product
is defective, the customer must return it to an
authorized Yakima dealer with proof of purchase.
Yakima will then issue authorization to the dealer for
the return of these products. If an article is found to
be defective upon inspection by Yakima, Yakima will
repair or replace the defective article at its discretion
without charge. The customer will pay freight to
Yakima, and Yakima will pay any applicable return
freight. Unauthorized returns will not be accepted.
Normal wear and tear of Yakima products or damage
resulting from misuse, accidents, or alterations are not
covered by this Limited Warranty.The purchaser
acknowledges that Yakima has no control over the
attachment of its products to vehicles or the
attachment of items to the Yakima products.
Accordingly, Yakima cannot assume responsibility for
any damage to any property arising out of the improper
attachment or use of its products. In addition, this
Limited Warranty applies only to Yakima products and
not to other products used in conjunction with Yakima
products. This Limited Warranty is in lieu of all other
warranties, expressed or implied, and does not cover
consequential damages of any kind that may arise from
the use or misuse of any Yakima product.
Attach using wing nuts and bolts.
Secure bikes with straps.

RimROC
1031832F-5/12
AVERTISSEMENT IMPORTANT:
IL EST IMPÉRATIF QUE LES
PORTE-BAGAGES ET LES
ACCESSOIRES YAKIMA SOIENT
CORRECTEMENT ET SOLIDEMENT
FIXÉS AU VÉHICULE. UN
MONTAGE MAL RÉALISÉ
POURRAIT PROVOQUER UN
ACCIDENT D’AUTOMOBILE, QUI
POURRAIT ENTRAÎNER DES
BLESSURES GRAVES OU MÊME
LA MORT, À VOUS OU À
D’AUTRES PERSONNES. VOUS
ÊTES RESPONSABLE DE
L’INSTALLATION DU PORTE-
BAGAGES ET DES ACCESSOIRES
SUR VOTRE VÉHICULE, D’EN
VÉRIFIER LA SOLIDITÉ AVANT DE
PRENDRE LA ROUTE ET DE LES
INSPECTER RÉGULIÈREMENT
POUR EN CONTRÔLER L’ÉTAT,
L’AJUSTEMENT ET L’USURE.
VOUS DEVEZ DONC LIRE
ATTENTIVEMENT TOUTES LES
INSTRUCTIONS ET TOUS LES
AVERTISSEMENTS
ACCOMPAGNANT VOTRE
PRODUIT YAKIMA AVANT DE
L’INSTALLER ET DE L’UTILISER. SI
VOUS NE COMPRENEZ PAS
TOUTES LES INSTRUCTIONS ET
TOUS LES AVERTISSEMENTS, OU
SI VOUS N’AVEZ PAS DE
COMPÉTENCES EN MÉCANIQUE
ET NE COMPRENEZ PAS
PARFAITEMENT LA MÉTHODE DE
MONTAGE, VOUS DEVRIEZ FAIRE
INSTALLER LE PRODUIT PAR UN
PROFESSIONNEL, COMME UN
MÉCANICIEN OU UN
CARROSSIER COMPÉTENT.
Ce produit est conçu pour un tube
d’attelage de 2 po.
Si le tube est plus petit, ce produit ne
s’y adaptera pas. Le tube d’attelage, et
la structure le supportant, peuvent
parfois constituer les parties faibles du
montage. Des bicyclettes lourdes ou la
conduite hors route pourraient
endommager le tube d’attelage. Si vous
ne connaissez pas la solidité du tube
d’attelage du véhicule, consulter un
professionnel pour vérifier la résistance
du tube et de sa structure.
LIRE CES
AVERTISSEMENTS!
• LA CHARGE MAXIMALE EST DE TROIS VÉLOS.
• LA CONDUITE HORS-ROUTE n’est pas
recommandée car cela pourrait endommager
le véhicule et les vélos.
OUTILS RECOMMANDÉS
• Il faudra peut-être une clé à
douille de 23 mm (7/8 po) OU
de 24 mm (15/16 po)
• 2 clés à molette ou 2 clés de 15
mm (9/16 po)

1031832F-6/12
Glisser la goupille à
travers les trous de la
base et du mât.
Enfiler la broche sur le
bout de la goupille.
Enfiler le porte-vélos
dans l’attelage du
véhicule.
EMBOÎTER LA BASE SUR LE
MÂT DU PORTE-VÉLOS.
SERRER avec les clés à molette ou
les clés de 15 mm (9/16 po). Enfoncer un deuxième boulon dans le
trou voisin.
Au passage, mettre en place sur le
boulon le manchon transparent.
Poser l’écrou.
SERRER avec les clés à molette ou les
clés de 15 mm (9/16 po).
ATTENTION:
NE PAS TROP
SERRER CE
BOULON!
ALIGNER LES TROUS DE LA BASE ET DU MÂT.
Au trou centré près du bout, enfoncer un boulon
et une rondelle. Poser une autre rondelle et
l’écrou au bout du boulon.

1031832F-7/12
Accrocher une sangle
sur chacun des six
berceaux.
Pour charger les vélos, engager les
roues UNE à la fois sur les berceaux.
Bien tendre les sangles.
Poser le gros boulon D’ATTELAGE et sa
rondelle de sécurité.
Employer une clé à douille de
23 mm (7/8 po) ou de 24 mm
(15/16 po) et SERRER.
Enfoncer les boutons de
blocage argentés et faire
pivoter les bras vers le bas.
Mettre en place la serrure
d’attelage. Verrouiller le
porte-vélo au
véhicule.
Enfoncer la clé,
fermer la serrure et
couvrir la fente de
la clé.
Enlever les goupilles des deux côtés. Relever chaque bras et l’enfoncer vers
le mât jusqu’au bout.
Remettre les goupilles en
place dans les trous du haut
pour bloquer les bras.
Positionner les coussinets
en caoutchouc pour protéger
le fini des vélos.
Passer le câble à travers les
cadres et le ramener par-dessus
le tube du premier vélo.
Engager la serrure sur son ergot de
blocage et la verrouiller avec la clé.

1031832F-8/12
POUR RABATTRE LA POTENCE ET AVOIR ACCÈS À L’ARRIÈRE DU VÉHICULE:
DÉCHARGER LES VÉLOS.
Décrocher
l’étrier de
sécurité en tirant
sur le bout qui
n’est pas fixé.
Sortir la
goupille tout
en soutenant
la potence.
Ne pas oublier de remettre la goupille
en place ET de raccrocher l’étrier de
sécurité.
ENTRETIEN
Laver au besoin avec un savon doux.
Ne pas
appliquer de lubrifiant sur
les
pièces en plastique ou en caoutchouc.
LES DISPOSITIFS DE FIXATION PEUVENT SE
DESSERRER À LA LONGUE. LES INSPECTER
ET LES RESSERRER AU BESOIN, ET AVANT
CHAQUE UTILISATION.
Poser la barre stabilisatrice
ROC Solid. La fixer à l’aide
des boulons et des écrous à
ailettes. Stabiliser les vélos à
l’aide des sangles.
• S’assurer que toutes les
goupilles de blocage sont
bien en place.
• Quand il ne sert pas, le
câble se verrouille sur
l’ergot de blocage du mât.
• Relever la barre
stabilisatrice à la verticale.
Quand on ne transporte pas de bicyclettes, le porte-vélo
RimROC peut être replié, partiellement ou complètement.
CON SERVER CES INSTRUCTIONS!
SI VOUS AVEZ BESOIN DE
RENSEIGNEMENTS TECHNIQUES
COMPLÉMENTAIRES OU DE
PIÈCES DE RECHANGE:
prière de contacter votre
dépositaire ou appelez-nous au
(888) 925-4621 ou au
(707) 826-8000, du lundi au
vendredi, entre 8 heures et 17
heures, heure du Pacifique.
GARANTIE LIMITÉE
Yakima Products (“Yakima”) s’engage à réparer ou à
remplacer les produits qui présenteraient des vices de
matériau ou de fabrication. Cette garantie limitée a une
durée de trois ans à partir de la date d’achat. Cette garantie
limitée ne s’applique que si les instructions et la liste de
compatibilité (“Fit List”) ont été respectées et si les produits
ont été utilisés normalement. Si le client estime qu’un
produit Yakima est défectueux, le client doit le retourner à
un dépositaire Yakima autorisé, accompagné de la preuve
d’achat. Yakima autorisera alors le dépositaire à retourner
le produit. Si, après inspection, Yakima juge le produit
défectueux, Yakima réparera ou remplacera le produit, à
sa discrétion et sans frais. Le client devra assumer les frais
de transport jusqu’à Yakima et Yakima assumera les frais
de retour au client. Les retours non autorisés ne seront
pas acceptés. Cette garantie limitée ne couvre pas l’usure
normale ou les dommages résultant d’un usage abusif, d’un
accident ou de modifications aux produits Yakima.
L’acheteur reconnaît que Yakima n’a aucun contrôle sur la
façon dont ses produits sont fixés aux véhicules, ou dont
les articles transportés sont fixés aux produits Yakima. Il
s’ensuit que Yakima ne peut assumer de responsabilité pour
des dommages matériels consécutifs au mauvais montage
ou au mauvais emploi de ses produits. De plus, la présente
garantie limitée ne s’applique qu’aux produits Yakima et
non à d’autres produits utilisés conjointement aux produits
Yakima. Cette garantie limitée remplace toute autre
garantie, expresse ou tacite, et ne couvre pas d’éventuels
dommages indirects pouvant survenir par suite de l’emploi,
correct ou non, des produits Yakima.
AVANT DE PRENDRE LA ROUTE!
• Vérifier que les sangles des berceaux sont accrochées.
• Vérifier RÉGULIÈREMENT le boulon de l’attelage et le serrer au besoin.
SI L’ON EFFECTUE PAR CES VÉRIFICATIONS DE SÉCURITÉ AVANT DE PRENDRE LA ROUTE,
ON RISQUE DE PROVOQUER DES DOMMAGES, DES BLESSURES OU MÊME LA MORT.
RimROC
1031832F-9/12
Part #1031832 RevE
AVISO IMPORTANTE!
ES FUNDAMENTAL QUE TODAS
LAS PARRILLAS Y ACCESORIOS
YAKIMA ESTÉN BIEN
COLOCADOS Y ASEGURADOS AL
VEHÍCULO. UNA INSTALACIÓN
DEFICIENTE PODRÍA RESULTAR
EN ACCIDENTE
AUTOMOVILÍSTICO Y PROVOCAR
HERIDAS GRAVES O MUERTE A
USTED O A TERCEROS. USTED ES
RESPONSABLE DE ASEGURAR
LAS PARRILLAS Y ACCESORIOS
AL VEHÍCULO, VERIFICANDO
UNIONES Y AMARRES ANTES DE
USAR E INSPECCIONANDO EL
AJUSTE DE LOS PRODUCTOS, SU
DESGASTE Y POSIBLES DAÑOS.
POR ELLO DEBE LEER Y
COMPRENDER TODAS LAS
INSTRUCCIONES Y
ADVERTENCIAS QUE VIENEN CON
LOS PRODUCTOS YAKIMA ANTES
DE INSTALARLOS O USARLOS. SI
NO ENTIENDE TODAS LAS
INSTRUCCIONES Y
ADVERTENCIAS, O NO TIENE
EXPERIENCIA EN MECÁNICA O
NO ESTÁ FAMILIARIZADO CON
LOS PROCEDIMIENTOS DE
INSTALACIÓN, HAGA INSTALAR
EL PRODUCTO POR UN
PROFESIONAL EN UN GARAGE
RECONOCIDO O UN TALLER DE
CARROCERÍA.¡
Este producto está diseñado para un
receptor de enganche de 2" (5 cm).
Algunos receptores más pequeños
pueden no aceptar este producto. El
receptor del enganche y su estructura de
montaje son posibles partes débiles en el
equipo. Las bicicletas pesadas o conducir
fuera de las rutas pueden provocar daños
al receptor del enganche. Si usted no
conoce las capacidades de su receptor
de enganche, haga que un profesional lo
verifique junto con el soporte de montaje.
¡LEA ESTAS
ADVERTENCIAS!
• LA CARGA MÁXIMA DE LA BARRA ES
TRES BICICLETAS.
• NO SE RECOMIENDA CONDUCIR FUERA
DE LA RUTA pues podría dañarse el
vehículo o las bicicletas.
HERRAMIENTAS RECOMENDADAS:
• Podría necesitar una llave de
cubo de 7/8" (23mm) O de 15/
16" (24mm).
• 2 llaves ajustables o de 9/16"
(15 mm)

1031832F-10/12
Inserte el tornillo de
seguridad a través de los
agujeros de las placas y
del mástil.
Coloque el gancho de
seguridad en el extremo del
tornillo del enganche.
Instale el
portabicicletas
en el enganche
del vehículo.
ENCAJE LA BASE SOBRE
EL MÁSTIL DEL
PORTABICICLETAS.
APRIETE con llaves ajustables o
de 9/16" (15mm). Inserte el segundo tornillo en el
agujero siguiente.
Coloque el manguito para que
el tornillo pueda pasar a través.
Coloque tuerca.
APRIETE con llaves
ajustables o de 5/16" (15mm).
ATENCIÓN:
¡NO AJUSTE
ESTE TORNILLO
DE MÁS!
HAGA COINCIDIR LOS AGUJEROS EN EL MÁSTIL Y LA BASE.
En el agujero del centro cerca del extremo, inserte el tornillo y
arandela. Complete con otra arandela y tuerca.

1031832F-11/12
Instale el tornillo del ENGANCHE grande y
la arandela de cierre.
Use una llave de cubo
de 7/8" (23mm) o de 15/
16" (24mm) y AJUSTE.
Oprima los botones plateados
para soltar los brazos y
bajarlos.
Coloque el cerrojo del
enganche. Asegure el
portabicicletas al
vehículo
Inserte la llave,
cierre el cerrojo y
cubra la abertura
de éste con el
capuchón.
Quite los tornillos de tope de ambos lados. Levante cada brazo y empújelo hacia
el mástil hasta que haga tope.
Vuelva a colocar los tornillos
en los agujeros superiores
para asegurar los brazos.
Enganche una tira de
sujeción en cada una
de las seis cunas.
Para cargar la bicicleta,
coloque los neumáticos en
las cunas UNO por vez.
Cierre las tiras con fuerza.
Pase el cable por los cuadros
de las bicicletas y por encima
de la primera.
Conecte los extremos del
cerrojo y cierre con llave.
Coloque las almohadillas
de gomas para proteger la
pintura de la bicicleta.

1031832F-12/12
PARA BAJAR EL MÁSTIL Y ACCEDER AL COMPARTIMIENTO DE CARGA:
DESCARGUE LAS BICICLETAS.
Suelte el gancho
de seguridad
tirando hacia
afuera del
extremo no
trabado.
Saque el
tornillo
apoyando
sobre el
mástil.
No olvide volver a colocar el tornillo
Y ajustar el gancho de seguridad.
MANTENIMIENTO
Lave con detergente suave si es
necesario. Mantenga el
lubricante alejado de las partes
plásticas o de caucho.
LAS UNIONES Y PIEZAS DE MONTAJE
PUEDEN AFLOJARSE CON EL TIEMPO.
VERIFIQUE Y AJUSTE SI ES NECESARIO Y
ANTES DE CADA USO.
¡ANTES DE PARTIR!
• ANTES DE PARTIR, asegúrese de que las tiras de las cunas están enganchadas.
• PERIÓDICAMENTE verifique el tornillo del enganche y ajústelo si es necesario.
SI NO VERIFICA LA SEGURIDAD ANTES DE PARTIR PODRÍAN PRODUCIRSE DAÑOS
A LA PROPIEDAD, HERIDAS CORPORALES O MUERTE.
Instale el estabilizador
ROC Solid.
Utilice tuercas mariposa y tornillos.
Asegure las bicicletas con correas. • Asegúrese de que todos los
pernos de tope están
firmes en sus sitios.
• El cable puede trabarse en
el perno del mástil cuando
no se use.
• Coloque el estabilizador en
posición vertical.
Cuando conduzca sin transportar bicicletas, el
RimROC puede plegarse total o parcialmente.
¡CONSERVE ESTAS INSTRUCCIONES!
SI NECESITA MÁS ASISTENCIA
TÉCNICA O REPUESTOS:
comuníquese con su
concesionario o llámenos al
(888) 925-4621o al
(707) 826-8000, de lunes a
viernes de 8:00 am a 5:00
pm, hora del Pacífico.
GARANTÍA LIMITADA
Yakima Products (“Yakima”) se compromete a reparar o
reemplazar la mercancía que presente defectos en
materiales o en elaboración. Esta garantía limitada es
válida por tres años contado desde la fecha de compra.
La garantía limitada es aplicable solamente si se han
cumplido con los requisitos de la Lista de Compatibilidad
(Fit List) y si el producto se ha usado en la forma debida.
Si un cliente cree que un producto Yakima es defectuoso,
el cliente debe devolver dicho producto a un representante
autorizado de Yakima, adjuntando prueba de compra.
Entonces Yakima dará autorización a dicho representante
para devolver el producto. Si al inspeccionar el producto
Yakima encuentra que es en realidad defectuoso, Yakima
reparará o reemplazará el artículo defectuoso a su
discreción, sin cargo alguno para el cliente. El cliente se
compromete a pagar por el flete para enviar el producto a
Yakima y Yakima pagará el flete que corresponda para
devolver dicho producto al cliente. No se aceptarán
devoluciones no autorizadas. Esta garantía limitada no
cubre el desgaste normal de los productos Yakima, ni
daños resultantes de uso inadecuado, accidentes o
alteraciones. El comprador reconoce que Yakima no tiene
ningún control sobre la forma en que sus productos han
sido afianzados a los vehículos o sobre la fijación de otros
artículos a los productos Yakima, por lo tanto, Yakima no
asume responsabilidad alguna por daños a la propiedad
resultantes de una fijación mal hecha del uso de sus
productos. Además, esta garantía limitada es aplicable
únicamente a los productos Yakima y no a otros productos
usados en conjunto con los productos Yakima. Esta
garantía limitada reemplaza cualquier otra garantía,
explícita o implícita, y no cubre daños consecuentes de
ninguna clase que puedan resultar del uso correcto o
incorrecto de cualquier producto Yakima.
Table of contents
Languages:
Other Yakima Automobile Accessories manuals

Yakima
Yakima K999 User manual

Yakima
Yakima ReelDeal User manual

Yakima
Yakima KingJoe 2 User manual

Yakima
Yakima LOCKN'LOAD Instruction sheet

Yakima
Yakima Whispbar K720W User manual

Yakima
Yakima K892 User manual

Yakima
Yakima K979 User manual

Yakima
Yakima Safety Pole User manual

Yakima
Yakima CopperHead User manual

Yakima
Yakima Mako Saddles User manual

Yakima
Yakima K1200W User manual

Yakima
Yakima Whispbar K1135 User manual

Yakima
Yakima K096W User manual

Yakima
Yakima K1019 User manual

Yakima
Yakima K719 User manual

Yakima
Yakima Whispbar WB200 User manual

Yakima
Yakima LittleJoe User manual

Yakima
Yakima FrontLoader User manual

Yakima
Yakima K677 User manual

Yakima
Yakima K1211 User manual