manuals.online logo
Brands
  1. Home
  2. •
  3. Brands
  4. •
  5. Yealink
  6. •
  7. Telephone
  8. •
  9. Yealink SIP-T48S User manual

Yealink SIP-T48S User manual

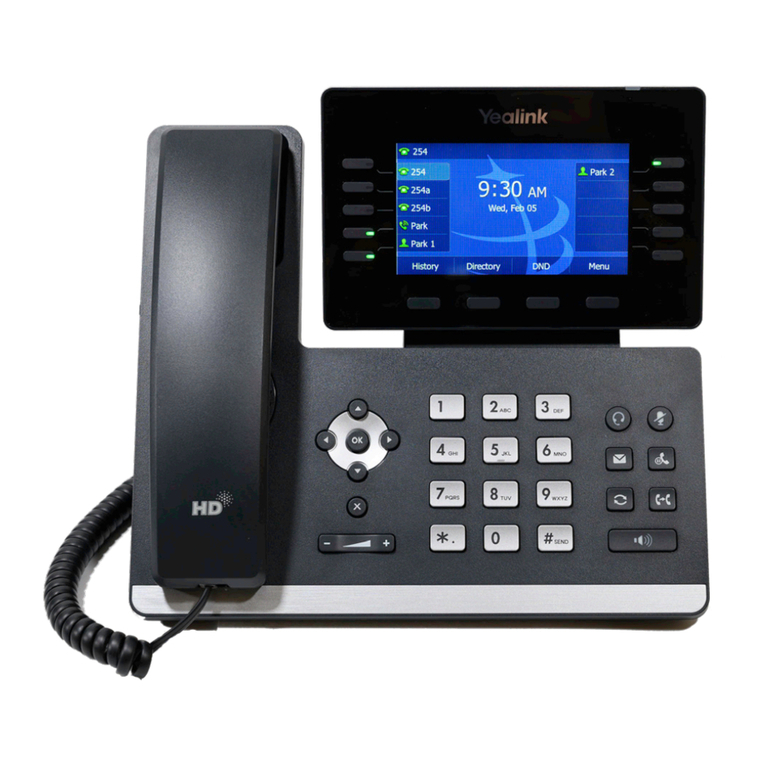
Yealink SIP-T48S with SwyxWare QUICKSTART
In order to use extended functionality, the "Feature Pack for Certified SIP Phones"
license is required from the administrator. In addition, each device must be set up initi-
ally via Swyx Control Center before operation, see also help.swyx.com/controlcenter/
latest.version/web/Swyx/en-US/index.html#page/help/chap_deskpho-
nes.12.1.html#.
For information on the characteristics and operation of the Yealink SIP-T48S, see the
manufacturer's documentation (support.yealink.com).
It is required to activate the terminal device on first connection if your administrator has
selected the "Activation required on certified phones" option in the server configura-
tion.
1. Connect the phone to the power supply and to the network via the "Internet" port using
a LAN cable. Alternatively, the phone also supports connection via PoE (Power over
Ethernet) according to the IEEE 802.3af standard.
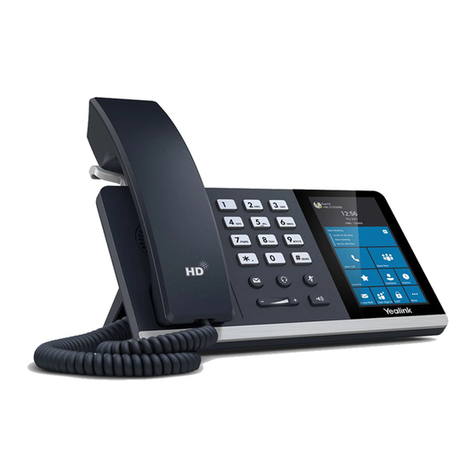
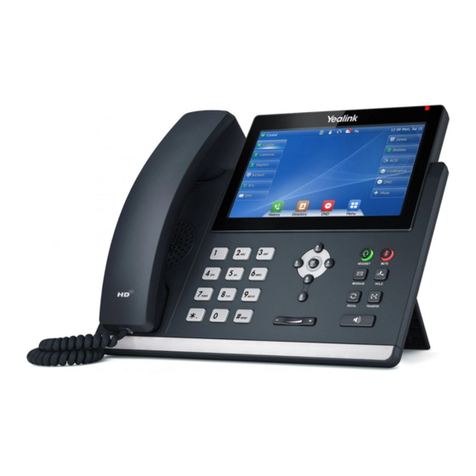
1 Phone model
Please note that the operation and selection on the Yealink SIP-T48S is done via touch dis-
play. It may be necessary to first press a key when the phone is in standby mode before
taking any action.
2 Activate terminal device
Yealink desk phones are configured in English by factory default. After connection to the
SwyxServer, the language is automatically changed to the standard server language.
2. Wait for the login prompt. Enter your internal telephone number as the "Username".
3. Press the arrow key .
4. In the "Password" field, enter the 8-digit activation key you received from your adminis-
trator. If necessary, press to enter numbers via the display.
5. Press "OK" to confirm your entries.
The telephone connects to the SwyxServer. After completion of the configuration,
your user name is shown on the display. The telephone can be used immediately
and configured if necessary.
You can log on to any certified SIP terminal activated in the network (hot desking).
Logging on
1. On your Yealink desk phone, press "Login ".
2. Enter your internal call number under "Internal Number".
3. Press the arrow key .
4. Enter your 'User PIN on Desk Phone' in the "PIN" field. The 'User PIN on Desk Phone'
can be found in your welcome email or in Swyx Control Center under "User | [User
name] | Desk phones | Certified Phones".
5. Confirm your entries with "OK".
The confirmation "Login successful" appears for approx. 5 seconds.
If you connect the terminal device to the network before your administrator has entered
the MAC address of the terminal device in Swyx Control Center, the login prompt may not
appear on restart. The device will then not be recognized by SwyxServer.
After the required configuration has been made, you can restart the device and the logon
prompt via "Reboot", or by disconnecting the device from the network for a short time.
If you have left the login menu without entering your login information, restart the phone
by disconnecting it from the power supply for 10 seconds.
3 Logging on and logging off from a terminal device
A Yealink desk telephone can also be logged on and off for you by the administrator.
A Swyx user remains logged on to a Yealink phone even if he reboots or disconnects it
from the network. You must therefore log off your user on the phone by yourself.
&123
Yealink SIP-T48S with SwyxWare QUICKSTART
Logging off
Select " (More) | Logout " and confirm with "OK".
The confirmation "Logout successful" appears for approx. 5 seconds.
If you wish to customize the function keys on your telephone individually, use the Swyx-
Ware Web Administration (menu item "Desk Phones"). The terminal device must be
activated in order to be configured. Details regarding this are available from your admi-
nistrator.
1. Press on "PhoneBook".
Your Swyx phonebook is displayed. You can initiate calls and look for users here.
To search or filter for an entry, enter a name or phone number.
2. Tap on the desired entry from the list.
The selected contact is called.
3. If several phone numbers have been specified for the contact, tap on the desired num-
ber.
1. Press on "History".
Your Swyx Call Journal appears. Your call history is synchronized with SwyxServer.
2. In the left menu you can switch between "Network Calls" (corresponds to "All calls"),
"Missed", "Placed" and "Received" by tapping.
You can only log out if your administrator has assigned you a 'User PIN on Desk Phone'.
Contact your administrator if necessary.
4 Set function keys
Assign function keys only in Swyx Control Center. The configuration of the device itself
cannot be corrected by SwyxServer in case of an update.
5 Dialing from the Phonebook
6 Opening the Call Journal
If you open your call log on a device or in SwyxIt!, the notification will also disappear on all
devices except Dec devices you are logged in with.
If you have configured several internal numbers (including group numbers and alterna-
tive numbers) in your SwyxWare user account, a corresponding function key can be con-
figured as an internal number key for each number.
You must first define the internal number keys as corresponding function keys in order
to use the "Internal number" function on the Yealink desk telephone. See Set function
keys, page 2. When assigning the function keys, please note the limitation of the tele-
phone number assignment, see Limitation of number assignment, page 3.
To start a call from a desired phone number, tap on the desired internal number key in
the margin.
Or change the phone numbers using the arrow keys and .
All further calls are made with the number selected in this way until a change is made
again.
Or tap on the user name in the top left corner and then select the desired line from the
drop-down list.
Forwarding incoming calls
1. When you are called, press on "Forward".
2. Enter the phone number to which you want to forward the incoming call and confirm
with "OK" or "Send".
The call is deflected before it is connected to you.
Forwarding active calls
1. You are already making a call to a subscriber.
2. Press on "Transfer".
The call is put on hold and the caller hears music on hold.
7 Function "Internal number"
You cannot configure different phone numbers for Yealink desk telephones for outgoing
and incoming calls on one internal number key.
It is recommended to define the assignment of the internal number key according to the
settings in SwyxIt!.
On the Yealink phone, the internal number key is highlighted with the corresponding
phone number on which a call is received.
If you have configured internal number keys and have not selected a specific telephone
number for a call, the system uses your first defined internal telephone number.
8 Forwarding calls
If problems occur with subsequent forwarding, check whether second calls are permitted.
For this purpose, click on "Settings" in SwyxIt! and deactivate the control box next to
"Deactivate secondary call".
Yealink SIP-T48S with SwyxWare QUICKSTART
3. Enter the number to which you wish to forward the call to and confirm with "OK" or
"Send". After a few seconds the call will also be initiated without confirmation.
4. When the call is answered, tap on "Transfer".
The active call is connected with the previous call. The home screen is displayed
again on your telephone.
Forwarding calls on hold
1. You are already making a call to a subscriber.
2. Press on "Hold".
The call is put on hold and the caller hears music on hold.
3. Tap on "New Call" to call a second conversation partner.
4. Enter the number of the second caller and confirm with the "OK" or "Send" button. After
a few seconds the call will also be initiated without confirmation.
5. When the call is answered, select "Transfer".
6. Select the caller to whom you want to forward the now active call.
The active call is connected to the previously held call. The home screen is displayed
again on your telephone.
Transfering active calls (without consultation)
1. You are already making a call to a subscriber.
2. Tap on "Transfer".
The call is put on hold and the caller hears music on hold.
3. Enter the phone number to which you want to transfer the call to and tap on "B transfer".
As soon as the call is accepted, you have transferred the call. The home screen is
displayed again on your telephone.
The Yealink desk phone supports conferences with up to three participants.
1. Call a subscriber.
2. Select "Hold".
The call is put on hold and the caller hears music on hold.
3. Select "New Call".
4. Enter the telephone number of the third participant and confirm with the "OK" or "Send"
button. After a few seconds the call will also be initiated without confirmation.
5. When the call is answered, select "Conference".
6. In the list on the left, tap the participant on hold.
You are now connected to both conversation partners in a conference.
If you wait longer than 3 seconds after entering the telephone number in the following
operating step, a second call to the subscriber will be initiated. A forwarding is then only
possible using the method Forwarding active calls, page 2.
9 Starting conferences
You can set your presence status with the phone.
1. Tap on "DND" (Do Not Disturb) .
Your presence status is set to "DND" and the telephone displays "DND" in the upper
information bar.
2. To change your presence status back to "Available", tap on "DND" again.
This Yealink desk phone supports the assignment of up to nine phone numbers. When
assigning the phone numbers, group phone numbers or alternative phone numbers
count in as well. If you exceed the limit for number assignment during assignment, the
numbers are treated with the following prioritization: 1. Own numbers, 2. Group num-
bers, 3. Alternate numbers. All phone numbers that exceed the limit cannot be used on
this device.
10 Determining status information
The status LED of a user on a speed dial key displayed on the phone does not show the
Swyx status but the call status.
11 Limitation of number assignment
03/2020 — Subject to technical changes. All of the product and brand
names mentioned here are registered trademarks of the respective manu-
facturers. Complete user documentation can be found at
swyx.com/products/support/documentation.html

Other manuals for SIP-T48S

8

Other Yealink Telephone manuals

Yealink CP965 User manual

Yealink

Yealink CP965 User manual

Yealink SIP-T42U User manual

Yealink

Yealink SIP-T42U User manual

Yealink SIP-T58V User manual

Yealink

Yealink SIP-T58V User manual

Yealink SIP-T57W Instruction manual

Yealink

Yealink SIP-T57W Instruction manual

Yealink SIP-T54W User manual

Yealink

Yealink SIP-T54W User manual

Yealink T48S Skype For Business Edition User manual

Yealink

Yealink T48S Skype For Business Edition User manual

Yealink T4 series User manual

Yealink

Yealink T4 series User manual

Yealink Telkom W52P User manual

Yealink

Yealink Telkom W52P User manual

Yealink SIP-T57W User manual

Yealink

Yealink SIP-T57W User manual

Yealink CP900 User manual

Yealink

Yealink CP900 User manual

Yealink T54W User manual

Yealink

Yealink T54W User manual

Yealink VP530 User manual

Yealink

Yealink VP530 User manual

Yealink CAM50 User manual

Yealink

Yealink CAM50 User manual

Yealink W78H User manual

Yealink

Yealink W78H User manual

Yealink SIP-T58A User manual

Yealink

Yealink SIP-T58A User manual

Yealink T27 Series User manual

Yealink

Yealink T27 Series User manual

Yealink W53 Series User manual

Yealink

Yealink W53 Series User manual

Yealink SIP-T57W User manual

Yealink

Yealink SIP-T57W User manual

Yealink W52H User manual

Yealink

Yealink W52H User manual

Yealink T48 User manual

Yealink

Yealink T48 User manual

Yealink SIP-T22 User manual

Yealink

Yealink SIP-T22 User manual

Yealink EVE T40P User manual

Yealink

Yealink EVE T40P User manual

Yealink CP900 Instruction Manual

Yealink

Yealink CP900 Instruction Manual

Yealink T41 User manual

Yealink

Yealink T41 User manual

Popular Telephone manuals by other brands

V-tech Star2Star VCS754 Quick user guide

V-tech

V-tech Star2Star VCS754 Quick user guide

V-tech ia5870 Errata

V-tech

V-tech ia5870 Errata

V-tech i6727 instructions

V-tech

V-tech i6727 instructions

V-tech Vonage IP 8100-2 user manual

V-tech

V-tech Vonage IP 8100-2 user manual

V-tech DS6752-4 manual

V-tech

V-tech DS6752-4 manual

V-tech CM18245 user manual

V-tech

V-tech CM18245 user manual

V-tech A1100 Analog Classic Series Master user guide

V-tech

V-tech A1100 Analog Classic Series Master user guide

V-tech CS6648-2 user manual

V-tech

V-tech CS6648-2 user manual

Etec EPH1020 manual

Etec

Etec EPH1020 manual

V-tech ErisTerminal VSP875G quick start guide

V-tech

V-tech ErisTerminal VSP875G quick start guide

BZB Gear BG-OMNITALK user manual

BZB Gear

BZB Gear BG-OMNITALK user manual

Unimax MAXBravo user manual

Unimax

Unimax MAXBravo user manual

V-tech CS6859 user manual

V-tech

V-tech CS6859 user manual

Samsung SCH-A512 user manual

Samsung

Samsung SCH-A512 user manual

Alphacom a300 user guide

Alphacom

Alphacom a300 user guide

Comdial Impact 8012S Series user guide

Comdial

Comdial Impact 8012S Series user guide

Nokia N76 manual

Nokia

Nokia N76 manual

ALcom G-1100 user guide

ALcom

ALcom G-1100 user guide

manuals.online logo
manuals.online logoBrands
  • About & Mission
  • Contact us
  • Privacy Policy
  • Terms and Conditions

Copyright 2025 Manuals.Online. All Rights Reserved.