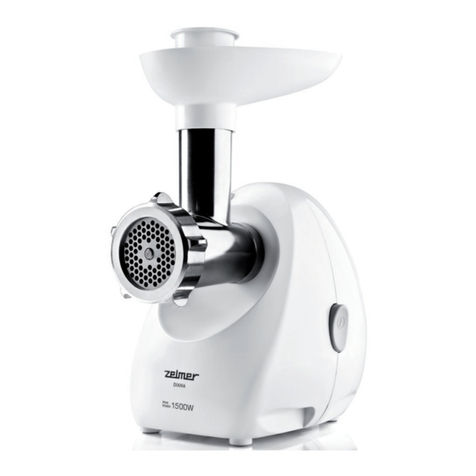
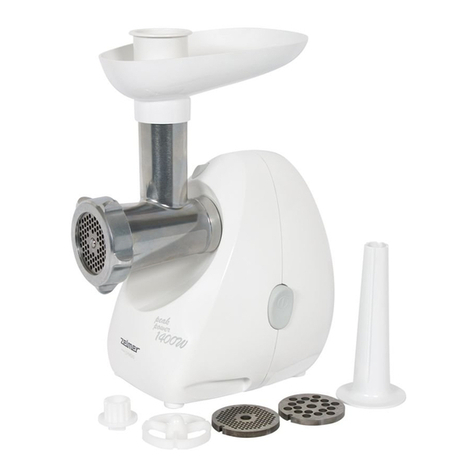
Zelmer ZMM2851B User manual

ZMM2851B / ZMM2853B /
ZMM2854B
MASZYNKA DO MIELENIA MIĘSA
Мясорубка
/ Meat mincer
INSTRUKCJA UŻYTKOWANIA
Maszynka do mielenia mięsa
ИНСТРУКЦИЯ ПО ЭКСПЛУАТАЦИИ
Мясорубка
NÁVOD K POUŽITÍ
Mlýnek na maso
ИНСТРУКЦИИ ЗА УПОТРЕБА
Месомелачка
NÁVOD NA UOBSLUHU
Mlynček na mäso
ІНСТРУКЦІЯ ПО ЗАСТОСУВАННЮ
М’ясорубка
USER MANUAL
Meat mincer
BENUTZERHANDBUCH
Fleischwolf
HASZNÁLATI UTASÍTÁS
Húsdaráló
INSTRUCȚIUNI DE UTILIZARE
Mașină de tocat carne
PL
EN
DE
CZ
SK
HU
RO
RU
UA
BG
ZMM2851B / 52B / 53B

1
15
16
17
20
18
19
21
14
2
3
11
12
13
10
87
6
5
4
9

2
1
1
1
1
2
3
4
2
1

2
1
2
1
5
6
7
8
2
1

9
10
11
12

6
PL
PL
DZIĘKUJEMY ZA WYBÓR MARKI ZELMER. ŻYCZYMY SATYSFAKCJI Z UŻYTKOWANIA
URZĄDZENIA.
OSTRZEŻENIE
Przed użyciem produktu należy uważnie przeczytać instrukcję użytkowania. Przechowuj ją w
bezpiecznym miejscu do wykorzystania w przyszłości.
OPIS
1. Jednostka główna
2. Przełącznik
3. Przycisk blokady
4. Komora mielenia
5. Ślimak podający z zamontowanym sprzęgłem
6. Ostrze dwustronne
7. Sitko o oczkach 3 mm
8. Sitko o oczkach 5 mm
9. Sitko o oczkach 7 mm
10. Pierścień
11. Podajnik żywności
12. Popychacz żywności
13. Akcesoria do kiełbas z separatorem
Akcesoria do warzyw
14. Tarka o drobnych oczkach
15. Gruba tarka
16. Gruba krajalnica
17. Tarka o bardzo drobnych oczkach
18. Korpus
19. Zaczep blokujący
20. Podajnik
21. Popychacz
INSTRUKCJE BEZPIECZEŃSTWA
Jeżeli przewód zasilający jest uszkodzony, musi on
zostać wymieniony przez producenta, autoryzowany
serwis lub osobę posiadającą podobne kwalikacje, aby
uniknąć zagrożenia.
Przestrzegaj czasu działania akcesoriów podanego w
poszczególnych rozdziałach instrukcji obsługi.
W celu czyszczenia postępuj zgodnie z rozdziałem
dotyczącym konserwacji i czyszczenia niniejszej
instrukcji obsługi.

7
PLPL
Należy zachować ostrożność podczas obsługi ostrzy
tnących, i podczas czyszczenia.
Należy zawsze odłączać produkt od zasilania, jeśli
pozostaje on bez nadzoru lub przed montażem,
demontażem bądź czyszczeniem.
Wyłącz urządzenie i odłącz je od zasilania przed
zmianą akcesoriów lub zbliżaniem się do części, które
mogą poruszać się podczas użytkowania.
Dzieci nie mogą korzystać z tego urządzenia.
Urządzenie oraz jego przewód należy przechowywać
poza zasięgiem dzieci.
Urządzenie może być używane przez osoby o
obniżonych zdolnościach zycznych, sensorycznych
i umysłowych oraz bez doświadczenia i wiedzy,
jeśli są nadzorowane lub poinstruowane w zakresie
użytkowania urządzenia w bezpieczny sposób oraz jeśli
zrozumiały związane z tym zagrożenia. Dzieciom nie
wolno bawić się urządzeniem.
WAŻNE OSTRZEŻENIA
Urządzenie zostało zaprojektowane do użytku domowego i pod żadnym pozorem nie powinno być
wykorzystywane do użytku komercyjnego lub przemysłowego. Każde nieprawidłowe użycie lub
niewłaściwa obsługa produktu spowoduje unieważnienie gwarancji.
Przed podłączeniem produktu do sieci należy sprawdzić, czy napięcie sieciowe jest takie samo, jak
wskazano na etykiecie produktu.
Podczas użytkowania przewód zasilania nie może być splątany ani okręcony wokół produktu.
Nie używaj urządzenia ani nie podłączaj i odłączaj od sieci mokrymi dłońmi i/lub stopami.
Nie ciągnij za przewód zasilania w celu odłączenia od sieci i nie używaj go do przenoszenia. W
przypadku awarii lub uszkodzenia i kontaktu należy natychmiast odłączyć produkt od sieci.
Nie przetwarzaj twardej żywności, takiej jak kości, orzechy (np. suszone i twarde ziarna soi) lub innej
żywności z twardymi włóknami.
Podczas obsługi należy korzystać z popychacza, nie należy popychać żywności rękoma.
Przed wyciskaniem soku za każdym razem należy sprawdzić ltr. W przypadku pęknięć lub uszkodzenia
nie korzystaj z wyciskarki i skontaktuj się ze sprzedawcą lub producentem.
W przypadku awarii lub uszkodzenia należy natychmiast odłączyć produkt od sieci i skontaktować
się z autoryzowanym serwisem. Nie otwieraj urządzenia, aby zapobiec niebezpieczeństwu. Tylko
wykwalikowany personel techniczny z autoryzowanego serwisu marki może przeprowadzać naprawy
urządzenia.

8
PL
PL
Firma Eurogama Sp. z o.o. zrzeka się wszelkiej odpowiedzialności za szkody, które mogą wystąpić u
ludzi, zwierząt lub na przedmiotach z powodu nieprzestrzegania niniejszych ostrzeżeń.
INSTRUKCJA OBSŁUGI
Maszynka do mielenia mięsa
Ciągłe użytkowanie nie powinno przekraczać 10 minut; wstrzymaj użytkowanie po upływie 10 minut i
uruchom ponownie maszynę po schłodzeniu.
Sposób instalacji maszynki do mielenia mięsa
Krok 1: przytrzymaj i przechyl łącznik maszynki do mielenia mięsa o mniej więcej 45 stopni w kierunku
przycisku przełączania wbudowanego w wyjściowe koło zębate, w celu zamocowania przykręć do
korpusu w kierunku przeciwnym do ruchu wskazówek zegara (jak przedstawiono na rysunku), a przycisk
blokady automatycznie zamocuje łącznik. (Rys. 1)
Krok 2: włóż ślimak w łącznik maszynki do mielenia mięsa (jak przedstawiono na rysunku) (Rys. 2)
Krok 3: zamontuj ostrze dwustronne na wale śrubowym (jak przedstawiono na rysunku) ostrzem na
zewnątrz (nieprawidłowe umieszczenie spowoduje usterkę). (Rys. 3)
Krok 4: zamocuj sitko do ostrza krzyżowego (w zależności od potrzeby wybierz odpowiednie sitko) i
zablokuj (jak przedstawiono na rysunku). (Rys. 4)
Krok 5: jedną ręką wciśnij środek sitka, a drugą przykręcić nasadkę ze stopu aluminium (jak
przedstawiono na rysunku). (Rys. 5)
Krok 6: włóż i zamocuj podajnik na łączniku i ustaw zmontowaną właściwie maszynkę na stabilnej
powierzchni. (Rys. 6)
Przystąpienie do pracy:
Potnij mięso na długie paski o wymiarach ok. 20 mm × 20 mm × 60 mm (zalecane jest mięso bez kości i
ścięgien) i ułóż je na podajniku.
Po włączeniu przełącznika zasilania kolejno wkładaj przygotowane mięso do wlotu podajnika łącznika.
W przypadku gdy żywność nie zostanie automatycznie wciągnięta do ślimaka, powoli wciskaj żywność
za pomocą popychacza. (Dozwolone jest stosowanie jedynie oryginalnego popychacza).
Po użyciu wyjmij wtyczkę z gniazdka.
Uwaga: w przypadku gdy żywność zablokuje ślimak podczas pracy, natychmiast wyłącz zasilanie.
Wytwarzanie kiełbas
Sposób instalacji:
Krok 1: przytrzymaj i przechyl łącznik maszynki do mielenia mięsa o mniej więcej 45 stopni w kierunku
przycisku przełączania wbudowanego w wyjściowe koło zębate, w celu zamocowania przykręć do
korpusu w kierunku przeciwnym do ruchu wskazówek zegara (jak przedstawiono na rysunku), a przycisk
blokady automatycznie zamocuje łącznik. (Rys. 7)
Krok 2: włóż ślimak do łącznika (jak przedstawiono na rysunku). (Rys. 8)
Krok 3: zamontuj akcesorium do kiełbasy (jak przedstawiono na rysunku). (Rys. 9)
Krok 4: włóż rurę do kiełbas do łącznika (jak przedstawiono na rysunku). (Rys. 10)
Krok 5: przykręć nasadkę ze stopu aluminium (jak przedstawiono na rysunku). (Rys. 11)
Krok 6: włóż i zamocuj podajnik w łączniku teowym. (Rys. 12)
Przystąpienie do pracy:
Ustaw zmontowane właściwie urządzenie na stabilnej powierzchni, włącz włącznik zasilania, zamocuj
czysty łącznik oraz podajnik, po upewnieniu się, że urządzenie pracuje prawidłowo, włóż żywność
9
PLPL
do podajnika i użyj popychacza. Po zakończeniu użytkowania maszynki wyjmij wtyczkę z gniazda
zasilającego.
Zakres zastosowania: różne rodzaje mięsa bez kości i ścięgien, mięso i mieszanka przypraw.
Przygotowanie purée ziemniaczanego i czosnkowego
Uwaga: sposób instalacji do przygotowania purée ziemniaczanego i czosnkowego jest taki sam jak
wyciskarki, z wyjątkiem zamiany siatki wyciskarki w kroku 2 na końcówkę do przecierania i zamiany
dyszy wyciskarki na dyszę do przecierania w kroku 4.
Przystąpienie do pracy:
zamocuj zmontowane urządzenie na stabilnej powierzchni stołu, potnij ziemniaki (obrany czosnek) na
paski o wymiarach ok. 20 mm × 20 mm × 20 mm i ułóż je na podajniku.
Po uruchomieniu przełącznika zasilania powoli wciskaj żywność do wejścia podajnika za pomocą
popychacza, po sprawdzeniu czy urządzenie pracuje prawidłowo.
Po użyciu wyłącz zasilanie i zabierz przetworzoną żywność.
Uwaga: sposób instalacji w przypadku przygotowania makaronu jest taki sam jak w przypadku instalacji
wyciskarki wolnoobrotowej, z wyjątkiem zamiany mocowania siatki wyciskarki w kroku 2 na cylinder do
przecierania i zamiany dyszy wyciskarki na dyszę do makaronu okrągłego/linguine w kroku 4.
Przystąpienie do pracy:
Ustaw zmontowane urządzenie na stabilnej powierzchni i ułóż ciasto na podajniku.
Po włączeniu przełącznika zasilania powoli wciskaj ciasto do wejścia podajnika po sprawdzeniu czy
urządzenie pracuje prawidłowo.
Po użyciu wyjmij wtyczkę z gniazdka.
Szatkowanie i krojenie
Sposób instalacji:
Krok 1: przytrzymaj i przechyl łącznik szatkownicy o mniej więcej 45 stopni w kierunku przycisku
przełączania wbudowanego w wyjściowe koło zębate, w celu zamocowania przykręć do korpusu w
kierunku przeciwnym do ruchu wskazówek zegara, a przycisk blokady automatycznie zamocuje łącznik.
(Rys. 13)
Krok 2: otwórz łącznik szatkownicy i włóż wybrany bęben tnący o wymaganej grubości szatkowania
(Ryc. 14)
Krok 3: dokręć pokrywę łącznika szatkownicy i ustaw zmontowane urządzenie na stabilnej powierzchni.
(Rys. 15)
Przystąpienie do pracy:
Ułóż przygotowane owoce i warzywa na podajniku.
Po włączeniu przełącznika zasilania kolejno wkładaj żywność do wejścia podajnika po sprawdzeniu czy
urządzenie pracuje prawidłowo i powoli wciskaj żywność popychaczem.
Zakres zastosowania: dynia, ogórek, ziemniak, batat, marchew oraz inne owoce i warzywa z miękkimi
włóknami.
Uwaga: w przypadku gdy żywność zablokuje ślimak podczas pracy, natychmiast wyłącz zasilanie.
KONSERWACJA I CZYSZCZENIE
Przed czyszczeniem zawsze należy wyłączyć urządzenie i wyjąć wtyczkę z gniazdka.
Nie zanurzaj urządzenia i kabla zasilania w wodzie ani innych płynach i nie myj ich w zmywarce.
Podpowiedź: sugeruje się, aby czyścić urządzenie natychmiast po użyciu.
Aby rozmontować urządzenie, należy obracać urządzenie w

10
PL
PL
kierunku odwrotnym niż podczas instalacji.
Po zdemontowaniu wszystkich elementów naciśnij przycisk blokady 1 jedną ręką, a drugą odkręć łącznik
zgodnie z kierunkiem strzałki przedstawionym na rysunku.
Podczas demontażu należy zachować szczególną ostrożność.
Do czyszczenia wyciskarki nie używać środków ściernych, skrobaków, acetonu i alkoholu.
Ponieważ niektóre części są ostre, należy czyścić je szczoteczką, aby nie skaleczyć palców.
Nie zanurzaj silnika w wodzie ani nie płucz go pod bieżącą wodą. Temperatura wody używanej do
czyszczenia nie powinna przekraczać 60°C.
Tylko plastikowe części nadają się do mycia w zmywarce. W przypadku metalowych części zalecane
jest płukanie ich pod bieżącą wodą i natychmiastowe suszenie.
Tabela z przepisami
Ciągła praca nie powinna przekraczać 10 minut; wstrzymaj pracę po upływie 10 minut i uruchom
maszynę po schłodzeniu.
Akcesoria Żywność Ilość Czas pracy
Funkcja mielenia Wołowina 5 kg 15 minut
Szatkownica Namoczona marchew 0,5 kg 1 minut(y)
EKOLOGICZNA UTYLIZACJA
To urządzenie jest oznaczone zgodnie z Dyrektywą Europejską 2012/19/UE oraz polską
Ustawa z dnia 11 września 2015 r. „O zużytym sprzęcie elektrycznym i elektronicznym” (Dz.U.
z dn. 23.10.2015 poz. 11688) symbolem przekreślonego kontenera na odpady.
Takie oznakowanie informuje, że sprzęt ten, po okresie jego użytkowania nie może być
umieszczany łącznie z innymi odpadami pochodzącymi z gospodarstwa domowego.
Użytkownik jest zobowiązany do oddania go prowadzącym zbieranie zużytego sprzętu elektrycznego
i elektronicznego. Prowadzący zbieranie, w tym lokalne punkty zbiórki, sklepy oraz gminne jednostki,
tworzą odpowiedni system umożliwiający oddanie tego sprzętu.
Właściwe postępowanie ze zużytym sprzętem elektrycznym i elektronicznym przyczynia się do
uniknięcia szkodliwych dla zdrowia ludzi i środowiska naturalnego konsekwencji, wynikających z
obecności składników niebezpiecznych oraz niewłaściwego składowania i przetwarzania takiego
sprzętu.

11
PLEN
WE WOULD LIKE TO THANK YOU FOR CHOOSING ZELMER. WE WISH THE PRODUCT
PERFORMS TO YOUR SATISFACTION AND PLEASURE.
WARNING
Please read the instructions for use carefully prior to using the product. store these in a safe place for
future reference.
DESCRIPTION
1. Main unit
2. Switch
3. Lock button
4. Mincing chamber
5. Feed screw with assembled coupling
6. Double side blade
7. Mesh sieve with 3mm holes
8. Mesh sieve with 5mm holes
9. Mesh sieve with 7mm holes
10. Ring collar
11. Food tray
12. Food pusher
13. Sausage accessory with separator
Vegetables accessory
14. Fine grater
15. Coarse grater
16. Coarse slicer
17. Ultra-ne grater
18. Accessory body
19. Locking tab
20. Tray
21. Pusher
SAFETY INSTRUCTIONS
If the supply cord is damaged it must be replaced by
the manufacturer, its service agent or similarly qualied
persons in order to avoid a hazard.
Respect the operating times of the accessories
indicated in their specic sections of the manual.
Proceed according to maintenance and cleaning
section of this manual for cleaning. Warning: potential
injury from misuse!

12
PL
EN
Care shall be taken when handling the sharp cutting
blades and during cleaning.
Always disconnect the appliance from the supply if it is
left unattended and before assembling, disassembling
or cleaning.
Switch off the appliance and disconnect from supply
before changing accessories or approaching parts that
move in use.
This appliance shall not be used by children. Keep the
appliance and its cord out of reach of children.
Appliances can be used by persons with reduced
physical, sensory or mental capabilities or lack of
experience and knowledge if they have been given
supervision or instruction concerning use of the
appliance in a safe way and if they understand the
hazards involved. Children shall not play with the
appliance.
IMPORTANT WARNINGS
This appliance is designed for home use and should never be used for commercial or industrial use
under any circumstances. Any incorrect use or improper handling of the product shall render the
warranty null and void.
Prior to plugging in the product, check that your mains voltage is the same as the one indicated on the
product label.
The mains connection cable must not be tangled or wrapped around the product during use.
Do not use the device, or connect and disconnect to the supply mains with the hands and/or feet wet.
Do not pull on the connection cord in order to unplug it or use it as a handle Unplug the product
immediately from the mains in the event of any breakdown or damage and contact
This appliance is designed for home use and should never be used for commercial or industrial use
under any circumstances. Any incorrect use or improper handling of the product shall render the
warranty null and void.
Prior to plugging in the product, check that your mains voltage is the same as the one indicated on the
product label.
Do not pull on the connection cord in order to unplug it or use it as a handle.
Do not process tough foods, such as bones, nuts (such as dry and hard soybeans) or other food with
tough ber.
Please utilize the feeder push during operation, instead of pushing food by hands.
Check the lter before squeezing juicer per time. Do not use the juicer any more in case of any cracks or

13
PLEN
damage, and get in touch with the nearest dealer and manufacturer.
Unplug the product immediately from the mains in the event of any breakdown or damage and contact
an ofcial technical support service. In order to prevent any risk of danger, do not open the device. Only
qualied technical personnel from the brand´s Ofcial technical support service may carry out repairs or
procedures on the device.
Eurogama Sp. z o.o. disclaims all liability for damages that may occur to people, animals or objects, for
the non-observance of these warnings.
INSTRUCTIONS FOR USE
Meat Grinder
The continuous operation should not exceed 10 minutes; suspend the operation in the event of
exceeding 10 minutes and restart the machine after cooling down.
Installation method for meat grinder.
Step 1: hold and tilt the tee-junction of minced meat toward the switching push button at about 45
degrees embedded in the output gear, anticlockwise screw in the body (as shown in the picture) for
fastening, and the lock button will automatically x the tee-junction. (Fig.1)
Step 2: put the screw into the tee-junction of minced meat (as shown in the picture) (Fig.2)
Step 3: assemble the crossblade on the screw shaft (as shown in the picture) with blade outward (failure
will be caused by incorrect placement). (Fig.3)
Step 4: attach the mesh sieve to the crossblade (select micropore mesh sieve, mesopore mesh sieve
and macropore mesh sieve as needed), and lock the half slot of mesh sieve to the adjusting pin of tee-
junction (as shown in the picture). (Fig.4)
Step 5: press on the center of the mesh sieve with one hand and screw the aluminum alloy cap with the
other hand (as shown in the picture). (Fig.5)
Step 6: put and x the material plate into the tee-junction, and x the assembled appliance on a stable
surface. (Fig.6)
Operational Approach:
Cut the meat into long strip of about 20mm×20mm×60mm (meat without bone or tendons is
recommended) and put it into the material plate.
Turn on the power switch, and put the prepared meat into feed port of tee-junction in turn after
conrming the normal operation of the appliance.
In case the food failed to be automatically drawn into the meat screw, slowly press the food with feeder
push. (Feeder push is allowed only).
Please disconnect the power plug after use.
Note: in case food locked in the screw out of work during the operation, immediately turn off the power.
Making Sausages
Installation method:
Step 1: hold and tilt the tee-junction of minced meat toward the switching push button at about 45
degrees embedded in the output gear, anticlockwise screw in the body (as shown in the picture) for
fastening, and the lock button will automatically x the tee-junction. (Fig.7)
Step 2: put the screw of minced meat into the tee-junction (as shown in the picture). (Fig.8)
Step 3: assemble sausage lter (as shown in the picture). (Fig.9)
Step 4: put the sausage tube into the tee-junction (as shown in the picture). (Fig.10)
Step 5: screw up the aluminum alloy cap (as shown in the picture). (Fig.11)
Step 6: put and x the material plate into tee-junction. (Fig.12)

14
PL
EN
Operational approach:
Fix the assembled appliance on the stable surface, turn on the power switch, embed the clean-washed
casing into the discharge port (for fastening) after conrming the normal operation of the appliance, put
the marinated food into the material plate, and push it into feed port by feeder push.
Please disconnect the power plug after use.
Scope of application: a variety of meat without bone or tendon, meat and seasoning mixture.
Making mashed potato and garlic
Important notice: the installation method for making mashed potato and garlic is same as that of juicer,
except replacing juicer mesh tube in step 2 with mashing cylinder and replacing juicer nozzle with
mashing nozzle in step 4.
Operational approach:
Fixed the assembled appliance on the stable surface, cut the potato (peeled garlic) into strip of
approximately 20mm×20mm×20mm and put them into material plate.
Turn on the power switch and slowly press the food into feed port by feeder push after conrming normal
operation of the appliance.
Disconnect the power supply after use and take processed food away.
Important notice: the installation method of making noodles is same as that of juicer, except replacing
juicer mesh tube in step 2 with mashing cylinder and replacing juicer nozzle with round-noodle/ linguine
nozzle in step 4.
Operational approach:
Fix the assembled appliance on the stable surface and put the duff into material plate.
Turn on the power switch and slowly put the duff into feed port after conrming the normal operational of
the appliance.
Disconnect the power supply after use.
Shred and Slice
Installation method:
Step 1: hold and tilt the tee-junction of shred and slice toward the switching push button at about 45
degrees embedded in the output gear, anticlockwise screw in the body for fastening and the lock button
will automatically x the tee-junction. (Fig.18)
Step 2: upward open the tee-junction of shred and slice and put the cutter in (select cutter of thick
lament, thin lament and slice as needed). (Fig.19)
Step 3: tighten the tee-junction cover of shred and slice, and x the assembled appliance on the stable
surface. (Fig.20)
Operational approach:
Put the prepared fruits or vegetables in the material plate.
Turn on the power switch, put the food into feed port in turns after conrming the normal operation of the
appliance and press the food by feeder push.
Scope of application: pumpkin, cucumber, sponge gourd, potato, sweet potato, carrot and other fruits or
vegetables with ne bers.
Note: in case food locked on the screw out of work during the operation, immediately turn off the power
supply.
MAINTENANCE AND CLEANING
Before cleaning, always turn off the appliance and unplug it from the power supply.
Do not immerse the appliance and power cord in water or other liquids or wash them in the dishwasher.

15
PLEN
Prompt: it is suggested that clean the appliance immediately after use, which is
easy for cleaning.
In the event of disassembling the appliance, rotate the appliance on the
opposite direction of installation direction.
When disassembling all tee-junctions, press on the lock button 1 with one hand and screw off the tee-
junction with the other hand as the direction of the arrow shown in the right picture.
Please be careful for the disassembly of the appliance, so as not to scratch your ngers.
Do not use abrasives, scrubbers, acetone and alcohol to clean juicer.
Since some parts are relatively sharp, clean them with a brush, so as not to scratch ngers;
Neither immerse the motor in water, nor rinse it under the water tap. Water temperature for cleaning
should not exceed 60 ° C.
Only plastic parts are suitable for dishwashing machine. For the metal parts it is recommended to rinse
them under tap water and dry them immediately.
Table of recipes
The continuous operation should not exceed 10 minutes; suspend the operation in the event of
exceeding 10 minutes and restart the machine after cooling down.
Accessory Load Quantity Time of operation
Mincer function Beef 5.0 kg 15 minutes
Shredder and grater Soaked carrots 0.5 kg 1 minute
PRODUCT DISPOSAL
This product complies with European Directive 2012/19/EU on electrical and electronic
devices, known as WEEE (Waste Electrical and Electronic Equipment), provides the legal
framework applicable in the European Union for the disposal and reuse of waste electronic
and electrical devices. Do not dispose of this product in the bin, instead going to the electrical
and electronic waste collection centre closest to your home.

16
PL
DE
WIR MÖCHTEN IHNEN DANKEN, DASS SIE SICH FÜR ZELMER ENTSCHIEDEN HABEN. WIR
WÜNSCHEN, DASS DAS PRODUKT ZU IHRER ZUFRIEDENHEIT UND FREUDE FUNKTIONIERT.
ACHTUNG
Bitte lesen Sie die Gebrauchsanweisung vor der Anwendung des Produkts aufmerksam durch.
Bewahren Sie diese für spätere Nachschlagezwecke an einem sicheren Ort auf.
BEZEICHNUNG
1. Haupteinheit
2. Schalter
3. Verriegelungsknopf
4. Wolfskammer
5. Förderschnecke mit montierter Kupplung
6. Doppelseitige Klinge
7. Maschensieb mit 3-mm-Lochung
8. Maschensieb mit 5-mm-Lochung
9. Maschensieb mit 7-mm-Lochung
10. Ringband
11. Essenstablett
12. Speiseschieber
13. Wurstwarenzubehör mit Trennscheibe
Zubehör für Gemüse
14. Feine Raspel
15. Grobe Reibe
16. Grobschneidemaschine
17. Ultra-feine Reibe
18. Zusätzlicher Aufbau
19. Verriegelungstaste
20. Fach
21. Speiseschieber
SICHERHEITSHINWEISE
Wenn das Netzkabel beschädigt ist, muss es vom
Hersteller, seinem Servicevertreter oder ähnlich
qualizierten Personen ersetzt werden, um eine
Gefährdung zu vermeiden.
Beachten Sie die Betriebszeiten des Zubehörs, die
in den entsprechenden Abschnitten des Handbuchs
angegeben sind.
Gehen Sie bei der Reinigung entsprechend dem
Wartungs- und Reinigungsabschnitt dieses Handbuchs
vor.

17
PLDE
Warnung: Mögliche Verletzung durch Missbrauch!
Bei der Handhabung der scharfen Schneidklingen, und
bei der Reinigung ist Vorsicht geboten.
Trennen Sie das Produkt immer von der
Stromversorgung, wenn er unbeaufsichtigt bleibt und
bevor Sie ihn zusammenbauen, zerlegen oder reinigen.
Schalten Sie das Gerät aus und trennen Sie es von der
Stromversorgung, bevor Sie Zubehörteile austauschen
oder sich an Teile, die sich im Gebrauch bewegen,
herantasten.
Dieses Gerät darf nicht von Kindern benutzt werden.
Bewahren Sie das Gerät und sein Kabel außerhalb der
Reichweite von Kindern auf.
Geräte können von Personen mit eingeschränkten
physischen, sensorischen oder mentalen Fähigkeiten
oder mit mangelnder Erfahrung und Kenntnissen
benutzt werden, wenn sie in sicherer Weise
beaufsichtigt oder unterwiesen wurden und wenn sie
die damit verbundenen Gefahren verstehen. Kinder
dürfen nicht mit dem Gerät spielen.
WICHTIGE WARNHINWEISE
Dieses Gerät ist für den Heimgebrauch konzipiert und sollte unter keinen Umständen für den
kommerziellen oder industriellen Gebrauch verwendet werden. Jede unsachgemäße Verwendung oder
unsachgemäße Handhabung des Produkts führt zum Erlöschen der Garantie.
Überprüfen Sie vor dem Anschließen des Produkts, ob Ihre Netzspannung mit der auf dem
Produktetikett angegebenen übereinstimmt.
Das Netzanschlusskabel darf sich während des Gebrauchs nicht verheddern oder um das Produkt
gewickelt werden.
Das Gerät nicht mit nassen Händen verwenden oder an das Versorgungsnetz anschließen oder trennen.
Ziehen Sie nicht am Anschlusskabel, um den Stecker zu ziehen oder es als Griff zu benutzen Ziehen Sie
bei einer Panne oder Beschädigung sofort den Netzstecker aus der Steckdose
Dieses Gerät ist für den Heimgebrauch konzipiert und sollte unter keinen Umständen für den
kommerziellen oder industriellen Gebrauch verwendet werden. Jede unsachgemäße Verwendung oder
unsachgemäße Handhabung des Produkts führt zum Erlöschen der Garantie.
Überprüfen Sie vor dem Anschließen des Produkts, ob Ihre Netzspannung mit der auf dem
Produktetikett angegebenen übereinstimmt.
Ziehen Sie nicht an der Verbindungsschnur, um den Stecker zu ziehen oder sie als Griff zu benutzen.

18
PL
DE
Verarbeiten Sie keine zähen Lebensmittel, wie Knochen, Nüsse (wie trockene und harte Sojabohnen)
oder andere Lebensmittel mit zähen Ballaststoffen.
Bitte nutzen Sie während des Betriebs den Zubringerschieber, anstatt das Essen mit den Händen zu
schieben.
Überprüfen Sie den Filter vor dem Auspressen des Entsafters pro Vorgang. Den Entsafter nicht mehr
verwenden, wenn er Risse oder Schäden aufweist, und setzten Sie sich mit dem nächsten Händler und
Hersteller in Verbindung.
Ziehen Sie im Falle einer Panne oder Beschädigung sofort den Netzstecker und wenden Sie sich
an einen ofziellen technischen Kundendienst. Um jegliches Gefahrenrisiko zu vermeiden, darf das
Gerät nicht geöffnet werden. Nur qualiziertes technisches Personal des ofziellen technischen
Kundendienstes der Marke darf Reparaturen oder Eingriffe an dem Gerät vornehmen.
Eurogama Sp. z o.o. übernimmt keine Haftung für Schäden, die an Menschen, Tieren oder
Gegenständen entstehen können, wenn diese Warnhinweise nicht beachtet werden.
GEBRAUCHSANWEISUNGEN
Fleischwolf
Der Dauerbetrieb sollte 10 Minuten nicht überschreiten; bei einer Überschreitung von 10 Minuten sollte
der Betrieb unterbrochen und die Maschine nach dem Abkühlen neu gestartet werden.
Installationsmethode für Fleischwolf.
Schritt 1: Halten Sie die T-Stückverbindung des Hackeischs und kippen Sie es in Richtung des
Schaltdruckknopfes in einem Winkel von ca. 45 Grad, der in das Ausgangsgetriebe eingebettet ist, zur
Befestigung gegen den Uhrzeigersinn in das Gehäuse (wie im Bild gezeigt), und der Verriegelungsknopf
xiert die T-Stückverbindung automatisch. (Abb.1)
Schritt 2: Stecken Sie die Schraube in die T-Stückverbindung zum Hackeisch (wie im Bild gezeigt)
(Abb.2)
Schritt 3: Montieren Sie die Querklinge auf dem Schraubenschaft (wie im Bild gezeigt) mit der Klinge
nach außen (das Versagen wird durch falsche Platzierung verursacht). (Abb.3)
Schritt 4: Befestigen Sie das Maschensieb am Kreuzblatt (wählen Sie je nach Bedarf das Mikroporen-
Maschensieb, das Mesoporen-Maschensieb und das Makroporen-Maschensieb), und verriegeln Sie
den halben Schlitz des Maschensiebs mit dem Einstellstift der T-Stückverbindung (wie in der Abbildung
gezeigt). (Abb.4)
Schritt 5: Drücken Sie mit einer Hand auf die Mitte des Maschensiebs und schrauben Sie mit der
anderen Hand die Kappe aus Aluminiumlegierung auf (wie auf dem Bild gezeigt). (Abb.5)
Schritt 6: Legen Sie die Materialplatte in die T-Stückverbindung und xieren Sie das zusammengesetzte
Gerät auf einer stabilen Oberäche. (Abb.6
Operativer Ansatz:
Schneiden Sie das Fleisch in lange Streifen von etwa 20mm×20mm×60mm (Fleisch ohne Knochen oder
Sehnen wird empfohlen) und legen Sie es in die Materialplatte,
Schalten Sie den Netzschalter ein und legen Sie das zubereitete Fleisch nach dem Betätigen des
normalen Betriebs des Geräts der Reihe nach in den Einfülltrichter der T-Stückverbindung.
Falls das zu verarbeitende Lebensmittel nicht automatisch in die Fleischschnecke eingezogen wird,
drücken Sie das Essen langsam mit einem Speiseschieber. (Nur Speiseschieber ist erlaubt).
Bitte ziehen Sie nach dem Gebrauch den Netzstecker.
Hinweis: Falls während des Betriebs Essen in der Schraube feststeckt, schalten Sie den Strom sofort
aus.
Wurstherstellung
Installationsmethode:
Schritt 1: Halten Sie die T-Stückverbindung des Hackeischs und kippen Sie es in Richtung des
Schaltdruckknopfes in einem Winkel von ca. 45 Grad, der in das Ausgangsgetriebe eingebettet ist, zur

19
PLDE
Befestigung gegen den Uhrzeigersinn in das Gehäuse (wie im Bild gezeigt), und der Verriegelungsknopf
xiert die T-Stückverbindung automatisch. (Abb.7)
Schritt 2: Setzen Sie die Hackeischschraube in die T-Stückverbindung (wie im Bild gezeigt). (Abb.8)
Schritt 3: Wurstlter zusammenbauen (wie im Bild gezeigt). (Abb.9)
Schritt 4: Stecken Sie den Wurstschlauch in die T-Stückverbindung (wie auf dem Bild). (Abb.10)
Schritt 5: Schrauben Sie die Kappe aus Aluminiumlegierung auf (wie in der Abbildung gezeigt). (Abb.11)
Schritt 6: Setzen und xieren Sie die Materialplatte in die T-Stückverbindung. (Abb.12)
Operativer Ansatz:
Befestigen Sie das zusammengebaute Gerät auf der stabilen Oberäche, schalten Sie den Netzschalter
ein, betten Sie das sauber gewaschene Gehäuse in die Auslassöffnung (zur Befestigung) ein, nachdem
Sie den normalen Betrieb des Gerätes betätigt haben, legen Sie das marinierte Lebensmittel in die
Materialplatte und schieben Sie es mit dem Speiseschieber in die Speiseöffnung.
Bitte ziehen Sie nach dem Gebrauch den Netzstecker.
Anwendungsbereich: verschiedene Fleischsorten ohne Knochen und Sehnen, Fleisch- und
Gewürzmischung.
Herstellung von Kartoffel- und Knoblauchpüree
Wichtiger Hinweis: Die Installationsmethode für die Herstellung von Kartoffel- und Knoblauchpüree ist
die gleiche wie die des Entsafters, mit Ausnahme des Austauschs des Entsafter-Gitterrohrs in Schritt 2
gegen den Maischezylinder und des Austauschs der Entsafterdüse gegen die Maischedüse in Schritt 4.
Operativer Ansatz:
Befestigen Sie das zusammengebaute Gerät auf der stabilen Oberäche, schneiden Sie die
Kartoffel (geschälter Knoblauch) in Streifen von ca. 20mm×20mm×20mm und legen Sie diese in eine
Materialplatte.
Schalten Sie den Netzschalter ein und drücken Sie nach Betätigung des Normalbetriebs des Geräts das
Essen langsam mittel Speiseschieber in die Einfüllöffnung ein.
Trennen Sie die Stromversorgung nach dem Gebrauch ab und entfernen Sie verarbeitete Lebensmittel.
Wichtiger Hinweis: Die Installationsmethode für die Herstellung von Nudeln ist die gleiche wie die des
Entsafters, außer dass in Schritt 2 das Maschenrohr des Entsafters durch einen Maischzylinder und in
Schritt 4 die Entsafterdüse durch eine Rundnudel-/Linguinendüse ersetzt wird.
Operativer Ansatz:
Befestigen Sie das zusammengebaute Gerät auf der stabilen Oberäche und legen Sie den Abfall in
eine Materialplatte.
Schalten Sie den Netzschalter ein und führen Sie den Abfall langsam in den Einfülltrichter ein, nachdem
Sie den Normalbetrieb des Geräts betätigt haben.
Bitte ziehen Sie nach dem Gebrauch den Netzstecker.
Zerkleinern und Zerschneiden
Installationsmethode:
Schritt 1: Halten Sie die T-Stückverbindung zum Zerkleinern und Zerschneiden und bewegen Sie
es in Richtung des Schaltdruckknopfes in einem Winkel von ca. 45 Grad, der im Ausgangsgetriebe
eingebettet ist, gegen den Uhrzeigersinn in das Gehäuse zur Befestigung und der Verriegelungsknopf
xiert automatisch die T-Stückverbindung. (Abb.13)
Schritt 2: Öffnen Sie die T-Stückverbindung zum Zerkleinern und Zerschneiden nach oben und setzen
Sie das Schneidemesser ein (wählen Sie je nach Bedarf das Schneidemesser für dicke und dünne
Streifen und Scheiben). (Abb.14)
Schritt 3: Ziehen Sie die Abdeckung der T-Stückverbindung zum Zerkleinern und Zerschneiden fest und

20
PL
DE
xieren Sie das zusammengebaute Gerät auf der stabilen Oberäche. (Abb.15)
Operativer Ansatz:
Legen Sie das zubereitete Obst oder Gemüse in die Materialplatte.
Schalten Sie den Netzschalter ein und drücken Sie nach Betätigung des Normalbetriebs des Geräts das
Essen langsam mittels Speiseschieber in die Einfüllöffnung ein.
Anwendungsbereich: Kürbis, Gurke, Schwammkürbis, Kartoffel, Süßkartoffel, Karotte und andere
feinfaserige Früchte oder Gemüse.
Hinweis: Falls während des Betriebs Essen in der Schraube feststeckt, schalten Sie den Strom sofort
aus.
INSTANDHALTUNG UND REINIGUNG
Schalten Sie das Gerät vor dem Reinigen immer aus und ziehen Sie den Netzstecker aus der
Steckdose.
Tauchen Sie das Gerät und das Netzkabel nicht in Wasser oder andere Flüssigkeiten ein und waschen
Sie es nicht in der Geschirrspülmaschine.
Hinweis: Es wird empfohlen, das Gerät sofort nach dem Gebrauch zu reinigen, was
leicht zu bewerkstelligen ist.
Im Falle einer Demontage des Geräts drehen Sie das Gerät in die
entgegengesetzte Richtung der Installationsrichtung.
Bei der Demontage aller T-Stückverbindungen drücken Sie mit einer Hand auf den Verriegelungsknopf 1
und schrauben die T-Stückverbindung mit der anderen Hand in Pfeilrichtung (siehe rechtes Bild) ab.
Bitte achten Sie bei der Demontage des Gerätes darauf, dass Sie sich nicht an den Fingern verletzen.
Verwenden Sie keine Scheuermittel, Schrubber, Aceton und Alkohol, um den Entsafter zu reinigen.
Da einige Teile relativ scharf sind, reinigen Sie sie mit einer Bürste, um die Finger nicht zu verletzen;
Tauchen Sie den Motor weder in Wasser ein, noch spülen Sie ihn unter dem Wasserhahn aus. Die
Wassertemperatur für die Reinigung sollte nicht über 60 ° C sein.
Nur Kunststoffteile sind für die Geschirrspülmaschine geeignet. Für die Metallteile wird empfohlen, sie
unter Leitungswasser zu spülen und sofort zu trocknen.
Rezepttabelle
Der Dauerbetrieb sollte nicht länger als 10 Minuten dauern; unterbrechen Sie den Betrieb, falls er länger
als 10 Minuten dauert, und starten Sie die Maschine nach dem Abkühlen neu.
Zubehör Befüllung Menge Betriebszeit
Fleischwolf-Funktion Rindeisch 5.0 kg 15 Minuten
Zerkleinerer und
Reibe Eingeweichte Karotten 0.5 kg 1 Minuten
PRODUKTENTSORGUNG
Dieses Produkt entspricht der Europäischen Richtlinie 2012/19/EU über elektrische und
elektronische Geräte, bekannt als WEEE (Waste Electrical and Electronic Equipment), die
den in der Europäischen Union geltenden gesetzlichen Rahmen für die Entsorgung und
Wiederverwendung von elektronischen und elektrischen Altgeräten darstellt. Entsorgen Sie
dieses Produkt nicht in der Mülltonne, sondern wenden Sie sich an die nächstgelegene
Sammelstelle für elektrischen und elektronischen Abfall.
This manual suits for next models
2
Table of contents
Languages:
Other Zelmer Kitchen Appliance manuals

Zelmer
Zelmer 886 User manual

Zelmer
Zelmer ZJE5750 User manual

Zelmer
Zelmer ZSM7850 User manual

Zelmer
Zelmer ZHB0804L User manual

Zelmer
Zelmer ZFS0919 User manual

Zelmer
Zelmer JE1200-5 User manual

Zelmer
Zelmer ZJE6800 User manual

Zelmer
Zelmer ZSM7700 User manual

Zelmer
Zelmer 887 User manual

Zelmer
Zelmer ZSM7900 User manual

Zelmer
Zelmer IR8100 User manual

Zelmer
Zelmer 491 symbio User manual

Zelmer
Zelmer ZMM5801P ZOSIA User manual

Zelmer
Zelmer ZSM7850 User manual

Zelmer
Zelmer 586 User manual

Zelmer
Zelmer Alexis Young User manual

Zelmer
Zelmer 393 User manual

Zelmer
Zelmer ZSM2102X User manual

Zelmer
Zelmer 493 User manual

Zelmer
Zelmer FD1000 User manual