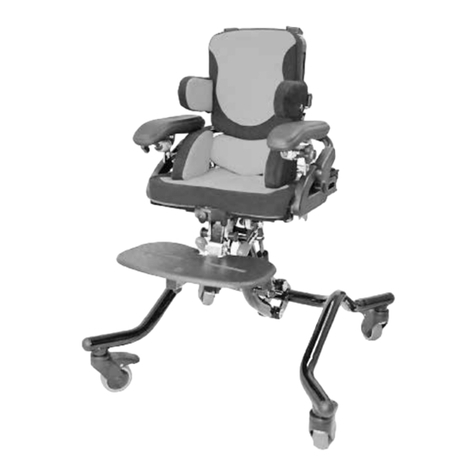
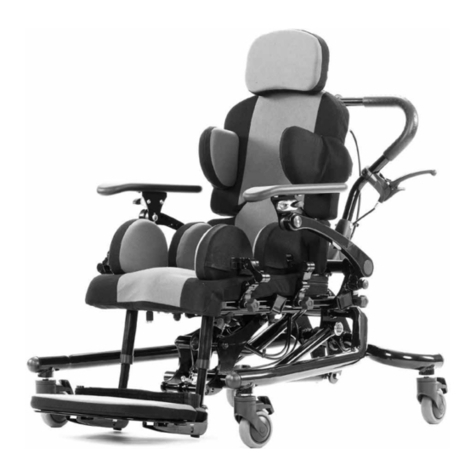
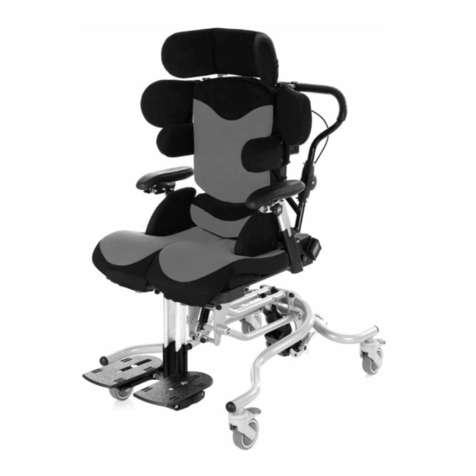
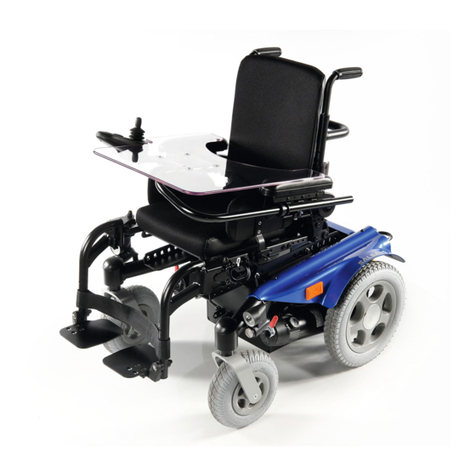
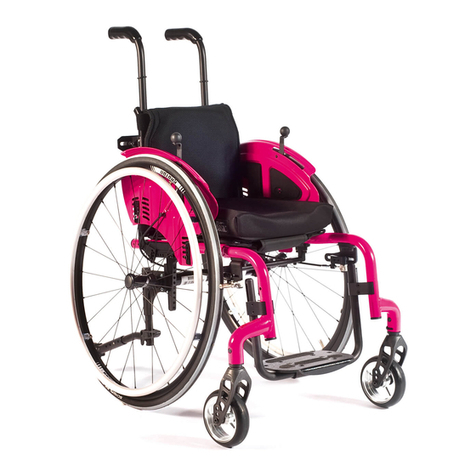
Zippie YOUNGSTER 3 Manual

Directions for use
Gebrauchsanweisung
Gebruikershandleiding
Notice d’utilisation
Manuale d'uso
Manual de usuario
Instruções Para Utilização
Brugervejledning
Instrukcja użytkowania
Brukerveiledning
YOUNGSTER 3
Wheelchair
Rollstuhl
Manual Rolstoel
Fauteuil roulant manuel
Carrozzina manuale
Silla de ruedas manual
Cadeira de Rodas Manual
Kørestole
Wózek Inwalidzki
Manuell Rullestol
000690636

IF YOU ARE VISUALLY IMPAIRED, THIS DOCUMENT CAN BE VIEWED IN
PDF FORMAT AT WWW.SUNRISEMEDICAL.CO.UK
FÜR SEHBEHINDERTE PERSONEN STEHT DIESES DOKUMENT IM PDF-
FORMAT AUF WWW.SUNRISEMEDICAL.DE
ALS U VISUEEL GEHANDICAPT BENT KAN DIT DOCUMENT OOK
WORDEN GELEZEN IN PDF-FORMAAT OP WWW.SUNRISEMEDICAL.NL
SI VOUS SOUFFREZ DE DÉFICIENCE VISUELLE, CE DOCUMENT PEUT
ÊTRE CONSULTÉ EN FORMAT PDF SUR WWW.SUNRISEMEDICAL.FR
QUESTO DOCUMENTO È PRESENTE IN FORMATO PDF PER GLI
IPOVEDENTI SUL SITO WEB ALL'INDIRIZZO WWW.SUNRISEMEDICAL.IT
SI TIENE DIFICULTADES VISUALES, PUEDE ENCONTRAR ESTE
DOCUMENTO EN FORMATO PDF VISITANDO WWW.SUNRISEMEDICAL.ES
SE TIVER PROBLEMAS VISU AIS , ESTE DOCUMENTO PODE SER VISU
ALIZADO EM FORMATO NA WWW.SUNRIS E MEDICAL.ES
HVIS DU HAR NEDSAT SYN, KAN DETTE DOKUMENT SES I PDF-FORMAT
PÅ WWW.SUNRISEMEDICAL.NO
JEŚLI SĄ OSOBY NIEDOWIDZĄCE, TO DOKUMENT MOŻE BYĆ OGLĄDANY
W FORMACIE PDF WWW.SUNRISEMEDICAL.PL
HVIS DU ER SYNS HANDICAPET , KAN DETTE DOKUMENT SES I PDF
-FORMAT PÅ WWW .SUNRISE MEDICAL .DE

ENGLISH
3
YOUNGSTER 3
Wheelchairs:
1. Push handles
2. Backrest upholstery
3. Sideguard
4. Seat sling
5. Footrest
6. Castors
7. Footboard
8. Fork
9. Quick-release axle
10. Wheel locks
11. Handrim
12. Rear wheel
Rollstühle:
1. Schiebegriffe
2. Rückenbespannung
3. Seitenteil
4. Sitzbespannung
5. Fußraste
6. Lenkräder
7. Fußbrett
8. Gabel
9. Steckachse
10. Feststellbremsen
11. Greifring
12. Antriebsrad
Fauteuils roulants :
1. Poignées de poussée
2. Toile du dossier
3. Protège-vêtement
4. Toile du siège
5. Repose-pieds
6. Roues avant
7. Palette
8. Fourche
9. Axe à déverrouillage rapide
10. Freins
11. Main courante
12. Roue arrière
Rolstoelonderdelen:
1. Duwhandvatten
2. Spanbanden rug
3. Zijbescherming
4. Zittingbespanning
5. Voetsteun
6. Voorwielen
7. Voetplaten
8. Vork
9. Quick release assen
10. Wielvergrendelingen
11. Hoepel
12. Achterwiel
Carrozzina:
1. Manopole di spinta
2. Rivestimento schienale
3. Spondina
4. Telo seduta
5. Pedana
6. Ruote anteriori
7. Appoggiapiedi
8. Forcella
9. Asse ad estrazione rapida
10. Freni
11. Corrimano
12. Ruota posteriore
1
2
12
11
10
9
8 6
5
4
3
7
Sillas de ruedas:
1. Empuñaduras
2. Tapicería del respaldo
3. Protector lateral
4. Tapicería del asiento
5. Reposapiés
6. Ruedas delanteras
7. Plataforma reposapiés
8. Horquilla
9. Eje de desmontaje rápido
10. Frenos
11. Aro
12. Rueda trasera
Cadeira de rodas
1. Punhos de empurar
2. Esto fo do encosto
3. Protecção lateral
4. Coreia do asento
5. Apoio de pés
6. Rodas
7. Apoios para pés
8. Castor forqueta
9. Estrutura rebat ível
10. Dispositivos de
Bloqueio das rodas
11. Roda traseira
12. Armação do braço
Kørestole:
1. Skubbehåndtag
2. Ryglæn betræk
3. Sideafskærmningen
4. Seat slynge
5. Fodstøtte
6. Hjul
7. Fodspark
8. Gaffel
9. Quick-release aksel
10. Hjulet låses
11. Gribering
12. Baghjul
Części wózka :
1. Uchwyty do popyc hania
2. Ta picerka oparcia
3. Osłona boczna
4. Zawiesie siedziska
5. Podnóżek
6. Kółka przednie
7. Płyta podnóżka
8. Wide lec
9. Oś szybkoz łączna
10. Blokady kó ł
11. Ciąg
12. Tylne ko ło
Rullestoler:
1. kjørehåndtak
2. rygg
3. klesbeskytter
4. setetrekk
5. benstøtte
6. svinghjul
7. fotplate
8. gaffel
9. hurtigkobling
10. bremser
11. drivring
12. drivhjul

ENGLISH
4YOUNGSTER 3
M5 = 5.0 Nm.
M6 = 7.0 Nm.
M8 = 10.0 Nm. Nm

ENGLISH
5
YOUNGSTER 3
Table of Contents
3.1 Denitions of words used in this manual
Word Definition
DANGER! Advice to the user of Potential Risk of
serious injury or death if the advice is
not followed
WARNING! Advice to the user of a potential risk of
injury if the advice is not followed
CAUTION! Advice to user that potential damage to
equipment may occur if the advice is not
followed
NOTE: General advice or best practice
Reference To Additional Documentation
NOTE:
Please keep a note of your local service agent’s address and
telephone number in the space provided.
In the event of a breakdown, contact them and try to give all
relevant details so they can help you quickly.
Dealer signature and stamp
Definitions
NOTE:
The wheelchairs shown and described in this user guide may
not correspond in every detail exactly to your own model.
However, all instructions are completely relevant, regardless of
possible detail differences.
The manufacturer reserves the right to alter without notice any
weights, measurements or other technical data shown in this
manual. All figures, measurements and capacities shown in this
manual are approximate, and do not constitute specifications.
Directions for use 5
Gebrauchsanweisung 24
Gebruikershandleiding 44
Notice d’utilisation 64
Manuale d'uso 84
Manual de usuario 104
Instruções Para Utilização 124
Brugervejledning 144
Instrukcja użytkowania 164
Brukerveiledning 184
Table of Contents 5
Definitions 5
Foreword 6
Use 6
Area of Application. 6
1.0 General safety notes and driving
restrictions 7
2.0 Transportability 9
3.0 Handling 11
4.0 Options 12
Tipping Tubes 12
Wheel Locks 12
Brakes 13
Footplates 13
Footplates 14
Headrest 14
Casters 14
Axle Plates 15
Cambers 15
Backrests 15
Sideguard 16
Push Handles 16
Lap belt 17
Anti-Tip Tubes 18
Standard Sling 19
Crutch Holder 19
Tray 19
Transit Wheels 19
Seat width growth (Fig. 4.32 / 4.33) 20
Seat depth growth (Fig. 4.34) 20
5.0 Tires and Mounting 20
6.0 Possible Problems 21
7.0 Technical Specifications 21
8.0 Nameplates 21
9.0 Maintenance and care 22
10.0 Disposal / Recycling of materials 22
11.0 Guarantee 23

ENGLISH
6YOUNGSTER 3
Foreword
Dear Customer,
We are very pleased that you have decided in favour of a high-
quality SUNRISE MEDICAL product.
This Owner’s manual will provide numerous tips and ideas so
that your new wheelchair can become a trustworthy and reliable
partner in your life.
Maintaining close ties to our customers means a lot to us at
Sunrise Medical. We like to keep you up-to-date about new and
current developments at our company. Keeping close to our
customers means: fast service, as little red tape as possible,
working closely with customers. When you need replacement
parts or accessories, or if you just have a question about your
wheelchair – we are there for you.
We want you to be satisfied with our products and service. At
Sunrise Medical we are constantly working to develop our pro-
ducts further. For this reason, changes can occur in our palette
of products with regard to form, technology, and equipment.
Consequently, no claims can be construed from the data or pic-
tures contained in this owner’s manual.
The management system of SUNRISE MEDICAL is certified
to DIN EN ISO 9001, ISO 13485 and ISO 14001.
As the manufacturer, SUNRISE MEDICAL,
declares that the lightweight wheelchairs con-
form to the 93/42/EEC guideline.
Please contact your local, authorised SUNRISE MEDICAL dea-
ler if you have any questions regarding the use, maintenance or
safety of your wheelchair.
In case there is no authorised dealer in your area, or you have
any questions, contact Sunrise Medical either in writing or by
telephone.
Sunrise Medical
Thorns Road
Brierley Hill
West Midlands
DY5 2LD
England
Phone: 0845 605 66 88
Fax: 0845 605 66 89
www.SunriseMedical.com
IMPORTANT:
DO NOT USE YOUR WHEELCHAIR UNTIL THIS
MANUAL HAS BEEN READ AND UNDERSTOOD.
Use
Wheelchairs are exclusively for a user who is unable to walk
or has limited mobility, for their own personal use, when
self-propelling and being moved by a third party (pushed by
attendant) within the home and outdoors.
The maximum weight limit (includes both the user and any
weight of accessories fitted to the wheelchair) is marked on
the serial number label, which is affixed to the cross-brace
or the stabilising bar under the seat.
Warranty can only be issued if the product is used under the
specified conditions and for the intended purpose.
The expected life of the wheelchair is 5 years.
NO NON-STANDARD PARTS are to be fitted, other than those
officially approved by Sunrise Medical.
Area of Application.
The variety of options as well as the modular design means that
it can be used by those who cannot walk or have limited mobili-
ty because of:
• Paralysis
• Loss of extremity (leg amputation)
• Extremity defect/deformity
• Joint contractures/joint injuries
• Illnesses such as heart and circulation deficiencies,
disturbance of equilibrium or cachexia as well as for
elderly people who still have strength in the upper body.
When considering provision, please also note the body size,
weight, physical and psychological constitution, the age of the
person, living conditions and environment.

ENGLISH
7
YOUNGSTER 3
1.0 General safety notes and driving restrictions
The engineering and construction of this wheelchair has
been designed to provide maximum safety. International
safety standards currently in force have either been fulfilled or
exceeded in parts. Nevertheless, users may put themselves at
risk by improperly using their wheelchairs. For your own safety,
the following rules must be strictly observed.
Unprofessional or erroneous changes or adjustments increase
the risk of accident. As a wheelchair user, you are also part of
the daily traffic on streets and pavements, just like anyone else.
We would like to remind you that you are therefore also subject
to any and all traffic laws.
Be careful during your first ride in this wheelchair. Get to know
your wheelchair.
Before each use, the following should be checked:
• Quick-release axles on the rear wheels
• Velcro on seats and backrests
• Tyres, tyre pressure and wheel locks.
Before changing any of the adjustments of this
wheelchair, it is important to read the corresponding
section of the user’s manual.
It is possible that potholes or uneven ground could
cause this wheelchair to tip over, especially when riding uphill or
downhill. When riding over a step or up an incline frontally, the
body should be leaning forward.
DANGER!
• NEVER exceed the maximum load of 85 kg for driver
plus any items carried on the wheelchair. Please note the
weight information for lighter weight options, which are
quoted separately. If you exceed the maximum load, this
can lead to damage to the chair, or you may fall or tip over,
lose control and may lead to serious injury of the user and
other people.
• Only permanently installed seats and safety belts will offer
sufficient protection in hazardous situations.
• To avoid falls and dangerous situations, you should first
practice using your new wheelchair on level ground with
good visibility.
• This wheelchair should be used exclusively to convey one
person at a time. Any other use does not comply with the
intended purpose.
• When getting on or off the wheelchair, do not use the
footboards. These should be flipped up beforehand and
swung to the outside as far as possible.
• Depending on the diameter and setting of the castors, as
well as the centre of gravity setting of the wheelchair, the
castors may begin to wobble at high speeds. This can lead
to the castors being blocked and the wheelchair may tip
over. Therefore, please make sure that the castors are
adjusted correctly (see the Chapter "Castors").
• In particular, do not travel on an incline without brakes,
travel at a reduced speed. This product has been tested to
a maximum speed of 10kph. At higher speeds, depending
on the configuration and/or physique/physical capabilities of
the user, there may be unexpected castor wobble. This can
lead to injury of the user.
• Explore the effects of changing the centre of gravity on
the behaviour of the wheelchair, for example on inclines,
slopes, all gradients or when overcoming obstacles. Do this
with the secure aid of a helper.We recommend that novice
users use anti-tip tubes.
• Anti-tip tubes should prevent the chair tipping over
backwards unintentionally. Under no circumstances
should they take the place of transit wheels, and be used
to transport a person in a wheelchair with the rear wheels
removed.
• With extreme settings (e.g. rear wheels in the most forward
position) and less than perfect posture, the wheelchair may
tip over even on a level surface.
• Lean your upper body further forward when going up slopes
and steps.
• Lean your upper body further back when going down slopes
and steps.
• Do not hang heavy items such as shopping bags or
backpacks, on the push handles, head rest or backrest of
the wheelchair.
• These can change the tipping point and there is a risk of
tipping backwards.
• When reaching for objects (which are in front of, to the side
or behind the wheelchair) make sure that you do not lean
too far out of the wheelchair, as if you change the centre of
gravity there is a risk of tipping or rolling over.
• Only use your wheelchair properly. For example, avoid
travelling against an obstacle without braking (step, kerb
edge) or dropping down gaps.
• Only attempt stairs with the help of an attendant. There is
equipment available to help you, e.g. climbing ramps or lifts,
please use them. If there is no such equipment available,
then the wheelchair must be tipped and pushed over the
steps (2 helpers).
• In general, any anti-tip tubes fitted must be set beforehand,
so that they cannot touch the steps, as otherwise this could
lead to a serious tumble. Afterwards the anti-tip tubes must
be set back to their correct position.
• Make sure that the attendant only holds the wheelchair
using securely mounted parts (e.g. not on the footrests or
the sideguards).
• When using the lifting ramp make sure that the anti-tip tubes
fitted are positioned outside the danger area.
• Secure your wheelchair on uneven ground or when
transferring (e.g. into a car) by using the wheel locks.
• For high amputees you must use anti-tip tubes.
Fig. A


ENGLISH
8YOUNGSTER 3
Therefore this must be determined by the user with the
assistance of an attendant to prevent tipping. It is strongly
recommended that inexperienced users have Ant-tips
fitted.Do not use your wheelchair on muddy or icy ground.
Do not use your wheelchair where pedestrians are not
allowed.
• With all moving parts there is a natural risk of finger traps.
Please handle with care
• The wheelchair should not be used in heavy rain, snow,
slippery, or unsound surfaces.Do not use the wheelchair in
hazardous environments.
NOTE !
• The effect of the knee-lever brake as well as the general
driving characteristics are dependant on tyre pressure. The
wheelchair is significantly lighter and easier to manoeuvre
when the rear wheels are pumped up correctly and both
wheels have the same pressure.
• Make sure that your tyres have sufficient tread!
• Please note that you are subject to any and all traffic laws
when driving in public traffic.
• When it is dark, please wear light clothing or clothing with
reflectors, so that you can be seen more easily. Make sure
that the reflectors on the side and back of the wheelchair
are clearly visible. We would also recommend that you fit
an active light.
• Always be careful with your fingers when working or
adjusting the wheelchair!
WARNING!
CHOKING HAZARD – This mobility aid uses small parts which
under certain circumstances may present a choking hazard to
young children.
The products shown and described in this manual may not be
exactly the same in every detail as your own model. However,
all instructions are still entirely relevant, irrespective of detail
differences.
The manufacturer reserves the right to alter without notice any
weights, measurements or other technical data shown in this
manual. All figures, measurements and capacities shown in this
manual are approximate and do not constitute specifications.
Lifetime
The expected lifetime of this product is 5 years.
• Before setting off, check that your tyre pressure is correct.
For rear wheels it should be at least 3.5 bar ( 350 kPa).
The max. pressure is indicated on the tyre.The knee-lever
brakes will only work if there is sufficient tyre pressure and
if the correct setting has been made (see the Chapter on
“Wheel locks”).The wheel locks are not intended to brake
your wheelchair. They are only there to ensure that your
wheelchair does not begin rolling unintentionally. When you
stop on uneven ground, you should always use the wheel
locks to prevent such rolling. Always apply both wheel
locks; otherwise, your wheelchair could tip over.
• The wheel locks have not been designed to be used as
brakes for a moving wheelchair.
• Always make use of elevators and ramps. If these are not
available, you should request the help of an attendant.
They should only grip the wheelchair at securely mounted
parts. If anti-tip tubes are fitted these must be folded away.
A wheelchair should never be lifted with an occupant; it
should only be pushed.
• If the seat and back sling are damaged, you must replace
them immediately.
• Do not lift or carry the wheelchair by the backtubes or the
pushhandles.
• Do not fit any unauthorized electronic equipment, powered
or mechanically operated mobility drives, hand-bike or any
other device that changes the intended use or the structure
of the wheelchair. Any combination with other medical
devices requires the approval of Sunrise Medical.
• Be careful with fire, in particular with burning cigarettes.
Seat and back slings can be set alight.
• If and whenever possible, during a journey in a specially
fitted vehicle for disabled people, vehicle occupants should
use the seats in the vehicle and the appropriate restraint
system. This is the only way to ensure that occupants
will have the maximum protection if there is an accident.
When using safety elements offered by SUNRISE
MEDICAL and using a specially designed safety system,
lightweight wheelchairs can be used as a seat when being
transported in a specially fitted vehicle. (See the Chapter
on “Transportation”).
• Always make sure that the quick-release axles on the rear
wheels are set properly and lock in. If the button on the
quick-release axle is not pressed in, the rear wheel cannot
be removed.
• In particular when using lightweight metal handrims, fingers
will easily become hot when braking from a high speed or
on long inclines.
• If the wheelchair is subject to direct sunlight for a long
period of time, then parts of the wheelchair (e.g. frame,
legrests, brakes and sideguard) may become hot (>41°C).
• To avoid hand injuries do not grab in between the spokes
or between the rear wheel and wheel lock when driving the
wheelchair.
• When using the chair outside, always wear leather gloves
which will increase your grip and protect the fingers from
dirt and overheating.
• Do not use the wheelchair on slopes > 10°.
• The Dynamic safe slope is dependant on the chair
configuration, the users abilities and the style of riding.
As the users abilities and style of riding cannot be pre-
determined then the max safe slope cannot be determined.

ENGLISH
9
YOUNGSTER 3
2.0 Transportability
DANGER!
There is a risk of serious injury or death if this if this
advice is ignored!
Transportation of your wheelchair within a vehicle:
A wheelchair secured in a vehicle will not provide the
equivalent level of safety and security as a vehicle
seating system. It is always recommended that the user
transfers to the vehicle seating. It is recognised that
this is not always practical for the user to be transferred
and in these circumstances, where the user must be
transported whilst in the wheelchair, the following advice
must be followed:
1. Confirm that the vehicle is suitably equipped to
transport a passenger in a wheelchair, and ensure the
method of access/egress is suitable for your wheelchair
type. The vehicle should have the floor strength to take
the combined weight of the user, the wheel chair and
accessories.
2. Sufficient space should be available around the
wheelchair to enable clear access to attach, tighten and
release the wheelchair and occupant tie down restraints
and safety belts.
3.The occupied wheelchair must be located in a forward
facing position and secured by the wheelchair tie down
and occupant restraint straps (WTORS tie downs
meeting the requirements of ISO 10542 or SAE J2249) in
accordance with the WTORS manufacturer’s instructions.
4. The wheelchair’s use in other positions within a vehicle
has not been tested e.g. transportation in a side facing
position must not be carried out under any circumstances
(Fig. A).
5. The wheelchair should be secured by a Tie Down
Restraint system, conforming to ISO 10542 or SAE
J2249 with non-adjustable front straps and adjustable
rear straps, which typically use Karabiner clips/S hooks
and tongue and buckle fittings. These restraints generally
comprise of 4 individual straps that are attached to each
corner of the wheelchair.
6. The tie-down restraints should be fitted to the main
frame of the wheelchair as indicated in the diagram
on the following page, and not to any attachments or
accessories, e.g. not around the spokes of wheels,
brakes or footrests.
Fig.A
7. The tie–down restraints should be attached as close
as possible at an angle of 45 degrees and tightened
securely in accordance with the manufacturer’s
instructions.
8.Alterations or substitutions must not be made to the
wheelchair securement points or to structural and frame
or components without consulting the manufacturer.
Failure to do so will invalidate the ability of a Sunrise
Medical wheelchair to be transported within a vehicle.
9. Both pelvic and upper torso restraint belts must be
used to restrain the occupant to reduce the possibility
of head and chest impacts with the vehicle components
and serious risk of injury to the user and other vehicle
occupants. (Fig B) The upper torso restraint belt should
be mounted to the vehicle “B” pillar - failure to do so will
increase the risk of serious abdominal injuries to the user.
10. A head restraint suitable for transportation (see label
on headrest) must be fitted and suitably positioned at all
times during transportation.
11. Postural supports (lap straps, lap belts) should
not be used or relied on for occupant restraint in a
moving vehicle unless they are labelled as meeting the
requirements specified in ISO 7176-19:2001 or SAE
J2249.
12. The safety of the user during transportation depends
upon the diligence of the person securing the tie-down
restraints and they should have received appropriate
instructions and/or training in their use.
13. Wherever possible remove and stow safely away
from the wheelchair all auxiliary equipment, for example:
Crutches, Loose cushions and Tray Tables.
14. Articulating/elevating leg rest should not be used in
the elevated position when the wheelchair and user are
being transported and the wheelchair is restrained using
Wheelchair Transport and Occupant Restraints.
15. Reclining backrests should be returned to an upright
position.
16. The manual brakes must be firmly applied.
17. Restraints should be mounted to the vehicle “B” pillar
and should not be held away from the body by wheelchair
components such as armrest or wheels.
Fig.B

ENGLISH
10 YOUNGSTER 3
Occupant Restraints Instruction:
1. The pelvic restraint belt must be worn low across the front
of the pelvis so that the angle of the pelvic belt is within the
preferred zone of 30 to 75 degrees to the horizontal.
A steeper (greater) angle within the preferred zone is
desirable i.e. closer to, but never exceeding 75 degrees. (Fig
C)
2. The upper torso restraint belt must fit over the shoulder
and across the chest as illustrated Fig d and e
Restraint belts must be adjusted as tightly as possible
consistent with user comfort.
Restraint belt webbing must not be twisted when in use.
The upper torso restraint belt must fit over the shoulder and
across the shoulder as illustrated in Fig D and E.
3. The attachment points to the chair are the inner front side
frame just above the castor, and the rear side frame. The
straps are fitted around the side frames at the intersection of
the horizontal and vertical frame tubes. (See Figs G-H-I)
4. The tie down symbol (Fig F) on the wheelchair frame
indicates the position of the wheelchair restraint straps. The
straps are then tensioned after the front straps have been
fitted to secure the wheelchair.
Transportability – positioning of wheelchair tie down
restraints on wheelchair
The wheelchair secured with front and rear wheelchair tie
down restraints, (Fig.K).
Position of the front wheelchair tie down restraint and the
tie down position, (Fig.I).
Position of the rear wheelchair tie down restraint and the
tie down position on the wheelchair, (Fig.J).
Transportability >>>
Fig.D
Fig.E
Fig.C
PREFERED
ZONE
Fig.F
Fig.K
Fig. I
Fig. J
Fig. G
Fig. H
USER WEIGHT LESS THAN 22 kg (48 lb 8.0 oz)
When the user being transported is a child, less than 22Kg
mass and the vehicle involved has less than eight (8) seated
passengers it is recommended that they be transferred to an
UNCE Regulation 44 compliant child restraint system (CRS).
This type of restraint system provides a more effective occupant
restraint system than the conventional 3 point occupant restraint
system and some CRS systems also include additional postural
supports to assist in maintaining the position of the child when
seated.
Parents or care providers may consider the option, in some
circumstances, for their child is to remain in their wheelchair
whilst in transport due to the level of posture control and
comfort provided by the set up in the wheelchair.
We would recommend in such circumstances that a risk
assessment be carried out by your healthcare professional and
relevant competent persons.

ENGLISH
11
YOUNGSTER 3
Folding up (Fig. 3.0)
First remove the seat cushion from the wheelchair and
flip up the (platform) footplate or the individual footplates.
Take hold of the sling from underneath in the middle and
pull upwards. The wheelchair will then fold up. (Fig.3.0).
Unfolding (Fig. 3.1)
Open the strap on folded frame prior to unfolding.
Press down on the seat tubing (see picture). Your
wheelchair is then unfolded. Now snap the seat tubing
into position in the seat saddle. This can be facilitated by
slightly tipping your wheel chair. In this way, the weight
can be taken off of one rear wheel so that the wheelchair
can be more easily unfolded.
WARNING!
Be careful not to get your fingers caught in the cross-tube
assembly, (Fig.3.1).
3.0 Handling
Quick-Release Axles for Rear Wheels
(Fig.3.2)
The rear wheels are equipped with quick-release axles.
The wheels can thus be installed or removed with-
out using tools. To remove a wheel, simply depress
the quick-release button on the axle (1) and pull it out,
(Fig.3.2).
CAUTION!
Hold the quick-release button on the axle depressed
when inserting the axle into the frame to mount the rear
wheels. Release the button to lock the wheel in place.
The quick-release button should snap back to its original
position.
Setting the directional stability (Fig. 3.3)
Release the Allen screws (1) on the underside of the fork.
You can then undo the screw (2). You can now turn the
black socket (3) left or right.
Left – chair pulls to the left
Right – chair pulls to the right
Then tighten up the screw (2) again. Please set a 90°
angle from the fork to the floor.
Now tighten up the screw (1) again. (Fig. 3.3). Use
Fig. 3.1
Fig. 3.0
Fig. 3.2
Fig. 3.3
2
3
1

ENGLISH
12 YOUNGSTER 3
Tipping Tubes (Fig. 4.0).
Tipping tubes are used by attendants to tip a wheelchair
over an obstacle. Simply step on the tube to push a
wheel chair, for example, over a curb or step,
NOTE:
Sunrise Medical strongly reccommends the use of a step
tube on any model where attendant use is the predomi-
nant intended use, as damage to the backposts may
occur if you pull back on them to tip the wheelchair
4.0 Options
Wheel Locks (Fig. 4.1 + 4.2)
Your wheelchair is equipped with two wheel locks.
They are applied directly against the tires. To engage,
press both wheel-lock levers forward against the stops
(Fig.4.1). To release the wheel, pull the levers back to
their original positions.
Braking power will decrease with:
• Worn tire tread
• Tire pressure that is too low
• Wet tires
• Improperly adjusted wheel locks.
The wheel locks have not been designed to be used as
brakes for a moving wheelchair. The wheel locks should
therefore never be used to brake a moving wheelchair.
Always use the handrims for brak ing. Make sure that the
interval between the tires and wheel locks complies with
given specifications (Fig.4.1). To readjust, loosen screw
(1) and set the appropriate interval. Tighten screw (see
the page on torque).
CAUTION!
After each adjustment of the rear wheels, check the
interval to the wheel locks and readjust if necessary.
Wheel Locks
Extension for the Brake Lever (Fig. 4.3)
The extension for the brake lever can be removed or
folded down. The longer lever helps to minimize the effort
needed to set the wheel locks, (Fig.4.3).
CAUTION!
Mounting the wheel lock too close toward the wheel will
result in a higher effort to operate. This might cause the
brake lever extension to break!
Leaning onto the brake lever extension while transferring
will cause the lever to break! Splashing water from tires
might cause the wheel lock to malfunction.
Tipping Tubes Fig. 4.0
Fig. 4.2
Fig. 4.3
3.0 mm
Fig. 4.1

ENGLISH
13
YOUNGSTER 3
Brakes
Drum Brakes (Fig. 4.4)
Drum brakes permit safe and convenient braking for
an attendant. They can also be set with the aid of a
locking lever (1) to prevent rolling. This lever must snap
audibly into place. Performance of the drum brakes is
not dependent on the air pressure inside the tires. Your
wheelchair cannot be moved when the drum brakes are
set.
CAUTION!
Drum brakes should only be adjusted by authorized
dealers.
Safari wheel lock (Fig. 4.5)
Safari wheel lock (Wheel lock integrated into Side guard):
The Safari wheel lock are operated by pushing the lever
forwards (away from the patient's body).
To release the brakes, pull the lever back towards the
body (Fig.4.5).
Footplates (Fig. 4.6)
There are two types of footplates: platform and divided.
They can be flipped up to facilitate getting in and get ting
out of your wheelchair.
Lower Leg Length
By removing the setscrews (1), the footrest can be
adjusted to fit any lower leg length. Remove set screws,
set tubing with footrest in the desired position, and
reinsert and tighten the setscrews (see the page on
torque). Make sure that the composite plastic pad is
in the proper position under the setscrew. A minimum
interval of 2.5 centimeters from the ground should always
be maintained.
Footplates
Lightweight footrest (Fig. 4.7)
The footboard angle can be adjusted by loosening the
screws (2). Side protection panels can be fitted to the
footboard using the mounting holes (3) These prevent
the feet slipping off accidentally, (Fig.4.8). Make sure that
after any adjustment work, all screws are tightened cor-
rectly (see the page on torque).
Width adjustment
To adjust the width of the footboard open the screw (2).
Then you can slide in and out the tubes in the holder to
adjust the width of the footboard (Fig.4.7).
Please make sure that the screws are tightened with the
correct torque .
Fig. 4.4
1
Fig. 4.5
Fig. 4.6
1
Fig. 4.7
2
2
3
3
Attendant wheel lock
The attendant wheel lock combines the Safari wheel
lock with an additional wheel lock handle operated by an
attendant person.
The handle (leaver) is mounted at the push handle (Fig.
4.4) and locks the Safari wheel lock if required.

ENGLISH
14 YOUNGSTER 3
Angle-adjustable footplate (composite + aluminum) -
(Fig.4.8-4.9)
The footplates can be flipped up to facilitate getting in
and out of your wheelchair.
The footplates can be adjusted within their angle of
inclination, relative to a level surface. Loosen screws (1
to 2). Then set the footplates to the desired angle. After-
wards, tighten all screws. After adjustment, always make
sure that all screws are tightened properly (see the page
on Torque). In order to avoid the wheelchair tipping over,
make sure that the minimum interval of 2.5 cm between
the foot rest tubing and the ground is maintained (with
horizontal seat).
To adjust the width open the screws (1+2) then slide out
both brackets (3+4).
Footplates Fig. 4.8 1
2
Fig. 4.9
3 4
Headrest
Headrest (Fig. 4.10)
The headrest (Fig. 4.14) can be raised and moved hori-
zontally both forwards and backwards.
To do this, loosen the screw (1,2 or 3).
Now you can adjust to the desired position. Tighten
screws again (see the page on torque).
In order to fold the wheelchair, please open the clamping
lever (1), slide the headrest bracket to the right side and
fold it down. Now you can fold the chair. To unfold the
chair, please fold the headrest bracket up, re-position the
sliding gap into the clamping lever and slide it to the left.
Finally close the clamping lever again (Fig.4.11).
Fig. 4.10
3
1
2
Fig. 4.11
1
1
Adjusting the castor
To ensure that both forks are set parallel, simply count
the teeth visible on both sides. After setting the castor
fork, the teeth will guarantee a secure position, allowing
an adjustment of 16° in 2° increments, (Fig. 4.12).
Use the flat side on the front of the castor fork to check
for a right-angled position to the ground.
The patented design allows the castor fork to be turned,
so that it can be reset at right-angles to the ground when
the seat angle is changed.
Casters
Setting the Castor, Castor adapter & Castor fork (Fig.
4.13)
If the wheelchair veers slightly to the right or left, or the
castors flutter, it may be caused by one or more of the
following:
• Forward and/or reverse wheel motion has not been set
properly.
• The castor angle has not been adjusted properly.
• Castor and/or rear wheel air pressure is incorrect; the
wheels do not turn sufficiently freely.
The optimum adjustment of the castors is required so that
the wheelchair runs in a straight line.
Castors should always be adjusted by an authorised
dealer. The castor plates must be re-adjusted, and the
wheel receiver must be checked every time the rear
wheel position has been altered.
+8° - 8°
Fig. 4.12
Fig. 4.13
2
3
1

ENGLISH
15
YOUNGSTER 3
Angle-Adjustable Backrests (Fig. 4.17)
The backrest can be ad just ed to 5 different positions (3°
forwards, 0°, 5°, 10°, and 15° backwards).
A plate (2) is located on the side guard, allowing you to
set the angle by removing the screws (1) (see the page
on torque).
CAUTION!
The screws (1) connect the backrest di rect ly to the frame;
screw ing them in too tightly may cause them to break.
Conversely, screws that are too loose can be easily lost.
In either case, injuries could result when using the push
handles to ascend stairs.
For your own safety, we recommend that adjustments
only be made by authorized dealers.
Cambers
Backrests
Cambers (Fig. 4.15 / 4.16)
The camber may be set be tween 1° and 4°. This makes
it possible to increase the chair’s lateral stability as well
as its maneuverability. Remove the axle plate screws (1).
Adjust the adapter (2) to the desired angle. Tighten the
screws. (see the page on torque). Raising the camber
also raises the overall width of the wheelchair (by about
1 cm per degree).
CAUTION!
It may be necessary to readjust both the wheel locks and
casters.
Axle Plates (Fig. 4.14)
The position of the body’s center of gravity with respect
to the rear wheels is critical for ensuring easy and pleas-
ant use of the wheelchair. Several positions are possible:
moving the axle plate (1) backwards along the holes
drilled in the frame (2) will make the chair more stable,
but it will not be as maneuverable as it would be if the
axle plate were positioned farther to the front. You may
adjust the seat height by moving the axle sleeve (3) in the
axle plate. When finished, make sure that all screws have
been properly tightened (see the page on torque).
CAUTION!
It may be necessary to readjust both the wheel locks and
casters.
Axle Plates Fig. 4.14
21
3
Fig. 4.16
Fig. 4.15
12
Fig. 4.17
1
2

ENGLISH
16 YOUNGSTER 3
Height-Adjustable Push Handles (Fig. 4.20)
These handles are secured with pins to prevent them
from sliding out uninten tion ally. Opening the quick-
release lever (1) makes it possible to adjust the push
handles to meet your individual needs. As you move the
lever, you will hear a locking mecha nism; you may now
easily position the push handle as desired. The nut (2) on
the tension lever determines how tightly the push handles
are clamped into place. If the nut is loose after adjusting
the tension lever, the push handle will also be too loose.
Turn the push handle from side to side before use to
make sure that it is clamped securely enough into place.
CAUTION!
After adjusting handle height, always clamp the tension
lever (1) securely into place. If the lever is not secure,
injuries could result when lifting over obstacles.
CAUTION!
Check the clamping force (screws) of the adjustable push
handles before use
Push Handles
Sideguard, Aluminum, Bolt-On with Cold-Weather
Protection (Fig. 4.19)
Clothing guards (optional) prevent water from splashing
up and soiling clothing.
Their position relative to the rear wheels can be set by
adjusting the sideguards.
To do this, remove the screws (1 and 2). The armrests
(optional) can be adjusted to the desired height after the
screws have been removed. When finished, make sure
that all screws have been properly tightened (see the
page on torque).
CAUTION:
Neither the sideguards nor the armrests are to be used
for lifting or carrying the wheelchair.
Adjustable Backrest Upholstery (Fig. 4.18)
The sling can be adapted to any degree of tension
by adjusting the Velcro fasten ers. The padding in the
backrest can be removed through an interior opening,
allowing you to cushion the backrest according to your
individual needs.
NOTE!
Too high tension on the adjustable backrest
upholstery will have a negativ impact on the folding
performance of your wheelchair.
Sideguard Fig. 4.19
12
Fig. 4.20
1
2
Fig. 4.18

ENGLISH
17
YOUNGSTER 3
Lap belt
CAUTION:
Before using your wheelchair ensure the lap belt is worn.
The lap belt must be checked on a daily basis to ensure it
is free from any obstruction or adverse wear.
Always make sure that the lap belt is correctly secured
and adjusted prior to use. Too loose a strap could cause
the user to slip down and risk suffocation or cause
serious injury.
The lap belt is ftted to the wheelchair as shown in the
illustrations. The seat belt comprises 2 halves. They
are ftted using the existing seat stay retaining bolt ftted
through the eyelet on the belt. The belt is routed under
the rear of the side panel. (Fig. 4.21)
Adjust the belt position so buckles are in the centre of the
seat. (Fig. 4.22)
Adjust lap belt to suit the user’s needs as follows:
To reduce the belt
length
Feed free belt back
through male buckle
and slide adjusters.
Ensure belt is not
looped at male
buckle.
Feed free belt through slide adjusters and
male buckle to provide more belt length.
To increase the belt length
When fastened check space between the lap belt and
user.
When correctly adjusted it should not be possible to
insert more than the fat of the hand between the lap belt
and the user. (Fig.4.23)
The lap belt should be fxed so that the belt sits at an
angle of 45 degrees across the users pelvis. The user
should be upright and be as far back as possible in the
seat when correctly adjusted. The lap belt should not
allow the user to slip down in the seat. (Fig.4.24)
Fig. 4.22
Fig. 4.21
Fig. 4.24
Fig. 4.23

ENGLISH
18 YOUNGSTER 3
Anti-Tip Tubes (Fig. 4.25- 4.26)
Anti-tip tubes (1) provide additional safety for inexperienced
users when they are still learning how to operate their
wheelchairs. Anti-tip tubes (1) prevent a wheelchair from tipping
over backwards. Pushing the anti-tip tubes (1) will move them
downwards; they can also be swung forward. An interval of
3 cm to 5 cm should be maintained between them and the
ground. You must swing the anti-tip tubes forward when going
up and down large obstacles (such as a curb) to prevent them
from touching the ground.
WARNING!
Incorrect set up of the anti-tips will increase the risk of a
rearwards tip.
Anti-Tip Tubes
To fasten buckle:
Firmly push male buckle into
female buckle.
To release belt:
Press exposed sides of male
buckle and push towards cen-
tre whilst gently pulling apart.
WARNING!
If in doubt about the use and operation of the lap belt then
ask your healthcare professional, wheelchair dealer, carer or
attendant for assistance.
Advice to client
The lap belt must only be fitted by an approved Sunrise Medical
dealer / agent. The lap belt should only be adjusted by a
professional, or a Sunrise Medical approved dealer / agent.
The lap belt must be checked on a daily basis to ensure it is
adjusted correctly and free from any obstruction or adverse
wear.
Sunrise Medical does not encourage the transportation of any
person in a vehicle using this lap belt as a method of restraint.
Please see Sunrise Medical transit booklet for further advice on
transportation.
Maintenance:
Check lap belt, and securing components, at regular intervals
for any sign of frays or damage. Replace if necessary.
NOTE:
The lap belt should be adjusted to suit the end user as detailed
above. Sunrise Medical recommend that the length and fit of the
belt be checked on a regular basis to reduce the risk of the end
user inadvertently re-adjusting the belt to an excessive length.
Fig. 4.26
Fig. 4.25
1
3-5 cm

ENGLISH
19
YOUNGSTER 3
Standard Sling (Fig. 4.27)
The sling is equipped with a Velcro fastener on one
side; this permits stepless adjustment of the sling. To
readjust the sling, first fold up the wheelchair slightly.
Then remove the screws (1) and pull the front plugs (2)
forward out of the frame. The sling (3) can then be slid off
of the frame. By un fastening the Velcro, the sling can be
readjusted. Reverse this procedure to reinstall the sling.
When finished, make sure that all screws have been
properly tightened (see the page on torque).
CAUTION!
For proper safety, at least 50 % of the Velcro surfaces
must make contact with each other at all times.
Standard Sling
Crutch Holder (Fig. 4.28)
This device permits crutches to be transported directly on
a wheelchair. It has a Velcro loop (1) to fasten crutches
or other aids.
CAUTION!
Never try to use or even remove the crutches or other
aids while moving.
Crutch Holder
Übersicht
Tray (Fig. 4.29)
The tray provides a flat surface for most activities. Before
using a tray, it first has to be adjusted once to the width of
the seat by an autho rized dealer. The user must be sitting
in the wheelchair during the trial run.
Tray
Fig. 4.27
Fig. 4.29
Transit Wheels (Fig. 4.30 + Fig. 4.31)
Transit wheels should be used wherever your wheelchair
would be too wide if the rear wheels were used (e.g.,
in airplanes, buses, etc.). After the rear wheels have
been removed with the aid of the quick-release axles,
the transit wheels can immediately be used to continue
riding. The transit wheels are mounted so that they are
approx. 3 centi meters above the ground when not in use.
They are thus out of the way when riding, transporting, or
when tipping to pass over obstacles (e.g., curbs, steps,
etc.).
CAUTION!
Your wheelchair does not have any wheel locks when the
transit wheels are being used.
Transit Wheels
Fig. 4.31
Fig. 4.30
1
3
2
Fig. 4.28
1

ENGLISH
20 YOUNGSTER 3
Tires and Mounting
Always make sure you that you maintain the correct
tire pressure, as this can have an effect on wheelchair
performance. If the tire pressure is too low, rolling resistance
will increase, requiring more effort to move the chair for-
ward; low tire pressure also has a negative impact on
maneuverability. If the tire pressure is too high, the tire could
burst. The correct pressure for a given tire is printed on the
surface of the tire itself. Tires can be mounted the same way
as an ordinary bicycle tire. Before in stalling a new inner tube,
you should always make sure that the base of the rim and the
interior of the tire are free of foreign objects. Check the pressure
after mounting or repairing a tire. It is critical to your safety and
to the wheelchair’s performance that regulation air pressure be
maintained and that tires be in good condition.
5.0 Tires and Mounting
Please open on each side of the frame the screws (1) and
separate the frame from the cross brace. Then take the
composite sleeves (2) out of their position in the cross brace
ends, turn them 180° and put them back into the cross brace
ends in the reversed position. Afterwards open the central cross
brace bolt (3) and remove the bolt. Then remove and reverse
the composite sleeves (4) also 180° and reposition them at the
cross brace. Now install the central bolt into the cross brace
again and close the screw with 7 NM. Finally bring the frames
and the cross brace together and close the screws (1) with 7
Nm again.
In order to adjust the seat upholstery open the screws (1),
remove the seat rail end plugs and pull the upholstery off the
seat rails. Then adjust the width of the upholstery with the
Velcro below the seat. Finally install the upholstery and the end
plugs in the seat rails and tighten the screws (See Fig. 4.27)
The back upholstery is width adjustable with Velcro straps –
both the straps as well as the cover therefore have Velcro parts
attached.
Finally the footrest offer a width adjustment over clamps (see
chapter footrests page.12)
Seat width growth (Fig. 4.32 / 4.33)
In order to adjust the seat depth, please open both
screws (1) on each side of the cross brace / seat rails.
Then move the seat rail and seat upholstery to the
dedicated position, ensure that both sides are aligned
and then tighten the screws (1) with 5 Nm. again. Finally
it might be needed to re-position the saddles (2) in one
position.
Seat depth growth (Fig. 4.34)
Fig. 4.32
1
2
Fig. 4.33
3
4
Fig. 4.34
1
2
Table of contents
Languages:
Other Zippie Wheelchair manuals

Zippie
Zippie IRIS User manual

Zippie
Zippie ZONE User manual

Zippie
Zippie X'CAPE User manual

Zippie
Zippie ZM-310 User manual

Zippie
Zippie X'CAPE User manual

Zippie
Zippie Salsa M Manual

Zippie
Zippie Neptune 2 Manual

Zippie
Zippie Zippie Z-Bop User manual

Zippie
Zippie X’CAPE WC-19 User manual

Zippie
Zippie RS User manual

Zippie
Zippie IRIS Installation and operation manual

Zippie
Zippie RS User manual

Zippie
Zippie Pluton 1 Manual

Zippie
Zippie IRIS User manual

Zippie
Zippie Simba Manual

Zippie
Zippie Neptune Manual

Zippie
Zippie Kid Kart Xpress User manual

Zippie
Zippie ZONE User manual

Zippie
Zippie Salsa R2 User manual

Zippie
Zippie VOYAGE User manual