Zmorph 2.0 S User manual

USER MANUAL
PERSONAL FABRICATOR
VERSION 2.0 S

TABLE OF
CONTENT
OVERVIEW
GET STARTED
SOFTWARE
THE ZMORPH
4
11
20
31
28
6
13
24
33
8
9
17
27
34
10
PRINTER CONNECTION
BASICS
CALIBRATION
FIRST PRINT
SAFETY
USB CONNECTIVITY
GENERATING GCODES
BED CALIBRATION
MACHINE OVERVIEW
LAN CONNECTIVITY
PREPARING GCODES
EXTRUDER TEST
CHAMBER
PANEL OVERVIEW
TESTING THE AXIS
SETTING G-CODES
PLASTICS STUCK
YOUR FIRST PRINT
ACCESSORIES

MAINTENANCE AND FUNCTION
SPECIFICATIONS
WARRANTY
CONTACT
77
81
35
82
37
42
53
61
65
68
55
54
62
74
40
51
54
61
74
58
63
76
64
VOXELIZER
TOOLHEADS
CNC-MILLING
TROUBLESHOOTING AND ADJUSTMENTS
UPGRADES
G-CODES IN VOXELIZER SOFTWARE
TOOLHEAD FEATURES
THE CNC-MILLING FEATURE
TROUBLESHOOTING
SOFTWARE UPGRADES
LUBRICATION
PREPARING THE DREMEL TOOL
DESIGN YOUR OWN TOOLHEADS
WORKING WITH VOXELS
CLEANING THE NOZZLE
THE FILE FORMAT: LOADING DFX
ADVANCED SERVICING AND MACHINE HACKING
FAQ
EXCHANGING THE TOOLHEADS
EXCHANGE AND REPLACEMENT OF TOOLHEAD
G-CODE AND PRINTING
NOZZLE REMOVAL
SETTING WORKING PARAMETERS
CONFIG FILE
MAKING THE PLASTIC PRINT STICK TO THE PRINTBED

OVERVIEW / THE ZMORPH
4
SAFETY
Before using the machine, You need to read the instructions carefully.
Improper use of the device might cause re, electric shock or damage
to the mechanical and electronic parts.
This machine is not a toy. Small children and pet animals
should not be allowed to interfere with it.
The machine is designed to operate indoors
and should not be exposed to rain or extreme humidity.
Device should be used away from water.
All ammable substances and materials should be kept away
during machine operation.
Before using the machine, You should make sure it is not damaged.
In such case stop using it and contact manufacturer.
Power supply should be grounded.
If there is no such option, do not use the machine.
The person using the machine should always have clean and dry hands.
!
!
!
!
!
!
!
!

OVERVIEW / THE ZMORPH
5
The machine shall not be covered during operation.
The machine must be supervised at all times.
ZMorph extruders and toolheads should be used only with materials
they were designed for.
Other use is prohibited and will void warranty.
The machine must be positioned on at surface.
During operation, the machine will produce high temperatures.
The user should not touch any elements marked with "hot surface" sticker.
Aer nishing working, the machine should be stored in a dry and clean area.
Filaments for 3D printing should be stored in clean and dry place.
The use of dirty laments might cause nozzle blockage.
The machine might emit fumes.
Make sure You work in a well ventilated environment.
If fumes make You feel unwell, switch the machine o and allow fresh air in.
!
!
!
!
!
!
!
!

FIRST STEPS
ZMORPH 3D PRINTER

OVERVIEW / THE ZMORPH
7
8
7
1
2
3
4
5
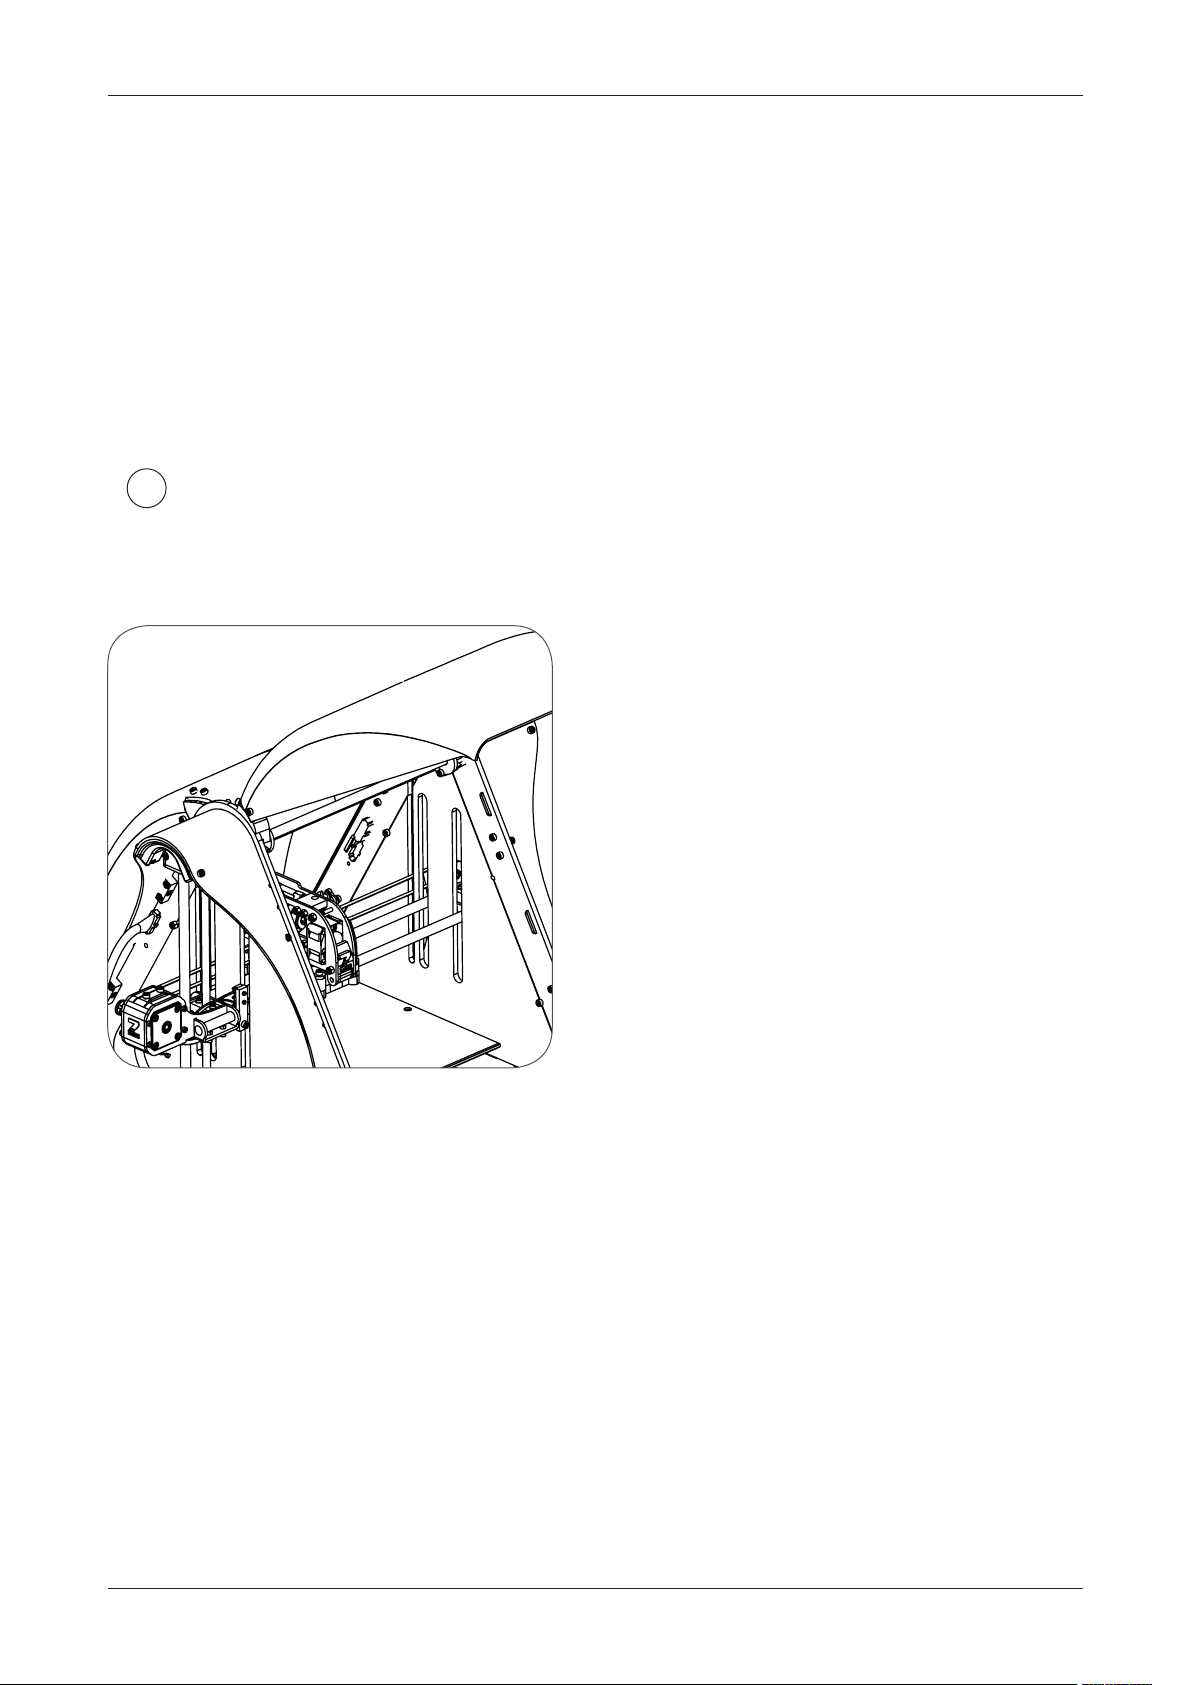
MACHINE OVERVIEW
MOST IMPORTANT ZMORPH PARTS
Chamber
Extruder
Navigation
panel
Reset button
Glass heated bedZ Endstop
X Axis motor
OVERVIEW / THE ZMORPH
8
1
CHAMBER
Zmorph has two covers that creates a closed heat chamber. This enables the machine to print
in ABS, which otherwhise would crack and warp due to uneven temperature.
The covers add extra safety when the machine is running, which is desirable for educational
use and public exhibitions. Fumes and noise are also kept inside.
When you work around the machine you might want to keep the covers open.
There is a magnetic lock built into the hinges. Just li the cover up until you hear click,
and you can leave it in this position.
In warmer days PLA prints come our better if the cover is lied.Cooling is more eicient in such
conditions. To achieve the same result with closed chamber, decrease extrusion temperature.

OVERVIEW / THE ZMORPH
9
PANEL OVERVIEW
RESET
PLAY/PAUSE
UP
OK
DOWN
2
1
5
3
4

OVERVIEW / THE ZMORPH
10
Micro SD card adapter
Extruder servicing tool
1
4
7
5
8
2 3
ACCESSORIES
ZMorph personal fabricator
Micro SD card with cong les
(installed in the machine)
Micro drill with handle
for nozzle cleaning
100 ml of ABS juice
(optional)
Spool stand
Endstop extension for XL tables
HEX keys set
6
9
Table of contents
Other Zmorph 3D Printer manuals


