2.
~llitt!i.Mtl1£ztHt.~•~~•.
~~ttzl!!l
ii!Itolti:
.
3.
_.iiU!!\UI~(D)
o
4.
~-tt:ie~:fiHil,
:f@~~I81Jttf#jiti,
i1E
~t!~Zltt,
~&&iUt
.
Table(
~
1)
~~
/
:St
M/C
Pulley
SiZe
{mm)
S.P.M
60Hz
50Hz
4500
90
105
4000
80
g.;
3500
70
85
~-~~llllil:if-iit~ttzJJt:!!.
m~z!!1~~5
1
~~~.-tt~$~:f~~~~~.~-llll~~
Jl\5~
.
2.
-?±;J~tt~ll't,
Q:tlf~tt.li511ti~(lll10)iSliU:'k
~toJttlti~~tt.litoJn~w.~s~rr!J~
.
1.
~t!lsU~&&~~~~*!!<ii~~•.
Jll!§>.
~
ll(Jf:i
~
~
$tlll(Jtt
ietf:f
liJ
illii!H
liJ
zi.ll§.
:tlf~tUl!UIIofttJ'ftoltt~B<JtU!IIIl(
.
&z
"'Jill~
.
2.
tt~t&~:tW§(III
1
1)
tttl!£tl~(B)
R'<tiU!!~Jll
ifl!l
~
*iiU
~if
lfltl:~,
~loll
f%!i
(A)~(B
)
l:
1'3
i;l)iiiJ
Jl,
f:E
(i}ll1'$Jit!£
:kll(J!il!lt'.t~<B>..t3.
&z
l'.\J
2.
Pu1
new
needle into
the
needle
damp
holes as
faras lheycan
go.
The scarf
of
needle should
be
on left side.
3.
Toghten
Screw(D).
4.
lmpi"O?Eir
needle setting wifl
cause
skipping
stitches, breaking threads,
and
damaging
loopers. Please
pay
attention
to
needle
installation.
X 0 X
FIG.8
k--~··
~
sr_,t.-
~~
,
-
~
-::..'
.•
..
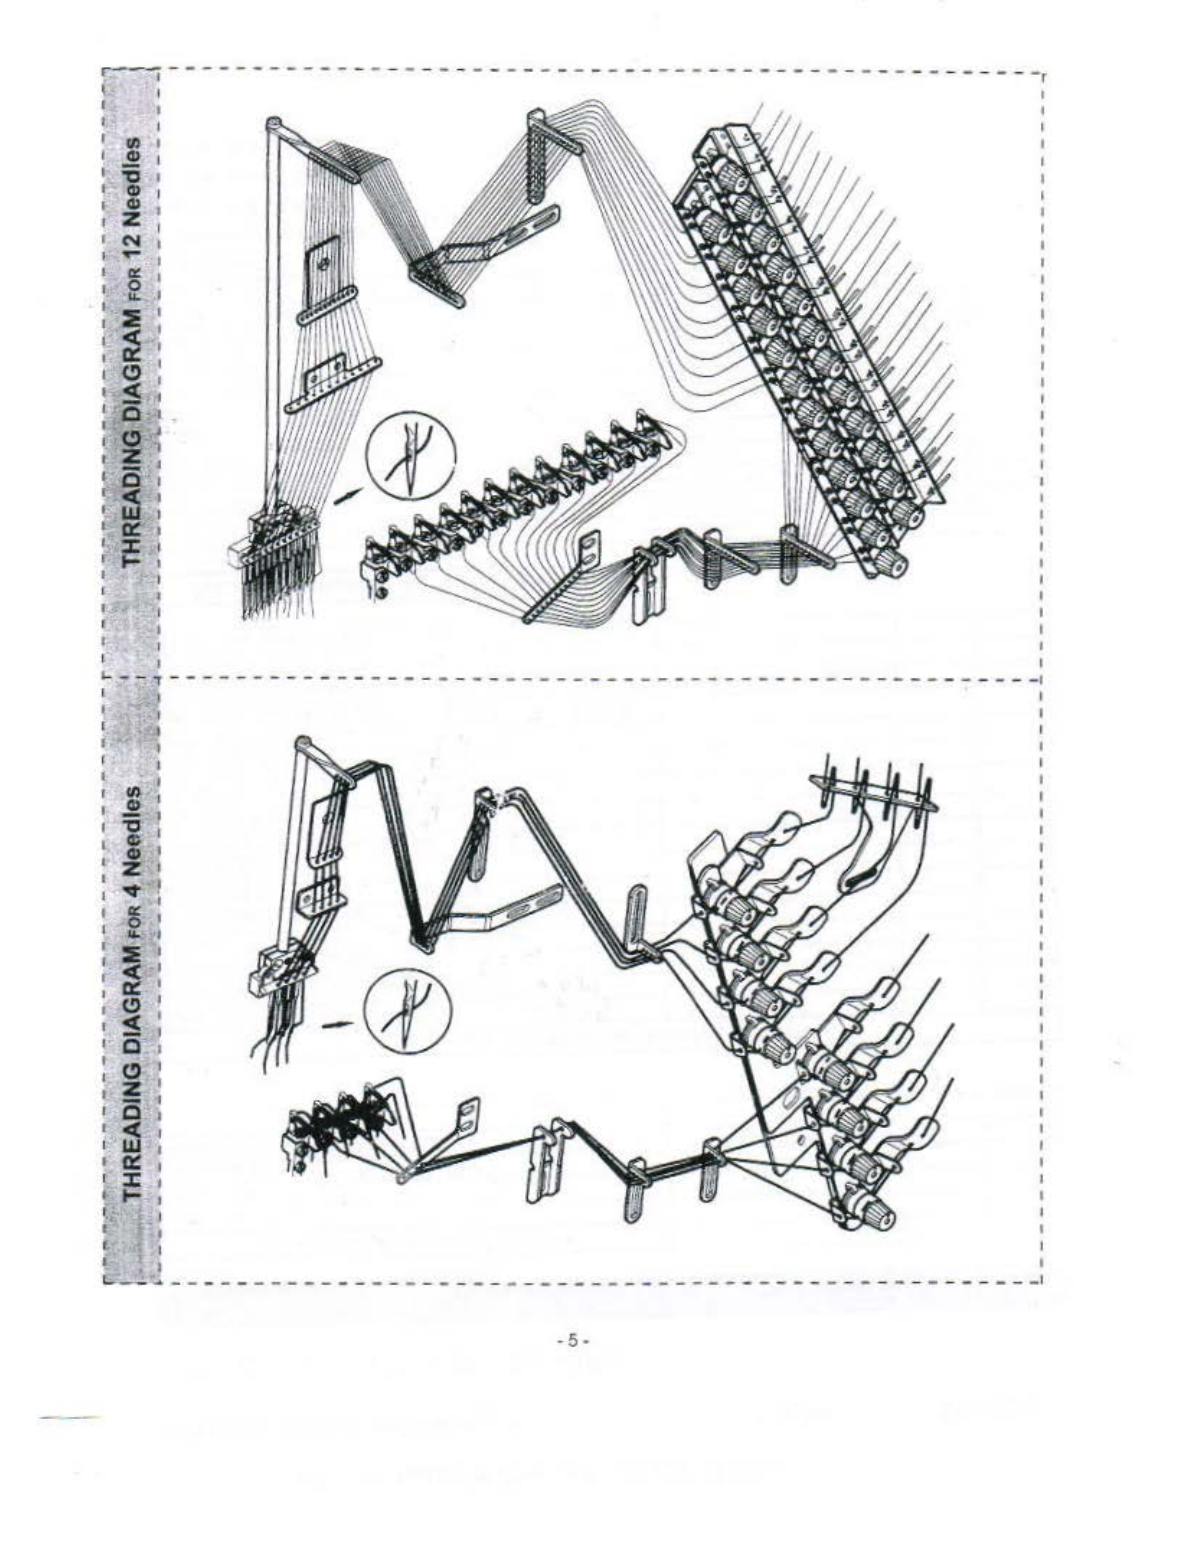
1. For
needle
threading. please thread carefully as
threading inustration page
5.
Please note: impro
per threading will cause breaking threads,
skipping stitches,
and
I
or
undesired sewings.
2. For looper threading, pull outthe lever "P" of
looperset as
the
arrowdirection then thread them
properly.(Fig. 10)
I
1. Thread
tensiOn
should be adjusted in
accondlng
to:
fabrics,
tl1ickness
offabrics. material, thread used 1
and
stitch length etc. 1
I
Tum thead-knob dockwise for
T~ghter
tension
and
:
vice versa.
2. T
akiH.I
p leveradjustment (Fig.11)
The position of Needle Thread
Take-up
Lever (B) 1
is adjustable according
to
thread used.
Loosen
Screw
(A) ,move Lever(B) up
and
down for the
optimum position. Forinstance,
·3·
From the library of: Superior Sewing Machine & Supply LLC