Once you receive confirmation that the service has been
Activated, follow the instructions below to complete
your Activation.
2. SET UP YOUR PHONE
1. Turn your phone OFF and back ON.
2. Make a call.
3. If your call is successful, you are finished. If the call fails,
wait a few minutes and repeat these steps.
Questions?
Visit TracFone.com or call 1-800-867-7183
START HERE
1. ACTIVATE YOUR SERVICE
Go to TracFone.com or call 1-800-867-7183 to Activate your
service. Be ready to provide the following:
• Service Plan PIN. You may also purchase one during
Activation using a credit or debit card.
• IMEI for this device (shown below)
• If you transfer your number from a different company,
provide the accurate:
• ACTIVE phone number to transfer
• Current Service Account Number, Name and Address
• Current Service Account Password or PIN
• Alternate contact phone number
®
PLEASE READ THE TERMS AND CONDITIONS OF SERVICE IN THIS
PACKAGE (or at TracFone.com) BEFORE ACTIVATING YOUR PHONE
OR ANY SERVICE PLANS.
®
CREATE AN ACCOUNT
Create an account at TracFone.com to maximize
your TracFone experience. Benefits Include:
• TracFone Programs • Promotions
• Offers • And much more...
KEEP YOUR SERVICE ACTIVE
Add Airtime BEFORE your Service End Date to keep your
service active.
Set Up Auto-Refill: Enroll in Auto-Refill at TracFone.com with
a credit card or debit card and we will add your Minutes and
Service Days automatically on your Service End Date. This
service includes pre-charge reminders, payment receipts and
credit card expiration alerts.
Buy an Airtime Card: There are several ways to buy an airtime card:
• Go to
TracFone.com
or call 1-800-867-7183
• Shop at local retailers (find store locations at TracFone.com)
Add an Airtime Card: There are several ways to add an Airtime
card directly from your phone:
•
Download* the TracFone
My Account
App and select the
Add Card option. Standard data rates may apply.
• Go to TracFone.com and select Add Airtime.
• Call 1-800-867-7183.
CHECK YOUR BALANCE AND SERVICE END DATE
Download* the free TracFone My Account App on Google Play to
check your Minutes or, visit TracFone.com and click on the Check
Your Balance tab.
®
*Standard data rates may apply.
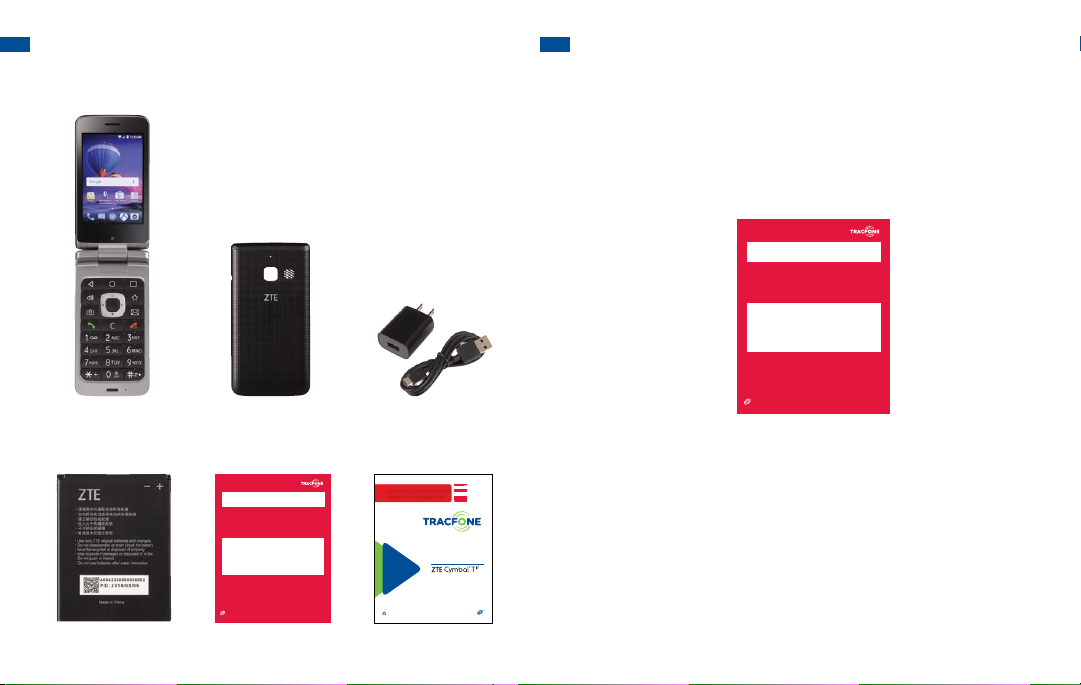
TRACFONE BACK COVER CHARGER/
USB CABLE
BATTERY ACTIVATION CARD SERVICES GUIDE
1.1 WHAT’S IN YOUR PACKAGE
LOCATE THE ACTIVATION CARD
INSIDE YOUR PACKAGE FIRST
STARTHERE
1.ACTIVATEYOURSERVICE
Go to TracFone.com or call 1-800-867-7183 to Activate your
service.Bereadytoprovide the following:
• ServicePlanPIN. You may also purchase one during
Activationusingacreditor debit card.
• IMEIforthis device (shown below)
•Ifyou transfer your number from a different company,
providetheaccurate:
• ACTIVEphonenumber to transfer
• CurrentServiceAccountNumber, Name and Address
• CurrentServiceAccountPassword or PIN
• Alternatecontactphonenumber
®
PLEASEREADTHE TERMS AND CONDITIONS OF SERVICE IN THIS
PACKAGE(oratTracFone.com) BEFORE ACTIVATING YOUR PHONE
ORANYSERVICEPLANS.
®
For more information and the
latest Terms and Conditions
of Service, visit TracFone.com
SERVICES
GUIDE
®
PLEASE RECYCLE
Printed in the U.S.A.
QUAG-TFZ353VC
Once you receive confirmation that the service has been
Activated, follow the instructions below to complete
your Activation.
2. PROGRAM YOUR PHONE
1. Call *22890 from your phone. Make sure to include the
* (star) key.
2. If the Activation is successful, you will receive a
confirmation message.
3. Make a test call to complete the Activation process.
4. If you do not receive a successful confirmation message,
wait a few minutes and call *22890 again.
Questions?
Visit TracFone.com or call 1-800-867-7183
START HERE
1. ACTIVATE YOUR SERVICE
Go to TracFone.com or call 1-800-867-7183 to Activate your
service. Be ready to provide the following:
• Service Plan PIN. You may also purchase one during
Activation using a credit or debit card.
• MEID DEC for this device (shown below)
• If you transfer your number from a different company,
provide the accurate:
• ACTIVE phone number to transfer
• Current Service Account Number, Name and Address
• Current Service Account Password or PIN
• Alternate contact phone number
®
PLEASE READ THE TERMS AND CONDITIONS OF SERVICE IN THIS
PACKAGE (or at TracFone.com) BEFORE ACTIVATING YOUR PHONE
OR ANY SERVICE PLANS.
®
CREATE AN ACCOUNT
Create an account at TracFone.com to maximize
your TracFone experience. Benefits Include:
• TracFone Programs
• Offers
• Promotions
• And much more...
KEEP YOUR SERVICE ACTIVE
Add Airtime BEFORE your Service End Date to keep your
service active.
Enroll in a Plan: Enroll in one of our Value Plans at TracFone.com
by using a credit or debit card and we will add your Minutes and
Service Days automatically. This service includes pre-charge
reminders, payment receipts and credit card expiration alerts.
Buy an Airtime Card: There are several ways to buy an airtime card:
• Go to
TracFone.com
or call 1-800-867-7183
• Shop at local retailers (find store locations at TracFone.com)
Add an Airtime Card: There are several ways to add an Airtime
card directly from your phone:
•
Download the TracFone My Account App and select the
Add Card option. Standard data rates may apply. Or
• Go to TracFone.com and select Add Airtime. Or
• Call 1-800-867-7183.
CHECK YOUR BALANCE AND SERVICE END DATE
• To check your balance, call
*777*1#
from your phone.
• To check your Service End Date, download* the free
TracFone My Account app from Google Play.
®
*Standard data rates may apply.
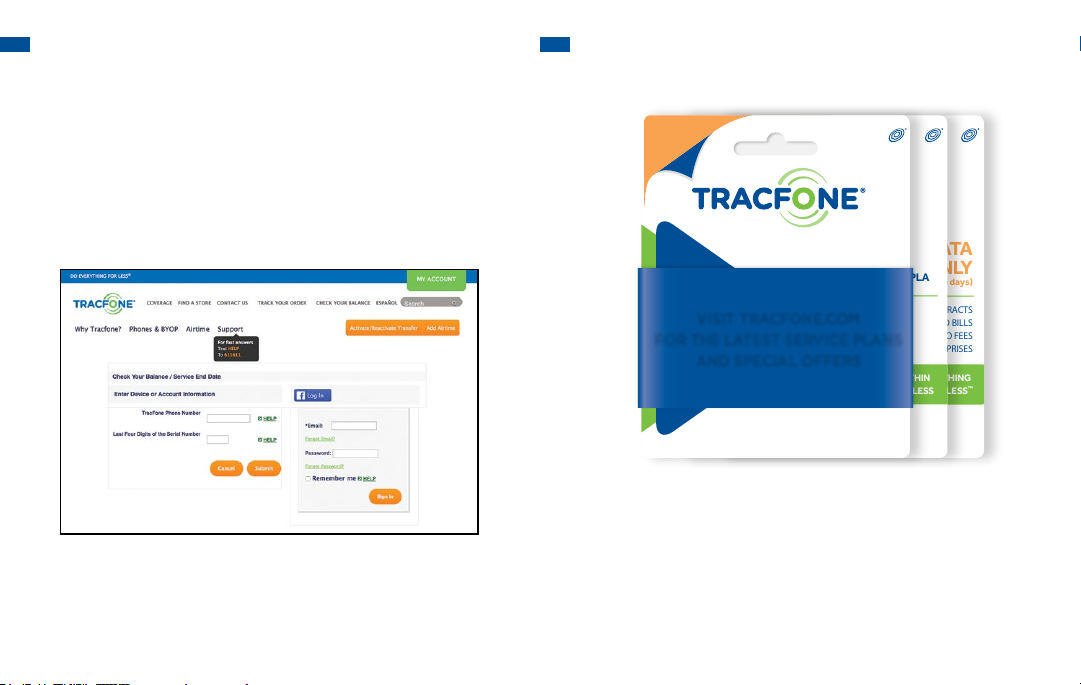
1.2 ACTIVATE YOUR TRACFONE
A. Locate the ACTIVATION CARD inside the package. This Card has the
Serial and SIM Numbers you need to Activate your phone.
B. To Activate your Service, go to TracFone.com or call 1-800-867-7183
from another phone. You will need a TracFone Service Plan or a credit
or debit card to purchase one during Activation.