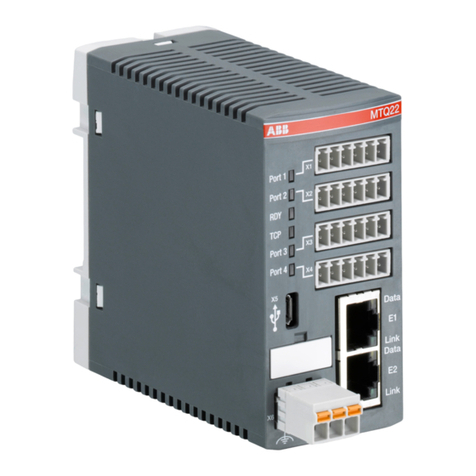
ABB SACE PR212/D-L User manual

L0520
RH0170.001 1/24ABB SACE SACEPR212
Manuale duso
UNITÀ DI COMUNICAZIONE LON® PR212/D-L
UNITÀ DIATTUAZIONEPR212/T

L0520
RH0170.001 2/24
ABB SACE SACEPR212
SOMMARIO
1. GENERALITÀ ...................................................................................................... 3
1.1. PREMESSA ................................................................................................................. 3
1.2. SCENARIO APPLICATIVO .............................................................................................. 4
2. UNITÁ DI COMUNICAZIONE LON®PR212/D-L ........................................ 4
2.1. CARATTERISTICHE T ECNICHE ....................................................................................... 5
2.1.1. Caratteristiche elettriche .............................................................................. 5
2.1.2. Caratteristiche meccaniche .......................................................................... 5
2.1.3. Caratteristiche ambientali ............................................................................ 5
2.1.4. Bus di comunicazione .................................................................................. 5
2.2. INTERFACCIA UTENTE .................................................................................................. 6
2.2.1. Utilizzo dei pulsanti ..................................................................................... 6
2.2.2. Segnalazioni ottiche .................................................................................... 6
2.2.3. Morsettiere ................................................................................................... 6
2.3. MESSA IN SERVIZIO .................................................................................................... 7
2.3.1. Istruzioni di montaggio ................................................................................ 7
2.3.2. Connessioni ................................................................................................. 7
2.3.3. Impostazione dip-switch .............................................................................. 7
2.3.4. Impostazioni di default .................................................................................8
2.3.5. Diagnostica .................................................................................................. 8
2.3.6. Serial Number .............................................................................................. 8
2.4. RICERCA GUASTI ........................................................................................................ 9
2.4.1. In caso di guasto .......................................................................................... 9
3. UNITÁ DIATTUAZIONE PR212/T .......................................................... 10
3.1. CARATTERISTICHE TECNICHE ........................................................................................ 10
3.1.1. Caratteristiche elettriche .............................................................................. 10
3.1.2. Alimentazione ausiliaria .............................................................................. 10
3.1.3. Caratteristiche meccaniche .......................................................................... 10
3.1.4. Caratteristiche ambientali ............................................................................ 10
3.2. INTERFACCIA UTENTE .................................................................................................. 11
3.2.1. Segnalazioni ottiche ..................................................................................... 11
3.2.2. Morsettiere ................................................................................................... 11
3.3. MESSA IN SERVIZIO .................................................................................................... 11
3.3.1. Istruzioni di montaggio ................................................................................ 11
3.3.2. Connessioni ................................................................................................. 12
3.3.3. Serial Number .............................................................................................. 12
3.4. RICERCA GUASTI ........................................................................................................ 12
3.4.1. In caso di guasto .......................................................................................... 12

L0520
RH0170.001 3/24ABB SACE SACEPR212
1. Generalità
1.1. Premessa
Leggere attentamente e completamente il presente documento.
Lunità di comunicazione PR212/D-L, connessa allunità di protezione PR212/P, rende possibile
la connessione dellinterruttore Isomax ad un sistema di controllo centralizzato così da permet-
tere la lettura e/o la modifica dei parametri di protezione (regolazione piu raffinata rispetto alla
configurazione manuale effettuata mediante dip switch sul PR212/P), lettura correnti circolanti,
stato dellinterruttore, invio di comandi di apertura e/o chiusura e altri ancora.
Lunità di attuazione PR212/T, connessa alle unità di comunicazione PR212/D-L, permette di
rendere attuabili i comandi di apertura e chiusura provenienti dal sistema di supervisione remoto
(vedi par.3).
Per aprire o chiudere linterruttore dal sistema di supervisione remoto è necessario disporre di:
·unità di comunicazione PR212/D-L
·unità di attuazione PR212/T
·comando motore
Per un corretto utilizzo e gestione delle unità di protezione PR212/P, interfacciabili con le unità
di comunicazione con protocollo LON®[PR212/D-L], e con le unità di attuazione PR212/T è
necessario considerare quanto riportato nei seguenti documenti:
·Foglio kit unità di protezione PR212/P (doc. n° RH0062.001)
·PR212/D-L LON System Interface (doc. n° RH0252.001)
·LON®installation guideline (doc.n° RH0297.001)
·Catalogo tecnico ABB SACE Isomax
Tutte le informazioni dettagliate sullinterfaccia di comunicazione (necessarie per lo sviluppo
del sistema di supervisione e controllo da parte del System integrator) sono riportate nel docu-
mento RH0252.001.
Tutte le informazioni dettagliate per la realizzazione dei collegamenti fisici esterni allunità di
comunicazione, nonchè le distanze massime dei cablaggi, il tipo di conduttore da utilizzare
sono riportate nel documento RH0297.001.
Echelon, LON, LONWORKS, LonBuilder, NodeBuilder, LonManager, LonTalk, LonUsers,
LonPoint, Neuron, 3120, 3150, il logo Echelon, e i loghi LonUsers sono trademarks di Echelon
Corporation registrati negli Stati Uniti e negli altri paesi. LonLink, LonResponse, LonSupport,
i.LON, LonWorld, Device Tone, ShortStack e LonMaker sono trademarks di Echelon
Corporation.

L0520
RH0170.001 4/24
ABB SACE SACEPR212
1.2. Scenario applicativo
Nello schema a blocchi che segue è riportato lo scenario applicativo che lega tra di loro :
·lunità di comunicazione PR212/D-L
·lunità di attuazione PR212/T
·lunità di protezione PR212/P
·il sistema di supervisione remoto.
I collegamenti tra le varie unità è rappresentato solo a scopo indicativo, per cui il cablaggio dovrà
essere effettuato secondo la documentazione ufficiale ABB SACE.
2. Unità di comunicazione LONÒPR212/D-L

L0520
RH0170.001 5/24ABB SACE SACEPR212
2.1. Caratteristiche Tecniche
2.1.1. Caratteristiche elettriche
Effettiva operatività : dopo massimo 2 s dallapplicazione
dellalimentazione.
MTBF (MIL-HDBK-217E) previsto: 15 anni a 45°C
2.1.1.1. Alimentazione ausiliaria
Essendo richiesta una Vaux isolata da terra, è necessario utilizzare convertitori galvanicamente
separati conformi alle norme IEC 60950 (UL1950) o sue equivavalenti [che garantiscano una
corrente di modo comune o corrente di fuga (vedi IEC 478/1, CEI 22/3) non superiore a 3,5mA],
IEC 60364-41 e CEI 64-8.
2.1.2. Caratteristiche meccaniche
Contenitore : Metallico (lamiera da 1mm)
Grado di Protezione : IP20
Dimensioni massime con connettori : 100 x 45 x 120 mm (h x l x p)
Peso massimo compreso connettori: 450 gr.
2.1.3. Caratteristiche ambientali
Temperatura Ambiente di esercizio: -5 °C ... +70 °C
Temperatura dimmagazzinaggio -40 °C ... +90 °C
2.1.4. Bus di comunicazione
2.1.4.1.Bus interno
Bus di comunicazione riservato ad ABB SACE.
2.1.4.2.Bus esterno
Bus esterno (LON®) 2-Wire Twisted Pair, 78 kbit/s, connessione a bus differenziale.

L0520
RH0170.001 6/24
ABB SACE SACEPR212
2.2. Interfaccia utente
Lunità dispone, nella parte frontale, di tre pulsanti, quattro led e due morsettiere.
2.2.1. Utilizzo dei pulsanti
·Neuron service: Premere per qualche secondo, fino al flash del led Tx per
linstallazione logica del PR212/D-L (nodo) su rete LON®.
·Reset: Premere per effettuare il reset hardware del PR212/D-L
·Remote disabled: Premere per passare dalla condizione di Remoto a Locale e
viceversa. In condizione Locale non sono accettati comandi di apertura e chiusura da
remoto, nè variazioni della parametrizzazione dellunità di protezione PR212/P
connessa. La condizione di Locale o Remoto è visibile controllando lo stato del led
Rem Dis / IB fault (vedi par. 2.2.2).
2.2.2 Segnalazioni ottiche
·Qualsiasi condizione di accensione dei led, diversa da quelle sopra descritte, indica un
probabile malfunzionamento dellunità SACE PR212/D-L.
·Le segnalazioni riportate nella tabella si intendono con Vaux presente.
·Per ulteriori dettagli in merito alle possibili condizioni di malfunzionamento vedi par. 2.4
2.2.3. Morsettiere
·Connessioni 119: ingressi e uscite dellunità PR212/D-L (vedi par. 2.3.2)
·RS232: connettore riservato esclusivamente al personale ABB SACE.

L0520
RH0170.001 7/24ABB SACE SACEPR212
2.3. Messa in servizio
2.3.1. Istruzioni di montaggio
Montaggio su guida standard da 35 mm (DIN EN50022 tipo TS 35 x 15mm).
Per i connettori frontali rimovibili utilizzare cavi con filo di sezione compresa tra 0.5 e 2.5
mm2 (AWG 22 ... 12).
La messa a terra del contenitore metallico va eseguita mediante collegamento, con filo di
sezione 4 mm2con terminale ad occhiello, allapposita vite M4 posizionata sul retro del
contenitore stesso.
Appositi morsetti di terra sono disponibili sui connettori frontali, per collegare la circuiteria
elettronica alla terra di impianto. Tali morsetti non devono essere connessi alla vite di messa
a terra della scatola metallica.
Non sono ammesse prove di Rigidità Dielettrica sugli ingressi e sulle uscite dellunità
PR212/D-L.
Anche se è consentito installare il PR212/D-L nella cella interruttore, è comunque buona
norma collocarlo nella cella strumenti del quadro. Per ulteriori informazioni (ubicazione del
dispositivo di comunicazione, distanza massima dallinterruttore) consultare i documenti
richiamati al par. 1.
2.3.2. Connessioni
Per la realizzazione dei cablaggi di ciascun morsetto consultare scrupolosamente gli schemi
elettrici applicativi nonchè tutte le indicazioni riportate nei documenti richiamati al par.1.
Trattandosi di ingressi e uscite dedicate, non è consentito un cablaggio ai vari morsetti
differente da quello riportato negli schemi elettrici ufficiali ABB SACE.
2.3.3. Impostazione dip-switch
Dopo aver cablato correttamente tutte le connessioni frontali e quella di messa a terra sul
retro è necessario impostare i dip switch riferiti al tipo di terminazione su Bus Interno e Bus
Esterno (LON®) presenti sulla parte superiore del dispositivo PR212/D-L.

L0520
RH0170.001 8/24
ABB SACE SACEPR212
2.3.3.1 Esempio dimpostazione dei dip-switch
2.3.4. Impostazioni di default
Il PR212/D-L viene fornito da ABB SACE con i seguenti parametri predefiniti:
Lunità è fornita con il nodo LON non installato logicamente (led Neuron Service lampeggian-
te, vedi par. 2.4)
2.3.5. Diagnostica
Dopo la fase iniziale dal power on o dal reset hw, lo stato dei led sarà come descritto al par. 2.2.2.
2.3.6. Serial Number
Letichetta con il Serial Number è posizionata sul fianco sinistro, in alto.

L0520
RH0170.001 9/24ABB SACE SACEPR212
2.4.1. In caso di guasto
Se si sospetta che il PR212/D-L sia guasto, presenti malfunzionamenti o abbia generato
comandi imprevisti, vi consigliamo di seguire scrupolosamente le seguenti indicazioni:
Preparare una breve descrizione del problema (quando è avvenuta ?, quante volte ?, levento è
riproducibile?)
Annotarsi eventuali accessori connessi allunità di protezione (unità di attuazione, unità di
segnalazione, YO, YU, ), il serial number dellunità (vedi par. 2.3.6), il tipo di Sw utilizzato
per la gestione del sistema di supervisione
Inviare/comunicare tutte le informazioni raccolte, corredate di schema elettrico applicativo
allassistenza ABB SACE a Voi più vicina.
La completezza e la precisione delle informazioni fornite allassistenza ABB faciliterà lanalisi
tecnica del problema riscontrato, e ci permetterà di attuare con sollecitudine tutte le azioni a
favore dellutente.
2.4. Ricerca guasti
Nella tabella seguente sono raccolte una serie di situazioni tipiche di esercizio, utili per capire e
risolvere ipotetici guasti o malfunzionamenti.
Nota bene:
·Prima di consultare la seguente tabella, verificare per alcuni secondi leventuale
segnalazione dei LED posti sul fronte del PR212/D-L (attendere alcuni secondi se lunità
PR212/D-L è appena stata accesa).
·Nel caso i suggerimenti proposti non portino alla risoluzione del problema, Vi preghiamo di
contattare il servizio di assistenza ABB SACE.

L0520
RH0170.001 10/24
ABB SACE SACEPR212
3. Unità di attuazione PR212/T
3.1. Caratteristiche tecniche
3.1.1. Caratteristiche elettriche
Effettiva operatività : dopo massimo 3 s dallapplicazione
dellalimentazione.
MTBF (MIL-HDBK-217E) previsto: 15 anni a 45°C
3.1.2. Alimentazione ausiliaria
Essendo richiesta una Vaux isolata da terra, è necessario utilizzare convertitori galvanicamente
separati conformi alle norme IEC 60950 (UL1950) o sue equivalenti [che garantiscano una
corrente di modo comune o corrente di fuga (vedi IEC 478/1, CEI 22/3) non superiore a 3,5mA],
IEC 60364-41 e CEI 64-8.
3.1.3. Caratteristiche meccaniche
Contenitore : Metallico (lamiera da 1mm)
Grado di Protezione : IP20
Dimensioni massime con connettori : 100 x 45 x 120 mm (h x l x p)
Peso massimo compreso connettori: 450 gr.
3.1.4. Caratteristiche ambientali
Temperatura Ambiente di esercizio: -5 °C ... +70 °C
Temperatura dimmagazzinaggio -40 °C ... +90 °C

L0520
RH0170.001 11/24ABB SACE SACEPR212
3.2. Interfaccia utente
Lunità dispone, nella parte frontale, di un led e due morsettiere.
3.2.1. Segnalazioni ottiche
·Le segnalazioni riportate nella tabella si intendono con Vaux presente
·Per ulteriori dettagli in merito alle possibili condizioni di malfunzionamento vedi par. 3.4
3.2.2. Morsettiere
·Connessioni 118: ingressi e uscite dellunità PR212/T (vedi par. 3.3.2)
3.3. Messa in servizio
3.3.1. Istruzioni di montaggio
Montaggio su guida standard da 35 mm (DIN EN50022 tipo TS 35 x 15mm).
Per i connettori frontali rimovibili utilizzare cavi con filo di sezione compresa tra 0.5 e 2.5
mm2(AWG 22 ... 12).
La messa a terra del contenitore metallico va eseguita mediante collegamento, con filo di
sezione 4 mm2con terminale ad occhiello, allapposita vite M4 posizionata sul retro del
contenitore stesso.
Appositi morsetti di terra sono disponibili sui connettori frontali, per collegare la circuiteria
elettronica alla terra di impianto. Tali morsetti non devono essere connessi alla vite di messa
a terra della scatola metallica.
Non sono ammesse prove di Rigidità Dielettrica sugli ingressi e sulle uscite dellunità PR212/T.
Per ulteriori informazioni (ubicazione del dispositivo di attuazione, distanza massima
dallinterruttore)consultare i documenti richiamati al par. 1.

L0520
RH0170.001 12/24
ABB SACE SACEPR212
3.3.2. Connessioni
Per la realizzazione dei cablaggi di ciascun morsetto consultare scrupolosamente gli schemi
elettrici applicativi nonchè tutte le indicazioni riportate nei documenti richiamati al par.1.
Trattandosi di ingressi e uscite dedicate, non è consentito un cablaggio ai vari morsetti differente
da quello riportato negli schemi elettrici ufficiali ABB SACE.
3.3.3. Serial Number
Letichetta con il Serial Number è posizionata sul fianco sinistro, in alto.
3.4. Ricerca guasti
Nella tabella seguente sono raccolte una serie di situazioni tipiche di esercizio, utili per capire e
risolvere ipotetici guasti o malfunzionamenti.
Nota bene:
·Prima di consultare la seguente tabella, verificare per alcuni secondi leventuale
segnalazione del led posto sul fronte dellunità di attuazione PR212/T.
·Nel caso i suggerimenti proposti non portino alla risoluzione del problema, vi preghiamo
di contattare il servizio di assistenza ABB SACE.
3.4.1. In caso di guasto
Se si sospetta che il PR212/T sia guasto, presenti malfunzionamenti o abbia generato comandi
imprevisti, Vi consigliamo di seguire scrupolosamente le seguenti indicazioni:
Preparare una breve descrizione del problema (quando è avvenuta ?, quante volte ?, levento è
riproducibile?)
Annotarsi eventuali accessori connessi allunità di protezione (unità di attuazione, unità di
segnalazione, YO, YU, ), il serial number dellunità (vedi par. 3.3.3)
Inviare/comunicare tutte le informazioni raccolte, corredate di schema elettrico applicativo
allassistenza ABB SACE a Voi più vicina.
La completezza e la precisione delle informazioni fornite allassistenza ABB faciliterà lanalisi
tecnica del problema riscontrato, e ci permetterà di attuare con sollecitudine tutte le azioni a
favore dellutente.

L0520
RH0170.001 13/24ABB SACE SACEPR212
Instruction manual
LON® PR212/D-LCOMMUNICATION UNIT
PR212/T ACTUATIONUNIT

L0520
RH0170.001 14/24
ABB SACE SACEPR212
SUMMARY
1. GENERAL ............................................................................................................. 15
1.1. INTRODUCTION .......................................................................................................... 15
1.2. APPLICATION SCENARIO .............................................................................................. 16
2. LON®PR212/D-L COMMUNICATION UNIT ................................................. 16
2.1. TECHNICAL CHARACTERISTICS ..................................................................................... 17
2.1.1. Electrical Characteristics .............................................................................17
2.1.2. Mechanical Characteristics ......................................................................... 17
2.1.3. Ambient Characteristics ............................................................................... 17
2.1.4. Communication Bus .....................................................................................17
2.2. USER INTERFACE ........................................................................................................ 18
2.2.1. Use of pushbuttons ...................................................................................... 18
2.2.2. Optic Signals ................................................................................................ 18
2.2.3. Terminal Boxes ............................................................................................ 18
2.3. PUTTING INTO SERVICE ............................................................................................... 19
2.3.1. Assembly instructions .................................................................................. 19
2.3.2. Connections ................................................................................................. 19
2.3.3. Setting dip-switches ...................................................................................... 19
2.3.4. Default settings ............................................................................................ 20
2.3.5. Diagnostics .................................................................................................. 20
2.3.6. Serial Number .............................................................................................. 20
2.4. TROUBLESHOOTING .................................................................................................... 21
2.4.1. In case of fault .............................................................................................. 21
3. PR212/TACTUATION UNIT ............................................................................. 22
3.1. TECHNICAL CHARACTERISTICS ....................................................................................... 22
3.1.1. Electrical characteristics ............................................................................... 22
3.1.2. Auxiliary power supply ................................................................................. 22
3.1.3. Mechanical characteristics ........................................................................... 22
3.1.4. Ambient characteristics................................................................................. 22
3.2. USER INTERFACE ......................................................................................................... 23
3.2.1. Optic signals ................................................................................................. 23
3.2.2. Terminal boxes .............................................................................................. 23
3.3. PUTTING INTO SERVICE ................................................................................................ 23
3.3.1. Assembly instructions ................................................................................... 23
3.3.2. Connections .................................................................................................. 24
3.3.3. Serial Number ............................................................................................... 24
3.4. TROUBLESHOOTING I................................................................................................... 24
3.4.1. In case of fault ............................................................................................... 24

L0520
RH0170.001 15/24ABB SACE SACEPR212
1. General
1.1. Introduction
Read this document carefully and completely.
The PR212/D-L communication units, connected to the PR212/P protection unit, make it
possible to connect Isomax circuit-breakers to a centralised control system to allow readout and/
or modification of the protection parameters (a more sophisticated adjustment compared with
manual configuration carried out using dip switches on the PR212/P), readout of circulating
currents, state of the circuit-breaker, transmission of opening and/or closing commands and
others, too.
The PR212/T actuation unit, connected to the PR212/D-L communication units, means that
the opening and closing commands coming from the remote supervision system can be actuated
(see par. 3).
In order to open or close the circuit-breaker from the remote supervision system, it is necessary
to have the following:
·PR212/D-L communication unit,
·PR212/T actuation unit
·motor operator
For correct use and management of the PR212/P protection units, which can be interfaced
with the communication units with LON®protocol [PR212/D-L], and with the
PR212/T actuation units, what is indicated in the following documents must be taken into
consideration:
·PR212/P protection unit kit sheet (doc. n° RH0062.001)
·PR212/D-L LON System Interface (doc. n° RH0252.001)
·LON installation guideline (doc. n° RH0297.001)
·ABB SACE Isomax technical catalogue
All the detailed information about the communication interface (needed for development
of the supervision and control system by the integrated System) is given either in document
RH0252.001.
All the detailed information for making the physical external connections to the communication
unit, as well as the maximum cabling distances, type of conductor to use . is given either in
document RH0297.001.
Echelon, LON, LONWORKS, LonBuilder, NodeBuilder, LonManager, LonTalk, LonUsers,
LonPoint, Neuron, 3120, 3150, the Echelon logo, and the LonUsers logos are Echelon
Corporation trademarks registered in the United States and in the other countries. LonLink,
LonResponse, LonSupport, i.LON, LonWorld, Device Tone, ShortStack and LonMaker are
Echelon Corporation trademarks.

L0520
RH0170.001 16/24
ABB SACE SACEPR212
1.2. Application scenario
In the block diagram below, the application scenario is given which links the following
together :
·the PR212/D-L communication units
·the PR212/T actuation unit
·the PR212/P protection unit
·the remote supervision system.
Connections between the various units are only shown indicatively, so cabling must be
carried out according to the official ABB SACE documentation.
2. LONÒPR212/D-L Communication unit

L0520
RH0170.001 17/24ABB SACE SACEPR212
2.1. Technical characteristics
2.1.1. Electrical characteristics
Effective operation : after a maximum of 5 s from turning on the
power supply.
MTBF (MIL-HDBK-217E) foreseen: 15 years at 45°C
2.1.1.1. Auxiliary power supply
Since an earth-insulated Vaux is required, it is necessary to use galvanically separated converters
in accordance with the IEC 60950 (UL1950) Standards or their equivalent [which guarantee a
common mode current or leakage current (see IEC 478/1, CEI 22/3) not exceeding 3.5mA], IEC
60364-41 and CEI 64-8.
2.1.2. Mechanical characteristics
Enclosure: Metallic (1mm sheet)
Degree of protection: IP20
Overall dimensions with connectors: 100 x 45 x 120 mm (h x l x d)
Maximum weight including connectors: 450 gr.
2.1.3. Ambient characteristics
Ambient operating temperature: -5 °C ... +70 °C
Storage temperature -40 °C ... +90 °C
2.1.4. Communication bus
2.1.4.1. Internal bus
Communication bus reserved for ABB SACE.
2.1.4.2. External bus
External bus (LON®) 2-Wire Twisted Pair, 78 kbit/s, connection to differential bus.

L0520
RH0170.001 18/24
ABB SACE SACEPR212
2.2. User interface
In its front part, the unit has three pushbuttons, four LEDs and two terminal boxes.
2.2.1. Use of the pushbuttons
·Neuron service: Press for a few seconds, until the Tx LED flashes for logic
installation of the PR212/D-L (node) on LON®network.
·Reset: Press to reset the PR212/D-L hardware
·Remote disabled: Press to pass from the Remote to Local condition and vice
versa. In the Local condition, remote opening and closing commands are not
accepted, nor variations to the parametrisation of the PR212/P protection unit
connected. The Local or Remote condition can be seen by checking the state of the
Rem Dis / IB fault LED (see par. 2.2.2).
2.2.2 Optic signals
·Any lighting up of LEDs, other than those described above, indicates probable
malfunction of the SACE PR212/D-L unit.
·The signals indicated in the table are intended with Vaux present.
·For further details regarding possible malfunctioning conditions see par. 2.4
2.2.3. Terminal boxes
·Connections 119: inputs and outputs of the PR212/D-L (see par. 2.3.2)
·RS232: connector reserved exclusively for ABB SACE personnel.

L0520
RH0170.001 19/24ABB SACE SACEPR212
2.3. Putting into service
2.3.1. Assembly instructions
Assembly on standard 35 mm guide (DIN EN50022 type TS 35 x 15mm).
For the front removable connectors, use cables with wire cross-section between 0.5 and 2.5
mm2 (AWG 22 ... 12).
Earthing of the metallic enclosure must be carried out by means of connection, with 4 mm2
cross-section wire with eyelet terminal, to the special M4 screw located on the rear of the
enclosure itself.
Special earthing terminals are available on the front connectors, to connect the electronic
circuit to the installation earth. These terminals must not be connected to the earthing
screw of the metallic box.
Dielectric Resistance tests are not allowed on the inputs and outputs of the PR212/D-L
unit.
Although the PR212/D-L can be installed in the circuit-breaker compartment, it is, in any
case, good practice to place it in the instrument compartment of the switchboard. For
further information (positioning of the communication device, maximum distance from the
circuit-breaker ), please consult the documents mentioned in par.1.
2.3.2. Connections
To carry out cabling of each terminal, closely follow the electrical application diagrams as well
as all the indications given in the documents mentioned in par.1.
Since the inputs and outputs are dedicated, cabling to the various terminals other than the one
indicated in the official ABB SACE electrical diagrams is not allowed.
2.3.3. Setting dip-switch
After cabling all the front connections correctly and the earthing connection on the rear, the
dip switches referring to the type of termination on the Internal Bus and External Bus (LONÒ)
in the top part of the PR212/D-L device must be set.

L0520
RH0170.001 20/24
ABB SACE SACEPR212
2.3.3.1 Example of dip-switch setting
2.3.4. Default settings
The PR212/D-L is delivered from ABB SACE with the following predefined parameters:
The unit is supplied with the LON node not installed logically (Neuron Service LED flashing,
see par. 2.4)
2.3.5. Diagnosis
After the initial power on or HW reset stage, the state of the LEDs will be as described in
par.2.2.2.
2.3.6. Serial Number
The label with the Serial Number is at the top on the left side.
This manual suits for next models
1
Table of contents
Languages:
Other ABB Control Unit manuals

ABB
ABB SafeGear User guide

ABB
ABB ACS880 Series User manual

ABB
ABB UCU-22 User manual

ABB
ABB MotiFlex e100 OPT-MF-005 User manual

ABB
ABB LW 110 User manual

ABB
ABB Relion 670 series Quick start guide

ABB
ABB COM600 series 5.0 Product manual

ABB
ABB ACS880-14 User manual

ABB
ABB Ability 800xA Series User manual

ABB
ABB Relion 615 series Datasheet

ABB
ABB Ability 800xA Series Instruction Manual

ABB
ABB FCAN-01 User manual

ABB
ABB IMASI13 User manual

ABB
ABB Unitrol 1000-PM40 User manual

ABB
ABB NMBP-01 Installation manual

ABB
ABB Relion 615 series User manual

ABB
ABB M4M Instruction Manual

ABB
ABB RPBA-01 User manual

ABB
ABB ACS580-04 User manual

ABB
ABB Welcome M2306 User manual