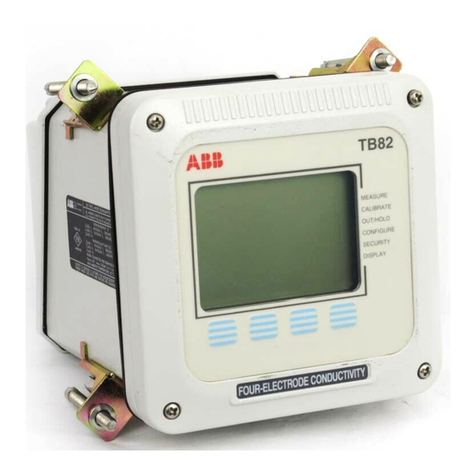
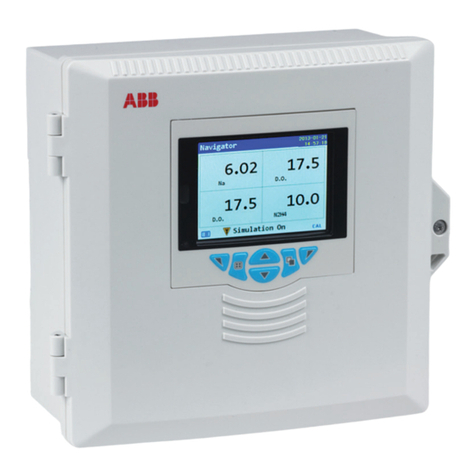
ABB 4600 Series User manual

ABB Instrumentation
Operating Instructions
Models 4681 and 4686
Oxygen Transmitters,
for use with ZGP2 Probes
4600 Series
4600
4600
A1
A2
% Oxygen 700°C
20.0
% Oxygen 700°C
20.0
A1
A2

ABB INSTRUMENTATION
✶
Note.
Clarification of an instruction or additional information.
Information.
Further reference for more detailed information or
technical details.
AlthoughWarning hazardsare related topersonalinjury,andCaution hazardsareassociated withequipmentorproperty damage,
it must be understood that operation of damaged equipment could, under certain operational conditions, result in degraded
process system performance leading to personal injury or death. Therefore, comply fully with all Warning and Caution notices.
Information in this manual is intended only to assist our customers in the efficient operation of our equipment. Use of this manual
for any other purpose is specifically prohibited and its contents are not to be reproduced in full or part without prior approval of
Technical Communications Department, ABB Instrumentation.
The Company
ABB Instrumentation is an established world force in the design and manufacture of
instrumentation for industrial process control, flow measurement, gas and liquid analysis and
environmental applications.
As a part of ABB, a world leader in process automation technology, we offer customers
application expertise, service and support worldwide.
We are committed to teamwork, high quality manufacturing, advanced technology and
unrivalled service and support.
The quality, accuracy and performance of the Company’s products result from over 100 years
experience, combined with a continuous program of innovative design and development to
incorporate the latest technology.
The NAMAS Calibration Laboratory No. 0255 is just one of the ten flow calibration plants
operated by the Company, and is indicative of ABB Instrumentation’s dedication to quality
and accuracy.
BS EN ISO 9001
St Neots, U.K. – Cert. No. Q5907
Stonehouse, U.K. – Cert. No. FM 21106
Stonehouse, U.K.
EN 29001 (ISO 9001)
Lenno, Italy – Cert. No. 9/90A
Use of Instructions
Warning.
An instruction that draws attention to the risk of injury or
death.
Caution.
Aninstruction that draws attention to the riskof damageto
the product, process or surroundings.
Health and Safety
To ensure that our products are safe and without risk to health, the following points must be noted:
1. The relevant sections of these instructions must be read carefully before proceeding.
2. Warning labels on containers and packages must be observed.
3. Installation, operation, maintenance and servicing must only be carried out by suitably trained personnel and in accordance with the
information given.
4. Normal safety precautions must be taken to avoid the possibility of an accident occurring when operating in conditions of high pressure
and/or temperature.
5. Chemicalsmustbestored awayfrom heat,protected fromtemperature extremesand powderskept dry.Normal safehandling procedures
must be used.
6. When disposing of chemicals ensure that no two chemicals are mixed.
Safety advice concerning the use of the equipment described in this manual or any relevant hazard data sheets (where applicable) may be
obtained from the Company address on the back cover, together with servicing and spares information.
R
E
G
I
S
T
E
R
E
D
0255

1
CONTENTS
Section Page
1 INTRODUCTION...........................................................2
2 PREPARATION.............................................................2
2.1 Checking the Code Number ..............................2
2.1.1 Wall-/Pipe-mounted Instruments ..........2
2.1.2 Panel-mounted Instruments .................2
3 MECHANICAL INSTALLATION ...................................3
3.1 Siting Requirements ..........................................3
3.2 Mounting ............................................................4
3.2.1 Wall-/Pipe-mounted Instruments ..........4
3.2.2 Panel-mounted Instruments .................5
4 ELECTRICAL CONNECTIONS ....................................6
4.1 Access to Terminals...........................................6
4.1.1 Wall-/Pipe-mounted Instruments ..........6
4.1.2 Panel-mounted Instruments .................6
4.2 Connections, General ........................................7
4.2.1 Relay Contact Protection
and Interference Suppression ..............7
4.3 Wall-/Pipe-mounted Instrument Connections ....8
4.4 Panel-mounted Instrument Connections ...........9
4.5 Selecting the Mains Voltage ............................10
4.5.1 Wall-/Pipe-mounted Instruments ........10
4.5.2 Panel-mounted Instruments ...............10
Section Page
5 CONTROLS AND DISPLAYS..................................... 11
5.1 Displays ........................................................... 11
5.2 Switch Functions ............................................. 11
6 OPERATION ...............................................................12
6.1 Instrument Start-up ..........................................12
6.2 Operating Page ...............................................12
6.3 Operating Page Error Messages .....................12
7 PROGRAMMING ........................................................13
7.1 Single-point Calibration ...................................14
7.2 Two-point Calibration .......................................15
7.3 Preset Calibration ............................................17
7.4 Access to Secure Parameters Page................18
7.5 Language Selection Page ...............................18
7.6 Set Up Thermocouple Page ............................19
7.7 Set Up Outputs Page.......................................20
APPENDIX A – ELECTRICAL CALIBRATION ...................22
A1 Equipment Required ........................................22
A2 Preparation ......................................................22
A3 Electrical Calibration Page ..............................23

2
The Models 4681 and 4686 Oxygen Transmitters are
designed for continuous monitoring of Oxygen content in
applications using 'in situ' ZGP2 probes.
Operation and programming of each Transmitter is via four
tactile membrane switches and a digital display located on the
front of the instrument. Two l.e.d.s on the front panel provide
local alarm indication.
In operation, each instrument can display measured %
oxygen, cell mV, or cell temperature. Set up of alarm,
retransmission and calibation parameters is achieved in
programming mode, where key parameters are protected by a
five-digit security code.
Measured %O2values can be retransmitted to remote
equipment using the retransmission output facility. The range
of values retransmitted can be set anywhere within the
instrument's display range of 0 to 25% O2, subject to limits
detailed in Section 7.7.
Remote alarm indication is provided by two relay outputs.
Relays are programmed to activate when the oxygen level
moves either above or below a pre-defined set point. The
second alarm relay can also be used as a 'general alarm'
which activates in the event of an instrument or system fault.
An optional external reference air unit is used to provide
reference air supply for the ZGP2 probe. If this unit is not
specified, reference air must be supplied to the probe from an
alternative source.
For full installation and operation details of the ZGP2 probe
refer to the Operating Instructions,
IM/ZGP2
.
2.1 Checking the Code Number
2.1.1 Wall-/Pipe-mounted Instruments – Fig. 2.1
2.1.2 Panel-mounted Instruments – Fig. 2.2
1 INTRODUCTION 2 PREPARATION
Fig. 1.1 System Schematic
Retransmission
Output
Alarm
Power
Supply
4600
4600
A1
A2
% Oxygen 700°C
20.0
%
O
x
y
g
e
n
7
0
0
°C
20.0
A1
A2
(Wall- /Pipe-mounted Model)
4681/501
Slide instrument
out of case
(Panel-Mounted Model)
Undo captive
screw
Remove Plug
(if fitted)
1
2
3
4686/501
Fig. 2.1 Checking the Code Number
(Model 4681)
Fig. 2.2 Checking the Code Number
(Model 4686)

3
3.1 Siting Requirements
Caution.
• Mount in a location free from excessive vibration.
• Mount away from harmful vapours and/or dripping
fluids.
Information. It is preferable to mount the
instrument at eye level, allowing an unrestricted view of
the front panel displays and controls.
IP66
C –Within Environmental Limits
55°C
Max.
–20°C
Min.
B –WithinTemperature Limits
Maximum Distance
100m
A – Maximum Distance of Instrument to Probe
3 MECHANICAL INSTALLATION
Fig. 3.1 Siting Requirements

4
160 (6.3)
250
(9.84)
69 (2.72)
Fixing Centers
Allowance for
Cable Bends
200 (7.9)
68 (2.68)
214
(8.43)
232
(9.13)
Fixing Centers
42 (1.65)
61 (23/8) O.D. Vertical or Horizontal Post
Dimensions in
mm (in)
3.2 Mounting
3.2.1 Wall-/Pipe-mounted Instruments – Figs. 3.2 and 3.3
…3 MECHANICAL INSTALLATION
Fig. 3.2 Overall Dimensions
Fig. 3.3 Wall-/Pipe-mounting
Mark fixing centers
(see Fig. 3.2)
Drill suitable
holes
Fix instrument to
wall using
suitable fixings
1
2
3
Position ‘U’ bolts on pipe
Position plates over ‘U’ bolts
Secure transmitter to mounting plate
Secure plates
1
2
3
4
A – Wall-mounting B – Pipe-mounting

5
…3.2 Mounting
3.2.2 Panel-mounted Instruments – Figs. 3.4 and 3.5
Dimensions in
mm (in)
Panel Cut-out
+0.8
–0
92
(3.62 )
+0.03
–0
+0.8
–0
92 (3.62 )
+0.03
–0
191 (7.52)
12 (0.47)96 (3.78)
96
(3.78)
3 MECHANICAL INSTALLATION
Cut a hole in the panel (see Fig. 3.4 for dimensions).
Instruments may be close stacked to DIN 43835.
Insert the instrument
into the panel cut-out.
Refit the panel clamps to the case, ensuring that the
panel clamp anchors are located correctly in their slot.
Secure the instrument by tightening
the panel clamp retaining screws.
Loosen the retaining screw
on each panel clamp.
Remove the panel clamp and
anchors from the instrument case.
1
2
3
4
5
6
3
Fig. 3.4 Overall Dimensions
Caution. The clamp must fit flat on the
instrument casing. If the clamp is bowed, the securing
screw is overtight and sealing problems may occur.
Fig. 3.5 Panel Mounting

6
Warning. Before making any connections, ensure that the power supply, any high voltage-operated control circuits
and high common mode voltages are switched off.
4.1 Access to Terminals
4.1.1 Wall-/Pipe-mounted Instruments – Fig. 4.1
4.1.2 Panel-mounted Instruments – Fig. 4.2
Remove nuts and
protection cover
Remove
mains cover
Mains Cover
1
2
4 ELECTRICAL CONNECTIONS
Earth Studs
slide
down
Pull out
slightly. . .
. . . and
slide off
Remove
protection
cover
Slacken
captive
screws
1
23
4
2
Fig. 4.1 Access to Terminals – Wall-/Pipe-mounted Instruments
Fig. 4.2 Access to Terminals – Panel Mounted Instruments

7
4.2 Connections, General
Information.
•Earthing (grounding) – stud terminal(s) is fitted to the transmitter case for bus-bar earth (ground) connection – see Fig.
4.1 or 4.5.
•Cable routing – always route signal output/O2probe cable leads and mains-carrying/relay cables separately, ideally in
earthedmetal conduit.Employtwisted pairoutput leadsoruse screenedcable withthescreen connectedto thecaseearth
stud.
Ensure that the cables enter the transmitter through the glands nearest the appropriate screw terminals and are short and
direct. Do not tuck excess cable into the terminal compartment.
•Cable glands & conduit fittings –ensure amoisture-tight fitwhen using cableglands, conduitfittings and blankingplugs/
bungs (M20 holes). The M16 glands ready-fitted to wall-mounted instruments accept cable of between 4 and 7mm
diameter.
•Relays –the relay contacts are voltage-free and must be appropriately connected in series with the power supply and the
alarm/control device which they are to actuate. Ensure that the contact rating is not exceeded. Refer also to Section 4.2.1
(below) for relay contact protection details when the relays are to be used for switching loads.
•Retransmission output – Do not exceed the maximum load specification for the selected current retransmission range –
see Section 10, SPECIFICATION.
Since the retransmission output is isolated the –ve terminal must be connected to earth (ground) if connecting to the
isolated input of another device.
4.2.1 Relay Contact Protection and Interference Suppression – Fig. 4.3
If the relays are used to switch loads on and off, the relay contacts can become eroded due to arcing.Arcing also generates radio
frequency interference (RFI) which can result in instrument malfunctions and incorrect readings. To minimise the effects of RFI,
arc suppression components are required; resistor/capacitor networks for a.c. applications or diodes for d.c. applications. These
components can be connected either across the load or directly across the relay contacts. On 4600 Series instruments the RFI
components must be fitted to the relay terminal block along with the supply and load wires – see Fig 4.3.
For a.c. applications the value of the resistor/capacitor network depends on the load current and inductance that is switched.
Initially, fit a 100R/0.022µF RC suppressor unit (part no. B9303) as shown in Fig. 4.3A. If the instrument malfunctions (incorrect
readings) or resets (display shows 88888) the value of the RC network is too low for suppression an alternative value must be
used. If the correct value cannot be obtained, contact the manufacturer of the switched device for details on the RC unit required.
For d.c. applications fit a diode as shown in Fig. 4.3B. For general applications use an IN5406 type (600V peak inverse voltage
at 3A – part no. B7363).
✶
Note. For reliable switching the minimum voltage must be greater than 12V and the minimum current greater than
100mA.
4 ELECTRICAL CONNECTIONS…
NC C NO
External
D.C. Supply
+–
Relay Contacts
Load
Diode
NC C NO
External
A.C. Supply
LN
Relay Contacts
C
R
Load
A – A.C. Applications B – D.C. Applications
Fig. 4.3 Relay Contact Protection

8
–Earth
Earth Stud
(on case) –
see Fig. 4.1
ProbeThemocouple Power
Supply
Retransmission Relay 1
Relay 2
1234567 +– N L
123
456
123
456
+
–Retrans.
Output
Relays
1
2
3
4
5
6
–
–
–
–
–
–
NC
C
NO
NC
C
NO
Relay 1
Relay 2
Mains Supply
N
L–
–Neutral
LIne
–
Output
NC
C
NO
Normally Closed
Common
Normally Open
=
=
=
Probe
Thermocouple Power
Supply
Retrans. Relay 1
Relay 2
output
1+
2–2–
3+
+ – +
4.3 Wall-/Pipe-mounted Instrument Connections – Fig. 4.4
✶
Note. Refer to Fig. 4.1 for Access to Terminals.
Caution. Slacken terminal screws fully before making connections.
…4 ELECTRICAL CONNECTIONS
Warning. The power supplyearth (ground)must be connected toensure safetyto personnel, reductionof the
effects of RFI interference and correct operation of the power supply interference filter terminal.
✶
Note. Cut the probe cable braid
back to the outer sheath.
Fig. 4.4 Wall-/Pipe-mounted Instrument Connections

9
4 ELECTRICAL CONNECTIONS…
4.4 Panel-mounted Instrument Connections – Fig. 4.5
✶
Note. Refer to Fig. 4.1 for Access to Terminals.
Caution. Slacken terminal screws fully before making connections.
1
2
3
4
5
6
7
8
9
10
11
12
1
2
3
4
5
6
7
8
9
E
N
L
Retransmission
output
TBA
Relay 1
Relay 2
1
2
3
4
5
6
7
8
9
E
N
L
1
2
3
4
5
6
7
8
9
10
11
12
+
–
Normally Closed
Common
Normally Open
Normally Closed
Common
Normally Open
Neutral
Live
Earth
Mains supply
TBB
Earth Stud
Earth Stud (on case)
+
–
+
Probe
Thermocouple
Warning. The power supply earth (ground) must be connected to ensure safety to personnel, reduction of the
effectsof RFIinterference and correctoperation of the power supplyinterference filter. Connect theearth lead directly
to the case earth stud and not to the 'E' terminal.
✶
Note. Cut the probe cable braid
back to the outer sheath.
Fig. 4.5 Panel-mounted Instrument Connections

10
…4 ELECTRICAL CONNECTIONS
230
Remove cover (see Fig. 4.1)
Slacken captive screws
and remove
protection cover
Remove front
panel screws
Remove front
panel
Remove cap
and screw
230
230V
115V
1
2
3
43
Select the mains
voltage required
5
4.5.2 Panel-mounted Instruments – Fig. 4.7
4.5 Selecting the Mains Voltage
4.5.1 Wall-/Pipe-mounted Instruments – Fig. 4.6
Slide instrument
out of case
Undo captive
screw
Remove plug
(if fitted)
1
2
3
Select
the mains
voltage
required
115
115
115V
230V
115
4
Information. Use a small,
flat-bladed screwdriver to remove
the screw cap from the case.
Fig. 4.6 Selecting the Mains Voltage – Wall-/Pipe-mounted Instruments
Fig. 4.7 Selecting the Mains Voltage – Panel-mounted Instruments

11
5 CONTROLS AND DISPLAYS
5.1 Displays – Fig. 5.1
The display comprises a 5-digit, 7-segment digital upper
displayline anda16-character dot-matrixlower display line.In
operation, the upper display line shows actual values of %
oxygen, temperature, cell millivolts or alarm set points. In
programming mode it is used to display programmable
parameters. The lower display line shows the associated units
and/or other programming information.
A – Advancing to Next Page
Parameter 1
Parameter 2
Parameter 3
Parameter 4
Page 1 Parameter 1
Parameter 2
Parameter 3
Page 2
Advance to
next page
For majority
of parameters
or
B – Moving Between Parameters
C – Adjusting and Storing a Parameter Value
New value is
automatically stored
Parameter Value Adjust
D – Selecting and Storing a Parameter Choice
or
Parameter 1
Parameter 2
Parameter 3
Page X
Parameter 4
Advance to
next parameter
Parameter X
Y
ZSelect
New value is
automatically stored
or
20.0
% Oxygen 700°C
Alarm
L.E.D.s
Upper
Display Line
Lower
Display Line
Membrane Switches
Fig. 5.1 Location of Controls and Displays
Fig. 5.2 Functions of the Membrane Switches
5.2 Switch Functions – Fig. 5.2

12
6.1 Instrument Start-up
Ensure all electrical connections have been made correctly and apply power to the instrument.
6.2 Operating Page
The operating page is a general use page in which continuously updated measured values and preset parameters can be viewed
but not altered. To adjust or set a parameter refer to the programming pages in Section 7.
6 OPERATION
% Oxygen
The upper display indicates the measured oxygen value. If over or under
temperature is monitored, the upper display shows '------' and an error
message is displayed on the lower dot matrix display – see Section 6.3.
The lower display indicates the measured cell temperature in °C.
Cell Temperature (°C)
The upper display indicates the measured cell temperature in °C.
Cell Millivolts
The upper display indicates the measured cell millivolts.
Alarm 1 Set Point
The upper display indicates the alarm 1 set point, displayed as % oxygen. The
set point value and the relay/l.e.d. action is programmed in the Set Up Outputs
Page – see Section 7.7.
Alarm 2 Set Point
Note. This frame is not displayed if the Alarm 2 Action parameter has
been set to General Alarm – see Section 7.7.
The upper display indicates the Alarm 2 set point, displayed as % oxygen.
Press to return to the top of the Operating Page.
Press to advance to the beginning of the Oxygen Calibration Sequence.
Alarm 2 Setpoint
Alarm 1 Setpoint
20.00
5.00
0.0
Cell milliVolts
20.9
% Oxygen 700°C
700
Cell Temperature
OXYG N CAL.
Note. If Alarm 2 has been programmed as a general system/instrument alarm, the associated front panel l.e.d. is
illuminated when the alarm is active and Relay 2 has de-energized.
6.3 Operating Page Error Messages
If an error is detected, the appropriate error message (see table below) will replace the % Oxygen frame in the Operating Page.
egasseMrorrE esuaCelbissoP
RORRYROMMVN ehtyfitceroT.purewopgnirudyltcerrocdaerneebtonevahyromemelitalov-nonehtfostnetnocehT .ynapmoCehttcatnocstsisreptluafehtfI.niaganohctiwsdnasdnoces01tiaw,ffohctiws,tluaf
PMTRDNULLC 006<(sgnidaerelbatiusniatbooterutarepmettneiciffusadehcaertonsaheborpehT °.)C
LIAFNOITARBILAC .deliafnoitarbilactniop-owtro-elgnistsalehT
TIUCRICNPOC/T sierutarepmetelpuocomrehtehtrotiucricnepoerasnoitcennocelpuocomrehtehT 0021nahtretaerg °2912/C °0051ro)elpuocomrehtKepyt(F °2372/C °.)selpuocomrehtB&S,Repyt(F

13
7 PROGRAMMING
Operating
Parameters
Secure
Parameters
20.9
% Oxygen
700
Cell Temperature
0.0
Cell milliVolts
20.00
Alarm 1 Setpoint
5.00
Alarm 2 Setpoint
Section 6.2
-----
OXYG N CAL. S Q.
0.0
Cell Constant mV
100.0
Span % of Theory
00000
Cal. User Code
Preset Cal.
One Point Cal.
-----
Two Point Cal.
0.0
Adjust Cell Zero
-----
Span Theory NO
Y S
Section 7.1
Section 7.3
20.95
00000
Security Code
Connect to Air
20.95
Calibrating Air
-----
Calibration Pass
Failed Constant
Failed Unstable
20.95
Connect to Air
20.95
Calibrating Air
1.00
nter Span Gas
1.00
Connect Span Gas
1.00
Calibrating Span
-----
Calibration Pass
Failed Span
Failed Constant
Failed Unstable
Section 7.4
Section 7.1
Section 7.5 Section 7.7
Y S
Section A.3
Section 7.6
Section 7.2
xxxxx
nglish
-----
Deutsch
Français
spañol
-----
S T UP OUTPUTS
-----
A1 Action A
-----
A1 Setpoint
0.0
A2 Action A
20.00
A2 Setpoint
-----
RTX Type 4-20
-----
Log Output NO
25.00
Retrans Span
0.0
Retrans Zero
-----
Hold Outputs NO
B
B
General Alarm
0-20
0-10
Y S
Y S
-----
L CTRICAL CAL.
-----
Calibrate Y S
xxxxx
mV Zero 1 -20mV
mV Span 1 180mV
xxxxx
mV Zero 2 10mV
xxxxx
mV Span 2 40mV
100.0
Test Retrans (%)
00000
Alter Sec. Code
00000
Alter Cal. Code
25.0
Adjust CJ Value
-----
Adjust RTX Zero
-----
Adjust RTX Span
K
-----
S T UP T/C
T/C TYP NON
R
S
-----
700
Preset Temp
NO
B
Fig. 7.1 Overall Programming Chart

14
Note. Before commencing a gas calibration procedure the analyzer and probe must be switched on and allowed to run
for at least one hour to allow the system to stabilize thermally.
7.1 Single-point Calibration
The calibration sequence involves standardizing the analyzer and the oxygen probe, using air as the test gas. Until a calibration
sequence has been completed successfully, the existing slope remains unaffected.
…7 PROGRAMMING
Oxygen Calibration Sequence
Cell Zero mV
The upper display shows the millivolt offset of the oxygen probe from the last
successful calibration.
Span % of Theory
Avalue between 90 and 110% should be displayed. The display indicates the
oxygen probe output slope using parameters derived at the last successful
two-point calibration or the preset values.
Calibration User Code
[00000 to 19999]
If an incorrect value is entered, access to the calibration sequence is inhibited
and the display returns to the beginning of the Oxygen Calibration Sequence.
One Point Calibration
Select one-point calibration sequence.
Connect to Air
Connect the air supply to the probe (refer to the probe's Operating Instructions,
IM/ZGP2
). The upper display indicates the measured % oxygen.
Calibrating Air
The upper display indicates the measured % oxygen. When a stable reading is
detected the display advances automatically to the next frame. To abort
calibration, press either the or switch.
Calibration Pass/Fail
On completion a calibration status message is displayed:
Calibration Pass: Calibration sequence successful
Failed Constant: Cell offset >±10mV
(upper display shows cell mV output)
Failed Unstable: Cell output unstable (drifting).
Note. If the sensor calibration is unsuccessful then the Cell Zero mV and
Span % of Theory parameters are unaffected. The instrument continues to
operate using parameters stored during the last successful calibration.
Press to return to the beginning of the Oxygen Calibration Sequence.
Press to advance to the Secure Parameters Page.
Failed Unstable
Preset Cal.
Connect to Air
20.95
Calibrating Air
One Point Cal.
-----
Two Point Cal.
20.95
-----
Calibration Pass
Failed Constant
0000.0
Cal. User Code
-----
OXYG N CAL. S Q.
0.0
Cell Constant mV
100.0
Span % of Theory
S CURITY COD
Incorrect Calibration User Code

15
7.2 Two-point Calibration
7 PROGRAMMING…
Preset Cal.
Connect to Air
20.95
Calibrating Air
One Point Cal.
-----
Two Point Cal.
20.95
0000.0
Cal. User Code
-----
OXYG N CAL. S Q,
0.0
Cell Constant mV
100.0
Span % of Theory
1.00
nter Span Gas
1.00
Connect Span Gas
1.00
Calibrating Span
Incorrect Calibration User Code
Oxygen Calibration Sequence
Cell Zero mV
The upper display shows the millivolt offset of the oxygen probe from the last
successful calibration.
Span % of Theory
Avalue between 90 and 110% should be displayed. The display indicates the
oxygen probe output slope using parameters derived at the last successful
two-point calibration or the preset values.
Calibration User Code
[00000 to 19999]
If an incorrect value is entered, access to the calibration sequence is inhibited
and the display returns to the beginning of the Oxygen Calibration Sequence.
Two Point Calibration
Select the two-point calibration sequence.
Connect to Air
Connectthe airsupply tothe probe (referto theprobe's OperatingInstructions,
IM/ZGP2
). The upper display indicates the test gas value in % oxygen.
Calibrating Air
The upper display indicates measured % oxygen. The display advances
automatically to the next frame when a stable reading is detected. To abort
calibration, press either the or switch to advance to the next frame.
Enter Span Gas
[between 0.10 and 10.00% O2]
Set the oxygen content of the gas used to calibrate the span.
Connect Span Gas
Connect the span gas to the probe (refer to the probe's Operating Instructions,
IM/ZGP2
). The upper display indicates the test gas value in % oxygen.
Calibrating Span
The upper display indicates measured % oxygen. The display advances
automatically to the next frame when a stable reading is detected. To abort
calibration, press either the or switch to advance to the next frame.
Continued on next page.

16
…7.2 Two-point Calibration
…7 PROGRAMMING
Calibration Pass/Fail
On completion a calibration status message is displayed.
Calibration Pass: Calibration sequence successful
Failed Constant: Cell offset >±10mV
(upper display shows cell constant)
Failed Span %: Cell output <90% or >110% of slope
(upper display shows measured slope)
Failed Unstable: Cell output unstable (drifting).
Note.Ifsensorcalibration is unsuccessfulthenthe Cell Zero mV andSpan
% of Theory parameters are unaffected. The instrument continues to operate
using parameters stored during the last successful calibration.
Press to return to the beginning of the Oxygen Calibration Sequence.
Press to advance to the Access to Secure Parameters Page.
Failed Unstable
-----
Calibration Pass
Failed Constant
S CURITY COD
Continued from previous page
Failed Span

17
7.3 Preset Calibration
7 PROGRAMMING…
Oxygen Calibration Sequence
Cell Zero mV
The upper display shows the millivolt offset of the oxygen probe from the last
successful calibration.
Span % of Theory
Avaluebetween90 and110% should bedisplayed.If thevalueis outside these
limits then the oxygen probe must be checked.
Calibration User Code
[00000 to 19999]
If an incorrect value is entered, access to the calibration sequence is inhibited
and the display returns to the beginning of the Oxygen Calibration Sequence.
Preset Calibration
Select the preset calibration sequence.
Adjust Cell Zero
[0 to ±10mV]
The upper display shows the cell output (in mV) corresponding to a reading of
20.95 %O2. Adjust the reading to correspond with the probe.
Span Theory
Select Y S iftheSpan % of Theory parameter isto bereset to 100%.Select NO
to retain the existing value.
Press to return to the beginning of the Oxygen Calibration Sequence.
Press to advance to the Access to Secure Parameters Page.
Preset Cal.
Adjust Cell Zero
-----
Span Theory NO
One Point Cal.
-----
Two Point Cal.
0.0
0000.0
Cal. User Code
-----
OXYG N CAL. S Q.
0.0
Cell Zero mV
100.0
Span % of Theory
Y S
S CURITY COD
Incorrect Calibration User Code

18
…7 PROGRAMMING
-----
Security Code
nglish
Deutsch
nglish
-----
S T UP T/C
Français
spañol
7.4 Access to Secure Parameters Page
A 5-digit security code is used to prevent tampering with the secure parameters.
Security Code
[00000 to 199999]
If an incorrect value is entered, access to programming pages is inhibited.
Press to advance to the Language Selection Page.
7.5 Language Selection Page
Language Selection
Select the language in which all text is subsequently displayed:
English
German
French
Spanish
Press to advance to the Set Up Thermocouple Page.
This manual suits for next models
2
Table of contents
Other ABB Transmitter manuals

ABB
ABB TTH300 Series User manual

ABB
ABB 261GS User manual

ABB
ABB AWT210 User manual

ABB
ABB LST300 Series Operating and installation instructions

ABB
ABB TTF300 User manual

ABB
ABB 266HSH User manual

ABB
ABB TTH200 User manual

ABB
ABB 266 MODBUS User manual

ABB
ABB 2600T Series User manual

ABB
ABB PGX100 User manual