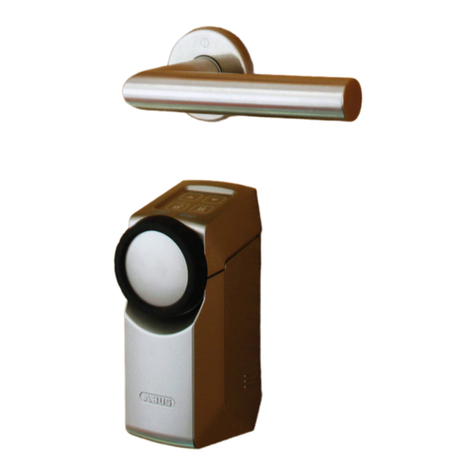
Abus AWLX PRO Mounting instructions

[1] wAppLoxx Pro –installation instructions and user guide
Installation instructions and user
guide
wAppLoxx Pro
WLX PRO –Access and Intrusion
WLX-PRO-L*

[2] wAppLoxx Pro –installation instructions and user guide
Contents
I. General............................................................................................................................................ 3
II. Technical data ................................................................................................................................. 5
III. Installing wAppLoxx Pro Double-Knob Cylinder.......................................................................... 7
1. Individual parts............................................................................................................................ 7
2. Installation................................................................................................................................... 9
2.1 Installation from the outside............................................................................................... 9
WLX-PRO-LA .................................................................................................................................... 9
WLX-PRO-HZ (from Step 3).............................................................................................................. 9
2.2 Installation from the inside ..................................................................................................... 13
3. Installation: Adjusting the cylinder body to the door thickness ............................................... 16
3.1 Extending the inside................................................................................................................ 16
3.2 Extending the outside........................................................................................................ 19
IV. Logging the wAppLoxx Pro Cylinder into and out of the wAppLoxx Control ............................ 22
V. Operating the wAppLoxx Pro Cylinder .......................................................................................... 23

[3] wAppLoxx Pro –installation instructions and user guide
I. General
This product complies with current domestic and European regulations. Conformity has
been certified, and all related certifications are available from the manufacturer on
request. To ensure the condition of this product is maintained and that safe operation is
guaranteed, this user guide must be observed. No part of the product may be changed or
modified in any way, with the exception of adjusting the cylinder body to the door
thickness as described in Chapter III.3.
ABUS Security-Center GmbH & Co. KG shall not be held liable for loss or damage caused –
or alleged to have been caused –either directly or indirectly by this manual. We reserve
the right to make changes to this manual without prior notice.
ABUS Security-Center hereby declares that the radio system type 505272 and all WLX
cylinders comply with RED Directive 2014/53/EU. The full EU Declaration of Conformity
text can be found at:
https://www.abus.com/ger/Objektsicherheit /Zutrittskontrolle/wAppLoxxPro
Safety information
Explanation of symbols:
The triangular warning symbol indicates important notes in this user guide which must
be observed.
The triangular high voltage symbol is used to warn of the risk of
injury or health hazards (e.g. caused by electric shock).
This symbol indicates special tips and notes on the operation of the unit.
Information on the wireless range:
It is essential to check whether there is an adequate wireless connection prior to
installation and commissioning.

[4] wAppLoxx Pro –installation instructions and user guide
Information on the battery:
The wAppLoxx Pro Cylinder is powered with direct current via a 3 V CR2 lithium battery that is
included in the scope of delivery.
In order to ensure a long lifespan and to prevent fire and injury, comply with the
following instructions:
•When inserting the battery, ensure the polarity is correct.
•Batteries must not be exposed to direct sunlight or other heat sources or stored in
places exposed to very high temperatures.
•Keep batteries away from children.
•Batteries are not rechargeable.
•Batteries must not be dismantled, pierced or otherwise damaged. They must not be
burned, come into contact with water or be short-circuited.
•When replacing the batteries, the respective temperature specifications of the
manufacturer must be observed
To ensure a long lifespan and safe operation, you must use the following high-quality
batteries:
VARTA CR2 / CR17355 3 V lithium battery
If you do not use a Varta CR2 battery, the specified lifespan cannot be guaranteed and
it is not possible to ensure that the battery warning display of the WLX Pro Control will
be correctly displayed.

[5] wAppLoxx Pro –installation instructions and user guide
II. Technical data
Cylinder variants: LA Double-knob cylinder, reader outside
LB Double-knob cylinder, reader both sides
LA-P Double-knob cylinder, panic
HZ Half cylinder
OPZ Double-knob cylinder for doors without PZ perforation
Scope of delivery: Locking cylinder, quick guide, forend screw, VARTA 3 V CR2 lithium
battery
Required accessories: ABUS Mifare DESfire EV1 Tag,
WLX Pro Tool Set (small)
Optional accessories: WLX card reader
WLX Pro tool set (large)
Tags: ABUS Mifare DESfire EV1 Tag
4-byte/7-byte Mifare Classic tags
(we accept no liability for the use of other tags)
Areas of usage: Doors with PZ mortise lock, multiple locking,
panic locks in line with EN 179 and EN 1125
Configuration: Via wAppLoxx Pro Control
Power supply: 3 V CR2 lithium battery
Conditions of use: -25 °C to +65 °C
Standard length: 30 mm outside / 30 mm inside
Adaptable length: Can be lengthened in 5 mm increments from 30 mm outside / 30 mm
inside to 90 mm outside / 90 mm inside. Extension pieces available in
the lengths 5 mm, 10 mm, 15 mm and 30 mm
Drilling protection Standard
Security with extra-reinforced anti-drill pins in the shaft and
cylinder body
IP protection class: IP 66
Outer knob dimensions: Diameter 38 mm, length 48 mm
Inner knob dimensions: Diameter33 mm, length 27 mm (Standard)
Diameter 26/30 mm, length 27 mm (Narrow-frame doors)
Inner knob variant: Standard, inner knob for narrow-frame doors

[6] wAppLoxx Pro –installation instructions and user guide
Material: Knob: Stainless steel
Reading cap: plastic
Outer knob colour variants: black, white, grey
Delivery status: Coupled
(Decoupling is not carried out until it has been successfully
programmed into the wAppLoxx Pro Control)
Functions: Opening period can be set to 6 or 12 seconds
Tag reader
Remote access

[7] wAppLoxx Pro –installation instructions and user guide
III. Installing wAppLoxx Pro Double-Knob Cylinder
1. Individual parts
1. Outer cap
2. Battery
3. Electronic knob with 30-mm shaft
3.1. PCB holder
3.2. Basket
3.3. Shaft with motor
4. Mounting plate
5. Outer cylinder body
6. Core retaining ring
7. Shaft extension
8. Outer extension bridge (the mark next to the forend screw marks the outside)
9. Inner extension bridge
10. Cam
11. Body extension
12. Shaft for mechanical inner knob
13. Mechanical inner knob
1
2
3
4
6
6
5
7
v
8
11
10
9
12
13
a
b
e
c
d
7
v
11
3.1
3.2
3.3

[8] wAppLoxx Pro –installation instructions and user guide
Tools required (must be ordered separately):
a. Closing pliers
b. Opening pliers
c. 1.5-mm hexagon key, inner knob, WLX Pro
d. 2.5-mm hexagon key, modular, WLX Pro
e. Outer cap opening key
Two different tool sets are available.
ACWZ00001 - WLX Pro tool set, large for extensions
•Closing pliers
•Opening pliers
•1.5-mm hexagon key, inner knob, WLX Pro
•2.5-mm hexagon key, modular, WLX Pro
•Outer cap opening key
ACWZ00002 - WLX Pro tool set, large for installation and battery replacement
•1.5-mm hexagon key, inner knob, WLX Pro
•Outer cap opening key

[9] wAppLoxx Pro –installation instructions and user guide
2. Installation
2.1 Installation from the outside
WLX-PRO-LA
WLX-PRO-HZ (from Step 3)
wAppLoxx Pro as delivered
Outer cap (1) and inner knob (13) are installed. The
battery (2) is not yet inserted. The cam is coupled to
prevent accidental locking.
Removing the inner knob
The inner knob (13) must be removed in order to insert
the wAppLoxx Pro into the lock from the outside.
Fitting the wAppLoxx Pro in the door
Once the inner knob (13) has been removed,
the wAppLoxx Pro can be pushed through the door leaf
from the outside (#1).
Fix the wAppLoxx Pro in the lock case with the forend
screw like a mechanical locking cylinder. (#2)

[10] wAppLoxx Pro –installation instructions and user guide
Installing the inner knob
Screw the inner knob (13) into the thread in the shaft end
piece (12) using a 1.5-mm hexagon key (c).
Removing the outer cap 1
The outer cap (1) has to be removed in order to insert the
battery (2). Using the opening key (e), fix the mounting
plate (4) onto its notch and unscrew the outer cap (1).
Removing the outer cap 2
The sealing ring (marked red) of the knob is located just
behind the mounting plate (4).
Carefully pull the outer cap (1) over the sealing ring using
your fingers

[11] wAppLoxx Pro –installation instructions and user guide
Removing the outer cap 3
Once the outer cap (1) has been pulled over the sealing
ring, the outer cap can be completely pulled off the knob.
Make sure that the outer cap (1) is straight when pulled
off. If not, you risk damaging the antenna circuit board.

[12] wAppLoxx Pro –installation instructions and user guide
Inserting the battery
Make sure that the battery (2) is placed on the white
battery flag. When inserting the battery, make sure that
the polarity is correct (positive terminal facing antenna
circuit board).
Installing the outer cap
Screw the outer cap (1) back on by securing the mounting
plate using the opening key (e).
There is a marking on the outer cap (1) that makes it
easier to position the outer cap correctly on the groove of
the knob (3).
When installing the outer cap (1), it is essential to ensure
that the orange O-ring lies flush between the mounting
plate and the knob.

[13] wAppLoxx Pro –installation instructions and user guide
2.2 Installation from the inside
The cylinder must be installed from the inside for the following variants:
•WLX-PRO-LB
•WLX-PRO-LA-P
•WLX-PRO-LA OPZ
wAppLoxx Pro as delivered
Outer cap (1) and inner knob (13) are installed. The
battery (2) is not yet inserted. The cam (10) is coupled to
prevent accidental locking. There are 8 electronic screws
in the scope of delivery, which are used to attach the
knob.
Removing the outer cap
The entire outer knob (1+3) must be removed in order to
insert the wAppLoxx Pro into the lock from the outside.
Firstly, remove the outer cap (1)
Removing the electronic knob 1
After removing the outer cap, the electronic knob (3.1)
must be removed. After this, remove the PCB bracket
(3.1) from the basket (3.2) and remove the basket (3.2)
from the shaft including the mounting plate (4).
Fitting the wAppLoxx Pro in the door
Once the outer knob (1) has been removed, the
wAppLoxx Pro can be pushed through the door leaf from
the inside. Fix the wAppLoxx Pro in the lock case with the
forend screw like a mechanical locking cylinder.

[14] wAppLoxx Pro –installation instructions and user guide
Installing the basket
During installation, make sure that the mounting plate (4)
between the basket (3.2) and the shaft with the motor
(3.3) is inserted in the correct order.
When the cylinder body has been installed in the lock,
secure the basket (3.2) to the shaft with the motor (3.3)
using 6 screws.
In order to ensure that the cylinder is tight, it must be
ensured that sufficient screw glue is applied to the
electronic screws.
Installing the PCB holder
Place the PCB holder (3.1) in the basket and secure using
two small electronic screws.
When inserting the holder, ensure that the EMC contact
is not bent (see figure on the left).

[15] wAppLoxx Pro –installation instructions and user guide
Inserting the battery
Make sure that the battery (2) is placed on the white
battery flag. When inserting the battery, ensure the
polarity is correct (positive terminal facing antenna circuit
board).
Installing the outer cap
Screw the outer cap (1) back on by securing the mounting
plate (4) using the opening key (e).
There is a marking on the outer cap (1) that makes it
easier to position the outer cap correctly on the groove of
the knob (3).
When installing the outer cap, it is essential to ensure
that the orange O-ring lies flush between the mounting
plate (4) and the knob (3).

[16] wAppLoxx Pro –installation instructions and user guide
3. Installation: Adjusting the cylinder body to the door thickness
3.1 Extending the inside
Removing the core retaining ring
Remove the core retaining ring (6) on the outer
cylinder body (5) using the WLX Pro opening pliers
(a).
Removing the shaft
Remove the shaft end piece (12) from the outer
cylinder body (5)
Releasing the cylinder body
Remove the grub screw in the outer cylinder body (5)
using the hexagon key (d)
Removing the cylinder body
Remove the outer cylinder body (5) from the inner
extension connector (8)

[17] wAppLoxx Pro –installation instructions and user guide
Changing the inner extension connector
Twist the inner extension connector (8) out of the
outer extension connector (11)
Changing the inner extension connector
Screw the desired inner extension connector (8) into
the outer extension connector (11). There is a
specific extension connector (30 mm–90 mm) (8) for
every inner length.
Fitting the extension pieces
Push the desired extension piece (9) together with
the corresponding shaft extension (7) onto the
extension connector (8) until it makes contact with
the outer extension connector (11), and thereby
secure the cam (10).
Tightening the cylinder body
Secure the grub screw in the outer cylinder body (5).
Pushing on the shaft for the mechanical inner knob
Slide the shaft end piece (12) or outer knob (1) into
the outer cylinder body (5).

[18] wAppLoxx Pro –installation instructions and user guide
Securing the shaft
Fit a new core retaining ring using the closing pliers
to secure the shaft.
Make sure that the various shaft extensions interlock
and that the corresponding groove is positioned at
the opening of the core retaining ring.
Make sure that a new core retaining ring (6) is used
each time the length is adjusted during installation.
Only then can correct installation be ensured

[19] wAppLoxx Pro –installation instructions and user guide
3.2 Extending the outside
Removing the core retaining ring
Remove the core retaining ring (6) on the
outer cylinder body (5) using the WLX Pro
opening pliers (a).
Removing the shaft
Remove the shaft end piece (12) from the
outer cylinder body (5)
Releasing the cylinder body
Remove the grub screw in the outer cylinder
body (5) using the hexagon key (d)
Removing the cylinder body
Remove the outer cylinder body (5) from the
extension connector (8)

[20] wAppLoxx Pro –installation instructions and user guide
Changing the outer extension connector
Twist the inner extension connector (8) out of
the outer extension connector (11). To do this,
first remove the core retaining ring on the
inside (see above). Screw the inner extension
connector into the desired outer extension
connector.
There is a specific extension connector
(30 mm–90 mm) (8) for every outer length.
Fitting the extension pieces
Push the desired extension piece (9)
together with the corresponding shaft
extension (7) onto the extension connector (8)
until it makes contact with the outer extension
connector (11), and thereby secure the cam
(10).
Tightening the cylinder body
Secure the grub screw in the outer cylinder
body (5).
Sliding on the electronic knob with shaft
Slide the shaft end piece (12) or outer knob (1)
into the outer cylinder body (5).
This manual suits for next models
2
Table of contents
Other Abus Door Lock manuals

Abus
Abus HomeTec Pro Manual

Abus
Abus PR2600 Manual

Abus
Abus 4010 Manual

Abus
Abus HomeTec Pro CFA3000 Instruction Manual

Abus
Abus 7010 E User manual

Abus
Abus 7510 Manual

Abus
Abus HomeTec Pro CFA3000S User manual

Abus
Abus wAppLoxx Pro Series User manual

Abus
Abus FTS 3002 User manual

Abus
Abus HomeTec Pro CFS3100 User manual
Popular Door Lock manuals by other brands

CODELOCKS
CODELOCKS CODELOCK 300 installation instructions

TownSteel
TownSteel Prodigy SmartLock 4000 Series Programming guide

ANXELL
ANXELL ML-655 Series Installation instruction

Salto
Salto Neo B2 Series installation guide

Von Duprin
Von Duprin 376-T installation instructions

PBB
PBB CH 53 installation instructions