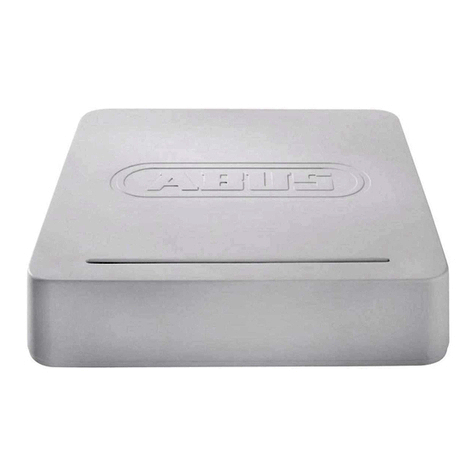
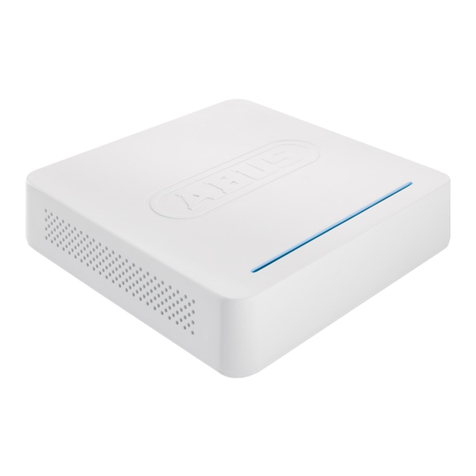
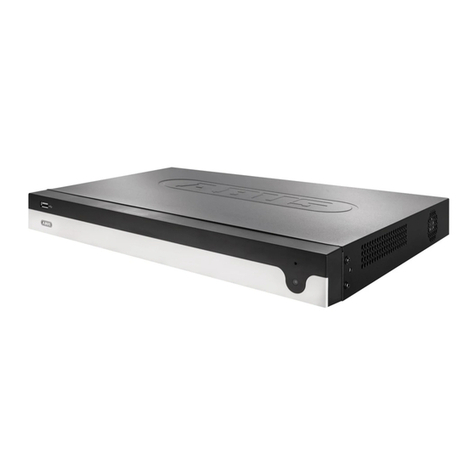
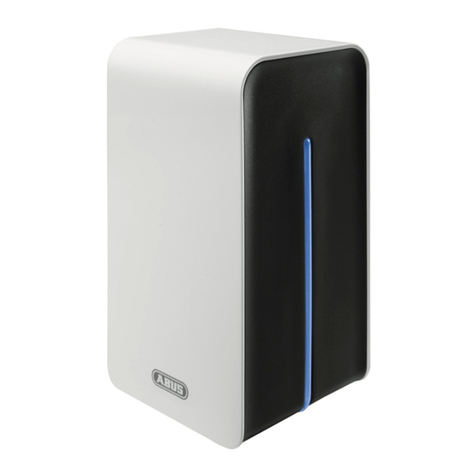
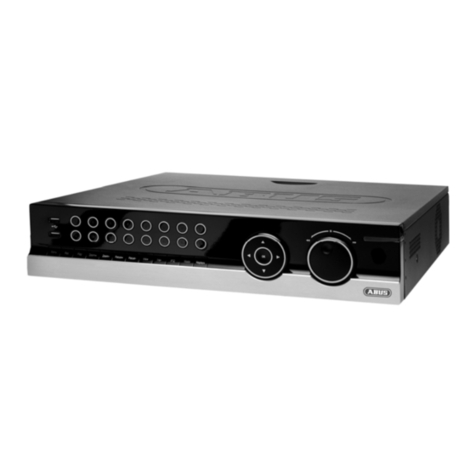
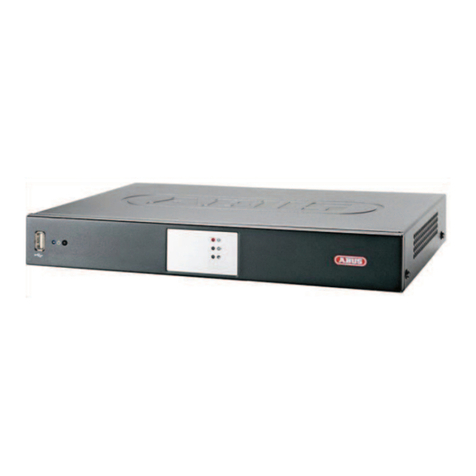
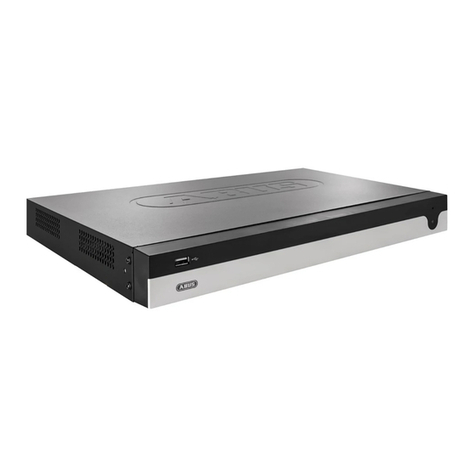
Abus TVVR35002 User manual

ABUS embedded NVR
Local user interface user guide
Date: 04.05.2016
Firmware: 3.3.4

English
This user guide contains important information on starting
operation and using the device.
Make sure that this user guide is handed over when the
product is given to other persons.
Keep this user guide to consult later.
You will find a list of contents with the corresponding
page numbers in the contents.

Contents
3
Important safety information ..........................................................................................................................................6
Explanation of symbols....................................................................................................................................................6
Intended use ....................................................................................................................................................................6
General ............................................................................................................................................................................6
Power supply ...................................................................................................................................................................6
Installation........................................................................................................................................................................7
Children............................................................................................................................................................................7
Introduction......................................................................................................................................................................8
General information .........................................................................................................................................................8
On-screen keyboard ........................................................................................................................................................8
Starting the device ...........................................................................................................................................................9
Switching off the device, locking, rebooting.....................................................................................................................9
Setup wizard...................................................................................................................................................................10
Setting up the system ....................................................................................................................................................10
Administrator set up.......................................................................................................................................................11
System time and date....................................................................................................................................................11
Network settings ............................................................................................................................................................12
Hard disk drive management.........................................................................................................................................12
Camera assistant...........................................................................................................................................................13
Camera recording..........................................................................................................................................................13
Live view.........................................................................................................................................................................14
Overview........................................................................................................................................................................14
Pop-up menu with mouse operation..............................................................................................................................14
Selection bar in the camera image................................................................................................................................15
Settings..........................................................................................................................................................................15
Setting the camera output.............................................................................................................................................16
Playback in live view .....................................................................................................................................................17
General ..........................................................................................................................................................................17
Playback screen............................................................................................................................................................17
Control via the control panel..........................................................................................................................................17
Selecting playback type.................................................................................................................................................18
Playback: Duration.........................................................................................................................................................19
Playback: Event .............................................................................................................................................................19
Playback: Tag ................................................................................................................................................................19
Playback: Smart.............................................................................................................................................................19
Playback: Multi-Timeshift...............................................................................................................................................20
Playback: External File ..................................................................................................................................................20
Playback: Image ............................................................................................................................................................21
Device menu...................................................................................................................................................................22
Menu overview...............................................................................................................................................................22
Settings...........................................................................................................................................................................23
Menu description...........................................................................................................................................................23
Configuration..................................................................................................................................................................24
Overview........................................................................................................................................................................24
General settings.............................................................................................................................................................24
Network layout...............................................................................................................................................................26
Network configuration....................................................................................................................................................26
General tab....................................................................................................................................................................27
PPPOE tab....................................................................................................................................................................27
DDNS tab ......................................................................................................................................................................27
NTP tab .........................................................................................................................................................................28

Contents
4
Email tab........................................................................................................................................................................28
NAT tab .........................................................................................................................................................................29
SNMP tab......................................................................................................................................................................29
More Settings tab ..........................................................................................................................................................29
Alarm..............................................................................................................................................................................30
Alarm Status tab............................................................................................................................................................30
Alarm Input tab..............................................................................................................................................................30
Trigger Channel tab.......................................................................................................................................................30
Arming Schedule tab.....................................................................................................................................................30
Linkage Action tab.........................................................................................................................................................31
PTZ Linking tab .............................................................................................................................................................31
Alarm Output tab ...........................................................................................................................................................31
RS-232...........................................................................................................................................................................32
Exception .......................................................................................................................................................................32
User................................................................................................................................................................................33
Hot Spare.......................................................................................................................................................................34
Setting up hot spare mode............................................................................................................................................34
Camera............................................................................................................................................................................35
Camera ..........................................................................................................................................................................35
Camera tab....................................................................................................................................................................35
IP Camera Import/Export tab.........................................................................................................................................36
OSD ...............................................................................................................................................................................37
Image.............................................................................................................................................................................37
PTZ ................................................................................................................................................................................37
Motion ............................................................................................................................................................................38
Settings..........................................................................................................................................................................39
Private Zone...................................................................................................................................................................40
Tamper monitoring.........................................................................................................................................................40
Video Loss .....................................................................................................................................................................41
VCA................................................................................................................................................................................42
Recording .......................................................................................................................................................................43
Schedule........................................................................................................................................................................43
Record tab.....................................................................................................................................................................43
Parameters ....................................................................................................................................................................44
Record tab.....................................................................................................................................................................44
Substream tab...............................................................................................................................................................45
Capture tab....................................................................................................................................................................45
Advanced settings..........................................................................................................................................................45
Holiday...........................................................................................................................................................................45
HDD .................................................................................................................................................................................47
Hard disk drives .............................................................................................................................................................47
General ..........................................................................................................................................................................47
Advanced settings..........................................................................................................................................................48
RAID...............................................................................................................................................................................49
TAP physical disk..........................................................................................................................................................49
TAP array ......................................................................................................................................................................50
Panic recording..............................................................................................................................................................51
Recording.......................................................................................................................................................................51
Continuous Capture.......................................................................................................................................................51
Alarm..............................................................................................................................................................................51
VCA Search.....................................................................................................................................................................52
Behaviour Search ..........................................................................................................................................................52
Face Search...................................................................................................................................................................53
Contents
5
People Counting ............................................................................................................................................................53
Video Export...................................................................................................................................................................55
Duration..........................................................................................................................................................................55
Event..............................................................................................................................................................................56
Maintenance ...................................................................................................................................................................57
System Info....................................................................................................................................................................57
Log Information..............................................................................................................................................................57
Import/Export .................................................................................................................................................................58
Upgrade .........................................................................................................................................................................58
Default............................................................................................................................................................................59
Net Detect......................................................................................................................................................................59
Traffic tab.......................................................................................................................................................................59
Network Detection tab...................................................................................................................................................59
Network Stat. tab...........................................................................................................................................................60
HDD Detect....................................................................................................................................................................60
Checking the hard disk drive status ..............................................................................................................................61
Technical data................................................................................................................................................................62
Fault rectification...........................................................................................................................................................63
Disposal..........................................................................................................................................................................63
Notes on EC directives for waste electrical and electronic equipment..........................................................................63
Notes on RoHS EU Directive.........................................................................................................................................63
Glossary..........................................................................................................................................................................64
Technical terms used.....................................................................................................................................................64

Important safety information
6
Important safety information
Explanation of symbols
The following symbols are used in this manual and on the
device:
Symbol
Signal
word
Meaning
Warning
Indicates a risk of injury or health
hazards.
Warning
Indicates a risk of injury or health
hazards caused by electrical
voltage.
Important
Indicates possible damage to the
device/accessories.
Note
Indicates important information.
The following annotations are used in the text:
Meaning
1. …
2.
…
Required action to be carried out in a set order
…
…
List without a set order, given either in the text
or warning notice
Intended use
Only use the recorder for the purpose for which it was
built and designed. Any other use is considered unin-
tended!
This device may only be used for the following pur-
pose(s):
This recorder is used in combination with video signal
sources (network cameras) and video output devices
(TFT monitors) for object surveillance.
Note
Data storage is subject to national data privacy
guidelines.
When carrying out the installation advise your cus-
tomers of the existence of this guideline.
General
Before using this recorder for the first time, please read
the following instructions carefully and observe all warn-
ing information, even if you are familiar with the use of
such recorders.
Warning
All guarantee claims are invalid in the event of
damage caused by non-compliance with this user
manual.
We cannot be held liable for resulting damage.
Warning
In the event of personal or material damage
caused by improper operation or non-compliance
with the safety information, we cannot be held lia-
ble.
All guarantee claims are void in such cases.
Retain this handbook for future reference.
If you sell or pass on the recorder to third parties, you
must include these instructions with the device.
Power supply
Warning
Prevent data loss.
The recorder should only ever be used with a de-
vice that is constantly connected to an uninter-
ruptible power supply UPS with surge protection.
Warning
Modifications to the device invalidate the guaran-
tee.

Important safety information
7
Installation
Observe all safety and operating instructions before
installing the device for the first time.
Only open the housing to install the hard disk drive.
Only install the software on devices that are ex-
pressly suitable for the intended purpose. Otherwise,
damage to the device can occur.
Note
Compatible devices:
- TVVR35002
- TVVR35011
- TVVR45021
- TVVR45030
- TVVR60011
- TVVR60021
Warning
If in doubt, have the device installed by a special-
ist technician.
Children
Do not allow electrical devices to be handled by chil-
dren. Do not allow children to use electrical devices
unsupervised. Children may not properly identify pos-
sible hazards. Small parts may be fatal if swallowed.
Keep packaging film away from children. Risk of suf-
focation.
This device is not intended for children. If used incor-
rectly, parts under spring tension may fly out and
cause injury to children (e.g to eyes).

Introduction
8
Introduction
Dear Customer,
Thank you for purchasing this product.
This device complies with the requirements of the EU
Low Voltage Directive (2006/95/EC) and the RoHS Di-
rective (2011/65/EU). The declaration of conformity
can be obtained from:
ABUS Security-Center GmbH & Co. KG
Linker Kreuthweg 5
86444 Affing
GERMANY
To ensure this condition is maintained and that safe oper-
ation is guaranteed, it is your obligation to observe this
user manual.
Please read the entire user manual carefully before put-
ting the product into operation, and pay attention to all
operating instructions and safety information.
All company names and product descriptions are trade-
marks of the corresponding owner. All rights reserved.
If you have any questions, please contact your specialist
installation contractor or specialist dealer.
Disclaimer
This user manual has been produced with the
greatest of care. Should you identify any omis-
sions or inaccuracies, please contact us at the ad-
dress shown on the back of the manual. ABUS
Security-Center GmbH does not accept any liabil-
ity for technical and typographical errors, and re-
serves the right to make changes to the product
and user manuals at any time and without prior
warning. ABUS Security-Center GmbH is not lia-
ble or responsible for direct or indirect damage re-
sulting from the equipment, performance and use
of this product. No guarantee is made for the con-
tents of this document.
General information
To use the device properly, read this user handbook
thoroughly and retain it for later use.
Note
Be aware that alterations to the recorder carried
out via the software must be accepted by clicking
"Apply"/"Confirm" before leaving the tab or menu.
On-screen keyboard
If you click with the mouse in a text input field, the on-
screen keyboard appears:
For simple figure input, the following on-screen keyboard
appears:
The keys have exactly the same function as a computer
keyboard.
To input a figure, click on it with the left mouse key.
To finish the entry, click on Enter.
To delete the figure in front of the cursor, click on .
To switch between upper and lower case text, click
on the framed a. The active setting is indicated above
the keyboard.
To cancel an entry, or to leave the field, click on ESC.

Introduction
9
Starting the device
Attention
The device may only be connected to a mains
voltage supply as specified on the type plate.
For security, use an uninterruptable power supply
UPS.
When the device is connected to the power supply, it
starts up automatically and the LED status bar glows.
1.
During the start-up procedure, the device carries out
a self-test.
2.
Finally, the setup wizard appears. End this, to go to
live view.
Switching off the device, locking, rebooting
In the main menu, click on Shutdown. The overview ap-
pears.
1.
To switch off, select the Shutdown option and con-
firm the query with Yes. The device is switched off.
Do not press any key during the switch off pro-
cedure.
Now pull out the plug of the power supply unit.
2.
To lock the system, select the left hand symbol Log-
out. The user interface is locked. To reach the
menu, a password must be entered.
3.
To reboot, select the right hand symbol Reboot. The
device carries out a reboot.
Switching on the device
Plug in the power supply unit to start the device.

Setup wizard
10
Setup wizard
Setting up the system
The setup wizard guides you through the required basic
settings for the system. The network video recorder will
then be ready for recording and monitoring.
Note
All the advanced settings can be found in the de-
vice menu see the overview on page 22.
Following the first switch-on, the language selection ap-
pears:
1.
Click on the input field and select your language from
the list. To proceed, click on . The following query
appears:
Click on Next to start the wizard.
Note
After the system has been set up the 'checkbox'
can be deactivated, the tick is hidden and the wiz-
ard no longer starts automatically.

Setup wizard
11
Administrator set up
Warning
Note down the admin password.
The preset password is:
"1 2 3 4 5".
1.
Click on the input field and enter the admin pass-
word.
2.
To assign a new password, activate the 'checkbox' in
front of New Admin Password.
3.
Enter the new password and confirm the entry in the
field below.
4.
Click on Next.
System time and date
1. Enter the system time consisting of date and time.
2. Finish the setting by clicking
on Next.

Setup wizard
12
Network settings
Note
Ask the network administrator responsible
whether the DHCP can be selected or the IP ad-
dress and additional settings have to be done
manually.
1. DHCP active: if the DHCP has been set up in the
network router, enable the DHCP 'checkbox'. All net-
work settings are then completed automatically.
2. DHCP inactive: enter the data manually (IPv4 ad-
dress, IPv4 subnet mask as well as the default set
up for the IPv4 Gateway = IPv4 address of the
router). Alternatively you can also enter the address
of the DNS server, which is required for email dis-
patch.
A typical address assignment could appear as fol-
lows:
IPv4 address: 192.168.0.50
IPv4 Subnet Mask: 255.255.255.0
IPv4 Default Gateway: 192.168.0.1
Preferred DNS Server: 192.168.0.1
1. To set up remote access, activate DDNS using the
"checkbox".
2. Click on the input field and select the DDNS type.
3. Save the server address and the Device Domain
Name, user name and password.
4. Click on Next.
Hard disk drive management
1. To set up a hard disk drive, enable the 'checkbox'
with a left click and then click on Init.
Note
When the device is accessed remotely via the in-
ternet, it should be given a fixed network address.

Setup wizard
13
Warning
This will delete all data found on the disc.
2. Click on OK to acknowledge the security prompt.
The hard disk drive is set up for use. Progress is
shown on the status bar.
3. Finish the setting with OK and then click on Next.
Camera assistant
1. Click on Search to display the cameras on your net-
work.
2. To add network cameras, activate the desired cam-
eras and click on Add.
3. Click on Next to continue with the setup.
Camera recording
1. Select the recording type. It is possible to select be-
tween "Continuous" and "Movement detection".
2. Complete the setting and the setup wizard with OK.

Live view
14
Live view
Overview
Live view starts automatically when the device is
switched on.
The following menus are found in the header:
Menu
Live view
PTZ
Playback
Multiview
The device date and time are displayed on the right-hand
side of the header.
Click on the icon to open the pop-up menu of the Mul-
tiview.
Click on one of the icons in the pop-up bar on the
right-hand side to switch between the different views.
The signals of the connected cameras are displayed on
the main screen.
By double clicking with the left mouse button, you can
display the selected camera image in full screen or
switch back to the original view.
Status symbols
The following symbols are displayed depending on
the operating status of the device:
Symbol
Meaning
Red: motion recording
recording only upon motion detection
Blue: Recording
continuous recording
Pop-up menu with mouse operation
Note
Right click when the mouse pointer is positioned
on a live image.
The following settings can be made. The arrow pointing
to the right indicates that a sub-menu opens for selection:
Menu
Opens the main menu
Single Screen
Full-screen view of the selected
camera.
Multi-screen
Various camera layouts
Previous Screen
Displays the previous camera
Next Screen
Displays the next camera(s)
Start Auto-switch
Starts the camera sequence display
Start Recording
Starts continuous recording or mo-
tion detection
Add IP Camera
Adds additional IP cameras
Playback
Switches to playback mode
PTZ
Opens the PTZ control
Output Mode
Sets the output mode for the screen
display

Live view
15
Aux Monitor
Switches the mouse control to the
AUX monitor
Note
Start Auto-switch:
Specify the display sequence delay in the display
settings.
Note
Activation of "AUX monitor" without a connected
spot monitor:
Mouse pointer function is disabled.
Selection bar in the camera image
In single or multi-screen, click on a camera image. A se-
lection bar will appear:
(0) (1) (2) (3) (4) (5) (6) (7) (8) (9) (10) (11)
No.
Meaning of the symbol
(0)
Area for moving the miniature bar
(1)
Activate/deactivate manual recording
(2)
Instant playback of the last 5 minutes
(3)
Activate / deactivate the audio function
(4)
Create a snapshot from the current camera
(5)
Open the PTZ control menu (for PTZ cameras
only)
(6)
Digital zoom
(7)
Image display settings
(8)
Face Detection
(9)
Live View Strategy
(10)
Stream information
(11)
Close the selection bar
Settings
Note
The following settings are available for the live
view.
Open the main menu and click on Configuration. Then
click on Live View:
The following settings are available in the General tab:
Video Output In-
terface
VGA/HDMI
Select the connection where the set-
tings are changed.
Live View
Mode
Various camera layouts
1x1, 2x2, 1+5.
Dwell Time
Switching time between the individ-
ual cameras during auto-switch.
Enable Audio
Output
Activates the audio output
(VGA/HDMI/BNC) for the live view.
Display status
bar
Activate/deactivate the status bar.
Volume
Adjust volume
Event Output
Allocate monitor for the output of
events.
Full Screen Moni-
toring Dwell Time
The number of seconds for which
the event will be displayed on the al-
located monitor.
Post Event Dis-
play Time
The number of seconds for which
the pop-up window should be dis-
played in the event of an alarm.
Note
VGA monitor connected:
If a VGA monitor is connected, it will be recog-
nised automatically when the device is started up.
The main video signal will be displayed on the
monitor.
No HDMI monitor connected:
If no HDMI cable is connected to the monitor
when the device is started up, the main video sig-
nal will be emitted at the main VGA connection.
Connect the VGA cable and restart the recorder to
perform automatic detection.

Live view
16
Setting the camera output
You can display up to 36 cameras simultaneously in live
view.
1.
Click on the View tab:
2.
Select the display mode.
1 x 1
2 x 2
1 + 5
1 + 7
3 x 3
4 x 4
5 x 5
6 x 6
3.
Use the navigation keys to allocate the camera sig-
nal required to the corresponding screen section.
The X setting means that this particular camera
is not being displayed.
4.
Click on Apply to apply the setting.
Note
The number of cameras displayed depends on
your existing device.

Playback in live view
17
Playback in live view
General
There are three different options for playback:
Playback icon in the title bar
Context menu in the live image
Playback function in the overview menu
Note
The "Previous/Next file/day/event" buttons are allo-
cated as follows, depending on the playback
mode:
Normal playback:
Pressing one of the buttons switches playback to
the previous/next day.
Event search:
Pressing one of the buttons switches playback to
the previous/next event.
Data export:
Pressing one of the buttons switches playback to
the previous/next file.
Note
The capacity for simultaneous playback on multi-
ple camera channels depends on your end device.
Playback screen
Playback is controlled via the control panel:
No.
Area
Running playback with date and time
Selection of camera for playback
Calendar with recording type
Control panel with time bar (see right)
Selection of playback type
Control via the control panel
The control panel (4) is used to control running playback.
The symbols have the following meanings:
No.
Meaning of the symbol
1
Time bar:
Click on the time bar with the mouse to continue
playback from another point.
Click on the slider and drag it to a specific time
to start playback from that point.
2
Enable/disable audio output.
3
Start/stop video clip
4
Capture
5
Lock file
6
Add tag
7
Add user-defined tag (see "Tag" playback type).
8
File management
9
Zoom+
10
Reverse playback
11
Stop
12
Start/pause playback.
13
Go back 30 seconds.
14
Go forward 30 seconds.
15
Go forward in slow-motion (8x 1x).
16
Fast forward (1x 8x).
17
Previous tag
18
Next tag
19
Reduce time bar section.
20
Increase time bar section.
(1)
(2)
(3)
(4)
(5)
(6)
(7)
(8)
(10)
(11)
(12)
(13)
(14)
(15)
(16)
(17)
(18)
(19)
(20)
2
5
6
7
8
9
14
(9)

Playback in live view
18
Click on 'File management' (8):
The following tabs are available:
Tab
Description
Video
Clips
Export and manage video clips
Playback
Capture
Export and manage recordings
Locked
File
Export, manage and unlock your Locked
Files
Tag
Tag management
Go to the Tag tab and click on the edit icon to change
the description of your tag. To remove a tag, click on
the delete icon.
Selecting playback type
Selecting the playback type (5) allows various types of
recording and event to be displayed and filtered in the
playback view.
The following menus are available:
Type
Description
Duration
Playback of recorded video data.
Event
Search and playback of video data rec-
orded by means of motion detection, VCA
or alarm input.
Tag
Search and playback of video data pro-
vided with a tag.
Smart
Search and playback of video data via pre-
defined full screen motion detection for all
recorded data.
Multi-
Timeshift
Simultaneous playback of video data from
one camera at different times.
External
File
Search and playback of video data found
on a connected external data storage de-
vice (USB).
Image
Playback of saved snapshots with date
and camera filter.

Playback in live view
19
Playback: Duration
"Continuous" playback is the default view always dis-
played when the playback function is opened.
Using this view, all recorded data can be quickly dis-
played and analysed. The time bar distinguishes between
continuous recording and event recording (motion, alarm,
VCA).
Filters
Description
Camera
channels
Select one or more camera channels.
Calendar
Select a date for playback.
Timeline
Select a playback time on the timeline us-
ing the mouse.
Playback: Event
Using "Event" playback, event recordings can be
searched in a targeted way. There are other filters availa-
ble for the search:
Filters
Description
Filter1
Select an event type: motion, alarm, VCA
Filter2
Select a VCA type: All, Tripwire, Intrusion
Detection, Face Detection.
Cameras
Select one or more camera channels.
Start time
Select the start date and start time.
End Time
Select the end date and end time.
Search
Start the event search using the previously
defined filters.
Select an entry from the list of results and start playback
by clicking on the appropriate icon.
Playback: Tag
Using "Tag" playback, the recordings can be searched
using pre-defined tags. This requires tags to have been
created beforehand by the user.
There are other filters available for the search:
Filters
Description
Cameras
Select one or more camera channels.
Keyword
You have the option of entering a keyword
as a full text filter for the search. If no key-
word is specified, all tags are searched.
Start time
Select the start date and start time.
End Time
Select the end date and end time.
Search
Start the tag search using the previously
defined filters.
Select an entry from the list of results and start playback
by clicking on the appropriate icon.
Playback: Smart

Playback in live view
20
Using "Smart" playback, a retrospective motion analysis
of the recorded data from the NVR is carried out. To do
this, the recorded image content from the selected chan-
nel is analysed. The image area to be analysed is se-
lected using the bar on the left-hand edge of the image.
There are other filters available for the search:
Filters
Description
Camera
Select a camera channel.
Calendar
Select the recording date. The
whole day (24h) is analysed.
Draw Line
Analyse the recording using
Tripwire. This is only possible if
the channel was recorded with
Tripwire.
Draw Quadrilateral
Analyse the recording using In-
trusion Detection. This is only
possible if the channel was rec-
orded with Intrusion Detection.
Draw Motion Quadri-
lateral
Analyse the recording using
Motion Detection. Set the image
area here.
Motion Detection: Full
Screen
A full screen mask is created for
analysis using Motion Detec-
tion.
Clear All
Deletes all lines, quadrilaterals
and motion screens for the
analysis.
The results of the analysis are displayed as a separate
green line on the time bar.
Playback: Multi-Timeshift
Using "Multi-Timeshift" playback, different points in time
from one single camera channel can be simultaneously
analysed in a targeted way. To do this, the channel is
played back with a time delay of up to 16x, according to
the setting.
There are other filters available for the search:
Filters
Description
Camera
Select a camera channel.
Segments
Select the number of segments
for simultaneous playback. The
more segments selected, the
shorter the time interval from
one segment to the next during
playback. The division of the
segment is as follows:
Duration of recording per
day/number of segments = time
interval per segment.
Clicking on a segment displays the time range as the top
line within the timeline.
Playback: External File
Using "External File" playback, previously exported video
clips and images from external data storage devices can
be played back.
There are other filters available for the search:
Filters
Description
Device Name
Select a USB data storage de-
vice from the list.
File Type
Select a file type from the list.
Select an entry from the list of results and start playback
by clicking on the appropriate icon.
Other manuals for TVVR35002
1
This manual suits for next models
5
Table of contents
Other Abus DVR manuals

Abus
Abus HDCC90002 User manual

Abus
Abus TVVR36500 User manual

Abus
Abus TVHD80100 User manual

Abus
Abus TVVR20001 User manual

Abus
Abus Eytron TV8465 User manual

Abus
Abus TVVR33004 User manual

Abus
Abus TVVR41100 User manual

Abus
Abus Eytron TV8931 User manual

Abus
Abus Eytron JPEG2000 User manual

Abus
Abus TVVR33005 User manual
Popular DVR manuals by other brands

CD3 Video Security
CD3 Video Security DVR-N4 Specifications

ALIBI
ALIBI ALI-QVR5016H Quick setup guide

Lawmate
Lawmate PV-RC200 Operation manual

Conceptronic
Conceptronic C8CHIPSKIT user manual

Omega Power Equipment
Omega Power Equipment JPEG2000 Triplex user manual

AVE
AVE MultiView MV-DR3000 Installation & operation manual