manuals.online logo
Brands
  1. Home
  2. •
  3. Brands
  4. •
  5. ADC
  6. •
  7. Medical Equipment
  8. •
  9. ADC Advantage 2200 User manual

ADC Advantage 2200 User manual

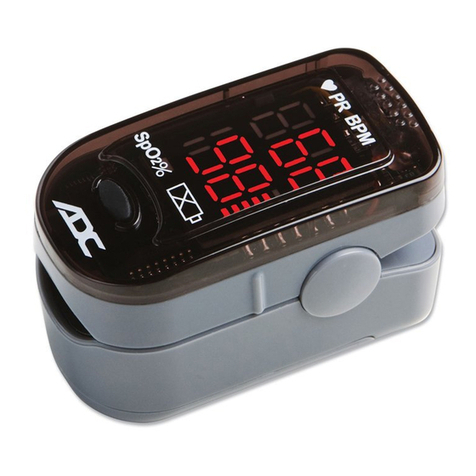
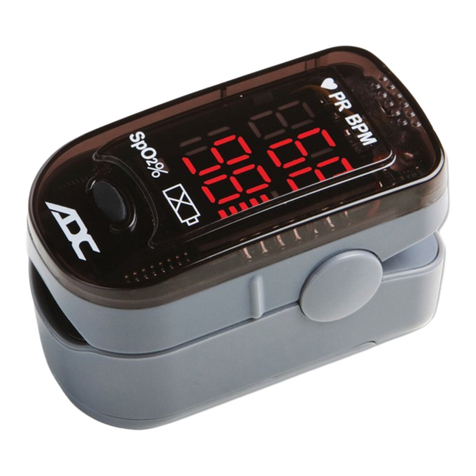
ADC Fingertip Pulse Oximeter
Thank you for purchasing an ADC Advantage Fingertip Pulse Oximeter.
We’re proud of the care and quality that goes into the manufacture of
every product that bears our name. The ultra-portable Advantage 2200
will give you information about oxygen saturation (the amount of oxygen
in the blood) and pulse rate at your fingertip. The 2200 is easy to use
and needs no routine maintenance except battery replacement. This
User’s Guide explains how to use and care for your Advantage 2200.
Contents of this Package
• Advantage 2200 • Two AAA batteries
• Lanyard • Instructions for Use
Intended Use
The Advantage 2200 is a handheld non-invasive device intended for spot-
checking of oxygen saturation of arterial hemoglobin (SpO2) and Pulse Rate of
adult, adolescent and child patients in hospitals, hospital-type facilities and
homecare.
Contraindications:
• The patient suffers from significant levels of dysfunctional
hemoglobins (such as carboxyhemoglobin or methemoglobin).
• Intravascular dyes such as indocyanine green or methylene blue
have been injected into the patient.
• Used in the presence of high ambient light (e.g., direct sunlight).
Shield the sensor area with a surgical towel if necessary.
• There is excessive patient movement.
• The patient experiences venous pulsations.
• The patient has hypotension, severe vasoconstriction, severe
anemia, or hypothermia.
• The patient is in cardiac arrest or is in shock.
• Fingernail polish or false fingernails as they may cause inaccurate
SpO2 readings.
General Warnings
WARNING:
Keep the Advantage 2200 away from young children.
Small items such as the battery cover, battery, and lanyard are
choking hazards.
WARNING: Certain activities may pose a risk of injury, including
strangulation if the lanyard should become wrapped around your neck.
Use the lanyard with caution.
WARNING:
Explosion hazard: Do not use the pulse oximeter in
an explosive, oxygen enriched, environment.
CAUTION:
Only a healthcare professional is qualified to interpret
SpO2measurements. This device is NOT intended to replace
regular medical checkups.
CAUTION:
It is recommended that your physician review your
procedure for using this device.
CAUTION:
SpO2readings obtained by this device should be
verified before prescribing or making adjustments to any
medications. Under no circumstances should YOU alter the
dosages of any drugs prescribed by your doctor.
CAUTION:
Excessive movement of the pulse oximeter during
measurement may cause inaccurate readings. Limit finger
movement as much as possible when using the device.
CAUTION:
The pulse oximeter is not intended for continuous
monitoring.
CAUTION:
Do not place the pulse oximeter on the same hand/arm
when using a blood pressure monitor.
CAUTION:
This pulse oximeter has no alarms. It will not sound if the
amount of oxygen in your blood is low or if the pulse rate is too high or
too low.
CAUTION:
This pulse oximeter readings may be adversely affected in
the presence of high ambient light. Shield the device if necessary.
CAUTION:
Do not immerse the pulse oximeter in liquid or clean with
agents that are not listed in this User’s Guide.
CAUTION:
Any of the following conditions may reduce the performance of
the pulse oximeter:
• Very bright or flickering light
• Weak pulse
• Low hemoglobin
• Arterial catheters
• Nail polish and/or artificial nails
• Any tests recently performed on you that required the
injection of intravascular dyes
CAUTION:
The pulse oximeter may not function if you have poor
circulation. Rub your fingers to increase circulation or try an alternate
finger if you are having trouble obtaining readings.
CAUTION:
Batteries can leak or explode if used or disposed of improperly.
Remove the battery if the pulse oximeter will not be used for more than
30 days.
CAUTION:
Do not use the pulse oximeter outside the specified
operating and storage temperature ranges.
CAUTION
:
Do not use the pulse oximeter for more than 30 minutes
without relocating the device to another finger.
CAUTION:
Do not tamper with the pulse oximeter.
CAUTION:
Radios, cell phones, or other similar devices may affect the
pulse oximeter and should be kept at least 7 feet away from the device.
CAUTION:
Use in emergency vehicles with communication systems may
affect the accuracy of the pulse oximeter.
CAUTION
:
Field strengths from fixed transmitters (radio, phone base
stations, AM/FM radio or TV broadcast towers) may affect the accuracy of
the pulse oximeter.
CAUTION:
Follow local ordinances and recycling instructions regarding
disposal or recycling of the Advantage 2200 including batteries.
CAUTION:
The Advantage 2200 is a precision electronic instrument and
must be serviced by ADC’s service department.
Battery Installation (Figure 1)
1. Slide off battery cover in direction of arrow.
2. Put the two AAA batteries into battery compartment, observing
correct polarity.
3. Slide the battery cover on by reversing Step #1.
Note:
• Battery polarity should be observed to prevent damage to the device.
• When battery is low, the battery indicator symbol on the display will
flash. Replace low battery as soon as possible. Remove battery if the
device will not be used for more than 30 days.
Strap Installation (Figure 2)
1. Thread thinner end of the strap through the loop.
2. Thread thicker end of the strap through the threaded end and
pull tightly.
ADC®2200
AdvantageTM Fingertip
Pulse Oximeter
Instructions for Use
1
Sp02
PulseOximeter
Power2x1.5VAAA
SN:
Model:2200
(Figure 1)
SpO
2
%
PRBPM
9
9
5
6
SpO
2
%
PRBPM
9
9
5
6
1. 2.
(Figure 2)
Symbol Definition
The equipment type is BF
Refer to user manual
before use
Hemoglobin saturation
Pulse rate (BPM) beats per
minute
Low power indication
Serial number
Manufacturer’s information
Symbol Definition
Meets essential requirements of
European Medical Device Directive
93/42/EEC
Authorized European
representative’s information
Not for continuous monitoring
Storage temperature and
relative humidity
Recyclable
IPX1 Protected against dripping water
SpO
2
Symbol Definitions
The following symbols are associated with your Advantage 2200
-13°F
(-25°C)
min
158°F
(70°C)
max
RH≤93%
non-condensing
SN
%SpO2
PR BPM
0123
93-2200-00 rev 8.qxp_Layout 1 5/11/21 2:48 PM Page 1
Operation Instructions (Figure 3)
1. Hold the Advantage 2200 with the display screen facing
toward you as shown in Figure 3. Gently squeeze the hinged
end and insert one finger into the device fully. Release hinged
end to allow device to clamp down onto finger. Be sure finger
is fully inserted. (When your finger is inserted into the device,
your nail surface must be facing the same side as the display.)
2. Press the power button on the front panel once.
3. Remain still while taking a measurement and avoid applying
pressure to the clamped device while in use.
4. The device will display a reading once it has had a moment to
begin measurement.
Note:
• The rubber inside the oximeter that touches the finger may
be cleaned with alcohol.
• For best results, keep the Advantage 2200 at heart or chest level.
• The index (pointer) finger is recommended.
• While on the finger, do not press the Advantage 2200 against
any surface and do not squeeze it or hold the device.
• The internal spring provides the correct pressure. Additional
pressure may affect readings.
Reading Your Results
After measurement begins, you will see three pieces of information
displayed on your pulse oximeter:
• A pulse bar graph display
corresponding with your
pulse beat will be shown.
The height of the bar
graph shows your
pulse strength.
• Your pulse rate will
be displayed as
BPM or beats per
minute.
• The amount of oxygen in your
blood will be displayed as
SpO2%
.
Changing Directions of the Display
When you first power on the unit, the display will orient it with the
numbers facing the person wearing the device. The display can be
re-orientated to face the other direction, if desired.
1. To change the direction of the display, press the power button
while the unit is displaying a reading.
Note: By default, the unit will always display the readout facing the wearer.
Maintenance and Storage
1. When the low-power indicator comes on, you must replace
the batteries.
2. The surface of the pulse oximeter that comes into contact with
your finger should be kept clean.
3. When storing the pulse oximeter for more than 30 days, remove
the batteries.
4. When storing the pulse oximeter, ensure that the temperature
is between -13°F to 158°F (-25°C to 70°C) with a relative humidity
less than or equal to 93%.
5. Store the pulse oximeter in a dry environment. Exposure to
moisture may decrease the lifespan of your device.
6. Batteries should be disposed of in accordance with local and
state laws.
Cleaning the Pulse Oximeter
Clean the rubber touching the finger inside of the device with a soft dampened
cloth with 70% isopropyl alcohol, and clean the test finger using alcohol before
and after each test. Do not pour or spray any liquids onto the pulse oximeter,
and do not allow any liquids to enter any openings in the device. Allow the
device to dry thoroughly before reusing.
Detailed Description of Product Functions
Limited Warranty
ADC warrants its products against defects in materials and workmanship under normal use and service as follows:
1. Warranty service extends to the original retail purchaser only and commences with the date of delivery.
2. Your pulse oximeter is warranted for one year from date of purchase (all parts).
What is Covered:
Replacement of parts, and labor.
What is Not Covered: Batteries where supplied. Transportation charges to and from ADC. Damages
caused by abuse, misuse, accident, or negligence. Incidental, special, or consequential damages. Some
states do not allow the exclusion or limitation of incidental, special, or consequential damages, so this lim-
itation may not apply to you.
To Obtain Warranty Service: Send item(s) postage paid to ADC, Attn: Repair Dept., 55 Commerce Dr.,
Hauppauge, NY 11788. Please include your name and address, phone no., proof of purchase, and a brief
note explaining the problem.
Implied Warranty: Any implied warranty shall be limited in duration to the terms of this warranty and in
no case beyond the original selling price (except where prohibited by law).
This warranty gives you specific legal rights and you may have other rights which vary from state to state.
Declaration: This product complies with the IEC60601-1-2 standard. The user-contacting materials are
non-toxic and comply with ISO10993-1, ISO10993-5 and ISO10993-10.
IB p/n 93-2200-00 rev 8 (05/05/21) Printed in China
SpO2
or
pulse rate
cannot be
shown
normally
1. Finger is not
inserted correctly
2. Oxyhemoglobin
value is too low to
be measured
1. Reinsert / reposition finger
2. Ensure that sensor is clean
and not blocked
3. Try taking a reading on a
different finger or warm
your finger by rubbing
SpO2or
pulse rate
is shown
unstably
1. Finger might not
be inserted deep
enough
2. Excessive movement
during measurement
1. Reinsert / reposition finger
2. Remain still during
measurement
The pulse
oximeter
cannot
be powered
on
1. Low battery strength
2. Batteries installed
incorrectly
3. The pulse oximeter
might be damaged
1. Replace batteries
2. Reinstall the batteries
3. Contact warranty center
for service
Display
suddenly
powers
off.
1. The product is
automatically powered
off when no signal
is detected for longer
than 8 seconds
2. Low battery strength
1. Reinsert / reposition finger
2. Replace the batteries
“Error7” 1. Low power
2. Pulse oximeter is
damaged
1. Replace batteries
2. Contact warranty center
for service
Troubleshooting
Problems Possible reason(s) Solution(s)
SpO
2
%
PRBPM
9
9
5
6
(Figure 3)
Guidance and manufacturer’s declaration - electromagnetic emission
The Pulse Oximeter is intended for use in the electromagnetic environment specified below. The customer or the
user of the Pulse Oximeter should assure that it is used in such an environment
RF emissions
CISPR 11
Guidance and manufacturer’s declaration - electromagnetic
emissions for all EQUIPMENT and SYSTEMS
Group 1 The Pulse Oximeter uses RF energy only for its internal function. Therefore, its RF
emissions are very low and are not likely to cause any interference in nearby
electronic equipment.
Emission Test Compliance Electromagnetic Environment Guidance
SpO
2
%
PR BPM
99
56
Power
Button
Low-Power
Indicator
Pulse Bar
Graph
Pulse
Rate
Oxygen
Saturation
Finger Enters
Here
Press Here
to Open
Beijing Choice Electronic Technology Co., Ltd.
2nd Fl., 3rd Fl., and Room 410-412 4th Fl.
No.2 Bldg., No 9 Shuangyuan Rd
Shijingshan District, 100041
Bejing, P.R.C.
Shanghai International
Holding Corp. GmbH (Europe)
EiffestraBe 80, 20537
Hamburg, Germany
Mfg. for: ADC®
55 Commerce Drive
Hauppauge, NY 11788
Inspected in the U.S.A.
Made in China
tel: 631-273-9600
1-800-232-2670
fax: 631-273-9659
www.adctoday.com
0123
1. Display Type:
LED
2. SpO2:
Measurement
Range: 70-100%
Accuracy: 70%-100%, ±2%;
0-69% no definition
3. Pulse Rate:
Measurement
Range: 30bpm~250bpm
Accuracy: 30~99BPM, ±2BPM;
100bpm~250bpm, ±2%
Pulse Intensity: Bar Graph Indicator
4. Power Requirements:
Two AAA alkaline batteries
Power
Consumption: Less than 40mA
Low-Power Indication:
Battery Life: Two AAA 1.5V,
1200mAh alkaline.
Could continuously operate for 18 hrs.
5. Dimensions:
Length: 2.19” (5.5cm)
Width: 1.13” (2.9cm)
Height: 1” (2.5cm)
Weight: 1.76oz. (50g)
(including two AAA batteries)
6. Environment Requirements:
Operation Temperature:
41°F to 104°F (5°C to 40°C)
Storage Temperature:
-13°F to 158°F (-25°C to 70°C)
Ambient Humidity:
Operation: 15%~93%
no condensation
in operation
Storage: ≤93% no condensation
in storage/transport
RF emissions
CISPR 11
Class B The Pulse Oximeter is suitable for use in all establishments, including domestic
establishments and those directly connected to the public low-voltage power
supply network that supplies buildings used for domestic purposes.
To register your product visit us at www.adctoday.com/support/warranty-registration
FOR QUESTIONS, COMMENTS, OR SUGGESTIONS CALL TOLL FREE: 1-800-ADC-2670 OR VISIT
www.adctoday.com/feedback
93-2200-00 rev 8.qxp_Layout 1 5/11/21 2:48 PM Page 2

Other manuals for Advantage 2200

2

Other ADC Medical Equipment manuals

ADC ADSCOPE 600 User manual

ADC

ADC ADSCOPE 600 User manual

ADC Diagnostix 2100 Manual

ADC

ADC Diagnostix 2100 Manual

ADC Diagnostix ADCUFF Maintenance manual

ADC

ADC Diagnostix ADCUFF Maintenance manual

ADC Satin 4079 Manual

ADC

ADC Satin 4079 Manual

ADC DIAGNOSTIX 972 Maintenance manual

ADC

ADC DIAGNOSTIX 972 Maintenance manual

ADC Diagnostix 752M User manual

ADC

ADC Diagnostix 752M User manual

ADC 3699 User manual

ADC

ADC 3699 User manual

ADC 657 User manual

ADC

ADC 657 User manual

ADC ADC Adscope 658 User manual

ADC

ADC ADC Adscope 658 User manual

ADC 5110N Series Maintenance manual

ADC

ADC 5110N Series Maintenance manual

ADC Proscope 5212 Maintenance manual

ADC

ADC Proscope 5212 Maintenance manual

ADC DIAGNOSTIX 952 Maintenance manual

ADC

ADC DIAGNOSTIX 952 Maintenance manual

ADC ADSCOPE Series Maintenance manual

ADC

ADC ADSCOPE Series Maintenance manual

ADC Diagnostix 752M User manual

ADC

ADC Diagnostix 752M User manual

ADC Adscope 641 Sprague Maintenance manual

ADC

ADC Adscope 641 Sprague Maintenance manual

ADC e-sphyg 2 User manual

ADC

ADC e-sphyg 2 User manual

ADC PROSCOPE 671 User manual

ADC

ADC PROSCOPE 671 User manual

ADC Diagnostix 2100 Manual

ADC

ADC Diagnostix 2100 Manual

ADC PG-PLUS PLL-734 User manual

ADC

ADC PG-PLUS PLL-734 User manual

ADC ADC Adscope 658 User manual

ADC

ADC ADC Adscope 658 User manual

ADC Satin Mac 0 User manual

ADC

ADC Satin Mac 0 User manual

ADC Advantage 2200 Manual

ADC

ADC Advantage 2200 Manual

ADC Adscope 600 User manual

ADC

ADC Adscope 600 User manual

ADC Adtemp 658 User manual

ADC

ADC Adtemp 658 User manual

Popular Medical Equipment manuals by other brands

mychway WL-SW5 user manual

mychway

mychway WL-SW5 user manual

MedRx Avant A2D+ Training manual

MedRx

MedRx Avant A2D+ Training manual

Hitachi EUP-C516 instruction manual

Hitachi

Hitachi EUP-C516 instruction manual

GNATUS ENDUS owner's manual

GNATUS

GNATUS ENDUS owner's manual

Sirona C2+ Cleaning and care

Sirona

Sirona C2+ Cleaning and care

GE SIGNA PIONEER installation manual

GE

GE SIGNA PIONEER installation manual

Bien Air DMX2 Plus instruction manual

Bien Air

Bien Air DMX2 Plus instruction manual

Bodypoint PivotFit SH290 Installation and user instructions

Bodypoint

Bodypoint PivotFit SH290 Installation and user instructions

Braun Aesculap Quintex Instructions for use/Technical description

Braun

Braun Aesculap Quintex Instructions for use/Technical description

BD Alaris CCneXus1 Directions for use

BD

BD Alaris CCneXus1 Directions for use

Dittmann RGT 284 instruction manual

Dittmann

Dittmann RGT 284 instruction manual

Omron LD-60 user guide

Omron

Omron LD-60 user guide

bort medical 102 900 quick guide

bort medical

bort medical 102 900 quick guide

Invacare Aquatec BELUGA Assembly instructions

Invacare

Invacare Aquatec BELUGA Assembly instructions

Sanyo MCO-19M Service manual

Sanyo

Sanyo MCO-19M Service manual

EDAN SE-1 user manual

EDAN

EDAN SE-1 user manual

PHILIPS Respironics BiPAP A40 Setup guide

PHILIPS Respironics

PHILIPS Respironics BiPAP A40 Setup guide

GE Vital Signs enFlow Service manual

GE

GE Vital Signs enFlow Service manual

manuals.online logo
manuals.online logoBrands
  • About & Mission
  • Contact us
  • Privacy Policy
  • Terms and Conditions

Copyright 2025 Manuals.Online. All Rights Reserved.