manuals.online logo
Brands
  1. Home
  2. •
  3. Brands
  4. •
  5. ADC
  6. •
  7. Medical Equipment
  8. •
  9. ADC Diagnostix ADCUFF Maintenance manual

ADC Diagnostix ADCUFF Maintenance manual

ADC
55 Commerce Drive
Hauppauge, NY 117
ADC (UK) Ltd.
Unit 6, PO14 1TH
United Kingdom
Assembled, inspected, and
packaged in the U.S.A.
tel: 631-273-9600
toll free: 1- 00-232-2670
fax: 631-273-9659
www.adct day.c m
info@adctoday.com
IB p/n 9350N-00 Printed in the U.S.A.
Use, Care, & Maintenance
DiagnostixTM Aneroids
Pocket, Palm, Clock Type
®
6. Measurement
R cord th ons t of Korotkoff sounds as th systolic pr ssur , and th disapp aranc
of th s sounds as diastolic pr ssur . (Som h althcar prof ssionals r comm nd
r cording diastolic 1 and diastolic 2. Diastolic on occurs at phas 4).
NOTE: It is r comm nd d that K4 b us d in childr n ag d 3 to 12, and K5 should
b us d for pr gnant f mal pati nts unl ss sounds ar audibl with th cuff d flat d,
in which cas K4 should b us d. K5 should b us d for all oth r adult pati nts.
Aft r m asur m nt is compl t d, op n valv fully to r l as any r maining air in th
cuff. R mov cuff.
Care and Maintenance
STORAGE:
P cket Gauge: Aft r m asur m nt, fully xhaust cuff th n wrap cuff around gaug
and bulb and stor in zipp r d carrying cas .
Palm Gauge: Aft r m asur m nt, fully xhaust cuff and stor in zipp r d carrying
cas . If unit will not b us d for an xt nd d p riod of tim , l av th trigg r valv in
th full xhaust position.
Cl ck Gauge: Aft r m asur m nt, fully xhaust cuff th n wrap cuff around bulb and
stor in storag compartm nt.
NOTE: This product will maintain th saf ty and p rformanc charact ristics
sp cifi d at t mp ratur s ranging from 50°F to 104°F (10°C to 40°C) at a r lativ
humidity l v l of 15% to 85%.
Man meter: Your ADC DIAGNOSTIXTM brand pock t an roid gaug (#800 or #802),
palm an roid (804) or clock an roid (805) r quir s minimal car and maint nanc .
Th manom t r may b cl an d with a soft cloth but
should not b dismantl d und r any circumstanc s.
Gaug accuracy can b ch ck d visually; simply b
c rtain th n dl r sts within th print d oval wh n
th unit is fully d flat d (Figur 3).
Should th indicator n dl of th manom t r r st
outsid of this calibration mark, th n th manom t r
must b r -calibrat d to within ±3 mmHg wh n compar d to a r f r nc d vic that
has b n c rtifi d to national or int rnational m asur m nt standards. A manom t r
whos indicator n dl is r sting outsid of this mark, is NOT acc ptabl for us .
In th v nt that th gaug is v r in n d of calibration, simply r turn to ADC.
Damag d or brok n parts will b r plac d as n d d at a minimum charg . R f r to
th warranty for sp cific d tails of warranty cov rag .
The manufacturer recommends a calibration check every 2 years.
Cuff Cleaning and Disinfecting
NOTE: Us on or mor of th following m thods and allow to air dry:
• Wip with mild d t rg nt and wat r solution (1:9 solution). Rins .
• Wip with Enzol p r manufactur r’s instructions. Rins .
• Wip with .5% bl ach and wat r solution. Rins
• Wip with 70% isopropyl alcohol.
• Laund r with mild d t rg nt in warm wat r, normal wash cycl .
R mov bladd r first. Cuff is compatibl with 5 wash cycl s.
Low Level Disinfection
Pr par Enzol nzymatic d t rg nt according to th manufactur r’s instructions. Spray
d t rg nt solution lib rally onto cuff and us a st ril brush to agitat th d t rg nt
solution ov r ntir cuff surfac for fiv minut s. Rins continuously with distill d
wat r for fiv minut s. To disinf ct, first follow th cl aning st ps abov , th n spray cuff
with 10% bl ach solution until saturat d, agitat with a st ril brush ov r ntir cuff
surfac for fiv minut s. Rins continuously with distill d wat r for fiv minut s. Wip
off xc ss wat r with st ril cloth and allow cuff to air dry.
CAUTION: Do not iron cuff.
CAUTION: Do not h at or st am st riliz cuff.
Manometer Quality Control
A S rial numb r and Lot numb r ar
automatically assign d to v ry an roid
during manufacturing, nsuring v ry it m
is "controll d".
Th S rial Numb r can b locat d on th
fac plat of ach an roid (Figur 4).
Th Lot numb r is locat d on th outsid
lab l of th manom t r packaging (Figur 5).
Standards
ANSI/AAMI/ISO 81060-1:2007 • ANSI/AAMI SP-10:2002
EN 1060-1:1995 • EN 1060-2:1995
Disposal
Wh n your sphygmomanom t r has r ach d its nd of lif , pl as b sur to dispos
of it in accordanc with all r gional and national nvironm ntal r gulations. D vic s
that hav b com contaminat d should b dispos d of in accordanc with all local
ordinanc s and r gulations.
Symbol Definitions
Th following symbols ar associat d with your ADC® DiagnostixTM An roid
(Figur 4)
Serial Number
!
!
Warranty
Am rican Diagnostic Corporation’s (ADC®) warranty s rvic xt nds to th original
r tail purchas r only and comm nc s from th dat of d liv ry. ADC warrants its
products against d f cts in mat rials and workmanship und r normal us and s rvic
as follows:
• Your DIAGNOSTIX™ manom t r is warrant d for lif .
Th manom t r is warrant d to r main accurat to +/-3mmHg (or th
pr vailing standard) ov r its full rang wh n compar d to a r f r nc
standard for lif .
• Inflation syst m compon nts (cuff, bladd r, tubing, bulb, valv s, conn ctors)
ar warrant d for thr y ars.
What is C vered: R plac m nt of parts, and labor.
What is N t C vered: Transportation charg s to and from ADC®. Damag s
caus d by abus , misus , accid nt, or n glig nc . Incid ntal, sp cial, or
cons qu ntial damag s. Som stat s do not allow th xclusion or limitation of
incid ntal, sp cial, or cons qu ntial damag s, so this limitation may not apply
to you.
T Obtain Warranty Service: S nd it m(s) postag paid to ADC®, Attn: R pair
D pt., 55 Comm rc Dr., Hauppaug , NY 11788. Pl as includ your nam and
addr ss, phon no., proof of purchas , and a bri f not xplaining th probl m.
Implied Warranty: Any impli d warranty shall b limit d in duration to th t rms
of this warranty and in no cas b yond th original s lling pric ( xc pt wh r
prohibit d by law). This warranty giv s you sp cific l gal rights and you may hav
oth r rights which vary from stat to stat .
NOTE: Stor gaug with
valv in full xhaust position.
(Figur 3)
***LATEX-FREE***
LOT 0 00000 000
DIAGNOSTIXTM
Aneroid
SIZE: Adult
COLOR: Black
CONTENTS: 1 ea
Hauppauge, NY
0000-00
ADC
0000
!
REF
(Figur 5)
Lot Number
This manual is available online in a variety of
languages, follow the links for language options.
.adctoday.com/care
To register your product visit us at
www.adct day.c m/register
FOR QUESTIONS, COMMENTS,
OR SUGGESTIONS CALL TOLL FREE:
1-800-ADC-2670
OR VISIT
.adctoday.com/feedback
Symb l Definiti n
Important Warning/Caution
Lat x-Fr
Circumf r nc Siz
Symb l Definiti n
Conforms to EU Standards
Authoriz d Europ an
R pr s nativ ’s Information
Manufactur r’s Information 0197
ADC®Aneroid Sphygmomanometer
(manom t r, cuff, bladd r, bulb and valv )
Thank you for choosing an ADC®DIAGNOSTIXTM An roid Sphygmomanom t r. Your
n w ADC®DIAGNOSTIXTM an roid is d sign d to provid unrival d durability, and
unparall l d comfort. Ev ry compon nt has b n car fully d sign d to maximiz
p rformanc . This Us , Car , & Maint nanc guid r f rs to ADC mod l s ri s; 700,
703, 705, 720, 728, 731, 732, 740, 750, 752, 778, and 788.
Device Description and Intended Use
ADC®an roid sphygmomanom t rs ar us d by prof ssional h althcar provid rs
and individuals train d in th auscultatory blood pr ssur t chniqu to d t rmin
systolic and diastolic blood pr ssur in humans.
Contraindications:
An roid sphygmomanom t rs
ar contraindicat d for n onat
us . Do not us with n onatal
cuffs or n onat pati nts.
R vi w th siz chart (right) for
prop r ag and limb rang
usag .
General Warnings
A warning statement in this manual identifies a condition or practice
which, if not corrected or discontinued immediately could lead to patient
injury, illness, or death.
WARNING:
Do not allow a blood pr ssur cuff to r main on pati nt for mor
than 10 minut s wh n inflat d abov 10 mmHg. This may caus pati nt distr ss,
disturb blood circulation, and contribut to th injury of p riph ral n rv s.
WARNING:
If lu r lock conn ctors ar us d in th construction of tubing,
th r is a possibility that th y might b inadv rt ntly conn ct d to intra-vascular
fluid syst ms, allowing air to b pump d into a blood v ss l. Imm diat ly consult a
physician if this occurs.
WARNING: Saf ty and ff ctiv n ss with n onat cuff siz s 1 through 5 is
not stablish d.
WARNING: If this quipm nt is modifi d, appropriat insp ction and t sting
must b conduct d to nsur its continu d saf us .
WARNING: Do not apply cuff to d licat or damag d skin. Ch ck cuff sit
fr qu ntly for irritation.
WARNING: Only us th cuff wh n th rang markings indicat d on th cuff
show that th prop r cuff siz is s l ct d, oth rwis rron ous r adings
may r sult.
WARNING: Allow spac b tw n pati nt and cuff. Two fing rs should fit in
this spac if th cuff is corr ctly position d.
WARNING: Do not apply cuff to limbs us d for IV infusion.
WARNING: Pati nt should r main still during m asur m nt to avoid
rron ous r adings.
CAUTION: F d ral law r stricts this d vic to sal by or on th ord r of a
physician or lic ns d h althcar practition r.
CAUTION:
To obtain th gr at st accuracy from your blood pr ssur instrum nt,
it is r comm nd d that th instrum nt b us d within a t mp ratur rang of
50°F (10°C) to 104°F (40°C), with a r lativ humidity rang of 15%-85%
(non-cond nsing).
CAUTION: Extr m altitud s may aff ct blood pr ssur r adings. Your d vic
has b n d sign d for normal nvironm ntal conditions.
Operation of DiagnostixTM Pocket Aneroids
This bookl t contains op rating and maint nanc information for th DIAGNOSTIXTM 700,
720, 728, and 778 S ri s pock t an roid sphygmomanom t rs. Pl as r ad and r tain.
Your ADC DIAGNOSTIXTM
brand pock t an roid
sphygmomanom t r consists
of an an roid manom t r
(gaug ), compl t inflation
syst m (ADCUFFTM calibrat d
nylon cuff, lat x-fr inflation
bladd r, squ z bulb, and th
ADFLOWTM valv ), a zipp r d
carrying cas , and op rating
instructions.
Units ar pr ass mbl d and
r ady for us . If hanging th
gaug from th cuff gaug hang tab (s illustration), it is r comm nd d that th
bladd r tubing conn cting th gaug b trimm d to a l ngth of 6” to 9” for conv ni nc .
Operation of DiagnostixTM Palm Aneroids
This bookl t contains op rating and maint nanc information for th DIAGNOSTIXTM
703, 788 S ir s, Syst m 3, P diatric, G n ral Practic , Syst m 4 and Syst m 5
Multicuff instrum nts. Pl as r ad and r tain.
Your DIAGNOSTIX™palm styl an roid
manom t r with int gral bulb and trigg r
air r l as valv (#804N), ADCUFF™
calibrat d cuff with Siz Guid ™marking
syst m, bladd r, lu r slip conn ctor
(attach d to bladd r tubing), zipp r d
carrying cas , and instruction bookl t.
ADC®’s Multicuff Syst ms (Syst m 3, 4, 5,
GPK, and PMK) contain th #804 manom -
t r and a vari ty of cuffs with singl tub
bladd rs, ach quipp d with a lu r slip
conn ctor, and a compartm ntaliz d cas .
Connecting Gauge to Cuff
To conn ct th cuff to th gaug ins rt th lu r slip conn ctor at
th nd of th bladd r tub into th r c ptacl on th top of th
gaug with a firm twist until s cur . To r mov , r v rs proc dur .
NOTE: To avoid damag to th instrum nt, do not forc conn ction into port.
Using the Trigger Valve
Deflati n: G ntly squ z th bottom of th trigg r to d flat th cuff.
Alt ring th pr ssur aff cts th d flation rat .
Rapid Exhaust: To xhaust r maining air aft r m asur m nt is
compl t d, squ z trigg r until it clicks and locks in plac .
Caution: Never force trigger.
Cuff
Index Line
Hang
Tab
Gauge
Artery Mark
Bulb & Valve
Bladder &
Tubing
Operation of DiagnostixTM Clock Aneroids
This bookl t contains op rating and maint nanc information for th DIAGNOSTIX™750W
s ri s, Wall Mount and 752M s ri s, Mobil An roid Sphygmomanom t r. Pl as r ad and
r tain.
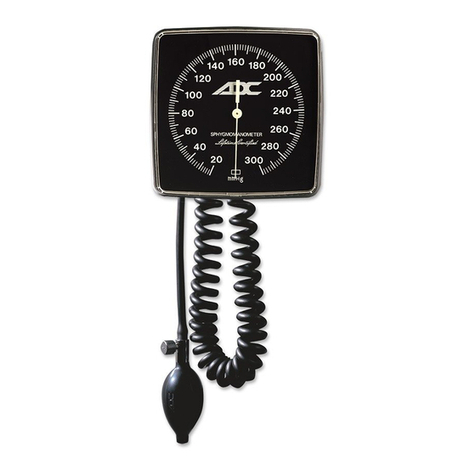
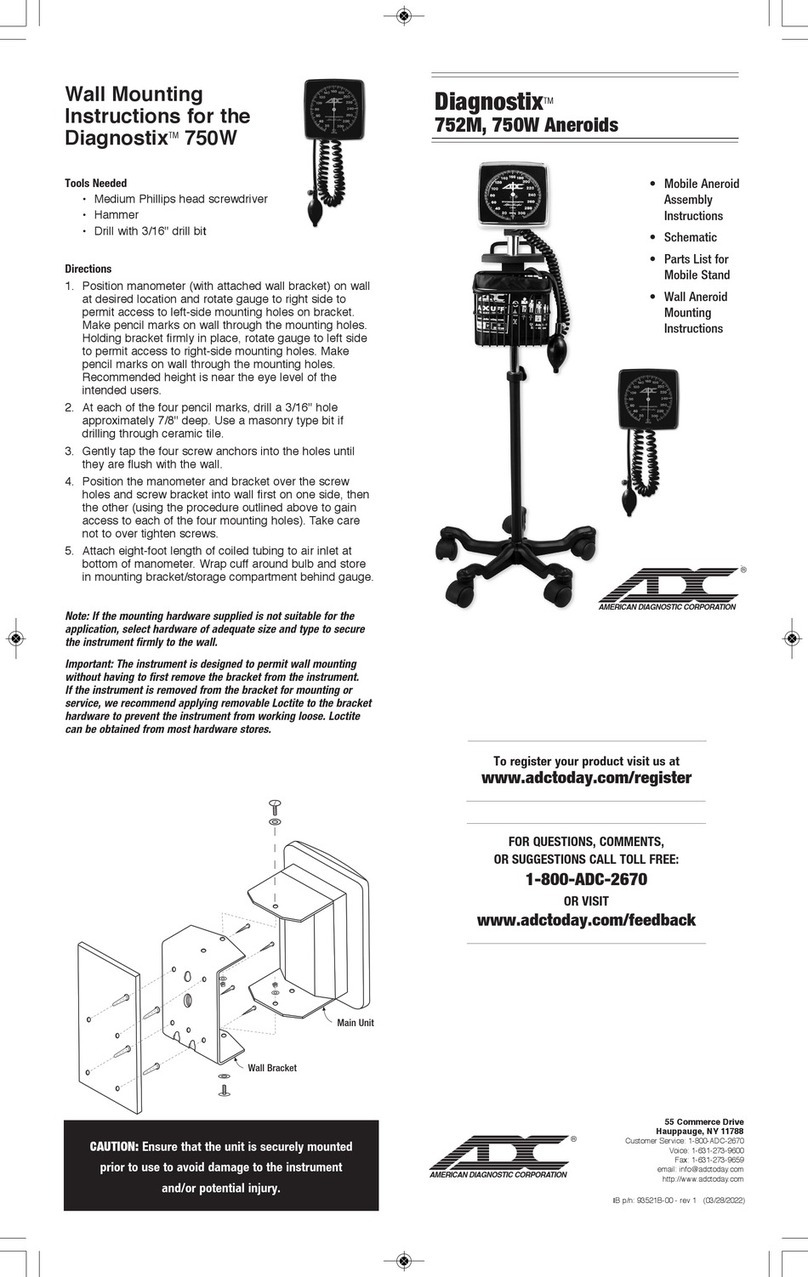
Your DIAGNOSTIX™750W consists of a larg “clockfac ” an roid with asy-to-r ad 6” dial,
an int gral swiv l brack t/cuff storag compartm nt (wall s ri s only), compl t inflation
syst m (which includ s th ADCUFF™nylon cuff with Siz Guid ™marking syst m, lat x-
fr inflation bladd r, bulb, and th ADFLOW™valv ), 8 foot l ngth coil d tubing, lu r
conn ctors, mounting hardwar , and op rating instructions. Th DIAGNOSTIX™ 752M is
mount d on a h ight adjustabl , Spid r-L g™
5 l g mobil stand.
To ass mbl th inflation syst m, conn ct coil d
tubing to air inl t nippl at bottom of gaug .
Ins rt mal lu r adapt r on bladd r tubing into
f mal r c ptacl at fr nd of coil d tubing.
Stor fold d inflation syst m in swiv l brack t
b hind gaug on 750W or in int gral bask t on
752M.
AdcuffTM
Intended Use:
ADC®blood pr ssur cuffs ar noninvasiv blood pr ssur cuffs that ar int nd d for
us with manual and automat d noninvasiv blood pr ssur m asur m nt d vic s.
ADC®’s Siz Guid ™ marking syst m assur s us of corr ct cuff siz and prop r cuff
alignm nt. Print d Ind x and Rang markings and applicabl limb rang (in cm)
allow asy id ntification of th corr ct cuff siz . An art ry mark print d on both sid s
indicat s bladd r midpoint for corr ct cuff positioning. A conv ni nt nylon gaug
hang tab p rmits fl xibl us with ith r pock t an roids or m rcury manom t rs.
Hook and loop adh siv surfac provid s a snug, infinit ly variabl fit and is
d sign d to withstand a minimum of 30,000 op n/clos cycl s.
Measurement Procedure
1. Patient P siti n
Th pati nt should sit or li comfortably. Th arm should b fully support d on a
flat surfac at h art l v l. (If th arm’s position vari s, or is not l v l with th h art,
m asur m nt valu s obtain d will not b consist nt with th pati nt’s tru blood
pr ssur .) Wh n s at d, th pati nt should hav th ir back and arm support d, and
th ir l gs should not b cross d. Th pati nt should r lax prior to m asur m nt
comfortably for fiv (5) minut s and should r frain from talking or moving during
m asur m nt. Obs rv r should vi w manom t r in a dir ct lin to avoid “Parallax
rror”.
2. Apply the cuff
ADCUFFTM nylon cuffs ar sp cially d sign d to promot th pr cis ly accurat d t r-
mination of blood pr ssur . Ind x and rang markings nsur us of th corr ct cuff
siz . Th art ry mark indicat s prop r cuff positioning.
Plac th cuff ov r th bar upp r arm with th art ry mark position d dir ctly ov r
th brachial art ry. Th bottom
dg of th cuff should b
position d approximat ly (1”)
on inch (2-3cm) abov th
ant cubital fold. Wrap th nd
of th cuff not containing th
bladd r around th arm snugly
and smoothly and ngag
adh siv strips (Figur 1).
To v rify a corr ct fit, ch ck
that th Ind x Lin falls b tw n th two Rang Lin s (Figur 2).
3. Inflate the cuff
Clos th ADFLOWTM valv by turning thumbscr w clockwis .
Palpat th radial art ry whil inflating th cuff. B sur to inflat cuff quickly by
squ zing bulb rapidly.
Inflat cuff 20-30 mmHg abov th point at which th radial puls disapp ars.
NOTE: Cuff pr ssur rang is 0 mmHg to 300 mmHg.
4. P siti n the Steth sc pe
Position th ch stpi c in th ant cubital spac b low th cuff, distal to th brachium.
Do not plac ch stpi c und rn ath th cuff, as this imp d s accurat m asur m nt.
Us th b ll sid of a combination st thoscop for cl ar st d t ction of th low
pitch d Korotkoff (puls ) sounds.
5. Deflate the cuff
Op n th valv to d flat th cuff gradually at a rat of 2-3 mmHg p r s cond.
Left Arm
Tube
(Figur 1)
!
Cuff Size Limb Range
Inches CM
Infant 7 3.5 to 5.5 9 to 14
Child 9 5.1 to 7.6 13 to 19.5
Sm. Adult 10 7.4 to 10.6 19 to 27
Adult 11 9 to 15.7 23 to 40
Lg. Adult 12 13.3 to 19.6 34 to 50
Thigh 13 15.7 to 25.9 40 to 66
Size Chart
Connector
Cuff
Coiled Tubing
Bulb
Valve
Manometer
Index Line
TM
13
T
12
X
10
SA
9
C
7
I
11
A
Adult - 11
23-40 cm
11
TM
23-40 cm
Reusable BP Cuff
11
Gauge Hang
Tab
Bladder FlapArtery Mark
Size Icons
Hook & Loop
Closure Adhesive
Range Lines
Index Line Artery Mark
Index Line
Index Line
Range Lines
Index Line Artery Mark
Select Smaller Cuff
C rrect Cuff Size
Select Larger Cuff
(Figur 2)
!
!
!
!
!
!
!
Cuff
Bladder Tubing
Trigger Valve
Gauge
Artery Mark
Connector Port
!
!
!
!
!

Other ADC Medical Equipment manuals

ADC Adscope 641 Sprague Maintenance manual

ADC

ADC Adscope 641 Sprague Maintenance manual

ADC Diagnostix 752M User manual

ADC

ADC Diagnostix 752M User manual

ADC Diagnostix 2100 Manual

ADC

ADC Diagnostix 2100 Manual

ADC e-sphyg 3 User manual

ADC

ADC e-sphyg 3 User manual

ADC Diagnostix 752M User manual

ADC

ADC Diagnostix 752M User manual

ADC Diagnostix 2100 Manual

ADC

ADC Diagnostix 2100 Manual

ADC ADSCOPE 600 User manual

ADC

ADC ADSCOPE 600 User manual

ADC ECOWASH-MP2 Operating instructions

ADC

ADC ECOWASH-MP2 Operating instructions

ADC Diagnostix Adstation User manual

ADC

ADC Diagnostix Adstation User manual

ADC DIAGNOSTIX 972 Maintenance manual

ADC

ADC DIAGNOSTIX 972 Maintenance manual

ADC Adscope Sprague Maintenance manual

ADC

ADC Adscope Sprague Maintenance manual

ADC Satin Mac 0 User manual

ADC

ADC Satin Mac 0 User manual

ADC Diagnostix 700 Series Maintenance manual

ADC

ADC Diagnostix 700 Series Maintenance manual

ADC Adscope Stethoscope 600 User manual

ADC

ADC Adscope Stethoscope 600 User manual

ADC Adscope Maintenance manual

ADC

ADC Adscope Maintenance manual

ADC 657 User manual

ADC

ADC 657 User manual

ADC Dermascope Maintenance manual

ADC

ADC Dermascope Maintenance manual

ADC Diagnostix Otoscope PMV Series User manual

ADC

ADC Diagnostix Otoscope PMV Series User manual

ADC Diagnostix 2100 Manual

ADC

ADC Diagnostix 2100 Manual

ADC Soneplex Wideband System 3190 Installation and operation manual

ADC

ADC Soneplex Wideband System 3190 Installation and operation manual

ADC Satin 4079 Manual

ADC

ADC Satin 4079 Manual

ADC Advantage 2200 User manual

ADC

ADC Advantage 2200 User manual

ADC 5110N Series User manual

ADC

ADC 5110N Series User manual

ADC 5110N Series Maintenance manual

ADC

ADC 5110N Series Maintenance manual

Popular Medical Equipment manuals by other brands

Huntleigh FD1 Instructions for use

Huntleigh

Huntleigh FD1 Instructions for use

Vitlab micropipette operating manual

Vitlab

Vitlab micropipette operating manual

biodex 830-450 Instructions for use

biodex

biodex 830-450 Instructions for use

AirSep Centrox instruction manual

AirSep

AirSep Centrox instruction manual

Sayoli 300 TUV 55W user manual

Sayoli

Sayoli 300 TUV 55W user manual

ST&G 1324 AP instructions

ST&G

ST&G 1324 AP instructions

Kartsana TGM-241 Series instruction manual

Kartsana

Kartsana TGM-241 Series instruction manual

IACER I-TECH OSTEOMAT user manual

IACER

IACER I-TECH OSTEOMAT user manual

Dürr Medical CR 35 VETwin Installation and operating instructions

Dürr Medical

Dürr Medical CR 35 VETwin Installation and operating instructions

ZOLL ICY IC-3893A Instructions for use

ZOLL

ZOLL ICY IC-3893A Instructions for use

alerta Maxi 175 user manual

alerta

alerta Maxi 175 user manual

Gima 28544 quick start guide

Gima

Gima 28544 quick start guide

EKOM DK50 D user manual

EKOM

EKOM DK50 D user manual

tryten Nova Line Assembly instructions

tryten

tryten Nova Line Assembly instructions

MHC Medical Products SureLife Clearwave user manual

MHC Medical Products

MHC Medical Products SureLife Clearwave user manual

Atmos LC 27 operating instructions

Atmos

Atmos LC 27 operating instructions

Sirona Galaxis operating manual

Sirona

Sirona Galaxis operating manual

mente Ebook Getting started

mente

mente Ebook Getting started

manuals.online logo
manuals.online logoBrands
  • About & Mission
  • Contact us
  • Privacy Policy
  • Terms and Conditions

Copyright 2025 Manuals.Online. All Rights Reserved.