manuals.online logo
Brands
  1. Home
  2. •
  3. Brands
  4. •
  5. ADLINK Technology
  6. •
  7. Control Unit
  8. •
  9. ADLINK Technology NuDAM-6017 User manual

ADLINK Technology NuDAM-6017 User manual

6000 SeriesAnalog InputModules
The Optimal Choice for Harsh Environment
-6017 Analog Input Module
1. Introduction
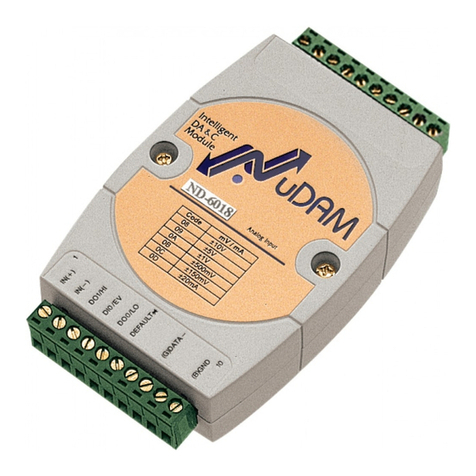
NuDAM-6017 is an analog input module with 8 input
channels. Six of the eight channels are differential and the
other two are single ended type.
Features
u8 analog input channels
u6 differential input and 2 single ended input
uprogrammable input range
uprogrammable host watchdog timer for host failure
protection
u2500 Vrms analog input isolation
uinternal watchdog timer for device failure protection
ueasy programming by software
ueasy installation and wiring
Specifications
uInterface:
RS-485, 2 wires
Speed (bps): 600, 1200, 2400, 4800, 9600, 19.2k,
38.4k, 57.6k, 115.2k
uAnalog Input:
Differential channels: 6
Single ended channels: 2
Resolution: 16 bits
Accuracy: ±0.05%
Sampling rate:20
Unit conversion: mV, V or mA
Voltage range: programmable 5 levels:
±10V, ±5V, ±1V, ±500mV, ±150mV
Current measurement: 20mA (with external 125
ohm resistor)
Isolation Voltage: 2500 Vrms
Note: The maximum input voltage shall not
exceed to ±30V with reference to AGND
otherwise, they may cause an unrecoverable
harm to the hardware component.
uStorage Temperature Range: -25 to 80 °C
uOperating Temperature Range: -10 to 70 °C
uPower Requirement: +10V to +30VDC Unregulated
with against power reversal
uPower Consumption: 1.08W
uCase: ABS with captive mounting hardware
uCE Class A Conformity
2. Pin Assignment
ND-6017
(Y
)D
AT
A+
(G
)D
AT
A-
(R
)+
Vs
(B)
G
N
D
8-CH Analog Input
1
10
Vi
n
5+
Vi
n
5-
Vi
n
6+
A
G
N
D
Vi
n
7+
D
EF
A
U
LT
*
Vi
n
4-
Vi
n
4+
Vi
n
3-
Vi
n
3+
Vi
n
2-
Vi
n
2+
Vi
n
1-
Vi
n
1+
Vi
n
0-
Vi
n
0+ 11
20
08
09
0A
0B
0C
10V
5 V
1 V
500 mV
100 mV
0 - 20 mA
CODE mV/mA
0D
Pin Definitions
Pin # Signal Name
Description
1Vin5+ Differential positive input channel 5
2Vin5-Differential negative input channel 5
3Vin6+ Single-ended input channel 6
4AGND Analog signal ground of channel 6 & 7
5Vin7+ Single-ended input channel 7
6DEFAULT* Initial state setting
7(Y)DATA+ RS-485 signal, positive
8(G)DATA-RS-485 signal, negative
9(R)+VS Power supply, +10V ~ +30Vdc
10 (B)GND Ground
11 Vin0+ Differential positive input channel 0
12 Vin0-Differential negative input channel 0
13 Vin1+ Differential positive input channel 1
14 Vin1-Differential negative input channel 1
15 Vin2+ Differential positive input channel 2
16 Vin2-Differential negative input channel 2
17 Vin3+ Differential positive input channel 3
18 Vin3-Differential negative input channel 3
19 Vin4+ Differential positive input channel 4
20 Vin4-Differentialnegative input channel 4
*The module is in DEFAULT mode when DEFAULT* pin
connected to GND while applying power on the module.
*Do not apply any power signal to DEFAULT* pin, just left
it open or connected it to GND.
3. Application Wiring
Differential Voltage Input
AGND
AGND
Differential
Signal
Source
<30V
IN(-)
IN(+)
ADC
Single Ended Voltage Input
Ground
Signal
Source
AGND
IN(+) ADC
Current Input Measurement
Current
Source
R=125 Ohm
%1 accuracy
IN(-)
IN(+)
ADC
R
4. Functional Block Diagram
5. Installation
Equipment for Installation
Aexisting RS-485 network
NuDAM modules
DC Power supply (+10V~+30V)
Wires for power, communication and I/O signal
Installation Procedure
1. Configure every single NuDAM module under the
administration utility
2. The baud rate setting and calibration procedure must be
done under the DEFAULT* mode
3. The baud rate and check-sum status must be identity
with the application network. The address ID must not
be conflict with other modules on the network
4. Plug the new module to the existing network
5. Use the NuDAM administration utility to check the
entire network
Power Input
+10V ~ +30V
+ 5V
Power
Regulator & Filter
Data+
Data
-
GND
RS
-
485
Rec/Drv
Micro
Processor
EEPROM
Config Data
Safe Value
ADC
1
-
bit
Digital Input
8
Analog
Input
channels
Default*
Pin
Mux
Watchdog/Power Failure
Supervisor
6000 Series Analog Modules
The Optimal Choice for Harsh Environment
6. Command Set
There are three categories of NuDAM commands. The first
is the general commands, including set configuration
command, read configuration, reset, read module‘s name or
firmware version, etc. Every NuDAM can response to the
general commands. The second is the functional commands,
which depends on functions of each module. Not every
module can execute all function commands. The third is the
special commands including functions about the
programmable watchdog timer, safe values, and the
programmable leading code. All the commands used in the
NuDAM analog input module are list in the following table.
Command Syntax
General Command
Set Configuration %(OldAddr)(NewAddr)
(InputRange)(BaudRate)
(DataFormat)
Read Configuration $(Addr)2
Read Module Name $(Addr)M
Read Firmware Version $(Addr)F
Software Reset $(Addr)RS
Functional Command
Span Calibration $(Addr)0
Offset Calibration $(Addr)1
Read Analog Data From
Channel N #(Addr)(Channel No)
Read All Analog Data #(Addr)A
Enable/Disable Channel for
Multiplexing $(Addr)5(ChannelVal)
Read Channel Status $(Addr)6
Special Command
Read Command Leading Code
Setting ~(Addr)0
Change Command Leading
Code Setting ~(Addr)10(C1)(C2)(C3)
(C4)(C5)(C6)
Set Host Watchdog / Safety
Value ~(Addr)2(Flag)
(TimeOut)(SafeValue)
Read Host WatchDog / Safe
Value ~(Addr)3
Host is OK ~**
* The module accepts calibration command, baud rate and
checksum configuration setting under the DEFAULT*
mode.
* Please refer the manual in PDF file format in the CD for
detail description of these commands.
7. ADLINK on the Internet
The full version manual can be download from website
http://www.adlink.com.tw/download/manual/index.htm#6000
Homepage http://www.adlink.com.tw
Service: [email protected]
TechnicalAssistance: [email protected]
Copyright 2000 ADLINK TECHNOLOGY INC.
TEL: 886-2-82265877 FAX:886-2-82265717
Contents and specification subject to change without notice.
NuDAMis a registered trademark of ADLINK TECHNOLOGY
INC. Other brands of products are trademarks or registered
trademarks of their respective holders. AM-ND6017-E1.00

Other ADLINK Technology Control Unit manuals
ADLINK Technology PCIe-9529 User manual

ADLINK Technology

ADLINK Technology PCIe-9529 User manual

ADLINK Technology HSL-4XMO User manual

ADLINK Technology

ADLINK Technology HSL-4XMO User manual

ADLINK Technology ND-6021 User manual

ADLINK Technology

ADLINK Technology ND-6021 User manual

ADLINK Technology cPCI-3840 Series User manual

ADLINK Technology

ADLINK Technology cPCI-3840 Series User manual

ADLINK Technology EGX-MXM-T1000 User manual

ADLINK Technology

ADLINK Technology EGX-MXM-T1000 User manual

ADLINK Technology cExpress-HL User manual

ADLINK Technology

ADLINK Technology cExpress-HL User manual

ADLINK Technology com express User manual

ADLINK Technology

ADLINK Technology com express User manual

ADLINK Technology USB-1210 User manual

ADLINK Technology

ADLINK Technology USB-1210 User manual

ADLINK Technology cPCI-6830 Series User manual

ADLINK Technology

ADLINK Technology cPCI-6830 Series User manual

ADLINK Technology PXI-7931 User manual

ADLINK Technology

ADLINK Technology PXI-7931 User manual

ADLINK Technology PXI-7901 User manual

ADLINK Technology

ADLINK Technology PXI-7901 User manual

ADLINK Technology EGX-MXM-P2000 User manual

ADLINK Technology

ADLINK Technology EGX-MXM-P2000 User manual

ADLINK Technology COM Express nanoX-BASE User manual

ADLINK Technology

ADLINK Technology COM Express nanoX-BASE User manual

ADLINK Technology MPC-8164 User manual

ADLINK Technology

ADLINK Technology MPC-8164 User manual

ADLINK Technology NuDAM-6018 User manual

ADLINK Technology

ADLINK Technology NuDAM-6018 User manual

ADLINK Technology Express-SL User manual

ADLINK Technology

ADLINK Technology Express-SL User manual

ADLINK Technology cPCI-8168 User manual

ADLINK Technology

ADLINK Technology cPCI-8168 User manual

ADLINK Technology PXI-7921 User manual

ADLINK Technology

ADLINK Technology PXI-7921 User manual

ADLINK Technology NuIPC cPCI-6760D Series User manual

ADLINK Technology

ADLINK Technology NuIPC cPCI-6760D Series User manual

ADLINK Technology HSL-DI32-UD User manual

ADLINK Technology

ADLINK Technology HSL-DI32-UD User manual

ADLINK Technology SMARC LEC-PX30 User manual

ADLINK Technology

ADLINK Technology SMARC LEC-PX30 User manual

ADLINK Technology AVA-5500 Series User manual

ADLINK Technology

ADLINK Technology AVA-5500 Series User manual

ADLINK Technology cPCI-3938 User manual
ADLINK Technology

ADLINK Technology cPCI-3938 User manual

ADLINK Technology cPCI-R6500 Series User manual

ADLINK Technology

ADLINK Technology cPCI-R6500 Series User manual

Popular Control Unit manuals by other brands

Jetter JXM-IO-E31 user manual

Jetter

Jetter JXM-IO-E31 user manual

Siemens SIMOTICS CONNECT 600 operating instructions

Siemens

Siemens SIMOTICS CONNECT 600 operating instructions

Danfuss AB-QM DN 10-32 operating guide

Danfuss

Danfuss AB-QM DN 10-32 operating guide

BADLANDS LE-03 quick guide

BADLANDS

BADLANDS LE-03 quick guide

Monacor TVCCD-30MA manual

Monacor

Monacor TVCCD-30MA manual

ABB Welcome M2306 user manual

ABB

ABB Welcome M2306 user manual

bihl+Wiedemann C Series user manual

bihl+Wiedemann

bihl+Wiedemann C Series user manual

Aewin Technologies CB-7960 user manual

Aewin Technologies

Aewin Technologies CB-7960 user manual

KONTRONIK PIX4000 Operation manual

KONTRONIK

KONTRONIK PIX4000 Operation manual

ADTRAN Async-232 user manual

ADTRAN

ADTRAN Async-232 user manual

HBX CPU-0500 Quick start up guide

HBX

HBX CPU-0500 Quick start up guide

Ei Electronics EIB100MRF instructions

Ei Electronics

Ei Electronics EIB100MRF instructions

Hidrotermal HT-SAV01 user manual

Hidrotermal

Hidrotermal HT-SAV01 user manual

WNC IMQ6 user manual

WNC

WNC IMQ6 user manual

Sakura Tissue-Tek TEC 6 operating manual

Sakura

Sakura Tissue-Tek TEC 6 operating manual

GOK AUV PS 16 bar Assembly and operating manual

GOK

GOK AUV PS 16 bar Assembly and operating manual

Siemens XDLC installation instructions

Siemens

Siemens XDLC installation instructions

Digi XBee DigiMesh 2.4 user guide

Digi

Digi XBee DigiMesh 2.4 user guide

manuals.online logo
manuals.online logoBrands
  • About & Mission
  • Contact us
  • Privacy Policy
  • Terms and Conditions

Copyright 2025 Manuals.Online. All Rights Reserved.