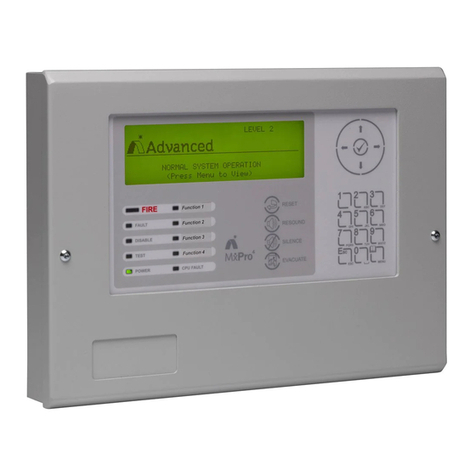
Advanced Mx-5101xR User manual

www.advancedco.com
5000 Series Rack Panels
The operation and functions described in this manual are available from Software Version Mx5000-050-04 onwards.

www.advancedco.com
Specifications & Ordering:
Models, Sales Order Parts:
Mx-5101xR Panel 1-LP Module 6U
Mx-5201xR –Mx-5202xR Panel 2-LP Module 6U
Mx-5401xR –Mx-5404xR Panel 4-LP Module 6U
* Add suffix (x): N for Nittan and V for Argus Vega
Mxp-514 AC Filter Card Kit
Mxm-510-16U Enclosure IP55 16U
Mxm-510-20U Enclosure IP55 20U
Mxm-510-KL Optional CAM Key-Lock kit for outer door
Mxm-510-BS Enclosure Battery Shelf (7Ah/18Ah)
Mxm-510-BS1 Enclosure Battery Shelf Lower (25Ah)
Mxm-510-CP Enclosure Chassis Plate
Mxm-511-XX Enclosure –Blanking Plates –XX = 1U, 2U, 4U, 6U
Mxm-512 Enclosure –LED Mounting Plate 4U
Mxm-513-BB Enclosure –Utility Module 6U –Back Box
Mxm-513-D1 Enclosure –Utility Module 6U –Blank Door
Mxm-513-D2 Enclosure –Utility Module 6U –Door with LED Aperture
Mxm-513-D3 Enclosure –Utility Module 6U –Door with Aperture
Mxm-513-FP Enclosure –Utility Module 6U –Fascia Plate Blank
Mxm-513-MF Enclosure –Utility Module 6U –Switch / LED Mounting Frame
Mxm-513-BP Enclosure –Utility Module 6U –Switch / LED Blanking Plate
Mxm-514-BB Enclosure –Utility Module 8U –Back Box
Mxm-514-D1 Enclosure –Utility Module 8U –Door with Aperture
Mxm-514-FP Enclosure –Utility Module 8U –Fascia Plate Blank
Mxm-515-6U Enclosure –Utility Chassis Plate 6U
Mxm-515-8U Enclosure –Utility Chassis Plate 8U
Mxm-534 Loop Card Vibration Support Plate
Applications / Limitations:
Enclosure solutions requiring rack mounting arrangement and increased IP rating.
With the MXM-510-KL fitted the IP rating of the enclosure is IP44.
Fit the MXM-534 when the panel module is mounted in large floor mounting rack enclosures.
Compatibility:
5000 Series panels, power supplies, peripheral bus modules and network peripherals.

www.advancedco.com
3
Table of Contents Page
1INTRODUCTION.............................................................................................................................................4
1.1 STANDARDS.............................................................................................................................................4
1.2 CAUTIONS AND WARNINGS .......................................................................................................................5
1.3 DESCRIPTION ...........................................................................................................................................5
1.3.1 5000R Series .....................................................................................................................................5
1.3.2 5000VR Series...................................................................................................................................5
1.4 EN54 FUNCTIONS ....................................................................................................................................5
1.5 INSTALLATION APPROVALS.......................................................................................................................6
1.5.1 Fire System Installations....................................................................................................................6
1.5.2 Wiring Regulations.............................................................................................................................6
2INSTALLATION..............................................................................................................................................7
2.1 IDENTIFICATION OF PARTS ........................................................................................................................7
2.2 MECHANICAL SPECIFICATIONS..................................................................................................................8
2.2.1 Enclosure –16U ................................................................................................................................8
2.2.2 Enclosure –Other Sizes....................................................................................................................9
2.2.3 Enclosure –Commercial....................................................................................................................9
2.2.4 Battery Gas Venting...........................................................................................................................9
2.2.5 Battery Shelf / Chassis Plate / DIN Rail.............................................................................................9
2.2.5.1 MXM-510-BS: ..........................................................................................................................................9
2.2.5.2 MXM-510-BS1: ........................................................................................................................................9
2.2.5.3 MXM-510-CP:........................................................................................................................................10
2.2.5.4 DIN-RAIL: ..............................................................................................................................................10
2.3 MODULES...............................................................................................................................................11
2.3.1 Panel Module...................................................................................................................................11
2.3.1.1 Wiring.....................................................................................................................................................12
2.3.2 LED Modules....................................................................................................................................14
2.3.3 Utility Module –6U...........................................................................................................................15
2.3.3.1 Chassis..................................................................................................................................................15
2.3.3.2 Door Options..........................................................................................................................................17
2.3.4 Utility Module –8U...........................................................................................................................19
2.3.4.1 Chassis –6U .........................................................................................................................................19
2.3.4.2 Chassis –8U .........................................................................................................................................20
2.3.4.3 Mimic Door.............................................................................................................................................21
2.3.5 AC Filter Card ..................................................................................................................................22

www.advancedco.com
4
1 Introduction
1.1 Standards
Advanced Electronics Ltd declares that the products identified below conform to the essential requirements
specified in the Construction Products Directive 89/106/EEC:
0786-CPD-20952
EN54-2: 1997 +A1:2006
Control and indicating equipment for fire detection and fire
alarm systems for buildings
Provided options:
- Outputs to Fire Alarm Devices
- Output to Fire Routing Equipment
- Output to Fire Protection Equipment
- Output to Fault Routing Equipment
- Investigation Delays to Outputs
- Dependency on more than one alarm signal
- Fault Signals from Points
- Disablement of Points
- Alarm Counter
- Test Condition
- Standardised Input / Output
EN54-4: 1997 +A1:2002 +A2:2006
Power supply equipment for fire detection and fire alarm
systems for buildings
Mx-5100R, Mx-5200R, Mx-5400R
Mx-5100VR, Mx-5200VR, Mx-5400VR
In addition, the products comply with the following:
Low Voltage Directive 2006/95/EC
BS EN60950-1: 2006 Safety of information technology equipment
Electromagnetic Compatibility Directive 2004/108/EC
BS EN55022: 1998 Emissions, Class B
BS EN50130-4: 1996 +A2: 2003 Immunity, Product Family Standard

www.advancedco.com
5
1.2 Cautions and Warnings
STOP
BEFORE INSTALLATION –Refer To the Ratings shown on the label inside
the product and to the ‘Specifications Chart’ in this document.
Please read this manual carefully. If you are unclear on any point DO NOT
proceed. Contact the manufacturer or supplier for clarification and guidance.
Only Trained service personnel should undertake the Installation,
Programming and Maintenance of this equipment.
This product has been designed to comply with the requirements of the Low
Voltage Safety and the EMC Directives. Failure to follow the installation
instructions may compromise its adherence to these standards.
ATTENTION
OBS ER VE PR ECA UTIO NS
FO R H AND LING
EL ECT RO S TA TIC
SE NSITIV E DEV IC ES
This equipment is constructed with static sensitive components. Observe anti-
static precautions at all times when handling printed circuit boards. Wear an
anti-static earth strap connected to panel enclosure earth point. Before installing
or removing any printed circuit boards remove all sources of power (mains and
battery).
1.3 Description
The 5000R Series is a modular assembly rack mount version of the 5000 Series of Fire Alarm Control panels.
The panels and peripheral devices are housed in dedicated module assemblies designed to be installed into
standard 19” rack mount enclosures.
Enclosures are provided in different sizes to IP55 rating (IP30 with outer glass door open). In addition, the
module assemblies can be mounted into commercial rack mount enclosures.
This manual covers the installation of the rack mount 5000R, 5000VR Series Fire Alarm Control Panel
assemblies and enclosures only. For all other information:
Refer to Product Manual (Document No. 680-165) for all other information on installation and programming
of the panel.
Refer to the User Manual (Document No. 680-166) for details of how to operate the panel.
Refer to the appropriate protocol application note for further and specific information for each protocol.
Refer to individual power supply module, peripheral bus module or network peripheral module
documentation for detailed information on these items.
1.3.1 5000R Series
The 5100R is a Single Loop, Analogue Addressable Fire Alarm Control Panel.
The 5200R is a Two Loop, Analogue Addressable Fire Alarm Control Panel.
The 5400R is a Multiple Loop, Analogue Addressable Fire Alarm Control Panel with provision for up to four
loops.
All above models are designed for use with the Apollo (Discovery, Explorer, XP95 and Series 90) and Hochiki
(ESP).
1.3.2 5000VR Series
The 5100VR is a Single Loop, Analogue Addressable Fire Alarm Control Panel.
The 5200VR is a Two Loop, Analogue Addressable Fire Alarm Control Panel.
The 5400VR is a Multiple Loop, Analogue Addressable Fire Alarm Control Panel with provision for up to four
loops.
All above models are designed for use with the Advanced (AV) fire detection devices.
1.4 EN54 Functions
The EN54 functions and options with requirements are identical to standard 5000 Series Panels. Refer to the
Product Manual (Document No. 680-165) for information.

www.advancedco.com
6
1.5 Installation Approvals
1.5.1 Fire System Installations
The panel must be installed and configured for operation in accordance with these instructions and the
applicable code of practice or national standard regulations for fire systems installation (for example BS5839-1:
2002) appropriate to the country and location of the installation.
1.5.2 Wiring Regulations
The panel and system must be installed in accordance with these instructions and the applicable wiring codes
and regulations (for example BS7671) appropriate to the country and location of the installation.

www.advancedco.com
7
2 Installation
2.1 Identification of Parts
The following diagram shows the major parts of the panels for the 16U enclosure.
Alternative enclosure sizes follow the same general arrangement.
The standard enclosures offer ingress protection to category IP55 with the outer door closed. Internal ingress
protection (with the door open) is to category IP30.
For full details of each individual model refer the separate sections in this manual.
Visual indicators can be seen through the glass panel. The outer door is not locked to provide access to Level 1
and Level 2 controls.
An optional key-lock is available for critical installations
1
.
1
This means, however, that the panel will not fulfil all of the requirements of EN54-2 at Level 1 –in this case, the connection of a remote
terminal (5030) will fulfil all indication and control requirements.
Back Box
1U Blank Plate
1U Blank Plate
Blank Plates or
optional modules
Glazed Outer Door
Control Panel
Key Lock
CAM Lock
Optional key lock is
available

www.advancedco.com
8
2.2 Mechanical Specifications
Item
Specification Details
MXM-510-16U
MXM-510-20U
Dimensions (H x W x D)
730 x 535 x 230
910 x 535 x 230
Weight
22 Kg
25 Kg
IP Rating (Door Closed)
IP55
IP55
IP Rating (Door Open)
IP30
IP30
2.2.1 Enclosure –16U
The diagram below shows the overall dimensions and fixing points for the 16U enclosure.
Optional battery shelves can be fitted in the back box at the positions indicated for batteries (7Ah or 18Ah).
Alternatively, batteries can be mounted in the bottom of the enclosure. Larger batteries (up to 45Ah) must be
mounted in the bottom of the enclosure and can be fitted behind Zone LED modules or blanking plates.
Mount the enclosure on the wall using fixing hardware suitable for the size and weight of the complete
enclosure.
2
The fixing holes are fitted with plugs. To maintain the IP rating, only remove the required plugs and then fit the
supplied sealing washers to the fixing screws.
Knockouts are provided in the top (44), rear (20) and bottom (44) of the enclosure. To maintain the IP rating,
only remove sufficient knockouts for the required cabling and use 20mm cable glands with IP55 rating or better.
If a knockout is removed in error and unused, fit a 20mm sealing plug.
2
Depending on the optional modules fitted, the weight of the complete panel(not including the weight of batteries)can be > 40kg. Including
45Ah batteries, the weight can be > 70kg.

www.advancedco.com
9
2.2.2 Enclosure –Other Sizes
Other wall mount enclosure sizes are available in height increments of 4U (178mm). Fixings point positions are
adjusted accordingly.
2.2.3 Enclosure –Commercial
All of the modules may be housed in any commercially available 19” rack mount enclosure (e.g. SAREL or
RITTAL)
3
. This manual does not provide any information on these enclosures but the information provided will
assist and guide the installation of the modules in these enclosures.
The following are recommended:
SAREL –Spacial S3D wall mount enclosures
(500H x 500W x 200D up to 1000H x 800W x 250D)
RITTAL –TS8 Baying System floor mount enclosures
(1400H x 600W x 500D up to 2000H x 800W x 600D)
The enclosures should be fitted with a glass door option for viewing of Level 1 indications.
2.2.4 Battery Gas Venting
The charging of batteries can result in the release of flammable gases (hydrogen). To prevent a build up of
potentially hazardous gases in a sealed or semi-sealed enclosure, the enclosure should be fitted with a vent
suitable for the IP rating required.
2.2.5 Battery Shelf / Chassis Plate / DIN Rail
2.2.5.1 MXM-510-BS:
Up to two battery shelves can be fitted for mounting of 7Ah or 18Ah batteries. The shelves rest on the side wall
flanges and are secured with three M4 nuts and washers and fit behind panel and utility panel modules. Order
these items separately.
2.2.5.2 MXM-510-BS1:
A battery shelf can be located and secured with four M4 nuts and washers to the bottom of the enclosure whilst
maintaining access to the bottom 20mm knockouts. The shelf will accept up to 2x 25Ah batteries. Field wiring
cables can be routed behind the battery shelf. Order this item separately.
NOTE: If using the top knockouts, batteries up to 45Ah can be located directly in the bottom of the enclosure.
3
For compliance with the requirements of EN54-2 and EN54-4 the commercial enclosure and internal arrangement must follow the
instructions in this manual and must continue to meet an IP30 ingress protection rating with the outer door in both open and closed
positions. If the panel door is lockable, the panel will not fulfil all of the requirements of EN54-2 at Level 1 –in this case, the connection of a
remote terminal (5030) will fulfil all indication and control requirements.

www.advancedco.com
10
2.2.5.3 MXM-510-CP:
A chassis plate can be fitted and secured to the rear wall using six M4 nuts and washers and utilises the same
fixing points as the battery shelves. Order this item separately.
If fitted, batteries must be located in the bottom of the enclosure with or without MXM-510-BS1.
The chassis plate provides mounting positions for up to eight peripheral bus modules or up to six peripheral bus
modules and a power supply (MXS-050 or MXS-051).
Fixed stand-off pillars are provided for six of the peripheral bus modules. The modules can be mounted directly
to these stand-off pillars using the M3 screws supplied with the module.
Separate M-F pillars are supplied with the chassis plate for mounting the further two peripheral bus modules.
Screw these M3 pillars into the captive nuts on the chassis plate and then mount and affix the modules using
the M3 screws supplied with the module.
The PSE module fits directly the chassis plate and is fixed using four M3 screws.
Fit the terminal block to the chassis plate using the two supplied M3x14 screws and affix the integral earth lead
to the stud using the supplied M4 Nuts and Washers.
Affix the supplied warning label to the right of the terminal block.
The incoming AC cables can be tied down to the chassis using one of the supplied cable ties.
2.2.5.4 DIN-RAIL:
M4 Fixing points are provided for up to two DIN Rail sections. Three fixings per rail give options for 200mm,
270mm or 450mm long rails.
If fitted, batteries must be located in the bottom of the enclosure with or without MXM-510-BS1.
PSE
PBUS Module
PBUS Module
PBUS Module
PBUS Module
PBUS Module
PBUS Module
PBUS Module
PBUS Module

www.advancedco.com
11
2.3 Modules
2.3.1 Panel Module
The Panel Module comprises metalwork and electronics. The metalwork is designed to accommodate the
standard common 5000 Series Base Card and Display Card chassis assemblies.
The Panel Module is supplied in a 6U High rack mount enclosure chassis. The depth of the back box is 125
mm. The panel module weight is 6 kg.
The door is securely locked using the standard Advanced Electronics Ltd panel key. The internal arrangement
of the panel module is shown in the following diagram.
The enclosure comprises the standard 5000 panel chassis and display plate assemblies. Up to one peripheral
bus or expansion bus module can be mounted on the chassis plate to the left of the base card. Standard printer
and key-switch options can be mounted to the display plate –refer to main panel manual for details.

www.advancedco.com
12
When the panel module is mounted in large
floor standing rack enclosures, fit the MXM-
MXM-534 loop card support plate as shown
opposite.
Remove the three screws fixing the display
card and replace with the supplied pillars.
Mount the plate onto the pillars and fix in place
using the supplied screws.
2.3.1.1 Wiring
Cable entry holes are provided for installation wiring –two on the right hand side for AC Supply and Battery
Supply –one on the left for internal wiring. Also on the left (top) is a U channel cut-out for routing field wiring to
the side frame of the enclosure.
Cable tie anchor points are provided at strategic locations to tie down the wiring.
Refer to the wiring section of the product manual 680-165 for full information. The AC Supply and Battery
Supply connections are re-iterated below for reference.
2.3.1.1.1 AC Supply
Route the high voltage mains AC wiring into the
enclosure at the upper right corner only. Keep the
AC wiring away from the circuit boards and all
other wiring.
The mains input connector is shown in the
diagram below. Note the positions of the earth,
neutral and live terminal connections. These are
clearly marked on the label next to the connector.
The connector block contains an integral fuse
holder.
FU SE
Brown
Green
LIVE
EARTH
NEUTRA L
Panel W iring
Blue
3.15A
AC Mains terminations
The fuse is rated as follows:
T 3.15A H 250V
Replace with correct rating and specification only.
Must be
earthed
The panels must be connected to
the supply earth through the power
cable.
Secure the mains input wiring by tie wrap as close
to the terminal block as possible.
Connect the Control Panel to the mains supply via
a readily accessible disconnect-device (Isolation
Switch) and suitable earth fault protection
incorporated in the building installation wiring. The
Mains cable should be 0.75mm2cable rated at
250V and fused via a 5A anti-surge fuse.
NOTE: If two or more power supplies are installed
then an MXP-514 AC Filter card kit must be
installed in the back box. Refer to Section 2.3.5 for
more details.
M3 Pillars
MXM-534 Plate
Order separately

www.advancedco.com
13
2.3.1.1.2 Battery
The batteries must be located on the battery shelf behind the module or in the bottom of the enclosure. Fit the
Mxp-501 Battery Remote Temperature Sensor to ensure that the batteries are charged at the correct voltage.
Plug the Mxp-501 into the connector and route the sensor cable along with the battery leads. Use the supplied
tie-wraps to tie the sensor cable to the battery leads so that the encapsulated sensor is located close to the
batteries. The sensor cable is 500mm in length.
NOTE: If the base card is not fitted with either a jumper or a remote temperature sensor the panel will indicate a
charger failure condition. Ensure that the jumper is replaced if the remote sensor is removed / not used.
WARNING: HIGH VOLTAGE INSIDE
DO NOT REMOVE COVER
No Serviceable Parts Inside
Jumper –centre two pins
Battery Leads
Sensor

www.advancedco.com
14
2.3.2 LED Modules
LED Indicator Modules are available with 50 (Column), 100 or 200 LED indicators. All Modules are 4U in height
(see also 6U Utility Module for additional mounting options). Order the required LED Module and the 4U
Mounting Plate separately.
A Panel can support up to 250 LED
indicators in total (or one 200 LED
module). An example (50 LED column
format) is shown opposite.
The Zone LED chassis plate is mounted
onto the 19” mounting frame using 4x M4
Nuts and washers.
Connect the ribbon cable to the display
card. Route the cable through the lower
hole in the left hand side of the panel
module enclosure and connect to the input connector (top) of the first LED module. Use the long ribbon cable
supplied with the 4U mounting plate instead of the cable supplied with the LED Module. Use the short ribbon
cable to connect between modules.
Connect the supplied ribbon cables between the modules.
Connect the earth lead fitted on each 19” 4U mounting frame
to the nearest suitable earth point in the enclosure.
Up to 5 modules
(250 LED)
100-LED Modules
50-LED (Column) Modules
200-LED Module

www.advancedco.com
15
2.3.3 Utility Module –6U
The Utility Module comprises of the same metalwork assembly as the Panel Module.
Alternative doors are available and must be specified separately. All doors are securely locked using the
standard Advanced Electronics Ltd panel key. The weight is 4-6 kg depending on modules fitted.
The module accommodates a standard 6U utility chassis plate to which power supplies, peripheral bus cards
and network peripherals may be fitted.
2.3.3.1 Chassis
The utility chassis plate can accept the following module types:
1x PSE Module (Mxs-049, Mxs-050 or Mxs-051) and
1x Mxp-510 BMS Interface
4
or 1x Mxp-554 ipGateway or 2x standard peripheral bus modules or 2x Mxp-539
Mimic Interface Modules
OR
1x Mxp-510 BMS Interface or 1x Mxp-554 ipGateway and 1x standard peripheral bus module
OR
2x Mxp-539 Mimic Interface Modules and 1x standard peripheral bus modules
OR
3x standard peripheral bus modules
4
Mxp-020 and Mxp-045 modules can also be fitted in this one location.
Chassis
Plate
Order
separately
AC Terminal Block
and cable (supplied
with PSU module)
Earth Stud
Back Box
Order
separately

www.advancedco.com
16
2.3.3.1.1 Modules
Screw the M3 Pillars supplied with the chassis plate into the required mounting holes. Fit the module to the
pillars with the supplied M3 Screws.
2.3.3.1.2 PSE
The PSE modules fit directly the chassis plate and are fixed using four M3 screws. Fit the Mxs-049 to the upper
four holes and fit the Mxs-050 and Mxs-051 to the outer four holes.
Fit the terminal block to the enclosure using the two supplied M3 Screws and affix the integral earth lead to the
stud using the supplied M4 Nuts and Washers.
Affix the supplied warning label to the right of the terminal block.
The incoming AC cables can be tied down to the enclosure using one of the supplied cable ties.
PSE
MXP-539
MXP-510/MXP-554
MXP-539
PBUS Module
PBUS Module
PBUS Module

www.advancedco.com
17
2.3.3.2 Door Options
The following door options are available (all diagrams show the rear view of the door). Order the required door
and associated metal parts separately. Mount the door to the back box and secure the hinge using the supplied
M4 Nuts, Plain and Spring Washers supplied.
2.3.3.2.1 Blank Door Option
The utility enclosure can be simply fitted with a blank door to provide secure (key cam lock) access to the
internal modules.
2.3.3.2.2 Zone LED Door Option
Any of the Zone LED option cards can also be fitted to the 6U Utility Module.
Route the ribbon cable from the panel display card
through the lower hole in the left hand side of the panel
module enclosure. Route the cable through the lower
hole in the left hand side of the utility module enclosure
and connect to the input connector (top) of the first LED
module.
Refer to the LED section for further details.
2.3.3.2.3 Switch / LED Door Option
This option comprises of the standard panel module door fitted with a mounting frame to accept up to two Mxp-
538 Switch / LED cards.
Mount the Mxp-538 module on the four fixing studs of the mounting frame.
Fit a blanking plate to the second aperture if unused.
Refer to the data sheet supplied with
the Mxp-538 for full wiring information.
Hinge (Common to all doors)
Affix with the supplied nuts
and washers to the three
studs on the back box.
Hinge
Mxp-538
Positions
Mounting
Frame
Order
separately
Blanking
Plate
Order separately
if required

www.advancedco.com
18
2.3.3.2.4 Small Mimic Door Option
This option consists of the standard 6U panel door (with aperture) and a fascia plate. The fascia plate can be
drilled and screen printing for the required graphic indicator diagram.
Mimic area = 350 W x 180 H
Up to two Mxp-539 Input / Output Cards are required to be mounted to the chassis. LED and Switch options
required are available.
Up to 48 (96) LED indicators and 16 (32) Switches can be driven by one (or two) Mxp-539 modules.
Hinge
Fascia
Plate
Order
separately

www.advancedco.com
19
2.3.4 Utility Module –8U
The large Utility Module is of similar construction but 8U in height. The module accommodates either the
standard 6U or large 8U utility chassis plates. The weight is 5-8 kg depending on modules fitted.
The main use of the large utility enclosure is for graphical mimic indicator panels. The blank plate in the door
can be removed so that it can be drilled and screen printed as required for fitting of switches and LED
indicators.
2.3.4.1 Chassis –6U
The 6U Chassis can be fitted –refer to previous section for full details.
Up to 7Ah batteries can be installed in the 8U Utility Module if the 6U Chassis is employed. Otherwise, batteries
can be mounted in the bottom of the enclosure or on the battery shelf.
Chassis Plate
Order separately
AC Terminal Block
and cable (supplied
with PSU module)
Earth Stud
Back Box
Order
separately

www.advancedco.com
20
2.3.4.2 Chassis –8U
The utility chassis plate can accept the following module types:
1x PSE Module (Mxs-049, Mxs-050 or Mxs-051) and
1x Mxp-510 BMS Interface
5
or 1x Mxp-554 ipGateway and up to 2x Mxp-539 Mimic Interface Modules
OR
1x PSE Module (Mxs-049, Mxs-050 or Mxs-051) and
Up to 4x Mxp-539 Mimic Interface Modules (Up to 192 LED and up to 64 Switches)
5
Mxp-020 and Mxp-045 modules can also be fitted in this one location. An additional Mxs-027 can be also be fitted to provide a further 100
LED outputs.
PSE
MXP-539
MXP-510/MXP-554
or Mxp-020/045
MXP-539
MXP-539
MXP-539
Mxs-027
LED Extender
Chassis Plate
Order separately
AC Terminal Block
and cable (supplied
with PSU module)
Earth Stud
Cable tie anchor
points for DC
power wiring
Cable clip positions
This manual suits for next models
4
Table of contents
Other Advanced Control Panel manuals
Advanced
Advanced ExGo Series User manual
Advanced
Advanced MxPro4 Series User manual
Advanced
Advanced MxPro 5 Installation and operating instructions
Advanced
Advanced MxPro 4 4100S User manual
Advanced
Advanced Lux Intelligent LX-9400 User manual
Advanced
Advanced Quick Zone XL Guide

Advanced
Advanced MxPro4 Series User manual
Advanced
Advanced Mx Pro 4 User manual
Advanced
Advanced LIFELINE Px-100 User manual
Advanced
Advanced Ex-3001 User manual

