g
11
; This appliance meets the following
EC guidelines:
• 73/23/EWG of 19.02.1973 "Low voltage
directive", including Amendment
guideline 93/68/EWG
• 89/336/EWG vom 03.05.1989 "Electro
magnetic compatibility guidelines",
including Amendment Guideline
92/31/EWG
Technical Data
Mains voltage: 230/240 V
Power consumption: 600 W
Possible applications
The blender can be used for mixing a
wide variety of drinks, crushing ice,
reducing fruit and vegetables, whip-
ping cream, etc.
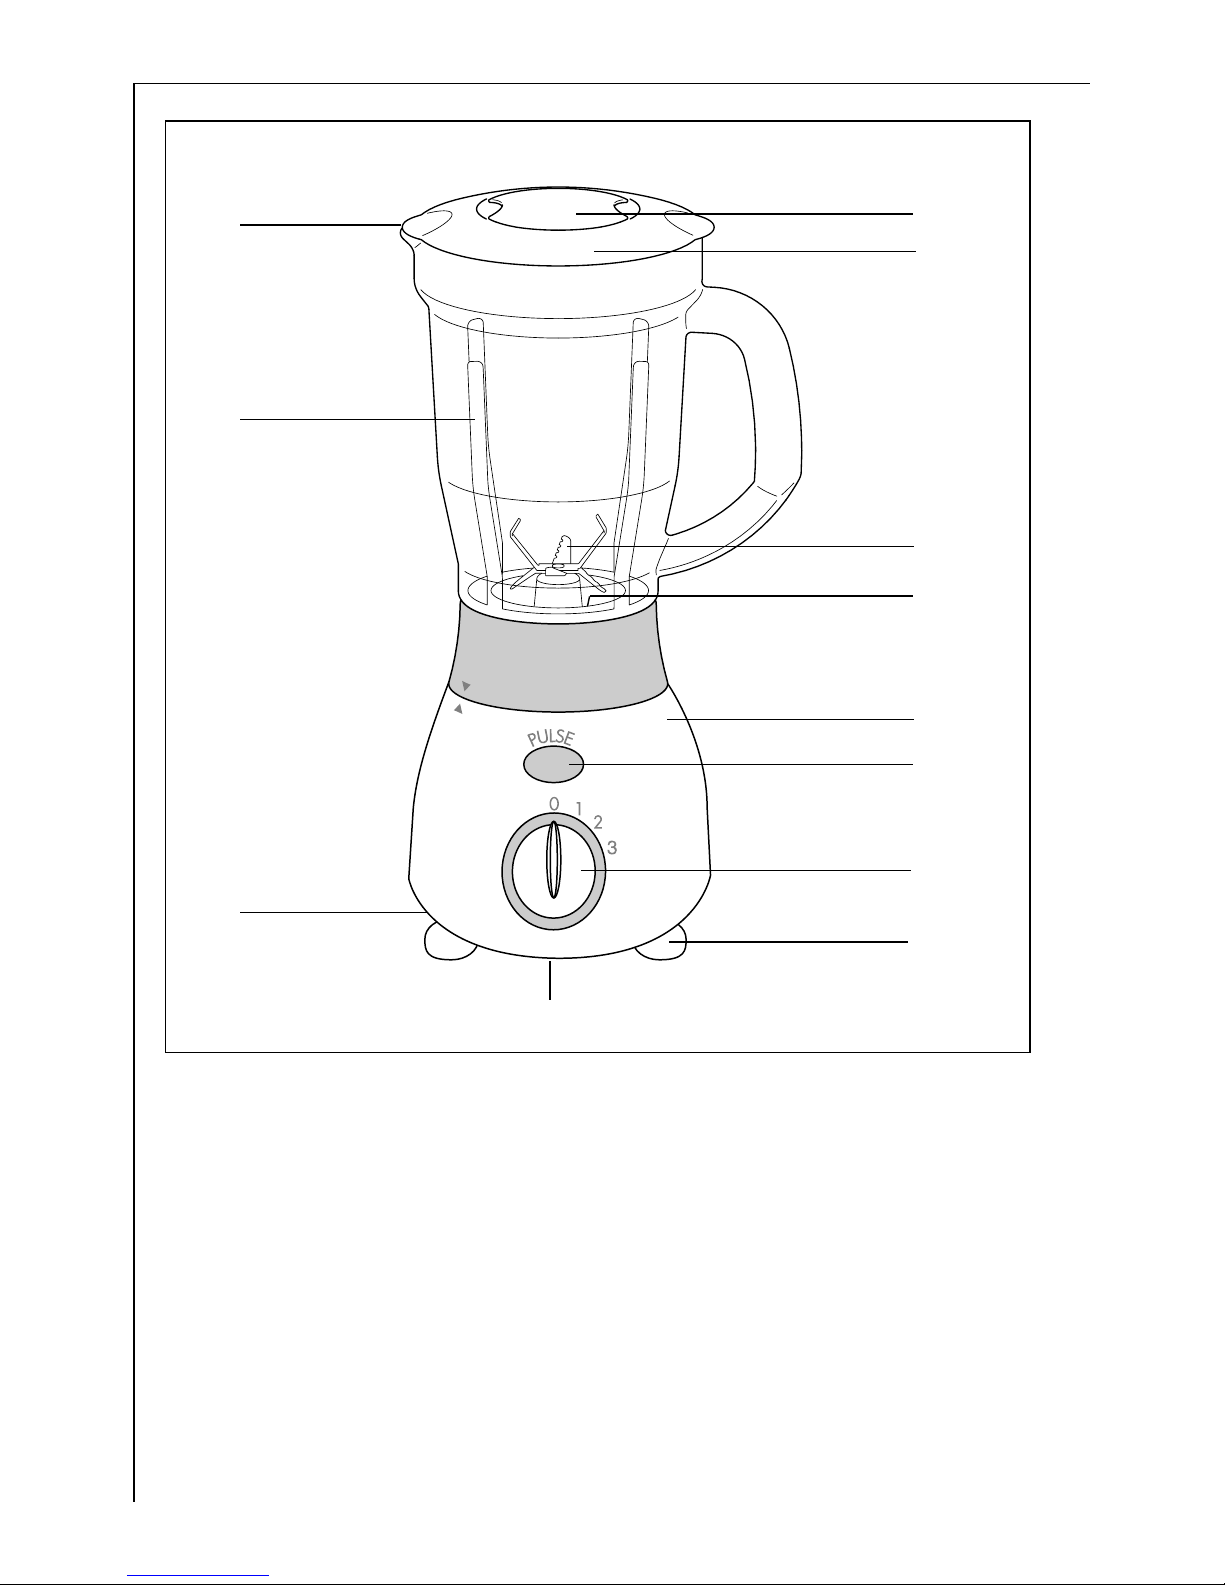
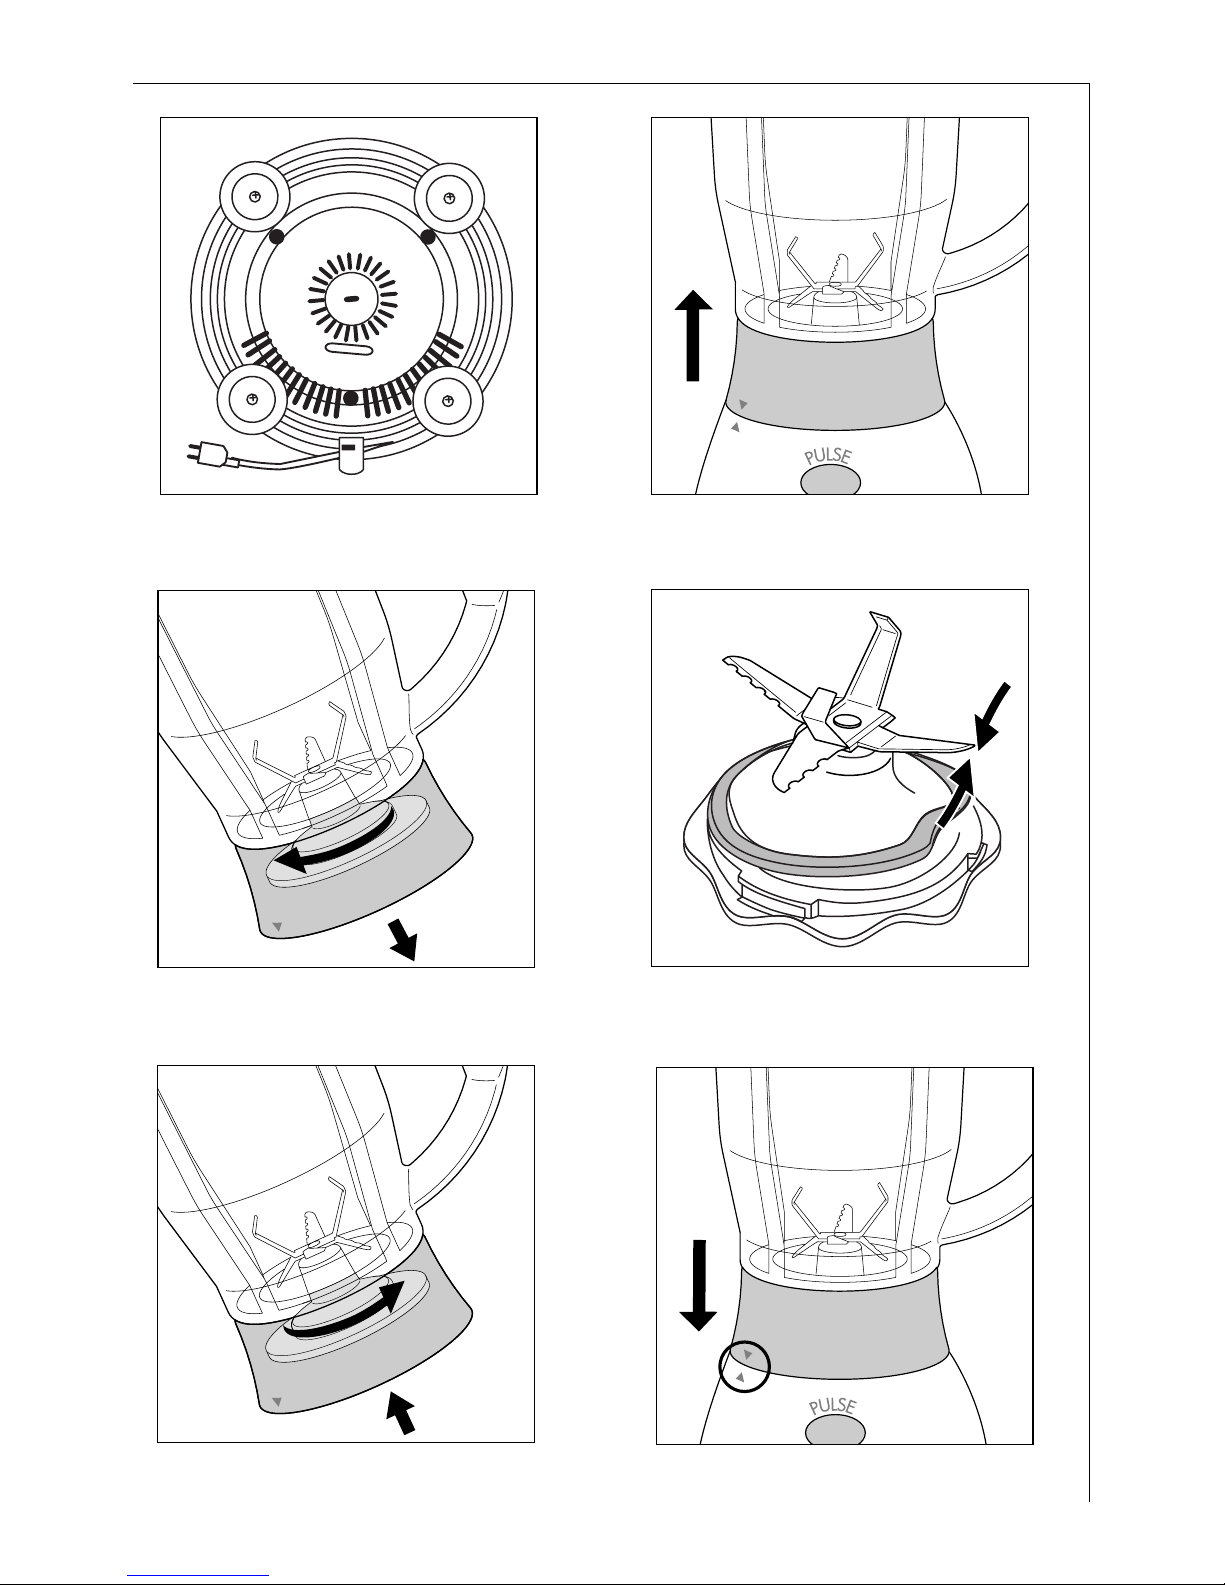
Cord storage drawer (Figure 2)
The appliance is fitted with a storage
drawer at the bottom. If the connec-
tion cord to the power outlet is too
long, it can be fed back into the drawer
until it is the required length.
Disassembling the Apliance
0Take the plug out of the socket.
0Remove the lid (Figure 1/D).
0Remove the tank (Figure 3).
0Turn the blade assembly counterclock-
wise and remove (Figure 4).
0You can now remove the rubber seal
(Figure 5).
1 Caution! the blade assembly is very
sharp. It can cause injury if handled
incorrectly! The rubber seal can easily
be irreparably damaged by the blade
assembly.
Caution! Do not use force when taking
the blade assembly out of the blender,
as this might cause damage. If neces-
sary, tilt it slightly when removing.
Assembling the Blender
0Place the rubber seal on the blade
assembly (Figure 5).
0Insert the blade assembly into the tank
from the bottom. Turn it clockwise to
fasten it (Figure 6).Caution! Handle
carefully!
0Seat the tank on the motor casing,
ensuring that the two arrows are in
alignment with one another (Figure 7).
0Set the lid on the tank.
3 The blender will not operate unless the
two arrows are correctly aligned with
one another (Figure 7). Refer to "Safety
System“.
0Insert the filler cup (Figure 1/C), and
lock it in.
Operating the Blender
3 Place the blender on a level, dry sur-
face.
0Open the lid (Figure 1/D) and put all
the required ingredients in the tank.
Important! Do not exceed the maxi-
mum capacity of 1.5 litres.
3 You can add other ingredients through
the filler hole while the blender is run-
ning. You can use the filler cup in the
lid to do this (Figure 1/C). Close the
filler hole immediately after, to avoid
splashing.
0Start the blender by turning the selec-
tor (Figure 1/J) to the right, or by
pressing the Pulse Button (Figure 1/H).
3 We recommend starting with blender
Speed 1, then progressing to Speed 2.
To crush ice, select Speed 3. The Pulse
Button runs the blender at full speed.
0After mixing, first remove the tank
(Figure 3), before taking off the lid.
1 Do not let the blender run for more
than 3 minutes at a time. After run-
ning for 3 minutes, the blender should
be left to cool for at least 10 minutes.