manuals.online logo
Brands
  1. Home
  2. •
  3. Brands
  4. •
  5. aFe Power
  6. •
  7. Automobile Accessories
  8. •
  9. aFe Power Scorpion 79-21005L User manual

aFe Power Scorpion 79-21005L User manual

advanced FLOW engineering
Instruction Manual P/N: 79-21005L
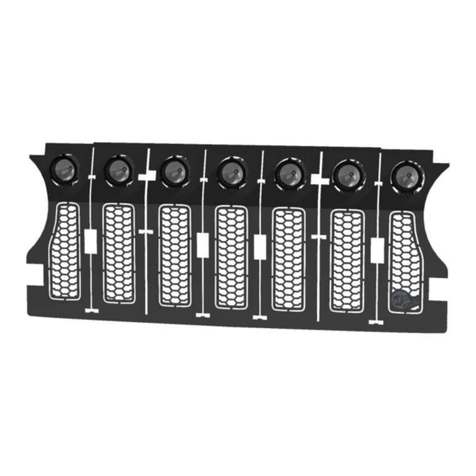
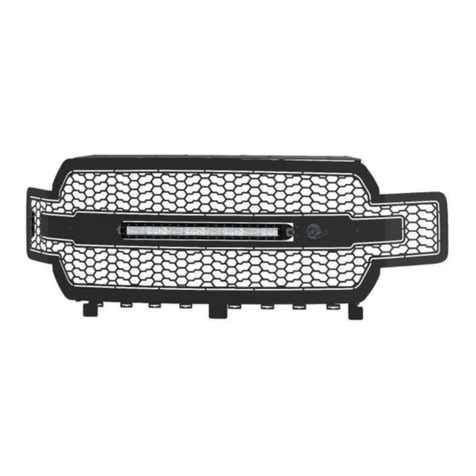
Scorpion Grille with FFC
Make: Ford Model: F-150 Year: 2018-2020
1
•Please read the entire instruction before proceeding.
•Ensure all components listed are present.
•Ensure you have all necessary tools before proceeding.
•Disconnect the negative battery terminal before proceeding.
•If you are missing any of the components, call customer support 951 493 7100
Label
Qty.
Description
A
1
aFe Scorpion Grille
B
5
Bolt, M6 x 1.0mm x 25mm Hex
C
7
Washer, Flat #10
D
5
Clip nut, M6
E
2
Screw, #10-32 x 5/8” Button Head
F
5
Lock nut, #10-32 Nylon
G
2
Lock nut, 1/4”-20 Nylon
H
2
Washer, 1/4" Flat
I
3
Washer, 3/16” x 1 SS Fender (black)
J
1
aFe Logo Back Plate
K
6
Screw, #10-32 x 1/2” Button Head (black)
L
6
Nut, #10-32 Flange SS
M
1
Clamp, Cable 5/16” (black)
N
2
Bracket, LED #1
O
1
Power Harness
P
15
Ties, Cable
Q
1
20” Single Row LED
•Applications models vary. We recommend verifying fitment before beginning installation process.
•Images featured in the instruction documents may not always exactly match your grille.
2
3
Note: Before you begin, use “Painters Tape” to apply a protective guard around the work
areas (fender and bumper valance). This will help protect the paint and finish of your vehicle.
1. Disconnect the negative battery terminal.
2. Locate (12) plastic clips on top of plastic shroud. Carefully pry the pins out to remove and
then set aside. Save all parts for reinstallation.
3. Remove the plastic shroud. Set it aside for reinstallation.
4
4. Remove the four (4) bolts that attach the factory grille assembly to the core support. Save
for reinstallation.
5. Located near the hood latch, disconnect the two (2) electrical connectors and the Forward-
Facing Camera (FFC) washer hose connection.
5
6. If equipped, disconnect the wheel arch moldings. Pull on the wheel arch moldings carefully
until it comes off the two bottom tabs. Be careful not to break them.
7. Starting on the passenger side, pull on the plastic bumper cap fascia till it disconnects from
the fender. After the passenger side is disconnected, move to the driver’s side and
disconnect it from the fender on that side. When both sides are disconnected, pull on the
plastic bumper cap fascia until it disconnects from the grille and carefully remove it.
6
8. Remove the one (1) bolt located on each side of the grille. Save for reinstallation.
7
Note: To prevent scratching painted parts use protective covering between the grille and a
flat surface.
9. Disconnect the clips (located near the headlights) behind the grille by pulling gently.
10. Remove the grille and active shutter assembly from the truck.
8
11. Remove the eight (8) push pins and remove the plastic lower shroud.
9
12. Disconnect the electrical connector from the FFC and the FFC washer water hose.
10
13. Disconnect the five (5) clips connecting the active shutter grille to the factory grille.
14. Remove the active grille shutters from the factory grill and set it to the side. Save for
reinstallation.
11
Note: Please read the next instruction carefully prior to performing the step.
15. Pull the FFC washer nozzle out of the factory grille. It is spring loaded and will be a little
difficult to pull out. You will need to find a way to keep the washer nozzle out so that you
can take the trim piece off. With the washer nozzle out, carefully remove the trim piece
from the end of the washer nozzle. Save for reinstallation.
12
16. Remove the FFC and the FFC washer assembly from the factory grille.
17. Set the factory grille aside.
13
Note: To prevent scratching the aFe Scorpion Grille while preforming assembly, use a
protective covering between the grille and a flat surface.
18. Remove the supplied aFe Scorpion grille from the box and place it on a flat surface for
assembly.
19. Remove the FFC mounting bracket from the aFe Scorpion grille. Save the hardware for
reinstallation.
14
20. Install the FFC assembly to the FFC mounting bracket with the two (2) supplied #10-32 x
5/8” button head screws, two (2) supplied #10 flat washers, and two (2) supplied #10-32
nylon lock nuts.
Note: The washer nozzle trim piece will sit flat on the bracket when it is oriented correctly.
21. Install the FFC washer trim piece (removed in Step 15) back onto the washer nozzle.
15
22. Reinstall the FFC mounting bracket onto the aFe Scorpion grille using the hardware
removed in Step 19. Before tightening, make sure to center the camera and the washer.
16
23. Remove and discard the two (2) nuts from the supplied 20” single row LED light.
17
Note: Please read the instruction below prior to installation.
24. Locate the drilled hole furthest to the driver’s side. Install one (1) supplied #10-32 x 1/2”
button head screw (black) thru the front of the aFe Scorpion grille. Turn the aFe Scorpion
grille over and install the aFe logo back plate onto the #10-32 x 1/2” button head screw
(black). Install one (1) supplied #10-32 SS flange nut onto the #10-32 x 1/2” button head
screw (black). Snug the #10-32 flange nut up but do not tighten.
25. Install the supplied 20” single row LED light through the front of the aFe Scorpion grille.
While holding the 20” single row LED light, install two (2) supplied #1 LED bar brackets
(bracket feet point away from each other) from the back of the aFe Scorpion grille and onto
the studs on the 20” single row LED light. Install the two (2) supplied 1/4" washers (black)
and two (2) supplied 1/4"-20 nylon lock nuts (black) onto the light. Do not tighten. From the
front, install four (4) #10-32 x 1/2” button head screws (black) through the aFe Scorpion
grille. Turn the aFe Scorpion grille around and make sure that the driver’s side #10-32 x 1/2”
button head screws (black) pass thru the aFe logo back plate and thru the #1 LED bracket.
The passenger side runs thru the #1 LED bracket only. Install four (4) #10-32 SS flange nut
onto the #10-32 x 1/2” button head screws (black). Tighten the #1 LED brackets first. Then
tighten the 20” single row LED light while centering it.
18
Note: Please read the instruction below prior to installation.
26. Install one (1) supplied cable clamp 5/16” (black) around the wiring for the 20” single row
LED light.
27. Locate the drilled hole furthest to the passenger side. Install one (1) #10-32 x 1/2” button
head screw (black) through the aFe Scorpion grille. Turn the aFe Scorpion grille around and
place the cable clamp installed in Step 26 onto the #10-32 x 1/2” button head screw (black).
Install one (1) #10-32 SS flange nut onto the #10-32 x 1/2” button head screw (black) and
tighten.
19
28. Place the aFe Scorpion grille to the side and place the active shutter grille assembly onto the
work surface.
29. Install the five (5) M6 clip nuts to the top of the active shutter grille.

Other aFe Power Automobile Accessories manuals

aFe Power MOMENTUM GT 50-70034S User manual

aFe Power

aFe Power MOMENTUM GT 50-70034S User manual

aFe Power SCORPION 79-21008L User manual

aFe Power

aFe Power SCORPION 79-21008L User manual

aFe Power 46-70049 User manual

aFe Power

aFe Power 46-70049 User manual

aFe Power SCORCHER 77-44008 User manual

aFe Power

aFe Power SCORCHER 77-44008 User manual

aFe Power Magnum FORCE 54-13035D User manual

aFe Power

aFe Power Magnum FORCE 54-13035D User manual

aFe Power 77-43023 User manual

aFe Power

aFe Power 77-43023 User manual

aFe Power 77-83046 User manual

aFe Power

aFe Power 77-83046 User manual
aFe Power 46-70022 User manual

aFe Power

aFe Power 46-70022 User manual

aFe Power 50-70007D User manual

aFe Power

aFe Power 50-70007D User manual

aFe Power Magnum FORCE User manual

aFe Power

aFe Power Magnum FORCE User manual

aFe Power 77-86318 User manual

aFe Power

aFe Power 77-86318 User manual

aFe Power 77-83028 User manual

aFe Power

aFe Power 77-83028 User manual

aFe Power 51-82722 User manual

aFe Power

aFe Power 51-82722 User manual

aFe Power 50-70009S User manual

aFe Power

aFe Power 50-70009S User manual
aFe Power takeda 56-70043D User manual

aFe Power

aFe Power takeda 56-70043D User manual

aFe Power 54-10468 User manual

aFe Power

aFe Power 54-10468 User manual

aFe Power 51-74201 User manual

aFe Power

aFe Power 51-74201 User manual

aFe Power 52-10002D User manual

aFe Power

aFe Power 52-10002D User manual
aFe Power Quantum 2500 User manual

aFe Power

aFe Power Quantum 2500 User manual

aFe Power 77-47001 User manual

aFe Power

aFe Power 77-47001 User manual

aFe Power 440-401006-N User manual

aFe Power

aFe Power 440-401006-N User manual

aFe Power 46-39102 User manual

aFe Power

aFe Power 46-39102 User manual

aFe Power SCORPION 79-21004L User manual

aFe Power

aFe Power SCORPION 79-21004L User manual

aFe Power 52-10001D User manual

aFe Power

aFe Power 52-10001D User manual

Popular Automobile Accessories manuals by other brands

Dectane MODULITE Instruction

Dectane

Dectane MODULITE Instruction

Kia E8300-4D000 manual

Kia

Kia E8300-4D000 manual

Car-Interface.com c.LOGiC lite-Interface manual

Car-Interface.com

Car-Interface.com c.LOGiC lite-Interface manual

HAUL MASTER 94564 Assembly and operating instructions

HAUL MASTER

HAUL MASTER 94564 Assembly and operating instructions

Yakima K893 instructions

Yakima

Yakima K893 instructions

ATD Tools SPI-77101 user manual

ATD Tools

ATD Tools SPI-77101 user manual

Whispbar K538W Fitting instructions

Whispbar

Whispbar K538W Fitting instructions

Dhollandia DH-RB 05.02 Series user manual

Dhollandia

Dhollandia DH-RB 05.02 Series user manual

Polaris 2880325 quick guide

Polaris

Polaris 2880325 quick guide

Flash Cover MN012 installation manual

Flash Cover

Flash Cover MN012 installation manual

Sunit fd user guide

Sunit

Sunit fd user guide

Holley Terminator Stealth EFI installation manual

Holley

Holley Terminator Stealth EFI installation manual

Thule 157 Mounting & installation

Thule

Thule 157 Mounting & installation

DMF RW-1016 Parts & service manual

DMF

DMF RW-1016 Parts & service manual

Cruz Evo Rack Module E23 Assembly instructions

Cruz

Cruz Evo Rack Module E23 Assembly instructions

Safe Fleet Prime Design FBM-1029 quick start guide

Safe Fleet

Safe Fleet Prime Design FBM-1029 quick start guide

Menabo MARIUS TYPHOON Fitting instructions

Menabo

Menabo MARIUS TYPHOON Fitting instructions

iDataLink maestro Rr install guide

iDataLink

iDataLink maestro Rr install guide

manuals.online logo
manuals.online logoBrands
  • About & Mission
  • Contact us
  • Privacy Policy
  • Terms and Conditions

Copyright 2025 Manuals.Online. All Rights Reserved.