manuals.online logo
Brands
  1. Home
  2. •
  3. Brands
  4. •
  5. Agora Models
  6. •
  7. Motorized Toy Car
  8. •
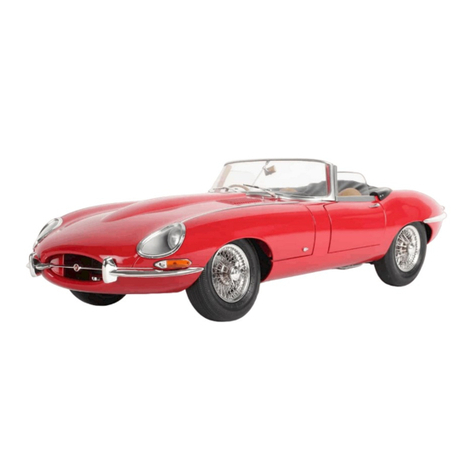
  9. Agora Models JAGUAR E-TYPE Pack 01 Manual

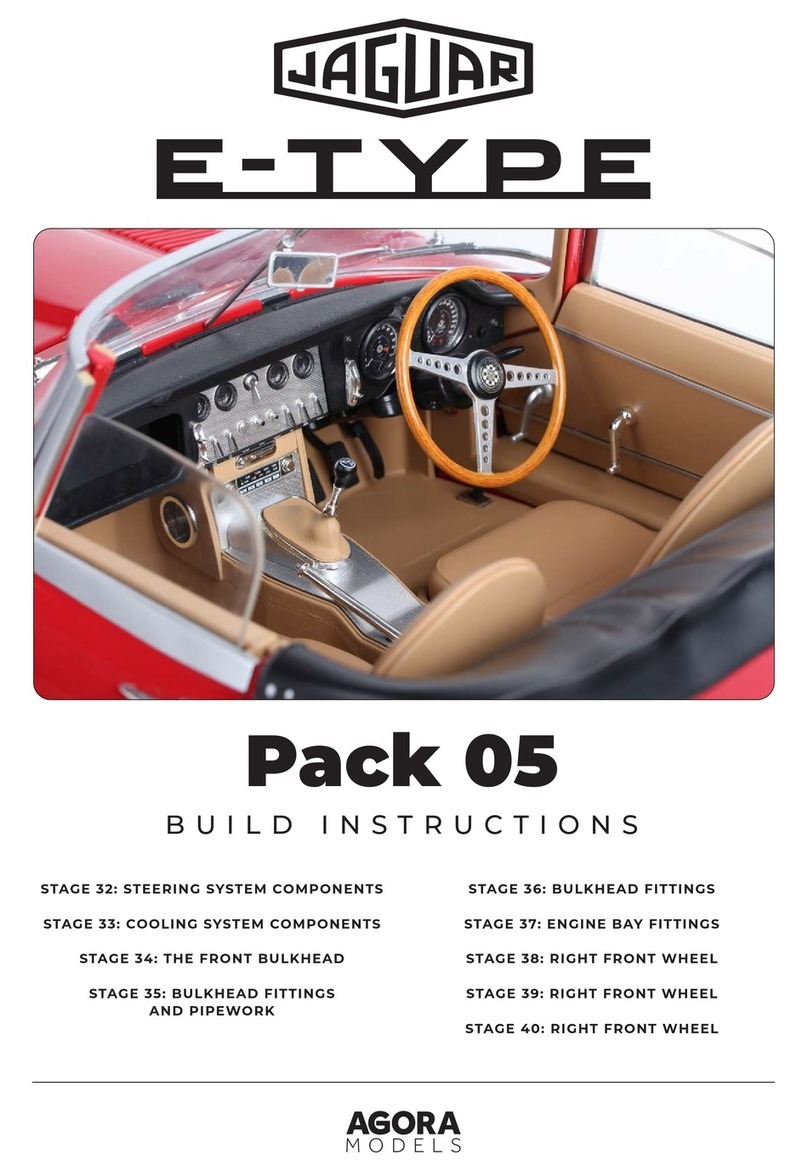
Agora Models JAGUAR E-TYPE Pack 01 Manual

STAGE 01: ASSEMBLING THE CYLINDER HEAD
AND CAM COVERS
STAGE 02: ASSEMBLING THE CARBURETTOR
STAGE 03: ASSEMBLING THE CARBURETTOR 2
STAGE 04: ASSEMBLING THE ENGINE BLOCK 1
STAGE 05: ASSEMBLING THE ENGINE BLOCK 2
STAGE 06: ASSEMBLING THE FAN BELT
AND ELECTRICS
STAGE 07: ASSEMBLING THE EXHAUSTS
AND IGNITION
Pack 01
BUILD INSTRUCTIONS
AGORAMODELS JAGUAR E-TYPE
2
Spare screws are included with each part. Occasionally, you may be instructed to keep spare or
unused screws for a later stage. Keep these spares in a safe place and label them correctly.
Please make sure you don’t mix up the screws. They look quite similar, but the threads do vary
slightly. Using the wrong screws may damage the parts.
When securing parts together using multiple screws, fit each screw loosely to ensure all the
parts are correctly aligned before gently tightening them firmly, but not overtight, in the order
in which you placed them.
The screwdriver can be magnetized by stroking it with a magnet (fridge magnet, etc.) enabling
it to hold the screws and make assembly easier.
If a screw is tight going into a metal part, do not force it as you may shear the head off. Remove
it and put a tiny smear of Vaseline, soap or light oil on the thread. That will lubricate it and make
it easier to drive home.
During the course of this build, you will receive many pieces that you will assemble immediately
– following the instructions in the corresponding stage – and other pieces that you should store
safely to one side, for use in future assembly stages.
Left and Right! When building your Jaguar, the left or right hand side refers to each side as you
are sitting in the car.
WARNING: Some parts are assembled using magnets. These magnets can cause serious injury
if they are swallowed. Keep away from children. If you suspect a magnet has been swallowed,
seek medical help straight away.
Advice from the experts
!
AGORAMODELS JAGUAR E-TYPE
3
Name
Cylinder head
Steering wheel
Oil cap
Horn button
Inlet cam cover
Inlet camshaft
Exhaust camshaft
Exhaust cam cover
Screws type AG02 x 2
STAGE 01 PARTS LIST
In this first stage of building
the Jaguar E-type, you will
start assembling the top of the
remarkable 3.8 litre XK engine and
the steeering wheel.
Stage 01: Assembling the Cylinder Head
and Cam Covers
Cylinder Head
Horn Button
Oil Cap
Steering Wheel
Screws AG02 x2
Exhaust Cam Cover (L)
Exhaust Camshaft
Inlet Camshaft
Inlet Cam Cover (R)
AGORAMODELS JAGUAR E-TYPE
4
STEP 1
1
3
2
ASSEMBLE THE EXHAUST CAM COVER
Align the locating tab on the back of the oil cap with the shaped hole
in the exhaust cam cover.
Secure in place from the reverse side using an AG02 screw.
Place into position, checking that the Jaguar logo is horizontal as
shown.
Stage 01: Assembling the Cylinder Head
and Cam Covers
1 x AG02
AGORAMODELS JAGUAR E-TYPE
5
STEP 2
1
3
2
4
FIX THE INLET CAMSHAFT TO THE CYLINDER HEAD
The inlet camshaft is different to the exhaust camshaft so check you
have the correct part. Align the three pins on the inlet camshaft with
the corresponding holes on the cylinder head. The projections on the
upper surface should angle outwards.
FIX THE EXHAUST CAMSHAFT TO THE CYLINDER HEAD
Align the three pins on the exhaust camshaft to the opposite side of
the cylinder head so that the projections on the upper surface angle
outwards.
Fit in place.
Correct positioning of the camshafts.
Stage 01: Assembling the Cylinder Head
and Cam Covers
AGORAMODELS JAGUAR E-TYPE
6
5
7
6
8
FIX THE INLET CAM COVER TO THE CYLINDER HEAD
Align the two holes on the inlet cam cover with the two pins
projecting from the cam shaft.
FIX THE EXHAUST CAM COVER TO THE CYLINDER
HEAD
Align the two holes on the exhaust cam cover with the two pins
projecting from the cam shaft.
Press the cam cover firmly into place.
Press firmly into place.
Stage 01: Assembling the Cylinder Head
and Cam Covers
AGORAMODELS JAGUAR E-TYPE
7
STEP 3
1 2
FIX THE HORN BUTTON TO THE STEERING WHEEL
Align the pins on the underside of the horn button with the
corresponding holes on the steering wheel.
Press firmly into place, checking that the logo is correctly centred as
shown.
STAGE COMPLETE
Stage 01: Assembling the Cylinder Head
and Cam Covers
AGORAMODELS JAGUAR E-TYPE
8
Name
Manifold upper half
Throttle linkage
Shaft
Suction chambers x3
Screws type AG02 x3
STAGE 02 PARTS LIST
In this second stage you’ll continue
to build the engine by starting to
assemble the carburettor.
Manifold Upper Half
Screws AG02 x2
Suction Chambers x3
Shaft
Throttle Linkage
Stage 02: Assembling the Carburettor
AGORAMODELS JAGUAR E-TYPE
9
STEP 1
1
3
2
4
ATTACH THE THROTTLE LINKAGE TO THE MANIFOLD
Align the three pins on the throttle linkage with the corresponding
holes on the manifold as shown, then fit into place.
This shows how your assembly should look.
Secure from the reverse side using 2 x AG02 screws.
Take the shaft and note that one end has ridges (see inset). Feed the
unridged end through the holes in the throttle linkage.
Stage 02: Assembling the Carburettor
2 x AG02
AGORAMODELS JAGUAR E-TYPE
10
5
7
6
Push the shaft through the holes as far as it will go.
This shows how your assembly should look.
Using pliers, squeeze the ridged end of the shaft through the first
small hole to anchor the shaft into position.
The three suction chambers will be used in the next stage. Keep them
in a safe place until required. It is also a good idea to label and keep
any unused screws in case you need spares at a later stage of the
build!
STAGE COMPLETE
Stage 02: Assembling the Carburettor
AGORAMODELS JAGUAR E-TYPE
11
Name
Manifold lower half
Air cleaner
Petrol feed pipe
Air balance pipe
Screws type AG02 x7
Screws type AG03 x3
STAGE 03 PARTS LIST
In this third stage you’ll fit the rest
of the carburettor.
Manifold Lower Half
Stage 03: Assembling the Carburettor 2
Air Cleaner
Petrol Feed Pipe
Air Balance Pipe
Screws AG02 x7 Screws AG03 x3
AGORAMODELS JAGUAR E-TYPE
12
STEP 1
1
3
2
4
ASSEMBLE THE CARBURETTOR
Align the fixings on the manifold lower half with the assembly from
the previous stage.
Take one of the suction chambers from the previous stage and press it
into the key-shaped hole on the carburettor.
Fix the two parts together using 2 x AG03 screws.
Fix in place from the reverse side using an AG02 screw.
Stage 03: Assembling the Carburettor 2
2 x AG03
1 x AG02
AGORAMODELS JAGUAR E-TYPE
13
5
7
6
8
Repeat the process shown in 3 and 4 to fix the remaining two suction
chambers using two more AG02 screws.
This shows the air balance pipe correctly positioned.
Align the three lugs on the air balance pipe with the three holes on
the manifold and fit into position.
Fix into place from the reverse side using 3 x AG02 screws.
Stage 03: Assembling the Carburettor 2
3 x AG02
AGORAMODELS JAGUAR E-TYPE
14
9
11
10
12
Align the petrol feed pipe with the assembly as shown. There are three
fixing points – see circled in the next picture.
Align the air cleaner with the circular mounting on the manifold,
noting the two fixing pins.
Using tweezers, push the hole on the left hand side of the pipe over
the projecting pin on the lower float bowl (1). Connect the central hole
on the pipe to the pin on the central float bowl (2), and then connect
the remaining union to the pin on the third float bowl at the right
hand side (3). Apply a drop of superglue if necessary.
Press firmly into place.
Stage 03: Assembling the Carburettor 2
3
1 2
AGORAMODELS JAGUAR E-TYPE
15
STAGE COMPLETE
Stage 03: Assembling the Carburettor 2
AGORAMODELS JAGUAR E-TYPE
16
Name
Engine block and clutch bellhousing (Right)
Distributor
Starter motor
Screws type AG03 x6
STAGE 04 PARTS LIST
In this fourth stage you will
assemble the engine block before
fitting the carburettor.
Engine block and clutch bellhousing (R)
Stage 04: Assembling the Engine Block 1
Screws AG03 x6
Starter motor
Distributor
AGORAMODELS JAGUAR E-TYPE
17
STEP 1
1
3
2
FIT THE STARTER MOTOR AND DISTRIBUTOR TO THE
ENGINE BLOCK
Align the key-shaped fixing on the starter motor with the
corresponding hole in the engine block.
Fix in place from the reverse side using an AG03 screw.
Press into place.
Stage 04: Assembling the Engine Block 1
1 x AG03
AGORAMODELS JAGUAR E-TYPE
18
4
1
5
2
Align the key-shaped fixing on the distributor with the corresponding
hole in the engine block.
ATTACH THE CARBURETOR ASSEMBLY TO THE ENGINE
BLOCK
Align the three lugs on the inlet manifold with the corresponding
holes in the engine block.
Press firmly into place. Secure from the underside using an AG03
screw.
Fix in place from the reverse side using 3 x AG03 screws.
STEP 2
Stage 04: Assembling the Engine Block 1
1 x AG03
3 x AG03
AGORAMODELS JAGUAR E-TYPE
19
STAGE COMPLETE
Stage 04: Assembling the Engine Block 1
AGORAMODELS JAGUAR E-TYPE
20
Name
Battery box
Filter head and hose
Engine block and clutch housing (left)
Screws type AG03 x 3
STAGE 05 PARTS LIST
You’ll now assemble the other
side of the engine block and fit
the battery box to run the model’s
electrics.
Battery box
Stage 05: Assembling the Engine Block 2
Screws AG03 x3
Filter head and hose
Engine block and clutch housing (L)

Other Agora Models Motorized Toy Car manuals

Agora Models Pack 07 Manual

Agora Models

Agora Models Pack 07 Manual

Agora Models LONDON TRANSPORT ROUTEMASTER BUS Manual

Agora Models

Agora Models LONDON TRANSPORT ROUTEMASTER BUS Manual

Agora Models JAGUAR E-TYPE Manual

Agora Models

Agora Models JAGUAR E-TYPE Manual

Agora Models 1965 SHELBY COBRA 427 S/C Manual

Agora Models

Agora Models 1965 SHELBY COBRA 427 S/C Manual

Agora Models STEVE MCQUEEN'S ICONIC PORSCHE 917 KH Pack... Manual

Agora Models

Agora Models STEVE MCQUEEN'S ICONIC PORSCHE 917 KH Pack... Manual

Agora Models MERCEDES-BENZ 300SL GULLWING 1955 Pack 02 Manual

Agora Models

Agora Models MERCEDES-BENZ 300SL GULLWING 1955 Pack 02 Manual

Agora Models FDNY FIRE TRUCK TOWER LADDER 9 Manual

Agora Models

Agora Models FDNY FIRE TRUCK TOWER LADDER 9 Manual

Agora Models LAMBORGHINI MIURA Pack 12 Manual

Agora Models

Agora Models LAMBORGHINI MIURA Pack 12 Manual

Agora Models MERSEDES-BENZ 300SL GULLWING 1955 Pack 03 Manual

Agora Models

Agora Models MERSEDES-BENZ 300SL GULLWING 1955 Pack 03 Manual

Agora Models SHELBY COBRA 1965 Manual

Agora Models

Agora Models SHELBY COBRA 1965 Manual

Agora Models STEVE MCQUEEN'S ICONIC PORSCHE 917KH Pack 02 Manual

Agora Models

Agora Models STEVE MCQUEEN'S ICONIC PORSCHE 917KH Pack 02 Manual

Agora Models SHELBY COBRA 427 SEMI-COMPETITION 1965 Manual

Agora Models

Agora Models SHELBY COBRA 427 SEMI-COMPETITION 1965 Manual

Agora Models FDNY FIRE TRUCK TOWER LADDER 9 Manual

Agora Models

Agora Models FDNY FIRE TRUCK TOWER LADDER 9 Manual

Agora Models Steve McQueen's Iconic Porsche 917KH Pack 01 Manual

Agora Models

Agora Models Steve McQueen's Iconic Porsche 917KH Pack 01 Manual

Agora Models JAGUAR E-TYPE Manual

Agora Models

Agora Models JAGUAR E-TYPE Manual

Agora Models RM 857 Manual

Agora Models

Agora Models RM 857 Manual
Agora Models JAGUAR E-TYPE Manual

Agora Models

Agora Models JAGUAR E-TYPE Manual

Agora Models SHELBY COBRA 427 SEMI-COMPETITION 1965 Manual

Agora Models

Agora Models SHELBY COBRA 427 SEMI-COMPETITION 1965 Manual

Agora Models Lamborghini MIURA Pack 11 Manual

Agora Models

Agora Models Lamborghini MIURA Pack 11 Manual

Agora Models STEVE MCQUEEN'S ICONIC PORSCHE 917KH Pack 10 Manual

Agora Models

Agora Models STEVE MCQUEEN'S ICONIC PORSCHE 917KH Pack 10 Manual

Agora Models Mercedes 300SL Gullwing 1955 Manual

Agora Models

Agora Models Mercedes 300SL Gullwing 1955 Manual

Agora Models LAMBORGHINI MIURA Pack 01 Manual
Agora Models

Agora Models LAMBORGHINI MIURA Pack 01 Manual

Agora Models Jaguar E-Type Pack 10 Manual

Agora Models

Agora Models Jaguar E-Type Pack 10 Manual

Agora Models MERCEDES-BENZ W196R Manual

Agora Models

Agora Models MERCEDES-BENZ W196R Manual

Popular Motorized Toy Car manuals by other brands

Jamara BMW M4 Coupe 2,4GHz instructions

Jamara

Jamara BMW M4 Coupe 2,4GHz instructions

Associated Electrics RC10B6.2 KIT Assembly manual

Associated Electrics

Associated Electrics RC10B6.2 KIT Assembly manual

Traxxas 68054-1 owner's manual

Traxxas

Traxxas 68054-1 owner's manual

Kogan KAMERSUVBKA user guide

Kogan

Kogan KAMERSUVBKA user guide

Crooza 266 Quad INSTRUCTIONS ON USE

Crooza

Crooza 266 Quad INSTRUCTIONS ON USE

WowWee Dragster quick start guide

WowWee

WowWee Dragster quick start guide

Atomic FFZV2 instruction manual

Atomic

Atomic FFZV2 instruction manual

Little Tikes COZY TRUCK 642319M Assembly instructions

Little Tikes

Little Tikes COZY TRUCK 642319M Assembly instructions

WRC GT4-1 instruction manual

WRC

WRC GT4-1 instruction manual

CyClone D4 instruction manual

CyClone

CyClone D4 instruction manual

Radio Shack Scorpion owner's manual

Radio Shack

Radio Shack Scorpion owner's manual

Associated Electrics 20500 user guide

Associated Electrics

Associated Electrics 20500 user guide

Tenth Technology Predator Assembly instructions

Tenth Technology

Tenth Technology Predator Assembly instructions

Baghera 926 Assembly instruction

Baghera

Baghera 926 Assembly instruction

motonica P81 RS instruction manual

motonica

motonica P81 RS instruction manual

LRP S18.MT instruction manual

LRP

LRP S18.MT instruction manual

Carrera RC Power Speedfighter Assembly and operating instructions

Carrera

Carrera RC Power Speedfighter Assembly and operating instructions

AUTEC Cartronic Shadow Striker instruction manual

AUTEC

AUTEC Cartronic Shadow Striker instruction manual

manuals.online logo
manuals.online logoBrands
  • About & Mission
  • Contact us
  • Privacy Policy
  • Terms and Conditions

Copyright 2025 Manuals.Online. All Rights Reserved.