manuals.online logo
Brands
  1. Home
  2. •
  3. Brands
  4. •
  5. Agora Models
  6. •
  7. Motorized Toy Car
  8. •
  9. Agora Models SHELBY COBRA 427 SEMI-COMPETITION 1965 Manual

Agora Models SHELBY COBRA 427 SEMI-COMPETITION 1965 Manual

1
AGORAMODELS SHELBY COBRA 427 S/C
STAGE 41: DASHBORD SWITCHES AND
STEERING ROD GUIDE
STAGE 42: DASHBOARD DIALS
AND SWITCH
STAGE 43: CENTER CONSOLE AND
LEFT FLOOR SECTION
STAGE 44: RIGHT FLOOR SECTION
AND FLOOR MATS
STAGE 45: COCKPIT REAR WALL
STAGE 46: GEAR LEVER,
HANDBRAKE AND U-BAR
STAGE 47: ACCELERATOR PEDAL & SWITCH,
BRAKE PEDAL & SWITCH, CLUTCH PEDAL,
FLOOR PLATE
STAGE 48: MOUNTING BOX
AND MAIN SWITCH
Pack 06 |Build Instructions
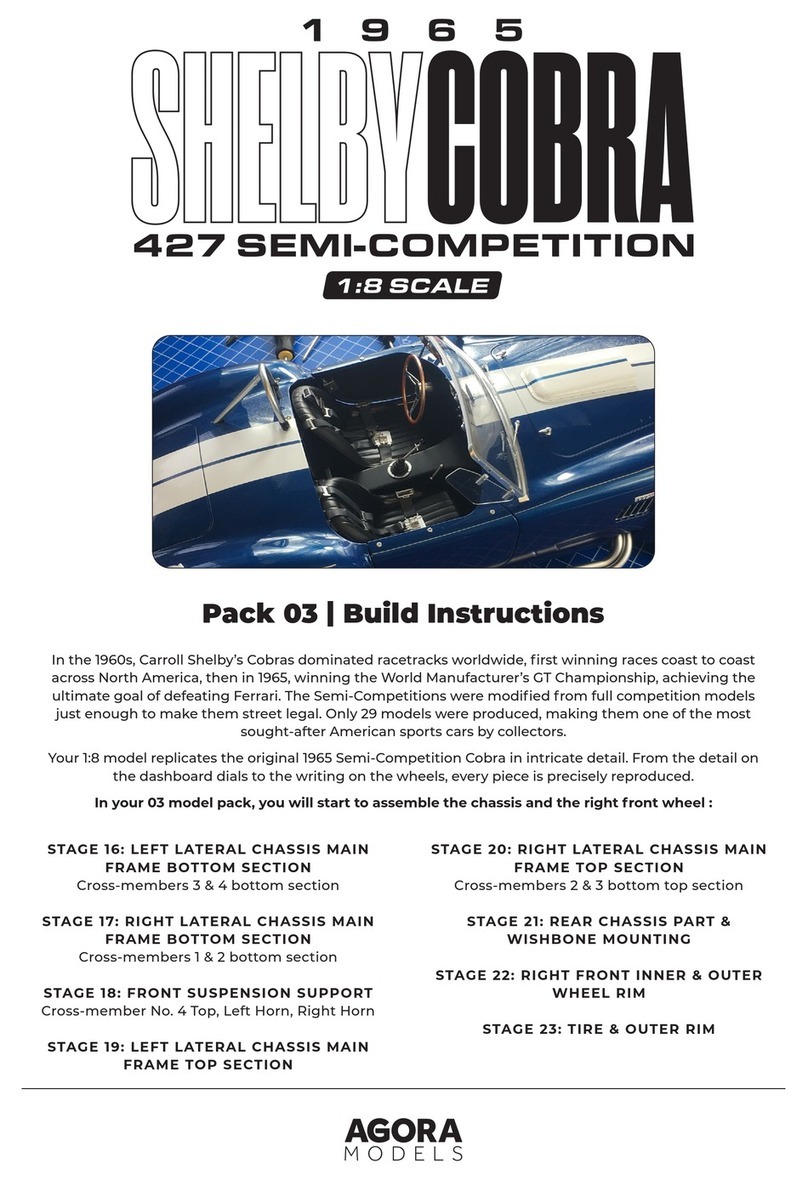
In the 1960s, Carroll Shelby’s Cobras dominated racetracks worldwide, first winning races coast to coast
across North America, then in 1965, winning the World Manufacturer’s GT Championship, achieving the
ultimate goal of defeating Ferrari. The Semi-Competitions were modified from full competition models
just enough to make them street legal. Only 29 models were produced, making them one of the most
sought-after American sports cars by collectors.
Your 1:8 model replicates the original 1965 Semi-Competition Cobra in intricate detail. From the detail on
the dashboard dials to the writing on the wheels, every piece is precisely reproduced.
In your sixth model pack, you will assemble:
2
AGORAMODELS SHELBY COBRA 427 S/C
Name Quantity
Dashboard Main Panel 1
Dashboard Button Line 1 1
Dashboard Button Line 2 1
Dashboard Button Line 3 1
Dashboard Plate 1 1
Dashboard Plate 2 1
Dashboard Plate 3 1
Steering Rod Guide 1
Screw TYPE OP08 4
STAGE 41 PARTS LIST
In this first stage of building the
Shelby Cobra, you will assemble the
dashboard.
Stage 41: Dashbord Switches and Steering Rod Guide
Dashboard Main Panel
Dashboard Button Line 2 Dashboard Plate 1 Dashboard Plate 3
Dashboard Button Line 1
Dashboard Button Line 3
Dashboard Plate 2
Steering Rod Guide
Screws
3
AGORAMODELS SHELBY COBRA 427 S/C
STEP 1
1
2
3
4
ATTACH THE DASHBOARD PLATES AND
STEERING ROD GUIDE
With the reverse side of the Dashboard Main
Panel facing you, place the Dashboard Plate 1
and the Dashboard Plate 2 into position on their
correspnding lugs. These are a push fit and do not
screw on. Both plates will only fit one way round.
Stage 41: Dashbord Switches and Steering Rod Guide
4
AGORAMODELS SHELBY COBRA 427 S/C
5
6
7
8
9
CONTINUED...
Turn the Main Panel over so the front side is facing
you and place the Dashboard Plate 3 into position.
Fix from the reverse side using a TYPE OP08
screw.
Still on the reverse side, place the Steering Rod
Guide into position and fix in place with 2 x TYPE
OP08 scxrews. The Steering Rod will only fit one
way round.
Stage 41: Dashbord Switches and Steering Rod Guide
1 x OP08
2 x OP08
5
AGORAMODELS SHELBY COBRA 427 S/C
STEP 2
1 2 3
4 5
6
ATTACH THE DASHBOARD SWITCHES
Take the Dashboard Button Line 1 and remove the button shown.
Push into position on the Main Panel as shown in picture 3. Repeat
this process, removing buttons from the two lines and positioning
them where shown. Some of the buttons have a D-shaped peg to
ensure they are aligned properly. Note: some spare buttons have
been supplied.
7
89
10 11
Stage 41: Dashbord Switches and Steering Rod Guide
6
AGORAMODELS SHELBY COBRA 427 S/C
13
14 15
16 17
18
12
19
20 21
22 23
Stage 41: Dashbord Switches and Steering Rod Guide
7
AGORAMODELS SHELBY COBRA 427 S/C
Stage 41 complete!
Stage 41: Dashbord Switches and Steering Rod Guide
8
AGORAMODELS SHELBY COBRA 427 S/C
Name Quantity
Dial Board 1
Push Button Switch 1
Chrome Dial Surround 1
Dial Lenses Board 1
Dial Holding Plate 1
Dial Stickers 1
Screws TYPE OP08 4
STAGE 42 PARTS LIST
In stage 42, you will assemble the
dashboard dials.
Stage 42: Dashbord Dials and Switch
Dial Board
Chrome Dial Surround
Dial Holding Plate
Push Button Switch
Dial Lenses Board
Dial Stickers
Screws
9
AGORAMODELS SHELBY COBRA 427 S/C
STEP 1
1
2
3
4
ASSEMBLE THE DASHBOARD DIALS
Peel the dashboard Dial Stickers from the sticker
sheet and position them on the Dial Board in the
positions shown.
Mount the Lenses Board onto the Chrome
surround, pushing them together.
AB
FF
GG
Stage 42: Dashbord Dials and Switch
D EC A
B
C
D
E
ADVICE FROM THE EXPERTS
Use a pair of tweezers to apply the
stickers accurately.
!
10
AGORAMODELS SHELBY COBRA 427 S/C
5
6
7
8
9
CONTINUED...
Then sandwich the lenses in place by placing the
Dial Board on top, squeezing them together to fix.
Next, take the Dial Holding Plate (picture 7) and
position the Switch with cable 03 as shown.
Lower the Dial Lenses/Board assembly onto the
Holding Plate and squeeze together.
Stage 42: Dashbord Dials and Switch
11
AGORAMODELS SHELBY COBRA 427 S/C
11
12
13
14
Stage 42: Dashbord Dials and Switch
CONTINUED...
Then align the chrome plate on the Dial Lenses
assembly with the Main Panel from the previous
stage. The central tab on the Main Panel extends
into the notch on the dials (arrows - picture 12).
Fix everything together from the reverse side of
the Main Panel using 3 x TYPE OP08 screws.
Press the light switch to make sure you can feel
the click of the button. If not, check that you have
installed the switch correctly.
3 x OP08
12
AGORAMODELS SHELBY COBRA 427 S/C
Stage 42 complete!
Stage 42: Dashbord Dials and Horn Switch
13
AGORAMODELS SHELBY COBRA 427 S/C
Name Quantity
Center Console 1
Left Floor Part 1
Electrical Wire Holder 1
Screws TYPE OP08 5
STAGE 43 PARTS LIST
Now the dashboard is complete,
you will start to assemble the floor
sections.
Stage 43: Center Console and Left Floor Section
Center Console
Electrical Wire Holder
Left Floor Part
Screws
14
AGORAMODELS SHELBY COBRA 427 S/C
STEP 1
1
2
3
4
5
ASSEMBLE THE FLOOR
Place the Center Console on your worksurface
with the reverse side facing up and align the screw
holes on the Left Floor Part. Place the two sections
together and fix using 3 x TYPE OP08 screws.
Then take the Electrical Wire Holder and fix it to
the Center Console in the position shown using 1 x
TYPE OP08 screw
Stage 43: Center Console and Left Floor Section
3 x OP08
1 x OP08
15
AGORAMODELS SHELBY COBRA 427 S/C
Stage 43 complete!
Stage 43: Center Console and Left Floor Section
16
AGORAMODELS SHELBY COBRA 427 S/C
Name Quantity
Right Floor Part 1
Driver’s Floor Mat 1
Passenger’s Floor Mat 1
Screws TYPE OP08 4
STAGE 44 PARTS LIST
In stage 44, you will continue to
assemble the floor.
Stage 44: Right Floor Section and Floor Mats
Right Floor Part
Passenger’s Floor Mat Driver’s Floor Mat
Screws
17
AGORAMODELS SHELBY COBRA 427 S/C
STEP 1
1
2
3
4
5
ASSEMBLE THE FLOOR AND FIX THE
FLOOR MATS
Align the screw holes on the Right Floor Part with
the opposite side of the Center Console, just as in
the previous stage. Place the sections together
and fix in place using 3 x TYPE OP08 screws.
With the carpeted side facing upwards, position
the Passenger's Floor Mat by pushing the lug on
the reverse side through the corresponding hole
in the floor. Repeat on the opposite side with
the Driver's Floor Mat. Firmly push the sections
together to hold.
Stage 44: Right Floor Section and Floor Mats
3 x OP08
18
AGORAMODELS SHELBY COBRA 427 S/C
Stage 44 complete!
Stage 44: Right Floor Section and Floor Mats
19
AGORAMODELS SHELBY COBRA 427 S/C
Name Quantity
Cockpit Rear Wall 1
Screws TYPE OP08 5
STAGE 45 PARTS LIST
In stage 45, you will add the rear
wall of the cockpit to the floor.
Stage 45: Cockpit Rear Wall
Cockpit Rear Wall
Screws
20
AGORAMODELS SHELBY COBRA 427 S/C
STEP 1
1
2
ATTACH THE REAR WALL
Take the Cockpit Rear Wall and align the four-
tabs-with-screwholes with the corresponding
holes on the floor assembly. Place the parts
together and fix using 4 x TYPE OP08 screws.
Stage 45 complete!
Stage 45: Cockpit Rear Wall
DOMESTIC TIP FROM THE EXPERTS
Be careful not to put the cockpit floor on
a polished table as the screw heads could
scratch it.
!

Other manuals for SHELBY COBRA 427 SEMI-COMPETITION 1965

2

Other Agora Models Motorized Toy Car manuals

Agora Models Steve McQueen's Iconic Porsche 917KH Pack 01 Manual

Agora Models

Agora Models Steve McQueen's Iconic Porsche 917KH Pack 01 Manual

Agora Models STEVE MCQUEEN'S ICONIC PORSCHE 917KH Pack 10 Manual

Agora Models

Agora Models STEVE MCQUEEN'S ICONIC PORSCHE 917KH Pack 10 Manual

Agora Models FDNY FIRE TRUCK TOWER LADDER 9 Manual

Agora Models

Agora Models FDNY FIRE TRUCK TOWER LADDER 9 Manual

Agora Models Shelby GT500 1967 Super Snake Manual

Agora Models

Agora Models Shelby GT500 1967 Super Snake Manual

Agora Models LAMBORGHINI MIURA Pack 01 Manual

Agora Models

Agora Models LAMBORGHINI MIURA Pack 01 Manual

Agora Models SHELBY COBRA 1965 Manual

Agora Models

Agora Models SHELBY COBRA 1965 Manual

Agora Models Corvette Sting Ray Z06 N03 1963 Pack 03 Manual

Agora Models

Agora Models Corvette Sting Ray Z06 N03 1963 Pack 03 Manual

Agora Models STEVE MCQUEEN'S ICONIC PORSCHE 917KH Manual

Agora Models

Agora Models STEVE MCQUEEN'S ICONIC PORSCHE 917KH Manual

Agora Models JAGUAR E-TYPE Manual

Agora Models

Agora Models JAGUAR E-TYPE Manual

Agora Models JAGUAR E-TYPE Manual

Agora Models

Agora Models JAGUAR E-TYPE Manual

Agora Models MERCEDES-BENZ W196R Manual

Agora Models

Agora Models MERCEDES-BENZ W196R Manual

Agora Models MERSEDES-BENZ 300SL GULLWING 1955 Pack 03 Manual

Agora Models

Agora Models MERSEDES-BENZ 300SL GULLWING 1955 Pack 03 Manual

Agora Models Hachette Mitsubishi A6MZERO FIGHTER User manual

Agora Models

Agora Models Hachette Mitsubishi A6MZERO FIGHTER User manual

Agora Models Lamborghini MIURA Pack 11 Manual

Agora Models

Agora Models Lamborghini MIURA Pack 11 Manual

Agora Models RM 857 Manual

Agora Models

Agora Models RM 857 Manual

Agora Models SHELBY COBRA 427 SEMI-COMPETITION 1965 Manual
Agora Models

Agora Models SHELBY COBRA 427 SEMI-COMPETITION 1965 Manual

Agora Models SHELBY COBRA 427 SEMI-COMPETITION 1965 Manual

Agora Models

Agora Models SHELBY COBRA 427 SEMI-COMPETITION 1965 Manual

Agora Models SHELBY COBRA 427 S/C User manual

Agora Models

Agora Models SHELBY COBRA 427 S/C User manual

Agora Models Mercedes 300SL Gullwing 1955 Manual

Agora Models

Agora Models Mercedes 300SL Gullwing 1955 Manual

Agora Models Pack 07 Manual

Agora Models

Agora Models Pack 07 Manual

Agora Models JAGUAR E-TYPE Pack 01 Manual
Agora Models

Agora Models JAGUAR E-TYPE Pack 01 Manual

Agora Models LAMBORGHINI MIURA Pack 12 Manual
Agora Models

Agora Models LAMBORGHINI MIURA Pack 12 Manual

Agora Models STEVE MCQUEEN'S ICONIC PORSCHE 917KH Pack 05 Manual

Agora Models

Agora Models STEVE MCQUEEN'S ICONIC PORSCHE 917KH Pack 05 Manual

Agora Models Jaguar E-Type Pack 10 Manual

Agora Models

Agora Models Jaguar E-Type Pack 10 Manual

Popular Motorized Toy Car manuals by other brands

REVELL 4333 manual

REVELL

REVELL 4333 manual

Auto caddy Breeze user manual

Auto caddy

Auto caddy Breeze user manual

Capricorn RC TE02 instruction manual

Capricorn RC

Capricorn RC TE02 instruction manual

Fisher-Price POWER WHEELS Barbie Jammin' Jeep WRANGLER Owner's manual with assembly instructions

Fisher-Price

Fisher-Price POWER WHEELS Barbie Jammin' Jeep WRANGLER Owner's manual with assembly instructions

Team Magic E4JSII Instruction & setup manual

Team Magic

Team Magic E4JSII Instruction & setup manual

Jamara Mercedes-Benz G55 AMG Instruction

Jamara

Jamara Mercedes-Benz G55 AMG Instruction

Fisher Robo Explorer Assembly instructions

Fisher

Fisher Robo Explorer Assembly instructions

Team Losi 8IGHT instruction manual

Team Losi

Team Losi 8IGHT instruction manual

WRC NTX.3 instruction manual

WRC

WRC NTX.3 instruction manual

Tyco Electronics 00007-1856 manual

Tyco Electronics

Tyco Electronics 00007-1856 manual

LaTrax 76054-5 quick start guide

LaTrax

LaTrax 76054-5 quick start guide

DHK Hobby HUNTER 8135 User instruction manual

DHK Hobby

DHK Hobby HUNTER 8135 User instruction manual

Costway TQ10165 manual

Costway

Costway TQ10165 manual

Jiajia JJ298 instruction manual

Jiajia

Jiajia JJ298 instruction manual

A&N Model Trucks ANMT-56 Assembly instructions

A&N Model Trucks

A&N Model Trucks ANMT-56 Assembly instructions

FID RACING FID VOLT Z instruction manual

FID RACING

FID RACING FID VOLT Z instruction manual

Amewi G106E VOLLMETALL BAGGER 1:14 Operation manual

Amewi

Amewi G106E VOLLMETALL BAGGER 1:14 Operation manual

Opitec Grand Prix Racing manual

Opitec

Opitec Grand Prix Racing manual

manuals.online logo
manuals.online logoBrands
  • About & Mission
  • Contact us
  • Privacy Policy
  • Terms and Conditions

Copyright 2025 Manuals.Online. All Rights Reserved.