manuals.online logo
Brands
  1. Home
  2. •
  3. Brands
  4. •
  5. AQUAPHOR
  6. •
  7. Water Filtration System
  8. •
  9. AQUAPHOR B150 FAVORITE User manual

AQUAPHOR B150 FAVORITE User manual

Aquaphor
B150 FAVORITE
USER MANUAL
The multistage filter system provides deep purification of all main contaminants
that exist in water.
This filter cartridge has composite carbon-block structure.
Its optimal combination of unique AQUALEN
TM
fibres and granular components,
which effectively removes active clorine, organic compounds and heavy metals
in water.
The water filter should be installed by special trained personnel only.
If the filter was not used for more than 7 days, discard the filtered water for 5 minutes.
Use only fresh filtered water.
Do not expose the water filter to freezing temperatures.
Guard from blows and falls.
WARRANTY
The water filter is warranted by the Manufacturer for a period of 90 days from the date
of purchase against any defect in materials and/or craftsmanship. Liability of the
Manufacturer is limited to the cost of the purchased filter only. Inquiries regarding
AQUAPHOR water filters should be directed to: AQUAPHOR Corp. 27 lit.A Pyonerskaya Str.
St. Petersburg, 197110, Russia www.aquaphor.com
Multistage water purifier Aquaphor B150 model Aquaphor B150 Favorite
ATTENTION!
REPLACING THE FILTER CARTRIDGE
- disconnect flexible tubes off the water filter (2);
- unscrew the handle (17) and take off the clamp of the filter;
- take away the semi-housing and disconnect the filter cartridge off the connecting pipe;
- wash out the semi-housings, rubber gaskets (18) and plastic ring (19) from dirt;
- place a new filter cartridge, put it on the connecting pipe with hole without gag;
- assemble the filter, paying attention to correct placing of two rings (18) into the ring (19) and the ring (19)
into the bottom semi-housing. Put on the clamp on the semi-housings and screw the handle (17) against stop;
- make sure that there is no leakage.
MANUFACTURER’S RATINGS
Overall dimensions of the water filter’s housing
as an assembly (mm) 180–200
Maximum working pressure of water (MPa/bar) 0.65/6.3
Replacement filter cartridge capacity (L) 12 000
Recommended filtration rate (L/min) 2.5
Weight (kg) 3.9
For replacing the filter cartridge:
- turn off water supply. Relieve pressure by turning on the clean water filter.
Attention: Use the control valve (3) to turn off water supply for the time period necessary to replace the filter
cartridge only. Operate with the control valve with your hand only. Some dripping from the faucet (1) is allowed
while the control valve is in the turn off position.
Replace the filter cartridge in proper time.
AQUAPHOR Corp.
27 lit.A Pyonerskaya Str.
St. Petersburg, Russia, 197110
www.aquaphor.com
The manufactured retains the right to modify the water purifier without notification.
Manufacturing and quality control date
(the appropriate model is noted):
Date of Purchase:
The Quality Management System
is certified according to ISO 9001
Water filter (housing assembled with the replacement filter cartridge) 1
Connection node 1
Ceramic core faucet for clean water (with a set of gaskets as per illustration) 1
Flexible tube (one metre long) 1
Flexible tube (one metre long) with a inlet conical bushing 1
User manual 1
Packing 1
THE UNIT BOX SHOULD INCLUDE (PCS):
INSTALLATION
Installation of the clean water faucet:
- drill an 11.5-12.0 mm diameter hole in the determined place. Trim burrs;
- screw out the nut (12) off the faucet threaded bushing (1);
- string decorative washer (4) and rubber gasket (5) on the faucet threaded bushing (1);
- install the faucet (1) using washers provided (6; 7; 8) and screw on the nut (9) tight;
- insert the tubing (10) with conical bushing (11) into the faucet threaded bushing (1) and screw on the
nut (12) tight against stop;
- check that all the tubing is connected fully firm.
- pull out the clips (13) from-under the plastic bushes of the inlet and outlet connecting pipes of the water
filter (2);
- connect the faucet (2) with the outlet-connecting pipe (15) using the tubing (10).
- connect the control valve (3) with the inlet-connecting pipe (16) using the tubing (14).
The wetted tubing should be inserted against stop at about 15 mm depth.
- insert the clips (13) under the plastic bushes of the inlet and outlet connecting pipes of the water filter (2).
(To disconnect the tubing, remove the clip (13) off the plastic bushing, push the latter on the collar in
and draw the tubing out.)
NOTE: Follow the IN and OUT pointers on the housing lid.
Attaching the flexible tubes to the water filter:
- turn on water supply;
- turn on the faucet (1);
- adjust appropriate water flow, using the control valve (3);
- discard the filtred water for 10–15 minutes;
- turn off the faucet;
- make sure that there is no leakage;
- your filter is ready for operation.
After installation and engaging of the water filter:
After installation of a new cartridge discard the filtered
water for 10–15 minutes.
Profile of junction
of semi-housings
Installation fig.
11,5...12 mm
4
1
5
13
16
OUT
IN
17
14
2
6
8
7
9
11
12
10
15
18
19
clamp
bottom
semi-housing
upper
semi-housing
To connect a water filter to the water supply:
- Shut off the cold water line and discard excess pressure;
- Make sure you have the gasket (3a) in the cap nut
connection node (3);
- Install a pipeline connection node (3). If necessary, to seal
the external thread node, use the tape of sealing material.
Attention: When tightening the nut can not make
significant efforts!
- Close the connection node (to the "valve closed") and by
applying water, make sure to seal joints (no leaks);
- Pull out of the plastic sleeve ball valve connection node (3)
clip (13);
- Insert into the hub node connecting the ball valve (3)
moistened with water pipe (14), be sure to stop bringing it up
to a depth of about 15 mm;
- Insert the clip (13) under a plastic sleeve to connect the ball
valve unit (3);
- Check the strength of the fixing tube (14): 8–10 kgs in an
effort tube (14) should not pull out.
3
13
14
3
Household drinking
cold water tap
position
"valve open"
13
3a
3
Household drinking
cold water tap
36 mm max
Determine the best place to mount the faucet (1), water filter (2) and control valve (3).
the tubing should be placed easily and without fracture, and it should be safe of damage and of being pulled out
of the fittings.
NOTE: Use only the faucet provided in set.

Other AQUAPHOR Water Filtration System manuals

AQUAPHOR RO-31 User manual

AQUAPHOR

AQUAPHOR RO-31 User manual

AQUAPHOR tritan Provence User manual

AQUAPHOR

AQUAPHOR tritan Provence User manual

AQUAPHOR APRO Series User manual

AQUAPHOR

AQUAPHOR APRO Series User manual

AQUAPHOR RO-312S PRO User manual

AQUAPHOR

AQUAPHOR RO-312S PRO User manual

AQUAPHOR DWM-101 User manual

AQUAPHOR

AQUAPHOR DWM-101 User manual

AQUAPHOR RO-101S User manual

AQUAPHOR

AQUAPHOR RO-101S User manual

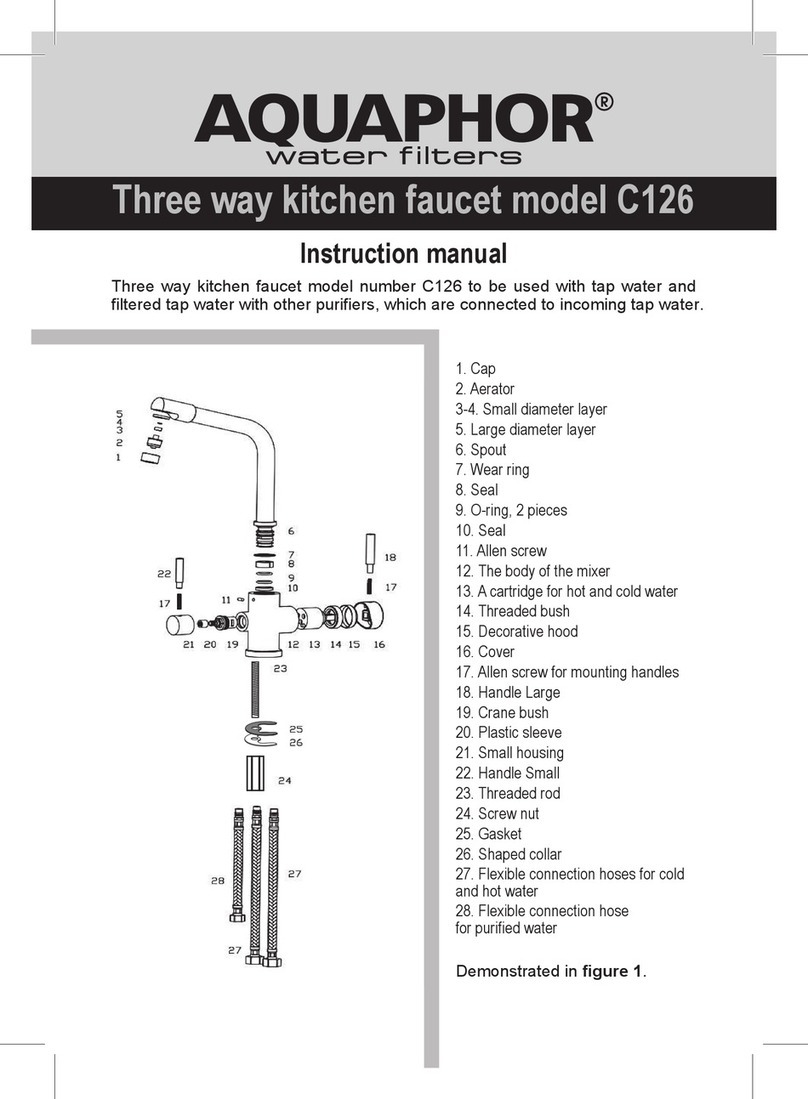
AQUAPHOR C126 User manual

AQUAPHOR

AQUAPHOR C126 User manual

AQUAPHOR ECO PRO User manual

AQUAPHOR

AQUAPHOR ECO PRO User manual

AQUAPHOR EXTRA-SOFT User manual

AQUAPHOR

AQUAPHOR EXTRA-SOFT User manual

AQUAPHOR RO-202S User manual

AQUAPHOR

AQUAPHOR RO-202S User manual

AQUAPHOR ONYX User manual

AQUAPHOR

AQUAPHOR ONYX User manual

AQUAPHOR RO-70S User manual

AQUAPHOR

AQUAPHOR RO-70S User manual

AQUAPHOR RO-102S User manual

AQUAPHOR

AQUAPHOR RO-102S User manual

AQUAPHOR RO-31 User manual

AQUAPHOR

AQUAPHOR RO-31 User manual

AQUAPHOR Crystal Solo User manual

AQUAPHOR

AQUAPHOR Crystal Solo User manual

AQUAPHOR CRYSTAL User manual

AQUAPHOR

AQUAPHOR CRYSTAL User manual

AQUAPHOR RO-101S User manual

AQUAPHOR

AQUAPHOR RO-101S User manual

AQUAPHOR ONYX User manual

AQUAPHOR

AQUAPHOR ONYX User manual

AQUAPHOR RO-206S User manual

AQUAPHOR

AQUAPHOR RO-206S User manual

AQUAPHOR P140B05FM User manual

AQUAPHOR

AQUAPHOR P140B05FM User manual

AQUAPHOR APRO WH 1000 LPH User manual

AQUAPHOR

AQUAPHOR APRO WH 1000 LPH User manual

AQUAPHOR OSMO PRO 50 User manual

AQUAPHOR

AQUAPHOR OSMO PRO 50 User manual

AQUAPHOR DWM-203 Quick start guide

AQUAPHOR

AQUAPHOR DWM-203 Quick start guide

AQUAPHOR Time User manual

AQUAPHOR

AQUAPHOR Time User manual

Popular Water Filtration System manuals by other brands

Vision Aqua VA-H-FT-DF-1000-20-1 instruction manual

Vision Aqua

Vision Aqua VA-H-FT-DF-1000-20-1 instruction manual

ENEKA Greasly-A Installation, operation and maintenance manual

ENEKA

ENEKA Greasly-A Installation, operation and maintenance manual

Bluewater CLEONE Complete user's manual

Bluewater

Bluewater CLEONE Complete user's manual

Spirax Sarco 5800 Series Installation and maintenance instructions

Spirax Sarco

Spirax Sarco 5800 Series Installation and maintenance instructions

Lifesaver CUBE user manual

Lifesaver

Lifesaver CUBE user manual

Aquasana AQ-RO3-R Replacement

Aquasana

Aquasana AQ-RO3-R Replacement

OptiPure FX-21 Installation, operation & maintanance manual

OptiPure

OptiPure FX-21 Installation, operation & maintanance manual

Hilti DD-REC 1 operating instructions

Hilti

Hilti DD-REC 1 operating instructions

CSI Duplex SD48 Installation & operation manual

CSI

CSI Duplex SD48 Installation & operation manual

Waterway ClearWater Series manual

Waterway

Waterway ClearWater Series manual

Brita On tap Installation and instructions for use

Brita

Brita On tap Installation and instructions for use

Anchor AF-4003 Quick setup guide

Anchor

Anchor AF-4003 Quick setup guide

LifeSource ApaPure2 Owner's manual & installation guide

LifeSource

LifeSource ApaPure2 Owner's manual & installation guide

Aqua Ultraviolet Ultima II Pro 3" Series instruction manual

Aqua Ultraviolet

Aqua Ultraviolet Ultima II Pro 3" Series instruction manual

Laica MikroPLASTIK-STOP DUF1P00 manual

Laica

Laica MikroPLASTIK-STOP DUF1P00 manual

laguna PRESSURE-FLO PT1500 instruction manual

laguna

laguna PRESSURE-FLO PT1500 instruction manual

Deuba Monzana DBWC001 instructions

Deuba

Deuba Monzana DBWC001 instructions

Welker OdorEyes AEF-1 Installation, operation and maintenance manual

Welker

Welker OdorEyes AEF-1 Installation, operation and maintenance manual

manuals.online logo
manuals.online logoBrands
  • About & Mission
  • Contact us
  • Privacy Policy
  • Terms and Conditions

Copyright 2025 Manuals.Online. All Rights Reserved.