SM1916
16
NOTES AND USEFUL ADVICE FOR THE USER
❃The washing machine has been designed for
domestic use only, and as such any other use
is regarded as improper and therefore poten-
tially dangerous.
❃Any modifications or attempts to alter the
equipment in any way may be dangerous for
the user and cause damage to the washing
machine.
❃Due to the weight of the machine, special
safety standards must be observed during
handling.
❃The machine must not be used by unsuper-
vised children.
❃Any modifications to the water or electrical
system must be carried out by authorised spe-
cialists.
❃When positioning the appliance, make sure
that the power supply cable is not bent or
squashed and that it is accessible.
❃Before operating the machine, remove all pack-
ing materials and the locking device used for
protection during transport (protection screws).
Failure to do this may result in serious dam-
age to the machine and to your home.
❃If the machine is installed on a carpeted floor,
make sure that air is free to circulate between
the machine and the floor.
❃The washing machine must never be over-
loaded.
❃When the machine is in operation, avoid any
contact with the water coming out of the drain
hose, as this may be hot. Do not touch the
door glass as this may also heat up during the
wash
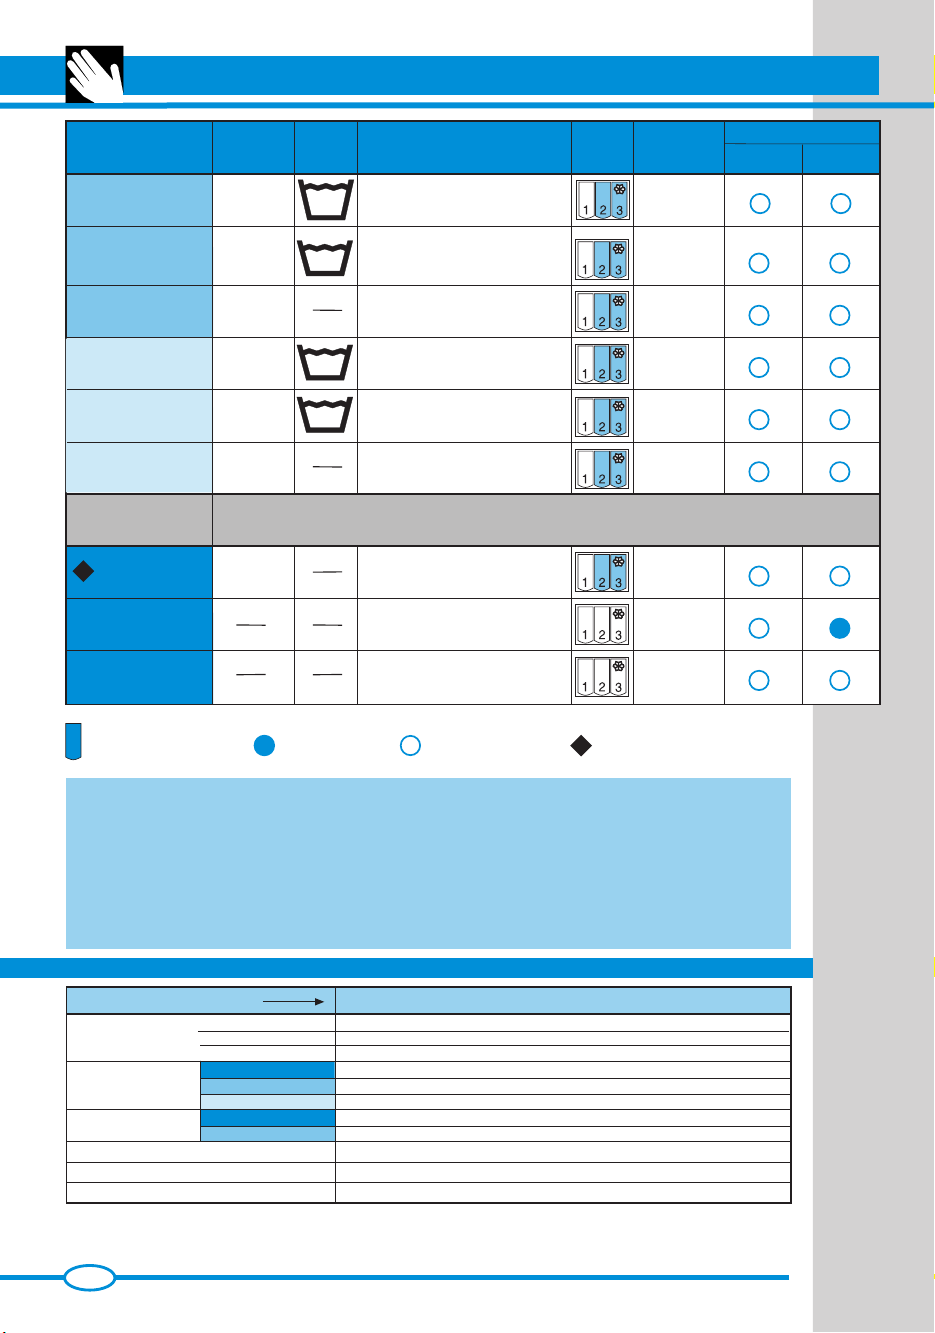
❃Only wash clothes that are machine washable.
In case of doubt, check the manufacturer’s in-
structions found on the label attached to the
clothes (see “Clothing cares symbols “ ) .
❃Before loading clothes into the washing ma-
chine, check that all the pockets are empty.
Hard or pointed objects such as coins, pins,
nails, screws or even stones can cause seri-
ous damage.
❃Clothes that have been dirtied with substances
containing petroleum cannot be washed in the
machine. If stains have been removed using
vaporising products, before loading the clothes
in the washing machine, wait until the sub-
stances have completely evaporated from the
material.
❃Do not use detergents formulated for hand
washing, in that the excessive lather produced
could damage the internal components.
❃After washing rugs, blankets or any other long
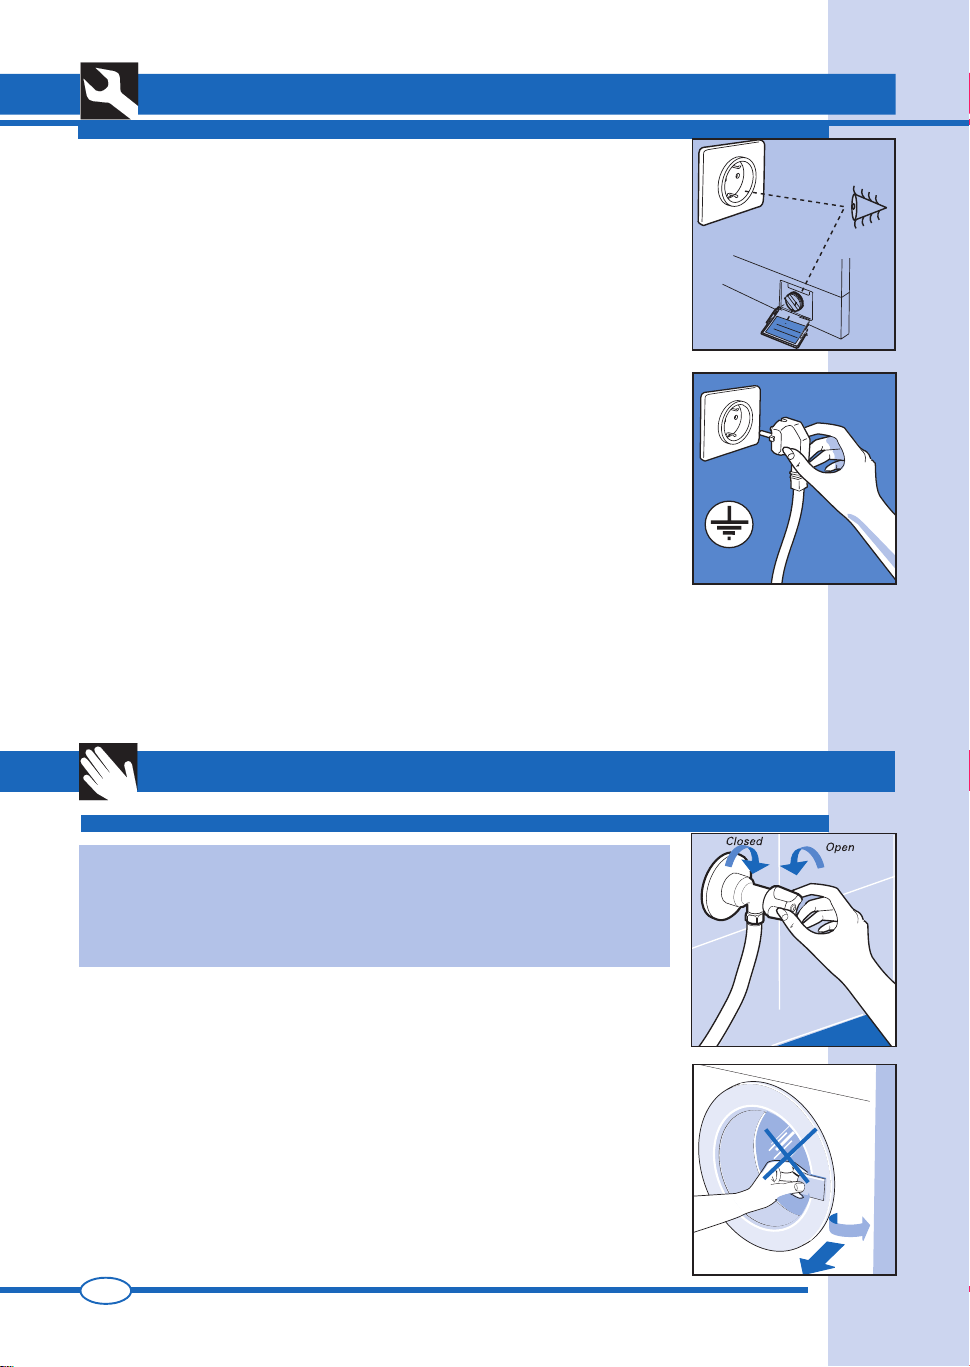
Do not plug-in or unplug
the machine with wet
hands.
Unplug the washing ma-
chine from the power sup-
ply before servicing and
cleaning.
To disconnect the machine
from the power supply, pull
the plug and not the cable.
After the end of each wash-
ing cycle it is advisable to
unplug the machine and
shut-off the water supply.
Do not expose the appli-
ance to atmospheric
agents.
The power supply socket
to which the machine is
connected must be
earthed and must comply
with the safety require-
ments
Extension leads or multiple
adapters must not be used
to connect the washing ma-
chine to the mains supply.
The door can only be
opened approximately
three minutes after the end
of each wash, as a safety
device has been fitted to
protect from accidental
opening.
N.B. for electronic models
the door will open when the
“end” indicator lights up
GB