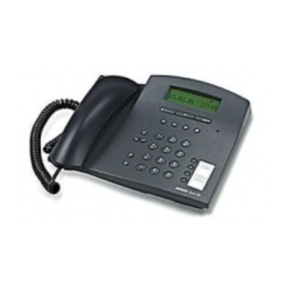
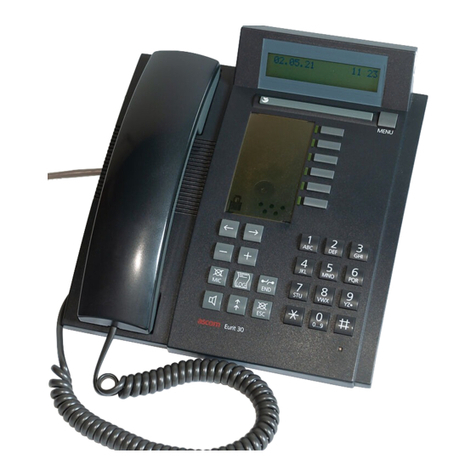
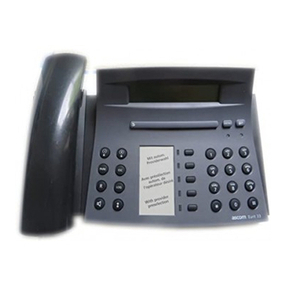
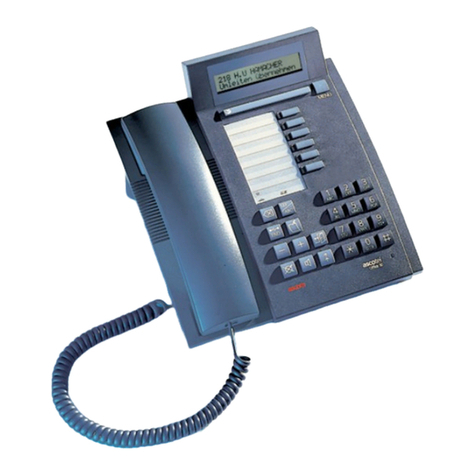
ASCOM Eurit 22 User manual

qcCOm
Eurit
22

Opera t&g and display elements
12-
6-
5-
ooooooooooooq
a
o
000000000000C
ooooooooooooc
000000000000C
ooooooooooooc
0000000000000
63
Display symbols
Informationen available
(Display using
@
and
@)
Second functional level
(Display using
@)
Loudspeaker switched on
If flashing: volume 0 (Do not disturb)
Further sub-menus available
(Display using
Ici
or
I)
Text overflow: message on display longer
than 14 characters
Call forwarding activated
8
m
Text input
M
Mute, microphone switched off
AUser A activated
B
User B activated
C
User C activated
#
Call back activated
When flashing: call-back may be
selected

Operating and display elements
1
The display
Single line, alphanumerical display and display-symbol bar.
2
Foxkey
(multi-function key)
Press I: Confirm input of settings, access sub-menus
Press
IFl/i
:
Select sub-menus, select ON/OFF (Y/N), telephone functions
3
User key
Activate the user A, B, C
4Menu key (with
@I
:
Info key)
Select the various main menus.
Press
@
and
@
:
Call up additional information
5
SHIFT key (level change key)
Second functional level/Press and hold: second functional level permanently activated
6
ESCAPE key (with
@
:
DELETE key)
Press briefly: Jump back one menu level
/
Press and hold: Return to basic mode
Press
@
and
@
:
Delete characters from right to left
/
Delete entries in directory,
unanswered calls list, etc./Press and hold: delete several characters
7Call-back key (with
@I
:
END key)
Initiate an enquiry call, switch between two calls (brokering)
Press
@I
and
m
:
Clear call.
8Park key (with
@
:
MUTE key)
Park and retrieve a call.
Press
@
and
@
:
Mute microphone. In basic mode: suppress number.
9
10
11
12
13
Last number redial key (with
@I
:
LOG key)
Retrieve the last number dialled.
Press
@
and
a
:
Retrieve answered calls
Loudspeaker key (with
@I
:
Loudspeaker volume)
Switch loudspeaker on and off.
Press
@
and
@
:
Adjust volume.
Dialling keypad
Entering telephone numbers
Press
@
and dialling key: Speed dialling
Label/Emergency operation switch
Label for speed-dial keys.
Emergency operation switch is situated behind perspex cover.
LED indicator
Lights if ringing tone is switched off or if “unconditional call forward” is selected
(with at least 1 user defined).

Contents
ZCOII?
Eurit
22
Euro-ISDN
telephone
Congratulations on your purchase of an Eurit 22.
Thank you for choosing a Swiss quality product.
Eurit 22 is designed for connection to the public Euro-ISDN network.
If the Eurit 22 is to be connected to a PBX, please refer to the section “Operation with
a PBX”.
Please read this operating manual carefully to take full advantage of the features offered by
your new Eurit 22.
Keep this operating manual in a safe place!
Important information about your
Euro-ISDN
connection
This operating manual describes all the functions which you must request from your telecoms
operator, some of which are subject to charge.
The number of services you have at your disposal is dependent on the type of connection you
have subscribed to.
For detailed information about the services available on your
ISDN
connection please contact
your telecoms operator.
Operating and display elements
..................................................
..~.....................................
1
Installation and startup ........................................................................................................
5
Contents of the packet.........................................................................................................
5
Connecting
the
handset and the telephone ..........................................................................
5
Placing the telephone ........................................................................................................... 6
Emergency operation ............................................................................................................
6
Basic operating information ................................................................................................. 7
Users
....................................................................................................................................
7
Menus ..................................................................................................................................
7
Display
..................................................................................................................................
7
Acoustic signals
....................................................................................................................
8
Basic settings .........................................................................................................................
9
Display on startup .................................................................................................................
9
Define a user ......................................................................................................................
10
Date and time .....................................................................................................................
11
Display contrast
..................................................................................................................
11
Connection to a PBX ...........................................................................................................
12
Call charge factor ...............................................................................................................
12
Currency.. ...........................................................................................................................
12
6
..............................................
13
d
Operation with a headset (headphones and microphone set)
s
...........................................................................................................................
13
K
Language
2
Software version ................................................................................................................. 14
5
E
Checksum
.......................................................................................................................... 14
2

Contents
User-specific settings ...........................................................................................................
15
Ringing
tone .......................................................................................................................
15
Suppress
number ................................................................................................................
16
Suppress call waiting.. .........................................................................................................
17
Dialling .................................................................................................................................
18
On-hook
dialling
................................................................................................................. 18
Redialling
............................................................................................................................ 18
Dial from the unanswered calls list ......................................................................................
19
Dialling a number from the LOG memory............................................................................ 20
Dialling from the directory ..................................................................................................
20
Dialling using speed-dial keys..............................................................................................
21
Making a call ........................................................................................................................ 22
Incoming
calls
.....................................................................................................................
22
Reject incoming calls...........................................................................................................
22
Display during the call .........................................................................................................
22
Listening by loudspeaker ..................................................................................................... 23
Microphone mute ............................................................................................................... 23
Directory ............................................................................................................................... 24
General information ...........................................................................................................
24
New entry...........................................................................................................................
25
Change entry......................................................................................................................
25
Delete an entry ...................................................................................................................
25
Extended features ...............................................................................................................
26
Call charges per user, call charge total ................................................................................
26
Enquiry call
.........................................................................................................................
26
Brokering (switching between two calls) ............................................................................. 27
Explicit Call Transfer (ECT)
................................................................................................... 27
Three-way conference call ...................................................................................................
28
Automatic call back if busy .................................................................................................
28
Call waiting /accept a second call....................................................................................... 29
Call
forward.. ......................................................................................................................
30
Park call
..............................................................................................................................
31
Speed dialling ..................................................................................................................... 32
Special characters
...............................................................................................................
33
Function list
........................................................................................................................
33
Register malicious calls (MCID) ............................................................................................
33
DTMF (Dual Tone Multi Frequency) dialling .......................................................................... 34
Subaddresses
...................................................................................................................... 34
3
Contents
Operation with a PBX ......................................................................................................... 35
Keypad information ............................................................................................................ 35
Settings for operation with a PBX ....................................................................................... 36
Exchange access code
......................................................................................................... 36
Incoming exchange
access
code
.......................................................................................... 37
Call
transfer by going on-hook ........................................................................................... 38
Call transfer using disconnect ............................................................................................. 39
Automatic keypad send ...................................................................................................... 40
Important information ........................................................................................................
41
Menu structure ...................................................................................................................
41
Option: dialling from a
PC
(PC-Dialer) ................................................................................. 43
Software Update ................................................................................................................. 43
Safety precautions .............................................................................................................. 43
Disposal
.............................................................................................................................. 44
Technical data
..................................................................................................................... 44
Product conformity ............................................................................................................. 44
Guarantee .......................................................................................................................... 44
Index
. . . . . . . . . . . . . . . . . . . . . . . . . . . . . . . . . . . . . . . . . . . . . . . . . . . . . . . . . . . . . . . . . . . . . . . . . . . . . . . . . . . . . . . . . . ..*...............*.....................
45
4

Installation and startup
Eurit 22 telephone
Handset
Telephone connection cable
Handset cable
Perspex cover for label
Operating Manual
The connection sockets are on the base of your
telephone. First connect the handset by plugging
the longer end of the coiled handset cable into the
small socket on the base of the telephone
0.
When plugging in the connector, ensure that you
hear it click into place. Lead the cable through the
strain-relief groove
0
and plug the connector on
the short end of the cable into the handset
0.
Give
the cable a slight tug to ensure that the connector
has locked into place.
Now connect the telephone by plugging the
telephone cable into the larger socket on the base
of the telephone
0.
When plugging in the
connector, ensure that you hear it click into place.
Give the cable a slight tug to ensure that the
connector has locked into place. Lead the cable
through the strain-relief groove
0
and plug the
connector on the other end of the cable into the
telephone socket
0.
a
Once you
have
connected your Eurit
22, the following prompt is displayed:
“Please enter at least one MSN (subscriber number) including name <OK>
‘.
Please read the section entitled “Display on
startup
I’
under “Basic Settings
I’.
Wall mounting
Your Eurit 22 can also be wall-mounted.
e
For
the
wall-mounting
kit please contact your local supplier
Insert the plastic feet in the appropriate slots in the housing base
0.
Fasten the two screws to
the wall and hang your Eurit 22 by clipping the screw heads into the two holes on the telephone
base
0.
5

Imtallation
and startup
Label for speed-dial numbers/functions
Cut out a label from the back cover of this operating manual (or copy them) and enter the
names associated with the speed-dial numbers/functions you have stored.
Lay the label in the recess under the handset and fit the perspex cover.
Before putting the telephone into operation, please read the Paragraph “Safety Precautions” in
this manual.
In view of the extensive range of surfacing materials used on furniture, it is impossible to
guarantee that the various parts of the telephone, (e.g. the feet) will not leave marks. We
therefore recommend that the telephone be placed on a non-slip mat.
If the local 230 V mains supply for the network terminating unit (NTBA) fails, the
ISDN
connec-
tion is powered directly from the exchange (emergency operation). However, this remote power
supply is only sufficient to power a single telephone set!
Thus if several telephones are operated on the same connection, only one may be authorized for
emergency operation; otherwise the
ISDN
connection is taken out of service.
Assign emergency authorization to a telephone by pressing down and locking into place the
switch under the perspex cover for the speed-dial keys. To deactivate emergency authorization,
release the switch by pressing the toggle sideways.
e
During normal operation, the emergency telephone can be used to telephone as usual.
c3
The programmed settings and the entries in the directory are maintained
during
a
power failure.
0
During emergency operation, the display is switched off The ringing volume and the
loudspeaker volume are reduced.
a
The emergency telephone signals the calls for all Multi Subscriber Numbers
(MSN).
0
In order to telephone during emergency operation, the handset must be lifted
before the number is dialled (the loudspeaker no longer functions).
c3
The telephone authorized for emergency operation should be clearly labelled using a
coloured sticker

Basic operating information
The Eurit 22 allows you to define up to three users on the same telephone. For instance, if you
use the phone in your own home, you can define one user “Mother”, a second “Father” and a
third “Daughter/Son’,
or in an office
environment one user
“Company”, a second “Sales reps”
and a third
‘Private”.
By pressing
@
you can change from one user to the next and the display
indicates the symbol for the current user (A, B,
C).
a
Please refer to the Section
"Basic
Settings” for details of the procedure for defining
several users.
Once you have defined the individual settings for the different users (see “Basic Settings”), your
Eurit 22 handles a whole range of functions differently dependent on the selected user:
Each time a call is made, the number of the active user is displayed on the telephone of the
called person, and incoming calls are stored in the “missed calls” list of the appropriate user. Call
charges are calculated and billed separately for each user. Calls can be separately forwarded
(diverted) for each user depending on their requirements, etc.
Your Eurit 22 is easy to use because for many functions you are guided via menus. Entries in the
directory (and subsequent changes to these), settings and programming of your telephone are all
done using menus.
For the rapid selection of menus or sub-menus, simply press
@
once. Subsequently press
m
as often as necessary until the required menu/sub-menu is displayed. Confirm selection of the
displayed menu by pressing
El.
To jump back to the previous menu level press
@I.
To return to the main menu press
@.
6
A diagram showing the
complete
menu structure of your Eurit 22 is given in the Section
“lmportan
t information
I’.
e
Various telephone functions are available both when on-hook
and
during a call, and
these can be called up by pressing El.
The display shows what inputs are required and the current state of your telephone using a text
line and additional symbols.
You can follow queries and changes on the display.

Basic operating information
Your telephone provides additional information during use by emitting acoustic signals:
Confirmation tone
Your telephone confirms correct entry or adaptation of an entry with two short, high-pitched
tones.
Warning tone
In the event of an incorrect action or input, a single, low-pitched tone is sounded.

Basic settings
The settings described below are user-independent and are valid for all users.
To be able to use all the functions of your Eurit 22, you must define at least one user (i.e. enter
at least one multiple subscriber number or
MSN).
For this reason the following prompt is displayed once your Eurit 22 has been started up:
“Please enter at least one
MSN
(subscriber number) including name
<OK>“.
For details on defining users, see ‘Define a user”.
If you wish to use the telephone before defining a user:
Lift the handset (the prompt disappears) and enter
the number.
zm33-
The selected number is displayed
At the end of the call the date and time are
displayed.
r3
Remember to define at
least
one user
at
a later stage, to benefit from the full range of
Eurit 22 functions.

You can define up to three users on your Eurit 22, with each user being allocated their own
Multiple Subscriber Number (MSN A, B, C). Your telephone will ring when a call is received for
one of the defined numbers.
c3
When the telephone leaves the factory no users are defined and your Eurit 22
will ring for all incoming
calls.
0
In order to be able
to
use the full
range
of Eurit 22 functions,
at
least
one
user
must be defined!
In order to define a user proceed as follows:
Press
@.
and then press
IZI
as often as necessary
until “INSTALLATION” is displayed. Confirm the
menu selection by pressing
l3Kl.
The message ‘SET
MSN”
is displayed. Confirm by
pressing I.
“MSN
A” is displayed. Press
m.
Enter the number
for MSN A and confirm by pressing
IOK
“USER
_‘I
is displayed. Using the dialling keypad,
enter the name associated with MSN A and
confirm by pressing I.
Correct entry is indicated by a short signal tone.
Press
m
to change to the menu for defining
MSN B.
MSN B and C can be defined by repeating the
procedure described for MSN A.
r3
Caution: always enter MSN without prefix!
c3
When a
call
is received your
Eurit
22
recognizes
for which user it is and indicates this by
different
ringing
melodies
(see “Ringing tone”
and
“Incoming calls”).
c3
With
a//
outgoing calls, the
Multiple
Subscriber Number of the active user is
sent
to the
called party If you do not want the Multiple Subscriber Number for
a
particular user
to
be displayed on the called party’s telephone, you can suppress this (see “Suppress line
identification
I’).
0
A user can be deleted by deleting his
MSN.
$
2
A
F
2
10

When the telephone is first connected or after a power cut, the time display will flash. As soon
as you make a call, the date and time are set and the display stops flashing. Any difference
between the displayed time and the system time is corrected each time a call is made. You can
also set the time and date manually:
Press
@I
and then press
m
as often as necessary
until “INSTALLATION” is displayed. Confirm the
menu selection by pressing
I.
Press
m
as often as necessary until “DATE
/TIME”
is displayed. Confirm the menu selection by
pressing
(.
The date is displayed. Enter today’s date and
confirm by pressing
IIKI.
Correct entry is confirmed
by a short signal tone.
A time is displayed. Enter the actual time and
confirm by pressing I. Correct entry is confirmed
by a short signal tone.
6
When the telephone is first connected (and as long as no incoming calls have been
received) the date and time are displayed. As soon as
calls
are received by your Eurit 22,
the number of calls
and
the time are
displayed.
You can set the contrast of the display to one of seven levels.
When the telephone leaves the factory the display contrast level is set to 4.
i
0
MENU
mpN5mmqm
Press
@
and then press
B
as often as necessary
until “INSTALLATION” is displayed. Confirm the
menu selection by pressing
(.
&rmrmTm
Press
(-)I
as often as necessary until “CONTRAST”
is displayed. Confirm the menu selection by
pressing I.
/CON:RRl
The current contrast setting, represented by up to
seven bars, is displayed.
m/El
El
Reduce or increase the display contrast one level at
a time by pressing
Icl/l
until the required level
has been reached. Confirm the selection by
pressing
I.
The entry is confirmed by a short
signal tone.

Basic settings
Settings for use with a PBX are given in the section “Operation with a PBX”.
To ensure that the displayed call charge is correct, the call charge factor must be set. When the
telephone leaves the factory the call charge factor is set to 12.1 1 (12.1 1 pfennig). The current
call charge factor can be obtained from your telecoms operator.
Press
@
and then press
Fl
as often as necessary
until “INSTALLATION’ is displayed. Confirm the
menu selection by pressing
I33
Press
m
as often as necessary until “CHARGES” is
displayed. Confirm the menu selection by pressing
El.
“FACTOR” is displayed. Confirm by pressing
IOK
The current call charge factor setting is displayed
“DM
0,121O”.
Enter the correct call charge factor
and confirm by pressing
@IOK
The entry is con-
firmed by a short signal tone.
c3
See also "Call charges per user; call charge total"
You can change the currency unit as necessary:
Press
@
then press
i3l
as often as necessary until
“INSTALLATION”
is displayed. Confirm the menu
selection by pressing
lKi.
Press
141
as often as necessary until “CHARGES” is
displayed. Confirm the menu selection by pressing
IOK
Press
m
as often as necessary until “CURRENCY’
is displayed. Confirm the menu selection by
pressing
I.
“CURRENCY
DM”
is displayed. Enter the currency
abbreviation (max. 4 characters) and confirm by
pressing I.
c3
Callchargesperuserandcallcharge
total are
displayedin
the
definedcurrency
N
12

If you telephone a great deal, you can connect a headset (headphones and microphone set) to
the Eurit 22. Once you have selected operation with headset, calls can be accepted or cut off
using the loudspeaker key.
Press
@J
and then press
iXl
as often as necessary
until “INSTALLATION” is displayed. Confirm the
menu selection by pressing
IOK
p$mET-jm
Press
m
as often as necessary until “HEADSET” is
displayed. Confirm the menu selection by pressing
El.
“HEADSET
Y&l”
(Factory setting is NO (OFF))
Press
Ic.
The cursor jumps to
“Y”
(Headset
operation switched ON). Confirm the selection by
pressing
/.
The entry is confirmed by a short
signal tone.
c3
for optimum
use of your Eurit 22 with a headset, we recommend that you use
the
headset specially supplied by
Ascom.
Your local supplier can provide additional informa-
tion (see the address on the back cover of this user
manual).
You can select the language for the displayed messages (German or English). When the
telephone leaves the factory German is set as the display language.
Press
@
and then press
I-)j
as often as necessary
until “INSTALLATION” is displayed. Confirm the
menu selection by pressing
I.
Press
m
as often as necessary until “LANGUAGE”
is displayed. Confirm the menu selection by
pressing
/.
“GERMAN” is displayed.
Press
I,
“ENGLISH” is displayed. Confirm the
menu selection by
pressing
I.
The entry is
confirmed by a short signal tone.
13

You can display the software version of your telephone
Press
@
and then press
C%l
as often as necessary
until “INSTALLATION” is displayed. Confirm the
menu selection by pressing
I.
Press
a
as often as necessary until “SOFTWARE”
is displayed. Confirm the menu selection by
pressing (OK.
“VERSION’ is displayed. Confirm the menu
selection by pressing
IOK
The version number of the installed software is
displayed.
c3
If you have
a
question you need clarified, then before you
call
our Hotline (see back
cover of this user manual for the address and phone number) please check the version
number
of your software.
e
Software-Update see “Option: dialling from a PC”.
For hotline enquiries you can display the checksum:
Press
53
then press
(-)I
as often as necessary until
“INSTALLATION” is displayed. Confirm the menu
selection by pressing
CKI.
rq-p-%m~m
Press
m
as often as necessary until “SOFTWARE”
!
is displayed. Confirm the menu selection by
pressing
loK.
Press
C3I
as often as necessary until “CHECKSUM”
is displayed. Confirm the menu selection by
pressing (OK.
“IN PROGRESS” is displayed. After a short time the
checksum of your telephone is displayed.
14

User-speciJic
settings
User-specific settings can be made depending on the requirements of the individual users.
e
Before these
setting can
be made, at least one user must have been defined on your
Eurit 22 (see “Defining a user”).
Each user can select a ringing tone from a choice of seven melodies and set the volume in the
range 0 to 7.
Press
@
and then press
m
as often as necessary
until “RINGING TONE” is displayed. Confirm the
menu selection by pressing
I.
&imrqm
Press
IXi
and the number representing the
selected melody is displayed (when the telephone
leaves the factory “MELODY 1
”
is set). The melody
represented by the number displayed is reproduced
via the loudspeaker. When the melody you would
like is played, confirm the selection by pressing
El.
The volume of the ringing tone can be set. The
ringing volume set in the factory is displayed
(maximum 7).
Press
1cI
to change the volume. The number of
bars displayed (max. 7) indicate the current setting.
Confirm the menu selection by pressing
IOK
The
entry is confirmed by a short signal tone.
c3
Ensure
that
a different melody is selected for each user so that it is possible
to
differenti-
ate
between the incoming calls.
c3
Warning: If you select volume 0, your Eurit 22 no longer rings. The LED above
m@
lights.
15

User-speci$c
settings
When you make a call, your number (i.e. their MSN) is displayed for the called party. When you
are called, your number is sent to the calling party. You can suppress your call number for
outgoing and incoming calls:
Permanently suppress the number
(CLIRKOLR)
i
0
MENU Press
@
and then press
191
as often as necessary
until “SETTINGS” is displayed. Confirm the menu
selection by pressing
I.
“SUPPRESS NO.
’
is displayed. Confirm by pressing
El.
“SUPPRESS NO.
Y&J’“,
(The status set in the factory
isMO(OFF)).
Press
Ic1
and the cursor jumps to
“Y’
(Suppress
number is ON
0).
Confirm the menu selection by
pressing I.
Dial the number.
When calling line number suppression is active, the
dialled number is displayed preceded by a
“C
‘I.
Suppress the number for a single call (CLIR)
03-U’1-‘31
I?UIII
The telephone is in the basic state (on-hook).
Press
m
as often as necessary until “SUPPRESS
NO.” is displayed. Press
@!I.
The confirmation
“SUPPRESSED” is shortly displayed.
Dial the number.
When calling line number suppression is active, the
dialled number is displayed preceded
by a
“C
‘I.
ti
You can also suppress your number with Eurit 22 by pressing
@
and
@
in the basic
state.
2
:
K
R
5
K
16

If you are engaged in a call, a second incoming call is indicated by an acoustic signal tone.
Additional information about “Call waiting” is given in the section “Advanced features/Call
waiting”.
Each user can suppress “Call waiting” so as not to be disturbed during a conversation.
Press
@
and then press
B
as often as necessary
until “SETTINGS” is displayed. Confirm the menu
selection by pressing
Bl.
Press
f3l
as often as
necessary until “CALL WAITING” is displayed.
Confirm the menu selection by pressing
IKI.
“CALL WAITING
y/N”
is displayed (When the
telephone leaves the factory YES is set (ON)).
Press
I,
The cursor jumps to
“N”
(No)
(Call waiting switched OFF).
Confirm by pressing I.
17

Dialling
Enter the number you wish to call. Press
0.
When
the called party answers lift the handset.
a
The function “Listening by loudspeaker” is
not
available.
Your Eurit 22 stores the last 10 telephone numbers dialled in the redial memory, regardless of
which user entered the numbers (the redial memory is user-independent). You can redial these
numbers without having to enter them again:
401
J
4
0
Press the redial key
a
as many times as necessary
to select the number you want to call from the last
10 numbers dialled. Lift the handset or press
@,
the number is dialled.
When the redial memory is full, the oldest entry is overwritten.
To delete a number from the redial
memoq
press
@
and when the number to be
deleted is displayed, press @.
To
disp/ay
the call charge for a specific call
press
@
and
@.
When
calling
line
number suppression is
active,
dialled numbers are also stored in the
last number redial memory preceded by a
7’.
Table of contents
Other ASCOM Telephone manuals

ASCOM
ASCOM Eurit 30 User manual

ASCOM
ASCOM OFFICE M User manual

ASCOM
ASCOM OFFICE 35 User manual

ASCOM
ASCOM OFFICE 10 User manual

ASCOM
ASCOM Eurit 40 User manual

ASCOM
ASCOM Ascotel Office 35 User manual

ASCOM
ASCOM Eurit 33 Plus User manual

ASCOM
ASCOM Aura 15 User manual

ASCOM
ASCOM OFFICE 25 User manual

ASCOM
ASCOM Berkshire MR42 User manual

ASCOM
ASCOM OFFICE 45 - User manual

ASCOM
ASCOM ASCOTEL OFFICE TERMINALS-FEATURES User manual

ASCOM
ASCOM Eurit 4000 User manual

ASCOM
ASCOM ascotel 200 office 30 User manual

ASCOM
ASCOM Ascotel Office 30 User manual

ASCOM
ASCOM OFFICE T User manual

ASCOM
ASCOM OFFICE 45 - User manual

ASCOM
ASCOM OFFICE 10 User manual

ASCOM
ASCOM Eurit 20 User manual

ASCOM
ASCOM Eurit 25 User manual