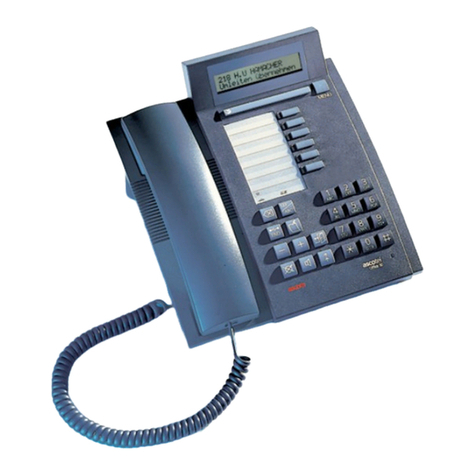
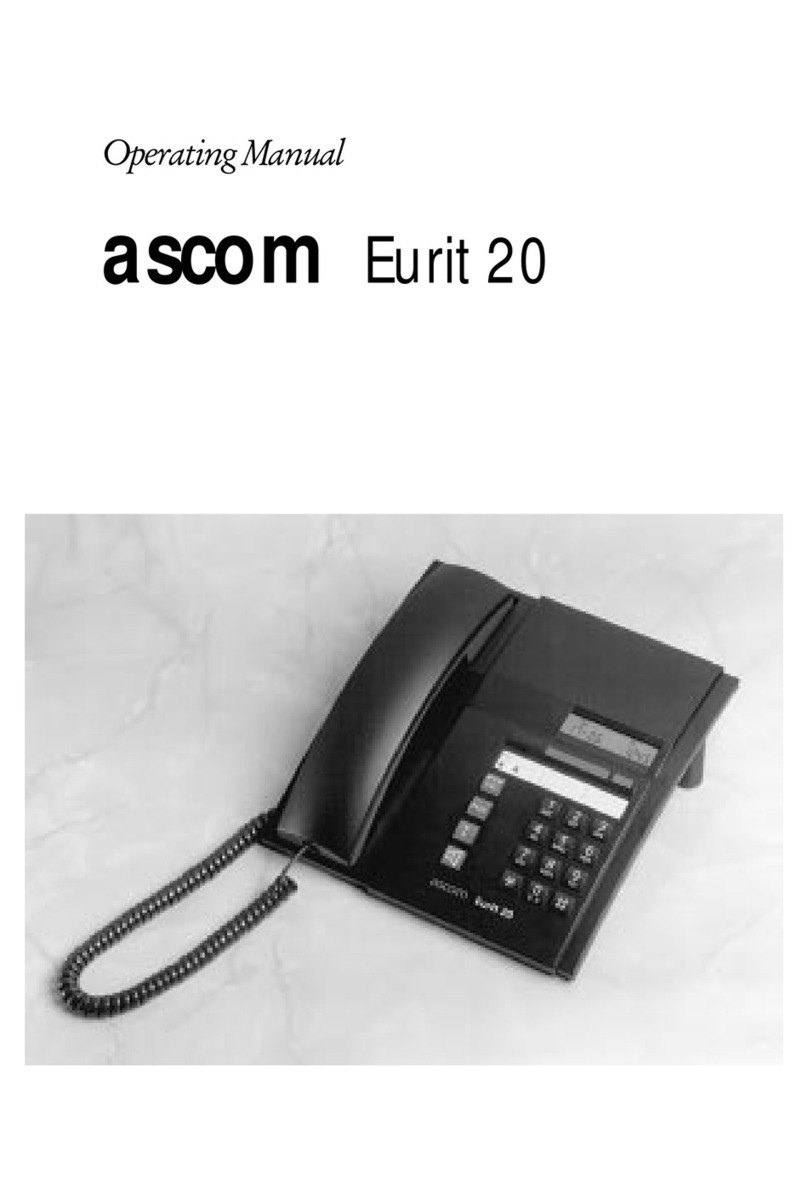
ASCOM Eurit 33 Plus User manual

a The world in your hands
Ascom Eurit 33 / 33 plus
ISDN telephone
Operating Instructions


20312912en_ba_a0
Note the following safety precautions for positioning, connecting and operating the telephone.
➭
Place your telephone on a non-slip mat!
➭
Position the connection cable carefully to avoid accidents!
➭
Avoid positioning the telephone near heat sources, in direct sunlight and in the vicinity of
other electrical equipment.
➭
Protect your telephone against dust and avoid exposing it to moisture, steam or aggres-
sive liquids.
➭
Plug the connection cable only into the outlet intended for this purpose.
➭
Connect only authorised accessories.
➭
Never
– open your telephone yourself!
– touch contacts with pointed, metallic objects!
➭
Clean your telephone only with a slightly damp cloth or antistatic cloth.
Never use a dry cloth or cleaning and chemical substances.
➭
Do not use your telephone in damp rooms (e.g. bathroom) or in areas at risk from
explosion.
Safety tips
I

20312912en_ba_a0
3
D
E
F
1
2
A
B
C
G
H
I
4
5
J
K
L
6
M
N
O
7
P
Q
R
S
8
T
U
V
9
W
X
Y
Z
0
MENUMENU
PARK ESC
LOG
R
II
Operating elements and displays
Display: Signs and symbols
\Show next display
ûShow previous display
∏Inbox (calls, messages, mails)
õMail
õ˜ Send mail
óTelephone answering machine TAM
˚Number suppressed
√Play
–Stop
—Pause
ãPrevious message (skip)
£Display previous selection
ôNext message (skip)
@Display next selection
ÎAnswer only
ÿAnswer and record
˙Provider
∞∞ Phonebook
˜∞∞ Enter in phonebook
∞∞˜ Read from phonebook
·Reject
ìCall forwarding permanent
íCall forwarding if busy
ΩCall forwarding delayed
ÛCallback
ÁHotline
‚Call filter
îAppointment
ƒLoudspeaker
Microphone
„Microphone Mute
ùDo Not Disturb
áHeadset
ÚInformation
Œ... ªUser symbols
1 2 34 56
8716 121514 13 91011

20312912en_ba_a0
III
Operating elements and displays
1 Display
Two-line alphanumeric display with 24 characters per line
2 Foxkey (multifunction key)
The available functions are shown under the display line and directly called up by press-
ing the Foxkey under the relevant text.
3 Menu key
Press once: Select main menu, return from sub-menus to the main menu.
Press and hold down: Switch TAM on and off for all users
4 Telephone answering device LED
Unlit: TAM switched off.
Lit: TAM switched on, no messages.
Slow flash: TAM switched on, no messages.
Fast flash: TAM memory full
5 User key
Select user A, B, C, D or E
6 User LED
Unlit: All users accept calls. Lit: At least one user is not accepting calls (Call Forwarding
active, Do Not Disturb etc.)
7 Dialling keypad
12 dual-function keys for numerical and alphanumerical entry
8 Short dialling keys
The five short dialling keys are capable of storing two numbers and are freely program-
mable.
9 Emergency mode switch
The emergency mode switch is located under the write-on label.
10 ESC key (Escape key)
Press once: Skip to previous menu level. Press and hold down: Switch to standby mode
11 LOG key
Shows the numbers of the last 10 answered calls
12 Redial key
Shows the last 10 dialled numbers
13 Loudspeaker key
Switch loudspeaker on and off
14 R key (enquiry key)
Initiate enquiry call, switch between two calls
15 Park key
Park and retrieve a call
16 Minus and plus keys (cursor keys)
Move cursor left or right, adjust volume up or down, decrease or increase values

1
20312912en_ba_a0
A Eurit 33 / 33 plus Euro-ISDN Telephone
In purchasing the Eurit 33 / 33 you have selected a Swiss-quality product.
Thank you for your confidence in our company.
The Eurit 33 / 33 is designed for connection to the public Euro-ISDN network.
If you plan to use the Eurit 33 / 33 plus in conjunction with a PBX, please refer to the
Chapter »PBX Operation«.
Please read these operating instructions carefully to familiarise yourself with and take full
advantage of the benefits of your new Eurit 33 / 33 plus.
Keep these operating instructions in a safe place!
Important information on your Euro-ISDN connection
These operating instructions describe all the functions you need to apply for from your
network provider. Some of these functions are available at a charge.
The services available at your ISDN access port depend on the type of subscriber
connection you have.
For further information on the available services, contact your network provider.
Contents
Contents
Safety tips .............................................................................................................................. 2
Operating elements and displays......................................................................................... 3
Setting up the telephone ...................................................................................................... 5
Contents of the package ...................................................................................................... 5
Connecting the telephone .................................................................................................... 5
Display on setup ................................................................................................................... 6
Positioning the telephone ..................................................................................................... 6
Preparing the write-on labels. ............................................................................................... 6
Setting up the telephone ...................................................................................................... 7
Changing the housing .......................................................................................................... 7
Emergency mode ................................................................................................................. 7
Basic operating information ................................................................................................. 8
User concept ........................................................................................................................ 8
Changing users .................................................................................................................... 8
Display in standby mode....................................................................................................... 9
Menus................................................................................................................................ 10
Acoustic signals .................................................................................................................. 10

2
20312912en_ba_a0
Contents
Dialling ................................................................................................................................. 11
On-hook dialling ................................................................................................................11
Redial ................................................................................................................................. 11
Dialling numbers from the caller list.................................................................................... 12
Dialling from the call LOG .................................................................................................. 13
Dialling from the phonebook.............................................................................................. 14
Speed-dialling .................................................................................................................... 14
Telephoning ......................................................................................................................... 15
Incoming calls .................................................................................................................... 15
Rejecting incoming calls ..................................................................................................... 15
Handsfree .......................................................................................................................... 15
Listening by loudspeaker .................................................................................................... 16
Mute .................................................................................................................................. 16
Phonebook ........................................................................................................................... 17
General information ........................................................................................................... 17
New entry .......................................................................................................................... 19
Changing an entry ............................................................................................................. 21
Deleting an entry................................................................................................................ 22
Advanced features .............................................................................................................. 23
Call forwarding .................................................................................................................. 23
Individual user charges, call charge total ............................................................................. 24
Setting hotline (direct call) .................................................................................................. 25
Setting appointments (alarm function)................................................................................ 26
Enquiry call......................................................................................................................... 26
Switching between calls ..................................................................................................... 27
Call transfer ...................................................................................................................... 27
Three-party conference ...................................................................................................... 28
Call divert (CD) ................................................................................................................... 28
Automatic callback or redial if busy .................................................................................... 29
Call waiting / accepting a second call ................................................................................. 30
Park ................................................................................................................................... 31
Speed-dialling .................................................................................................................... 32
Malicious Call Identification (MCID) .................................................................................... 34
DTMF (Dual Tone Multifrequency) ...................................................................................... 34
Subaddresses ..................................................................................................................... 35
Send keypad ...................................................................................................................... 35
Send mail (UUS) .................................................................................................................36
Info messages .................................................................................................................... 37

3
20312912en_ba_a0
Contents
Basic settings ....................................................................................................................... 38
User setup .......................................................................................................................... 38
Deleting users .................................................................................................................... 39
Setting the date and time ................................................................................................... 40
Setting the language .......................................................................................................... 41
Switching the headset on and off ....................................................................................... 42
Settings for automatic redial (autodial) ............................................................................... 43
PBX settings ....................................................................................................................... 43
Setting the contrast ............................................................................................................44
Setting the tax factor and currency ..................................................................................... 45
Editing the provider list / dialling via provider ...................................................................... 46
User settings ........................................................................................................................ 48
Setting the ringing melody and volume .............................................................................. 48
Switching the call filter on and off ...................................................................................... 49
CLIR (Calling Line Identification Restriction) ........................................................................ 50
Call waiting ........................................................................................................................ 51
Entering the park code ....................................................................................................... 52
Eurit 33 plus telephone answering machine (TAM).......................................................... 53
Introduction ....................................................................................................................... 53
Activating/deactivating the TAM for all users ...................................................................... 54
Activating / deactivating the TAM for individual users ......................................................... 54
Call acceptance .................................................................................................................. 55
Greetings ........................................................................................................................... 56
Default greeting ................................................................................................................. 56
Recording greetings ........................................................................................................... 56
Selecting / playing back the greeting .................................................................................. 58
Deleting / changing greetings ............................................................................................. 59
Incoming messages ............................................................................................................ 60
Telephoning during recording of an incoming message ...................................................... 60
Message playback .............................................................................................................. 60
Deleting messages.............................................................................................................. 62
Ring count / economy function........................................................................................... 63
Message length / listen ....................................................................................................... 64
Recording quality / recording time ...................................................................................... 65
Recording the closing message ........................................................................................... 66
Eurit 33 plus remote access................................................................................................. 67
Introduction ....................................................................................................................... 67
Setting the PIN-Code .......................................................................................................... 68
Setting up a connection to the TAM ................................................................................... 69
4
20312912en_ba_a0
Contents
Remote access with economy function ............................................................................... 69
Remote access functions .................................................................................................... 70
Setting room surveillance ................................................................................................... 73
Setting a direct access number ........................................................................................... 74
Setting the number of rings for automatic remote activation of the TAM ........................... 75
Recording a help message .................................................................................................. 76
PBX operation ...................................................................................................................... 77
Setting the Exchange Access Code (EAC)............................................................................ 77
Incoming EAC ....................................................................................................................78
Setting the transfer type ..................................................................................................... 79
Call transfer on-hook ......................................................................................................... 80
Keypad information............................................................................................................ 81
Sending the keypad automatically ...................................................................................... 82
Reset functions .................................................................................................................... 83
Resetting the telephone to default ..................................................................................... 83
Deleting the phonebook..................................................................................................... 83
Deleting the remote access PIN........................................................................................... 84
Resetting the TAM ............................................................................................................. 84
Deleting the parameters ..................................................................................................... 85
Important information ........................................................................................................ 86
Show software version and checksum ................................................................................ 86
PC dialling option (PC Dialer II) ........................................................................................... 86
Software update ................................................................................................................ 86
Technical Data.................................................................................................................... 87
Warranty conditions ........................................................................................................... 87
Disposal ............................................................................................................................. 87
Default settings / delivery status ......................................................................................... 88
Menu structure ..................................................................................................................89
Index ..................................................................................................................................... 91

5
20312912en_ba_a0
Contents of the package
Eurit 33 / 33 plus with mounted housing
Handset
Telephone connection cable
Spiral handset cord
Transparent cover for write-on panel
Operating Instructions
Connecting the telephone
The connection sockets are located on the underside of the telephone.
Connect the handset first by plugging the connector of the longer,
straight end of the handset cord into the socket on the underside
of the telephone . Make sure the connector clicks into place.
Insert the connector at the spiral end of the handset cord into the
handset . Pull lightly on the cable to check that it is in position.
Insert the cord in the cable
guide .
Now plug the shorter con-
nector of the telephone ca-
ble into the socket on
the underside . Make sure
the connector clicks into
place. Pull lightly on the
cable to check that it is in
position.
Insert the other end of the
cable into your ISDN tel-
ephone outlet .
Insert the cable in the cable
guide .
To release the cable use a ballpoint pen or similar object to press the holding hook on the con-
nector in the direction of the connector body and prise the connector out along with the cable.
Setting up the telephone

6
20312912en_ba_a0
Setting up the telephone
Display on setup
Once you have connected your Eurit 33 / 33 plus the display shows the prompt: »Bitte geben
Sie mindestens eine MSN (Mehrfachrufnummer) mit Bezeichnung ein«. (Please enter at least
one MSN (Multiple Subscriber Number) with code).
To be able to use all the functions of your Eurit 33 / 33 plus, you must define at least one user
(i.e. enter at least one Multiple Subscriber Number [MSN]).
The detailed procedure for setting a user is described under »User setup«
If you wish to use the telephone first and define a user later:
Lift the handset and enter a number.
The number is displayed.
Replace the handset when the call is over.
Date and time are displayed.
➭
Do not forget to define at least one user later, to ensure full functionality of your Eurit 33
(see »User setup«).
Positioning the telephone
Your telephone is designed for use under normal conditions. Modern furniture is coated with a
wide range of varnishes and plastics and treated with a variety of different finishes and polishes.
Some of these agents may contain ingredients that corrode and soften the plastic pads of the
telephone. If this happens, it may lead to undesirable marks on the furniture surface.
Understandably, the manufacturer cannot accept any liability for such damage.
We therefore recommend that you position your telephone on a non-slip mat, especially if it is
placed on new or varnished furniture.
Preparing the write-on labels.
Turn over the printed write-on label for speed-dial numbers or cut out a label from the back of
the operating instructions. The label for your own telephone number is also located at the back
of the operating instructions.
If you already know which speed-dial numbers you wish to store, note the associated numbers
or functions on the write-on label for speed-dial numbers. Enter your own number(s) and
emergency numbers on the write-on label for your telephone number.
Place the labels in the label recesses (left of the short dialling keys or on the underside of the
handset) and cover them with the transparent panel.
Dial: 0551234567_
21.01.99 11:11
0
7 9
4 65
1 32

7
20312912en_ba_a0
Setting up the telephone
Changing the housing
Your telephone is delivered with a standard mounted housing (upper housing cover). You can
change the housing as required, in order to customise your telephone. Other housings in a
range of colours are available from your telephone retail outlet as accessories for the Eurit 33 /
33 plus.
Unplug the telephone before changing housings! To change the housing, grip the upper
left-hand corner (above the display) with the right hand. Place the left hand on the handset and
press down against the base of the telephone. Now give the cover a good pull towards you
(slight upward pull).
Position the new housing correctly and press it onto the telephone until it clicks into place.
Check that all keys can be activated easily. Plug the telephone in again.
Emergency mode
If the 230 V power supply is cut off from the mains connector (NTBA), the ISDN port is powered
directly from the exchange (emergency mode). This remote power supply is sufficient only to
power a single telephone.
If several telephones are operated from the same connection, only one set may be authorised
for emergency mode. Otherwise the entire ISDN port is disabled during emergency operation.
The emergency mode switch is located under the write-on label for one-touch numbers.
Activating emergency mode authorisation
Emergency mode authorisation can be activated by pressing
the switch (e.g. with a ballpoint pen). The switch slides to the
lower position.
Deactivating emergency mode authorisation
Slide the switch to off position by pressing against the
retaining spring (e.g. with a ballpoint pen).
➭
You can use an emergency-authorised set to telephone in the normal manner.
➭
In the event of a power failure the settings and entries in the phonebook are retained.
➭
During emergency mode the display may be switched off. Ringing and loudspeaker vo-
lume may also be reduced.
➭
The emergency mode telephone signals calls for all Multiple Subscriber Numbers (MSN).
➭
To telephone in emergency mode you must first lift the handset and then dial the number
(loudspeaker key does not function).
➭
The emergency mode telephone should be clearly marked with a stick-on label.
on off

8
20312912en_ba_a0
Basic operating information
User concept
The Eurit 33 / 33 plus allows you to set up to five users for one telephone. For example, if you
use the telephone at home you can set the following users:»Mother«, »Father«, »Child 1«,
»Child 2«, and »Child 3«. If, for instance, you use it for work and private applications, you can
set »Company«, »Private«, »Club 1«, »Club 2«, and »Club 3«. You can switch from one user
to another by pressing the user key. The display shows the active user’s code (A, B, C, D or E).
➭
The detailed procedure for setting different users is described in the Chapter »Basic
settings«.
Once you have defined the relevant settings for each user, your Eurit 33 / 33 plus handles
various functions individually depending on the set user. For every call the active user’s number
is displayed on the partner’s telephone. Incoming calls are assigned to the relevant user and
stored in his own caller list or TAM. Costs are charged to the individual users. Calls can be
separately forwarded according to the user’s individual requirements.
Changing users
If a user code (A, B, C, D or E) is displayed on the right of the upper display line, the user can be
changed as follows:
The active user is displayed on the right of the
upper display line.
Press the user key.
The name of the next user is briefly displayed.
Press the user key until the relevant user is
displayed.
After a brief pause the previous display re-
appears, with the code of the selected user in
the upper display line.
21.01.99 ˚fi 11:11 Œ
˝˝˝˝˝˝˝˝˝˝Tom˝˝˝˝˝˝˝˝˝˝˝
˝˝˝˝˝˝˝˝˝John˝˝˝˝˝˝˝˝˝˝˝
21.01.99 ˚fi 11:11 ª

9
20312912en_ba_a0
Basic operating information
Display in standby mode
If your Eurit 33 / 33 plus is in standby mode, the display shows the date, status pictograms (if
applicable), the time and the active user code. If more than 8 status pictograms are displayed,
the date is not shown.
Standby mode for fewer than 8 status
pictograms.
Standby mode for more than 8 status
pictograms. The status pictograms are always
displayed right-justified in the following order:
The meanings are as follows:
Á Hotline on
fi TAM on
ù Not Disturb
˚ Number suppressed
≈ Filter on
˙ Provider on
î Appointment on
‰ Call forward on (any user)
Û Callback on
á Headset on
If you press the Foxkey under you are given
the choice of the functions »Suppress No.« or
»Tell No.« and can activate them by pressing
the Foxkey again. The associated status
pictogram is displayed or disappears.
21.01.99 ˚fi 11:11 Œ
áÛ‰î˙≈˚ùfi 11:11 Œ
21.01.99 11:11 Œ
Suppress No.
21.01.99 ˚ 11:11 Œ
Tell No.

10
20312912en_ba_a0
Basic operating information
Menus
The Eurit 33 / 33 plus offers simple operation thanks to menu-driven guidance. Entries in the
phonebook (and subsequent editing), settings and programming are performed using menus. If
you have selected menus or submenus, the handset must always be on-hook. If you receive a
call or lift the handset during menu selection, the procedure is automatically aborted.
Use the menu key and Foxkey to select menus or submenus as follows:
Hold down the ESC key until the Eurit 33 / 33
plus is in standby mode (date, status and time
displayed).
Press the menu key until the relevant menu is
shown. »Phonebook«, »Functions«, »Settings«,
»Installation«.
After the last menu the telephone returns to
standby mode.
Press the Foxkey under \or ûuntil the
desired submenu is displayed.
Execute the function.
Press the menu key to go to the next-highest
menu level.
Press the ESC key to return to standby mode.
➭
The entire menu structure is described under »Important information«.
Acoustic signals
Your telephone offers further operating assistance by means of acoustic signals:
Confirmation signal
This confirms correct entries/changes by emitting two short, high tones.
Warning signal
This alerts you to incorrect manoeuvres or entries by emitting a single deep warning signal.
Taxes: DM 99.50 Œ
change û \
MENU
Functions Œ
û\
Functions Œ
û\
MENU
ESC
21.01.99 ˚fi 17:31 Œ
∏3(5)
21.01.99 ˚fi 17:31 Œ
∏3(5)
ESC

11
20312912en_ba_a1
Dialling
On-hook dialling
Enter the number you wish to call.
You can press the Foxkey under ∞∞˜ to search
for and dial a number stored in the phonebook
(see »Dialling from the phonebook«)
Press the Foxkey under ˜∞∞ to enter the dialled
number in the phonebook.
Press the Foxkey under »del« to delete the
character at the cursor position.
Press loudspeaker key.
Lift the handset when your call has been
answered.
Redial
The redial memory stores the 10 last-dialled telephone numbers irrespective of which user has
entered the numbers (the redial memory is not user-specific). You can call these numbers again
without entering the numbers.
Press the redial key, if necessary several times,
to select a number from the last-dialled number
list.
The display shows the last-dialled number or, if
this is stored in the phonebook, the associated
name.
You can scroll up or down the list using the
Foxkey under \or û.
Lift the handset or press the loudspeaker key.
The number is dialled.
➭
If the redial memory is full, the oldest entry is overwritten.
➭
To delete an entry in the redial memory, press the Foxkey under »del«.
➭
To display detailed information on an entry in the redial memory, press the Foxkey under
»i«. The display shows the active user, charge and duration of the call.
➭
Calling Line Identification Restriction (CLIR, suppress calling number) is recognised by the
redial memory and indicated by a »C« in front of the number.
0
7 9
4 65
1 32
Dial: 0551234567_
∞∞˜ ˜∞∞ del
ƒ 0551234567_ Œ
terminate
ˆ 0551234567 Œ
DM 0.10 terminate
Newman John Œ
del ˜∞∞ Ú û \
ƒ 0551234567 Œ
terminate
0551234567 Œ
del ˜∞∞ Ú û \

12
20312912en_ba_a0
Dialling
Dialling numbers from the caller list
Every unanswered call is entered in an individual caller list for each user. Up to 30 calls are
stored in the caller list (in total for all users).
If someone has tried to reach you, a message - for example »∏3(5)« - appears in the lower
display line. The number in brackets indicates that 5 calls have been made to your Eurit 33 and
the number preceding this indicates that 3 calls were intended for the active user.
Press the Foxkey under »∏3(5)« to call up your
personal caller list.
The display shows the number of the most
recent incoming call or, if this is stored in the
phonebook, the caller’s name.
If several calls have been made to your
telephone, you can scroll up or down the list
using the Foxkey under \or û.
Lift the handset or press the loudspeaker key.
The number is dialled.
➭
Press the Foxkey under »i« to display the date and time of the call (if a caller has called
several times e.g. 3x, the date and time of the last call are displayed).
➭
After 30 calls the oldest entry is overwritten.
➭
Once you have returned the call from the caller list, the unanswered call is deleted and
stored in the redial memory.
➭
Press the Foxkey under
˜∞∞
to enter the dialled number in the phonebook.
➭
To delete an entry from the caller list, press the Foxkey under »del« (the entry can only be
deleted if no message has been left).
➭
If the caller has recorded a message, the lower display line also shows
fi/i
. The message
can be played back by pressing the Foxkey under
fi/i
.
➭
If the caller has left a mail (UUS), the lower display also shows
ı
. To show the mail, press
the Foxkey under
ı
.
11.11.98 ˚fi 11:11 Œ
∏3(5)
0551234567 Œ
del ˜∞∞ Ú û \
Newman John Œ
del No. Ú û \
Newman John Œ
terminate

13
20312912en_ba_a0
Dialling
Dialling from the call LOG
Your Eurit 33 / 33 plus stores the last 10 answered calls (total for all users) in the call LOG.
Press the LOG key, if necessary several times, to
select a number from the list of answered calls.
The display shows the number of the most
recently answered call or, if this is stored in the
phonebook, the caller’s name.
If several calls have been made to your
telephone, you can scroll up or down the list
using the Foxkey under \or û.
Lift the handset or press the loudspeaker key.
The number is dialled.
➮
Press the Foxkey under »i« to display the user along with date and time of the last
answered calls.
➮
Press the Foxkey under ␣
˜∞∞
to enter the dialled number in the phonebook.
➮
To delete an entry in the caller list, press the Foxkey under »del«.
0551234567 ≠
del ˜∞∞ Ú û \
0551234567 ≠
del ˜∞∞ Ú û \
LOG
0551234567 ≠
terminate
Newman John ≠
del No. Ú û \

14
20312912en_ba_a0
Dialling
Dialling from the phonebook
Press menu key
»Phonebook«.appears in the display.
Press Foxkey under \ou û.
The first or last entry in the phonebook is
displayed.
To dial a number from the phonebook you have
two options:
Either enter the first letters ...
For example, for the name »Newman«,
press Key 6 twice.
The display shows the first name beginning
with »N«.
Press the Foxkey under \until the name you
are seeking is shown.
Lift the handset or press the loudspeaker key.
The number is dialled.
... or scroll
Press the Foxkey under \ ou ûto scroll
through the phonebook.
Once the name you are seeking appears in the
display, lift the handset or press the
loudspeaker key. The number is dialled.
➭
For detailed information on the phonebook (entering, editing, etc.), refer to
»Phonebook«.
Speed-dialling
Press the relevant speed-dialling key briefly
(numbers 1 to 5) or twice in rapid succession
(numbers 6 to 10).
The preprogrammed number or function is
displayed.
Lift the handset or press the loudspeaker key.
The number is dialled or the function executed.
➭
For detailed information on speed-dialling, refer to »Speed-dialling«.
MENU
Phonebook Œ
new û \
Angel Tim Œ
change new del û \
M
N
O
6
M
N
O
6
Nail Nancy Œ
change new del û \
Newman John Œ
change new del û \
ƒ Newman John Œ
terminate
Bang Nancy Œ
change new û \
ƒ Newman John Œ
terminate
Dial: 0551234567
∞∞˜ ˜∞∞ del
0551234567 Œ
terminate

15
20312912en_ba_a0
Telephoning
Incoming calls
Incoming calls are signalled by the user’s own set ringing melody, in order to acoustically
distinguish between calls for different users.
The display shows the caller’s number provided Calling Line Identification Presentation is active
or the number is available. If the number is stored in the phonebook, the name is automatically
displayed. The name on the left of the display shows which user is being calls.
Rejecting incoming calls
If you do not wish to answer an incoming call:
Press the Foxkey under @until »reject«
appears in the lower display line.
Press Foxkey under »reject«.
The call is rejected and the caller’s number is
stored in the caller list.
➭
The lower display line offers you further options:
–
êfiTAM
(Forward call to TAM)
–
forward
(Forward call to another number, see »Advanced features«).
Handsfree
If you wish to conduct a call without using the handset, you can talk into the microphone of
your Eurit 33 / 33 plus and listen to your call partner over the loudspeaker.
During the call press the loudspeaker key and hold down until you have replaced
the handset.
You can hear your call partner in the handset as well as through the loudspeaker.
Replace the handset and release the loudspeaker key.
Handsfree operation is activated.
If you wish to continue the call on the handset, lift the handset.
0551234567 Œ
John accept @
0551234567 Œ
êfiTAM reject @
21.01.99 13:55 Œ
∏1(1) @
Table of contents
Other ASCOM Telephone manuals

ASCOM
ASCOM OFFICE 10 User manual

ASCOM
ASCOM Ascotel Office 30 User manual

ASCOM
ASCOM Eurit 30 User manual

ASCOM
ASCOM OFFICE M User manual

ASCOM
ASCOM OFFICE T User manual

ASCOM
ASCOM ascotel 200 office 30 User manual

ASCOM
ASCOM Aura 15 User manual

ASCOM
ASCOM OFFICE 10 User manual

ASCOM
ASCOM OFFICE 155PRO User manual

ASCOM
ASCOM OFFICE 45 - User manual

ASCOM
ASCOM OFFICE 45 - User manual

ASCOM
ASCOM OFFICE 25 User manual

ASCOM
ASCOM OFFICE 35 User manual

ASCOM
ASCOM Eurit 4000 User manual

ASCOM
ASCOM ASCOTEL OFFICE TERMINALS-FEATURES User manual

ASCOM
ASCOM Eurit 20 User manual

ASCOM
ASCOM OFFICE 10 User manual

ASCOM
ASCOM Eurit 22 User manual

ASCOM
ASCOM Eurit 40 User manual

ASCOM
ASCOM Eurit 25 User manual