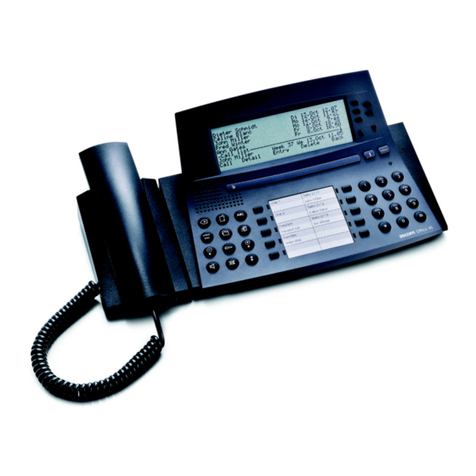
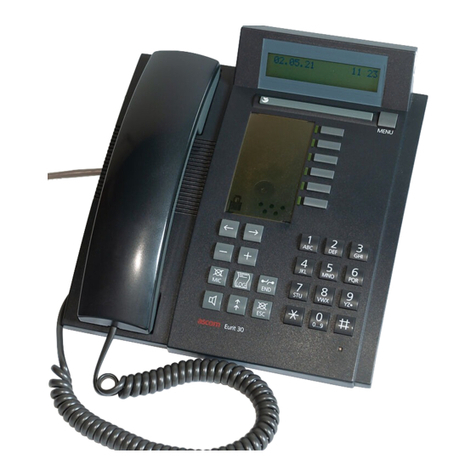
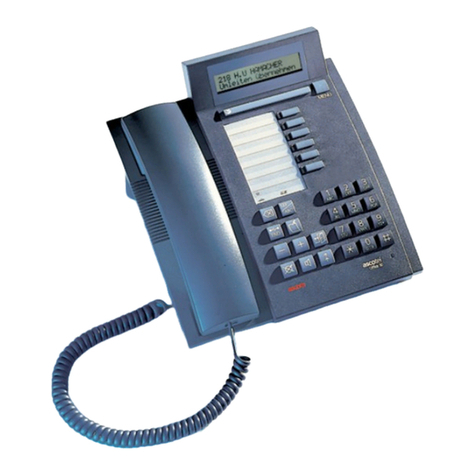
ASCOM Eurit 40 User manual

Operating instructions
ascom Eurit 40

i
General notes to the user
Dear customer,
With the Ascom Eurit 40 you have purchased a Swiss quality product. Thank you for the confidence
you have shown in our company.
Eurit 40 is designed for connection to the Euro ISDN. Before you put your new telephone set into
operation, please read these operating instructions carefully and then store them in a safe place so
that you can refer to them also in the future.
These operating instructions contain the information necessary for correct utilization, optimum use
of the features, and proper maintenance of the Eurit 40 telephone set. Some of the functions
described are subject to a charge. The services available at your ISDN access point depend on the
type of subscriber connection you have. For detailed information on the available services, please
contact your network operator.
If you need additional information on topics that are not covered adequately for your purpose,
please contact a specialist.
These operating instructions contain information that are protected by copyright. Photocopying or
translation into another language is allowed only with the prior written consent of Ascom.
Symbols
The following symbols are used in these operating instructions:
EAction to be performed by you
KK Display key to be pressed
Dialling via the numeric keypad
Dialling via the alphanumeric keypad
store The display texts quoted in the text are represented in this font.
Take the handset off-hook
Put the handset on-hook
Tip
Detail of display
Q W E
A S D
I ?
shift del
Y X
E
X

Display and operating elements
13
14
15
B
18
19
20
21
23 22 1216
17
1
2
6
8
10
11
7
9
3
4
5
A
ii

Display and operating elements
iii
ADisplay 8-Line display
BLED LED on: Answering machine switched on
LED flashes: Answering machine switched on
Message waiting on answering machine.
1KK Display keys Press one of the Display keys to:
– select a displayed name or telephone
number
– activate a function
– branch to a submenu.
2Cursor keys Press one of the cursor keys to scroll the display
horizontally or vertically.
3Menu key Press the Menu key to branch:
–From the basic state into the menus.
(Each time you press this key the next menu is
activated until the basic state is again displayed)
–From a submenu back to the corresponding
main menu.
4INFO key Press the INFO key, followed by the correspon-
ding Display key, to
– obtain information on the displayed telephone
numbers/name
– activate additional functions.
5Escape key Press the Escape key to branch to the basic state
without activating any changes.
6Alphanumeric The alphanumeric keypad permits you to
keypad enter letters and special characters such as period,
comma, semicolon, etc.
7Return key Press the Return key to change the line.
8Delete key Press the Delete key to delete the entered letters,
digits, etc.
9Space key Press the Space key to enter a blank.
10 Shift key Press the Shift key to enter upper case letters.
shift
Q W E
A S D
I ?
shift del
Y X
E
X
F G E
H

11 Dialling keypad Digits and the characters * and # can be entered
via the dialling keypad.
12 Hands-free Use the hands-free microphone to make calls
microphone without taking the handset off-hook.
13 ON/OFF key Switches the answering machine on or off.
14 PARK key Parks the existing connection.
15 END key Terminates a call.
16 LOG key Press the LOG key to call up the LOG directory.
The LOG directory contains the numbers
(or associated names) of the last ten answered
calls. (These are entered in the LOG irrespective
of which phone accepted the calls.)
17 Redial key Press the redial key to call up the redial
directory. The redial directory contains the 20
last-dialled numbers (or associated names).
18 Plus key Increases the volume of the handset and the
loudspeaker.
19 Minus key Decreases the volume of the handset and the
loudspeaker.
20 Microphone mute Press the Microphone mute (Mic-Mute) key to:
– switch the microphone on or off (on telephone
handset and hands-free microphone)
– suppress the own line identification number.
21 Loudspeaker key Press the Loudspeaker key to:
– audibly monitor the status of the connection
to be established
– switch listening by loudspeaker/hands-free
calling on or off.
22 Label For inserting a label with your own telephone
number.
23 Emergency operation The emergency operation switch is located
switch under the label.
P
OFF
ON
Display and operating elements
iv

Symbols/pictograms on the display
Symbol/Pictogram Explanation
›The cursor symbols appear whenever scrolling of the display is
Øpossible. Cursor key can be used.
ıMail switched on
ÁÁ˝ INFO key active
ÛMessage waiting on the answering machine
Ó”Alarm” function on
T”Timer” function on
≥”Call filter” on
PProvider manually selected
ÅLoudspeaker on
ʼn Handsfree calling on
‹Mic-Mute on
Ï”Call forwarding” or ”Call diversion” activated
˙”Outgoing MSN” (here outgoing MSN A)
ÍActive connection
¤CCBS (call-back) activated
·”Headset” function on
fi”Programming lock” function on
”CLIR” function on
ÙSkip forward
@Forward wind
ˆPlay
»Stop
¸Pause
ˇAnnouncement with voice prompt
‡Announcement without voice prompt
Display and operating elements
v

Important information . . . . . . . . . . . . . . . . . . . . . . . . . . . . . . . . . . . . . . . . . . . . . . . . . . . . . . .3
Safety information . . . . . . . . . . . . . . . . . . . . . . . . . . . . . . . . . . . . . . . . . . . . . . . . . . . . .3
Maintenance and disposal . . . . . . . . . . . . . . . . . . . . . . . . . . . . . . . . . . . . . . . . . . . . . . . .3
Conformity to laws and standards . . . . . . . . . . . . . . . . . . . . . . . . . . . . . . . . . . . . . . . . . .4
Warranty . . . . . . . . . . . . . . . . . . . . . . . . . . . . . . . . . . . . . . . . . . . . . . . . . . . . . . . . . . . .4
Euro ISDN . . . . . . . . . . . . . . . . . . . . . . . . . . . . . . . . . . . . . . . . . . . . . . . . . . . . . . . . . . . . . . . . . .5
Euro ISDN connection . . . . . . . . . . . . . . . . . . . . . . . . . . . . . . . . . . . . . . . . . . . . . . . . . . .5
Functions of Euro ISDN . . . . . . . . . . . . . . . . . . . . . . . . . . . . . . . . . . . . . . . . . . . . . . . . . .5
Installation and start-up . . . . . . . . . . . . . . . . . . . . . . . . . . . . . . . . . . . . . . . . . . . . . . . . . . . . . .7
Unpacking the telephone set . . . . . . . . . . . . . . . . . . . . . . . . . . . . . . . . . . . . . . . . . . . . .7
Preparing the telephone set . . . . . . . . . . . . . . . . . . . . . . . . . . . . . . . . . . . . . . . . . . . . . .7
Connecting the telephone set . . . . . . . . . . . . . . . . . . . . . . . . . . . . . . . . . . . . . . . . . . . . .7
Positioning the telephone set . . . . . . . . . . . . . . . . . . . . . . . . . . . . . . . . . . . . . . . . . . . . .8
Emergency operation . . . . . . . . . . . . . . . . . . . . . . . . . . . . . . . . . . . . . . . . . . . . . . . . . . .8
Basic operating concept . . . . . . . . . . . . . . . . . . . . . . . . . . . . . . . . . . . . . . . . . . . . . . . . . . . . . .9
Examples of possible display formats . . . . . . . . . . . . . . . . . . . . . . . . . . . . . . . . . . . . . . . .9
How to program Eurit 40 . . . . . . . . . . . . . . . . . . . . . . . . . . . . . . . . . . . . . . . . . . . . . . .10
This is how you activate the INFO function . . . . . . . . . . . . . . . . . . . . . . . . . . . . . . . . . .11
Basic settings . . . . . . . . . . . . . . . . . . . . . . . . . . . . . . . . . . . . . . . . . . . . . . . . . . . . . . . . . . . . . .13
Default settings . . . . . . . . . . . . . . . . . . . . . . . . . . . . . . . . . . . . . . . . . . . . . . . . . . . . . . .13
Setting the language . . . . . . . . . . . . . . . . . . . . . . . . . . . . . . . . . . . . . . . . . . . . . . . . . . .14
Setting the time/date . . . . . . . . . . . . . . . . . . . . . . . . . . . . . . . . . . . . . . . . . . . . . . . . . .14
Switching the error tone on/off . . . . . . . . . . . . . . . . . . . . . . . . . . . . . . . . . . . . . . . . . . .14
Setting your own telephone numbers (MSN) . . . . . . . . . . . . . . . . . . . . . . . . . . . . . . . . .15
Setting up the card file . . . . . . . . . . . . . . . . . . . . . . . . . . . . . . . . . . . . . . . . . . . . . . . . .18
How to make telephone calls . . . . . . . . . . . . . . . . . . . . . . . . . . . . . . . . . . . . . . . . . . . . . . . . .22
Dialling with handset off-hook . . . . . . . . . . . . . . . . . . . . . . . . . . . . . . . . . . . . . . . . . . .22
Dialling with pre-selection . . . . . . . . . . . . . . . . . . . . . . . . . . . . . . . . . . . . . . . . . . . . . . .22
Dialling from the VIP directory . . . . . . . . . . . . . . . . . . . . . . . . . . . . . . . . . . . . . . . . . . . .22
Dialling from the card file . . . . . . . . . . . . . . . . . . . . . . . . . . . . . . . . . . . . . . . . . . . . . . .23
Dialling from the LOG directory . . . . . . . . . . . . . . . . . . . . . . . . . . . . . . . . . . . . . . . . . . .23
Dialling from the redial directory . . . . . . . . . . . . . . . . . . . . . . . . . . . . . . . . . . . . . . . . . .23
Dialling from the caller list . . . . . . . . . . . . . . . . . . . . . . . . . . . . . . . . . . . . . . . . . . . . . . .24
You receive a call . . . . . . . . . . . . . . . . . . . . . . . . . . . . . . . . . . . . . . . . . . . . . . . . . . . . . . . . . . .25
To answer the call . . . . . . . . . . . . . . . . . . . . . . . . . . . . . . . . . . . . . . . . . . . . . . . . . . . . .25
To reject the call . . . . . . . . . . . . . . . . . . . . . . . . . . . . . . . . . . . . . . . . . . . . . . . . . . . . . .25
Forwarding a call to a different telephone number (CD) . . . . . . . . . . . . . . . . . . . . . . . .25
Forwarding a call to the answering machine . . . . . . . . . . . . . . . . . . . . . . . . . . . . . . . . .26
Picking up a call from the answering machine . . . . . . . . . . . . . . . . . . . . . . . . . . . . . . . .26
Unanswered calls . . . . . . . . . . . . . . . . . . . . . . . . . . . . . . . . . . . . . . . . . . . . . . . . . . . . .26
Terminating a call . . . . . . . . . . . . . . . . . . . . . . . . . . . . . . . . . . . . . . . . . . . . . . . . . . . . . . . . . .27
One connection exists . . . . . . . . . . . . . . . . . . . . . . . . . . . . . . . . . . . . . . . . . . . . . . . . . .27
Several connections exist . . . . . . . . . . . . . . . . . . . . . . . . . . . . . . . . . . . . . . . . . . . . . . . .27
Other functions and facilities . . . . . . . . . . . . . . . . . . . . . . . . . . . . . . . . . . . . . . . . . . . . . . . . .28
Listening via loudspeaker . . . . . . . . . . . . . . . . . . . . . . . . . . . . . . . . . . . . . . . . . . . . . . .28
Hands-free mode . . . . . . . . . . . . . . . . . . . . . . . . . . . . . . . . . . . . . . . . . . . . . . . . . . . . .28
Adjusting the handset volume for an existing connection . . . . . . . . . . . . . . . . . . . . . . .29
Muting the microphone (Mic-Mute) . . . . . . . . . . . . . . . . . . . . . . . . . . . . . . . . . . . . . . .29
Setting the call charge units . . . . . . . . . . . . . . . . . . . . . . . . . . . . . . . . . . . . . . . . . . . . .29
Table of contents
1

Displaying/clearing the call charges and call duration . . . . . . . . . . . . . . . . . . . . . . . . . .29
Hotline (baby call) . . . . . . . . . . . . . . . . . . . . . . . . . . . . . . . . . . . . . . . . . . . . . . . . . . . . .30
Setting an outgoing MSN . . . . . . . . . . . . . . . . . . . . . . . . . . . . . . . . . . . . . . . . . . . . . . .30
Call forwarding . . . . . . . . . . . . . . . . . . . . . . . . . . . . . . . . . . . . . . . . . . . . . . . . . . . . . . .31
Incoming call selection (call filtering) . . . . . . . . . . . . . . . . . . . . . . . . . . . . . . . . . . . . . . .32
Telephoning via different providers . . . . . . . . . . . . . . . . . . . . . . . . . . . . . . . . . . . . . . . .34
Completion of call to busy subscriber (CCBS) . . . . . . . . . . . . . . . . . . . . . . . . . . . . . . . .36
Parking . . . . . . . . . . . . . . . . . . . . . . . . . . . . . . . . . . . . . . . . . . . . . . . . . . . . . . . . . . . .37
Call waiting . . . . . . . . . . . . . . . . . . . . . . . . . . . . . . . . . . . . . . . . . . . . . . . . . . . . . . . . .39
Setting up additional connections . . . . . . . . . . . . . . . . . . . . . . . . . . . . . . . . . . . . . . . . .40
Switching between existing connections (brokering) . . . . . . . . . . . . . . . . . . . . . . . . . . .41
3-party conference . . . . . . . . . . . . . . . . . . . . . . . . . . . . . . . . . . . . . . . . . . . . . . . . . . . .41
Call transfer (ECT) . . . . . . . . . . . . . . . . . . . . . . . . . . . . . . . . . . . . . . . . . . . . . . . . . . . . .42
Terminating existing connections . . . . . . . . . . . . . . . . . . . . . . . . . . . . . . . . . . . . . . . . . .42
Alarm . . . . . . . . . . . . . . . . . . . . . . . . . . . . . . . . . . . . . . . . . . . . . . . . . . . . . . . . . . . . . .43
Setting the timer . . . . . . . . . . . . . . . . . . . . . . . . . . . . . . . . . . . . . . . . . . . . . . . . . . . . .44
DTMF . . . . . . . . . . . . . . . . . . . . . . . . . . . . . . . . . . . . . . . . . . . . . . . . . . . . . . . . . . . . . .45
Subaddress . . . . . . . . . . . . . . . . . . . . . . . . . . . . . . . . . . . . . . . . . . . . . . . . . . . . . . . . . .45
Macros . . . . . . . . . . . . . . . . . . . . . . . . . . . . . . . . . . . . . . . . . . . . . . . . . . . . . . . . . . . . .45
Activating the macros . . . . . . . . . . . . . . . . . . . . . . . . . . . . . . . . . . . . . . . . . . . . . . . . . .47
Programming lock . . . . . . . . . . . . . . . . . . . . . . . . . . . . . . . . . . . . . . . . . . . . . . . . . . . . .48
Displaying the software version . . . . . . . . . . . . . . . . . . . . . . . . . . . . . . . . . . . . . . . . . . .48
Headset . . . . . . . . . . . . . . . . . . . . . . . . . . . . . . . . . . . . . . . . . . . . . . . . . . . . . . . . . . . .49
Data preservation in the event of power failure . . . . . . . . . . . . . . . . . . . . . . . . . . . . . . .49
Service menu . . . . . . . . . . . . . . . . . . . . . . . . . . . . . . . . . . . . . . . . . . . . . . . . . . . . . . . . .49
Supplementary services . . . . . . . . . . . . . . . . . . . . . . . . . . . . . . . . . . . . . . . . . . . . . . . . . . . . .50
Calling line identification restriction (CLIR) per call . . . . . . . . . . . . . . . . . . . . . . . . . . . . .50
Permanent calling line identification restriction (CLIR) . . . . . . . . . . . . . . . . . . . . . . . . . .50
Connected line identification presentation (COLP) . . . . . . . . . . . . . . . . . . . . . . . . . . . .51
Malicious call identification . . . . . . . . . . . . . . . . . . . . . . . . . . . . . . . . . . . . . . . . . . . . .51
Mail (User-to-user signalling, UUS) . . . . . . . . . . . . . . . . . . . . . . . . . . . . . . . . . . . . . . . .51
Closed user groups (CUG) . . . . . . . . . . . . . . . . . . . . . . . . . . . . . . . . . . . . . . . . . . . . . . .53
Telephone answering machine . . . . . . . . . . . . . . . . . . . . . . . . . . . . . . . . . . . . . . . . . . . . . . . .55
Your answering machine . . . . . . . . . . . . . . . . . . . . . . . . . . . . . . . . . . . . . . . . . . . . . . . .55
Announcements . . . . . . . . . . . . . . . . . . . . . . . . . . . . . . . . . . . . . . . . . . . . . . . . . . . . . .55
Programming the answering machine . . . . . . . . . . . . . . . . . . . . . . . . . . . . . . . . . . . . . .57
Switching the answering machine on/off . . . . . . . . . . . . . . . . . . . . . . . . . . . . . . . . . . .60
Replaying/deleting messages . . . . . . . . . . . . . . . . . . . . . . . . . . . . . . . . . . . . . . . . . . . . .61
Remote message retrieval . . . . . . . . . . . . . . . . . . . . . . . . . . . . . . . . . . . . . . . . . . . . . . . . . . . .62
Important information . . . . . . . . . . . . . . . . . . . . . . . . . . . . . . . . . . . . . . . . . . . . . . . . .62
Changing the PIN code for remote message retrieval . . . . . . . . . . . . . . . . . . . . . . . . . .62
Preparation for remote message retrieval . . . . . . . . . . . . . . . . . . . . . . . . . . . . . . . . . . .63
Enabling remote message retrieval for VIPs . . . . . . . . . . . . . . . . . . . . . . . . . . . . . . . . .63
Remote message retrieval . . . . . . . . . . . . . . . . . . . . . . . . . . . . . . . . . . . . . . . . . . . . . . .64
Use in conjunction with a PBX . . . . . . . . . . . . . . . . . . . . . . . . . . . . . . . . . . . . . . . . . . . . . . . .67
Entering the external line access number . . . . . . . . . . . . . . . . . . . . . . . . . . . . . . . . . . .67
Deleting incoming external line access number . . . . . . . . . . . . . . . . . . . . . . . . . . . . . . .67
Call transfer (ECT) by on-hook . . . . . . . . . . . . . . . . . . . . . . . . . . . . . . . . . . . . . . . . . . .67
Keypad information . . . . . . . . . . . . . . . . . . . . . . . . . . . . . . . . . . . . . . . . . . . . . . . . . . .68
Downloading a software release . . . . . . . . . . . . . . . . . . . . . . . . . . . . . . . . . . . . . . . . . . . . . .69
PC options (PC Dialer) . . . . . . . . . . . . . . . . . . . . . . . . . . . . . . . . . . . . . . . . . . . . . . . . . . . . . . .70
Troubleshooting guide . . . . . . . . . . . . . . . . . . . . . . . . . . . . . . . . . . . . . . . . . . . . . . . . . . . . . .71
Technical data . . . . . . . . . . . . . . . . . . . . . . . . . . . . . . . . . . . . . . . . . . . . . . . . . . . . . . . . . . . . .72
Index . . . . . . . . . . . . . . . . . . . . . . . . . . . . . . . . . . . . . . . . . . . . . . . . . . . . . . . . . . . . . . . . . . .73
Table of contents
2
Safety information
– Your telephone set is designed for normal use in residential or office areas and should not be
used where it can come into contact with water.
– Telephone sets are connected to an electrical voltage.
– Do not connect your telephone set if the connection cables are damaged. Before installation
check the connection cables and periodically re-examine them for damage. If any damage is
visible have it repaired by an authorized service centre.
– Never replace the connectors of the connection cable.
– Plug the connection cable only into outlet intended for this purpose.
– Do not touch the outlets with pointed metallic objects.
– Do not install or use your telephone set in explosion hazard rooms.
– Protect your telephone set from moisture, heavy dust, aggressive fluids and vapours.
– Do not expose your telephone set to direct sunlight or other sources of heat for any period of
time.
– Operate your telephone set only within the temperature range of +5°C to +35°C.
– Avoid using your telephone set in close proximity to radio, TV and video equipment.
– Avoid using the telephone set in close proximity to household equipment (electrical motors).
The speech intelligibility (transmission quality) can be impaired by the electromagnetic fields
generated by such equipment.
– Never carry your telephone set by dangling it on the connection cord.
– Place your telephone set on a non-slip mat.
– Do not drop your telephone set.
– Never open your telephone set yourself.
– If repair is required have the work performed by a specialist.
Maintenance and disposal
Cleaning
– Clean your telephone set using a soft, lightly moistened or anti-static cloth.
– Do not use cleansers or chemical substances for cleaning.
Repair
– Repairs should be performed only by specialists. Do not open the unit yourself under any
circumstance.
– If your Eurit 40 does not function correctly, consult a specialist.
Important information
3

Disposal
– To ensure that the packing material can be recycled, sort it before depositing at your local
collection site. Do not allow children to play with the packing material.
– Make sure that the telephone set is finally disposed off in accordance with local regulations.
Conformity to laws and standards
Eurit 40 conforms to all relevant EU directives.
Warranty
For your telephone set Ascom provides a warranty of 24 months from the date of purchase. As
proof of the purchase date save the sales slip. Within this warranty period Ascom remedies all
defects that are attributable to defective material or workmanship. Ascom may at its own discretion
repair or replace the defective unit.
Not covered by the warranty is damage attributable to improper use, wear, or technical intervention
by third parties. The warranty does not cover consumable materials and defects that do not signifi-
cantly affect the value or operation of the unit.
Warranty claims should be submitted to the authorized dealer from which you purchased your tele-
phone set.
Important Information
4

Euro ISDN connection
Your new telephone set Eurit 40 is designed for connection to the Euro ISDN. This is a digital net-
work that is standardized throughout Europe. It offers a comprehensive range of services that are
either included in your subscription or are available as supplementary services.
There are different types of Euro ISDN subscriber connections that vary in their scope of functions.
Eurit 40 supports all functions available through Euro ISDN. It may happen, however, that you can-
not use all of these functions because they are not included in the subscription for your particular
subscriber connection. Please refer to the documentation of your network operator for a list of
available services.
Functions of Euro ISDN
Euro ISDN offers among others, the functions listed below. Please note that certain Euro ISDN func-
tions can be used only if your communications partner also has an ISDN connection to which a cor-
responding telephone set is attached (for example, the facility to transmit ”Mails”).
Multiple subscriber numbers (MSN)
Depending on the connection type your network operator may allocate several (multiple) telephone
numbers to your connection which you can assign as desired. For example, you can assign a diffe-
rent telephone number to each telephone set on the ISDN connection, or you can assign several
telephone numbers to the same telephone set.
2 exchange lines
With your ISDN connection you can establish two mutually independent external calls. This is feasi-
ble because each ISDN connection features two exchange lines that can be used independently of
each other.
Euro ISDN
5

Caller identification
With incoming calls the telephone number of the calling party is shown on the display of your tele-
phone set (provided the call originates from an ISDN connection).
With outgoing calls your telephone number appears on the display of the called ISDN subscriber.
The caller identification can be suppressed continuously or temporarily.
Call waiting
It is possible to audibly and visually signal a second or even a third incoming call while a call is in
progress. You can decide whether you want to accept or reject the waiting call.
Call forwarding
You can forward all calls arriving for each of your multiple subscriber numbers to any directory
numbers. You can program this function individually for each multiple subscriber telephone num-
ber. You have the following capabilities:
– Call forwarding ”Always”: Incoming calls are forwarded immediately.
– Call forwarding ”No reply”: Incoming calls are forwarded after 15 seconds.
– Call forwarding on ”If busy”: Incoming calls are forwarded if your connection is busy.
Parking
You can ”park” an existing connection for up to 3 minutes in order to make a call from a different
telephone set. It is even possible to disconnect your telephone set and then plug it into a different
outlet of the same ISDN connection.
Call transfer (ECT)
You have initiated a telephone call and additional calls are on hold. You have the ability to inter-
connect two of these calls.
Brokering
If several connections are established you can alternate between two calls (brokering). The commu-
nication partners not in the active call cannot listen into the conversation.
Three-party conference
You can talk with two partners simultaneously.
Euro ISDN
6

Unpacking the telephone set
Unpack your telephone set and remove the packing material. Make sure that your package is com-
plete. You should have received:
– 1 Telephone set – 1 Connection cable
– 1 Handset – 1 Spiral cord
– 2 Snap-on pads
Preparing the telephone set
ESnap on the two pads (1)
EWrite your telephone number on the label
(the label is provided on the rear cover fold out).
ERemove transparent cover (2) of the labelling
window.
EInsert the label into the recess.
EReinsert the cover.
ERemove protective foil (3) from the display.
Connecting the telephone set
Connect the handset
The spiral cord has two straight ends with one
connector each.
EPlug connector (1) of the longer, straight cable
end into the socket on the underside of the tele-
phone set (spring tab F toward housing).
EInsert the cable into the cable guide (2).
EInsert the plug (3) of the shorter, straight cable
end into the handset.
Connect the telephone set to the Euro ISDN outlet
The connection cable has two identical connectors.
EPlug in one connector (4) on the base of the tele-
phone set.
EPlug the other connector (5) into your ISDN tele-
phone outlet.
Installation and start-up
7
1F 2
5
4
3
1 1

Positioning the telephone set
In view of the extensive range of surfacing materials used on furniture we cannot guarantee that
the base of the telephone set (e.g. the pads) will not cause marks. We therefore recommend that
you place the phone on a non-slip mat. It is preferable not to choose a location in direct proximity
of radio, TV and video equipment or close to sources of heat such as radiators.
Emergency operation
If the local 230 V mains supply fails, the ISDN connection is powered directly from the exchange.
However, the exchange supplies only sufficient power for one telephone set.
Important: If several telephone sets are operated on the same ISDN connection, only one may be
authorized for emergency operation.
During emergency operation the display is switched off and telephone calls can only be made by
taking the handset off-hook. In addition the following functions are not available:
– Volume control
– LED
– Clock
– Alarm
– Telephone answering machine, message forwarding
–Call announcement, name announcements, message announcements (on the answering machine)
–Download
Switching on emergency operation
The switch for activating the emergency operation is located
under the telephone number label plastic cover.
ERemove the plastic cover and label.
EPress the emergency operation switch (1) until it locks.
EReinsert the label and cover.
Deactivating the emergency operation
ERemove the label.
EPush nipple (2) on the emergency operation switch to the side.
EReinsert the label and cover.
GThe telephone set which has been switched to emergency mode should be clearly identified
using a coloured sticker.
Installation and start-up
8
1
2

Examples of possible display formats
Depending on the operating state of your telephone set, the display has a different format.
Basic display format
Handset on-hook. Listening by loudspeaker/hands-free calling switched off. No connection establis-
hed. No call is signalled.
Examples of possible display formats in the basic state:
Quiescent display: VIP display:
Date/Time Date/Time
Card file
Caller list entries assigned
Message on answ. machine to the VIP directory
Cursor symbol
Other functions Other functions that
that can be activated can be activated
Display format during programming
During programming you are in a menu or submenu.
Example of possible display formats during programming:
Menu title
Submenu title
Connection state
A connection is being set up or a connection exists already.
Examples of possible display formats in the connection state:
Display format during Display format during
an incoming call: an outgoing call:
Called MSN Call charges/duration
Caller's telephone number Telephone number
of called partner
Functions that Functions that
can be activated can be activated
Basic operating concept
9
19.08.96 14:25
Calls: (3)ÁÁÁ˝
Messages: no
Ø
VIP displayÁÁÁÁÁÁÁÁÁÁ
Tel. functionsÁÁÁÁÁÁÁ
Settings
Time/dateÁÁÁÁÁÁÁÁÁÁÁ
LanguageÁÁÁÁÁÁÁÁÁÁÁÁ
Error toneÁÁÁÁÁÁÁÁÁÁ
MSN settingsÁÁÁÁÁÁÁÁ
Suppl. servicesÁÁÁÁÁ
MiscellaneousÁÁÁÁÁÁÁ
19.08.96 14:25
›Feller ThomasÁÁÁÁÁÁ˝
CoiffeurÁÁÁÁÁÁÁÁÁÁÁ˝
Mustermann HansÁÁÁÁ˝
John MillerÁÁÁÁÁÁÁÁ˝
Tel. functionsÁÁÁÁÁÁÁ
Call: MSN A
01 123 45 67
to TADÁÁÁÁÁÁÁÁÁÁÁÁÁÁÁ
rejectÁÁÁÁÁÁÁÁÁÁÁÁÁÁÁ
forward (CD)ÁÁÁÁÁÁÁÁÁ
DM. 0.12 1’30”
Í_ 01 765 43_ 21ÁÁÁÁÁÁ˝
__
Addl. connectionÁÁÁÁÁ
Tel. functionsÁÁÁÁÁÁÁ

How to program Eurit 40
GProgramming is always performed with the handset on-hook. Programming is interrupted as
soon as you pick up the handset.
Your telephone set is very easy to operate thanks to the menu-driven user guidance. The functions
of your Eurit 40 are grouped in 3 menus. Each menu comprises several submenus.
Menu title
Submenu title
The submenu Tel. functions shows only those functions that can actually be activated in the
momentary state of the telephone set.
In the basic state: When one connection When two or more connections
is set up: are set up:
GThe function Delete call-back is displayed only when automatic ”Completion of call to
busy subscriber” is active.
This is how you access the menus
EPress the Menu key once
EPress the Menu key twice
EPress the Menu key three times
Basic operating concept
10
Main menu
Card fileÁÁÁÁÁÁÁÁÁÁÁ
AlarmÁÁÁÁÁÁÁÁÁÁÁÁÁÁÁ
TimerÁÁÁÁÁÁÁÁÁÁÁÁÁÁÁ
ChargesÁÁÁÁÁÁÁÁÁÁÁÁÁ
Answering machineÁÁÁ
Functions
Deposit mailÁÁÁÁÁÁÁÁ
ForwardingÁÁÁÁÁÁÁÁÁÁ
Call filterÁÁÁÁÁÁÁÁÁ
ProviderÁÁÁÁÁÁÁÁÁÁÁÁ
Data communicationÁÁ
Settings
Time/dateÁÁÁÁÁÁÁÁÁÁÁ
LanguageÁÁÁÁÁÁÁÁÁÁÁÁ
Error toneÁÁÁÁÁÁÁÁÁÁ
MSN settingsÁÁÁÁÁÁÁÁ
Suppl. servicesÁÁÁÁÁ
MiscellaneousÁÁÁÁÁÁÁ
Tel. functions
Suppress no. (CLIR)Á
Send mailÁÁÁÁÁÁÁÁÁÁÁ
Delete call-backÁÁÁÁ
Tel. functions
KeypadÁÁÁÁÁÁÁÁÁÁÁÁÁÁ
DTMFÁÁÁÁÁÁÁÁÁÁÁÁÁÁÁÁ
Register (MCID)ÁÁÁÁÁ
Suppress no. (CLIR)Á
Tel. functions
KeypadÁÁÁÁÁÁÁÁÁÁÁÁÁÁ
DTMFÁÁÁÁÁÁÁÁÁÁÁÁÁÁÁÁ
Register (MCID)ÁÁÁÁÁ
Conference (3 PTY)ÁÁ
Call transfer (ECT)Á
Suppress no. (CLIR)Á
Main menu
Functions
Settings

This is how you access the submenus
KK EPress the corresponding Display key.
This is how you return from a submenu to the corresponding menu
EPress the Menu key.
This is how you program the setting
EEnter the desired data.
or
KK EPress the corresponding Display key.
This is how you save the new settings
When save is displayed:
KK EPress the Display key at save.
This is how you return to the basic state
EPress the Escape key.
GIf during programming no key is pressed for 45 seconds, the display switches automatically to
the basic state (exception: set-up of an entry in the card file).
This is how you activate the INFO function
Using the INFO key you can obtain additional information on displayed telephone numbers or
names, and enable certain functions.
Precondition for activating the INFO function: The character ÁÁÁ˝ is displayed next to the telepho-
ne number or the name the display contains.
KK EConsecutively press the INFO key and the desired Display key (INFO key
first).
Q W E
A S D
I ?
shift del
Y X
E
X
Basic operating concept
11

Example:
You wish to have additional information about an entry in the caller list. With the handset on-hook:
KK EPress the Display key at Calls.
KK EConsecutively press the INFO key and the desired Display key (INFO key
first).
You obtain information on
– Caller's telephone number
– Time and date of call
– Called MSN
You can now activate the following functions:
– Enter the corresponding telephone number automatically in the card file, or
– Delete the corresponding telephone number.
Basic operating concept
12

Default settings
Your telephone set has been pre-programmed in the factory as follows:
Multiple Subscriber Number (MSN) None programmed
Language of display texts English
Call forwarding Off
Call filter Off
Call waiting On
Calling line identification restriction (CLIR) Off
Connected line identification presentation (COLP) Off
Ringing signal Melody: 0
Volume: 3
MSN outgoing MSN A
PIN code 1234
Direct call Off
Error tone On
Programming lock Off
TAD direct Off
Call transfer (ECT) by on-hook Off
Answering machine
Listening in On
Number of ringing signals 5
Charge saving function On
Recording time 180 seconds
Monitoring (room surveillance) Off
You can change these settings to suit your requirements.
For using the basic functions and capabilities of Eurit 40, the following settings are required (for
additional settings refer to section ”Other functions and facilities”, Page 28, and ”Supplementary
services”, Page 50):
– Set time/date
– Set display language
– Set error tone
– Set telephone numbers (MSN)
– Set-up card file
– Adjust volume
GFor programming the desired settings always leave the handset on-hook. The programming
operation is interrupted as soon as you pick up the handset.
Basic settings
13

Setting the language
For display texts you can select English, German, French or Italian. The factory default setting is
”English”. To change this setting:
KK EEnter the submenu Settings/Language.
KK EWhen English is displayed repeatedly press the Display key until the
desired language appears.
KK ESave.
Setting the time/date
The time and date can be set automatically or manually.
GThe time display flashes when your telephone set is connected for the first time or after a power
failure.
Automatic setting
After the first outgoing telephone call the time and date are set and subsequently updated auto-
matically. The time indication no longer flashes. Precondition: The called party answers.
Manual setting
KK EEnter the submenu Settings/Time/date.
EEnter the time and date.
KK ESave.
Switching the error tone on/off
When the ”Error tone” function is active your telephone set signals unacceptable entries with an
alert tone (error tone). The factory has programmed the ”Error tone” function to be on. To change
this setting:
KK EEnter the menu Settings/Error tone.
KK EPress the Display key at >ON<.
KK ESave.
Basic settings
14
Table of contents
Other ASCOM Telephone manuals

ASCOM
ASCOM ascotel 200 office 30 User manual

ASCOM
ASCOM Eurit 22 User manual

ASCOM
ASCOM OFFICE 155PRO User manual

ASCOM
ASCOM Aura 15 User manual

ASCOM
ASCOM OFFICE 10 User manual

ASCOM
ASCOM OFFICE 35 User manual

ASCOM
ASCOM OFFICE 45 - User manual

ASCOM
ASCOM OFFICE 25 User manual

ASCOM
ASCOM Ascotel Office 35 User manual

ASCOM
ASCOM OFFICE 10 User manual

ASCOM
ASCOM ASCOTEL OFFICE TERMINALS-FEATURES User manual

ASCOM
ASCOM OFFICE T User manual

ASCOM
ASCOM OFFICE M User manual

ASCOM
ASCOM Eurit 33 Plus User manual

ASCOM
ASCOM Berkshire MR42 User manual

ASCOM
ASCOM Eurit 4000 User manual

ASCOM
ASCOM Eurit 25 User manual

ASCOM
ASCOM Eurit 20 User manual

ASCOM
ASCOM Eurit 30 User manual

ASCOM
ASCOM OFFICE 10 User manual