Asko CBB862W User manual

INSTRUCTIONS FOR USE
Cooker hood
EN
CBB862W

3Use ..............................................................
3Introduction ..................................................
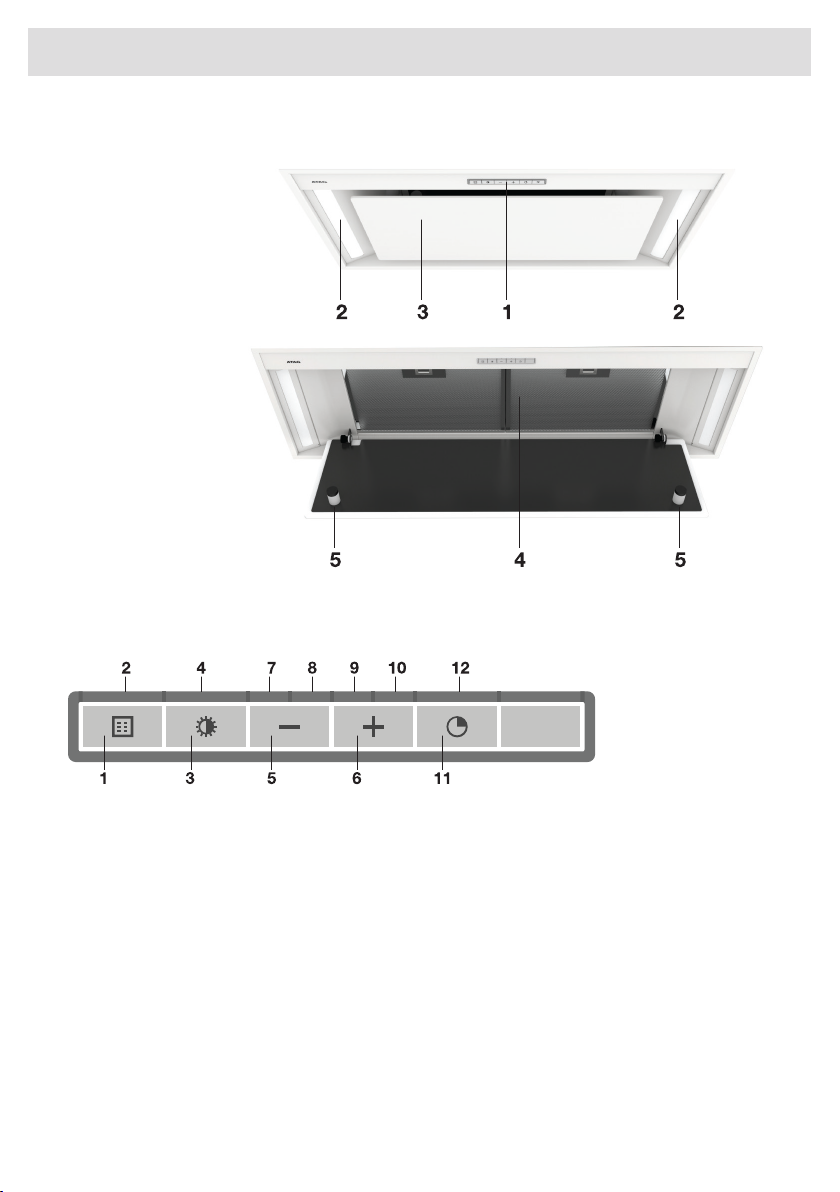
4Description hood .........................................
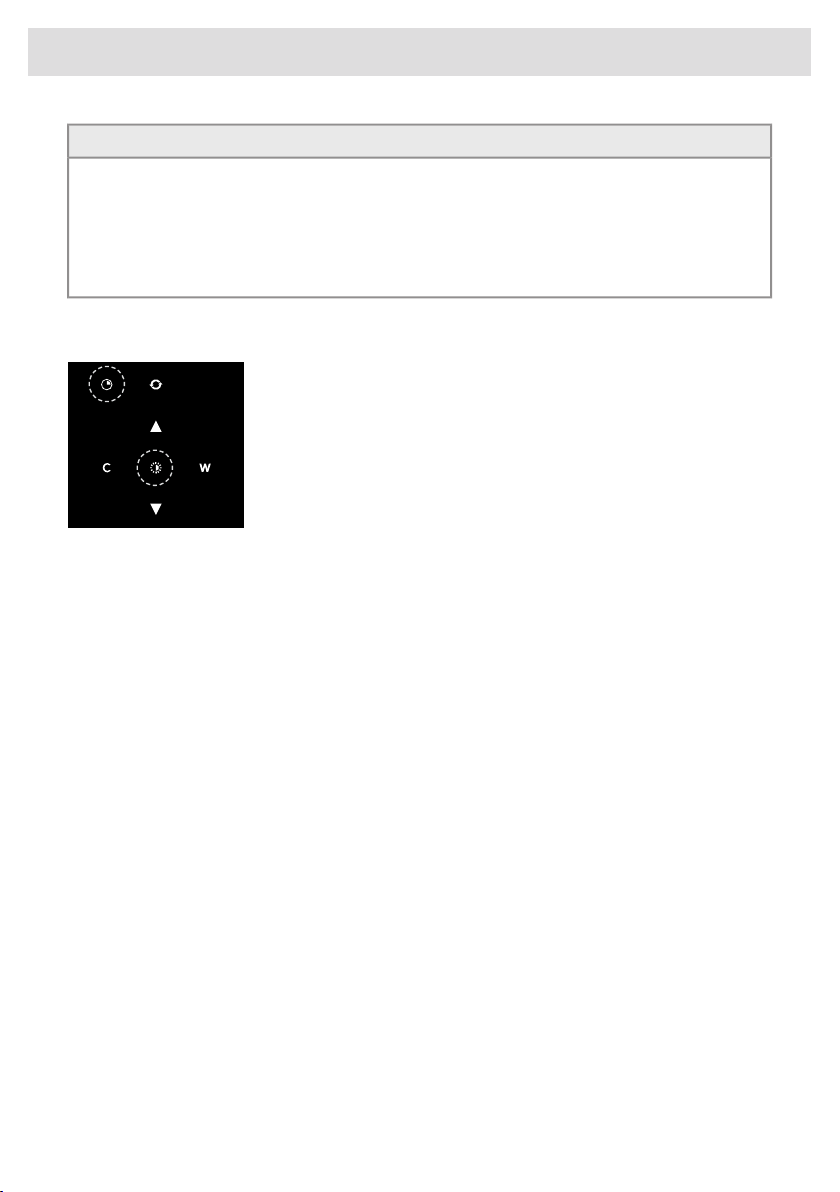
4Description button control ...........................
5Operation ....................................................
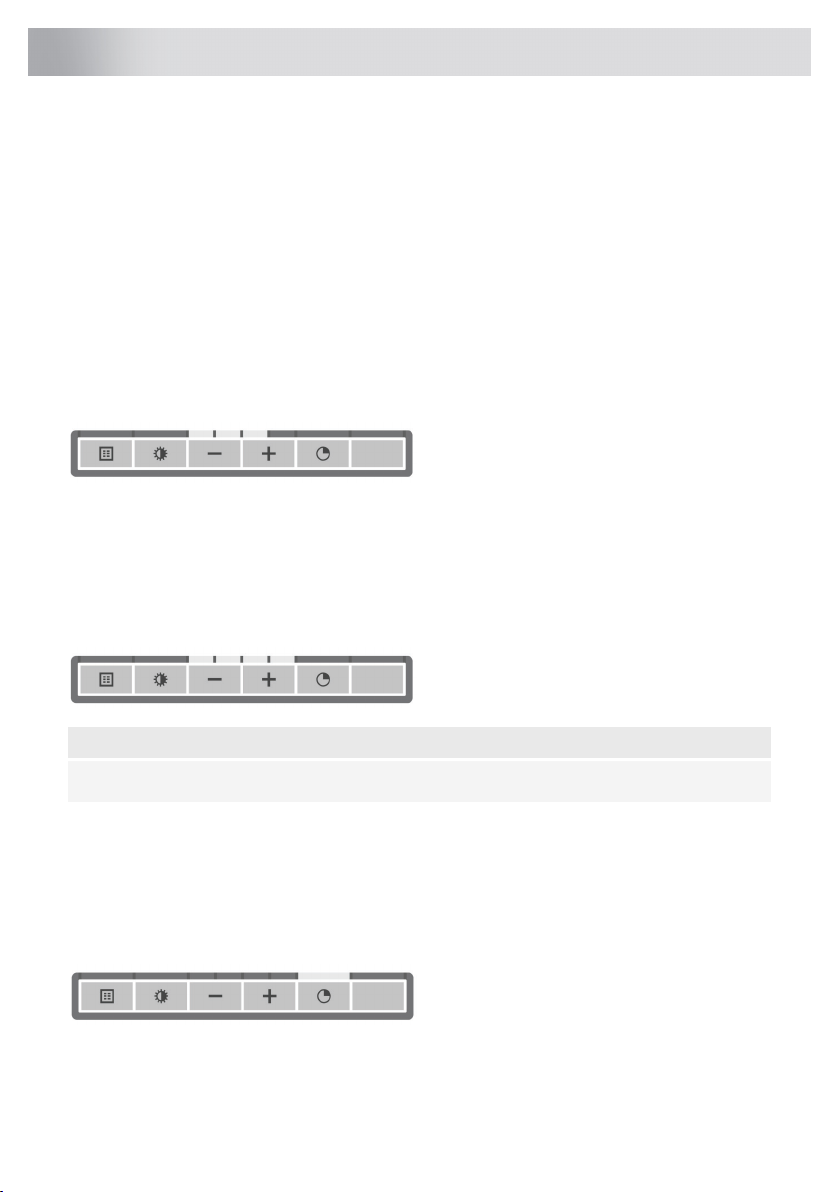
5Switching extraction on and off ...................
5Switch on the boost setting ..........................
5Switching on the timer .................................
6Switching on recirculation mode .................
6Switching off recirculation mode .................
6Clean Air function ........................................
7Switching the light on and off ......................
7Changing the colour temperature ................
8Remote control ...........................................
8Description remote control ..........................
8Pairing the remote ........................................
9Switching extraction on and off ...................
9Switch on the boost setting ..........................
9Switching on the timer .................................
10Switching on recirculation mode .................
10Switching off recirculation mode .................
10Clean Air function ........................................
11Switching the light on and off ......................
11Changing the colour lighting temperature ....
12Maintenance ...............................................
12Cleaning .......................................................
14Filter indicator ..............................................
14Lighting ........................................................
15Battery of the remote ...................................
16Technical data ............................................
16EU Product Sheet ........................................
16EU Product Fiche .........................................
17Environmental aspects ..............................
17
Tips for energy-efficient cooking with
hoods ...........................................................
17Disposal of the appliance and packaging ....
Contents

Introduction
On reading these user manuals you will soon become familiar with the features of this appliance.
Please read the appliance’s safety and maintenance instructions.
Compliance information
Cooker hood (Built-in Unit)Radio equipment type
2402 -2477 MHz (16 channels)Operating frequency range
-5.2 dBm EIRP average (calculated)Maximum output power
-7 dBiMaximum antenna gain
Hereby, ASKO Appliances AB declares that the radio equipment type Cooker hood (Ceiling unit) is
in compliance with Directive 2014/53/EU.
The following symbols are used throughout the manual and they have the following meanings:
INFORMATION!
Information, advice, tip, or recommendation
WARNING!
Warning –general danger
It is important that you carefully read the instructions.
WARNING!
Before use, read the separate safety instructions first!
3
Use

Description hood
1. Button Control
2. LED bar
3. Edge extraction
panel
4. Grease filter
5. Magnet
Description button control
1. Filter reset button, signals when filters require cleaning
2. Filter indicator
3. Lighting button, switches on/off and dims the lighting
4. Light indicator
5. Speed down button, reduces air extraction capacity and switches off
6. Speed up button, switches on and increases air extraction capacity
7. Speed level 1 indicator
8. Speed level 2 indicator
9. Speed level 3 indicator
10. Speed level 4/boost indicator
11. Timer function, turns off hood after time
12. Timer indicator
4
Use

Switching extraction on and off
1. Press the ‘+’button.
The cooker hood will switch on at the lowest setting.
2. Press the ‘+’button again for a higher fan setting. Press and hold the ‘+’button for 1 second to
select the highest setting (boost).
3. Press the ‘-’key to select a lower setting.
The extraction setting is indicated in the speed level indicators.
Each light area represents a speed level. Speed level indicator 4 also serves as a boost indicator
when it blinks.
4. If the extraction setting is set at 1, you can switch off the cooker hood by quickly pressing and
releasing the ‘-’button.
5. To switch off the cooker hood from, press and hold the ‘-’button for at least 1 second.
Switch on the boost setting
1. Press and hold the ‘+’button for at least 1 second.
The boost setting is switched on for 10 minutes. The speed level 4 indicator will flash during this
period. The original extraction setting will be reactivated after this period.
2. Press and release the ‘-’key to switch off the boost setting.
NOTE!
If the boost setting has been selected, the timer function cannot be activated.
Switching on the timer
1. Press the timer key.
The timer indicator will start to blink.
The cooker hood will switch off automatically after 10 minutes.
2. Switch off the timer function by pressing a random button (except the one for lighting).
5
Operation

TIP!
The cooker hood can be used in extraction mode or recirculation mode. The air extraction capacity
is adapted to the selected mode. The hood will start up in the default extraction mode. Is has to
be reset for recirculation mode.
With an RMS kit (Recirculation modification set) the air will first be cleaned by the grease filters
and then odours will be filtered by the charcoal filter. The cleaned air is recirculated back into the
kitchen.
Switching on recirculation mode
Simultaneously press and hold the timer button and the light button until the filter indicator flashes
3 times.
The carbon filter indicator is activated.
Switching off recirculation mode
Simultaneously press and hold the timer button and the light button until the filter indicator lights up
for 3 seconds and then turns off.
Clean Air function
The Clean Air function allows you to freshen the air in your kitchen for a maximum of 24 hours at
level 1.
1. Switch off the cooker hood.
2. Press and hold the timer button for approximately 3 seconds.
The cooker hood will switch on automatically for 10 minutes every hour at the lowest speed
setting. During extraction the display will show a fast moving ‘snake’. When the hood switches
off after 10 minutes, the display will show a slow moving ‘snake’until the hood switches on again
after 50 minutes.
3. Switch off the Clean Air function in the meantime by pressing a random button (any button other
than the light button).
6
Operation

Switching the light on and off
1. Quickly press and release the light button.
The light switches on at maximum strength.
2. Press and hold the lighting button to set the lighting strength.
3. To turn off the light, quickly press and release the light button while the light is on.
The lighting changes from maximum to minimum strength and vice versa.
Changing the colour temperature
You can adjust the lighting temperature.
Press and hold the light button. Press the ‘-’button to make the light ‘colder’or press the ‘+’button
to make the light ‘warmer’.
7
Operation

Description remote control
NOTE!
The remote control is available as an accessory for this cooker hood and is not included with this
appliance.
1. Timer function
2. Increase light intensity
3. Colder light temperature
4. Decrease light intensity
5. Decrease air extraction capacity
6. Clean Air function
7. Warmer light temperature
8. Switch on/off lighting
9. Increase air extraction capacity
10. Fan on/off
Pairing the remote
This remote control must be paired to the cooker hood before first use.
1. Start up the appliance (power on). Press and hold the -’and ‘+ for 3 seconds. The hood will start
‘pairing mode’for 5 minutes.
2. Activate the ’Remote pairing mode’by holding ‘c’and ‘w’for 3 sec.
3. During pairing all the indicators on the hood and remote will blink. All indicators will turn off when
the connection is established.
If the connection is not established repeat the entire pairing process.
NOTE!
Remote control will go into standby after 30 seconds. The remote will wake up when it is picked
up or detects movement.
8
Remote control

Switching extraction on and off
1. Press and hold the ‘Fan’key on the remote for 1 second.
The cooker hood will switch on at the lowest setting.
2. Press the ‘+’key again for a higher fan setting. Press and hold the ‘+’key for 1 second to select
the highest setting (boost).
3. Press the ‘-’key to select a lower setting.
The extraction setting is indicated by the speed level indicators on the hood.
4. To switch off the cooker hood, press and hold the ‘Fan’key for 1 second.
NOTE!
Lighting and motor key must be pressed for at least 1 second. This is to prevent the functions
from being accidentally switched on or off.
Switch on the boost setting
1. Press and hold the ‘+’button for at least 1 second.
The boost setting is switched on for 10 minutes. The speed level 4 indicator will flash during this
period. The original extraction setting will be reactivated after this period.
2. Press and release the ‘-’key to switch off the boost setting.
NOTE!
If the boost setting has been selected, the timer function cannot be activated.
Switching on the timer
1. Press the timer key.
The timer indicator will start to blink.
The cooker hood will switch off automatically after 10 minutes.
2. Switch off the timer function by pressing a random button (except the one for lighting).
9
Remote control

TIP!
The cooker hood can be used in extraction mode or recirculation mode. The air extraction capacity
is adapted to the selected mode. The hood will start up in the default extraction mode. Is has to
be reset for recirculation mode.
With an RMS kit (Recirculation modification set) the air will first be cleaned by the grease filters
and then odours will be filtered by the charcoal filter. The cleaned air is recirculated back into the
kitchen.
Switching on recirculation mode
When the light and fan are off, simultaneously hold the timer key and
the light key until the filter indicator flashes 3 times.
The carbon filter indicator is activated.
Switching off recirculation mode
When the light and fan are off, simultaneously hold the timer key and the light key until the filter
indicator lights up for 3 seconds and then turns off.
Clean Air function
The Clean Air function allows you to freshen the air in your kitchen for a maximum of 24 hours at
level 1.
1. Switch off the cooker hood.
2. Press and hold the ‘clean air’key for approximately 3 seconds.
The cooker hood will switch on automatically for 10 minutes every hour at the lowest speed
setting. During extraction the display will show a fast moving ‘snake’. When the hood switches
off after 10 minutes, the display will show a slow moving ‘snake’until the hood switches on again
after 50 minutes.
3. Switch off the Clean Air function by pressing the timer, clean air, ‘-’or ‘+’keys (any key other
than the light key).
10
Remote control

Switching the light on and off
1. Press and hold the light key for 1 second.
The light switches on at maximum strength.
2. Press and hold the ‘increase light’or ‘decrease light’key to set the lighting intensity.
3. To turn off the light, press and hold the light key for 1 second.
NOTE!
Lighting and motor key must be pressed for at least 1 second. This is to prevent the functions
from being accidentally switched on or off.
Changing the colour lighting temperature
You can adjust the lighting temperature.
1. Press and hold the light key for 1 second.
The light switches on at maximum strength.
2. Press the ‘C’key to make the light ‘colder’or press the ‘W’key to
make the light ‘warmer’.
11
Remote control

Cleaning
WARNING!
Important! For all maintenance, first switch off the mains power to the cooker hood by pulling
the plug out of the socket or by turning off the home's master switch. The hood needs to be
cleaned regularly, both inside as well as outside (at least as often as the grease filter).
Do not use abrasive cleaning products. Do not use alcohol!
If the instructions regarding cleaning of the appliance or replacing the filters are not followed,
this can cause a fire. These instructions must be followed! The manufacturer is not liable for
damage to the hood or fire damage resulting from incompetent maintenance or from
non-adherence to the safety instruction above.
Cooker hood
Clean the cooker hood with soapy water and a soft cloth.
Then rinse with clean water. Do not use aggressive cleaning agents such as caustic soda. The
cooker hood finish stays in good condition if it is buffed periodically following the application of wax.
NOTE!
Stainless steel cooker hoods
Do not use scouring pads or other abrasive cleaners on stainless steel cooker hoods. Finish with
a non-abrasive, non-polishing agent and buff the stainless steel in the direction of the grain.
Metal grease filters
Metal grease filters should be cleaned once a month (or when indicated by the filter cleaning indicator
–if present on the model) using a neutral cleaning agent, either by hand or in the dishwasher on a
short, low-temperature program. Place the grease filters with the openings facing downwards in the
dishwasher so the water can drain out of the filter. Aluminium grease filters become dull as a result
of dishwasher cleaning agents. This is normal and does not effect the working.
12
Maintenance

Removing cassette filter
1. Switch off the motor and lighting.
2. Pull the edge extraction panel carefully out of the magnetic seal.
Tilt the edge extraction panel downwards.
3. Open the filter’s access latch. Support the filter with your hand.
4. Remove the filter from the hood.
Cleaning
The filters can be cleaned in the dishwasher. Allow the filters to drain well before replacing.
The filters can also be cleaned by hand.
Clean the filters in soapy water with washing up liquid and rinse. Allow the filters to drain well. The
underside of the cooker hood can be cleaned with a mild cleaning agent and a damp cloth. Dry off
with a paper towel.
Replacing cassette filter
The filter should be placed with the locking mechanism on the front. Open the filter access latch.
The notches at the front of the filter will then slot in. Hold the access latch in this position when placing
the filters.
1. Slot the notches at the back of the filter in the specially designed opening of the cooker hood.
2. Tilt the filter upwards.
3. Release the filter access hatch. The notches at the back of the filter will extend outwards and
slot into the specially designed openings of the cooker hood.
The filter is now in position again.
4. Press the edge extraction panel firmly in the magnetic seal again (you will hear a click).
TIP!
The edge extraction panel can be removed for cleaning.
13
Maintenance

Active carbon filters
The regenerable active carbon filter must be washed by hand with neutral cleaning products, or in
the dishwasher at a maximum temperature of 65 °C (the washing should be done without any plates,
dishes, cups, etc. in the machine). Do not use washing detergent.
Remove the excess water without damaging the filter, remove the holder and let the filter dry in the
oven for at least 40 minutes at a maximum temperature of 70 °C.
To keep the regenerable carbon filter efficient, this action should be repeated every 2 months or
when indicated by the filter indicator. The filter must be replaced after no more than 3 years, or if it
has been damaged.
NOTE!
It is important that the grease filters and the regenerable active carbon filter are thoroughly dry
before repositioning.
Replacing the carbon filter
To replace the carbon filter, consult the manual for the recirculation kit.
Filter indicator
Saturation of grease and carbon filters
The filters should be replaced or cleaned when the filter indicator is lit. See ‘Maintenance’chapter.
Grease filter
The filter indicator will light up after 30 operating hours.
•The grease filters should then be cleaned.
•Reset the memory by pressing and holding the ‘-’key until the filter indicator goes off.
Carbon filter
The filter indicator will flash after 120 operating hours.
•The carbon filter should then be cleaned or replaced.
•Reset the memory by pressing and holding the ‘-’key until the filter indicator stops flashing.
Lighting
WARNING!
The hood is fitted with LED lights. These must be replaced by an authorized technician. Do not
attempt to replace the LED lights yourself.
14
Maintenance

Battery of the remote
TIP!
When the batteries are replaced the pairing connection will remain.
Replace the batteries in time, as the receiving distance will be shortened if the voltage of the battery
is too low.
Don’t forget to remove the batteries if you don’t use the remote for a long time.
Don’t leave the remote lying upside down on a conductive surface.
The warranty does not cover the batteries.
The battery may drain more quickly in connection with the lit icons.
Battery specifications: Two AAA batteries.
15
Maintenance

EU Product Sheet
Data determined according to:
Standard EN61591 and Commission Regulations (EU) no. 65/2014 and (EU) no. 66/2014.
CBB862W
ASKOTrademark
BU90AA-ABB01Type of model
21Annual Energy Consumption (AEChood) [kWh/a]
A++
Energy efficiency class
39Fluid Dynamic Efficiency (FDEhood) [%]
AFluid Dynamic Efficiency class
78.7Lighting Efficiency (LEhood) [lux/W]
ALighting Efficiency class
95.1Grease Filtering Efficiency (GFEhood) [%]
AGrease Filtering Efficiency class
332 / 450Air flow at minimum and maximum speed in normal use [m3/h]
713Air flow at intensive or boost setting [m3/h]
47 / 57Airborne acoustical A-weighted sound power emissions at minimum and
maximum speed in normal use [dB(A)]
67Airborne acoustical A-weighted sound power emissions at intensive or
boost setting [dB(A)]
-Power consumption off mode (Po)
0.37Power consumption in standby mode (Ps) [W]
EU Product Fiche
CBB862W
0.6Time increase factor (f)
33.4Energy Efficiency Index (EEIhood)
310Measured air flow rate at best efficiency point (QBEP) [m3/h]
375Measured air pressure at best efficiency point (PBEP)
82.7Measured electric power input at best efficiency point (WBEP)
3.9Nominal power of the lighting system (WL)
307Average illumination of the lighting system on the cooking surface (Emiddle)
[lux]
16
Technical data

Tips for energy-efficient cooking with hoods
•Use a low extractor setting and use the highest setting (boost) if necessary.
•A well-ventilated kitchen makes the range hood more efficient.
•Clean filters regularly and replace filters when needed to keep the filter efficiency high, as a
saturated filter cannot perform and leads to longer usage times.
Disposal of the appliance and packaging
Sustainable materials have been used during manufacture of this appliance. This appliance must
be disposed of responsibly at the end of its service life. Ask your local authorities for more information
about how to do this.
The appliance packaging is recyclable. The following may have been used:
•cardboard;
•polyethylene film (PE);
•CFC-free polystyrene (PS rigid foam).
Dispose of these materials in a responsible manner and in accordance with government regulations.
The product has been marked with a crossed-out dustbin symbol to
remind you of the obligation to dispose of electrical household
appliances separately. This means that the appliance may not be
included with normal domestic refuse at the end of its service life. The
appliance must be taken to a special municipal centre for separated
waste collection or to a dealer providing this service.
Separate collection of household appliances helps to prevent any
potential negative impact on the environment and on human health
caused by improper disposal. It ensures that the materials of which the
appliance is composed can be recovered to obtain significant savings
in energy and raw materials.
Declaration of conformity
We hereby declare that our products satisfy the applicable European
directives, orders and regulations, as well as the requirements stated
in the referenced standards.
17
Environmental aspects

843757
www.asko.com
We reserve the right to make changes.
-a1
Table of contents
Other Asko Ventilation Hood manuals

Asko
Asko CBB761SC User manual

Asko
Asko WS90CNTHJ User manual

Asko
Asko CCT9051SC User manual

Asko
Asko CD4634B/4000 User manual

Asko
Asko ES1011QAM User manual

Asko
Asko CW4934S/4000 User manual

Asko
Asko A4402TRVS/E01 User manual

Asko
Asko CCT1252WC User manual

Asko
Asko CCT1252W User manual

Asko
Asko CC4527S User manual
Popular Ventilation Hood manuals by other brands

ELICA
ELICA REEF A ISLAND Series Instruction on mounting and use

Cosmo
Cosmo COS-63175 quick start guide

Eurolux
Eurolux RETROZO 60PB WH instruction manual

Küppersbusch
Küppersbusch KD9540.0E Instructions for use and installation instructions

GLOBALO
GLOBALO Senturo 60 Operating and installation instructions

Electrolux
Electrolux EFB90463OX user manual