pg_9_UVE338_PostSaleStarter_WelcomeKit_RELEASEpg_8_UVE338_PostSaleStarter_WelcomeKit_RELEASE
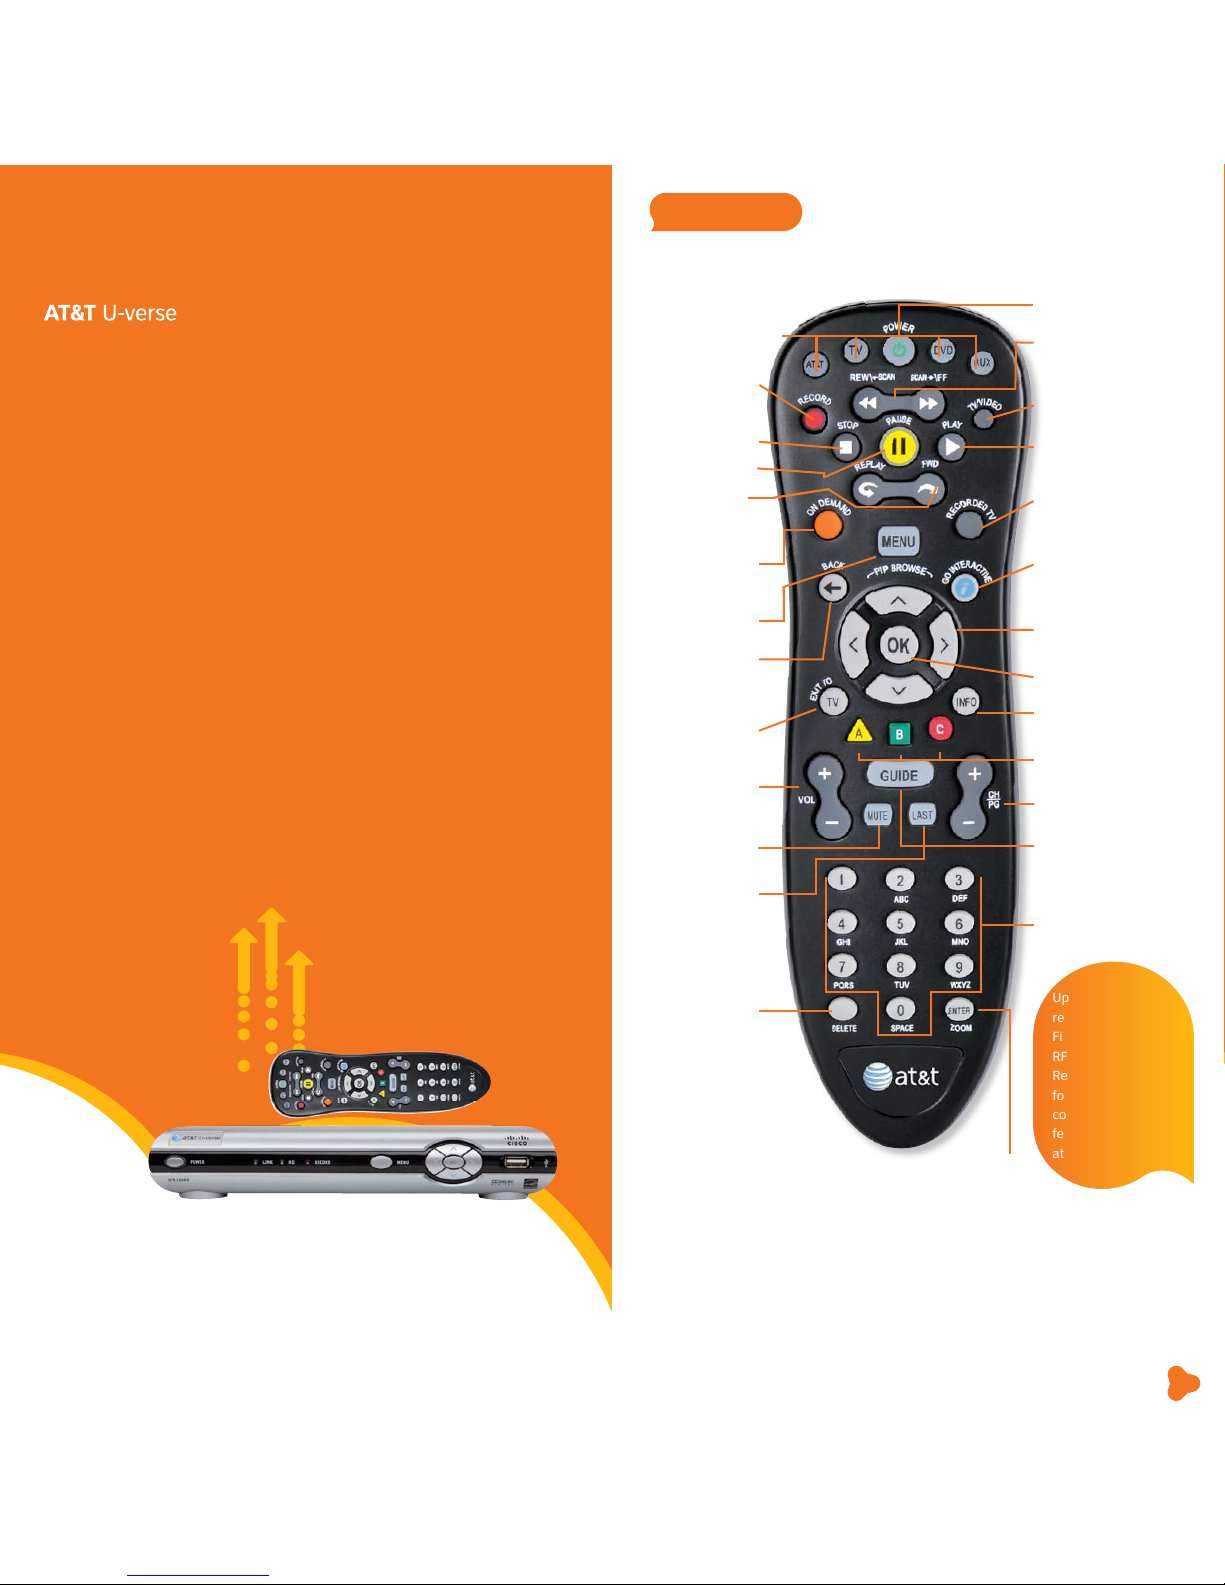
TV user guide
9
Find answers 24/7: a.com/uversesupport
Features subject to change. Simulated screen images for demonstration purposes only. 2 Free on Demand programming varies by
package subscription. Subscription to appropriate package and HD Technology Fee are required to access FREE and/or PREMIUM
HD On Demand titles. 3 U-verse Movies: Customer responsible for applicable charges. Once a U-verse movie is ordered, it cannot
be cancelled by remote or customer care. HBO®, Cinemax® and related channels and service marks are the property of Home Box
Office, Inc. 4 Event schedules subject to change. Once a Pay Per View is ordered, it cannot be cancelled by remote or customer
care. You will be billed and the event will air on your TV set.
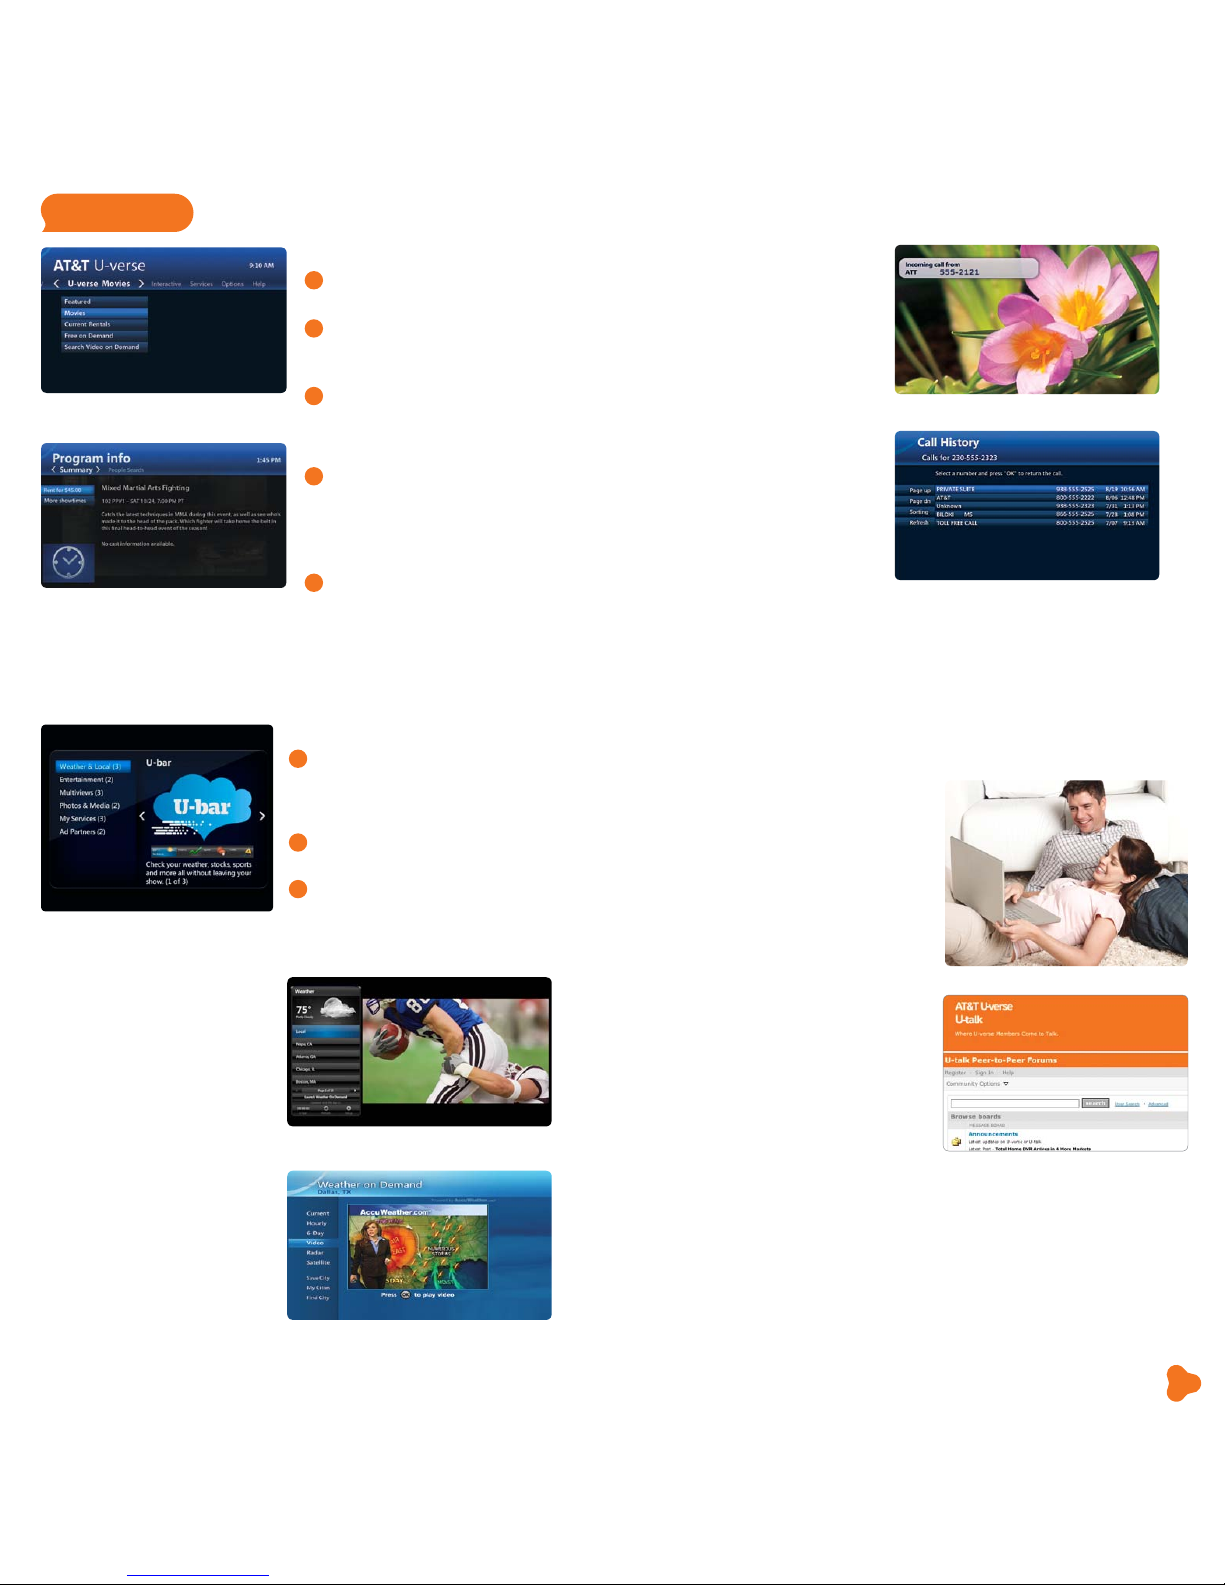
U-verse Movies and Pay Per View
programming
AT&T U-verse On Demand offers Free On Demand,2 a huge selection of U-verse Movies
rentals,3 plus Premium On Demand when you subscribe to HBO®, Cinemax®, STARZ®,
or SHOWTIME®. Pay Per View offers you a front-row seat at exciting live sporting
events, concerts, and more.4 Visit att.net/uverseonline to see clips of some of
your favorite shows.
Access Options from the Menu screen
to customize all your preferences
Here you can set favorite channels or
channels to hide, choose a parental locking
PIN, set your audio preferences, aspect ratio,
closed captioning, language settings, and
more. Press MENU on your remote. Use
ARROWS to select Options. Use ARROWS
to select the category of preferences you
want to change, and press OK.
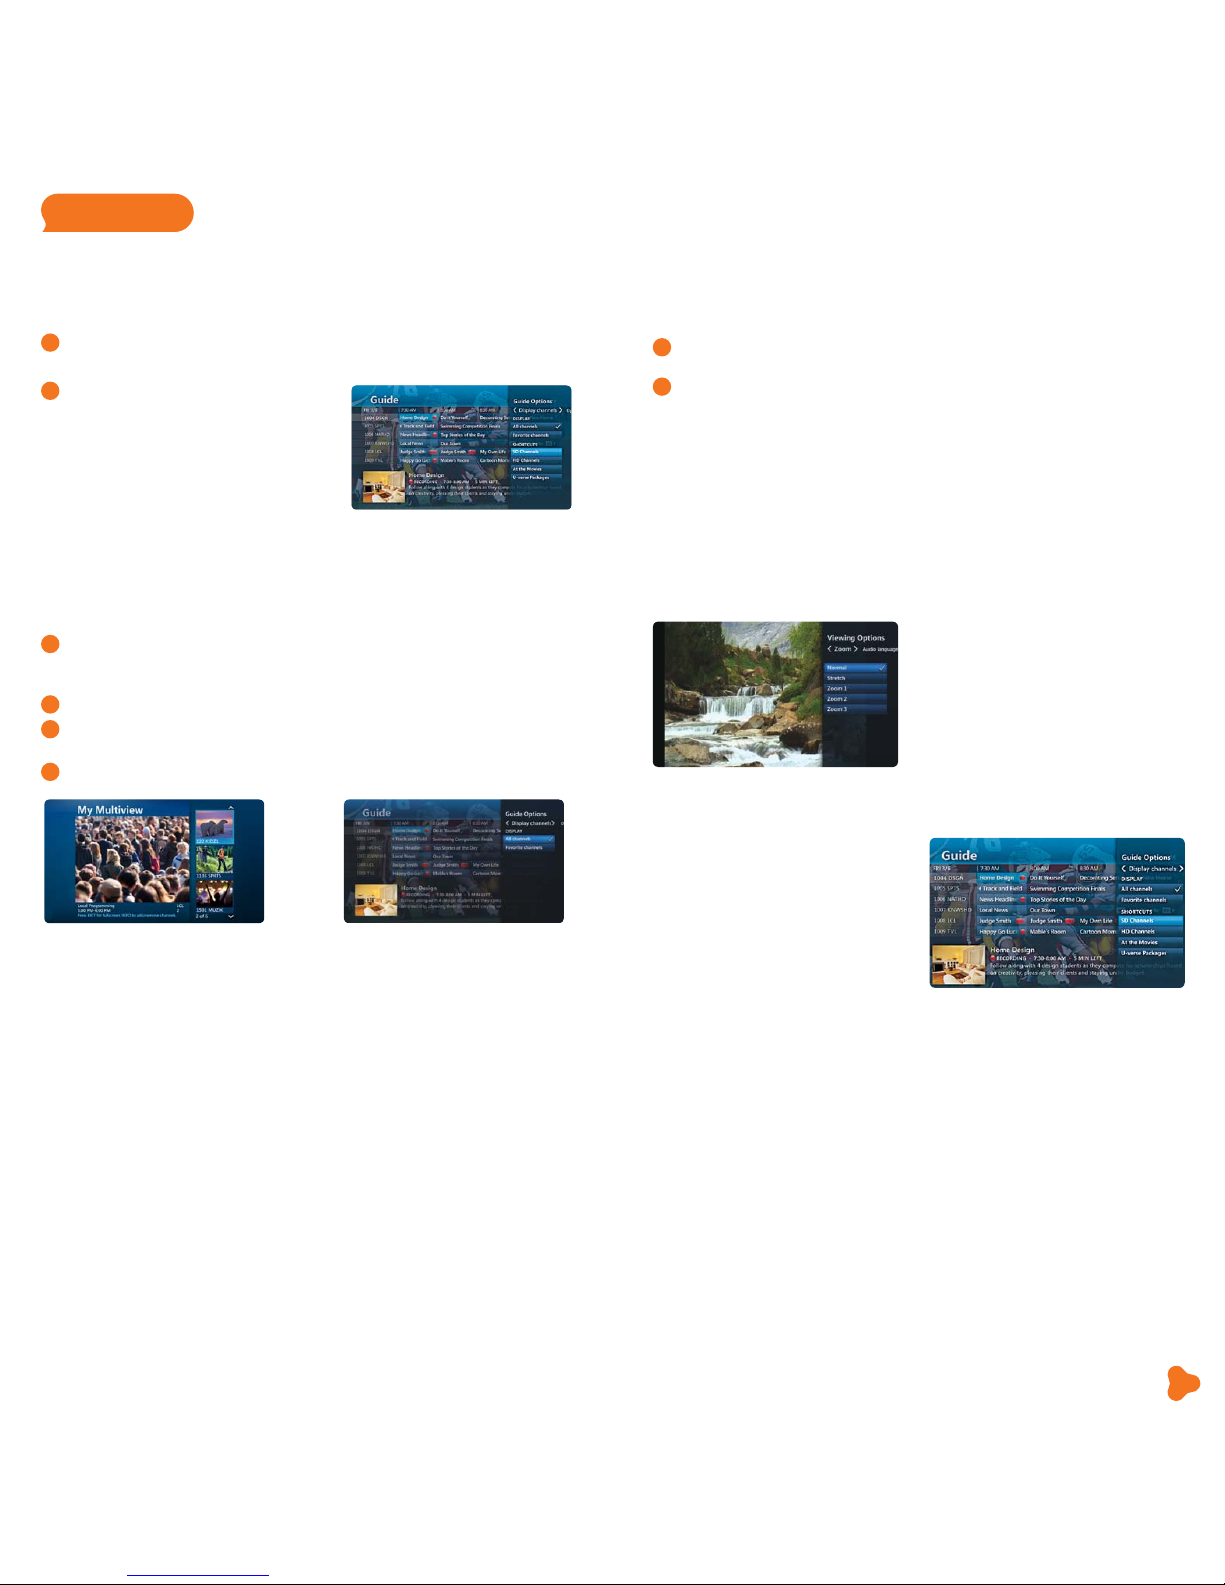
Access Options without changing the
channel or leaving the Guide screen
Change your onscreen language or enlarge
your view while watching live TV. Change
your Guide view, see your favorite channels,
or access Shortcuts to view the category of
channels you want to watch while the Guide
is visible. Press ENTER on your remote while
watching TV or from the Guide, use ARROWS
to choose the category of preferences you
want to change, and press OK.
Options menus offer bigger convenience
Watch TV the way you want by customizing your Guide screen view, what channels
you see, your onscreen language, sound settings, and more. There are two ways to
access Options:
How to use Parental Controls
Once you have a personal identification number (PIN), you can restrict viewing by TV or
movie rating, all adult-only programming, who can rent U-verse Movies, and more.
1 Press MENU, then RIGHT ARROW to Options, then down to Parental Locking.
Press OK.
2 Use the remote’s number pad to enter your four-digit PIN and press OK (press
DELETE to clear an entry). You’ll have to enter your PIN twice. The Parental
Locking screen will appear with your locking options.
Be sure to scroll down to the second page if you want to lock adult-only content,
titles and posters from the standard channels, U-verse Movies, and purchases from
Account Manager.
Watch four of your favorite shows at once
with My Multiview*
See only the channels you watch most (you’ll still see all channels in the Guide screen).
1 Press MENU and use the DOWN ARROW to select My Multiview and press OK.
Begin watching four of your Favorites (if already set). Press INFO and select
Add/Remove Channels and press OK to set or change your Favorites.
2 Scroll using UP/DOWN ARROWS and
press OK to check channels you want to see.
3 See checked channels by selecting View Checked, then press OK. (Select
Uncheck All and press OK to clear the whole Favorite Channels list.)
4 Done? Select Save and then press OK.
Other Multiview1 choices
Tune to one channel to see available programming in a single genre—choose News
Multiview (ch-201, or 1201 HD), Kids Multiview (ch-301, or 1301 HD), or Sports
Multiview (ch-601, or 1601 HD). Subscribers to ESPN GamePlan can tune to channels
620 and 4400. Multiview will display all available channels in your TV package.
In any Multiview, you can:
> Press UP/DOWN ARROWS to scroll through the available channels or to
select a channel
>Press OK to replace the channel in the viewport with the selected channel
>Record a program by selecting one of the Multiview screens and pressing RECORD
Check out ch-400 for seasonal Multiviews.
NOTE: If you hide channels from view in the Guide screen, they will still display
in Multiview windows unless you block them with Parental Controls.
Find shows fast with Channel Shortcuts
Browse channels grouped by category and easily find the type of programming you like.
Access Channel Shortcuts two ways:
1 Press MENU. With Live TV selected, use DOWN ARROW to select Channel
Shortcuts. Press OK and use DOWN ARROW to select your category.
2 From the Guide screen, press ENTER.
With Display Channels selected, use
DOWN ARROW to pick a category and
press OK.
*A limited number of HD channels are not supported for display within My Multiview. 1 Channels/content available for
viewing in Multiview are based on TV package and additional programming purchased.
Visit a.com/uverse/newcustomer to learn more