manuals.online logo
Brands
  1. Home
  2. •
  3. Brands
  4. •
  5. ATEN
  6. •
  7. Switch
  8. •
  9. ATEN CL5808 User manual

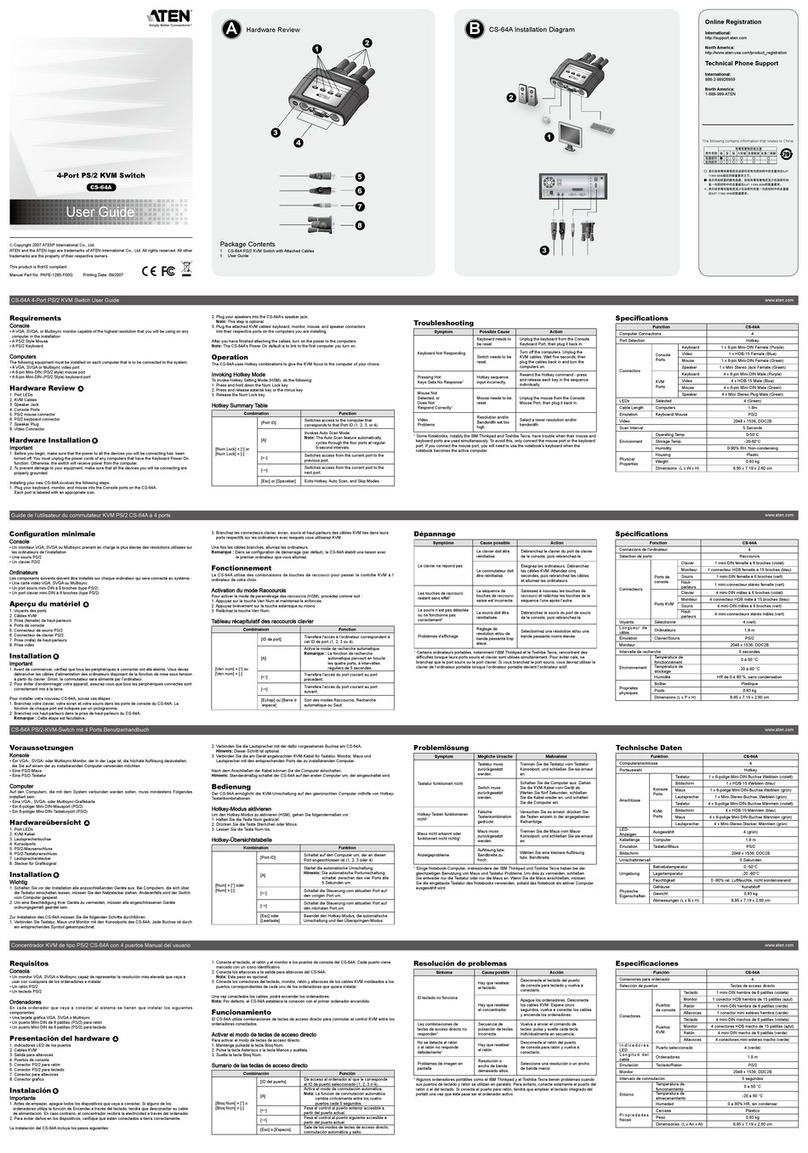
ATEN CL5808 User manual

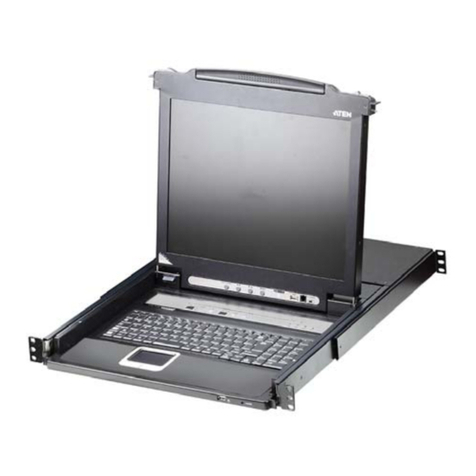
CL5808 / CL5816
8 / 16-Port VGA Dual Rail
LCD KVM Switch
User Manual
CL5808 / CL5816 User Manual
ii
Compliance Statements
FEDERAL COMMUNICATIONS COMMISSION INTERFERENCE
STATEMENT
This equipment has been tested and found to comply with the limits for a Class
A digital device, pursuant to Part 15 of the FCC ules. These limits are
designed to provide reasonable protection against harmful interference when
the equipment is operated in a commercial environment. This equipment
generates, uses, and can radiate radio frequency energy and, if not installed and
used in accordance with the instruction manual, may cause harmful
interference to radio communications. Operation of this equipment in a
residential area is likely to cause harmful interference in which case the user
will be required to correct the interference at his own expense.
The device complies with Part 15 of the FCC ules. Operation is subject to the
following two conditions: (1) this device may not cause harmful interference,
and (2) this device must accept any interference received, including
interference that may cause undesired operation.
FCC Caution
Any changes or modifications not expressly approved by the party responsible
for compliance could void the user's authority to operate this equipment.
Warning
Operation of this equipment in a residential environment could cause radio
interference.
Achtung
Der Gebrauch dieses Geräts in Wohnumgebung kann Funkstörungen
verursachen.
KCC Statement
RoHS
This product is oHS compliant.
CL5808 / CL5816 User Manual
iii
警告使用者:
警告使用者:警告使用者:
警告使用者:
此為甲類資訊技術設備,於居住環境中使用時,可能會造
成射頻擾動,在此種 況下,使用者會被要求採取某些適當的對策。
KVM+
KVM+KVM+
KVM+ 多
多多
多電腦切換器類產品
電腦切換器類產品電腦切換器類產品
電腦切換器類產品
製造商
製造商製造商
製造商:
::
:
宏正自動科技股份有限公司
地址
地址地址
地址
:新北市汐止區大同路二段 125 號三樓
最大操作環境溫度
最大操作環境溫度最大操作環境溫度
最大操作環境溫度 :
::
:
40ºC
最大額定電壓
最大額定電壓最大額定電壓
最大額定電壓 :
::
:
100 - 240V AC
設備名稱
Equipment
Name
16
埠
PS/2-USB VGA
雙滑軌
LCD KVM
多電腦切換器 型號
( 型式 )
Type designa-
tion (Type)
CL5816
單元
Unit
限用物質及其化學符號
estricted substances and its chemical symbols
鉛
Lead
(Pb)
汞
Mercury
(Hg)
鎘
Cadmium
(C )
價鉻
Hexavalent
chromium
(Cr
+6
)
多溴聯苯
Polybrominated
biphenyls
(PBB)
多溴二苯醚
Polybrominated
diphenyl ethers
(PBDE)
電纜線
Cable
- ○ ○ ○ ○ ○
印刷電路部件
PCBA
- ○ ○ ○ ○ ○
塑膠
/
其他部件
Plastic / Other
parts
○ ○ ○ ○ ○ ○
螢幕
Panel
- ○ ○ ○ ○ ○
鍵盤
Keyboard
- ○ ○ ○ ○ ○
滑鼠
Mouse
- ○ ○ ○ ○ ○
備考
1.
〝超出
0.1 wt %
〞及 〝超出
0.01 wt %
〞係指限用物質之百分比含量超出百分比含量基準值。
Note 1
:
“Exceeding 0.1 wt %” and “exceeding 0.01 wt %” indicate that the percentage content of the restricted
substance exceeds the reference percentage value of presence condition.
備考
2.
〝○〞係指該項限用物質之百分比含量未超出百分比含量基準值。
Note 2
:
“
○
” indicates that the percentage content of the restricted substance does not exceed the percentage of
reference value of presence.
備考
3.
〝-〞係指該項限用物質為排 項目。
Note 3
:
“−” indicates that the restricted substance corresponds to the exemption.
CL5808 / CL5816 User Manual
iv
User Information
Online Registration
Be sure to register your product at our online support center:
Telephone Support
For telephone support, call this number:
User Notice
All information, documentation, and specifications contained in this manual
are subject to change without prior notification by the manufacturer. The
manufacturer makes no representations or warranties, either expressed or
implied, with respect to the contents hereof and specifically disclaims any
warranties as to merchantability or fitness for any particular purpose. Any of
the manufacturer's software described in this manual is sold or licensed as is.
Should the programs prove defective following their purchase, the buyer (and
not the manufacturer, its distributor, or its dealer), assumes the entire cost of all
necessary servicing, repair and any incidental or consequential damages
resulting from any defect in the software.
The manufacturer of this system is not responsible for any radio and/or TV
interference caused by unauthorized modifications to this device. It is the
responsibility of the user to correct such interference.
The manufacturer is not responsible for any damage incurred in the operation
of this system if the correct operational voltage setting was not selected prior
to operation. PLEASE VE IFY THAT THE VOLTAGE SETTING IS
CO ECT BEFO E USE.
International http://eservice.aten.com
International 886-2-8692-6959
China 86-400-810-0-810
Japan 81-3-5615-5811
Korea 82-2-467-6789
North America 1-888-999-ATEN ext 4988
1-949-428-1111
CL5808 / CL5816 User Manual
v
Product Information
For information about all ALTUSEN products and how they can help you
connect without limits, visit ALTUSEN on the Web or contact an ALTUSEN
Authorized eseller. Visit ALTUSEN on the Web for a list of locations and
telephone numbers:
International http://www.aten.com
North America http://www.aten-usa.com
CL5808 / CL5816 User Manual
vi
Package Contents
Check to make sure that all the components are in working order. If you
encounter any problem, please contact your dealer.
The CL5808 / CL5816’s standard package consists of:
1 CL5808 / CL5816 LCD KVM Switch
2 custom KVM cables
1 5-in-1 console cable
1 firmware upgrade cable
1 power cord
1 standard rack mount kit
2 L brackets
1 user instructions
CL5808 / CL5816 User Manual
vii
Contents
Compliance Statements . . . . . . . . . . . . . . . . . . . . . . . . . . . . . . . . . . . . . . . ii
User Information . . . . . . . . . . . . . . . . . . . . . . . . . . . . . . . . . . . . . . . . . . . . iv
Online Registration . . . . . . . . . . . . . . . . . . . . . . . . . . . . . . . . . . . . . . . iv
Telephone Support . . . . . . . . . . . . . . . . . . . . . . . . . . . . . . . . . . . . . . . iv
User Notice . . . . . . . . . . . . . . . . . . . . . . . . . . . . . . . . . . . . . . . . . . . . . iv
Pro uct Information. . . . . . . . . . . . . . . . . . . . . . . . . . . . . . . . . . . . . . . . . . . v
Package Contents . . . . . . . . . . . . . . . . . . . . . . . . . . . . . . . . . . . . . . . . . . vi
Contents . . . . . . . . . . . . . . . . . . . . . . . . . . . . . . . . . . . . . . . . . . . . . . . . . . vii
About this Manual . . . . . . . . . . . . . . . . . . . . . . . . . . . . . . . . . . . . . . . . . . . x
Conventions . . . . . . . . . . . . . . . . . . . . . . . . . . . . . . . . . . . . . . . . . . . . xi
1. Introduction
Overview . . . . . . . . . . . . . . . . . . . . . . . . . . . . . . . . . . . . . . . . . . . . . . . . . . . 1
Features . . . . . . . . . . . . . . . . . . . . . . . . . . . . . . . . . . . . . . . . . . . . . . . . . . .2
Requirements . . . . . . . . . . . . . . . . . . . . . . . . . . . . . . . . . . . . . . . . . . . . . . . 5
External Console . . . . . . . . . . . . . . . . . . . . . . . . . . . . . . . . . . . . . . . . . . 5
Computers. . . . . . . . . . . . . . . . . . . . . . . . . . . . . . . . . . . . . . . . . . . . . . .5
Cables . . . . . . . . . . . . . . . . . . . . . . . . . . . . . . . . . . . . . . . . . . . . . . . . . . 5
Operating Systems . . . . . . . . . . . . . . . . . . . . . . . . . . . . . . . . . . . . . . . . 6
Components . . . . . . . . . . . . . . . . . . . . . . . . . . . . . . . . . . . . . . . . . . . . . . . . 7
Front View . . . . . . . . . . . . . . . . . . . . . . . . . . . . . . . . . . . . . . . . . . . . . . 7
Keyboar Mo ule . . . . . . . . . . . . . . . . . . . . . . . . . . . . . . . . . . . . . . . . . 8
LCD Mo ule . . . . . . . . . . . . . . . . . . . . . . . . . . . . . . . . . . . . . . . . . . . . . 9
Rear View . . . . . . . . . . . . . . . . . . . . . . . . . . . . . . . . . . . . . . . . . . . . . .11
2. ardware Setup
Before you Begin. . . . . . . . . . . . . . . . . . . . . . . . . . . . . . . . . . . . . . . . . . . . 13
Stan ar Rack Mount . . . . . . . . . . . . . . . . . . . . . . . . . . . . . . . . . . . . . . . . 14
Front L-Brackets Mounting . . . . . . . . . . . . . . . . . . . . . . . . . . . . . . . . . . . . 16
Optional Rack Mount Kits . . . . . . . . . . . . . . . . . . . . . . . . . . . . . . . . . . . . . 18
Single-Stage Installation . . . . . . . . . . . . . . . . . . . . . . . . . . . . . . . . . . . . . 19
Single-Stage Installation Diagram . . . . . . . . . . . . . . . . . . . . . . . . . . . 20
Cabling Diagrams . . . . . . . . . . . . . . . . . . . . . . . . . . . . . . . . . . . . . . . . 21
Daisy Chaining . . . . . . . . . . . . . . . . . . . . . . . . . . . . . . . . . . . . . . . . . . . . . 22
Daisy Chain Installation Diagram . . . . . . . . . . . . . . . . . . . . . . . . . . . . 23
3. Basic Operation
Opening the Console . . . . . . . . . . . . . . . . . . . . . . . . . . . . . . . . . . . . . . . . 25
Opening Separately . . . . . . . . . . . . . . . . . . . . . . . . . . . . . . . . . . . . . . 25
Opening Together . . . . . . . . . . . . . . . . . . . . . . . . . . . . . . . . . . . . . . . 27
Closing the Console . . . . . . . . . . . . . . . . . . . . . . . . . . . . . . . . . . . . . . . . . 28
Operating Precautions . . . . . . . . . . . . . . . . . . . . . . . . . . . . . . . . . . . . . . . 30
Powering Off an Restarting . . . . . . . . . . . . . . . . . . . . . . . . . . . . . . . . . . 31
CL5808 / CL5816 User Manual
viii
LCD OSD Configuration . . . . . . . . . . . . . . . . . . . . . . . . . . . . . . . . . . . . . 32
The LCD Buttons. . . . . . . . . . . . . . . . . . . . . . . . . . . . . . . . . . . . . . . . . 32
LCD A justment Settings . . . . . . . . . . . . . . . . . . . . . . . . . . . . . . . . . . 33
Hot Plugging . . . . . . . . . . . . . . . . . . . . . . . . . . . . . . . . . . . . . . . . . . . . . . 34
Hot Plugging Stations . . . . . . . . . . . . . . . . . . . . . . . . . . . . . . . . . . . . . 34
Hot Plugging KVM Ports . . . . . . . . . . . . . . . . . . . . . . . . . . . . . . . . . . . 34
Hot Plugging Console Ports . . . . . . . . . . . . . . . . . . . . . . . . . . . . . . . . 34
Port Switching . . . . . . . . . . . . . . . . . . . . . . . . . . . . . . . . . . . . . . . . . . . . . 35
Manual Port Switching . . . . . . . . . . . . . . . . . . . . . . . . . . . . . . . . . . . . 35
Port ID Numbering . . . . . . . . . . . . . . . . . . . . . . . . . . . . . . . . . . . . . . . . . . 36
USB Peripheral Devices . . . . . . . . . . . . . . . . . . . . . . . . . . . . . . . . . . . . . . 36
4. OSD Operation
Overview. . . . . . . . . . . . . . . . . . . . . . . . . . . . . . . . . . . . . . . . . . . . . . . . . . 37
Manufacturing Number . . . . . . . . . . . . . . . . . . . . . . . . . . . . . . . . . . . . 37
Logging In. . . . . . . . . . . . . . . . . . . . . . . . . . . . . . . . . . . . . . . . . . . . . . . . . 37
OSD Main Screen. . . . . . . . . . . . . . . . . . . . . . . . . . . . . . . . . . . . . . . . . . . 37
OSD Main Screen Hea ings . . . . . . . . . . . . . . . . . . . . . . . . . . . . . . . . . . 39
OSD Navigation . . . . . . . . . . . . . . . . . . . . . . . . . . . . . . . . . . . . . . . . . . . . 39
OSD Functions . . . . . . . . . . . . . . . . . . . . . . . . . . . . . . . . . . . . . . . . . . . . 40
F1: GOTO . . . . . . . . . . . . . . . . . . . . . . . . . . . . . . . . . . . . . . . . . . . . . 40
F2: LIST . . . . . . . . . . . . . . . . . . . . . . . . . . . . . . . . . . . . . . . . . . . . . . . 41
F3: SET . . . . . . . . . . . . . . . . . . . . . . . . . . . . . . . . . . . . . . . . . . . . . . . 42
F4: ADM . . . . . . . . . . . . . . . . . . . . . . . . . . . . . . . . . . . . . . . . . . . . . . . 44
F5: SKP . . . . . . . . . . . . . . . . . . . . . . . . . . . . . . . . . . . . . . . . . . . . . . . 48
F6: BRC . . . . . . . . . . . . . . . . . . . . . . . . . . . . . . . . . . . . . . . . . . . . . . . 49
F7: SCAN . . . . . . . . . . . . . . . . . . . . . . . . . . . . . . . . . . . . . . . . . . . . . . 49
F8: LOUT . . . . . . . . . . . . . . . . . . . . . . . . . . . . . . . . . . . . . . . . . . . . . . 50
5. Keyboard Port Operation
Hotkey Port Control . . . . . . . . . . . . . . . . . . . . . . . . . . . . . . . . . . . . . . . . . 51
Hotkey Mo e . . . . . . . . . . . . . . . . . . . . . . . . . . . . . . . . . . . . . . . . . . . . . . 52
Invoking Hotkey Mo e . . . . . . . . . . . . . . . . . . . . . . . . . . . . . . . . . . . . 52
Hotkey Mo e Active . . . . . . . . . . . . . . . . . . . . . . . . . . . . . . . . . . . . . . 52
Exiting Hotkey Mo e . . . . . . . . . . . . . . . . . . . . . . . . . . . . . . . . . . . . . 52
Selecting the Active Port . . . . . . . . . . . . . . . . . . . . . . . . . . . . . . . . . . . . . 53
Auto Scan Mo e . . . . . . . . . . . . . . . . . . . . . . . . . . . . . . . . . . . . . . . . . . . 54
Invoking Auto Scan . . . . . . . . . . . . . . . . . . . . . . . . . . . . . . . . . . . . . . . 54
Exiting Auto Scan . . . . . . . . . . . . . . . . . . . . . . . . . . . . . . . . . . . . . . . . 54
Pausing Auto Scan . . . . . . . . . . . . . . . . . . . . . . . . . . . . . . . . . . . . . . . 54
Skip Mo e . . . . . . . . . . . . . . . . . . . . . . . . . . . . . . . . . . . . . . . . . . . . . . . . 55
Invoking Skip Mo e. . . . . . . . . . . . . . . . . . . . . . . . . . . . . . . . . . . . . . . 55
Exiting Skip Mo e . . . . . . . . . . . . . . . . . . . . . . . . . . . . . . . . . . . . . . . . 55
Computer Keyboar /Mouse Reset . . . . . . . . . . . . . . . . . . . . . . . . . . . . . 56
Hotkey Beeper Control . . . . . . . . . . . . . . . . . . . . . . . . . . . . . . . . . . . . . . . 56
CL5808 / CL5816 User Manual
ix
Hotkey Invocation Key Selection . . . . . . . . . . . . . . . . . . . . . . . . . . . . . . . 57
OSD Hotkey Selection . . . . . . . . . . . . . . . . . . . . . . . . . . . . . . . . . . . . . . . 57
Port OS Selection . . . . . . . . . . . . . . . . . . . . . . . . . . . . . . . . . . . . . . . . . . .58
Set USB Spee . . . . . . . . . . . . . . . . . . . . . . . . . . . . . . . . . . . . . . . . . . . . . 58
Restore the Default Values . . . . . . . . . . . . . . . . . . . . . . . . . . . . . . . . . . . . 59
Hotkey Summary Table . . . . . . . . . . . . . . . . . . . . . . . . . . . . . . . . . . . . . . 60
6. Keyboard Emulation
Mac Keyboar . . . . . . . . . . . . . . . . . . . . . . . . . . . . . . . . . . . . . . . . . . . . . . 61
Sun Keyboar . . . . . . . . . . . . . . . . . . . . . . . . . . . . . . . . . . . . . . . . . . . . .62
7. The Firmware Upgrade Utility
Intro uction . . . . . . . . . . . . . . . . . . . . . . . . . . . . . . . . . . . . . . . . . . . . . . . .63
Downloa ing the Firmware Upgra e Package . . . . . . . . . . . . . . . . . . . . . 63
Preparation . . . . . . . . . . . . . . . . . . . . . . . . . . . . . . . . . . . . . . . . . . . . . . . .64
Starting the Upgra e . . . . . . . . . . . . . . . . . . . . . . . . . . . . . . . . . . . . . . . . 65
Upgra e Succee e . . . . . . . . . . . . . . . . . . . . . . . . . . . . . . . . . . . . . . . . 67
Upgra e Faile . . . . . . . . . . . . . . . . . . . . . . . . . . . . . . . . . . . . . . . . . . . . .68
Appendix
Safety Instructions. . . . . . . . . . . . . . . . . . . . . . . . . . . . . . . . . . . . . . . . . . .69
General . . . . . . . . . . . . . . . . . . . . . . . . . . . . . . . . . . . . . . . . . . . . . . . . 69
Rack Mounting . . . . . . . . . . . . . . . . . . . . . . . . . . . . . . . . . . . . . . . . . . 71
Consignes e sécurité . . . . . . . . . . . . . . . . . . . . . . . . . . . . . . . . . . . . . . . 72
Général . . . . . . . . . . . . . . . . . . . . . . . . . . . . . . . . . . . . . . . . . . . . . . . . 72
Montage sur bâti . . . . . . . . . . . . . . . . . . . . . . . . . . . . . . . . . . . . . . . . . 75
Technical Support . . . . . . . . . . . . . . . . . . . . . . . . . . . . . . . . . . . . . . . . . .76
International . . . . . . . . . . . . . . . . . . . . . . . . . . . . . . . . . . . . . . . . . . . . 76
North America . . . . . . . . . . . . . . . . . . . . . . . . . . . . . . . . . . . . . . . . . . 76
Specifications . . . . . . . . . . . . . . . . . . . . . . . . . . . . . . . . . . . . . . . . . . . . . .77
Connection Tables . . . . . . . . . . . . . . . . . . . . . . . . . . . . . . . . . . . . . . . . . .81
CL5808 to Compatible 8-Port Switches . . . . . . . . . . . . . . . . . . . . . . .81
CL5808 to Compatible 16-Port Switches . . . . . . . . . . . . . . . . . . . . . .81
CL5816 to Compatible 8-Port Switches . . . . . . . . . . . . . . . . . . . . . . .82
CL5816 to Compatible 16-Port Switches . . . . . . . . . . . . . . . . . . . . . .82
Supporte KVM Switches . . . . . . . . . . . . . . . . . . . . . . . . . . . . . . . . . . . . 83
Clear Login Information . . . . . . . . . . . . . . . . . . . . . . . . . . . . . . . . . . . . . . 84
OSD Factory Default Settings . . . . . . . . . . . . . . . . . . . . . . . . . . . . . . . . . 85
Troubleshooting . . . . . . . . . . . . . . . . . . . . . . . . . . . . . . . . . . . . . . . . . . . . 85
Overview . . . . . . . . . . . . . . . . . . . . . . . . . . . . . . . . . . . . . . . . . . . . . . 85
Keyboar Invocation Keys . . . . . . . . . . . . . . . . . . . . . . . . . . . . . . . . . . . . 86
About SPHD Connectors . . . . . . . . . . . . . . . . . . . . . . . . . . . . . . . . . . . . . 87
Limite Warranty . . . . . . . . . . . . . . . . . . . . . . . . . . . . . . . . . . . . . . . . . . . . 88
CL5808 / CL5816 User Manual
x
About this Manual
This manual is provided to help you get the most out of your CL5808 / CL5816.
It covers all aspects of the device, including installation, configuration, and
operation.
The LCD KVM switch models covered in this manual include:
An overview of the information found in the manual is provided below.
Chapter 1, Introduction, introduces you to the CL5808 / CL5816, its
purpose, features, and benefits, with its front and back panel components
described.
Chapter 2, ardware Setup, describes how to set up the CL5808 /
CL5816, and the necessary steps — from a basic single-stage hookup to a
complete 32-switch daisy-chained operation.
Chapter 3, Basic Operation, explains the fundamental concepts involved
in operating the CL5808 / CL5816.
Chapter 4, OSD Operation, provides a complete description of the
CL5808 / CL5816's OSD (On Screen Display), and the various functions
provided.
Chapter 5, Keyboard Port Operation, details all of the concepts and
procedures involved in the hotkey operation of your CL5808 / CL5816
installation.
Chapter 6, Keyboard Emulation, provides tables that list the PC-to-Mac
and PC-to-Sun keyboard emulation mappings.
Chapter 7, The Firmware Upgrade Utility, explains how to upgrade the
CL5808 / CL5816's firmware to the latest available versions using the
firmware upgrade utility.
Appendix, provides the specifications and other technical information at the
end of the manual.
Model Product Name
CL5808 8-Port PS/2-USB VGA Dual Rail LCD KVM Switch
CL5816 16-Port PS/2-USB VGA Dual Rail LCD KVM Swtich
CL5808 / CL5816 User Manual
xi
Note:
ead this manual thoroughly and follow the installation and operation
procedures carefully to prevent any damage to the unit or connected
devices.
The product may be updated, with features and functions added, improved,
or removed since the release of this manual. For an up-to-date user
manual, visit http://www.aten.com/global/en/
Conventions
This manual uses the following conventions:
Monospace In icates text that you shoul key in.
[ ] In icates keys you shoul press. For example, [Enter] means to
press the Enter key. If keys nee to be chor e , they appear
together in the same bracket with a plus sign between them:
[Ctrl+Alt].
1. Numbere lists represent proce ures with sequential steps.
♦Bullet lists provi e information, but o not involve sequential steps.
>In icates selecting consecutive options (such as on a menu or
ialog box). For example, Start
>
Run means to open the Start
menu, an then select Run.
In icates critical information.
CL5808 / CL5816 User Manual
xii
This Page Intentionally Left Blank
1
Chapter 1
Introduction
Overview
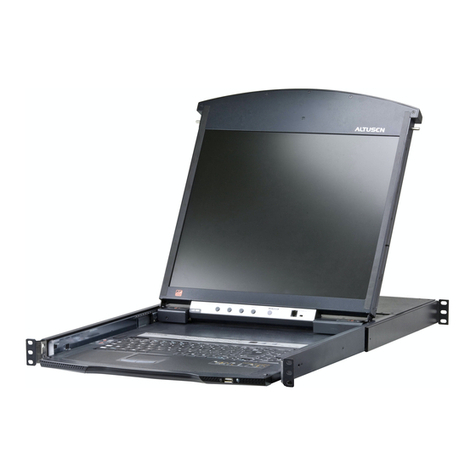
The CL5808 / CL5816 LCD KVM Switch is a keyboard, video, and mouse
(KVM) switch, integrated with an LCD console, that offers secure access to 8
/ 16 computers, and is mountable within a 1U rack space.
The CL5808 / CL5816’s 19” LED-backlit LCD monitor and keyboard /
touchpad can be slided independently of each other. To maximize space in your
data center, the keyboard / touchpad module can be slid back and "hid away"
when not in use, while the LCD monitor can be rotated back — flush against
the rack — allowing convenient monitoring of the connected computers. For
added convenience, it also supports an external USB mouse and an extra
console port is provided on the rear panel to manage the LCD KVM switch
from an optional external console (monitor, keyboard, and mouse). The
CL5808 / CL5816 supports both PS/2 and USB keyboard and mouse interfaces
for the connected computers, as well as USB peripheral devices to be used with
the attached computers. As many as 31 additional compatible KVM switches
can be daisy-chained so that up to 256 / 512 computers can all be controlled
from a single keyboard, monitor, and mouse console (see the Appendix for a
list of compatible ATEN switches).
The CL5808 / CL5816 is built with a modular design. The KVM section can
be detached from the switch section for convenient maintenance and repair.
There are two models in the series as outlined in the following table:
Your CL5808 / CL5816 investment is protected by an included firmware
upgrade utility, allowing you to stay up-to-date with the latest functionality
improvements by downloading firmware update files from our website as they
become available, and using the utility to quickly and conveniently perform the
upgrade.
Model LCD Panel KVM Ports Power
CL5808N 19" 8 AC
CL5816N 19" 16 AC
CL5808 / CL5816 User Manual
2
Setup is fast and easy — plugging cables into their appropriate ports is all that
is entailed. There is no software configuration required, with no need to get
involved in complex installation routines.
Access to any computer connected to the installation can be easily
accomplished by any of the following methods: by entering hotkey
combinations from the keyboard or via a powerful, menu-driven OSD (on-
screen display). A convenient Auto Scan feature also permits automated
monitoring by alternating views among the selected computers at set intervals.
There is no better way to save time and money than with a CL5808 / CL5816
installation. By using the CL5808 / CL5816 with its sliding LCD console to
manage your installation, you can eliminate the expense, space, and efforts
required of having to purchase a separate keyboard, monitor, and mouse for
each computer.
Features
Exclusive LED illumination light — illuminates the keyboard and
touchpad for operation under low-light conditions
Integrated KVM console with 19” LED-backlit LCD in a dual-rail
Slideaway
TM
housing
LCD module rotates up to 120 degrees for a more comfortable viewing
angle
Space saving — up to two consoles (one bus) control up to 8 / 16
computers
Daisy chain up to 31 additional units — control up to 256 (CL5808) / 512
(CL5816) computers from a single console
Dual interface — supports computers with PS/2 and USB keyboard and
mouse interfaces
USB port — allows each connected computer to access an attached USB
peripheral*
Multiplatform support — Windows, Linux, Mac, and Sun
Supports multimedia USB keyboards for PC, Mac, and Sun
Auto PS/2 and USB interface detection
1. Intro uction
3
Keyboard and mouse emulation (PS/2 and USB) for smooth switching and
simultaneous booting of multiple computers even when the console focus
is elsewhere
Superior video quality — supports resolutions of up to 1280 x 1024 @ 75
Hz
No software required — convenient computer selection via menu-driven,
intuitive OSD (on-screen display) and Hotkeys
Auto-senses station's position on daisy-chained installations; no need for
manual DIP switch setting; front panel LED indicates the station's position
Port names automatically reconfigured when station sequence is changed
Two-level password security — authorized users view and control
computers
Supports one administrator and four user accounts with separate profiles
Auto Scan mode enables automated monitoring of user-selected computers
Broadcast support — commands from the keyboard can be broadcasted to
all connected computers on the installation
Hot pluggable — add or remove computers without having to power down
the switch
Beeper on/off via hotkey and OSD
Firmware upgrades to all chained KVM switches at the same time via the
daisy chain cable
Only for computers connected with USB KVM cables.
Extra console port — for managing computers from an external console
(monitor, USB or PS/2 keyboard, and mouse)
Supports external USB mouse
Convenient direct port selection pushbuttons (8 / 16) — each with 2 LEDs
indicating whether the server is powered and selected.
Station up/down navigation buttons with a 2 x 7 segment LED display
indicating the currently selected station of a daisy-chained installation.
Port navigation buttons located on the front LCD panel for quick port
switching when the keyboard module is in the Slideaway
TM
position
behind and hidden.
Dedicated Hotkey mode and OSD Invocation Keys provide quick access to
related functions
CL5808 / CL5816 User Manual
4
OSD tree structure makes finding and managing computers easy
Console lock — enables the console drawer to remain securely locked
away when not in use
OSD port list automatically expands when new stations are added
Security — administrator / user password authentication for enhanced
security protection; administrator access rights synchronized between first
and chained stations
OSD screen automatically adjusts to resolution changes
Two types of logout: manual and timed
Slideaway
TM
housing is slightly less than 1U with top and bottom
clearance for smooth operation in 1U of rack space
DDC emulation — video settings of each computer are automatically
adjusted for optimal output to the monitor
Standard 105-key keyboard
Keyboard status restored when switching between computers
Keyboard languages supported: English (US), English (UK), French,
German, German (Swiss), Greek, Hungarian, Italian, Japanese, Korean,
ussian, Spanish, Swedish and Traditional Chinese
Optional rack mount kits available, including easy installation options
1. Intro uction
5
Requirements
External Console
The following hardware components are required for the external console:
A VGA, SVGA, or multisync monitor capable of displaying the highest
resolution provided by any computer in the installation.
A USB or PS/2 keyboard and mouse
Computers
The following equipment must be installed on each computer:
A VGA, SVGA, or multisync video graphics card with an HDB-15 port.
Note: The integrated LCD monitor's maximum resolution is
1280 x 1024 @ 75 Hz. Make sure that none of the computer
resolution settings exceed the LCD monitor's maximum resolution.
PS/2 mouse and keyboard ports (6-pin Mini-DIN), or at least one USB port.
Direct support Sun USB systems; or, for Sun legacy systems, an ATEN
CV130A Sun Console Converter.
Cables
Substandard cables may damage the connected devices or affect their overall
performance. For optimum signal integrity and simplified layout, we strongly
recommend the use of the high-quality CS custom cable sets described below:
Function Length Part Number
KVM switch to KVM switch
(Daisy chaining)
0.6 m
1.8 m
3.0 m
5.0 m
15.0 m
2L-1700
2L-1701
2L-1703
2L-1705
2L-1715
USB KVM cables 1.2 m
1.8 m
3.0 m
5.0 m
2L-5201U
2L-5202U
2L-5203U
2L-5205U
PS/2 KVM cables 1.2 m
1.8 m
3.0 m
6.0 m
2L-5201P
2L-5202P / 2L-5702P
2L-5203P
2L-5206P
CL5808 / CL5816 User Manual
6
Operating Systems
Supported operating systems are shown in the table below:
PS/2-USB KVM cables 1.2 m
1.8 m
3.0 m
2L-5301UP
2L-5302UP
2L-5303UP
OS Version
Win ows 2000 or later
Linux Re Hat 7.1 or later
SuSE 9.0 or later
Man riva (Man rake) 9.0 or later
UNIX AIX 4.3 or later
FreeBSD 4.2 or later
Sun Solaris 8 or later
Novell Netware 5.0 or later
Mac OS 9 or later
DOS 6.22
1. Intro uction
7
Components
Front View
No. Component Description
1 upper han le Pull to sli e the LCD mo ule out; push to sli e it in.
See Opening the Console, page 25, for etails on sli ing the
console in an out
2 mo ule release
catches
In or er to sli e the console out, you must first release it by
sli ing these catches to the insi e.
3 LCD mo ule See LCD Module, page 9.
4 exit / light
Pushbutton
Press this pushbutton for two secon s to turn the LED
Illumination Light on or off ( efault: on).
During the LCD OSD mo e, this pushbutton has more
functions, refer to The LCD Buttons on page 32 for more
etails.
5 keyboar mo ule See Keyboard Module, page 8.
6 USB port The USB port is available to connect a USB 1.1 peripheral
evice (flash rive, CD-ROM rive, etc.) to the switch.
7 lower han le Pull to sli e the keyboar mo ule out; push to sli e it in.
8 external mouse
port
A USB mouse port is provi e for users who prefer to use an
external mouse.
9 power LED Lights (blue) to in icate that the unit is receiving power.
10 LCD release
catch
These catches (one on each si e) release the LCD mo ule
so that you can sli e it away.
1
2
2
3
5
6
7
8
9
10 11
EXIT /LIGHT
12
4
CL5808 / CL5816 User Manual
8
Keyboard Module
11 rack mount
brackets
The rack mount brackets are locate at each corner of the
unit. See Standard Rack Mount, page 14, for etails.
12 LED illumination
light
Illuminates the keyboar an touchpa to allow visibility in
low-light con itions.
No. Component Description
1 touchpa Stan ar mouse touchpa
2 keyboar Stan ar 105-key keyboar
3 port selection
buttons an LEDs
To access a port on the currently selecte Station press its
correspon ing port selection button. In icator LEDs are built
into the switches:

An On Line LED lights to in icate that the computer
attache to its correspon ing port is up an running.

A Selected LED lights to in icate which port has the KVM
focus.
4 station ID LED In a aisy chaine installation, the Station ID of the currently
selecte station isplays as a 2 igit figure in this panel.
See Manual Port Switching, page 35 for further etails.
No. Component Description
2
1
3
4
5
6
7
8

Other manuals for CL5808

3

This manual suits for next models

1

Other ATEN Switch manuals

ATEN RCM101A User manual

ATEN

ATEN RCM101A User manual

ATEN CM1942 User manual

ATEN

ATEN CM1942 User manual

ATEN Master View CS-88A User manual

ATEN

ATEN Master View CS-88A User manual

ATEN CS22D User manual

ATEN

ATEN CS22D User manual

ATEN CS-62B User manual

ATEN

ATEN CS-62B User manual

ATEN CS1922 User manual

ATEN

ATEN CS1922 User manual

ATEN ALTUSEN KH2508 User manual

ATEN

ATEN ALTUSEN KH2508 User manual

ATEN UH-125 User manual

ATEN

ATEN UH-125 User manual

ATEN ALTUSEN KM0832 User manual

ATEN

ATEN ALTUSEN KM0832 User manual

ATEN VS-261 User manual

ATEN

ATEN VS-261 User manual

ATEN MASTER VIEW CS-142 User manual

ATEN

ATEN MASTER VIEW CS-142 User manual

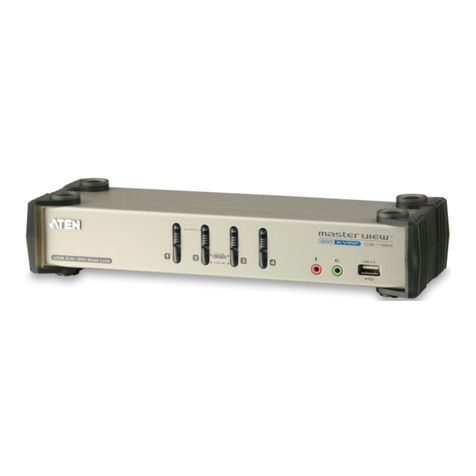
ATEN US3310-AT User manual

ATEN

ATEN US3310-AT User manual

ATEN Master View CS-1762 User manual

ATEN

ATEN Master View CS-1762 User manual

ATEN CL5808 User manual

ATEN

ATEN CL5808 User manual

ATEN CS52D User manual

ATEN

ATEN CS52D User manual

ATEN CS-228 User manual

ATEN

ATEN CS-228 User manual

ATEN ALTUSEN SN0108 User manual

ATEN

ATEN ALTUSEN SN0108 User manual

ATEN CL5816 User manual

ATEN

ATEN CL5816 User manual

ATEN VS0201 User manual

ATEN

ATEN VS0201 User manual

ATEN CS-74M User manual

ATEN

ATEN CS-74M User manual

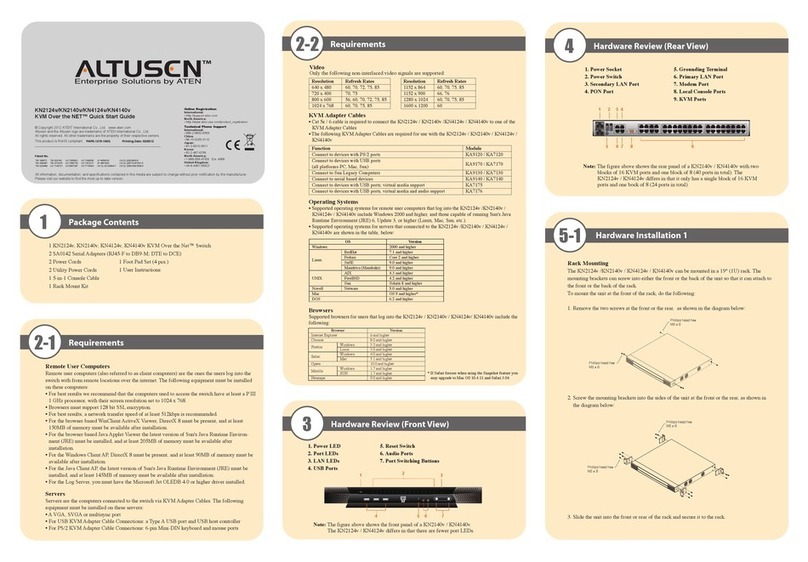
ATEN CN600 User manual

ATEN

ATEN CN600 User manual

ATEN Slideaway CL5708 User manual

ATEN

ATEN Slideaway CL5708 User manual

ATEN CS692 User manual

ATEN

ATEN CS692 User manual

ATEN VS0801H User manual

ATEN

ATEN VS0801H User manual

Popular Switch manuals by other brands

NTI UNIMUX-2X8-U Installation and operation manual

NTI

NTI UNIMUX-2X8-U Installation and operation manual

Chauvet Net-Switch Quick reference guide

Chauvet

Chauvet Net-Switch Quick reference guide

Extron electronics SGS 408 user manual

Extron electronics

Extron electronics SGS 408 user manual

Siemens RUGGEDCOM RS900F installation manual

Siemens

Siemens RUGGEDCOM RS900F installation manual

Wise T953 manual

Wise

Wise T953 manual

Logitech Cube Getting started guide

Logitech

Logitech Cube Getting started guide

Omnitron Systems FlexSwitch 6700-FK user manual

Omnitron Systems

Omnitron Systems FlexSwitch 6700-FK user manual

DSPPA PC1010H user manual

DSPPA

DSPPA PC1010H user manual

Lantech LPGS-2424C Series user manual

Lantech

Lantech LPGS-2424C Series user manual

IOGear MiniView Ultra GCS138 installation manual

IOGear

IOGear MiniView Ultra GCS138 installation manual

Austin Hughes CyberView RP-119QD user manual

Austin Hughes

Austin Hughes CyberView RP-119QD user manual

Austin Hughes CyberView RP-120 user manual

Austin Hughes

Austin Hughes CyberView RP-120 user manual

Cisco Catalyst 3560-8PC brochure

Cisco

Cisco Catalyst 3560-8PC brochure

HDL MPL8.48 user manual

HDL

HDL MPL8.48 user manual

Mellanox Technologies InfiniScale MTS3600Q-1BNC user manual

Mellanox Technologies

Mellanox Technologies InfiniScale MTS3600Q-1BNC user manual

SMC Networks PFA Series quick start guide

SMC Networks

SMC Networks PFA Series quick start guide

Cisco 7000 manual

Cisco

Cisco 7000 manual

Linksys SR2016 - Cisco - 10/100/1000 Gigabit Switch user guide

Linksys

Linksys SR2016 - Cisco - 10/100/1000 Gigabit Switch user guide

manuals.online logo
manuals.online logoBrands
  • About & Mission
  • Contact us
  • Privacy Policy
  • Terms and Conditions

Copyright 2025 Manuals.Online. All Rights Reserved.