manuals.online logo
Brands
  1. Home
  2. •
  3. Brands
  4. •
  5. Atlantic
  6. •
  7. Heater
  8. •
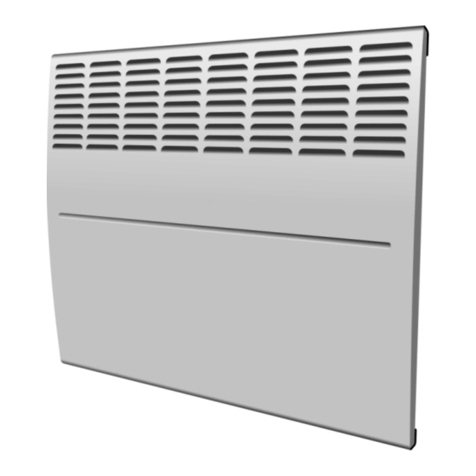
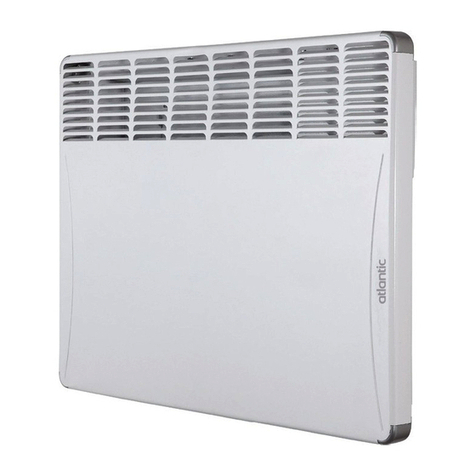
  9. Atlantic F17 User manual

Atlantic F17 User manual

1
아틀란틱 전기스토브
사용 설명서
2
❶
❷
❸
❹
❺ ❻
❼
❽
3
Warning 경고
Caution hot surface: Some parts of this product may become hot and cause burns. Must pay
particular attention to the presence of children and vulnerable people.
뜨거운 표면 주의! 본 제품의 일부분이 뜨거워져 화상을 입힐 수 있습니다. 어린이와 보호자가 필요한
사람에게는 특별한 주의가 필요합니다.
-Keep away from this unit the children under 3 years old, unless they are under a constant supervision.
보호자의 지속적인 감독하에 있지 않는 한, 3세 미만 아이들에게서 접근하지 못하게 멀리 유지하십시오.
-This device should not be used without supervision by children under 14 years old, by persons with
reduced physical, sensory or mental capabilities or by persons with lack of experience or knowledge, unless
they can benefit through a person responsible for their safety, of prior instructions.
본 제품은 사전 교육을 안전에 대한 책임이 있는 사람을 통해 도움을 받을 수 없는 한, 보호자의 감독이 없는
14세 이하 어린이와 신체적 및 정신적 혹은 지각능력에 장애가 있으신 분, 또는 경험이나 지식이 부족한 분은
사용 할 수 없습니다.
-Children less than 14 years old must not play, adjust, clean or perform the maintenance on the unit.
14세 이하 어린이는 본 기기를 가지고 장난이나 조작, 청소, 혹은 유지보수 등을 할 수 없습니다.
-This appliance must be connected according to the rules and standards applicable, by an authorized
person.
본 제품은 허가된 전문가에 의해 본 기기에 적용되는 규칙과 기준에 따라 연결해야 합니다.
-The instruction book is available by contacting the customer service number mentioned on the warranty
included in this guide.
취급설명서를 원하시면 본 사용설명서의 보증서에 명시된 고객서비스부서로 연락하여 사용할 수 있습니다.
-Do not use the device if the power cord is damaged.
전원코드 선이 손상된 경우에는 기기 사용을 금합니다.
To avoid overheating and for safety reasons, do not cover the heater.
과열을 방지하고 안전을 위하여 본 기기에 어떠한 물체로도 덮지 마십시오.
Devices with this symbol should not be placed with household waste but must be collected separately
and recycled. The collecting and recycling of end of life products must be made according to the
provisions and ordinances. 이 표시가 있는 제품은 생활 쓰레기로 버리지 마시고, 별도로 분리하여
재활용되어야 합니다. 폐 제품 수거 및 재활용은 법령 및 규정을 따라 주십시오.
The installation of a device in elevation causes an increase in the outlet temperature of air (about 10 °
C per 1000 m of vertical).
해발 고도가 높은 곳에 설치할 경우, 배출 공기의 온도가 상승됩니다. (수직 1Km 당 약 10 °C)
4
1. Installation 설치
1.1 WHERE INSTALL THE UNIT? 어디에 제품을 설치해야 되나요? (설치 장소)
-This device has been designed to be installed in residential premises. In all other cases, please consult your
dealer.
-본 기기는 주거용 시설에 설치하도록 고안된 제품입니다. 그 외의 모든 경우에는 구입한 대리점에 문의하시기
바랍니다.
-The installation must be made in the rules, the state of the art and complies with the standards in force in
the country of installation.
-설치는 국내 전기안전 법규에 따라 시행해야 하며, 설치 시 시행 기준을 준수하여야 합니다.
-The devices are Class II and protected against splash water IP 24. They can be installed in volume 2 of the
bathrooms (Figure ❶). It is forbidden to install the devices in volume 1. The control box of the device must
not be manipulated by a person using the shower or the bath.
-본 제품은 이중절연(Class II) 및 IP 24 등급제품입니다. 그림 ❶과 같이 욕실의 Volume 2 지역에는
설치가능하나 Volume 1 지역에 설치하는 것은 금합니다. 샤워나 목욕 중에는 기기의 컨트롤박스에 손대거나
조작하지 마십시오.
-Respect the minimum distances with the obstacles for the installation of the device (Figure ❷).
-그림 ❷와 같이 물체로부터 최소한의 거리를 두고 설치하십시오.
-The wall bracket lets a free space behind the unit to avoid disturbing its regulation. The distance between
the unit and the wall must not be obstructed.
-벽걸이 브라켓은 규정에 맞게 벽으로부터의 여유공간을 두어서 제품과 벽사이의 거리가 막히지 않아야 합니다.
1.2 WHERE AND HOW DO NOT INSTALL THE DEVICE? 설치 시 금지
사항
- Do not install the device in an air flow who may disturb its regulation
(under the ventilation etc.), under a fixed wall outlet (Figure ❸) or near
curtains or other combustible materials. 설치규정을 벗어나 공기흐름을
방해하는 환기 장치와 같은 장치 아래, 전기 콘센트 아래(그림 ❸), 그리고 커튼과 같은 인화성 물질
근처에서의 설치는 금하여 주십시오.
- The air outlet grid and the control box should be visible in the upper part of the device. It is forbidden to
install a vertical unit horizontally and vice versa (see figure). 공기 배출 그리드와 컨트롤 박스 장치는 제품
위쪽에 위치해야 하며 설치 시 정면에서 보았을 때 위쪽에 놓여지도록 하여야 합니다. 그림과 같이 벽걸이
수직으로 세우거나 뒤집거나 바닥에 뉘어서 설치하여 사용하는 것을 금지합니다. 그 반대의 경우도
마찬가지입니다.
1.3 HOW TO INSTALL THE DEVICE? 설치 방법
1.3.1 Mobile installation 이동식
-The mobile installation with feet must be positioned on a horizontal surface. Refer to the instruction of the
feet kits. 바퀴 부착 이동식 모델의 설치는 반드시 수평 바닥 위에 설치해야 합니다. 기타 바퀴조립관련사항은
이동식 바퀴 세트의 안내서를 참조하시기 바랍니다.
5
-Do not use this heater near a bathtub, a shower or a pool.
-본 제품을 욕조, 샤워기 또는 수영장 근처에서 사용하지 마십시오.
-Do not use this heater in small spaces when they are occupied by people who are unable to leave the
room by themselves unless constant supervision is provided.
-본 제품을 좁은 공간에서 보호자의 보호 및 도움 없이 혼자서 거동할 수 없는 사람은 사용하지 마십시오.
1.3.2 Wall installation 벽면에 설치
1.3.3 Release the appliance’s hook-on bracket (Figure ❹) 후크식 브라켓 해제
- We recommend that you place the device flat face down. Have a straight head screwdriver to hand.
앞면이 아래를 향하게 하여 편평한 바닥에 놓는다. 일자형 (스크루)드라이버를 준비한다.
1.3.4 Fix the hook-on bracket (Figure ❺) 고리식 브라켓 고정
-Use the wall-mounting bracket as a template for positioning the heater.
히터를 설치할 위치에 지지대 역할을 하는 벽걸이용 브라켓을 고정시킨다.
oDrilling points A 구멍 뚫는 위치 A
oDrilling points B 구멍 뚫는 위치 B
1.3.5 Connecting the panel heater 패널 히터 연결
- Refer to the instruction of the figure ❸.
그림 ❸.의 지시를 따른다.
- The appliance should have a 220V /60Hz power supply.
제품은 정격전압 220V/60Hz 단상 교류 용입니다.
- In humid areas such as bathrooms and kitchens the power socket must be installed at least 25 cm above
the floor.
욕실 및 주방과 같이 습기가 많은 곳에서의 전원콘센트는 바닥으로부터 적어도 25 cm 위에 있어야 합니다.
6
Commands
Received
수신 명령
No current
전원 연결 되지 않음
Complete
Altermation 230 V
완전 교류 230 V
Négative
Half/altermation
-110/-115 V
네거티브 -110/-115
V
Positive
Half/altermation
+110/+115 V
포지티브
+110/+115 V
Oscilloscope
Réf/Neutral
오실로스코우프
파형
Mode
Obtained
수신 모드
COMFORT ECO COMFORT ECO COMFORT ECO COMFORT ECO
7
1.3.6 Lock the appliance on the hook-on bracket (Figure ❻) 고리식 브라켓 잠금 (그림❻)
- Place the device on inclined supports C, rotates the device to put it on the supports D. Lower the device on
the attachment lug. A click indicates that the unit is attached and locked. To unlock the attachment lug,
grab a screwdriver and push the tab (at the top left of the attachment lug behind the unit) to the wall. Lift
the unit while holding the tab with the screwdriver.
제품을 경사지게 하여 지지대 C 에 체결하고, 지지대 D 에 체결하기 위해 제품을 벽 쪽으로 가볍게 밀어줍니다.
부착된 러그 지점에서 제품을 아래로 내린다. 찰깍 소리가 나면 체결 및 잠금이 된 것입니다. 부착된 러그를
분리하기 위해서는 (스크루)드라이버로 제품 뒤편 부착된 러그의 상부 왼쪽에 있는 탭을 벽 쪽으로 밀어준다.
(스크루)드라이버로 탭을 누른 채 제품을 들어 올린다.
Tilt it forward and remove the supports C. 앞쪽으로 기울여 지지대 C 로부터 빼낸다.
2. UTILISATION 사용 방법
2.1 Description of the control unit 제어장치 설명
2.2 Fixing the comfort temperature 쾌적한 온도 설정
-Refer to figure ❼. 그림 ❼ 참조.
-The comfort temperature is the temperature that you would like while the room is occupied. The comfort
mode allows you to adjust the temperature set to the temperature needed.
-쾌적한 온도란 원하는 실내 온도를 말한다. 쾌적한 모드에서 원하는 온도로 온도 조절이 가능하다.
-Set the switch H on and adjust the knob on the desired position, the heating indicator G lights if the
ambient temperature is lower than desired. Wait until the temperature stabilizes.
-스위치 H를 에 놓고 i온도조절기를 원하는 위치로 돌린다. 주위 온도가 원하는 온도보다 낮으면 난방표시등
G가 켜진다. 온도가 일정한 수준이 될 때까지 기다린다.
2.3 Fixing the Eco temperature 절전 (Eco) 온도 설정
- The Eco mode allows you to lower the comfort temperature of 3 to 4 ° C during unoccupied periods of the
room. It is recommended to use this mode for periods of no more than 2 hours. Put the cursor H on ECO
then adjust the knob to the desired position, the heating indicator G lights if the ambient temperature is
lower than the desired temperature setting ECO. Wait until the temperature stabilizes.
- Eco 절전 모드는 부재 시 사용하는 기능으로 설정된 온도보다 3 ~ 4 ° C 낮추어 가동되는 모드입니다. 이
절전모드는 2시간 이내의 부재 기간에 사용하기를 추천합니다. H 커서를 Eco에 두고 i 온도조절기를 원하는
위치로 돌려 준다. 주위 온도가 원하는 절전 (Eco) 온도보다 낮으면 난방표시등 G가 켜진다. 온도가 일정한
수준이 될 때까지 기다린다.
G Heating indicator light 난방 표시등
H Switch 스위치
I Temperature adjustment control
knob. 온도조절 스위치
8
2.4 Frost-Free mode 동파방지기능 모드
- This is the position of the knob that keeps the temperature at approximately 7 ° C in the room during a
prolonged absence from home (generally more than 24 hours). Put the H cursor on .
이 모드는 오랜 기간 (일반적으로 24시간 이상) 부재 시 실내 온도를 약 7 ° C로 유지하여 준다. H 커서를
에 둔다.
2.5 Locking the controls (Figure ❽) 기기 잠금 (그림 ❽)
It is possible to block or limit the use of the knob I and to block H cursor to prevent any manipulations.
Detach the unit from the bracket. On the back of the thermostat, remove the pieces J of their support:
- K position to block the knob.
- L positions to limit the operating range of the knob.
- M position to block the H cursor on the desired mode.
원치 않는 조작 변경을 방지하기 위하여 조절기 노브 I 및 H 커서의 조작을 제한하거나 막아버릴 수 있다. 벽걸이
브라켓으로 부터 제품을 탈거한다. 제품 뒤면 하단에 있는 조작방지 고정핀 J을 떼어내서 사용한다.
- K 설정된 조절기 노브를 고정하기 위한 위치
- L 조절기 노브의 조작 범위를 제한하는 위치의 예
- M 원하는 모드에서 H 커서 조작을 차단하는 위치
Advice for user 사용자를 위한 참고 사항
-There is no point in setting maximum heating; the room temperature will not rise any quicker. If you leave
for several hours, remember to reduce the temperature.
최고온도 설정에는 아무 문제가 없으나, 실내 온도는 빨리 상승하지 않습니다. 만약 몇 시간 동안 자리를
비우는 경우, 온도를 반드시 낮추어야 합니다.
-If you have several units in a room, let them operate simultaneously. This will give you a more uniform
temperature without increasing electricity consumption. This is also true for an unoccupied room; it is
interesting to let the device on with a lower setting than turning it off completely.
한 방안에 여러 대를 가동할 경우, 동시에 가동될 수 있도록 합니다. 이는 추가적인 전기 소모 없이 더 일정한
온도를 유지하게끔 해줍니다. 사람이 없을 때에도 해당되는데 전원을 완전히 끄기보다 낮게 설정하여 켜두는
것이 이득일 수 도 있습니다.
Maintenance 유지보수
-To maintain performances of your unit, you should clean the upper and lower grilles of the unit about twice
a year using a vacuum cleaner or a brush.
-제품의 성능을 유지하기 위해서는 진공청소기나 부드러운 브러시를 이용하여 일년에 2번 이상 상/하부의
그릴을 청소해야 합니다.
-Have a professional check of the inside of the unit every five years. Dirt may collect on the grille of the unit
if the atmosphere is polluted. This phenomenon is due to the poor quality of the ambient air. In this case, it
is recommended to check that the room is well ventilated (ventilation, air inlet, etc.), and that the air is
clean. The unit will not be replaced under the guarantee because of this type of dirt. The unit casing should
be cleaned with a damp cloth, never use abrasive products.
9
5년에 한번씩 전문기술자로부터 점검을 받아야 합니다. 주변이 불결하면 오염된 공기에 의해 그릴에 먼지가
쌓일 수 있는데
이러한 경우에는 먼저 실내 환기(환기구, 공기 유입구 등)가 잘 되는지, 그리고 공기는 깨끗한 지 여부를
점검하는 것이 좋습니다. 또한 제품의 고장을 방지하기 위해 월 1회 이상 자주 청소해 주어야 합니다. 위의
경우와 같은 오염에 의해서 발생된 제품의 고장은 보증을 받지 못합니다. 제품 본체 (케이스)는 물기가 있는
천으로 닦을 수 있지만 연마재는 절대 사용을 금합니다. 또한 청소 시 너무 강하게 문질러 표면이 벗겨지게
하거나 강한 성분의 세척제를 사용하지 마십시오.
Trouble Shooting 고장 수리
-If the unit does not heat: Check that the programmer is in COMFORT mode (electronical). Make sure that
the installation circuit breakers are switched on, or that the load shedder (if you have one) has not switched
off the unit power supply. Check the air temperature in the room.
-난방이 안될 경우: 제어 상태가 COMFORT(쾌적) 모드에 있는지 확인한다(전자식). 누전차단기(용량확인 필요)가
켜져 있는지 확인하시고, 혹시 부하 차단기가 (있는 경우) 제품의 전원 공급을 차단하지 않았는지 확인한다.
실내온도를 확인한다.
-The unit is permanently heating: Make sure that it is not in a draft and that the temperature setting has
not been changed.
난방이 계속되는 경우: 외기가 차단되었는지 혹은 온도 설정이 변경되었는지 여부를 확인한다.
-The smoke may be appeared: Make sure that natural ventilation is needed for at least 30 minutes if the
smoke appears during the initial use of the appliance for a while after installation, which is not a
malfunction or defective.
연기가 나는 경우: 설치 후 초기 제품 가동 시 잠시 동안 연기가 발생될 수도 있으니, 최소 30분 이상 창문을
열어 환기를 시켜주시기 바랍니다. 이 현상은 제품 제조상의 공정으로 인해 나타날 수 있는 것이므로 제품의
하자나 불량이 아닙니다.
모든 비슷한 종류 히터의 경우, 상승하는 공기의 흐름은 벽을 변색시킬 수 있습니다.
10
제품 제원 .
모델 사용전압(V) 전력(W) 크기(WxHxD)mm 무게(Kg)
AT - 500 D(DM) 220 460 384 x 450 x 78 2.85
AT - 1000 D(DM) 220 915 458 x 450 x 78 3.2
AT - 1500 D(DM) 220 1370 606 x 450 x 78 4.4
AT - 2000 D(DM) 220 1830 754 x 450 x 78 5.15
AT - 2500 D(DM) 220 2280 828 x 450 x 78 6.3
※모델명(DM)은 이동형 제품입니다.
수입처 : ㈜코퍼스트 경기도 이천시 장호원읍 선읍리 26-5 대표전화 : 1588-7122
판매처 : 제이앤엘바스 경기 부천시 소사구 괴안동 4-11 2 층 대표전화, A/S : 032-348-5032
11

Other manuals for F17

4

This manual suits for next models

1

Other Atlantic Heater manuals

Atlantic Odyssee F117 User manual

Atlantic

Atlantic Odyssee F117 User manual

Atlantic F17 Quick start guide

Atlantic

Atlantic F17 Quick start guide

Atlantic F120 Design User manual

Atlantic

Atlantic F120 Design User manual

Atlantic Oniris RAF3H-i2g User manual

Atlantic

Atlantic Oniris RAF3H-i2g User manual

Atlantic SOKIO User manual

Atlantic

Atlantic SOKIO User manual

Atlantic F620 User manual

Atlantic

Atlantic F620 User manual

Atlantic Maradja Digital User manual

Atlantic

Atlantic Maradja Digital User manual
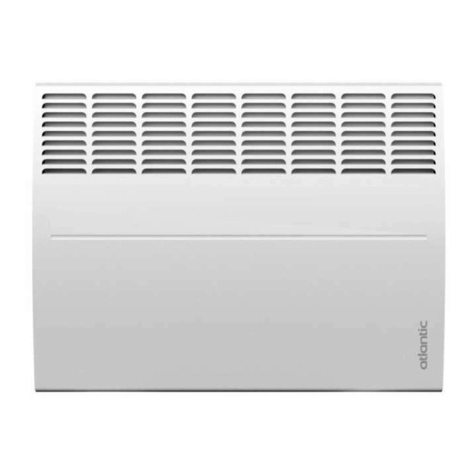
Atlantic F17 User manual

Atlantic

Atlantic F17 User manual

Atlantic Nefertiti User manual

Atlantic

Atlantic Nefertiti User manual

Atlantic Solius Eco Domo User manual

Atlantic

Atlantic Solius Eco Domo User manual

Atlantic 3410538311078 User manual

Atlantic

Atlantic 3410538311078 User manual

Atlantic Maradja Digital User manual

Atlantic

Atlantic Maradja Digital User manual

Atlantic Aeromobile 3000W Operating instructions

Atlantic

Atlantic Aeromobile 3000W Operating instructions

Atlantic CE06 User manual

Atlantic

Atlantic CE06 User manual

Atlantic Maradja Pilotage Intelligent R4GHDbis-MK22 User manual

Atlantic

Atlantic Maradja Pilotage Intelligent R4GHDbis-MK22 User manual

Atlantic DIVALI User manual

Atlantic

Atlantic DIVALI User manual

Atlantic SOKIO User manual

Atlantic

Atlantic SOKIO User manual

Atlantic F125 DESIGN User manual

Atlantic

Atlantic F125 DESIGN User manual
Atlantic ACCESSIO DIGITAL 2 User manual

Atlantic

Atlantic ACCESSIO DIGITAL 2 User manual

Atlantic F617 User manual

Atlantic

Atlantic F617 User manual

Atlantic F129 Design CMG-BD 1 User manual

Atlantic

Atlantic F129 Design CMG-BD 1 User manual

Atlantic F18 User manual

Atlantic

Atlantic F18 User manual
Atlantic VELMA User manual

Atlantic

Atlantic VELMA User manual

Atlantic Heater User manual

Atlantic

Atlantic Heater User manual

Popular Heater manuals by other brands

Vectaire Heatrec1003 Installation, operating and maintenance instructions

Vectaire

Vectaire Heatrec1003 Installation, operating and maintenance instructions

Clarke DEVIL 371PC Operating & maintenance instructions

Clarke

Clarke DEVIL 371PC Operating & maintenance instructions

GSi TopDry 2000 Series installation manual

GSi

GSi TopDry 2000 Series installation manual

Sencor SFH 8990BK Translation of the original manual

Sencor

Sencor SFH 8990BK Translation of the original manual

Klarstein Baltrum manual

Klarstein

Klarstein Baltrum manual

Pelonis HF-0063 user manual

Pelonis

Pelonis HF-0063 user manual

Honeywell HZ-510 - Professional Series Ceramic Heater instructions

Honeywell

Honeywell HZ-510 - Professional Series Ceramic Heater instructions

Broan BHFLED80 instructions

Broan

Broan BHFLED80 instructions

ecofort ecoheat Hybrid-T instruction manual

ecofort

ecofort ecoheat Hybrid-T instruction manual

HIRED-HAND Maywick SUPER-SAVER XL owner's manual

HIRED-HAND

HIRED-HAND Maywick SUPER-SAVER XL owner's manual

Sealey CD2005.V2 instructions

Sealey

Sealey CD2005.V2 instructions

SRP S Series Installation, operation and service instructions

SRP

SRP S Series Installation, operation and service instructions

Somogyi Elektronic Home FK 410 WIFI instruction manual

Somogyi Elektronic

Somogyi Elektronic Home FK 410 WIFI instruction manual

ORANGE 35-02-001 instruction manual

ORANGE

ORANGE 35-02-001 instruction manual

Stroco 15.00 M Service instructions

Stroco

Stroco 15.00 M Service instructions

Flagro FLE-60CSA Installation and maintenance manual

Flagro

Flagro FLE-60CSA Installation and maintenance manual

Remington REM-03-240-GH User's manual and operating instructions

Remington

Remington REM-03-240-GH User's manual and operating instructions

Westinghouse WSHPTC136 instruction manual

Westinghouse

Westinghouse WSHPTC136 instruction manual

manuals.online logo
manuals.online logoBrands
  • About & Mission
  • Contact us
  • Privacy Policy
  • Terms and Conditions

Copyright 2025 Manuals.Online. All Rights Reserved.