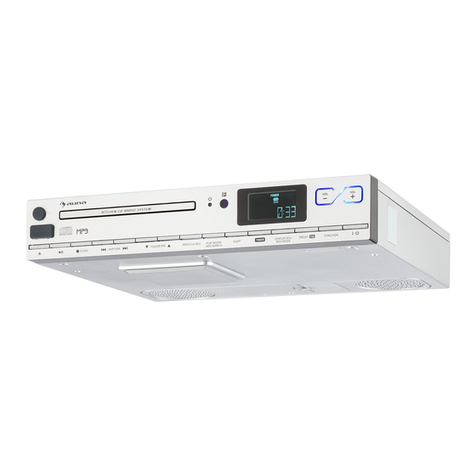
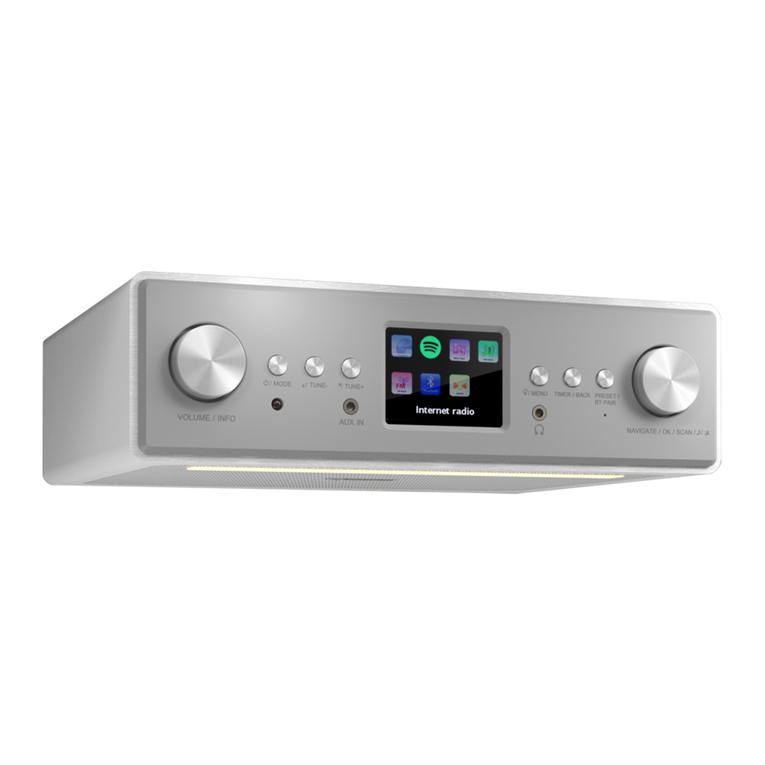
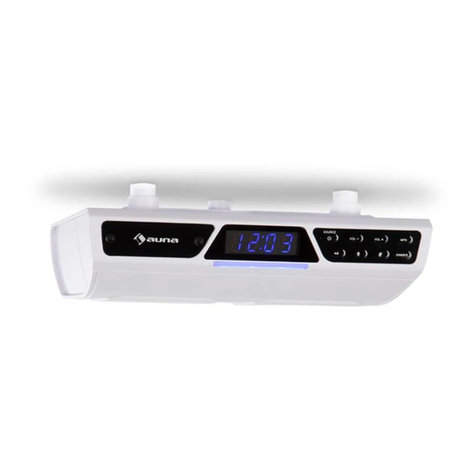
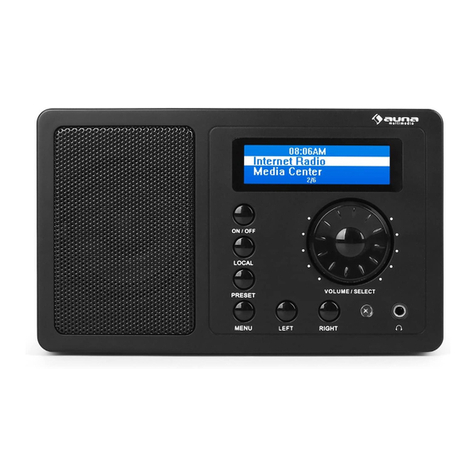
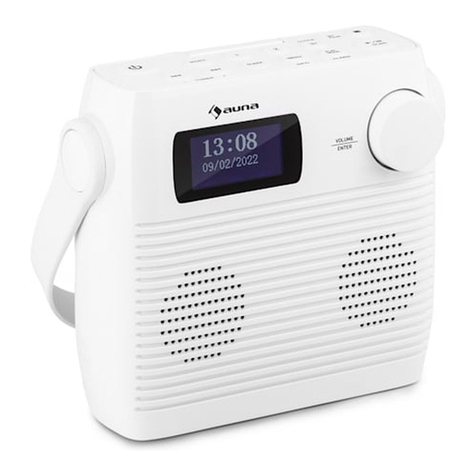
auna 10028699 User manual

www.auna-multimedia.com
10028699 10028700
BT Küchenradio

2
Sehr geehrter Kunde,
zunächst möchten wir Ihnen zum Erwerb Ihres Gerätes gratulieren.
Bitte lesen Sie die folgenden Anschluss- und Anwendungshinweise sorgfältig durch und befolgen Sie diese
um möglichen technischen Schäden vorzubeugen.
Technische Daten
Artikelnummer 10028699, 10028700
Stromversorgung 220-240 V ~50 Hz,
Batterie (für Uhrzeit-Anzeige): 3V Knopfzelle (CR2025)
Leistungsaufnahme 8 W
FM-Frequenzband 87,5 - 108 MHz
Maße / Gewicht 216 x 61 x 130 mm (BxHxT) / 0,8 kg
Warnung
• Das Gerät enthält Teile, die dem Benutzer nicht zugänglich sind. Reparaturen dürfen nur von qualizier-
ten Fachkräften durchgeführt werden.
• Setzen Sie das Gerät nicht Tropf- oder Spritzwasser aus. Stellen Sie auch keine mit Flüssigkeiten gefüll-
ten Gefäße, wie Vasen, darauf ab.
• Tauchen Sie das Gerät niemals in Wasser ein.
• Lassen Sie keine Gegenstände auf dieses Gerät fallen und lassen Sie das Gerät nicht fallen.
• Stellen Sie keine schweren Gegenstände auf dieses Gerät.
• Benutzen Sie nur Zubehör und Anbauteile, die vom Hersteller zugelassen sind.
• Eine Reparatur ist dann erforderlich, wenn das Gerät auf irgendeine Weise beschädigt wurde, das heißt
wenn Flüssigkeiten darauf ausgelaufen sind, Gegenstände darauf gefallen sind, das Gerät Regen oder
Feuchtigkeit ausgesetzt wurde, wenn es nicht ordnungsgemäß funktioniert oder fallengelassen wurde.
Versuchen Sie nicht das Gerät selbst zu reparieren. Durch Önen der Abdeckung verfällt die Garantie.
Transport: Bitte bewahren Sie die Originalverpackung auf. Um einen ausreichenden Schutz beim Transport
des Gerätes zu erreichen, verpacken Sie das Gerät in der Originalverpackung.
Reinigung: Verwenden Sie keine üchtigen Flüssigkeiten, wie Insektensprays. Durch zu starken Druck beim
Abwischen können die Oberächen beschädigt werden. Gummi- oder Plastikteile sollten nicht über einen
längeren Zeitraum mit dem Gerät in Kontakt sein. Nutzen Sie ein trockenes Tuch.
Kleine Objekte/Verpackungsteile: Bewahren Sie kleine Objekte (z.B. Schrauben und anderes Montage-
material, Speicherkarten) und Verpackungsteile außerhalb der Reichweite von Kindern auf, damit sie nicht
von diesen verschluckt werden können. Lassen Sie kleine Kinder nicht mit Folie spielen. Erstickungsgefahr!

3
Bedienelemente
Schrauben 1 10 STANDBY / FUNC
Schraub-Fassungen 2 11 Mikrofon (für Freisprechen via BT)
Display 3 12 BT-StatusLED
USB-Anschluss 4 13
PRE - / Alarm 1 5 14
TIME SET / COOK TIMER 6 15 / MODE /
SNOOZE / DIMMER 7 16 VOL+
PRE + / Alarm 2 8 17 VOL-
SLEEP 9

4
Rückseite:
Antenne 18 20 Netzkabel
Batteriefach 19
Montage
Beispiel:

5
Achtung: Stellen Sie sicher, dass das Netzkabel nicht eingesteckt ist, wenn Sie das Gerät montieren.
• Entfernen Sie alle Dinge aus dem Küchenschrank, unter dem Sie das Radio anbringen möchten. Für die
Erfolgreiche Installation sollte der Schrank folgende Bedingungen erfüllen:
• Die Stärke des Schrankbodens sollte zwischen 16 und 20 mm betragen.
• Der Schrank sollte stabil und ausgewogen an mindestens 2 Punkten fest an der ihn tragenden
Wand verankert sein.
• Der Schrank sollte sich nicht über einem Herd oder anderem Hitze ausstrahlenden Gerät (Toaster
etc.) benden. Kleingeräte sollten gegebenenfalls an einem anderen Ort platziert werden.
• Stellen Sie sicher, dass eine geeignete Haushaltssteckdose innerhalb der Reichweite des Netzkabels
liegt, bevor Sie sich an die Montage begeben.
• Für die Montage benötigen Sie
• eine Bohrmaschine (alternativ: Akkuschrauber) und einen 6mm-Bohrer (alternativ: 6mm Bohr-
aufsatz),
• einen Vorbohrer oder Nagel,
• einen passenden Inbusschlüssel,
• ein Maßband/Metermaß,
• Klebeband,
• eine Schere,
• das mitgelieferte Montagematerial: 4 Schrauben, 4 Distanzstücke.
Schritt 1: Markieren Sie die Bohrlöcher mit einem spitzen Gegenstand (zum Beispiel einem Nagel).
Schritt 2: Bohren Sie die Löcher - wenn nötig, bohren Sie mit einem Vorbohrer oder sehr dünnen Bohrer vor
(1 - 2mm), um eine „Führung“ für den 6-mm-Bohrer im zweiten Durchgang zu haben.
Schritt 3: Stecken Sie die Distanzstücke auf die Fassungen auf der Oberseite des Radios - diese sind wichtig,
damit das Gerät nicht überhitzt, sondern genügend Ventilation ausgesetzt ist,
Schritt 4: Schrauben Sie das Radio mit den vier Schrauben am Schrank fest. Nutzen Sie einen Inbusschlüs-
sel. Nutzen Sie hierzu keinen Akkuschrauber o.ä., da das Drehmoment in dem Fall zu hoch sein könnte und
somit die Gefahr besteht, das Radio zu beschädigen.
Aufstellung:
Sie können das Radio auch einfach an einen gewünschten Ort stellen. Kleben Sie einfach die mitgelieferten
Gummifüße in die vier Ecken auf der Unterseite des Geräts, um die Oberäche des Aufstellorts vor etwai-
gem Verkratzen zu bewahren.

6
Funktionen
Standby / Ein-/Ausschalten
• Drücken Sie STANDBY / FUNC, um das Gerät einzuschalten.
• Halten Sie STANDBY / FUN drei Sekunden gedrückt, um in den Standby-Modus zu schalten.
Radio-Funktionen
Automatische Sendersuche
Halten Sie SKIP+ bzw. SKIP- für 3 Sekunden gedrückt, um das Frequenzband automatisch in aufsteigende
bzw. absteigende Richtung zu durchsuchen. Das Gerät spielt den jeweils gefundenen Sender automatisch
ab.
Manuelle Sendersuche
Drücken Sie SKIP+ bzw. SKIP-, um das Frequenzband auf- respektive abwärts in 0.05MHz-Schritten zu
durchsuchen.
Manueller Senderspeicher
• Wählen Sie zunächst den gewünschten Sender per automatischer oder manueller Sendersuche aus.
• Drücken Sie / MODE / , um zur Preset-Auswahl zu gelangen.
• Auf dem Display erscheint (blinkend): „P01“.
• Wählen Sie mit PRE-/ALARM 1 oder PRE+/ALARM 2 den gewünschten Speicherplatz aus. Es stehen 30
Speicherplätze (Presets P01 - P30) zur Verfügung.
• Drücken Sie / MODE / , um den ausgewählten Speicherplatz zu bestätigen.
Sind alle Speicherplätze belegt, können Sie mit den Tasten PRE-/ALARM 1 oder PRE+/ALARM 2 zwischen
den Sendern hin- und herschalten, um den gewünschten Sender zu hören.
Automatischer Senderspeicher
• Halten Sie / MODE / für 3 Sekunden gedrückt, um die automatische Senderspeicher-Routine
aufzurufen. Das Gerät führt nun einen automatischen Sendersuchlauf aus und speichert selbsttätig bis
zu 30 gefundene Sender auf den zur Verfügung stehenden Speicherplätzen ab. Dieser Vorgang kann
einen Moment dauern.
Nun können Sie mit den Tasten PRE-/ALARM 1 oder PRE+/ALARM 2 zwischen den Sendern hin- und her-
schalten, um den gewünschten Sender zu hören.

7
USB-Funktion
• Stecken Sie einen USB-Stick mit Musikdateien im MP3- oder WAV-Format in den USB-Slot ein. Achten
Sie darauf, den Stick richtig herum einzustecken und wenden Sie dabei keine Kraft an, um weder Stick
noch Gerät zu beschädigen.
• Wählen Sie den USB-Modus mit STANDBY / FUNC aus. Das Abspielen beginnt automatisch.
• Steuern Sie die Wiedergabe mit , und .
BT-Funktionen
Pairing / Trennen
• Drücken Sie STANDBY / FUNC (evtl. mehrfaches Drücken notwendig), um den BT-Modus auszuwählen.
Die BT-LED blinkt blau, um den BT-Modus anzuzeigen.
• Aktivieren Sie BT auf Ihrem BT-Gerät (typischerweise Smartphone, Tablet oder Laptop) und verbinden
Sie mit dem KR-100.
• Bei erfolgreicher Verbindung, hört die BT-LED auf zu blinken und leuchtet durchgängig blau.
• Zum Trennen der BT-Verbindung drücken Sie / MODE / für etwa 3 Sekunden, bis die BT-LED
blau blinkt. Sie können nun zum Beispiel ein anderes externes Gerät verbinden.
Abspielen von Medieninhalten via BT
• Falls Sie zuvor bereits Musik per BT über das Gerät gestreamt haben, wird automatisch von der Stelle
aus weiter abgespielt.
• Stellen Sie die Lautstärke mit den Tasten VOL+ und VOL- ein.
• Steuern Sie die Medienwiedergabe über Ihr BT-Gerät.
Freisprecheinrichtung
Auf eingehende Anrufe macht Sie das Küchenradio mit einem Signalton aufmerksam. Sie können diese auch
per Druck auf / MODE / annehmen und das Gespräch dank des eingebauten Mikrofons über das
Küchenradio führen.
Uhrzeit-, Timer- und Alarm-Funktionen
Uhr stellen
• Schalten Sie das Gerät in den Standby-Modus (drücken Sie dazu STANDBY/FUNC für 3 Sekunden).
• Halten Sie (im Standby-Modus) TIME SET/COOK TIMER für 2 Sekunden gedrückt, um zur Einstellung
der Uhrzeit zu gelangen.

8
• Auf dem Display wird „24H“ (blinkend) angezeigt.
• Wechseln Sie hier per SKIP+/SKIP- Tasten zwischen den 24H- und der 12H-Anzeige (12H = Anglo-ame-
rikanisches Format mit 12 Stunden; 24H = Europäisches Uhrzeitformat mit 24 Stunden).
• Bestätigen Sie die gewählte Einstellung mit Druck auf TIME SET.
• Stellen Sie nun die Stunden ein: Wählen Sie die Stunde mit SKIP+/- und bestätigen Sie mit TIME SET.
• Wiederholen Sie daraufhin den Vorgang für die Minuten.
Bitte beachten Sie: Da die Einstellung der Uhrzeit im Standby-Modus erfolgt, ist die Displaybeleuchtung
gedimmt. Drücken Sie SNOOZE/DIMMER, um die Displaybeleuchtung anzupassen.
Alarm-Einstellung
Die Alarme sind nach erfolgter Einstellung der Uhrzeit korrekt editierbar. Das Gerät muss sich im Standby-
Modus benden.
• Halten Sie PRE-/ALARM1 bzw. PRE+/ALARM2 für 2 Sekunden gedrückt, um zu den Alarm-Einstellun-
gen zu gelangen.
• Wählen Sie dann mit SKIP+ und SKIP- zwischen den zur Auswahl stehenden Weck-Optionen: BELL
(Piepton), RADIO und USB. Bestätigen Sie die Auswahl.
• Stellen Sie ALARM 1 respektive ALARM 2 (die Alarme funktionieren unabhängig voneinander) dann mit
SKIP+ und SKIP- ein, analog zur Vorgehensweise beim Stellen der Uhrzeit, bestätigen Sie die Einstel-
lung jeweils mit ALARM1 bzw. ALARM2.
• Nach erfolgreicher Einstellung zeigt das Display „ALARM1“ bzw „ALARM2“ an.
• Aktivieren/deaktivieren Sie den jeweiligen Alarm mit Druck auf ALARM1 bzw. ALARM2.
• Um einen Alarm zu löschen, gehen Sie zu den Alarm-Einstellungen und halten Sie dann für 3
Sekunden gedrückt.
Snooze / Dimmer
Sobald einer der aktivierten Alarme losgeht, können Sie diesen per Druck auf SNOOZE/DIMMER für 10
Minuten verzögern.
Sonst hat die Taste die Funktion, das Display in drei Schritten zu dimmen. Dies kann im Standby-Modus
sowie während des Betriebs geschehen.
Sleep
Stellen Sie mit der SLEEP-Taste den Sleep-Modus ein. Drücken Sie mehrfach, um die gewünschte Zeit (nach
dieser schaltet sich das Gerät automatisch ab) einzustellen: 120min - 110min - 100min - ... 20min - 10min -
Sleep Timer aus.
Küchenuhr
Drücken Sie TIME SET/COOK TIMER mehrfach, um eine „Eieruhr“ parat zu haben. Jedes Drücken verlängert
den Countdown um eine Minute - maximal 180 Minuten sind möglich. Nach Ablauf der gewählten Zeit er-
tönt das Alarmsignal. Dies ist im Standby-Modus wie auch im Radio-Betrieb möglich.

9
Hinweise zur Entsorgung
Bendet sich die linke Abbildung (durchgestrichene Mülltonne auf Rädern) auf dem
Produkt, gilt die Europäische Richtlinie 2002/96/EG. Diese Produkte dürfen nicht mit
dem normalen Hausmüll entsorgt werden. Informieren Sie sich über die örtlichen Re-
gelungen zur getrennten Sammlung elektrischer und elektronischer Gerätschaften.
Richten Sie sich nach den örtlichen Regelungen und entsorgen Sie Altgeräte nicht
über den Hausmüll. Durch die regelkonforme Entsorgung der Altgeräte werden Um-
welt und die Gesundheit ihrer Mitmenschen vor möglichen negativen Konsequenzen
geschützt. Materialrecycling hilft, den Verbrauch von Rohstoen zu verringern.
Konformitätserklärung
Hersteller: Chal-Tec GmbH, Wallstraße 16, 10179 Berlin.
Dieses Produkt entspricht den folgenden Europäischen Richtlinien:
1999/5/EG (R&TTE)
2011/65/EG (RoHS)
Hinweise zur Stromversorgung
Netzstrom: Das Gerät wird mit Netzstrom aus der Haushaltssteckdose betrieben (220 - 240V ~50Hz).
Batterie: An der Unterseite des Geräts bendet sich ein Batteriefach, das die Back-Up Batterie beherbergt.
Diese ist dafür zuständig, die Uhr mit Strom zu versorgen, damit diese auch im Falle eines Stromausfalls
oder der Trennung von der Steckdoseweiterläuft.
Ersetzen Sie die Batterie vom Typ CR2025 (3V „Knopfzelle“) ausschließlich mit baugleichen Batterien! Ach-
ten Sie auf die korrekte Polarität, da es sonst zu Schäden - zum Beispiel durch das Auslaufen der Batterie
oder ihre Überhitzung - kommen kann.

10
Dear Customer,
Congratulations on purchasing this product. Please read and follow these instructions, in order to avoid
damaging the item. We do not cover any damages that may arise from improper use of the item or the
disregard of the safety instructions.
Technical Data
Article # 10028699, 10028700
Power supply 220-240V ~50Hz,
Batterie (für Uhrzeit-Anzeige): 3V Knopfzelle (CR2025)
Wattage 8W
FM Frequency range 87.5 - 108 MHz
Dimensions / Weight 216 x 61 x 130mm (WxHxD) / 0.80kg
Important Safety Advice
• Read all instructions before using.
• To protect against a re, electric shock or personal injury, do not immerse cord, electric plugs or device
in water or other liquids.
• Do not expose the appliance to extreme temperatures. The appliance shall be used in moderate cli-
mates.
• The use of attachments that are not recommended by the appliance manufacturer may result in re,
electric shock or personal injury.
• Do not open the unit by removing any cover parts. Do not attempt to repair the unit. Any repairs or
servicing should be done by qualied personell only.
• Only qualied persons may perform technical work on the product. The product may not be opened or
changed. The components cannot be serviced by the user. The manufacturer is not responsible for any
radio or TV interference caused by unauthorized modications.
• The appliance is not a toy. Do not let children play with it. Never let children insert foreign objects into
the appliance.
• Never clean the surface of the device with solvents, paint thinners, cleansers or other chemical pro-
ducts. Instead, use a soft, dry cloth or soft brush.
• Save these instructions.
Small objects: Keep small objects (i.e. screws, mounting material, memory cards etc.) and packaging out of
the range of children. Do not let Children play with foil. Choking hazard!
Transporting the device: Please keep the original packaging. To gain suicient protection of the device
while shipment or transportation, make sure to put it back in its original packaging.
Cleaning the surface: Do not use any volatile liquids, detergents or the like. Use a clean dry cloth.

11
Controls
Screws 1 10 STANDBY / FUNC
Drill Capsules 2 11 Internal microphone (for BT hands free feature)
Display 3 12 BT status LED
USB slot 4 13
PRE - / Alarm 1 5 14
TIME SET / COOK TIMER 6 15 / MODE /
SNOOZE / DIMMER 7 16 VOL+
PRE + / Alarm 2 8 17 VOL-
SLEEP 9

12
Rear:
Antenna 18 20 AC power cord
Battery compartment 19
Mounting
Example:

13
CAUTION: Make sure that the plug is not inserted when assembling the device!
• Remove all objects from the cupboard and anything which is fragile in the adjacent cupboards.
• For the installation the cupboard must full the following conditions:
• Thickness of the cupboard oor between 16 mm and 20 mm.
• The wall mounting of the cupboard must be stable and anchored rmly in the wall with at least
2 screws.
• Important! Do not install the device above a cooker!
• When installing the device it must be ensured that there is a power socket within reach.
• The mains socket must be within easy reach, so that the plug can be quickly removed in an emergency
• Important! Do not connect the device to the mains power supply until after installation!
• The device cannot be installed under cupboards under which there is a lighting strip.
• For mounting, you may need the following supplies: A drill with 6 mm drill bit, pilot drill or nail, Allen
key, tape measure, adhesive tape, scissors, safety goggles.
MOUNTING PROCEDURE
Supplied mounting accessories: 4 Screws; 4 Spacers;.
• Please adhere to the dimensions stated in the installation instructions.
• You should use only the installation accessories supplied.
STEP 1: With the help of a gimlet or nail pierce the crosses at the attachment points and use it to mark the
holes.
STEP 2: Drill the holes into the wall cupboard.
STEP 3: Insert the spacers into the holes provided on the device. NOTE: Suicient ventilation is only gua-
ranteed with a spacer.
STEP 4: Countersink the screws into the holes in the cupboard, using the 4 screws and the spacers, attach
the kitchen radio to the bottom of the cupboard. Tighten the screws hand-tight with an Allen key. CAUTION:
Use a wrench and not an electric screwdriver.
Use the 4pcs rubber feet provided and stick 1pc each on the 4 corners of the bottom of the unit. In
this case, the unit can be use as an independent sound system on the table without under-cabinet.

14
Operation
Standby / On/O
• Press STANDBY / FUNC to switch the device on.
• Press and hold STANDBY/FUNC for 3 seconds to switch to standby.
Radio Operation
Automatic Tuning
Press and hold the “SKIP +” or “SKIP -” button over 3 seconds to start the automatic tuning process. When
a station is tuned in the tuning process, it will stop automatically and you can listen to your desired station.
Manual Tuning
Press „SKIP +“ or „SKIP -“ each time not over 1 second or less. The frequency changes by a xed 0.05 MHz
steps.
Manual Memory Preset
• Tune in your desired station.
• Press / MODE / to enter the preset setting.
• The display shows (ashing): „P01“.
• Chose the desired preset number with PRE-/ALARM 1 or PRE+/ALARM 2. There is a total of 30 presets
(P01 - P30) available.
• Press Sie / MODE / , to save the current station to the chosen preset.
Press „PRE - / ALARM 1“ or „PRE + / ALARM 2“ to choose your desired station.
Automatic Memory System (AMS)
• Press and hold / MODE / for 3 seconds to start the automatic memory preset. The device will
search for available stations within the whole frequency range and automatically save 30 presets. This
might take a moment.
Press „PRE - / ALARM 1“ or „PRE + / ALARM 2“ to choose your desired station.

15
USB Operation
• Plug in a USB device to the USB slot.
• Press STANDBY / FUNC to chose USB mode. Playback will start automatically from the rst track.
• Navigate in the convenient way, using , and .
BT Operation
Pairing / Disconnecting
• Press the STANDBY/FUNC to select BT mode. The “BT INDICATOR” lights up blue and ashing.
• Activate BT on your mobile phone / iPod / tablet or similar and connect with KR-100.
• On successful pairing, the BT LED stops ashing.
• To disconnect, press / MODE / for 3 seconds, until the BT LED ashes again, indicating you can
now pair any other BT device.
Playback
• When connected to Bluetooth device, unit will follow the playback on Bluetooth device automatically.
• Select desired level by using the “VOL +” or “VOL -” button. The corresponding command is sent to this
system when connected Bluetooth device.
• Use your BT device to navigate through your media library.
BT Handsfree Feature
When there is an incoming call to the connected mobile device, you will hear an incoming call alert tone
from the speaker of the system. In this case, you can press / MODE / to accept the call. Use the
internal microphone for hands free talking.
Clock / Timer / Sleep Functions
Setting The Clock
• Press and hold “STANDBY / FUNC.” button for 3 seconds to switch unit at standby mode.
• Press and hold the „TIME SET / COOK TIMER“ button for 2 seconds to entry clock set mode. The dis-
play will show “24H” and ashing.
• Adjust time format (12H / 24H) by pressing the “SKIP +” or “SKIP -” button.
• Press the „TIME SET / COOK TIMER“ button to conrm time format. (Display will show “AM” or “PM”
if 12H format is set)
• Adjust hour by pressing the “SKIP +” or “SKIP -” button, press the „TIME SET / COOK TIMER“ button to
conrm. Adjust minute by pressing the “SKIP +” or “SKIP -” button, press the „TIME SET / COOK TIMER“
• button to conrm.

16
Alarm Setting
ALARM setting must be after completed clock setting. Unit must be in „STANDBY“ mode.
• Press and hold “STANDBY / FUNC.” button for 3 seconds to switch unit at standby mode.
• Press and hold the „PRE - / ALARM 1“ or „PRE + / ALARM 2“ button for 2 seconds to entry alarm set
mode.
• Press the „SKIP +“ or „SKIP -“ button to select below 1, 2 or 3 for wake-up function: 1 - BELL; 2 - RADIO;
3 - USB.
• Adjust hour by pressing the “SKIP +” or “SKIP -” button, press the „PRE - / ALARM 1“ or „PRE + / ALARM
2“ button to conrm. 5. Adjust minute by pressing the “SKIP +” or “SKIP -” button, press the „PRE - /
ALARM 1“ or „PRE + / ALARM 2“ button to conrm.
• Press the „PRE - / ALARM 1“ or „PRE + / ALARM 2“ button to conrm.
• The display will show “ALARM 1” or “ALARM 2”. ALARM set complete.
• Press the „PRE - / ALARM 1“ or „PRE + / ALARM 2“ button to activate alarm on / o function.
• To delete alarms, go to the alarm setting, then press and hold for at least 3 seconds.
Snooze / Dimmer
When the alarm is triggered. You may press the “SNOOZE / DIMMER” button to delay the alarm for another
10 minutes. When the backlight of display is light or dim, you may press the “SNOOZE / DIMMER” button
to adjust. DIMMER has 3 levels, and it can be used in Standby or Non-Standby Mode.
Sleep
• Press the „SLEEP“ button, display will show “120”. That means, after 120 minutes, appliance will auto-
matically turn to standby mode.
• Press the „SLEEP“ button again to select the automatically turn o time, from 120, 110, 100, 90, 80, 70,
60, 50, 40, 30, 20, 10 minutes.
• Press the „SLEEP“ button to “OFF” to cancel sleep function.
Cook Timer
• Press the “TIME SET / COOK TIMER” button to select cook timer, the longest timer is up to 180 minutes.
• After setting cook timer, cook timer will automatically operate. When timer countdown nished, appli-
ance will trigger the alarm.
Note: COOK TIMER setting must be after completed clock setting. Unit can work in „STANDBY“ or “RADIO”
mode.

17
Power Source
AC POWER
You can power your appliance by plugging the AC power cord at the back of the appliance into a wall AC
power outlet. Check that the rated voltage of your appliance matches your local voltage.
Back-up battery:
Open the battery compartment underneath the product. Insert a button cell battery (CR2025 type). The +
polarity must be positioned towards outside. Close the battery compartment. Note: The back-up battery
preserves the clock time in case of a temporary power blackout.
CAUTION: Danger of explosion if battery is incorrectly replaced. Replace only with the same or equi-
valent type.
Environment Concerns
According to the European waste regulation 2002/96/EG this symbol on the product
or on its packaging indicates that this product may not be treated as household waste.
Instead it should be taken to the appropriate collection point for the recycling of elec-
trical and electronic equipment. By ensuring this product is disposed of correctly, you
will hep prevent potential negative consequences for the environment and human
health, which could otherwise be caused by inappropriate waste handling of this prod-
uct. For more detailed information about recycling of this product, please contact your
local council or your household waste disposal service.
Declaration of Conformity
Producer: Chal-Tec GmbH, Wallstraße 16, 10179 Berlin, Germany.
This product is conform to the following European directives:
1999/5/EC (R&TTE)
2011/65/EU (RoHS)

18
Gentile Cliente,
La ringraziamo per aver acquistato il nostro prodotto.
La preghiamo di leggere attentamente le seguenti istruzioni di utilizzo del prodotto e di seguirle per evitare
eventuali danni.
Dati tecnici
Articolo numero 10028699, 10028700
Alimentazione
220-240 V ~50 Hz,
Batterie (per l’orologio): pile a bottone
3 V (CR2025)
Potenza assorbita 8 W
Banda di frequenza FM 87,5 - 108 MHz
Dimensioni 216 x 61 x 130 mm (BxHxT) / 0,8 kg
Avvertenze
• Il dispositivo contiene delle parti non accessibili all’utente. Le riparazioni devono essere eseguite
esclusivamente da personale qualicato.
• Non esporre il dispositivo agli spruzzi. Non posizionare sopra il dispositivo vasi contenenti acqua
come ad esempio vasi.
• Non immergere mai il dispositivo in acqua.
• Non far cadere oggetti sul dispositivo e non far cadere il dispositivo.
• Non collocare oggetti pesanti sul dispositivo.
• Utilizzare esclusivamente accessori e componenti approvati dal produttore.
• La riparazione del dispositivo è necessaria se il dispositivo è stato danneggiato in qualche modo,
ovvero se sono penetrati liquidi al suo interno, se sono caduti oggetti sopra di esso, se è stato
esposto alla pioggia o all’umidità, se non funziona correttamente o se è caduto. Non tentare
di riparare il dispositivo autonomamente. Non tentare mai di aprire il dispositivo altrimenti la
garanzia decade.
Trasporto: Conservare la confezione originale. Per garantire una protezio-
ne adeguata del dispositivo durante il trasporto, riporlo nella confezione originale.
Pulizia: Non utilizzare liquidi volatili come ad esempio spray per insetti. Non strona-
re le superci troppo energicamente per non danneggiarle. Le parti in plastica o in gom-
ma non devono restare a lungo a contatto con il dispositivo. Utilizzare un panno asciutto.
Parti più piccole/imballaggio: conservare le parti più piccole (ad esempio viti e altro mate-
riale di montaggio e d’imballaggio) fuori dalla portata dei bambini per evitare che le inge-
riscano. Non far giocare i bambini con il materiale d’imballaggio. Pericolo di soocamento!

19
Pannello di controllo
Viti 1 10 STANDBY / FUNC
Supporto per viti 2 11 Microfono (per parlare con vivavoce via BT)
Display 3 12 Spia BT a LED
Porta USB 4 13
PRE - /Alarm 1 5 14
TIME SET / COOK TIMER 6 15 / MODE /
SNOOZE / DIMMER 7 16 VOL+
PRE + /Alarm 2 8 17 VOL-
SLEEP 9

20
Parte posteriore:
Antenna 18 20 Cavo di rete
Vano batteria 19
Installazione
Esempio:
This manual suits for next models
1
Table of contents
Languages:
Other auna Radio manuals

auna
auna Connect 100 SE User manual

auna
auna DR-160 BT User manual

auna
auna 10024187 User manual

auna
auna US-10028155 User manual

auna
auna Worldwide Mini 10031919 User manual

auna
auna KR-200 User manual

auna
auna DABStep User manual

auna
auna 10030588 User manual

auna
auna 10031202, 10031203 User manual

auna
auna IR 160 User manual

auna
auna KR-400 User manual

auna
auna 10035328 User manual

auna
auna iTuner 320 User manual

auna
auna Sound Maitre DAB User manual

auna
auna Belle Epoque 1906 DAB User manual

auna
auna Elton User manual

auna
auna Weimar User manual

auna
auna Splash User manual

auna
auna Connect 150 MKII User manual

auna
auna Silver Star Mini User manual