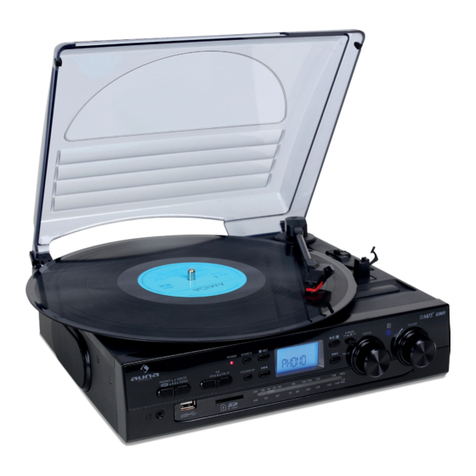
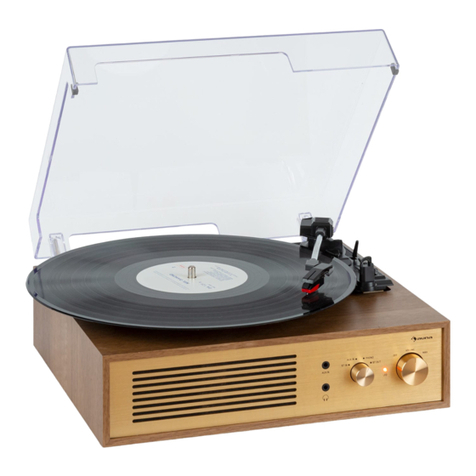
auna Jerry Lee BT User manual

www.auna-multimedia.com
Jerry Lee BT
Plattenspieler
Turntables
Tocadiscos
Platine vinyle
Giradischi
10032869


3
DE
English 9
Español 15
Français 21
Italiano 27
Sehr geehrter Kunde,
wir gratulieren Ihnen zum Erwerb Ihres Gerätes.
Lesen Sie die folgenden Hinweise sorgfältig durch
und befolgen Sie diese, um möglichen Schäden
vorzubeugen. Für Schäden, die durch Missachtung der
Hinweise und unsachgemäßen Gebrauch entstehen,
übernehmen wir keine Haftung. Scannen Sie den
folgenden QR-Code, um Zugri auf die aktuellste
Bedienungsanleitung und weitere Informationen rund
um das Produkt zu erhalten:
INHALTSVERZEICHNIS
Sicherheitshinweise 4
Geräteübersicht 4
Tasten und Anschlüsse 5
Inbetriebnahme und Bedienung 5
Pege und Wartung 6
Reinigung und Pege 7
Hinweise zur Entsorgung 7
TECHNISCHE DATEN
Artikelnummer 10032869
Stromversorgung 220-240 V ~ 50/60 Hz
Netzteil 9 V DC
KONFORMITÄTSERKLÄRUNG
Hersteller:
Chal-Tec GmbH, Wallstraße 16, 10179 Berlin,
Deutschland.
Dieses Produkt entspricht den folgenden
Europäischen Richtlinien:
2014/35/EU (LVD)
2011/65/EU (RoHS)
2014/53/EU (RED)
Die vollständige Konformitätserklärung des
Herstellers nden Sie unter folgendem Link:
https://use.berlin/10032869

4
DE
1 Verschlüsse
2 Schutzhaube
3 Power-Leuchte
4 Ein-Schalter/
Lautstärkeregler
5 Kopfhörer-
anschluss
6 Lautsprecher
7 Tonarm
8 Tonabnehmer
9 Gri
10 Drehteller
11 USB-Anschluss
SICHERHEITSHINWEISE
1. Wählen Sie einen sicheren Standort aus und stellen Sie das Gerät nicht
in direktes Sonnenlicht oder neben eine Wärmequelle.
2. Vermeiden Sie Umgebungen, an denen das Gerät Vibrationen,
übermäßigem Staub, Kälte oder Feuchtigkeit ausgesetzt ist.
3. Um Stromschläge zu vermeiden, darf das Gehäuse nicht geönet
werden. Sollte ein Fremdkörper versehentlich in das Innere des Gerätes
gelangen, wenden Sie sich bitte an einen Fachhändler.
4. Reinigen Sie das Gerät nicht mit chemischen Lösemitteln, da diese
die Oberäche beschädigen könnte. Benutzen Sie zur Reinigung ein
sauberes, trockenes Tuch.
5. Bewahren Sie dieses Handbuch zur späteren Verwendung auf.
GERÄTEÜBERSICHT

5
DE
TASTEN UND ANSCHLÜSSE
12 Vorspulen
13 Zurückspulen
14 Pause / Abspielen
15 Modus / AUX IN / BT /
Plattenspieler
16 AUX-Eingang
17 Rechter Kanal
18 Linker Kanal
19 Netzanschluss
INBETRIEBNAHME UND BEDIENUNG
Netzanschluss
Stellen Sie sicher, dass die Netzspannung Ihres Hauses mit der
Betriebsspannung des Gerätes übereinstimmt. Schließen Sie das Netzteil an
und stecken Sie den Stecker in die Steckdose.
Verstärkeranschluss (optional)
Sie können die Musik entweder über die eingebauten Lautsprecher des
Plattenspielers hören oder den Plattenspieler an Ihr bestehendes HiFi-
System anschließen. Verbinden Sie den Plattenspieler mit einem Cinch-
Kabel (nicht im Lieferumfang enthalten) mit dem Line-Eingang Ihres
Mischpults oder Verstärkers.
USB-Aufnahme
1 Wählen Sie den Plattenspieler-Modus.
2 Schließen Sie den USB-Speicher an und drücken Sie 2x auf die REC-
Taste. Die BT-Leuchte geht an und signalisiert, dass die Aufnahme
gestartet wird.
3 Wenn Sie die Aufnahme beenden möchten, drücken Sie erneut auf REC
oder heben Sie den Tonarm an.

6
DE
USB-Titel abspielen
Wählen Sie den USB-Modus. Es ertönt ein Signalton und die Musik wird
automatisch abgespielt.
BT-Modus
Wählen Sie den BT-Modus. Es ertönt ein Signalton und die BT-Leuchte geht
an. Önen Sie die BT-Geräteliste auf ihrem Smartphone und wählen Sie
„Jerry Lee“ aus. Sobald die Geräte erfolgreich verbunden sind, ertönt ein
Signalton.
PFLEGE UND WARTUNG
So ersetzen Sie die Kartusche (Nadel)
Hinweis: Bevor Sie die Kartusche austauschen, schalten Sie das Gerät
aus und ziehen Sie den Stecker aus der Steckdose.
1 Lösen Sie die Tonarm-Verriegelung.
2 Entfernen Sie den Tonabnehmer.
3 Trennen Sie die Kartusche vom Sockel.

7
DE
4 Entfernen Sie alle Audiokabel.
5 Gehen Sie nun in umgekehrter Reihenfolge vor.
6 Befestigen Sie die Audiokabel.
7Setzen Sie die neue Kartusche auf den Sockel.
8 Schließen Sie den Tonabnehmer.
Hinweis: Führen Sie den Austausch der Kartusche mit äußerster Sorgfalt
durch, damit der Tonarm und die Audiokabel nicht beschädigt werden.
Hinweise zu Reinigung und Pege
• Önen und schließen sie den Deckels vorsichtig.
• Berühren Sie die Nadelspitze nicht mit den Fingern und vermeiden Sie
es, die Nadel gegen den Plattenteller oder die Plattenkante zu stoßen.
• Reinigen Sie die Nadelspitze häug. Verwenden Sie dafür eine weiche
Bürste.
• Wenn Sie eine Nadelreinigungsüssigkeit verwenden müssen,
verwenden Sie diese sehr sparsam.
• Wischen Sie das Gehäuse des Plattenspielers vorsichtig mit
einem weichen Tuch ab. Verwenden Sie nur eine kleine Menge
Geschirrspülmittel, um den Plattenspieler zu reinigen.
• Verwenden Sie zur Reinigung niemals scharfe Reiniger oder Lösemittel.
HINWEISE ZUR ENTSORGUNG
Bendet sich die linke Abbildung (durchgestrichene
Mülltonne auf Rädern) auf dem Produkt, gilt die
Europäische Richtlinie 2012/19/EU. Diese Produkte
dürfen nicht mit dem normalen Hausmüll entsorgt
werden. Informieren Sie sich über die örtlichen
Regelungen zur getrennten Sammlung elektrischer
und elektronischer Gerätschaften. Richten Sie sich
nach den örtlichen Regelungen und entsorgen
Sie Altgeräte nicht über den Hausmüll. Durch die
regelkonforme Entsorgung der Altgeräte werden
Umwelt und die Gesundheit ihrer Mitmenschen
vor möglichen negativen Konsequenzen geschützt.
Materialrecycling hilft, den Verbrauch von Rohstoen
zu verringern.


9
EN
Dear Customer,
Congratulations on purchasing this equipment.
Please read this manual carefully and take care of the
following hints to avoid damages. Any failure caused
by ignoring the items and cautions mentioned in the
instruction manual is not covered by our warranty and
any liability. Scan the QR code to get access to the
latest user mannual and other information about the
product:
CONTENT
Safety Instructions 10
Product Overview 10
Buttons and Jacks 11
Start and Operation 11
Care and Maintenance 12
Hints on Disposal 13
TECHNICAL DATA
Item number 10032869
Power supply 220-240 V ~ 50/60 Hz
Power adaptor 9 V DC
DECLARATION OF CONFORMITY
Producer:
Chal-Tec GmbH, Wallstraße 16, 10179 Berlin, Germany.
This product is conform to the following European
Directives:
2014/35/EU (LVD)
2011/65/EU (RoHS)
2014/53/EU (RED)
The complete declaration of conformity of the
manufacturer can be found at the following link:
https://use.berlin/10032869

10
EN
1 Lock catch
2 Dust cover
3 Power light
4 Volume control
5 Headphone jack
6 Speaker
7 Tone arm
8 Cartridge
9 Carrying
10 Turntable plate
11 USB connector
SAFETY INSTRUCTIONS
1. Choose a safe location and avoid placing the unit in direct sunlight or
near any heat source.
2. Avoid environments subject to vibration, excessive dust, cold or
moisture.
3. Due to the risk of electrical shock, do not open the cabinet. Should
a foreign object accidentally nd its way into the interior of the unit,
contact your local dealer.
4. Do not attempt to clean the unit with chemical solvents as this might
damage the nishing. A clean, dry cloth is recommended for cleaning.
5. Keep this manual for future reference.
PRODUCT OVERVIEW

11
EN
BUTTONS AND JACKS
12 Previous music
13 Next music
14 Pause / Play
15 Mode / AUX IN / BT /
Turntable
16 AUX IN in jack
17 R channel
18 L channel
19 DC power jack
START AND OPERATION
Mains Connection
Ensure that the mains voltage of your home corresponds to the operating
voltage of the unit. Your unit is ready to be connected to a mains voltage of
9 V DC adaptor.
Amplier Connection (optional)
Whilst you can listen to your new turntable using the built in speakers you
may wish to connect it to your existing Hi Fi system. Connect the audio
plugs to the Line input on your mixer or amplier using an RCA cable (not
supplied)
USB recording
1 Select the turntable mode.
2 Connect the USB memory and press the REC button twice. The BT light
goes on and indicates that recording is being started.
3 To stop recording, press REC again or raise the tone arm.

12
EN
USB player
Select USB mode. A beep will sound and the music will play automatically.
BT mode
Select the BT mode. A signal tone sounds and the BT lamp lights up. Open
the BT device list on your smartphone and select „Jerry Lee“. As soon as the
devices are successfully connected, an acoustic signal sounds.
CARE AND MAINTENANCE
Installing a new stylus cartridge
Note: Before replacing the cartridge, turn o the unit and unplug it from
the power outlet.
1 Release the tonearm lock.
2 Remove the cartridge.
3 Disconnect the cartridge from the base.

13
EN
4 Remove all audio cables.
5 Now proceed in reverse order.
6 Attach the audio cables.
7Place the new cartridge on the base.
8 Close the cartridge.
Note: Replace the cartridge with extreme care to avoid damaging the
tonearm and audio cables.
Notes on cleaning and care
• When opening or closing the turntable cover, handle it gently.
• Do not touch the needle tip with your ngers; avoid bumping the needle
against the turntable platter or record edge.
• Frequently clean the needle tip-use a soft brush in a “back-to-front’
motion only.
• If you must use a needle cleaning uid, use very sparingly.
• Gently wipe the turntable player housing with a soft cloth. Use only a
small amount of mild detergent to clean the turntable player.
• Never apply harsh chemicals or solvents to any part of the turntable
system.
HINTS ON DISPOSAL
According to the European waste regulation 2012/19/
EU this symbol on the product or on its packaging
indicates that this product may not be treated as
household waste. Instead it should be taken to the
appropriate collection point for the recycling of
electrical and electronic equipment. By ensuring this
product is disposed of correctly, you will help prevent
potential negative consequences for the environment
and human health, which could otherwise be caused by
inappropriate waste handling of this product. For more
detailled information about recycling of this product,
please contact your local council or your household
waste disposal service.


15
ES
Estimado cliente:
Le felicitamos por la adquisición de este producto.
Lea atentamente el siguiente manual y siga
cuidadosamente las instrucciones de uso con el n de
evitar posibles daños. La empresa no se responsabiliza
de los daños ocasionados por un uso indebido del
producto o por haber desatendido las indicaciones de
seguridad. Escanee el código QR para obtener acceso
al manual de usuario más reciente y otra información
sobre el producto:
ÍNDICE DE CONTENIDOS
Indicaciones de seguridad 16
Vista general del aparato 16
Botones y conexiones 17
Puesta en funcionamiento 17
Limpieza y cuidado 18
Retirada del aparato 19
DATOS TÉCNICOS
Número de artículo 10032869
Fuente de alimentación 220-240 V ~ 50/60 Hz
Cable de alimentación 9 V DC
DECLARACIÓN DE CONFORMIDAD
Fabricante:
Chal-Tec GmbH, Wallstraße 16, 10179 Berlín
(Alemania).
Este producto cumple con las siguientes directivas
europeas:
2014/35/UE (baja tensión)
2011/65/UE (refundición RoHS)
2014/53/UE (RED)
Puede descargar la declaración de conformidad
completa del fabricante en el siguiente enlace:
https://use.berlin/10032869

16
ES
1 Cierre
2 Tapa
3 Indicador de
funcionamiento
4 Perilla de
encendido/
regulador de
volumen
5 Entrada para
auriculares
6 Altavoz
7 Brazo
8 Cápsula
9 Empuñadura
10 Giradiscos
11 Conexión USB
INDICACIONES DE SEGURIDAD
1. Instale el aparato en un lugar seguro, lejos de la luz directa del sol o una
fuente de calor.
2. Evite entornos en los que el aparato estaría expuesto a vibraciones,
polvo, humedad o frío.
3. Para evitar una descarga eléctrica, no abra la carcasa del aparato. Si
se ha introducido accidentalmente un objeto extraño en el interior del
aparato, póngase en contacto con un especialista técnico.
4. No limpie el aparato con disolventes químicos, ya que podrían dañar la
supercie. Utilice un paño seco y limpio.
5. Conserve este manual de instrucciones para futuras consultas.
VISTA GENERAL DEL APARATO

17
ES
BOTONES Y CONEXIONES
12 Avanzar
13 Rebobinar
14 Pausar / Reproducir
15 Modo / AUX IN / BT /
Plataforma giratoria
16 Entrada AUX
17 Canal derecho
18 Canal izquierdo
19 Conexión a red eléctrica
PUESTA EN FUNCIONAMIENTO
Conexión a red eléctrica
Asegúrese de que su suministro eléctrico coincide con el que gura en
la placa de características técnicas del aparato. Conecte el cable de
alimentación y el enchufe a la toma de corriente.
Conexión a un amplicador (opcional)
Puede escuchar música a través del altavoz integrado en el tocadiscos o
conectar el tocadiscos a un sistema HiFi. Conecte el tocadiscos mediante
un cable RCA (no incluido en el envío) a una entrada de línea de su mesa de
mezclas o amplicador.
Grabación mediante USB
1 Seleccione el modo de plato giratorio.
2 Conecte la memoria USB y pulse dos veces el botón REC. La luz BT se
enciende e indica que se está iniciando la grabación.
3 Para detener la grabación, pulse REC de nuevo o levante el brazo de
tono.

18
ES
Reproducir una pista mediante USB
Seleccione el modo USB. Sonará un pitido y la música se reproducirá
automáticamente.
Modo Bluetooth
Seleccione el modo BT. Suena una señal acústica y se enciende la lámpara
BT. Abra la lista de dispositivos BT en su smartphone y seleccione „Jerry
Lee“. En cuanto los aparatos se conectan con éxito, suena una señal
acústica.
LIMPIEZA Y CUIDADO
Cambiar el cartucho (aguja)
Atención: Antes de cambiar el cartucho, apague el dispositivo y
desconecte el enchufe de la toma de corriente.
1Desbloquee el cierre del brazo.
2 Retire la cápsula.
3 Separe el cartucho de la base.

19
ES
4 Retire todos los cables.
5 Ahora, proceda en orden invertido.
6 Conecte todos los cables.
7 Coloque un cartucho nuevo en la base.
8Coloque la cápsula.
Atención: Cambie el cartucho con mucho cuidado para no dañar el brazo
y los cables de audio.Hinweise zu Reinigung und Pege
• Abra y cierra la tapa con cuidado.
• No toque la aguja con los dedos y evite empujarla contra el giradiscos o
el borde del disco.
• Limpie la punta de la aguja regularmente. Utilice para ello un cepillo
suave.
• Si necesita emplear un líquido para limpiar la aguja, utilícelo con
moderación.
• Limpie la carcasa del tocadiscos con cuidado, utilizando un paño
húmedo. Utilice solamente un poco de producto de limpieza para
limpiar el tocadiscos.
• No utilice productos de limpieza abrasivos o disolventes.
RETIRADA DEL APARATO
Si el aparato lleva adherida la ilustración de la
izquierda (el contenedor de basura tachado)
entonces rige la normativa europea, directiva
2012/19/UE. Este producto no debe arrojarse a un
contenedor de basura común. Infórmese sobre las
leyes territoriales que regulan la recogida separada
de aparatos eléctricos y electrónicos. Respete las
leyes territoriales y no arroje aparatos viejos al cubo
de la basura doméstica. Una retirada de aparatos
conforme a las leyes contribuye a proteger el medio
ambiente y a las personas a su alrededor frente a
posibles consecuencias perjudiciales para la salud.
El reciclaje ayuda a reducir el consumo de materias
primas.

Table of contents
Languages:
Other auna Turntable manuals

auna
auna TT-Classic Plus User manual

auna
auna Peggy Sue User manual

auna
auna 10008989 User manual

auna
auna Mary Ann User manual

auna
auna 10034096 User manual

auna
auna TT-186E User manual

auna
auna TT-Classic Plus User manual

auna
auna 10008991 User manual

auna
auna Jerry Lee Series User manual

auna
auna Vinyl Clean User manual

auna
auna TT-18SB User manual

auna
auna ClearTech Record Player User manual

auna
auna TT-Classic Chrono User manual

auna
auna TT-Play Prime User manual

auna
auna TT-Play PLUS User manual

auna
auna Retro Plattenspieler User manual

auna
auna TT-Classic Light User manual

auna
auna Verticalo User manual

auna
auna 10008633 User manual

auna
auna Graceland TT User manual