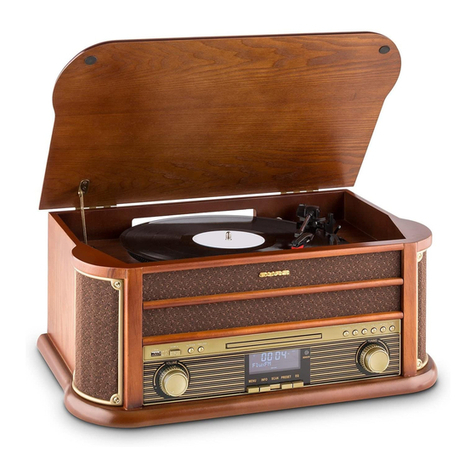
auna 10008990 User manual

www.auna-multimedia.com
10008990
Schallplattenspieler

2
Sehr geehrter Kunde,
wir gratulieren Ihnen zum Erwerb Ihres Gerätes. Lesen Sie die folgenden Anschluss- und Anwendungs-
hinweise sorgfältig durch und befolgen Sie diese, um möglichen technischen Schäden vorzubeugen.
Für Schäden, die durch Missachtung der Sicherheitshinweise und unsachgemäßen Gebrauch entstehen,
übernehmen wir keine Haftung.
Lieferumfang
Inhalt
Technische Daten
Artikelnummer 10008990
Stromversorgung 230 V~ 50 Hz
Drehzahl (U/min) 33/45
Anschlüsse 1 x Stereo-Cinch-Line-Ausgang
Abmessungen (B x H xT) 31,5 x 12 x 28,5 cm
Gewicht 2,2 kg
• 1 x Gerät
• 1 x 1 1/2‘‘ Spindeladapter
• Wurfantenne
• Bedienungsanleitung
Inhalt ...................................................................................2
Technische Daten ........................................................................2
Lieferumfang ............................................................................2
Sicherheitshinweise ......................................................................3
Geräteübersicht ..........................................................................4
Vor dem Gebrauch .......................................................................5
Benutzung...............................................................................5
Hinweise zur Entsorgung..................................................................6

3
Sicherheitshinweise
Allgemeine Sicherheitshinweise
• Diese Bedienungsanleitung dient dazu, Sie mit der Funktionsweise dieses Produktes vertraut zu ma-
chen. Bewahren Sie diese Anleitung daher stets gut auf, damit Sie jederzeit darauf zugreifen können.
• Sie erhalten bei Kauf dieses Produktes zwei Jahre Gewährleistung auf Defekt bei sachgemäßem Ge-
brauch.
• Bitte verwenden Sie das Produkt nur in seiner bestimmungsgemäßen Art und Weise. Eine ander-
weitige Verwendung führt eventuell zu Beschädigungen am Produkt oder in der Umgebung des Pro-
duktes.
• Ein Umbauen oder Verändern des Produktes beeinträchtigt die Produktsicherheit. Achtung Verlet-
zungsgefahr!
• Önen Sie das Produkt niemals eigenmächtig und führen Sie Reparaturen nie selber aus!
• Behandeln Sie das Produkt sorgfältig. Es kann durch Stöße, Schläge oder den Fall aus bereits gerin-
ger Höhe beschädigt werden.
• Halten Sie das Produkt fern von Feuchtigkeit und extremer Hitze.
• Reparaturen am Gerät sollten nur von einer autorisierten Fachwerkstatt durchgeführt werden.
• Önen Sie in keinem Fall das Gerät.
• Falscher Zusammenbau führt möglicherweise zu Fehlfunktionen oder dem Totalausfall.
• Das Gerät sollte vor jeglichen Feuchtigkeit und direkter Sonneneinstrahlung geschützt werden.
• Das Gerät bitte nicht mit Reinigungsmitteln reinigen.
• Verwenden Sie zur Reinigung nur ein trockenes (Mikrofaser) Tuch.
• Schließen Sie das Gerät nur an die dafür vorgesehene Netzspannung.
• Schließen Sie das Gerät in keinem Fall an andere Spannungen als vorgesehen an.
Netzkabel und Netzstecker
• Überprüfen Sie vor dem Gebrauch des Gerätes, ob Ihre örtliche Stromversorgung mit dem HI-FI
System kompatibel ist (230V-50Hz).
• Verbinden oder entfernen Sie das Netzkabel nicht mit nassen Händen.
• Wenn Sie wissen, dass Sie das Gerät über einen längeren Zeitraum (z.B. Urlaub) nicht verwenden
werden, ziehen Sie den Stecker aus der Steckdose.
• Wenn Sie das Kabel aus der Steckdose ziehen, fassen Sie das Kabel am Stecker an. Ziehen Sie nicht
am Netzkabel, um die Stromschlaggefahr aufgrund eines beschädigten Kabels zu vermeiden.

4
Geräteübersicht
1 Staubschutz
2 Lautsprecher links
3 Wahlanzeige
4 Frequenzregler
5 Band/Fm Stereo Wahlschalter
6 UKW-Stereo-Anzeige
7 Lautsprecher rechts
8 Ein/Aus & Lautstärkeregler
9 Betriebs-Led-Anzeige
10 Spindeladapter
11 Plattenteller Geschwindigkeitsregler
12 Tonabnehmerhalter
13 Line-Ausgang
14 UKW-Antenne
15 Autostopp-Schalter
16 Netzkabel

5
Vor dem Gebrauch
Benutzung
Aufbau
• Packen Sie das Gerät aus und entfernen sämtliches Verpackungmaterial.
• Prüfen sie vor dem Anschluss ob die Netzspannung, der auf dem Typenschild
• Angegebenen entspricht.
• Decken sie keine Belüftungsönungen ab und halten sie immer etwas Raum zur Belüftung um das
gerät.
Anschluss
Verbunden Sie den Netzstecker mit einer Steckdose. Stellen Sie das gerät auf „ Radio“ und die LED-
Anzeige leuchtet rot. Das bedeutet, dass das Gerät betriebsbereit ist und Musik wiedergeben kann.
Radiowiedergabe
Manuelle Frequenzeingabe
1. Drücken Sie „FUNCTION/BAND” und wählen das gewünschte Band (AM, FM oder FM-Stereo).
2. Wechseln sie mittels Frequenzregler zu einem Radiosender.
3. Stellen Sie die Lautstärke nach ihrem Belieben ein.
FM & FM-Stereo-Empfang
• Stellen Sie den Wahlschalter auf FM und die Sender werden in Mono empfangen: in manchen Fällen
ist so der Empfang besser.
• Stellen Sie den Bandwahlschalter auf FM-Stereo und die Sender werden in Stereo Empfängern. Die
FM-ST-LED leuchtet.
Hinweise für einen besseren Empfang
• AM: Die Stabantenne kann nur durch Bewegen des Gerätes bewegt und umpositioniert werden.
• FM: Das Gerät verfügt an der Rückseite des Gehäuses über eine Wurfantenne. Diese muss für einen
guten Empfang vollständig abgerollt und ausgelegt sein.
Schallplatte
Hinweise: Entfernen Sie den Nadelschutz. Prüfen Sie, ob der Abnehmer vor der Verwen-
dung vom Halter gelöst und danach diesem gesichert ist.
1. Wählen Sie die Funktion „ PHONO”.
2. Wählen Sie die Geschwindigkeit je nach abgespielter Schallplatte.
3. Legen Sie eine Schallplatte auf den Plattenteller (verwenden sie den Spindeladapter wenn nötig).
4. Heben Sie den Tonarm von der Ablage und bewegen diesen vorsichtig an den Rand der Schallplat-
te. Der Plattenteller beginnt sich zu drehen.
5. Setzen sie den Tonarm auf die gewünschte Position der Schallplatte.

6
6. Stellen sie die Lautstärke ein.
7. Am Ende der Schallplatte stoppt die Rotation automatisch. Heben sie den Tonarm an und legen
diesen zurück auf die Ablage.
8. Manueller Stopp; heben sie den Tonarm von der Schallplatte und legen diesen zurück auf die
Ablage.
Hinweis: Stoppt die automatische Stoppfunktion vor Ende der Schallplatte, müssen Sie
die automatische Stoppfunktion deaktivieren („off“). Der Tonarm läuft nun bis zum Ende;
stoppt aber nicht. Sie müssen die Wiedergabe dann manuell stoppen (schalten Sie das
Gerät aus, stellen den Autostopp wieder auf ein („on“) und legen den Tonarm wieder auf
den Halter).
LINE-Ausgang
Sie können das Gerät über den LINE-Ausgang (13) mit einer Stereoanalage verbinden. Verbinden sie
den LINE-Ausgang mit dem AUX-Eingang der Stereoanlage: verwenden sie hierzu ein Cinchkabel (nicht
im Lieferumfang enthalten).
Hinweis: Die Tonwiedergabe über die integrierten Lautsprecher wird nicht unterbrochen,
selbst dann nIcht; wenn das Gerät mit einer Hi-anlage verbunden ist. Drehen sie die Laut-
stärke auf ein Minimum, so dass der Klang nur von die Hi-Anlage kommt.
Hinweise zur Entsorgung
Bendet sich die linke Abbildung (durchgestrichene Mülltonne auf Rädern) auf dem Produkt,
gilt die Europäische Richtlinie 2002/96/EG. Diese Produkte dürfen nicht mit dem normalen
Hausmüll entsorgt werden. Informieren Sie sich über die örtlichen Regelungen zur getrenn-
ten Sammlung elektrischer und elektronischer Gerätschaften. Richten Sie sich nach den örtli-
chen Regelungen und entsorgen Sie Altgeräte nicht über den Hausmüll. Durch die regelkon-
forme Entsorgung der Altgeräte werden Umwelt und die Gesundheit ihrer Mitmenschen vor
möglichen negativen Konsequenzen geschützt. Materialrecycling hilft, den Verbrauch von
Rohstoen zu verringern.
Hersteller: Chal-Tec GmbH, Wallstraße 16, 10179 Berlin.
Dieses Produkt entspricht den folgenden Europäischen Richtlinien:
2014/30/EU (EMV)
2014/35/EU (LVD)
2011/65/EU (RoHS)

7
Included
Contents
Specications
Item number 10008990
Power supply 230 V~ 50 Hz
Rotation speeds 33/45 rpm
Connections 1 x stereo RCA line output
Measurements (W x H x D) 31,5 x 12 x 28,5 cm
Weight approx. 2.2 kg
• 1 x Device
• 1 x 1 1/2‘‘ spindle adapter
• Wire antenna
• User manual
Contents ................................................................................7
Specications............................................................................7
Included.................................................................................7
Safety Instructions .......................................................................8
Device Description .......................................................................9
Before Usage ...........................................................................10
Operation ..............................................................................10
Disposal Considerations ..................................................................11
Dear Customer,
Congratulations on purchasing this equipment. Please read this manual carefully and take care of the
following hints on installation and use to avoid technical damages. Any failure caused by ignoring the
items and cautions mentioned in the operation and installation instructions are not covered by our
warranty and any liability.

8
Safety Instructions
General safety instructions
• This user‘s manual intends to make you acquainted with the product. Keep these instructions in a
safe place so you can access them any time.
• You receive two years of warranty upon purchase in case of proper use.
• Use this product only in the way intended. Any other use may lead to the damage of the product or
its surroundings.
• Any modication or change to the product compromises the product safety. Caution: Danger of in-
jury!
• Do not open the product or carry out repairs by yourself.
• Handle the product with care. It can be damaged by knocks, blows or falling from even a low height.
• Keep the product away from humidity or extreme heat.
• Repairs must only be done by the authorised customer service.
• Any faulty assembly can lead to malfunctions of a complete failure.
• The device must be protected from direct sunlight.
• Do not use detergents when cleaning the device.
• For cleaning use a dry piece of cloth.
• Connect the device only the allowed voltage. Do not connect the device a dierent voltage than the
allowed one.
Power cord and power plug
• Before using the unit, check that the local mains supply is compatible with the HI-FI System (230V
50Hz).
• Do not plug or unplug the power cable when your hands wet.
• When planning not to use this unit for long periods of time (i.e, Vacation etc.) disconnect the plug
from the wall outlet.
• When disconnecting the power cord from the wall outlet, grasp the plug; do not pull the cord in order
to avoid shock risks caused by the damaged cable..

9
Device Description
1 dust cover
2 left speaker
3 dial pointer
4 tuning knob
5 band/fm stereo selector
6 fm stereo indicator
7 right speaker
8 power on/o and volume control knob
9 power led indicator
10 spindle adaptor
11 turntable speed selector
12 pick-up holder
13 line out socket
14 fm antenna
15 auto stop switch
16 ac cord

10
Before Usage
Operation
Installation
• Unpack all parts and remove protective material.
• Do not connect the unit to the mains before checking the mains voltage and before all other con-
nections have been made.
• Do not cover any vents and make sure that there is a space of several centimetres around the unit
for ventilation.
Connection
Connect the power cord to ac outlet. Switch the system to “ radio “ function. If the power led indicator
is on with red light, it’s mean the power supply is normal. Now your system is ready to play the music.
Listening to the radio
Manual tuning
1. Press “FUNCTION/BAND” button and select the desired band (am or FM or FM-STEREO).
2. Tune to the required station by turning the tuning knob.
3. Adjust volume knob to the desired volume level.
FM & FM stereo reception
• Set the FM mode selector at “ FM ” position. Programs are received in mono mode.
• In particular when stereo signals are weak. It is preferable to receive the Program in mono.
• Set the FM mode selector at “FM-ST” position for receiving stereo programs. The LED “ST” indicator
will light up to show FM stereo program is receiving.
Hints for best reception
• AM: The receiver has a built-in am bar antenna. If am rececption is weak, slightly rotate or re-posi-
tioning of the unit will usually improve the am reception.
• FM: The receiver has a build-in fm wire antenna hanging at the rear cabinet. This wire should be
totally unraveled and extended for best reception.
Phono
Remove the stylus protector. Be sure that the tone arm is being detached from the tone
arm rest before operating and re-secured again afterwards.
1. Select to “ phono ” function.
2. Set the speed selector to the proper position depending on the record to be played.
3. Place the record on the platter (use the spindle adaptor if required).
4. Lift the tone arm from the rest and slowly move it to the record side. The platter will start to rotate.

11
According to the European waste regulation 2002/96/EC this symbol on the product or on
its packaging indicates that this product may not be treated as household waste. Instead it
should be taken to the appropriate collection point for the recycling of electrical and elec-
tronic equipment. By ensuring this product is disposed of correctly, you will help prevent
potential negative consequences for the environment and human health, which could oth-
erwise be caused by inappropriate waste handling of this product. For more detailed infor-
mation about recycling of this product, please contact your local council or your household
waste disposal service.
Producer: Chal-Tec GmbH, Wallstraße 16, 10179 Berlin. Germany
This product is conform to the following European Directives:
2014/30/EU (EMV)
2014/35/EU (LVD)
2011/65/EU (RoHS)
5. Place the tone arm to the desired position of the record.
6. Adjust the volume to the desired level.
7. At the end of record, the platter will automatically stop rotating. Lift the tone arm from the record
and return it to the rest.
8. To stop manually, lift the tone arm from the record and return it to the rest.
Remark:
As some kind of record the auto-stop area was out of the unit setting, so it will stop before
the last rack nish. In this case, select the auto-stop switch to “ off “ position, then it will
run to the end of the record but will not stop automatically (turn off the unit by the power
button or switch back the auto-stop switch to “ on “ position to stop the platter rotate). Then
put back the tone arm to the rest position.
LINE OUT connection
You can connect the system to your whole hi- system by connecting the line out socket (13) to the aux-
iliary input socket with a RCA cable (not included).
Remark: the sound from the original build-in speaker will not be terminated even after
connecting to other hi- system via line out socket. You can turn the volume of system to
minimum level if you prefer the sound coming from the hi- system only.
Disposal Considerations
Table of contents
Languages:
Other auna Turntable manuals

auna
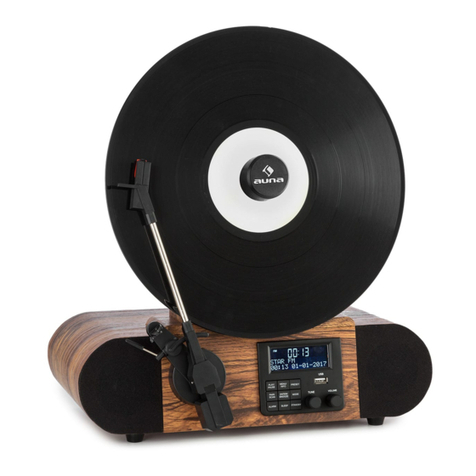
auna TT-Play PLUS User manual

auna
auna Belle Epoque 1905 User manual

auna
auna Berklee TT Play User manual

auna
auna TT-186 DAB User manual

auna
auna 10021685 User manual

auna
auna Verticalo SE DAB User manual

auna
auna Verticalo User manual

auna
auna NR-620 User manual

auna
auna 10008989 User manual

auna
auna Graceland TT User manual

auna
auna 10000343 User manual

auna
auna RTT 1922 User manual

auna
auna Pureness User manual

auna
auna Nostalgy User manual

auna
auna Peggy Sue User manual

auna
auna 10031016 User manual

auna
auna TT-Classic Light User manual

auna
auna TT-186E User manual

auna
auna TT1200 User manual

auna
auna Berklee TT Classic User manual