AURATON Tucana User manual

AURATON Tucana
Instruction manual version 20201122
The document contains information on the safety, installation, and use of the AURATON Tucana.
Weekly, wired thermostat
AURATON Tucana is a weekly, wired thermostat designed to work with a gas or electric heating
device.
ST
UV
4 independently settable temperatures
Day, night, anti-freeze, holiday.
&9 independent temperature programs
Including 6 user-modifiable programs.
LCD Backlit LCD display
Due to a backlit display, we can monitor the operation of the device even in a poorly lit
room (3 backlight colours to choose from).

Description of the AURATON Tucana
Weekly, wired thermostat
On the right side of the front part of AURATON Tucana you will find a sliding cover. Slide it open to see
the buttons. The cover can be removed for battery replacement.
LCD display1.
Programming buttons2.
Place for 2 batteries (AA LR6 1.5 V)3.
Mounting hole4.
RESET button5.
Mode selection buttons:6.
S – day mode
T – night mode
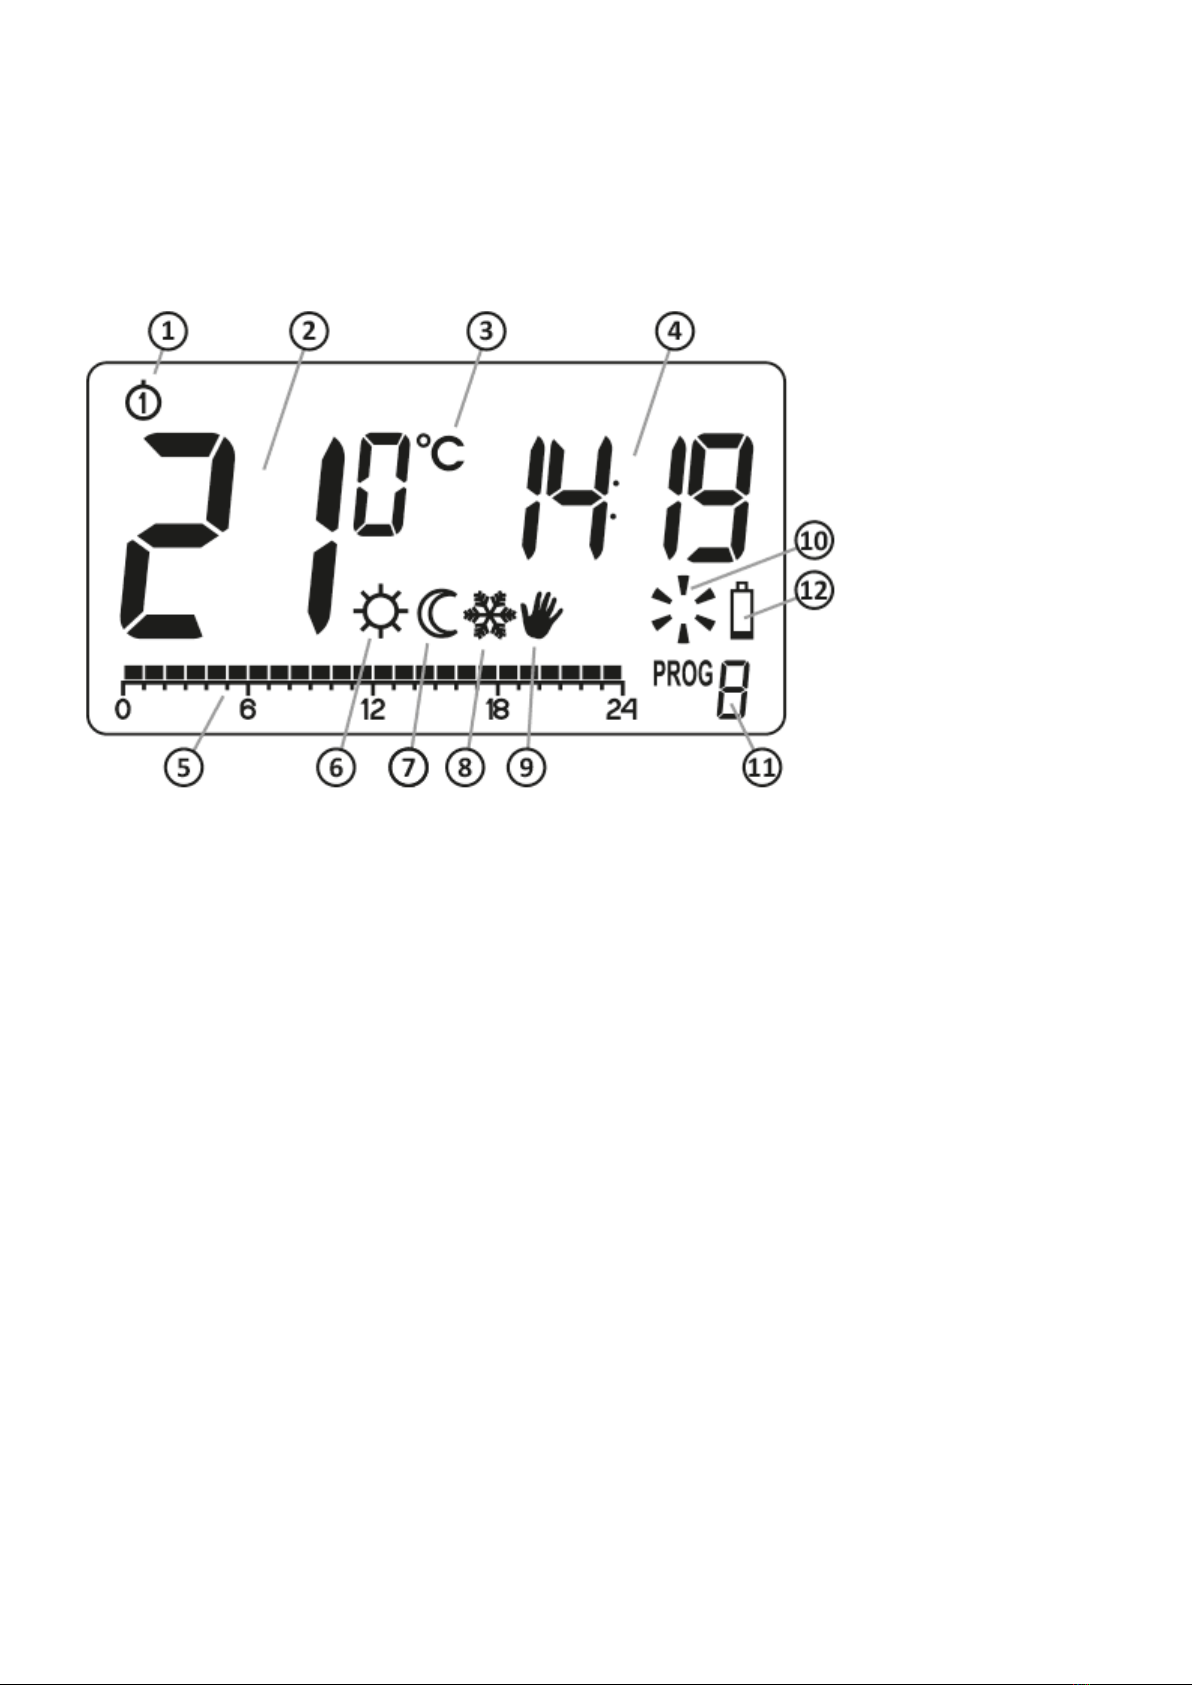
Display
Day of the week(8) – It indicates what day of the week it is. Each day has a number1.
assigned to it.
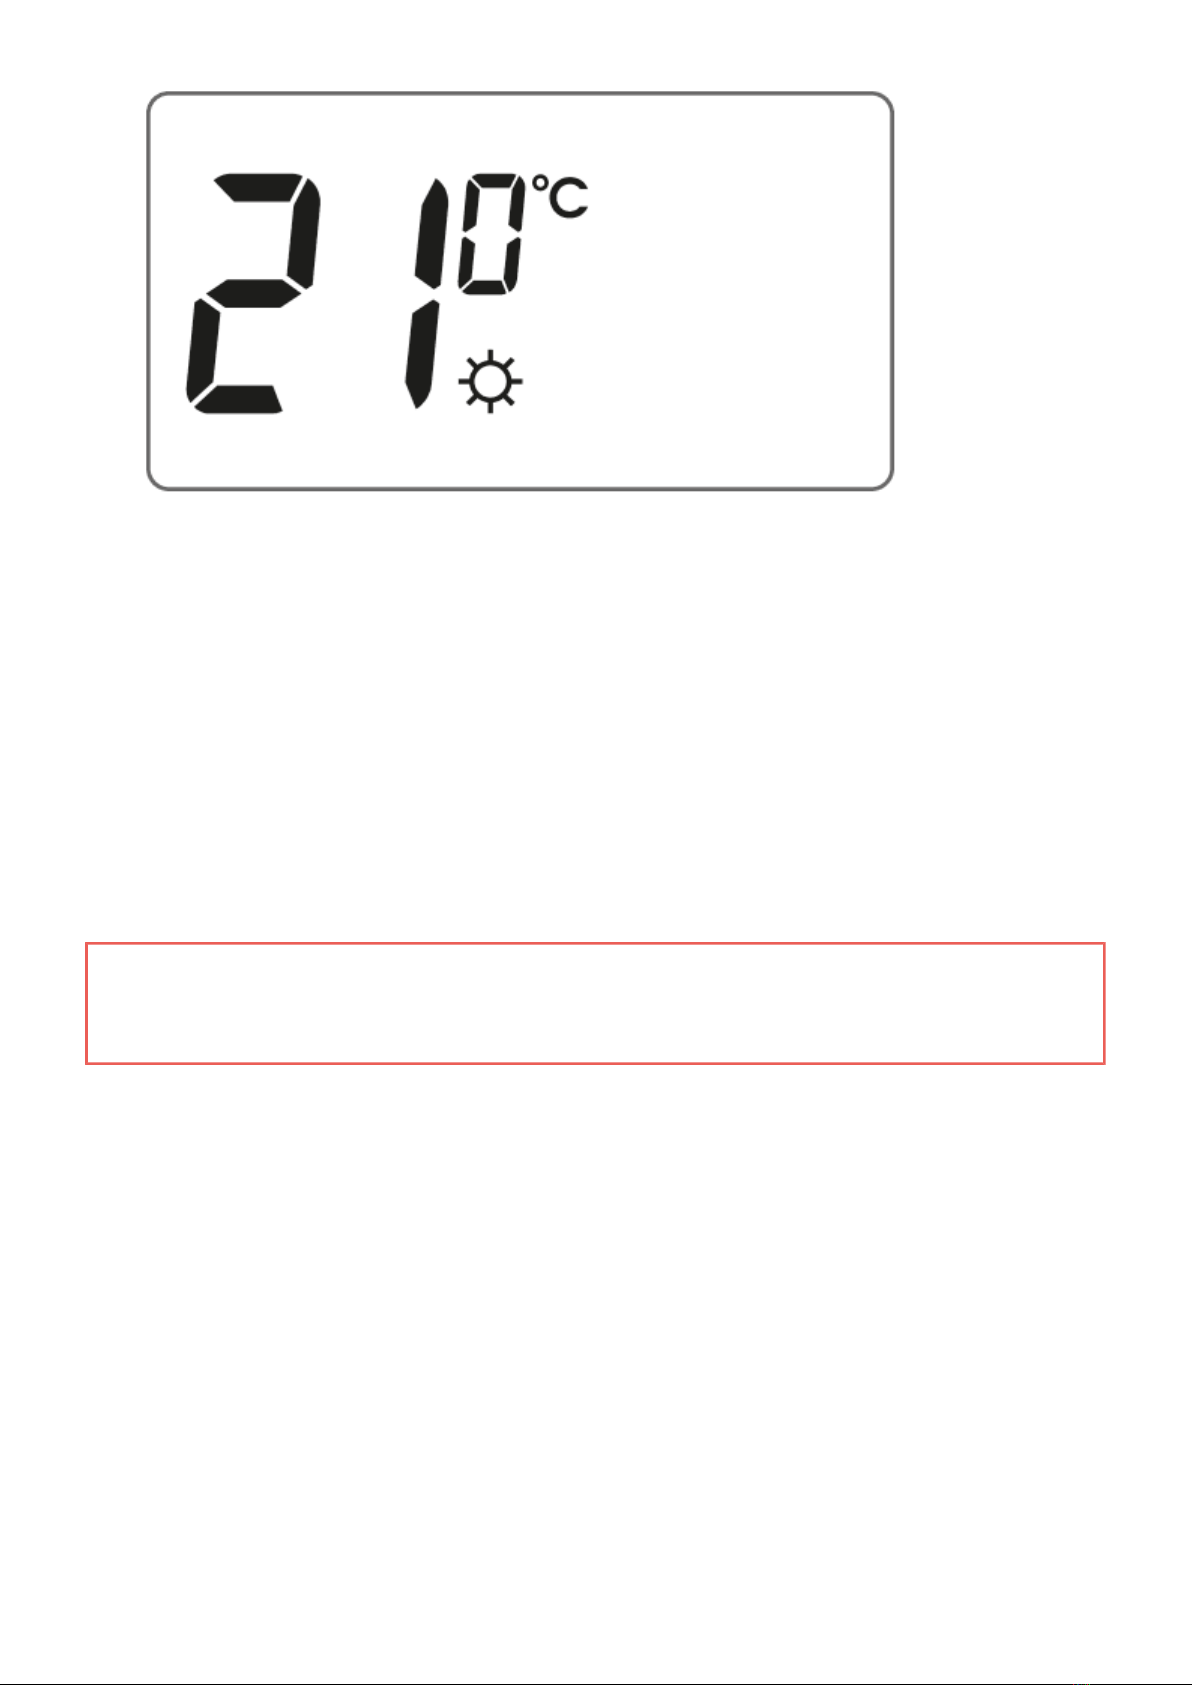
Temperature – In its normal operating mode, AURATON Tucana displays the temperature in2.
the room where it is installed.
Temperature unit – It indicates that the temperature is displayed in degrees Celsius (°C).3.
Clock4.
The time is displayed in the 24-hour system.
Timeline5.
Program sequence indicator. It is a line divided into 24 sections. Each section represents one
hour. The line shows how the program will be executed (see chapter: ‘Timeline’)
Day mode indicator (S)6.
It indicates the operation of AURATON Tucana in day mode. (see chapter: ‘Temperature
programming’)
Night mode indicator (T)7.
It indicates the operation of AURATON Tucana in night mode. (see chapter: ‘Temperature
programming’)
Anti-freeze mode indicator (U)8.
It indicates the operation of AURATON Tucana in anti-freeze mode (see chapter: ‘Anti-freeze
mode).
Manual control indicator (V)9.
It indicates the operation of AURATON Tucana in manual mode (see chapters: ‘Manual control’

and ‘Holiday mode’)
AURATON Tucana power-on symbol (Y)10.
The segment showing the working status of the device. Visible when the controlled device is
switched on.
Program number11.
It indicates the current program number (see chapters: ‘Factory programs’ and ‘Weekly
programming’).
Dead batteries (X)12.
The indicator is visible when the minimum permissible battery voltage level is exceeded. The
batteries need to be replaced as soon as possible.
IMPORTANT:
In order to maintain any programmed parameters, the battery replacement
operation should not exceed 30 seconds.
Choosing the right location for AURATON Tucana
The correct operation of AURATON Tucana is largely influenced by its location. Using the device in a
place with no air circulation or a place with direct sunlight may result in incorrect temperature control.
AURATON Tucana should be installed on the internal wall of a building (a partition wall), in an
environment with free air circulation. You should avoid proximity to heat-emitting devices (TV,
heaters, refrigerators) or locations exposed to direct sunlight. The vicinity of doors and exposing
AURATON Tucana to possible vibrations may also cause problems with proper operation of the device.
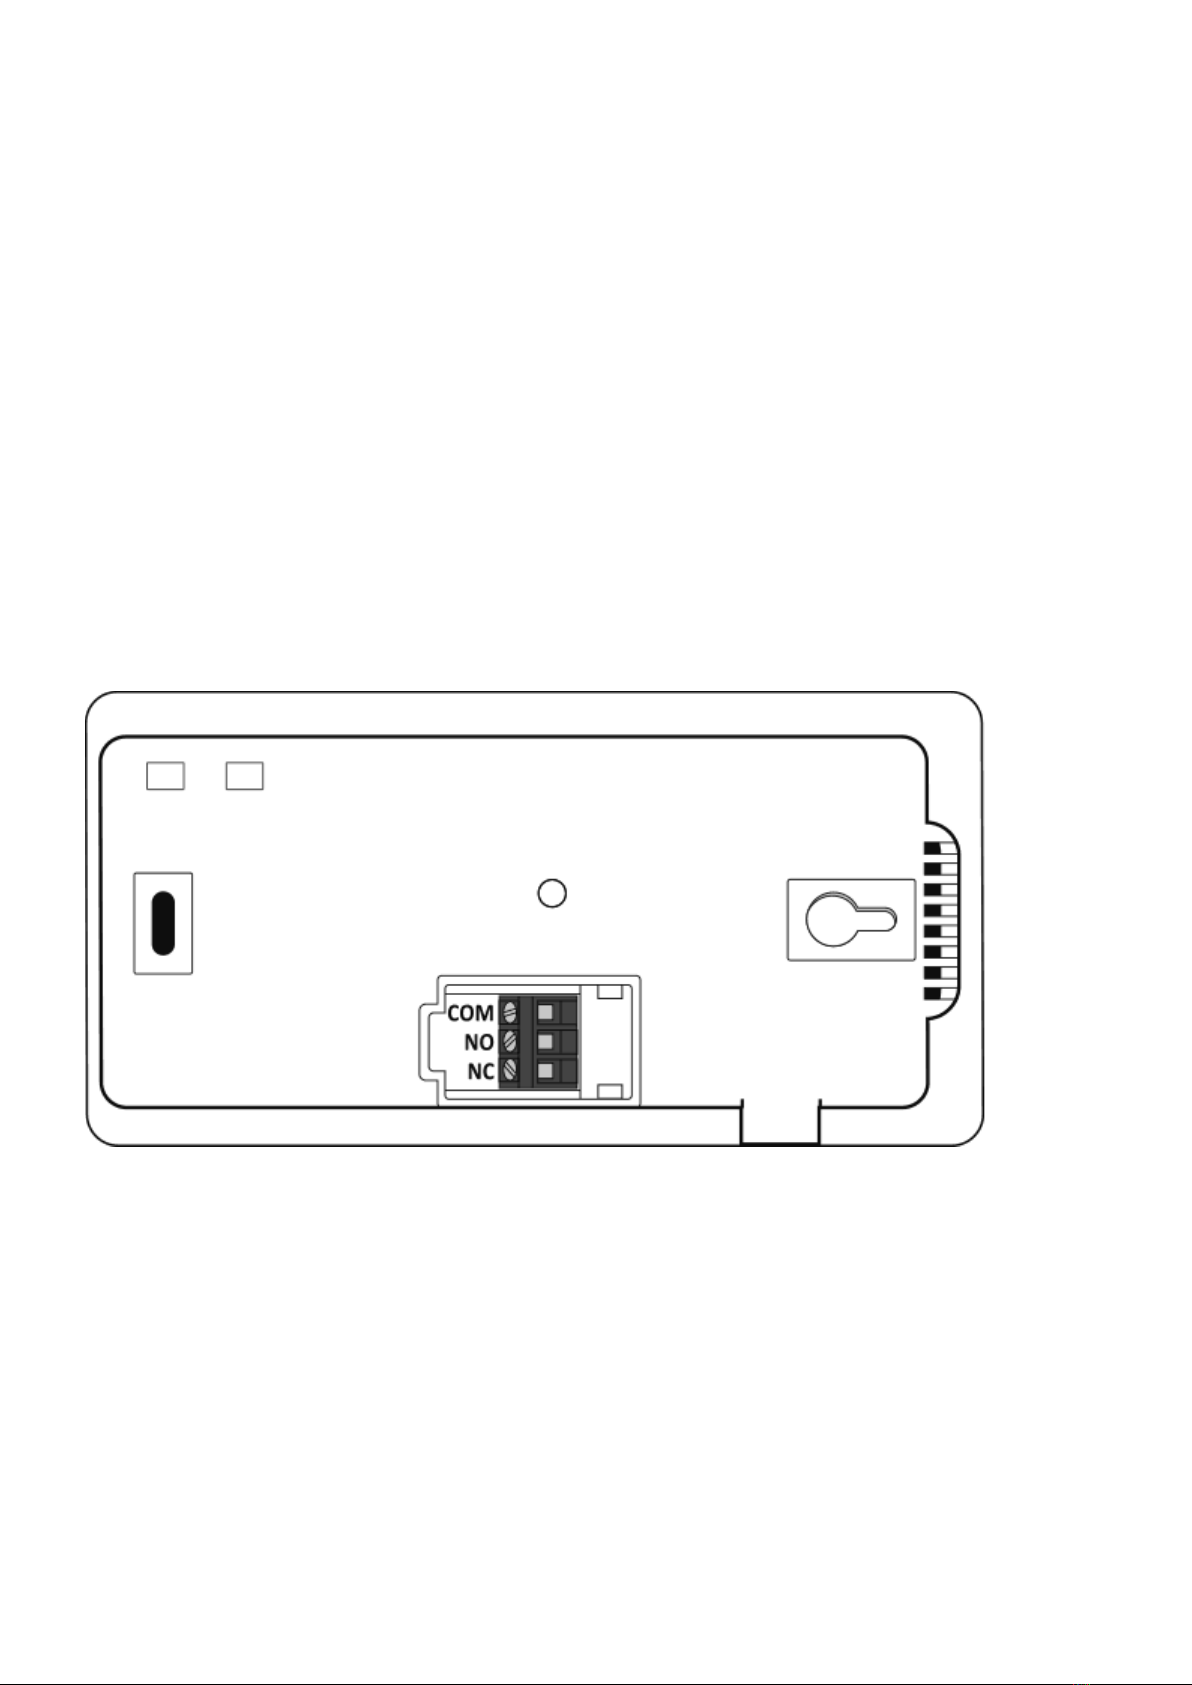
Connecting the wires to AURATON Tucana
The wire clips are located on the back of AURATON Tucana. It is a typical single-pole double-throw
relay. In most cases, the NC clip is not used.
Battery replacement
X
If the low battery symbol (X) appears on the display, it means that the battery level has fallen to the

minimum allowable level. Replace the batteries as soon as possible.
IMPORTANT:
In order to maintain any programmed parameters, the battery replacement operation should not
exceed 30 seconds.
IMPORTANT:
We recommend using alkaline batteries to power AURATON regulators. Do not use “rechargeable
batteries” because their rated voltage is too low.
Mounting AURATON Tucana – weekly, wired thermostat
To mount AURATON Tucana to the wall:
Drill two holes 6 mm in diameter in the wall (mark the hole spacing using the template attached1.
to the manual).
Insert the wall plugs (included).2.
Tighten the left screw with a 3 mm clearance.3.
Place AURATON Tucana through the screw head and slide to the right (note the keyhole-like4.
opening on the rear cover of AURATON Tucana).

Tighten up the right screw so that it holds AURATON Tucana mounted securely.5.
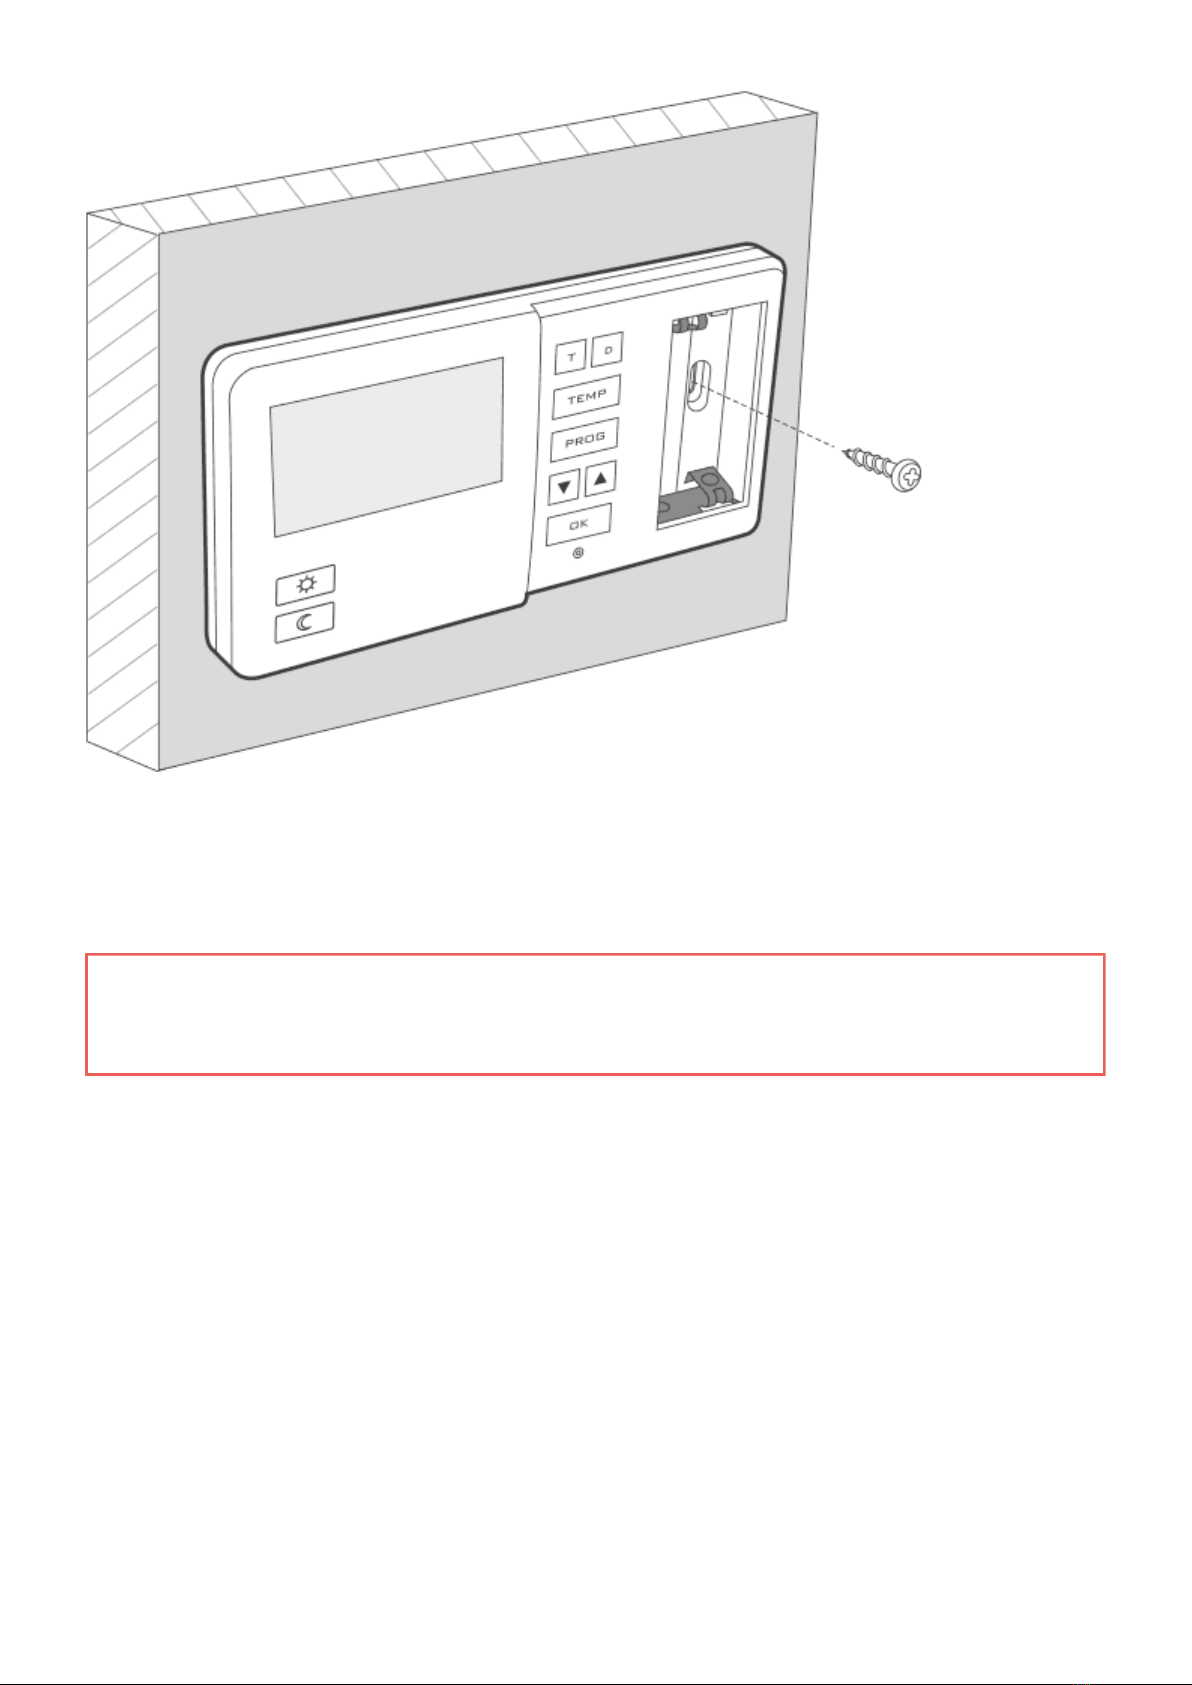
IMPORTANT:
In the case of a wooden wall, there is no need to use wall plugs. It is enough to drill holes with a
diameter of 2.7 mm (instead of 6 mm) and screw the screws directly into the wood.
Turning AURATON Tucana on for the first time
After inserting the batteries correctly into the battery compartment, the LCD screen will display all the
segments for a second (display test) and then the software version number.
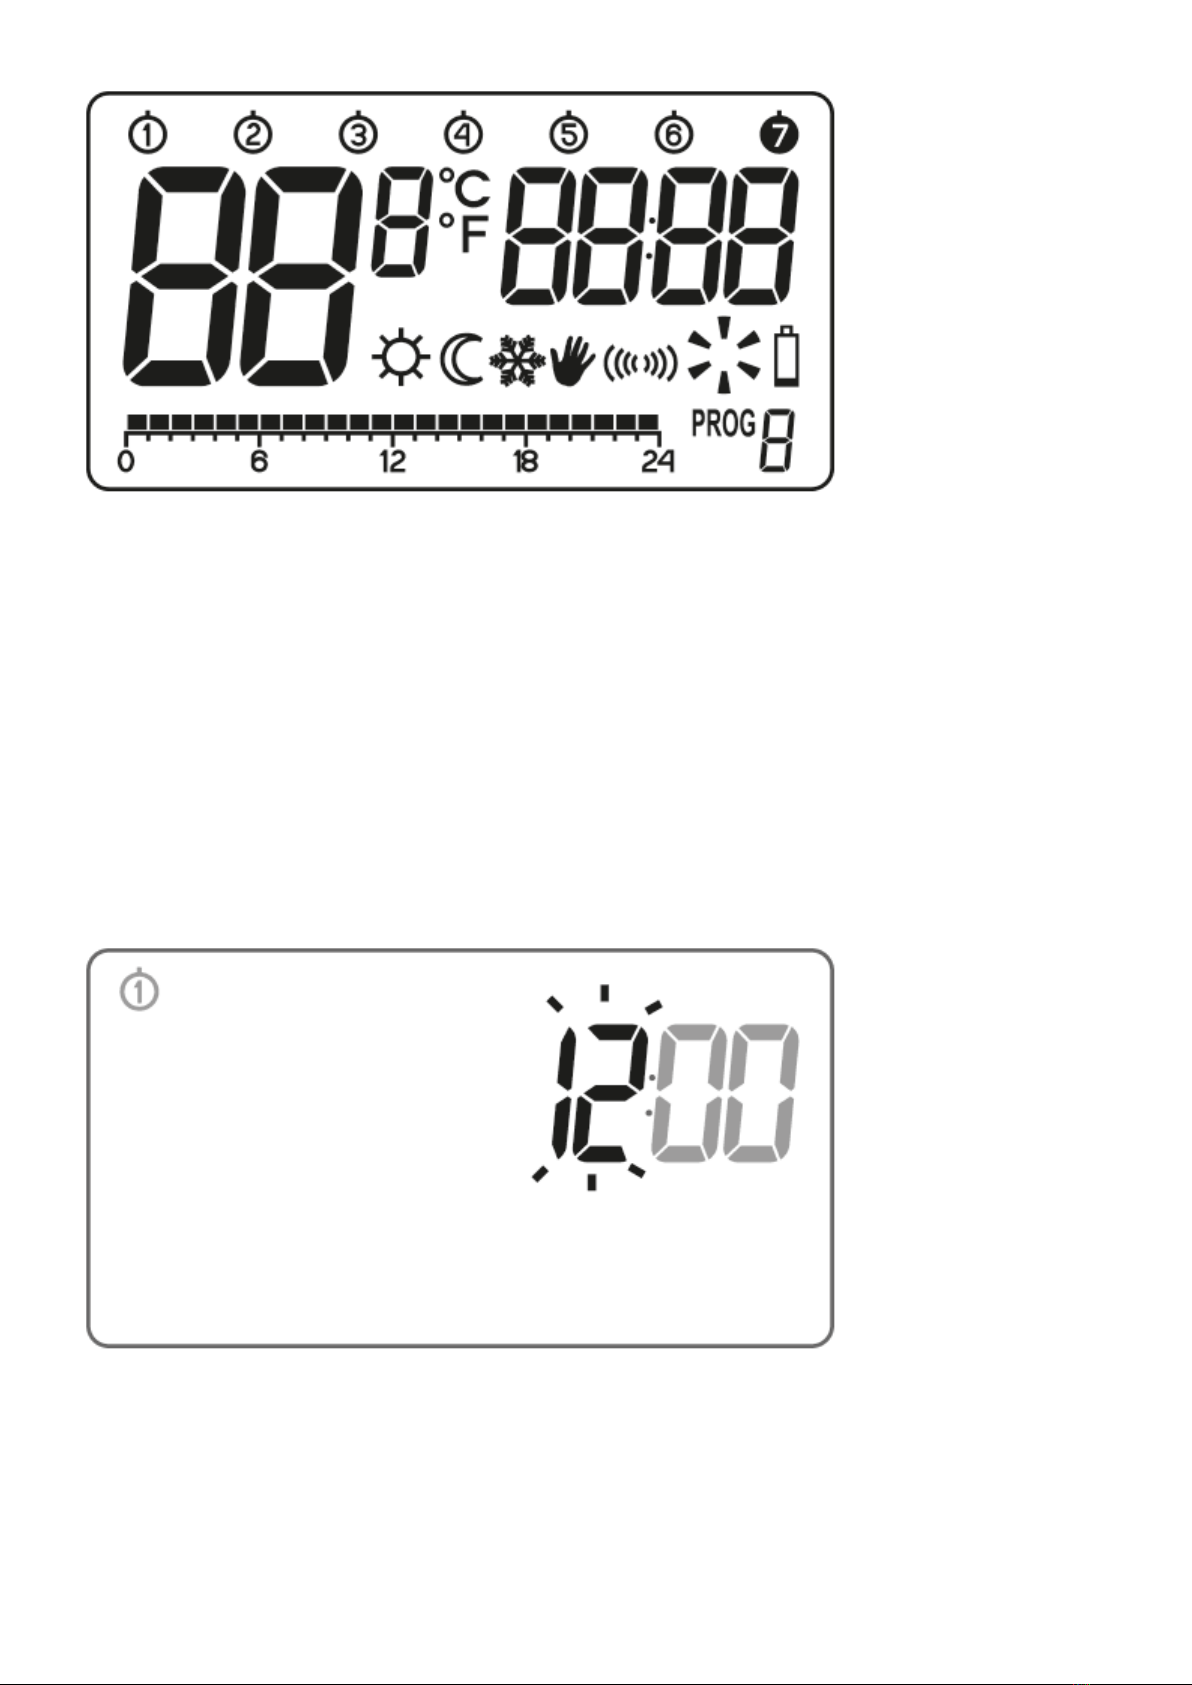
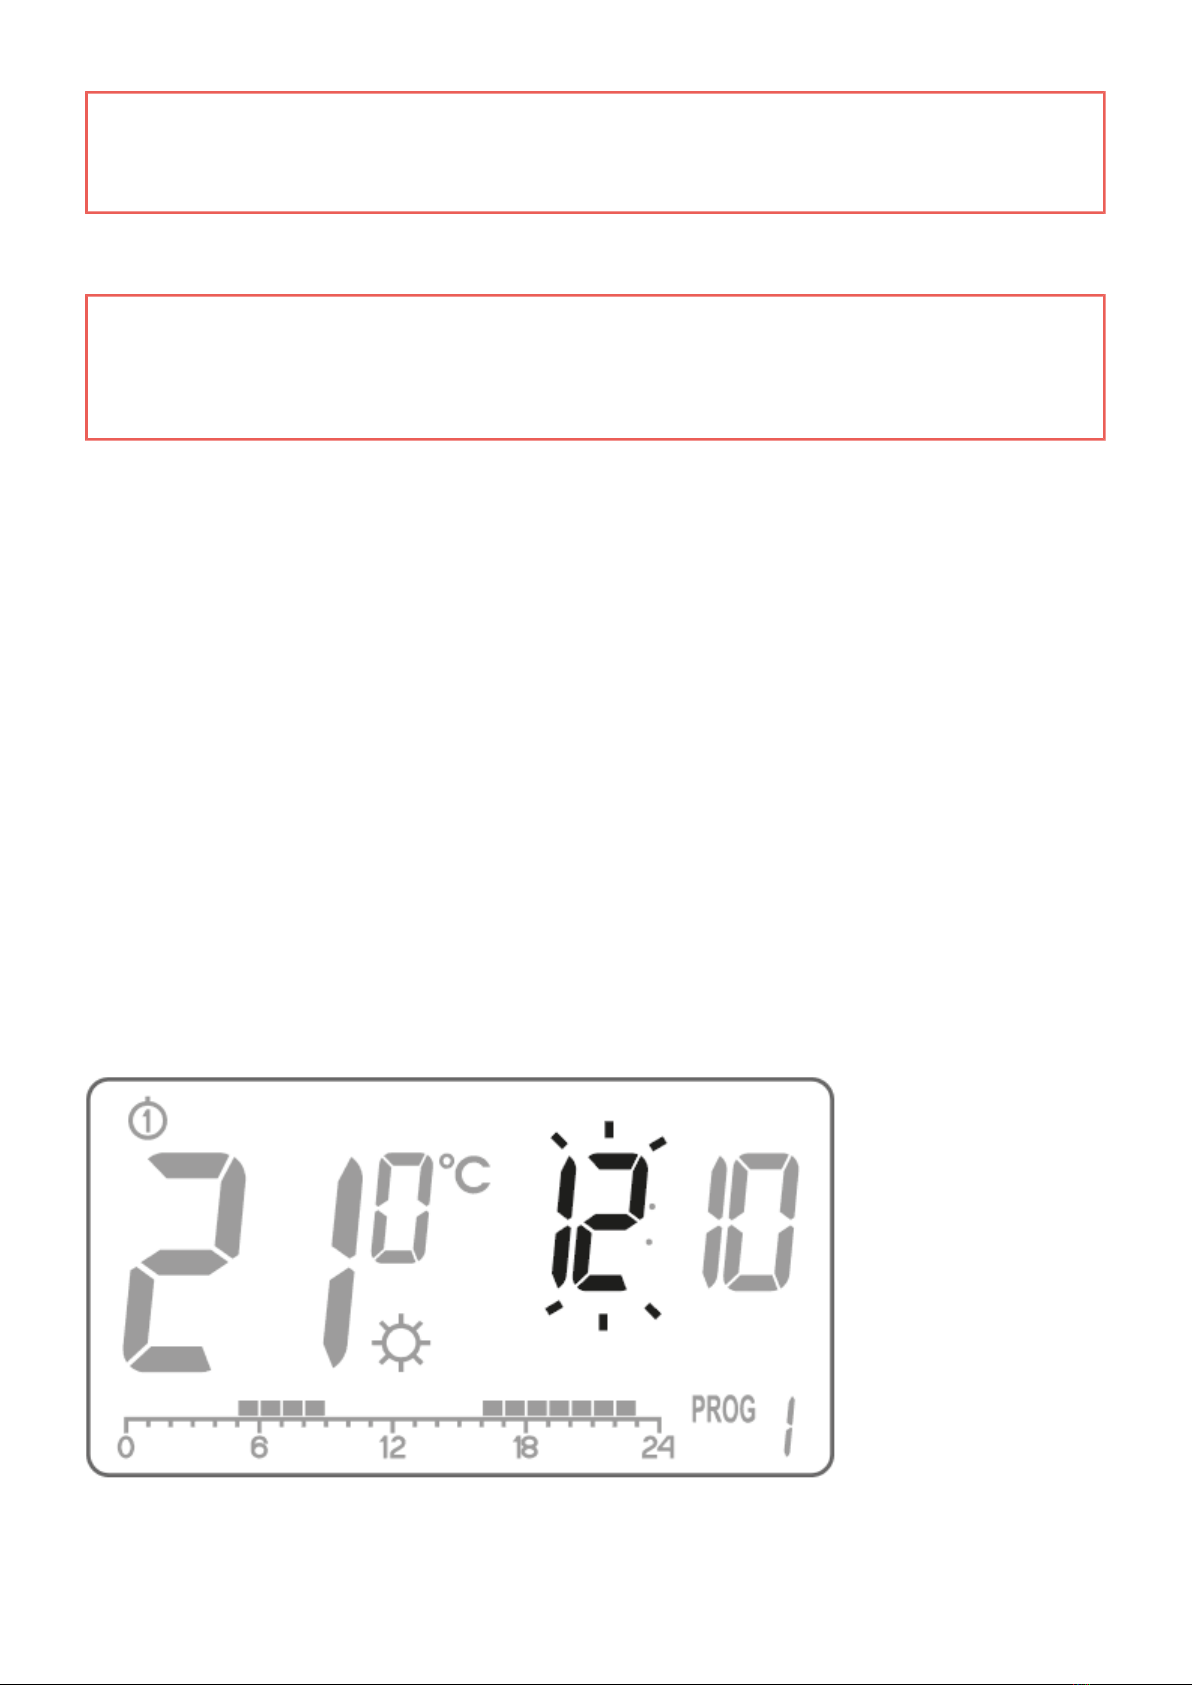
After a while, AURATON Tucana will automatically go to the hour setting. An item flashing on the
screen indicates that it is currently in editing mode. Use the bc buttons to set the desired hour and
confirm the setting with the i button.

AURATON Tucana will go to the minute setting. Use the bc buttons again to set the desired minute
value and confirm the setting by pressing the i button.
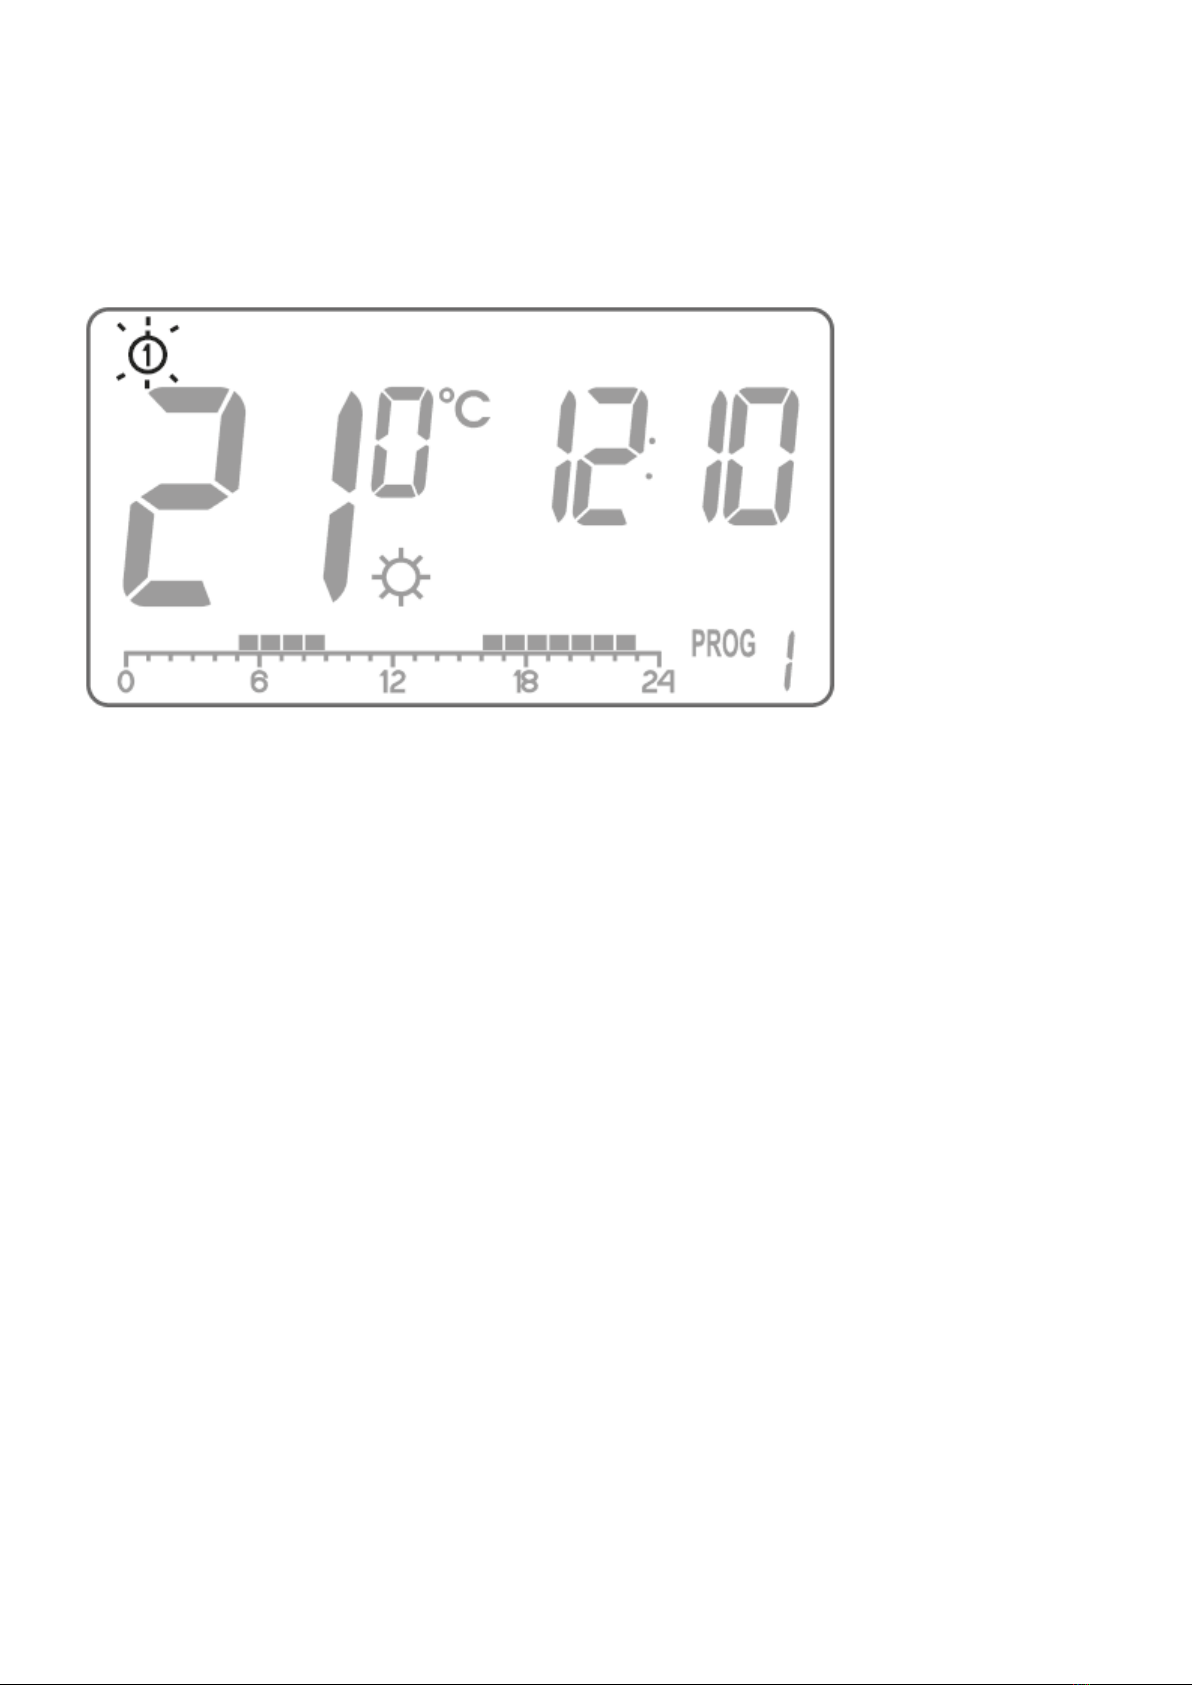
A flashing day of the week symbol appears in the upper left corner. Use the bc buttons to set the
desired day and confirm the selection with the i button. AURATON Tucana will enter its normal
operating mode.
NOTE:
If no button is pressed for 60 seconds during the initial hour setting, AURATON Tucana will
automatically enter its normal operating mode.
NOTE:
If no button is pressed for 10 seconds during the programming of any other functions, it is
equivalent to using the i button.
Setting the clock
To set the clock:
Press the k. button. The hour segment will start flashing on the display.1.
Use the bc buttons to set the correct hour.2.

Then press the k button again. The minute segment starts flashing.3.
Use the bc buttons to set the desired minute value.4.
Confirm the above settings with the i button.5.
Selecting the day of the week
8
To set the day of the week:
Press the l button. One of the digits symbolising the relevant day of the week will start flashing1.
on the display.
Use the bc buttons to select the correct day of the week.2.
Confirm the above settings with the i button.3.
LO HI temperature
If the ambient temperature is below 5°C the display will show „LO”.
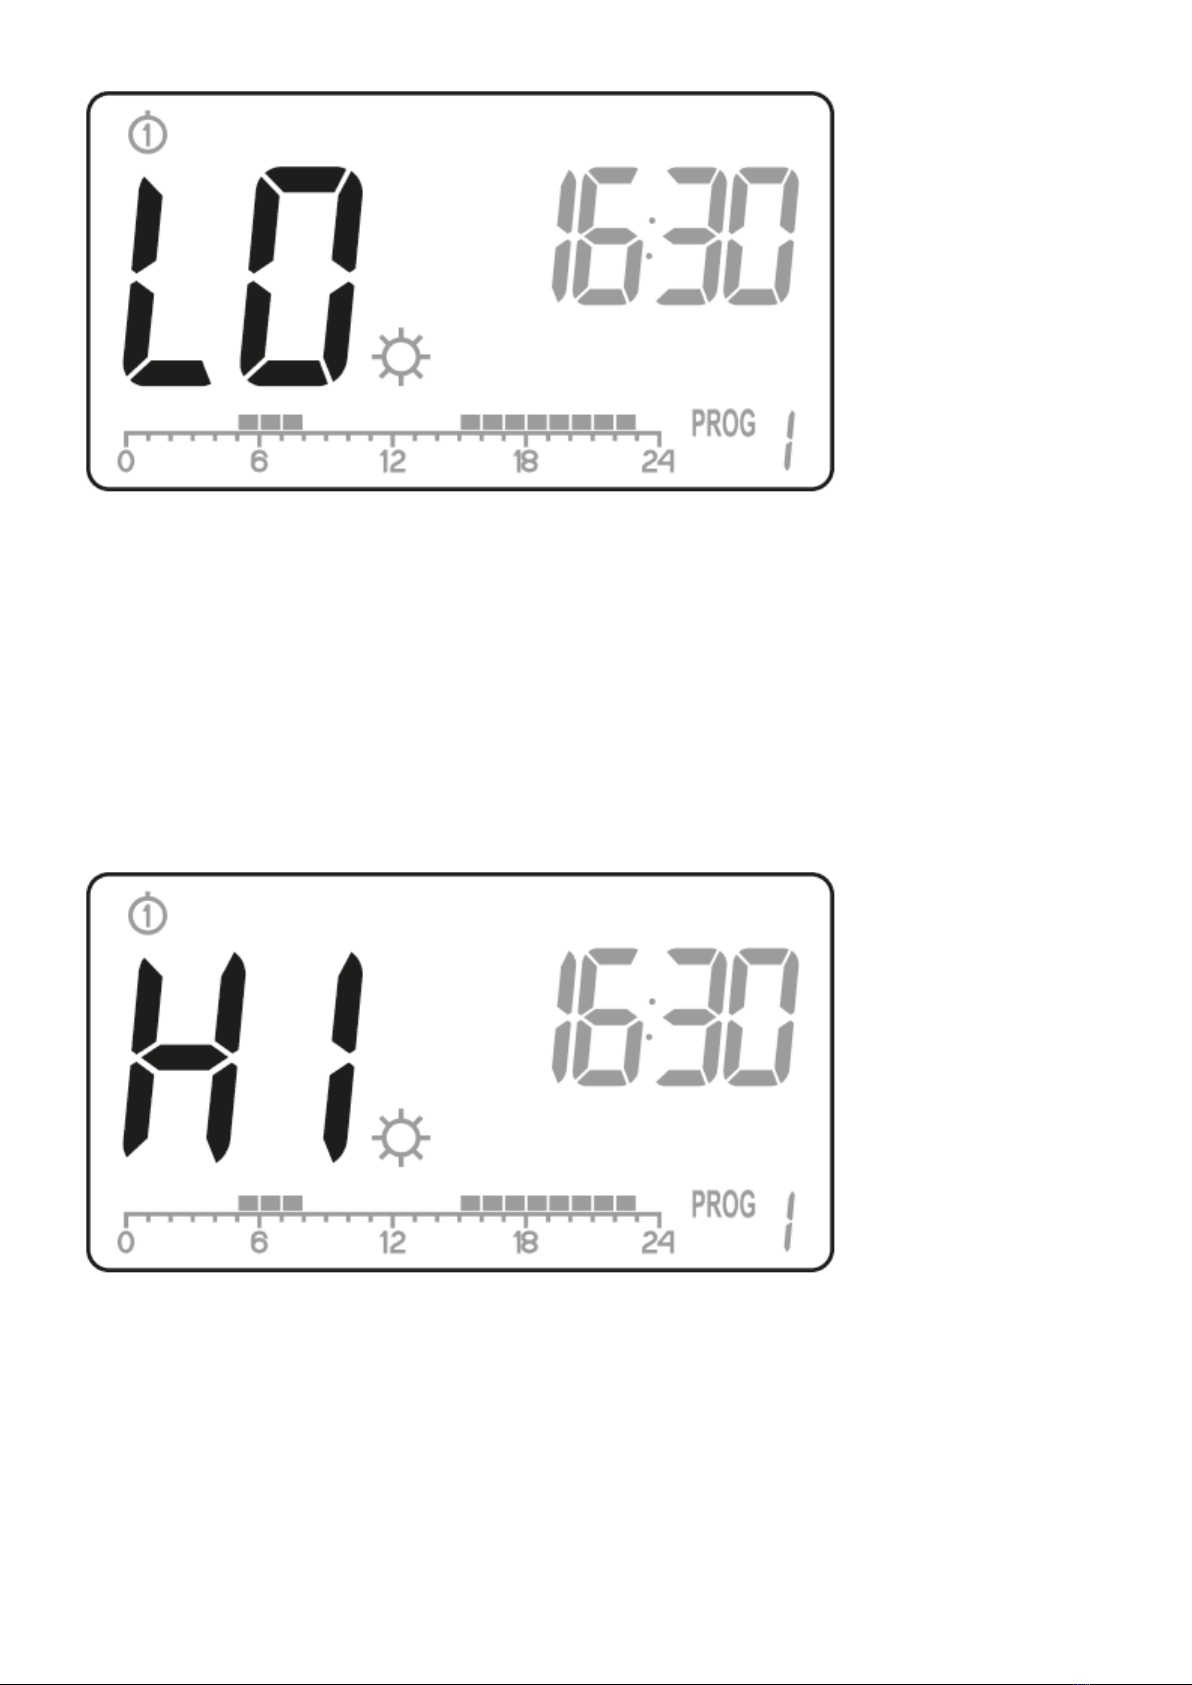
If the ambient temperature is above 35°C
the display will show „HI”.

Default program settings
Monday – Friday:
The heating device maintains the day temperature (S) from 05:00 to 8:00 A.M. and from
3:00 to 11:00 P.M.
Saturday – Sunday:
The heating device maintains the day temperature (S) from 06:00 A.M. to 11:00 P.M.
default temperature settings:
S day temperature – 21,0°C
T night temperature – 19,0°C
U anti-freeze temperature – 7,0°C
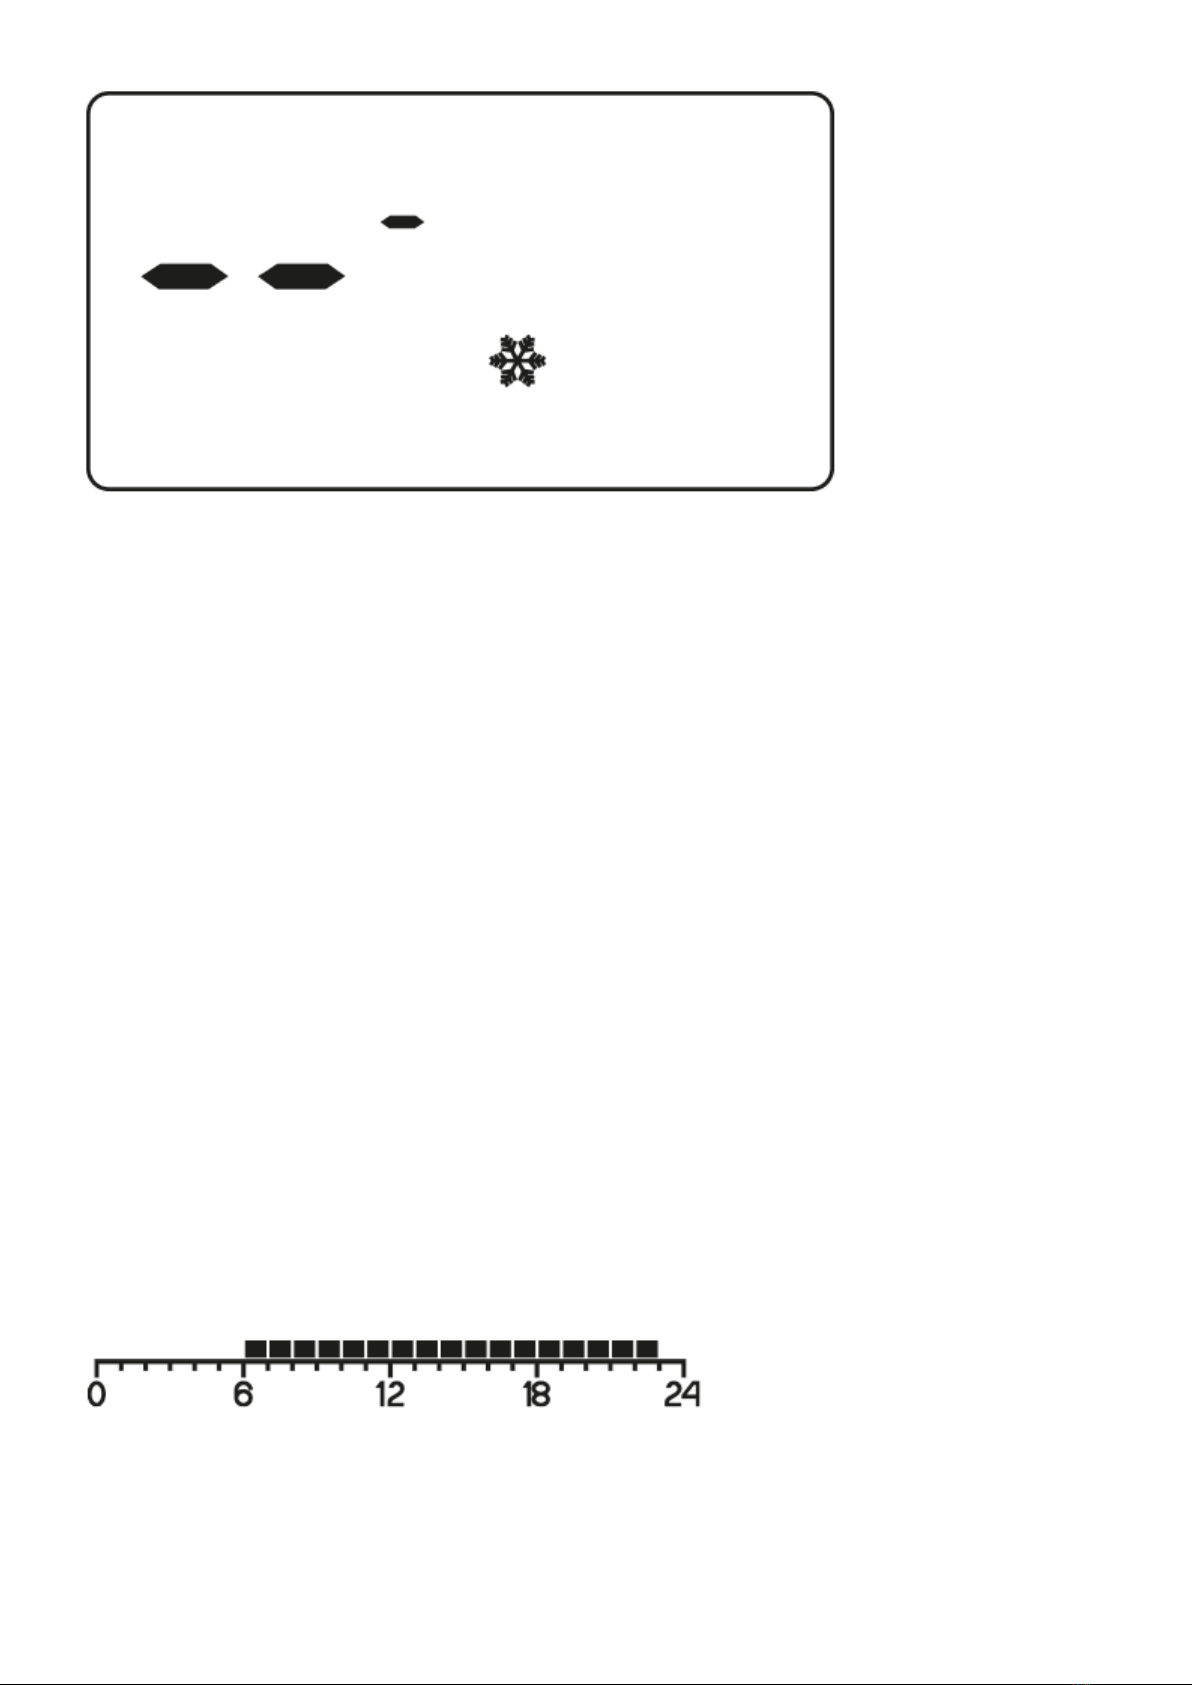
Programming the day, night and anti-freeze temperatures
AURATON Tucana allows you to program 3 types of temperature:
Day temperature (S) – from 5 to 30°C
Night temperature (T) – from 5 to 30°C
Anti-freeze temperature (U) – from 4 to 10°C
To set one of the above temperatures:
Press the ? button.1.
The display will show the currently set temperature with the following symbol:
S – day temperature,,
T – night temperature,
U – anti-freeze temperature.
Use the bc buttons to set the desired temperature.3.
By pressing the ? button again, toggle between the subsequent types of temperatures to be set4.
(S, T, U).
After setting all the 3 temperatures, confirm the settings with the i button.5.
IMPORTANT:
The night temperature setting can be equal to or lower than the day temperature. It is impossible
for the night temperature to be higher than the day temperature.
Deactivating the anti-freeze temperature
To deactivate the anti-freeze temperature in AURATON Tucana, set the ‘dash symbol’ (below 0 °C or
above 10 °C) on the display when programming this temperature.
Introduction to programming
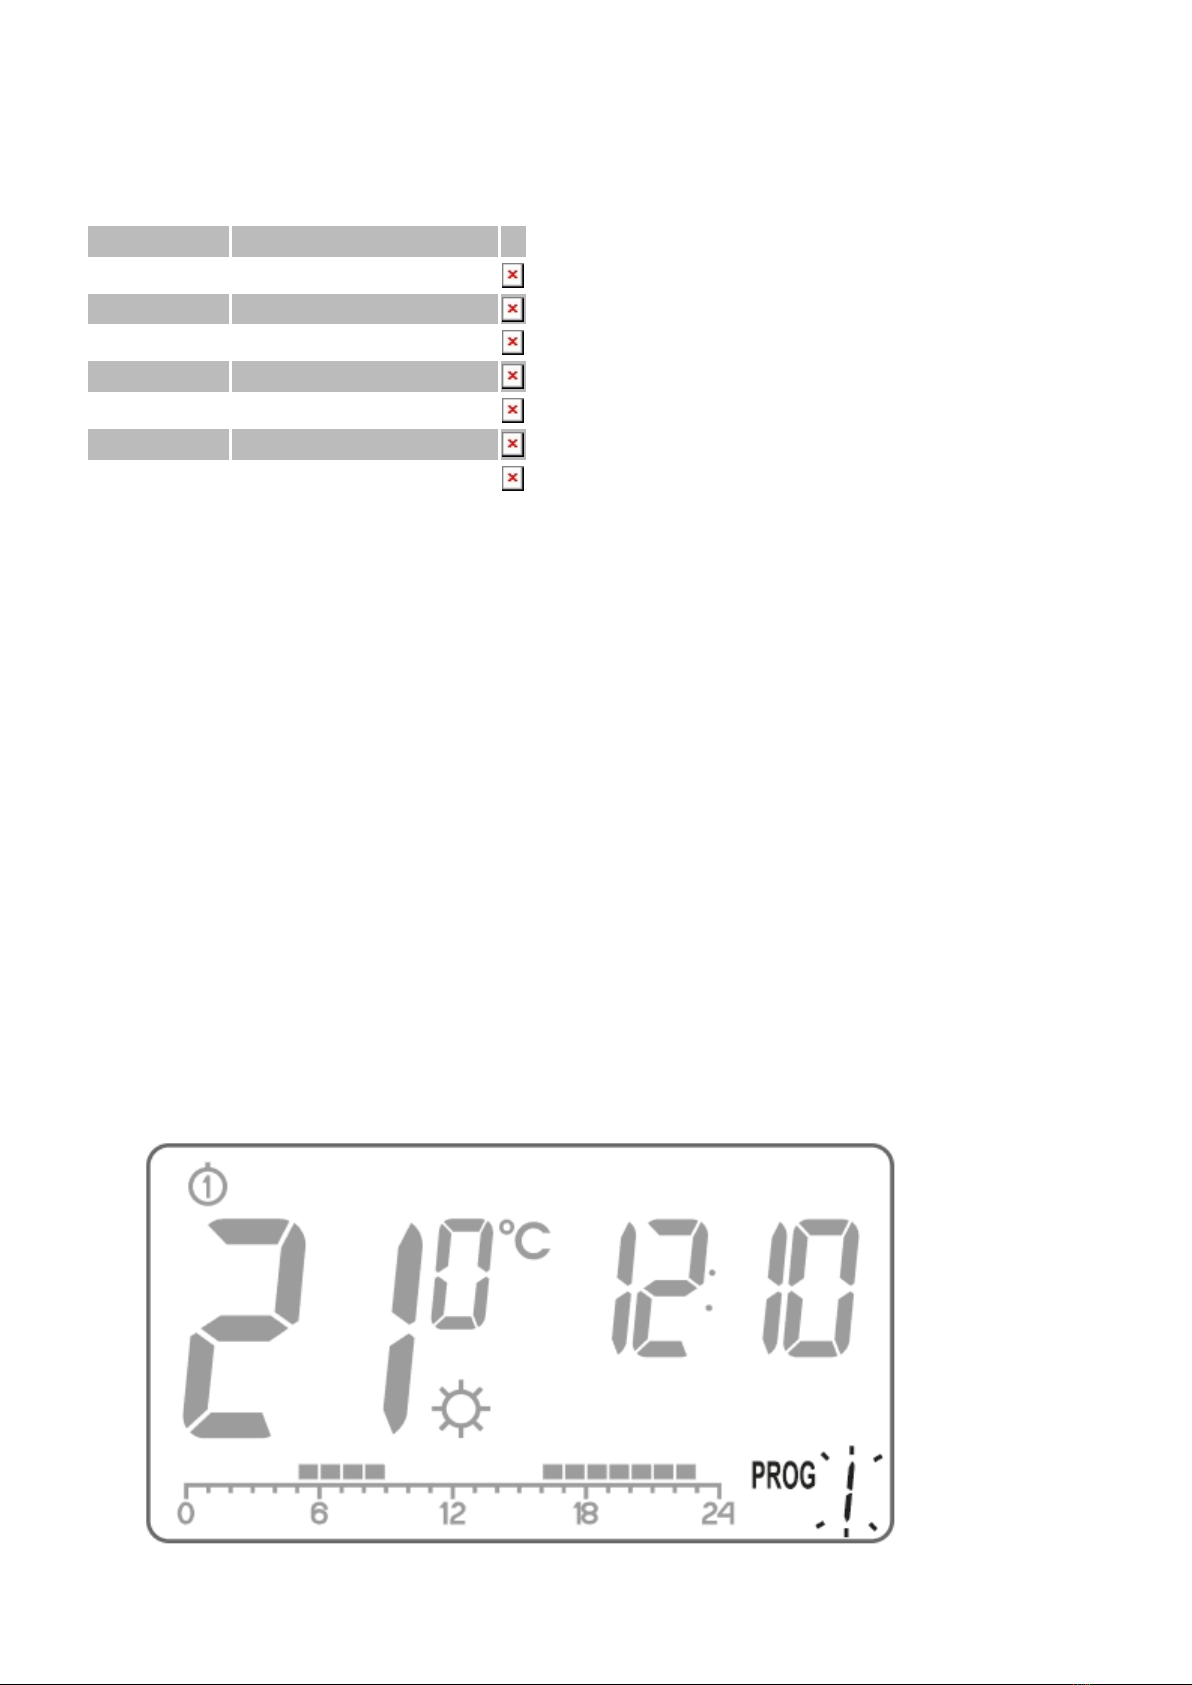
Timeline
The timeline on the LCD display is divided into 24 sections. Each of them symbolizes 1 hour of the
day.
Black rectangles above the timeline mean that the day temperature has been programmed for
specific hours, and that there is no night temperature.
Example:
The figure above shows that from 6.00 A.M. to 11.00 P.M. Auraton Tucana will control the heating
device in such a way that the room temperature will be day temperature (S). AURATON Tucana will
switch to night temperature from 11.00 P.M. to 6.00 A.M. (T).

Factory programs
In order for AURATON Tucana to know when to turn on the day and night temperatures, you should be
set to an appropriate program for each day of the week. For this purpose, you can use one of the
three factory programs (from 0 to 2):
Program no. 0 – anti-freezing U
Unmodifiable factory program. Designed for all-day anti-freezing temperature setting.
Program no. 1 – weekly
Unmodifiable factory program. Sets day temperature from 5:00 to 8:00 A.M. and from 3:00 to 11:00
P.M.
Program no. 2 – weekend
Unmodifiable factory program. Sets day temperature from 6:00 A.M. to 11:00 P.M.
Programs no. 3, 4,…., 9 – user-defined programs
Programs from 3 to 9 are user-defined programs. They can be freely modified and adapted to specific
requirements.
Programming
Weekly programming
To program AURATON Tucana, set the day temperature intervals for individual days of the week. At
other time, night temperature will be set.
Sample AURATON Tucana setting from Monday to Sunday. Outside the
intervals programmed, the night temperature will be set.
Day of week Day temperature
Monday 5:00 – 8:00; 15:00 – 23:00
Tuesday 5:00 – 8:00; 15:00 – 23:00
Wednesday 5:00 – 8:00; 15:00 – 23:00
Thursday 5:00 – 8:00; 15:00 – 23:00
Friday 5:00 – 8:00; 15:00 – 23:00
Saturday 8:00 – 23:00
Sunday 8:00 – 23:00
Program selection
To set a program:
Press the h button. The program number segment will start flashing.

Press the l button and then use the bc or l buttons to select the day of the week on which the
program is to be executed.
Press the h button several times and select the desired program number. Programs 0-2 are
factory ones, programs 3-9 can be modified by the user.
Other manuals for Tucana
1
Table of contents
Other AURATON Thermostat manuals

AURATON
AURATON 2100 TX User manual

AURATON
AURATON Auriga User manual

AURATON
AURATON 2005 User manual

AURATON
AURATON 2005 TX User manual

AURATON
AURATON T-1 RT User manual

AURATON
AURATON 1300 User manual

AURATON
AURATON Tucana User manual

AURATON
AURATON S03 RTH User manual

AURATON
AURATON R30 RT User manual

AURATON
AURATON 200 RTH User manual


