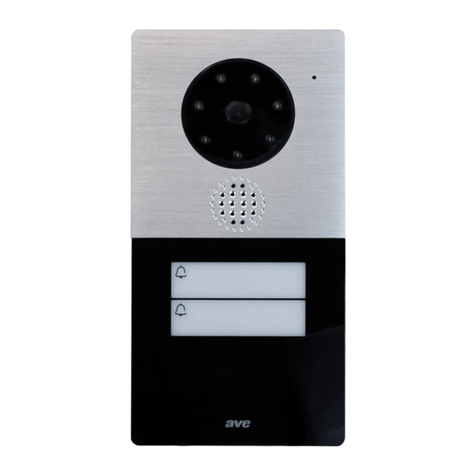
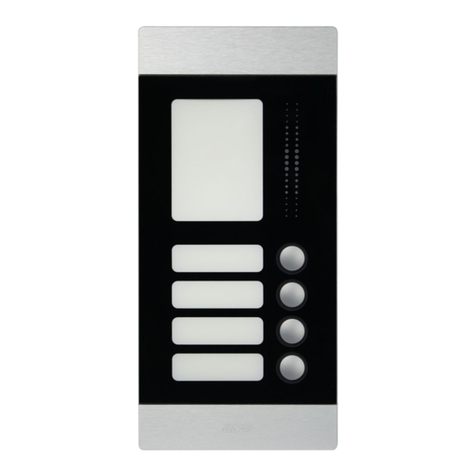
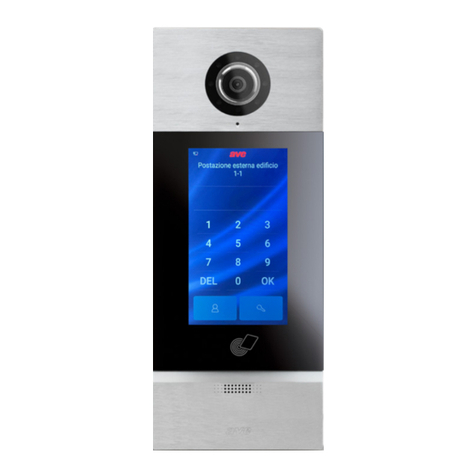
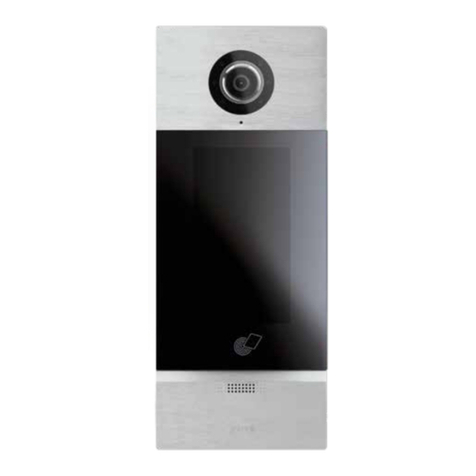
AVE V44 EASY User manual

ITA
1
Risposta ad una chiamata
Premere per rispondere/chiudere una chiamata in arrivo.
Durante il monitoraggio della telecamera della postazione esterna, senza
una chiamata in corso, la pressione del pulsante abilita la comunicazione.
Sblocco elettroserrature
Nessuna funzione in modalità Stand-by;
Durante una chiamata in arrivo e/o una conversazione, una breve
pressione sblocca il relè in potenza (Sblocco 1) della postazione esterna,
una pressione prolungata (3 sec) attiva il relè a contatto pulito (Sblocco 2).
179 mm 25 mm
179 mm
RC
NC
M
S
1 2
ON
BUS
BUS
DB
DA
GND
RS485
VI2F-PIT7WF
+30V
GND
POWER
179 mm
25 mm
179 mm
RC
NC
M
S
1 2
ON
BUS
BUS
DB
DA
GND
RS485
VI2F-PIT7WF
+30V
GND
POWER
179 mm
25 mm
179 mm
RC
NC
M
S
1 2
ON
BUS
BUS
DB
DA
GND
RS485
VI2F-PIT7WF
+30V
GND
POWER
SD card
Touch screen
Speaker
Microfono
VI2F-PIT7WF
POSTAZIONE INTERNA CON TOUCH SCREEN 7” WI-FI GAMMA 2 FILI V44 EASY
1) GENERALI
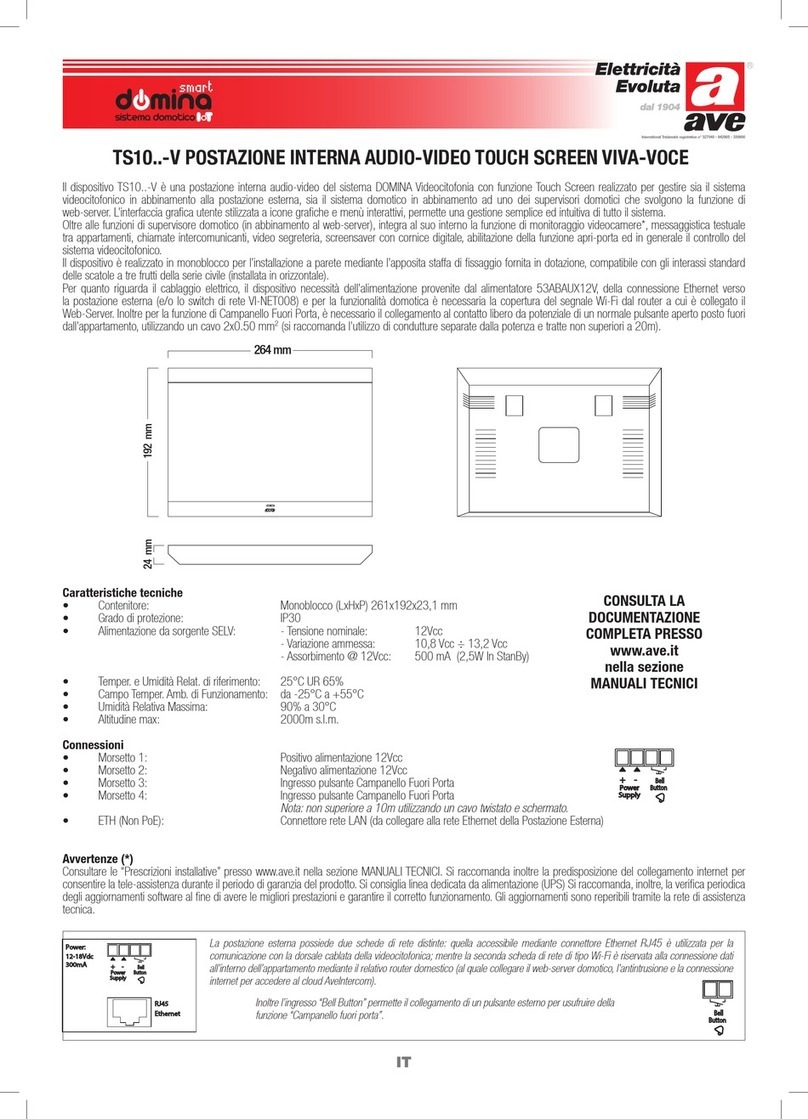
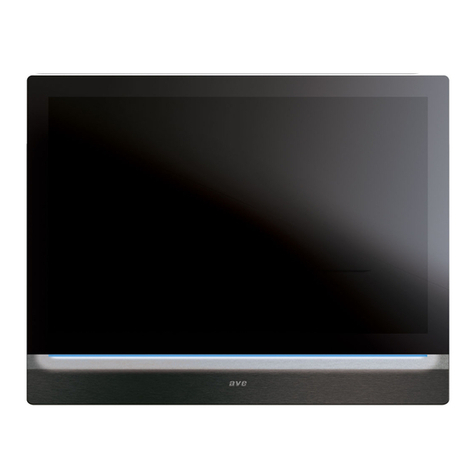
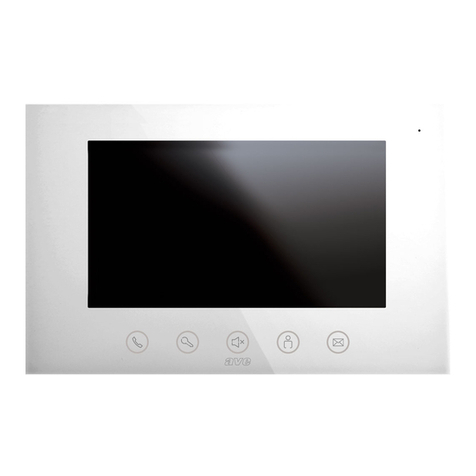
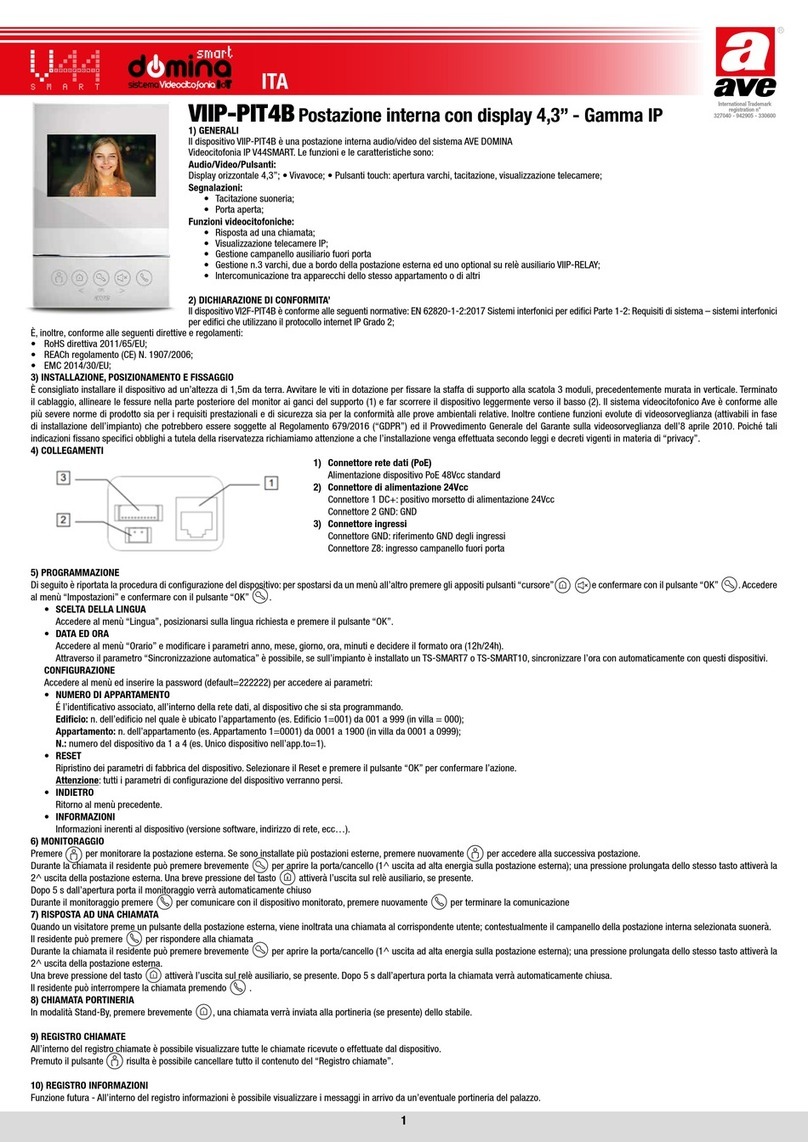
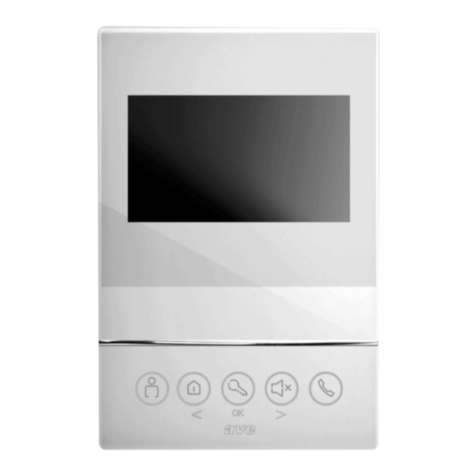
Il dispositivo VI2F-PIT7WF è una postazione interna audio/video del sistema videocitofonico 2 fili AVE V44 EASY.
Le funzioni e le caratteristiche sono:
Audio/Video/Pulsanti:
• Touch screen orizzontale 7”;
• Vivavoce;
• Pulsanti touch: apertura varchi, tacitazione, visualizzazione telecamere;
• Gestione remota tramite APP AVE VIDEO V44;
Segnalazioni:
• Chiamata persa;
• Porta aperta;
• Tacitazione suoneria attiva;
Funzioni videocitofoniche:
• Risposta ad una chiamata;
• Visualizzazione telecamere analogiche mediante apposita interfaccia VI2F-CAM;
• Gestione campanello ausiliario fuori porta
• Gestione n.3 varchi, due a bordo della postazione esterna ed uno optional su relè ausiliario VI2F-RELAY;
• Intercomunicazione tra apparecchi dello stesso appartamento o di altri
2) DICHIARAZIONE DI CONFORMITÀ
Il dispositivo VI2F-PIT7WF è conforme alle seguenti normative:
• EN 62820-1-1:2016 Sistemi interfonici per edifici - Parte 1-1: Requisiti di sistema - Generale grado2
• RoHS direttiva 2011/65/EU;
• REACh regolamento (CE) N. 1907/2006;
• RED direttiva 2014/53/EU (solo dove applicabile): Il testo completo della dichiarazione di conformità UE è disponibile al seguente indirizzo Internet: www.ave.it
3) INSTALLAZIONE, POSIZIONAMENTO E FISSAGGIO
É consigliato installare il dispositivo ad un’altezza di 1,5m da terra. Avvitare le viti in dotazione per fissare la staffa di supporto alla scatola rettangolare, precedentemente murata orizzontalmente.
Terminato il cablaggio, allineare le fessure nella parte posteriore del monitor ai ganci del supporto (1) e far scorrere il dispositivo leggermente verso il basso (2).
ATTENZIONE: il dispositivo è dotato di scheda Wi-Fi. Se in un impianto sono presenti più di n.1 art. VI2F-PIT7WF, è necessario installare un alimentatore "locale" (art. VI2F-ALI600MA) per ogni
dispositivo. Verificare gli assorbimenti massimi dei dispositivi installati per evitare assorbimenti elevati sul bus che ne inficerebbero il corretto funzionamento.
4) COLLEGAMENTI
Di seguito sono riportati il significato dei morsetti di collegamento e del dip-switch posti nella parte posteriore del dispositivo:
➀AUXILIARY POWER SUPPLY
Terminale 1 + 30 Vcc
Terminale 2 GND
➁2 Wire BUS
Terminale 1 BUS A
Terminale 2 BUS B
➂Campanello (cavetto fornito a corredo del dispositivo)
Terminale 1 Ingresso campanello
Terminale 2 GND
➃Interfaccia per estensione RS485 (solo per uso interno)
Terminale 1 DB
Terminale 2 DA
Terminale 3 GND
➄DIP SWITCH
DIP 1 - MASTER/SLAVE ON = postazione interna MASTER OFF= postazione interna SLAVE
DIP 2 - IMPEDENZA FINE LINEA (attivare se la postazione interna è l’ultima del ramo) ON = impedenza ON OFF= impedenza OFF
5) FUNZIONI VARIE

32
6) FUNZIONI DI BASE E CONFIGURAZIONE
6.1) PRIMA ACCENSIONE
Il dispositivo può essere alimentato direttamente dal BUS 2 fili o mediante un alimentatore stabilizzato 30 Vcc (VI2F-ALI600MA).
Alla prima accensione, o dopo un ripristino dei parametri di fabbrica, sull’LCD sarà visualizzata la pagina di selezione lingua: dopo aver effettuato la scelta verrà visualizzata la home page del
dispositivo.
Nota: se non viene selezionata alcuna lingua, dopo 1 minuto sarà selezionata in automatico la lingua inglese.
6.2) RISPOSTA AD UNA CHIAMATA
All'arrivo di una chiamata da una postazione esterna, il monitor interno comincerà a squillare e sarà visualizzata la schermata sotto riportata:
Sarà possibile:
- Rispondere alla chiamata in arrivo premendo il pulsante
- Sbloccare Ie elettroserrature durante la conversazione:
Sblocco 1 (relè in potenza): pressione del pulsante
Sblocco 2 (relè a contatto pulito): pressione del pulsante
Sblocco 3 (relè ausiliario a contatto pulito): pressione di 3 sec del pulsante
Dopo 5 secondi dallo sblocco di un’elettroserratura, il dispositivo ritorna automaticamente alla pagina principale.
- Chiudere/rifiutare una chiamata premendo sul pulsante
- Modificare il livello del volume della chiamata mediante i pulsanti e
- Durante la chiamata, premendo il pulsante è possibile scattare una fotografia dalla telecamera della postazione esterna
- Durante la chiamata, premendo il pulsante è possibile registrare un filmato; per tale operazione è necessario inserire una SD card nel dispositivo.
6.3) HOME PAGE
Nella home page del dispositivo (riportata a lato) sono rappresentati alcuni menù rapidi ai quali è possibile accedere premendo sugli stessi.
Sul pulsante “Registro” della pagina principale, è visualizzato un piccolo numero che identifica quante chiamate sono presenti nel registro
chiamate.
6.3.1) REGISTRO
Il menù Registro è utilizzato per salvare le informazioni delle chiamate giunte al dispositivo.
Premendo su ogni singola chiamata si può visualizzare la fotografia scattata nei primi 3 secondi della stessa.
Premendo sulla scritta “Cancella tutto” è possibile pulire il registro delle chiamate.
Il registro chiamate può memorizzare un numero massimo di 200 chiamate.
6.3.2) SFONDO
Nel menù “Sfondo” è possibile selezionare lo sfondo della home page della postazione interna videocitofonica.
Entrare nel menù, selezionare lo sfondo desiderato tra quelli visualizzati e premere “Fine” per confermare l’operazione.
Premendo il pulsante “Cancella” l’operazione sarà terminata ed il dispositivo tornerà automaticamente alla home page.
Premendo il pulsante “Reset”, il dispositivo visualizzerà l’immagine di default.
6.3.3) CHIAMATA
Il menù “Chiamata” è utilizzato per effettuare chiamate verso altri monitor dello stesso appartamento o di appartamenti differenti oppure verso la postazione della portineria.
Chiamata intercomunicate:inserire il numero dell’appartamento da chiamare (1-128) e premere l’icona
Chiamata verso la portineria: inserire il numero 200 (il numero attribuito della portineria non è modificabile) e premere il pulsante
Chiamata interfono: premere il pulsante “Chiamata interna” per avviare una chiamata verso tutte le postazioni interne dell’appartamento;
tutte le postazioni interne cominceranno a suonare.
6.3.4) MESSAGGIO VOCALE
La funzione consente di registrare un breve messaggio sulla postazione interna che potrà essere riascoltato in un secondo momento.
Sulla home page del dispositivo apparirà un numero per visualizzare quanti messaggi sono presenti all’interno del menù.
Registrazione di un messaggio: premere il pulsante di registrazione sulla parte sinistra dello schermo per avviare la registrazione e successivamente registrare il proprio messaggio.
Premere nuovamente il pulsante per terminare la registrazione. Il tempo massimo di registrazione è 30 secondi ed il tempo rimanente per la registrazione di un messaggio è visualizzato
nella parte bassa dello schermo.
Riascoltare un messaggio: premere il pulsante “Play” (triangolo verde) in corrispondenza del messaggio da riascoltare per attivarne la riproduzione.
Cancellazione della lista dei messaggi: premendo il pulsante “Cancella tutto” sarà possibile svuotare il registro.
Nota: il numero massimo di messaggi registrabili è 30.
6.3.5) MONITOR
Premendo sul pulsante “Monitor” è possibile attivare l’interfaccia verso le postazioni esterne
Monitoraggio e sblocco elettroserrature: spostarsi tra le varie postazioni esterne (se sull’impianto ne sono installate più di una) per visualizzare le loro telecamere. Durante il
monitoraggio è possibile sbloccare l’elettroserrature premendo gli appositi pulsanti di sblocco.
Sorveglianza, cattura foto/video: durante l’operazione di sorveglianza delle telecamere è possibile acquisire:
un’immagine premendo il pulsante
un filmato premendo il pulsante
Chiamata: durante l’operazione di sorveglianza delle telecamere è possibile attivare una comunicazione verso la postazione esterna premendo il pulsante
Note:
Le foto e i video acquisiti sono salvati nel registro delle chiamate.
Quando l’APP AVE VIDEO V44 associata, monitora da remoto la stazione esterna, il monitor principale “MASTER” entra nello stato di interfono Cloud e non può essere utilizzato.
I monitor “SLAVE”, a loro volta, entreranno nello stato di standby e non potranno monitorare la postazione esterna. Il normale funzionamento sarà ripristinato quando la comunicazione
verso APP AVE VIDEO V44 cesserà.
6.3.6) IMPOSTAZIONI
Entrando nel menù “Impostazioni” è possibile accedere a tutti i parametri di configurazione del sistema. Di seguito sono riportati i significati delle varie voci presenti nel menù:
IMPOSTAZIONI DISPLAY
- Luminosità: luminosità dello schermo;
- Ritardo screensaver: tempo trascorso il quale il blocca schermo è attivato;
- Durata screensaver: tempo dopo il quale lo schermo viene spento.
TONO DI AVVISO
- Volume suoneria: volume della suoneria al giungere di una chiamata;
- Volume tasti: volume del suono di pressione dei pulsanti;
- Tono tasti: suono emesso alla pressione di un pulsante;
- Suoneria: suono riprodotto all’arrivo di una chiamata.

32
NON DISTURBARE
Attivazione della funzione DND che inibisce la suoneria del dispositivo: premere il pulsante per attivare/disattivare la funzione. La pressione del pulsante per 5 secondi propaga lo stato di
DND attivo/spento a tutte le postazioni interne dell’appartamento.
IMPOSTAZIONE LINGUA
Selezionare la lingua del dispositivo tra quelle proposte.
CONFIGURAZIONE DATA E ORA
- Data e Ora: selezionare la data e l’ora del dispositivo;
- Sincronizza automaticamente l’ora: se il dispositivo è collegato ad internet, data ed ora vengono automaticamente sincronizzati;
- Formato 12 ore: attivazione del formato ora con modalità AM e PM;
- Fuso orario: selezionare il fuso orario della zona in cui il dispositivo è installato;
- Ora legale: attivazione ora legale/solare;
- Server NTP: inserire l’indirizzo del server per l’acquisizione automatica dell’ora.
RETE
Menù per l’attivazione della connessione WI-FI del dispositivo, della selezione della rete e per l’inserimento della password di sicurezza di tale rete.
ALTRE CONFIGURAZIONI
- Apertura automatica: attivazione automatica del relè in potenza all'arrivo di una chiamata;
- Registrazione automatica: avvio della registrazione automatica all'arrivo di una chiamata;
- Numero di postazioni esterne associate: il parametro indica il numero di postazioni esterne presenti sull'impianto per la loro visualizzazione da APP AVE VIDEO V44.
IMPOSTAZIONE CLOUD INTERCOM
Menù per l’attivazione del servizio Cloud per la gestione della risposta alle chiamate in arrivo da APP AVE VIDEO V44;
Aggiungi nuovo utente:
- Visualizzazione del codice QR univoco dell’impianto per l’associazione dello stesso all’APP AVE VIDEO V44;
- Attivazione Cloud Intercom: parametro per l'attivazione della comunicazione verso il server di remotizzazione dell'impianto; il parametro deve essere attivo (situazione di default) per la
gestione dell'impianto tramite APP AVE VIDEO V44;
- Indirizzo del server Cloud Intercom: indirizzo del server di remotizzazione. Il parametro non deve essere modificato.
Cancella utente APP: cancellazione di un utente associato all’impianto.
Nota: non è possibile cancellare l’utente proprietario dell’impianto, se si desiderasse effettuare tale operazione è necessario ripristinare i parametri di fabbrica del dispositivo.
INFO
Informazioni di sistema.
- Aggiornamento APP: consente, tramite una SD card (non fornita a corredo) inserita nell'apposito slot posto sul lato del dispositivo, l'aggiornamento dello stesso.
IMPOSTAZIONI PASSWORD
In questo menù è possibile modificare la password di accesso ai parametri avanzati di configurazione. Inserire la password attuale di accesso al menù: nella maschera che viene
successivamente visualizzata inserire la vecchia password, la nuova password e confermare quest’ultima. La password di default è 222222.
IMPOSTAZIONI DI CONFIGURAZIONE
Inserire la password di sicurezza per accedere ai seguenti parametri:
- Impostazione numero appartamento: è il numero dell’appartamento assegnato al dispositivo (numero corrispondente al pulsante di chiamata sulla postazione esterna)
- Reset dispositivo: ripristino dei parametri di fabbrica del dispositivo.
7) ASSOCIAZIONE APP AVE VIDEO V44
Il dispositivo può essere associato ad un cellulare per la risposta alla chiamata in arrivo da un cellulare con sistema operativo iOS o Android.
Scaricare l'applicazione AVE VIDEO V44 dall'APP STORE o da GOOGLE PLAY e registrare il nuovo utente.
Per associare il cellulare è sufficiente entrare nel menù impostazioni e successivamente nel menù "Impostazione Cloud Intercom". Premere il pulsante "Aggiungi nuovo utente" ed
inquadrare il QR code con la fotocamera del telefono.
8) CARATTERISTICHE TECNICHE
Tensione di lavoro 24Vcc
Tensione massima di lavoro 32Vcc
Assorbimento in esercizio 300 mA max @ 30 Vcc
Assorbimento in stand-by 150 mA max @ 30 Vcc
Dimensioni (L x H x P) 179 x 179 x 25 mm
Dimensioni LCD 7 pollici 16/9
Risoluzione 1024 x 600 pixel
Classe ambientale secondo EN 62820-1-1 CLASSE III
Temperatura di funzionamento Da -10°C a +55°C
Altitudine max. 2000 m s.l.m.
N. max di dispositivi installabili per appartamento 4 (nel caso siano installati più di un dispositivo prevedere, per ognuno di essi, l'alimentatore locale VI2F-ALI600MA)
N. max di dispositivi installabili 128
Montaggio Su scatole 3 moduli, mediante il supporto fornito in dotazione
Grado di protezione IP20 (IP40 quando installato)
SD card 2 – 32 GB (non fornita in dotazione)
VITI
SCATOLA
MURATA
GANCI DI ANCORAGGIO
PIASTRA DI SUPPORTO
179 mm 25 mm
179 mm
RC
NC
M
S
1 2
ON
BUS
BUS
DB
DA
GND
RS485
VI2F-PIT7WF
+30V
GND
POWER
1,5 m
TERRA

5
ENG
VI2F-PIT7WF
INDOOR STATION WITH 7" TOUCH SCREEN WI-FI RANGE 2 WIRE V44 EASY
1) OVERVIEW
The VI2F-PIT7WF device is an audio/video indoor station for the AVE V44 EASY 2-wire video intercom system.
The functions and characteristics are as follows:
Audio/Video/Buttons:
• 7" horizontal touch screen;
• Hands-free;
• Touch buttons: entrance opening, muting, camera display;
• Remote management via AVE VIDEO V44 APP;
Warnings:
• Missed call;
• Door open;
• Active ringer muting;
Video intercom functions:
• Call answering;
• Display of analogue cameras via dedicated VI2F-CAM interface;
• Management of outside door auxiliary bell
• Management of three gates, two on board the outdoor station and one optional on auxiliary relay VI2F-RELAY;
• Communication between devices in the same flat or other flats
2) DECLARATION OF CONFORMITY
The VI2F-PIT7WF device complies with the following standards:
• EN 62820-1-1:2016 Building intercom systems - Part 1-1: System requirements – General grade2
• RoHS Directive 2011/65/EU;
• REACh Regulation (EC) No. 1907/2006;
• RED Directive 2014/53/EU (only where applicable): The full text of the EU Declaration of Conformity is available at the following Internet address: www.ave.it
3) INSTALLATION, POSITIONING AND FIXING
The device should be installed at a height of 1.5 m from the ground. Screw the screws supplied to secure the support bracket to the rectangular box, after it has been horizontally recessed.
Once wiring operations have been completed, align the slots in the back of the monitor with the bracket hooks (1) and slide the device slightly downwards (2).
ATTENTION: the device is equipped with a Wi-Fi card. If a system features more than no.1 art. VI2F-PIT7WF, it is necessary to install a "local" power supply (art. VI2F-ALI600MA) for each device.
Check the maximum absorptions of the devices installed in order to avoid high absorptions on the bus which would compromise correct operation.
4) CONNECTIONS
The meanings of the connection terminals and dip-switches on the rear of the device are shown below:
➀AUXILIARY POWER SUPPLY
Terminal 1 + 30 VDC
Terminal 2 GND
➁2 Wire BUS
Terminal 1 BUS A
Terminal 2 BUS B
➂Bell (cable supplied with the device)
Terminal 1 Door bell input
Terminal 2 GND
➃Interface for RS485 extension (indoor use only)
Terminal 1 DB
Terminal 2 MD
Terminal 3 GND
➄DIP SWITCH
DIP 1 - MASTER/SLAVE ON = indoor station MASTER OFF = indoor station SLAVE
DIP 2 - END OF LINE IMPEDANCE (activate if the indoor station is the last one in the branch) ON = impedance ON OFF = impedance OFF
5) VARIOUS FUNCTIONS
4
Answering a call
Press to answer/close an incoming call.
While monitoring the outdoor camera, without a call in progress, pressing
the button enables communication.
Unlock electric locks
No function in Stand-by mode;
During an incoming call and/or conversation, a short press unlocks the
power relay (Unlock 1) of the outdoor station, a long press (3 sec) activates
the clean contact relay (Unlock 2).
179 mm 25 mm
179 mm
RC
NC
M
S
1 2
ON
BUS
BUS
DB
DA
GND
RS485
VI2F-PIT7WF
+30V
GND
POWER
179 mm
25 mm
179 mm
RC
NC
M
S
1 2
ON
BUS
BUS
DB
DA
GND
RS485
VI2F-PIT7WF
+30V
GND
POWER
179 mm
25 mm
179 mm
RC
NC
M
S
1 2
ON
BUS
BUS
DB
DA
GND
RS485
VI2F-PIT7WF
+30V
GND
POWER
SD card
Touch screen
Speaker
Microphone

5
6) BASIC FUNCTIONS AND CONFIGURATION
6.1) INITIAL POWER-UP
The device can be powered directly by the 2-wire BUS or by a stabilised 30 Vdc power supply (VI2F-ALI600MA).
When the device is switched on for the first time, or after a factory reset, the language selection page will appear on the LCD: after the language has been selected, the home page will be displayed.
Note: if no language is selected, English will be the automatic default language after 1 minute.
6.2) ANSWERING A CALL
When a call arrives from an outdoor station, the indoor monitor will start to ring and the screen shown below will be displayed:
It will be possible to:
- Answer an incoming call by pressing button
- Unlock the electric locks during the conversation:
Unlock 1 (power relay): press button
Unlock 2 (clean contact relay): press button
Unlock 3 (clean contact auxiliary relay): press button and hold for 3 seconds
Five seconds after releasing an electric lock, the device automatically returns to the home page.
- Close/reject a call by pressing button
- Change the call volume using buttons and
- During the call, pressing button takes a photo from the outdoor station camera
- During a call, pressing button records a video; for this you need to install an SD card in the device.
6.3) HOMEPAGE
The home page of the device (shown opposite) displays some quick menus that can be accessed by clicking on them.
The “Log” button on the main page includes a small number that indicates how many calls are in the call log.
6.3.1) LOG
The Log menu is used to save the information about calls that have reached the device.
By pressing on each individual call, you can view the snapshot photo taken during the first 3 seconds of the call.
Pressing the “Clear All” button deletes the call log.
The call log can store a maximum number of 200 calls.
6.3.2) BACKGROUND
From the “Background” menu, you can select the background of the homepage of the indoor video intercom station.
Enter the menu, select the desired background from those displayed and press “Finish” to confirm the operation.
Pressing the “Cancel” button will end the operation and the device will automatically return to the homepage.
Pressing the “Reset” button will display the default image.
6.3.3) CALL
The “Call” menu is used to make calls to other monitors in the same or different flats or to the gatehouse station.
Intercommunication call:enter the number of the flat to be called (1-128) and press the icon
Call to gatehouse station: enter the number 200 (the number assigned to the gatehouse station cannot be changed) and press button
Intercom call: press the “internal call” button to initiate a call to all internal stations in the flat;
all indoor stations will ring.
6.3.4) VOICE MESSAGE
This feature allows you to record a short message on the indoor station that can be played back at a later stage.
A number will appear on the homepage of the device to show how many messages are in the menu.
Recording a message: press the record button on the left side of the screen to start recording and then record your message.
Press the button once more to end the recording. The maximum recording time is 30 seconds and the remaining time for recording the message is displayed at the bottom of the screen.
Listening to a message: press the “Play” button (green triangle) beside the message to play the message.
Delete message list: press “Delete all” to clear the log.
Note: a maximum of 30 messages can be recorded.
6.3.5) MONITOR
Pressing the “Monitor” button activates the interface to outdoor stations
Monitoring and unlocking electric locks: switch between the various outdoor stations (if more than one is installed on the system) to display their cameras. During monitoring, it is possible
to unlock the electric locks by pressing the dedicated unlock buttons.
Surveillance, capture photo/video: during the camera surveillance operation, it is possible to capture:
an image by pressing button
a video by pressing button
Call: during the camera surveillance operation, communication to the outdoor station can be activated by pressing button
Notes:
Captured photos and videos are saved in the call log.
When the associated AVE VIDEO V44 APP remotely monitors the outdoor station, the main “MASTER” monitor enters the Cloud intercom state and cannot be used.
The “SLAVE” monitors, in turn, enter the standby state and cannot monitor the outdoor station. Normal operation will be restored when communication towards the AVE VIDEO V44 APP
stops.
6.3.6) SETTINGS
The “Settings” menu provides access to all system configuration parameters. The meanings of the various items in the menu are given below:
DISPLAY SETTINGS
- Brightness: screen brightness;
- Screensaver delay: time after which a screen lock is activated;
- Screensaver duration: time after which the screen is switched off.
WARNING TONE
- Ringer volume: ringer volume when a call comes in;
- Button volume: volume of button sounds;
- Button tone: sound emitted when a button is pressed;
- Ringtone: sound heard when a call comes in.

6
DO NOT DISTURB
Activation of the DND function that inhibits the device’s ringer: press the button to enable/disable the feature. Pressing the button for 5 seconds extends DND on/off status to all indoor
stations in the flat.
LANGUAGE SETTINGS
Select the language of the device from those provided.
DATE AND TIME CONFIGURATION
- Date and Time: select the date and time for the device;
- Automatically synchronise time: if the device is connected to the internet, the date and time are automatically synchronised;
- 12-hour format: activation of time format with AM and PM mode;
- Time zone: selection of the time zone of the area where the device is installed;
- Daylight saving time: activation of summer/winter time;
- NTP Server: enter the server address for automatic time acquisition.
NETWORK
Menu to activate the device's WI-FI connection, to select a network and to enter a security password for that network.
OTHER CONFIGURATIONS
- Automatic opening: automatic activation of the power relay when a call comes in;
- Automatic recording: start of automatic recording when a call comes in;
- Number of associated outdoor stations: the parameter indicates the number of outdoor stations present in the system for their display via the AVE VIDEO V44 APP.
CLOUD INTERCOM SETTINGS
Menu to activate the Cloud service to manage incoming call answering from AVE VIDEO V44 APP;
Add new user:
- Display of the system's unique QR code to pair it with the AVE VIDEO V44 APP;
- Cloud Intercom activation: parameter for activating communication towards the system's remote server; the parameter must be active (default situation) to be able to control the
system via the AVE VIDEO V44 APP;
- Cloud Intercom server address: remote server address. The parameter must not be changed.
Delete APP user: deletion of a user associated with the system.
Note: it is not possible to delete the user who is the owner of the system; if you wish to do so, you must reset the device to its factory settings.
INFO
System information.
- Update APP: allows the device to be updated by means of an SD card (not supplied) inserted in the slot on the side of the device.
PASSWORD SETTINGS
This menu allows you to change the password to access the advanced configuration parameters. Enter the current menu access password: in the window that appears, enter the old
password, the new password and confirm the latter. The default password is 222222.
CONFIGURATION SETTINGS
Enter the security password to access the following parameters:
- Flat number setting: this is the flat number assigned to the device (number corresponding to the call button on the outdoor station)
- Device reset: reset the device to default factory parameters.
7) PAIRING THE AVE VIDEO V44 APP
The device can be paired with a mobile phone to answer incoming calls from an iOS or Android operating system.
Download the AVE VIDEO V44 APP from the APP STORE or GOOGLE PLAY and register the new user.
To pair the mobile phone, simply enter the settings menu and then the “Cloud Intercom Settings” menu. Press "Add new user" and point your device's camera at the QR code.
8) TECHNICAL CHARACTERISTICS
Operating voltage 24Vcc
Maximum operating voltage 32Vcc
Absorption during operation 300 mA max @ 30 VDC
Absorption during stand-by 150 mA max @ 30 VDC
Dimensions (L x H x D) 179 x 179 x 25 mm
LCD size 7 inches 16/9
Resolution 1024 x 600 pixels
Environmental class as per EN 62820-1-1 CLASS III
Operating temperature From -10 °C to +55 °C
Maximum altitude 2000 m a.s.l.
Maximum number of devices that may be installed in each apartment 4 (if more than one device is installed, the local power supply VI2F-ALI600MA must be provided for each of them)
Maximum number of devices that can be installed 128
Installation On 3-module boxes, using the bracket provided
Protection rating IP20 (IP40 when installed)
SD card 2 – 32 GB (not supplied)
SCREWS
RECESSED
BOX
ANCHOR HOOKS
SUPPORT PLATE
179 mm 25 mm
179 mm
RC
NC
M
S
1 2
ON
BUS
BUS
DB
DA
GND
RS485
VI2F-PIT7WF
+30V
GND
POWER
1.5 m
GROUND

FRA
76
VI2F-PIT7WF
POSTE INTERNE ÉQUIPÉ D’ÉCRAN TACTILE 7POUCES WI-FI GAMMA 2FILS V44 EASY
1) GÉNÉRALITÉS
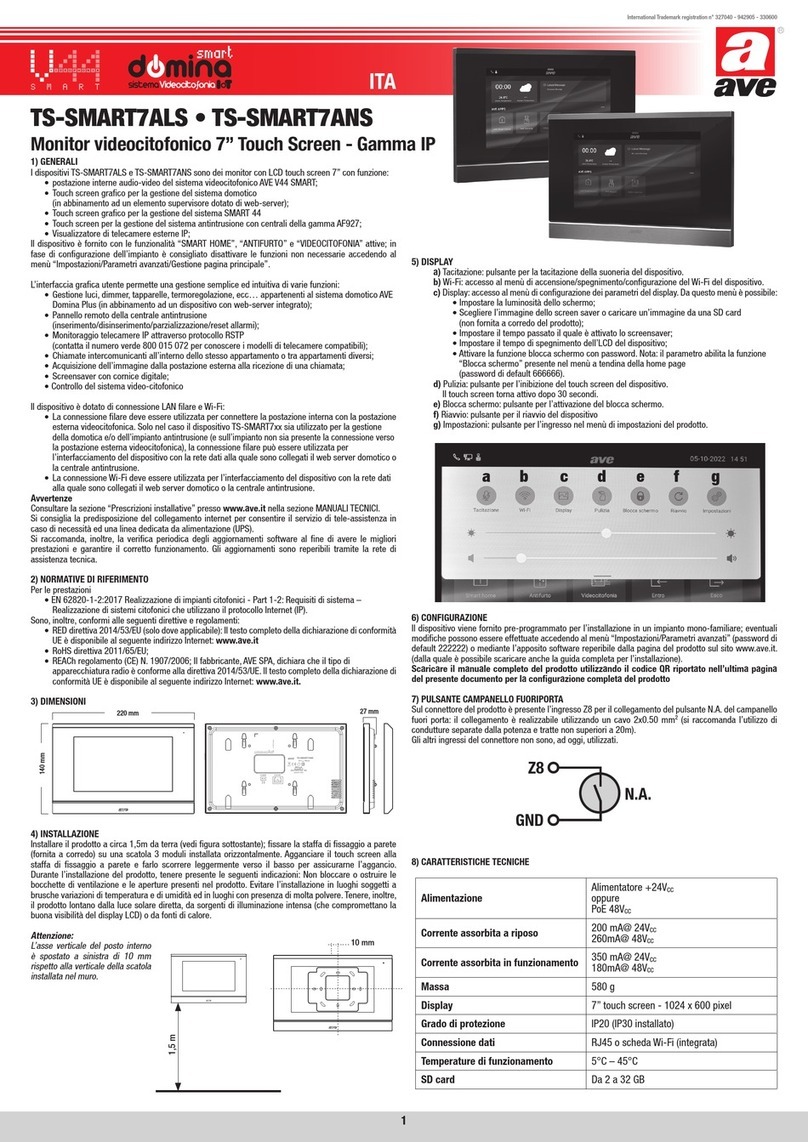
Le dispositif VI2F-PIT7WF est un poste interne audio/vidéo pour le système de visiophone à 2fils AVE V44 EASY.
Les fonctions et les caractéristiques sont les suivantes:
Audio/Vidéo/Boutons:
• Écran tactile horizontal de 7pouces;
• Haut-parleur;
• Boutons tactiles: ouverture des entrées, silencieux, affichage des caméras;
• Gestion à distance via APP AVE VIDEO V44;
Signalisations:
• Appel manqué;
• Porte ouverte;
• Silencieux actif de la sonnerie;
Fonctions visiophone:
• Réponse à un appel;
• Visualisation des caméras analogiques via l'interface dédiée VI2F-CAM;
• Gestion sonnette auxiliaire derrière la porte
• Gestion 3entrées, deux à bord du poste externe et une en option sur le relais auxiliaire VI2F-RELAY;
• Intercommunication entre appareils du même appartement ou d’autres appartements
2) DÉCLARATION DE CONFORMITÉ
Le dispositif VI2F-PIT7WF est conforme à la norme ci-dessous:
• EN 62820-1-1:2016 Systèmes d’interphone de bâtiment - Partie 1-1: Configuration de système requise - Catégorie générale grade2
• Directive RoHS 2011/65/UE;
• Règlement REACh (CE) N. 1907/2006;
• Directive RED 2014/53/UE (uniquement si applicable): Le texte complet de la déclaration de conformité UE est disponible à l’adresse Internet suivante: www.ave.it
3) INSTALLATION, PLACEMENT ET FIXATION
Il est recommandé d’installer le dispositif à une hauteur de 1,5m du sol. Vissez les vis fournies pour fixer le support au boîtier rectangulaire, précédemment encastré horizontalement.
Terminez le câblage, aligner les fentes à l’arrière du moniteur aux crochets du support (1) et faites coulisser légèrement le dispositif vers le bas(2).
ATTENTION: le dispositif est équipé d'une carte Wi-Fi. Si un système comporte plusieurs dispositifs réf. VI2F-PIT7WF, il est nécessaire d'installer une alimentation dite «locale» (article VI2F-
ALI600MA) pour chacun d’entre eux. Vérifiez les absorptions maximales des dispositifs installés afin d'éviter des absorptions élevées sur le bus qui nuiraient au bon fonctionnement.
4) BRANCHEMENTS
Ci-après la signification des bornes de connexion et du micro-interrupteur (dip-switch) situés à l'arrière du dispositif est indiquée:
➀ALIMENTATION ÉLECTRIQUE AUXILIAIRE
Terminal1 + 30Vcc
Terminal2 GND
➁2fils BUS
Terminal1 BUS A
Terminal2 BUS B
➂Sonnette (câble fourni avec le dispositif)
Terminal1 Entrée sonnette
Terminal2 GND
➃Interface pour l'extension RS485 (usage interne uniquement)
Terminal1 DB
Terminal2 DA
Terminal3 GND
➄MICROINTERRUPTEURS OU DIP SWITCH
DIP 1 - MASTER/SLAVE ON = poste interne MASTER OFF= poste SLAVE
DIP 2 - IMPÉDANCE FIN DE LIGNE (active si le poste interne est le dernier de la branche) ON = impédance ON OFF= impédance OFF
5) FONCTIONS DIVERSES
Réponse à un appel
appuyer pour répondre/raccrocher un appel entrant.
Pendant la surveillance de la caméra de la station extérieure, sans appel
en cours, appuyer sur le bouton permet la communication.
Déverrouillage des serrures électriques
Pas de fonction en mode veille;
Lors d'un appel entrant et/ou d'une conversation, une brève pression déverrouille
le relais d'alimentation (Déverrouillage1) de la station extérieure, une pression
plus longue (3 secondes) active le relais à contact sec (Déverrouillage2).
179 mm 25 mm
179 mm
RC
NC
M
S
1 2
ON
BUS
BUS
DB
DA
GND
RS485
VI2F-PIT7WF
+30V
GND
POWER
179 mm
25 mm
179 mm
RC
NC
M
S
1 2
ON
BUS
BUS
DB
DA
GND
RS485
VI2F-PIT7WF
+30V
GND
POWER
179 mm
25 mm
179 mm
RC
NC
M
S
1 2
ON
BUS
BUS
DB
DA
GND
RS485
VI2F-PIT7WF
+30V
GND
POWER
Carte SD
Écran tactile
Haut-parleur
Micro

8
6) FONCTIONS DE BASE ET CONFIGURATION
6.1) PREMIÈRE MISE SOUS TENSION
Le dispositif peut être alimenté directement par le BUS à 2fils ou un bloc d'alimentation stabilisé de 30Vcc (VI2F-ALI600MA).
Lors de la première mise sous tension, ou suite à la réinitialisation des paramètres d'usine, sur l'écran LCD apparaît la page de sélection de la langue: après avoir fait le choix, la page d'accueil du
dispositif s'affiche.
Remarque: si aucune langue n'est sélectionnée, la langue anglaise devient automatiquement la langue de dialogue après 1minute.
6.2) RÉPONSE À UN APPEL
Lorsqu'un appel arrive d'un lieu extérieur, le moniteur interne commence à sonner et la page-écran illustrée ci-après s'affiche:
Il vous sera possible de:
- Répondre à l'appel entrant en appuyant sur le bouton
- Déverrouiller les serrures électriques pendant la conversation:
Déverrouillage1 (relais de puissance): appuyez sur le bouton
Déverrouillage2 (relais à contact sec): appuyez sur le bouton
Déverrouillage3 (relais auxiliaire à contact sec): appuyez sur le bouton pendant 3secondes.
Au bout de 5secondes de déverrouillage d'une serrure électrique, le dispositif revient automatiquement à la page principale ou page d’accueil.
- Raccrocher/refuser un appel en appuyant sur le bouton
- Modifier le niveau du volume de l’appel à l’aide des boutons et
- Pendant l’appel, en appuyant sur le bouton vous pouvez prendre une photo à partir de la caméra du poste extérieur
- Pendant l'appel, il vous suffit d’appuyer sur le bouton pour enregistrer une vidéo; une carte SD doit être installée dans le dispositif pour cette opération.
6.3) PAGE D'ACCUEIL
La page d'accueil du dispositif (ci-contre) présente quelques menus rapides auxquels on peut accéder en appuyant sur la touche
Sur le bouton «Journal» de la page d'accueil, un petit nombre s'affiche pour indiquer combien d'appels figurent déjà dans le journal des
appels.
6.3.1) JOURNAL
Le menu Journal vous permet de sauvegarder des informations sur les appels qui sont arrivés sur le dispositif.
En appuyant sur chaque appel individuel, vous pouvez afficher la photo prise dans les 3premières secondes de l'appel.
En appuyant sur «Effacer tout», vous pouvez nettoyer le journal des appels.
Le journal des appels peut stocker un nombre maximum de 200appels.
6.3.2) ARRIÈRE-PLAN
Dans le menu «Arrière-plan», vous pouvez sélectionner le fond d'écran de la page d'accueil du poste interne de visiophone.
Accédez au menu, sélectionnez l’arrière-plan souhaité parmi ceux qui sont affichés et appuyez sur «Terminer» pour confirmer l'opération.
En appuyant sur le bouton «Annuler», l'opération est terminée et le dispositif revient automatiquement à la page d'accueil.
En appuyant sur le bouton «Réinitialisation», le dispositif affichera l'image par défaut.
6.3.3) APPEL
Le menu «Appel» vous permet d'appeler d'autres moniteurs dans le même appartement ou dans des appartements différents ou le poste de conciergerie.
Appel d'intercommunication:composez le numéro de l'appartement à appeler (1-128) en appuyant sur l'icône
Appel au poste de conciergerie: composez le numéro 200 (le numéro attribué au concierge est inchangeable) et appuyez sur le bouton
Appel d'interphone: appuyez sur le bouton «Appel interne» pour lancer un appel vers tous les postes internes de l'appartement;
tous les postes internes commenceront à sonner.
6.3.4) MESSAGE VOCAL
Cette fonction permet d'enregistrer un court message sur le poste interne qui pourra être réécouté ultérieurement.
Un nombre apparaîtra sur la page d'accueil du dispositif pour indiquer combien de messages sont présents dans le menu.
Enregistrement d’un message: appuyez sur le bouton d'enregistrement sur le côté gauche de l'écran pour démarrer l'enregistrement, avant d’enregistrer votre message.
Réappuyez sur ce bouton pour terminer l'enregistrement. Le délai d’enregistrement maximum est de 30secondes et le délai restant pour l’enregistrement d'une message s’affiche
en bas de l’écran.
Réécouter un message: appuyez sur la touche «Lecture» (triangle vert) au niveau du message à lire pour en activer la lecture.
Effacer la liste des messages: en appuyant sur le bouton «Effacer tout», vous videz le journal.
Remarque: le nombre maximum de messages pouvant être enregistrés est égal à 30.
6.3.5) MONITEUR/ÉCRAN
En appuyant sur le bouton «Moniteur/écran», vous pouvez activer l'interface avec les postes externes.
Monitorage et déverrouillage des serrures électriques: basculez entre les différents postes externes (si plusieurs sont installés sur le système) pour visualiser leurs caméras. Pendant
la surveillance, il est possible de déverrouiller les serrures électriques en appuyant sur les boutons de déverrouillage appropriés.
Surveillance, capture photo/vidéo : pendant le fonctionnement de la caméra de surveillance, il est possible de capturer :
une image en appuyant sur le bouton
une vidéo en appuyant sur le bouton
Appel: pendant l’opération de surveillance des caméras, vous pouvez activer une communication avec le poste externe en appuyant sur le bouton
Remarque:
Les photos et vidéos capturées sont enregistrées dans le journal des appels.
Lorsque l'APP AVE VIDEO V44 associée surveille à distance la station externe, le moniteur principal "MASTER" entre dans l'état d'interphone Cloud et ne peut pas être utilisé.
Les moniteurs "SLAVE", à leur tour, entreront en état de veille et ne pourront pas surveiller la station externe. Le fonctionnement normal sera rétabli lorsque la communication
vers APP AVE VIDEO V44 cessera.
6.3.6) PARAMÈTRES
En entrant dans le menu «Paramètres», il est possible d’accéder à tous les paramètres de configuration du système. Ci-après la signification des différents éléments de menu:
PARAMÈTRES ÉCRAN
- Luminosité : luminosité de l'écran;
- Retard de l'économiseur d'écran: délai après lequel le verrouillage de l'écran est activé;
- Durée de l'économiseur d'écran: temps après lequel l'écran s’éteint.
TONALITÉ D’AVERTISSEMENT
- Volume de la sonnerie: volume de la tonalité d’avertissement lors d'un appel entrant;
- Volume des touches: volume du son à la pression des touches;
- Tonalité des touches: son émis à la pression d’une touche;
- Sonnerie : son émis lors d'un appel.
98
NE PAS DÉRANGER
Activation de la fonction NPD qui inhibe la sonnerie du dispositif: appuyez sur la touche pour activer/désactiver la fonction. En appuyant sur le bouton pendant 5 secondes, l'état
d'activation/de désactivation du NPD se propage à tous les postes internes de l'appartement.
PARAMÈTRE DE LA LANGUE
Sélectionnez la langue du dispositif parmi celles proposées.
CONFIGURATION DE LA DATE ET DE L'HEURE
- Date et heure: sélectionnez la date et l'heure du dispositif;
- Synchronisation automatique de l'heure: si le dispositif est connecté à Internet, la date et l'heure sont automatiquement synchronisées;
- Format 12heures: activez le format d’affichage horaire en basculant entre les modes AM et PM;
- Fuseau horaire: sélectionnez le fuseau horaire de la zone où le dispositif est installé;
- Heure d'été: activation de l'heure d'été/solaire;
- Serveur NTP: saisissez l'adresse du serveur pour l'acquisition automatique de l'heure.
RÉSEAU
Menu permettant d'activer la connexion WI-FI du dispositif, de sélectionner le réseau et de saisir le mot de passe de sécurité pour ce réseau.
AUTRES CONFIGURATIONS
- Ouverture automatique: activation automatique du relais d'alimentation à l'entrée d'un appel;
- Enregistrement automatique: démarrage de l'enregistrement automatique à l'entrée d'un appel;
- Nombre de postes externes associés: le paramètre indique le nombre de postes externes présents sur le système pour leur affichage par APP AVE VIDEO V44.
PARAMÈTRE DE L'INTERCOMMUNICATION PAR CLOUD
Menu d'activation du service Cloud pour la gestion de la réponse aux appels entrants depuis l'APP AVE VIDEO V44;
Ajouter un nouvel utilisateur:
- Affichage du code QR unique du système pour son association avec l'APP AVE VIDEO V44;
- Cloud Intercom Activation: paramètre pour l'activation de la communication vers le serveur distant du système; le paramètre doit être actif (situation par défaut) pour la gestion
de l'installation via l'APP AVE VIDEO V44;
- Cloud Intercom server address: adresse du serveur de télécommunication. Le paramètre ne doit pas être modifié.
Supprimez l'utilisateur APP: supprime un utilisateur associé au système.
Remarque: il ne vous est pas possible de supprimer l'utilisateur propriétaire de l'installation; pour le faire, veuillez restaurer le paramétrage d'usine du dispositif.
INFO
Informations sur le système.
-Mise à jour APP: permet de mettre à jour le dispositif à l'aide d'une carte SD (non fournie) insérée dans la fente prévue à cet effet sur le côté du dispositif.
PARAMÈTRES DU MOT DE PASSE
Dans ce menu, vous pouvez changer le mot de passe pour accéder aux paramètres de configuration avancée. Saisissez le mot de passe actuel pour l'accès au menu: dans la page-écran
qui s’affiche, saisissez l'ancien et le nouveau mot de passe tout en confirmant ce dernier. Le mot de passe par défaut est 222222.
PARAMÈTRES DE CONFIGURATION
Saisissez le mot de passe de sécurité pour accéder aux paramètres suivants:
- Paramètres numéro appartement: est le numéro d'appartement attribué au dispositif (numéro correspondant au bouton d'appel du poste externe)
- Réinitialisation dispositif: réinitialise ou restaure le paramétrage d'usine du dispositif.
7) ASSOCIATION AVE VIDÉO V44 APP
Le dispositif peut être associé à un téléphone portable pour répondre aux appels entrants provenant d'un téléphone mobile doté du système d'exploitation iOS ou Android.
Téléchargez l'application AVE VIDÉO V44 depuis l'APP STORE ou GOOGLE PLAY et enregistrez le nouvel utilisateur.
Pour associer le téléphone portable, il vous suffit d'accéder au menu «Paramètres» puis dans le menu «Paramètres Interphone Cloud». Appuyez sur le bouton «Ajouter un nouvel utilisateur» et
encadrez le code QR avec l'appareil photo de votre portable.
8) CARACTÉRISTIQUES TECHNIQUES
Tension de travail 24Vcc
Tension maximale de travail 32Vcc
Absorption de fonctionnement 300mA max @ 30Vcc
Absorption en veille 150mA max @ 30Vcc
Dimensions (L x h x P) 179 x 179 x 25mm
Dimensions LCD 7 pouces 16/9
Résolution 1024 x 600 pixel
Classe environnementale selon EN 62820-1-1 CLASSE III
Température de fonctionnement De -10°C à +55°C
Altitude max. 2000m au-dessus du niveau de la mer
Nombre max de dispositifs pouvant être installés par appartement 4 (si plusieurs dispositifs sont installés, prévoir l'alimentation locale VI2F-ALI600MA pour chacun d'entre eux)
Nombre max de dispositifs pouvant être installés 128
Montage Sur les boîtes à 3modules, en utilisant le support fourni
Degré de protection IP20 (IP40 à l’installation)
CARTE sd 2 à 32Go (non fournis)
VIS
BOÎTIER
ENCASTRÉ
CROCHETS D'ANCRAGE
PLAQUE DE SUPPORT
179 mm 25 mm
179 mm
RC
NC
M
S
1 2
ON
BUS
BUS
DB
DA
GND
RS485
VI2F-PIT7WF
+30V
GND
POWER
1,5 m
MISE A LA TERRE

ES
10
VI2F-PIT7WF
PUESTO INTERNO CON PANTALLA TÁCTIL 7" WI-FI GAMA 2 CABLES V44 EASY
1) GENERALES
El dispositivo VI2F-PIT7WF es un puesto interno audio/vídeo del sistema de videoportero 2 cables AVE V44 EASY.
Las funciones y las características son:
Audio/Vídeo/Botones:
• Pantalla táctil horizontal 7";
• Manos libres;
• Botones táctiles: apertura puertas, silenciado, visualización cámaras;
• Gestión remota a través de APL AVE VÍDEO V44;
Señales:
• Llamada perdida;
• Puerta abierta;
• Silenciado tono de llamada activado;
Funciones del videoportero:
• Respuesta a una llamada;
• Visualización cámaras analógicas por medio de la interfaz adecuada VI2F-CAM;
• Gestión timbre auxiliar fuera puerta
• Gestión n.3 pasos, dos en la estación exterior y uno opcional en relé auxiliar VI2F-RELAY;
• Intercomunicación entre aparatos del mismo apartamento o de otros
2) DECLARACIÓN DE CONFORMIDAD
El dispositivo VI2F-PIT7WF está conforme con las siguientes normativas:
• EN 62820-1-1:2016 Sistemas de intercomunicación de edificios - Parte 1-1: Requisitos de sistema - General grado2
• Directiva RoHS 2011/65/EU;
• Reglamento REACh (CE) N. 1907/2006;
• Directiva RED 2014/53/EU (solo donde sea aplicable): El texto completo de la declaración de conformidad UE está disponible en el siguiente sitio Internet: www.ave.it
3) INSTALACIÓN, COLOCACIÓN Y FIJACIÓN
Se recomienda instalar el dispositivo a una altura de 1,5m del suelo. Apriete los tornillos en dotación para fijar el estribo de soporte a la caja rectangular, previamente tapiada horizontalmente.
Una vez completado el cableado, alinee las ranuras en la parte posterior del monitor con los ganchos del soporte (1) y deslice el dispositivo hacia abajo ligeramente (2).
ATENCIÓN: el dispositivo está equipado con ficha Wi-Fi. Si en un sistema están presentes más de n.1 art. VI2F-PIT7WF, es necesario instalar un alimentador "local (art. VI2F-ALI600MA) para cada
dispositivo. Verifique las absorciones máximas de los dispositivos instalados para evitar absorciones elevadas en el bus que afectarían el funcionamiento correcto.
4) CONEXIONES
A continuación, se muestra el significado de los bornes de conexión y del dip-switch colocados en la parte trasera del dispositivo:
➀AUXILIARY POWER SUPPLY
Terminal 1 + 30 Vcc
Terminal 2 GND
➁2 Wire BUS
Terminal 1 BUS A
Terminal 2 BUS B
➂Timbre (cable proporcionado junto con el dispositivo)
Terminal 1 Entrada timbre
Terminal 2 GND
➃Interfaz para extensión RS485 (solo para uso interno)
Terminal 1 DB
Terminal 2 DA
Terminal 3 GND
➄DIP SWITCH
DIP 1 - MASTER/SLAVE ON = puesto interno MASTER OFF = puesto interno SLAVE
DIP 2 - IMPEDANCIA FINAL LÍNEA (activar si el puesto interno es el último del sector) ON = impedancia ON OFF = impedancia OFF
5) FUNCIONES VARIADAS
Respuesta a una llamada
Presione para responder/cerrar una llamada entrante.
Durante el monitoreo de la cámara del puesto externo, sin una llamada en
curso, la presión del botón habilita la comunicación.
Desbloqueo electrocerraduras
Ninguna función en modalidad Stand-by;
Durante una llamada entrante y/o una conversación, una breve presión
desbloquea el relé en potencia (Desbloqueo 1) del puesto externo, una
presión prolongada (3 seg) activa el relé a contacto limpio (Desbloqueo 2).
179 mm 25 mm
179 mm
RC
NC
M
S
1 2
ON
BUS
BUS
DB
DA
GND
RS485
VI2F-PIT7WF
+30V
GND
POWER
179 mm
25 mm
179 mm
RC
NC
M
S
1 2
ON
BUS
BUS
DB
DA
GND
RS485
VI2F-PIT7WF
+30V
GND
POWER
179 mm
25 mm
179 mm
RC
NC
M
S
1 2
ON
BUS
BUS
DB
DA
GND
RS485
VI2F-PIT7WF
+30V
GND
POWER
tarjeta
SD
Pantalla táctil
Altavoz
Micrófono

1110
6) FUNCIONES DE BASE Y CONFIGURACIÓN
6.1) PRIMER ENCENDIDO
El dispositivo puede ser alimentado directamente desde el BUS 2 cables o por medio de un alimentador estabilizado 30 Vcc (VI2F-ALI600MA).
En el primer encendido, o después de un restablecimiento de los parámetros de fábrica, en el LCD se visualizará la página de selección del idioma: después de haber realizado la elección se
visualizará la página de inicio del dispositivo.
Nota: si no se selecciona ningún idioma, después de 1 minuto se seleccionará en automático el idioma inglés.
6.2) RESPUESTA A UNA LLAMADA
Con la llegada de una llamada desde un puesto externo, el monitor interno comenzará a sonar y se visualizará la pantalla antes mostrada:
Será posible:
- Responder a la llamada en llegada presionando el botón
- Desbloquear las electrocerraduras durante la conversación:
Desbloqueo 1 (relé de potencia): presión del botón
Desbloqueo 2 (relé de contacto limpio): presión del botón
Desbloqueo 3 (relé auxiliar de contacto limpio): presión de 3 segundos del botón
Después de 5 segundos desde el desbloqueo de una electrocerradura, el dispositivo vuelve automáticamente a la página principal.
- Cerrar/rechazar una llamada presionando el botón
- Modificar el nivel del volumen de la llamada por medio de los botones y
- Durante la llamada, presionando el botón es posible sacar una fotografía desde la cámara del puesto externo
- Durante la llamada, presionando el botón es posible grabar un video; para esta operación, es necesario insertar una tarjeta SD en el dispositivo.
6.3) HOME PAGE
En la página de inicio del dispositivo (como se muestra a un lado) se representan algunos menús rápidos a los que se puede acceder
presionando sobre ellos.
En el botón "Registro" de la página principal, se muestra un pequeño número que identifica cuántas llamadas están presentes en el
registro llamadas.
6.3.1) REGISTRO
El menú Registro se utiliza para guardar la información de las llamadas que han llegado al dispositivo.
Presionando en cada llamada se puede visualizar la fotografía que se ha tomado en los primeros 3 segundos de la misma.
Presionando en la inscripción "Cancelar todo" es posible limpiar el registro de las llamadas.
El registro llamadas puede memorizar un número máximo de 200 llamadas.
6.3.2) FONDO
En el menú "Fondo" es posible seleccionar el fondo de la home page del puesto interno de videoportero.
Entrar en el menú, seleccionar el fondo deseado entre los visualizados y presionar "Fin" para confirmar la operación.
Presionando el botón "Cancelar" la operación se terminará y el dispositivo volverá automáticamente a la home page.
Presionando el botón "Reset", el dispositivo visualizará la imagen por defecto.
6.3.3) LLAMADA
El menú "Llamada" se utiliza para realizar llamadas hacia otros monitores del mismo apartamento o de apartamentos diferentes o hacia el puesto de la conserjería.
Llamada intercomunicadas:introduzca el número del apartamento para llamar (1-128) y presionar el icono
Llamada a la portería: ingrese el número 200 (el número asignado a la portería no es modificable) y presione el botón
Llamada de interfono: presione el botón "Llamada interna" para iniciar una llamada a todas las estaciones internas del apartamento.
todos los puestos internos comenzarán a sonar.
6.3.4) MENSAJE VOCAL
La función permite registrar un breve mensaje en el puesto interno que podrá ser escuchado nuevamente en un segundo momento.
En la home page del dispositivo aparecerá un número para visualizar cuantos mensajes están presentes en el interior del menú.
Grabación de un mensaje: presione el botón de grabación en la parte izquierda de la pantalla para iniciar la grabación y luego registre su mensaje.
Presionar nuevamente el botón para terminar la grabación. El tiempo máximo de grabación es de 30 segundos y el tiempo restante para la grabación de un mensaje se muestra en la
parte inferior de la pantalla.
Reproducir un mensaje nuevamente: presione el botón "Play" (triángulo verde) junto al mensaje que desea volver a escuchar para activar la reproducción.
Borrado de la lista de mensajes: al presionar el botón "Borrar todo", se vaciará el registro.
Nota: el número máximo de mensajes que se pueden grabar es 30.
6.3.5) MONITOR
Presionando en el botón "Monitor" es posible activar la interfaz hacia los puestos externos
Monitoreo y desbloqueo de cerraduras eléctricas: desplazarse entre las diversas estaciones externas (si se han instalado más de una en el sistema) para ver sus cámaras. Durante la
monitorización, es posible desbloquear las cerraduras eléctricas presionando los botones de desbloqueo correspondientes.
Vigilancia, captura de fotos/videos: durante la operación de vigilancia de las cámaras, es posible capturar:
una imagen presionando el botón
un vídeo presionando el botón
Llamada: durante la operación de vigilancia de las cámaras, es posible activar una comunicación hacia la estación externa al presionar el botón
Notas:
Las fotos y los vídeos adquiridos se guardan en el registro de las llamadas.
CuandolaaplicaciónAVEVIDEOV44estáasociadaymonitoreade formaremotalaestaciónexterna,elmonitorprincipal"MASTER"entra enelestadodeinterfonoenlanubeynosepuedeutilizar.
Los monitores "SLAVE", a su vez, entrarán en el estado de espera y no podrán monitorear la estación externa. El funcionamiento normal se restaurará cuando la comunicación con la
aplicación AVE VIDEO V44 se detenga.
6.3.6) CONFIGURACIONES
Entrando en el menú "Configuraciones" es posible acceder a todos los parámetros de configuración del sistema. A continuación, se muestran los significados de las diferentes entradas
presentes en el menú:
AJUSTES PANTALLA
- Luminosidad: luminosidad de la pantalla;
- Retraso protector de pantalla: tiempo después del cual el bloqueo de la pantalla está activado;
- Duración protector de pantalla: el tiempo después del cual la pantalla se apaga.
TONO DE ALERTA
- Volumen del timbre: volumen del timbre al recibir una llamada;
- Volumen teclas: volumen del sonido de presión de los botones;
- Tono teclas: sonido emitido con la presión de un botón;
- Timbre: sonido reproducido al llegar una llamada.

12
NO MOLESTAR
Activación de la función DND que inhibe el tono de llamada del dispositivo: presionar el botón para activar/desactivar la función. La presión del botón por 5 segundos propaga el estado
de DND activo/apagado en todos los puestos internos del apartamento.
AJUSTES IDIOMA
Seleccionar el idioma del dispositivo entre los propuestos.
CONFIGURACIÓN FECHA Y HORA
- Fecha y Hora: seleccionar la fecha y la hora del dispositivo;
- Sincronización automática de la hora: si el dispositivo está conectado a Internet, la fecha y la hora se sincronizan automáticamente;
- Formato de 12 horas: activación del formato de hora con las modalidades AM y PM;
- Zona horaria: seleccione la zona horaria en la que está instalado el dispositivo;
- Horario de verano: activación del horario de verano/horario estándar;
- Server NTP: introducir la dirección del servidor para la adquisición automática de la hora.
RED
Menú para la activación de la conexión WI-FI del dispositivo de la sección de la red y para la introducción de la contraseña de seguridad de esta red.
OTRAS CONFIGURACIONES
- Apertura automática: activación del relé en potencia a la llegada de una llamada;
- Grabación automática: comienza la grabación automática al recibir una llamada;
- Número de puestos externos asociados: el parámetro indica el número de estaciones externas presentes en el sistema para su visualización desde la aplicación AVE VIDEO V44.
AJUSTES CLOUD INTERCOM
Menú para la activación del servicio en la nube para la gestión de la respuesta a las llamadas entrantes desde la aplicación AVE VIDEO V44;
Agregar nuevo usuario:
- Visualización del código QR único del sistema para su asociación con la aplicación AVE VIDEO V44;
- Activación de Cloud Intercom: parámetro para activar la comunicación con el servidor de remotización del sistema; el parámetro debe estar activo (situación por defecto) para la
gestión del sistema a través de la aplicación AVE VIDEO V44;
- Dirección del servidor Cloud Intercom: dirección del servidor de remotización. El parámetro no debe ser modificado.
Borrar usuario aplicación: borrado de un usuario asociado al sistema.
Nota: no es posible borrar el usuario propietario del sistema, si se desea realizar esta operación es necesario restablecer los parámetros de fábrica del dispositivo.
INFO
Información de sistema.
- Actualización de la aplicación: permite, mediante una tarjeta SD (no suministrada con el dispositivo) insertada en la ranura correspondiente en el lateral del dispositivo, la
actualización del mismo.
AJUSTES CONTRASEÑA
En este menú es posible modificar la contraseña de acceso a los parámetros avanzados de configuración. Introducir la contraseña actual de acceso al menú: en la máscara que se
visualiza posteriormente introducir la vieja contraseña, la nueva contraseña y confirmar esta última. La contraseña por defecto es 222222.
AJUSTES DE CONFIGURACIÓN
Introducir la contraseña de seguridad para acceder a los siguientes parámetros:
- Configuración del número de apartamento: es el número de apartamento asignado al dispositivo (corresponde al botón de llamada en la estación externa)
- Reset dispositivo: restablecimiento de los parámetros de fábrica del dispositivo.
7) ASOCIACIÓN APLICACIÓN AVE VÍDEO V44
El dispositivo puede ser asociado a un móvil para la respuesta a la llamada en llegada desde un móvil con sistema operativo iOS o Android.
Descargue la aplicación AVE VIDEO V44 desde la aplicaciones STORE o desde GOOGLE PLAY y registre el nuevo usuario.
Para asociar el teléfono móvil, simplemente ingrese al menú de configuración y luego en el menú "Configuración de Cloud Intercom". Presione el botón "Agregar nuevo usuario" y encuadre el código
QR con la cámara del móvil.
8) CARACTERÍSTICAS TÉCNICAS
Tensión de trabajo 24Vcc
Tensión máxima de trabajo 32Vcc
Absorción en ejercicio 300 mA máx @ 30 Vcc
Absorción en stand-by 150 mA máx @ 30 Vcc
Dimensiones (L x H x P) 179 x 179 x 25 mm
Dimensiones LCD 7 pulgadas 16/9
Resolución 1024 x 600 pixeles
Clase ambiental según EN 62820-1-1 CLASE III
Temperatura de funcionamiento De -10°C a +55°C
Altitud máx. 2000m s.n.m.
N. máx de dispositivos instalables por apartamento 4 (en caso de que se instale más de un dispositivo, proporcione, para cada uno de ellos, el alimentador local VI2F-ALI600MA)
N. máx de dispositivos instalables 128
Montaje En cajas 3 módulos, por medio del soporte proporcionado
Grado de protección IP20 (IP40 cuando instalado)
SD card 2 - 32 GB (no proporcionada)
TORNILLOS
CAJA
TAPIADA
GANCHOS DE ANCLAJE
PLACA DE SOPORTE
179 mm 25 mm
179 mm
RC
NC
M
S
1 2
ON
BUS
BUS
DB
DA
GND
RS485
VI2F-PIT7WF
+30V
GND
POWER
1,5 m
TIERRA

DE
1312
VI2F-PIT7WF
INNENSTATION MIT TOUCHSCREEN 7" WLAN GAMMA 2-DRAHT V44 EASY
1) ALLGEMEINES
Das Gerät VI2F-PIT7WF ist eine Audio/Video-Innenstation der AVE V44 EASY 2-Draht Video-Türsprechanlage.
Die Funktionen und Merkmale im Überblick:
Audio/Video/Tasten:
• 7" horizontaler Touchscreen;
• Freisprecheinrichtung;
• Berührungstasten: Toröffnung, Stummschaltung, Videokameraanzeige;
• Fernverwaltung über die AVE VIDEO V44 APP;
Signalisierungen:
• Verpasster Anruf;
• Tür offen;
• Klingeltonstummschaltung aktiv;
Video-Türsprechanlagen-Funktionen:
• Beantworten eines Anrufs;
• Visualisierung von analogen Videokameras über eine spezielle VI2F-CAM-Schnittstelle;
• Verwaltung der Zusatz-Türklingel
• Verwaltung von 3 Toren, zwei an der Außenstation und ein optionales am Zusatzrelais VI2F-RELAY.
• Interkommunikation zwischen Geräten in derselben oder anderen Wohnungen
2) KONFORMITÄTSERKLÄRUNG
Das Gerät VI2F-PIT7WF erfüllt die Anforderungen folgender Normen:
• EN 62820-1-1:2016 Gebäude-Sprechanlagen – Teil 1-1: Systemanforderungen - Allgemeine Klasse2
• RoHS-Richtlinie 2011/65/EU.
• REACH-Verordnung (EG) Nr. 1907/2006.
• RED-Richtlinie 2014/53/EU (nur wenn anwendbar): Der vollständige Text der EU-Konformitätserklärung ist abrufbar unter: www.ave.it
3) INSTALLATION, POSITIONIERUNG UND BEFESTIGUNG
Es wird empfohlen, das Gerät in einer Höhe von 1,5 m über dem Boden zu installieren. Schrauben Sie die mitgelieferten Schrauben fest, um die Halterung auf dem zuvor horizontal eingemauerten
rechteckigen Gehäuse zu befestigen.
Richten Sie nach der Verkabelung die Schlitze auf der Rückseite des Monitors an den Haken der Halterung aus (1) und schieben Sie das Gerät leicht nach unten (2).
ACHTUNG:Das Gerät istmiteinerWLAN-Karte ausgestattet.Wennmehrals 1Art.VI2F-PIT7WFin einem System vorhandenist,muss für jedes Gerätein"lokales" Netzteil (ArtikelVI2F-ALI600MA)installiert
werden. Überprüfen Sie die maximalen Absorptionswerte der installierten Geräte, um hohe Absorptionswerte auf dem Bus zu vermeiden, die den korrekten Betrieb beeinträchtigen würden.
4) ANSCHLÜSSE
Die Bedeutung der Anschlussklemmen und des Dip-Schalters auf der Rückseite des Geräts ist nachfolgend dargestellt:
➀HILFSSTROMVERSORGUNG
Terminal 1 + 30 VDC
Terminal 2 GND
➁2 Draht-BUS
Terminal 1 BUS A
Terminal 2 BUS B
➂Türklingel (Kabel im Lieferumfang des Geräts)
Terminal 1 Klingeleingang
Terminal 2 GND
➃Schnittstelle für RS485-Erweiterung (nur interner Gebrauch)
Terminal 1 DB
Terminal 2 DA
Terminal 3 GND
➄DIP-SCHALTER
DIP 1 - MASTER/SLAVE ON = interne Station MASTER OFF= interne Station SLAVE
DIP 2 - IMPEDANZ ENDLEITUNG (aktivieren, wenn die Innenstation die letzte in der Verzweigung ist)
ON = Impedanz ON OFF= Impedanz OFF
5) VERSCHIEDENE FUNKTIONEN
Beantworten eines Anrufs
Drücken, um einen eingehenden Anruf anzunehmen / zu beenden.
Wenn Sie die Videokamera der Außenstation überwachen, ohne dass ein Anruf
geführt wird, können Sie durch Drücken der Taste die Kommunikation aktivieren.
Entsperrung Elektroschlösser
Keine Funktion im Standby-Modus;
Während eines eingehenden Anrufs und/oder Gesprächs entsperrt ein kurzer
Druck das Stromrelais (Entsperrung 1) der Außenstation, ein längerer Druck
(3 Sekunden) aktiviert das potentialfreie Kontaktrelais (Entsperrung 2).
179 mm 25 mm
179 mm
RC
NC
M
S
1 2
ON
BUS
BUS
DB
DA
GND
RS485
VI2F-PIT7WF
+30V
GND
POWER
179 mm
25 mm
179 mm
RC
NC
M
S
1 2
ON
BUS
BUS
DB
DA
GND
RS485
VI2F-PIT7WF
+30V
GND
POWER
179 mm
25 mm
179 mm
RC
NC
M
S
1 2
ON
BUS
BUS
DB
DA
GND
RS485
VI2F-PIT7WF
+30V
GND
POWER
SD-Karte
Touchscreen
Sprecher
Mikrofon

14
6) GRUNDFUNKTIONEN UND KONFIGURATION
6.1) ERSTE INBETRIEBNAHME
Das Gerät kann direkt über den 2-Draht-BUS oder über ein stabilisiertes 30-VDC-Netzteil (VI2F-ALI600MA) versorgt werden.
Beim ersten Einschalten oder nach einem Zurücksetzen auf Werkeinstellungen erscheint auf der LCD-Anzeige die Seite zur Sprachauswahl: Nach der Auswahl wird die Startseite des Geräts
angezeigt.
Hinweis: Wenn keine Sprache ausgewählt ist, wird nach 1 Minute automatisch Englisch ausgewählt.
6.2) BEANTWORTEN EINES ANRUFS
Wenn ein Anruf von einer externen Station eingeht, beginnt der interne Monitor zu klingeln und der unten abgebildete Bildschirm wird angezeigt:
Sie haben folgende Möglichkeiten:
- Beantworten des eingehenden Anrufs durch Drücken der Taste
- Entsperren der Elektroschlösser während des Gesprächs:
Entsperrung 1 (Leistungsrelais): Taste drücken
Entsperrung 2 (Relais mit potentialfreiem Kontakt): Taste drücken
Entsperrung 3 (Hilfsrelais mit potentialfreiem Kontakt): Taste 3 Sek. lang drücken
Fünf Sekunden nach dem Entsperren eines Elektroschlosses kehrt das Gerät automatisch auf die Startseite zurück.
- Beenden/Ablehnen eines Anrufs durch Drücken der Taste
- Ändern der Anruflautstärke mit den Tasten und
- Während des Gesprächs kann durch Drücken der Taste ein Bild von der Videokamera der Außenstation aufgenommen werden
- Während des Anrufs kann durch Drücken der Taste ein Video aufgenommen werden; dazu muss eine SD-Karte in das Gerät eingelegt sein.
6.3) STARTSEITE
Auf der Startseite des Geräts (siehe nebenstehende Abbildung) werden eine Reihe von Schnellmenüs angezeigt, die durch Drücken der
entsprechenden Schaltfläche aufgerufen werden können.
Auf der Schaltfläche "Verzeichnis" auf der Startseite wird eine kleine Zahl angezeigt, die angibt, wie viele Anrufe sich in der Anrufliste
befinden.
6.3.1) VERZEICHNIS
Das Menü Verzeichnis wird verwendet, um die Informationen über Anrufe zu speichern, die auf dem Gerät eingegangen sind.
Wenn Sie auf jeden einzelnen Anruf drücken, wird das in den ersten 3 Sekunden des Anrufs aufgenommene Foto angezeigt.
Durch Drücken der Taste "Alle löschen" kann das Anrufverzeichnis gelöscht werden.
In der Anrufliste können maximal 200 Anrufe gespeichert werden.
6.3.2) HINTERGRUND
Im Menü "Hintergrund" können Sie das Hintergrundbild für die Startseite der internen Video-Türstation auswählen.
Rufen Sie das Menü auf, wählen Sie den gewünschten Hintergrund aus den angezeigten aus und bestätigen Sie den Vorgang mit "Beenden".
Durch Drücken der Schaltfläche "Abbrechen" wird der Vorgang beendet und das Gerät kehrt automatisch zur Startseite zurück.
Wenn Sie die Taste "Reset" drücken, wird das Gerät das Standardbild anzeigen.
6.3.3) ANRUF
Über das Menü "Anrufen" können Sie andere Monitore in derselben oder einer anderen Wohnung oder den Portier anrufen.
Intercom-Anruf:Geben Sie die Nummer der anzurufenden Wohnung ein (1-128) und drücken Sie das Icon
Anruf an den Portier: Geben Sie die Nummer 200 ein (die dem Portier zugewiesene Nummer kann nicht geändert werden) und drücken Sie die Taste
Interner Anruf: Drücken Sie die Taste "Interner Anruf", um einen Anruf an alle internen Stationen in der Wohnung zu tätigen;
alle Innenstationen beginnen zu klingeln.
6.3.4) SPRACHNACHRICHT
Mit dieser Funktion können Sie eine kurze Nachricht auf der Innenstation aufnehmen, die zu einem späteren Zeitpunkt abgespielt werden kann.
Auf der Startseite des Geräts wird eine Zahl angezeigt, die angibt, wie viele Nachrichten im Menü vorhanden sind.
Nachrichten aufzeichnen: Drücken Sie die Aufnahmetaste auf der linken Seite des Bildschirms, um die Aufnahme zu starten, und nehmen Sie dann Ihre Nachricht auf.
Drücken Sie die Taste erneut, um die Aufnahme zu beenden. Die maximale Aufnahmezeit beträgt 30 Sekunden, und die verbleibende Zeit für die Aufnahme einer Nachricht wird
am unteren Rand des Bildschirms angezeigt.
Wiedergabe einer Nachricht: Drücken Sie die "Play"-Taste (grünes Dreieck) bei der Nachricht, die wiedergegeben werden soll, um die Wiedergabe zu aktivieren.
Nachrichtenliste löschen: Durch Drücken der Schaltfläche "Alle löschen" wird das Verzeichnis geleert.
Hinweis: Es können maximal 30 Nachrichten aufgezeichnet werden.
6.3.5) MONITOR
Durch Drücken der Taste "Monitor" wird die Schnittstelle zu externen Stationen aktiviert
Überwachung und Entsperrung der Elektroschlösser: Bewegen Sie sich zwischen den verschiedenen externen Stationen (falls mehr als eine im System installiert ist), um deren
Videokameras zu sehen. Während der Überwachung ist es möglich, das Elektroschloss durch Drücken der entsprechenden Entsperrungstasten zu entriegeln.
Überwachung, Foto-/Videoaufnahme: Während des Überwachungsbetriebs der Videokamera ist es möglich, Aufnahmen zu machen:
ein Bild durch Drücken der Taste
ein Video durch Drücken der Taste
Anruf: während der Videokameraüberwachung ist es möglich, eine Kommunikation mit der Außenstation zu aktivieren, durch Drücken der Taste
Anmerkungen:
Aufgenommene Fotos und Videos werden in der Anrufliste gespeichert.
Wenn die zugehörige AVE VIDEO V44 APP die externe Station fernüberwacht, wechselt der "MASTER"-Hauptmonitor in den Cloud Intercom-Status und kann nicht verwendet werden.
Die "SLAVE"-Monitore gehen ihrerseits in den Standby-Zustand über und können die externe Station nicht überwachen.Der normale Betrieb wird wiederhergestellt, wenn die Kommunikation
zur APP AVE VIDEO V44 beendet wird.
6.3.6) EINSTELLUNGEN
Über das Menü "Einstellungen" haben Sie Zugriff auf alle Konfigurationsparameter des Systems. Nachstehend finden Sie die Bedeutung der einzelnen Menüpunkte:
DISPLAY-EINSTELLUNGEN
- Helligkeit: Bildschirmhelligkeit;
- Bildschirmschoner-Verzögerung: Zeit, nach der die Bildschirmsperre aktiviert wird;
- Dauer Bildschirmschoner: Zeit, nach der der Bildschirm ausgeschaltet wird.
TÖNE
- Klingeltonlautstärke: Klingeltonlautstärke, wenn ein Anruf eingeht;
- Tastenlautstärke: Tonlautstärke beim Drücken einer Taste;
- Tastenton: Ton, der beim Drücken einer Taste ertönt;
- Klingelton: Ton, der bei eingehenden Anrufen ertönt.

1514
NICHT STÖREN
AktivierungderDND-Funktion,diedenKlingeltondesGerätsunterdrückt:DrückenSiedieTaste,umdieFunktionzuaktivieren/deaktivieren.WennSiedieTaste5Sekundenlangdrücken,wirdder
DND-Status an alle Innenstationen in der Wohnung übertragen.
SPRACHEINSTELLUNG
Wählen Sie die Sprache des Geräts aus den vorgeschlagenen Sprachen aus.
KONFIGURATION VON DATUM UND UHRZEIT
- Datum und Uhrzeit: Wählen Sie das Datum und die Uhrzeit des Geräts aus;
- Automatische Synchronisierung der Uhrzeit: Wenn das Gerät mit dem Internet verbunden ist, werden Datum und Uhrzeit automatisch synchronisiert;
- 12-Stunden-Format: Aktivierung des Zeitformats mit AM- und PM-Modus;
- Zeitzone: Wählen Sie die Zeitzone des Gebiets aus, in dem das Gerät installiert ist;
- Sommerzeit: Aktivierung der Sommer-/Winterzeit;
- NTP-Server: Geben Sie die Serveradresse für die automatische Zeiterfassung ein.
NETZWERK
Menü zur Aktivierung der WLAN-Verbindung des Geräts, Auswahl des Netzes und Eingabe des Sicherheitspassworts für dieses Netzwerk.
ANDERE KONFIGURATIONEN
- Automatische Öffnung: automatische Aktivierung des Leistungsrelais bei Eingang eines Anrufs;
- Automatische Aufzeichnung: Start der automatischen Aufzeichnung beim Eingang eines Anrufs;
- Anzahl der zugeordneten Außenstationen: Der Parameter gibt die Anzahl der im System vorhandenen Außenstationen für deren Anzeige durch die APP AVE VIDEO V44 an.
CLOUD-INTERCOM-EINSTELLUNG
Menü zur Aktivierung des Cloud-Dienstes für die Verwaltung der Rufannahme von der APP AVE VIDEO V44;
Neuen Benutzer hinzufügen:
- Anzeige des eindeutigen QR-Codes des Systems für seine Verbindung mit der AVE VIDEO V44 APP;
- Aktivierung Cloud Intercom: Parameter zur Aktivierung der Kommunikation mit dem Remote Server des Systems; der Parameter muss aktiv sein (Standardeinstellung) für die
Verwaltung des Systems über die AVE VIDEO V44 APP;
- Adresse des Cloud Intercom-Servers: Adresse des Fernsteuerungsservers. Der Parameter darf nicht geändert werden.
APP-Benutzer löschen: löscht einen mit dem System verbundenen Benutzer.
Hinweis: Es ist nicht möglich, den Benutzer, der Eigentümer der Anlage ist, zu löschen; wenn Sie dies tun möchten, müssen Sie das Gerät auf die Werkseinstellungenr zurücksetzen.
INFO
Systeminformationen.
- APP Aktualisierung: ermöglicht über eine SD-Karte (nicht im Lieferumfang enthalten), die in den Slot an der Seite des Geräts eingesetzt wird, die Aktualisierung des Geräts.
PASSWORT-EINSTELLUNGEN
In diesem Menü können Sie das Passwort für den Zugriff auf die erweiterten Konfigurationsparameter ändern. Geben Sie das aktuelle Passwort für den Menüzugang ein: Geben Sie in der
folgenden Maske das alte und das neue Passwort ein und bestätigen Sie letzteres. Das Standardpasswort lautet 222222.
KONFIGURATIONSEINSTELLUNGEN
Geben Sie das Sicherheitspasswort ein, um auf die folgenden Parameter zuzugreifen:
- Einstellung Apartmentnummer: ist die dem Gerät zugewiesene Wohnungsnummer (Nummer, die der Anruftaste an der Außenstation entspricht)
- Geräte-Reset: setzt das Gerät auf die Werkseinstellungen zurück.
7) VERKNÜPFUNG DER AVE-VIDEO-APP V44
Das Gerät kann mit einem Mobiltelefon verbunden werden, um eingehende Anrufe von einem iOS- oder Android-Mobiltelefon entgegenzunehmen.
Laden Sie die AVE VIDEO V44 App aus dem APP STORE oder von GOOGLE PLAY herunter und registrieren Sie den neuen Benutzer.
Um das Mobiltelefon zu verknüpfen, gehen Sie einfach in das Einstellungsmenü und dann in das Menü "Einstellung Cloud Intercom". Drücken Sie die Taste "Neuen Benutzer hinzufügen" und
rahmen Sie den QR-Code mit der Kamera Ihres Telefons ein.
8) TECHNISCHE MERKMALE
Betriebsspannung 24Vcc
Maximale Betriebsspannung 32Vcc
Betriebsstromaufnahme 300 mA max @ 30 VDC
Stromaufnahme im Standby-Betrieb 150 mA max @ 30 VDC
Abmessungen (B x H x T) 179 x 179 x 25 mm
LCD-Abmessungen 7 Zoll 16/9
Auflösung 1024 x 600 Pixel
Umweltklasse nach EN 62820-1-1 KLASSE III
Betriebstemperatur Von -10 °C bis +55 °C
Max. Höhe 2000m s.l.m.
Max. Anzahl von Geräten, die pro Wohnung installiert werden können 4 (wenn mehr als ein Gerät installiert ist, ist für jedes Gerät das lokale Netzgerät VI2F-ALI600MA vorzusehen)
Max. Anzahl der installierbaren Geräte 128
Montage Auf 3-Modul-Dosen, unter Verwendung der mitgelieferten Halterung
Schutzart IP20 (IP40 wenn installiert)
SD Karte 2 - 32 GB (nicht mitgeliefert)
SCHRAUBEN
EINGEMAUERTES
GEHÄUSE
VERANKERUNGSHAKEN
HALTERUNGSPLATTE
179 mm 25 mm
179 mm
RC
NC
M
S
1 2
ON
BUS
BUS
DB
DA
GND
RS485
VI2F-PIT7WF
+30V
GND
POWER
1,5 m
ERDE

AR
16
VI2F-PIT7WF
V44 EASY 2 WI-FI “7
(1
AVE V44 EASY 2
/ VI2F-PIT7WF
//
;“7 •
;
•
;
, , •
;APP AVE VIDEO V44 •
; •
; •
;
•
; •
;VI2F-CAM
•
•
;VI2F-RELAY
3 •
•
(2
VI2F-PIT7WF
2 -
-
EN 62820-1-12016 •
2011/65/EU •
1907/2006 (
) •
www.ave.it
( ) 2014/53/EU •
(3
15
(2) (1)
(VI2F-ALI600MA ) "
"
VI2F-PIT7WF 1
Wi-Fi
BUS
(4
dip-
➀
30 + 1
GND 2
2 ➁
A 1
B 2
( ) ➂
1
GND 2
(
) RS485 ➃
DB 1
DA 2
GND 3
DIP ➄
=OFF = ON /
- DIP 1
=OFF = ON (
) - DIP 2
(5
/
"standby"
/
(1 )
(2 )
( 3 )
179 mm 25 mm
179 mm
RC
NC
M
S
1 2
ON
BUS
BUS
DB
DA
GND
RS485
VI2F-PIT7WF
+30V
GND
POWER
179 mm
25 mm
179 mm
RC
NC
M
S
1 2
ON
BUS
BUS
DB
DA
GND
RS485
VI2F-PIT7WF
+30V
GND
POWER
179 mm
25 mm
179 mm
RC
NC
M
S
1 2
ON
BUS
BUS
DB
DA
GND
RS485
VI2F-PIT7WF
+30V
GND
POWER
SD

1716
(6
(16
(VI2F-ALI600MA) 30 BUS 2
LCD
1
(26
-
-
(
) 1
(
) 2
3 (
) 3
5
/ -
-
-
SD
-
(36
( )
""
(136
3
“ ”
200
(236
“”
""
“”
,“ ”
(336
""
(128-1)
( ) 200
" "
(436
30
(
) "Play"
" "
30
(635
“”
(
)
/
Cloud
"MASTER" AVE VIDEO V44
APP AVE VIDEO V44 (Standby)
"() SLAVE"
(636
""
-
-
-
-
-
-
-

18
/ " " DND
5 /
" " DND
-
-
12 -
-
/ -
NTP -
WI-FI
-
-
AVE VIDEO V44
-
AVE VIDEO V44
AVE VIDEO V44 QR -
(
)
Cloud Intercom -
AVE VIDEO V44
Cloud Intercom -
(
) SD -
222222
( ) -
-
AVE VIDEO V44 (7
Android iOS
GOOGLE PLAY AVE VIDEO V44
(QR-code)
" " "Cloud Intercom "
(8
24Vcc
32Vcc
30 @
300
30 @
150
25 × 179 × 179 ( × × )
9/16 7 LCD
600 × 1024
EN 62820-1-1
°55+ °10-
2000
( VI2F-ALI600MA
) 4
128
3
(
IP40) IP20
(
) GB 32 – 2 SD
179 mm 25 mm
179 mm
RC
NC
M
S
1 2
ON
BUS
BUS
DB
DA
GND
RS485
VI2F-PIT7WF
+30V
GND
POWER
15

1918
MANUALE COMPLETO SISTEMA 2 FILI
COMPLETE MANUAL FOR 2-WIRE SYSTEM
MANUEL COMPLET SYSTÈME 2 FILS
MANUAL DOTADO DE SISTEMA DE 2 HILOS
VOLLSTÄNDIGES HANDBUCH
2-DRAHT-SYSTEM
VI2F-PIT7WF

NOTES
Pour la durée et les conditions de garantie de chacun des produits, veuillez consulter le site www.ave.it et le catalogue commercial en vigueur. Les produits doivent commercialisés dans l’emballage d’origine. Dans le
cas contraire, le revendeur et/ou l’installateur sont obligés d’appliquer et de transmettre à l’utilisateur les instructions qui accompagnent le produit et/ou qui sont publiées sur www.ave.it et sur le catalogue commercial
en vigueur. Les produits AVE sont des produits d’installation. Ils doivent être installés par des personnes qualifiées conformément aux normes en vigueur et aux usages, en respectant les instructions de conservation,
d’utilisation et d’installation d’AVE S.p.A. De plus, il faut que soient respectées les conditions générales de vente, les notes, les consignes générales, les consignes sur la garantie, les réclamations et les consignes
techniques pour l’installateur indiquées sur le site www.ave.it et sur le catalogue commercial en vigueur.
MISES EN GARDE: Les produits doivent être manipulés avec soin et stockés dans leur emballage d’origine dans un lieu sec, à l’abri des agents atmosphériques et à une température adaptée au stockage, conformément
aux indications fournies dans le manuel du produit. Si les produits sont dépourvus de leur emballage d’origine, il appartient au revendeur et/ou à l’installateur d’appliquer et de transmettre à l’utilisateur les instructions
d’utilisation qui accompagnent le produit. Il est déconseillé de stocker les produits pendant plus de 5 ans. Après l’ouverture de l’emballage, il convient de vérifier l’intégrité du produit. L’installation doit être effectuée par
du personnel qualifié, conformément aux dispositions de la réglementation en vigueur pour les systèmes électriques.
AVANT D’INSTALLER SYSTÈMES ET APPAREILLAGES D’AUTOMATISATION, IL EST FORTEMENT RECOMMANDÉ D’ASSISTER À UN COURS DE FORMATION ET DE LIRE
ATTENTIVEMENT LES INSTRUCTIONS.
NOTE
Para obtener información sobre la duración y las condiciones de garantía de cada uno de los productos, consulte el sitio www.ave.it y el catálogo comercial vigente. Los productos deben ser comercializados en su
embalaje original; de lo contrario, el vendedor y/o instalador deberá aplicar y transmitir al usuario las instrucciones que acompañan al producto y/o que se encuentran publicadas en el sitio www.ave.it y en el catálogo
comercial vigente. Los productos AVE son artículos que requieren instalación. La misma debe ser efectuada por personal cualificado, conforme a las normativas vigentes y a los usos, respetando las instrucciones de
conservación, uso e instalación establecidas por AVE S.p.A. Asimismo, es necesario respetar las condiciones generales de venta, notas, advertencias generales o de garantía, reclamos y advertencias técnicas para el
instalador detalladas en el sitio www.ave.it y en el catálogo comercial vigente.
ADVERTENCIAS: Los productos deberán manejarse con atención y almacenarse en su embalaje original en un lugar seco, resguardado de los agentes atmosféricos y a una temperatura adecuada para el
almacenamiento, tal como se indica en el manual del producto. En caso de que los productos no estén en su embalaje original, se exigirá al revendedor o al instalador que apliquen y transmitan al usuario las
instrucciones de uso que acompañan al producto. Se recomienda no almacenar productos por más de 5 años. Tras abrir el embalaje, asegurarse de que el producto esté intacto. La instalación deberá ser realizada por
personal cualificado, de acuerdo con las disposiciones de la normativa vigente para los equipos eléctricos.
ANTES DE INSTALAR SISTEMAS Y AUTOMATISMOS, ES MUY RECOMENDABLE ASISTIR A UN CURSO DE FORMACIÓN, ASÍ COMO LEER ATENTAMENTE LAS INSTRUCCIONES.
NOTES
For duration and warranty conditions regarding the single products, please visit www.ave.it and see the current commercial catalogue. Products shall be sold in the original packaging otherwise the dealer and/or installer
has the obligation to apply and submit the instructions provided alongside the product and/or published in www.ave.it and on the current commercial catalogue to the user. Ave products are installation products. They
should be installed by skilled personnel in compliance with the laws in force and uses, in accordance with the AVE S.p.A. storage, use and maintenance instructions. Installers are also required to meet the general sales
conditions, notes, general warnings, warranty conditions, claims and technical instructions indicated in www.ave.it and in the current commercial catalogue.
WARNINGS: The products must be handled with care and stored in their original packaging in a dry place, protected from the weather and at a suitable storage temperature as specified in the product manual. If the
products are not in their original packaging, the retailer and/or installer is required to apply the instructions for usage accompanying the product and pass them on to the user. Keeping products in stock for more than 5
years is not recommended. After opening the package, check that the product is intact. Installation must be performed by qualified personnel in compliance with current regulations regarding electrical installations.
BEFORE INSTALLING ANY AUTOMATION SYSTEMS, IT IS RECOMMENDED TO ATTEND A TRAINING COURSE AND READ THE INSTRUCTIONS CAREFULLY.
NOTE
Per la durata e le condizioni di garanzia dei singoli prodotti vedasi www.ave.it e il catalogo commerciale vigente. I prodotti devono essere commercializzati in confezione originale, in caso contrario al rivenditore e/o
installatore è fatto obbligo di applicare e di trasmettere all’utilizzatore le istruzioni che accompagnano il prodotto e/o pubblicate su www.ave.it e sul catalogo commerciale vigente. I prodotti AVE sono prodotti da
installazione. Vanno installati da personale qualificato secondo le normative vigenti e gli usi, rispettando le istruzioni di conservazione, d’uso e di installazione di AVE S.p.A. Si richiede inoltre il rispetto delle condizioni
generali di vendita, note, avvertenze generali, avvertenze garanzie, reclami e avvertenze tecniche per l’installatore riportate su www.ave.it e sul catalogo commerciale vigente.
AVVERTENZE: I prodotti devono essere maneggiati con cura e immagazzinati in confezione originale in luogo asciutto, al riparo dagli agenti atmosferici e ad una temperatura idonea allo stoccaggio come dà indicazioni
riportate sul manuale di prodotto. Qualora i prodotti non siano in confezione originale, è fatto obbligo al rivenditore e/o all’installatore di applicare e di trasmettere all'utilizzatore le istruzioni d'uso che accompagnano il pro-
dotto. Si consiglia di non tenere a magazzino prodotti per un periodo superiore a 5 anni Dopo aver aperto l'imballaggio, assicurarsi dell'integrità del prodotto. L’installazione deve essere effettuata da personale qualificato,
secondo le prescrizioni della norma vigente per gli impianti elettrici.
PRIMA DI INSTALLARE SISTEMI E AUTOMATISMI È VIVAMENTE CONSIGLIABILE FREQUENTARE UN CORSO DI FORMAZIONE, OLTRE LA LETTURA ATTENTA DELLE ISTRUZIONI
ANMERKUNGEN
Die Garantiezeiten und -bedingungen der einzelnen Produkte sind unter www.ave.it und im geltenden Verkaufskatalog zu finden. Die Produkte müssen in Originalverpackung vermarktet werden; andernfalls ist der
Händler bzw. Installateur verpflichtet, die Anleitung, die dem Produkt beiliegt bzw. unter www.ave.it und im geltenden Verkaufskatalog veröffentlicht ist, anzuwenden und an den Endkunden weiterzugeben. Die Produkte
von AVE sind Installationsprodukte. Sie müssen durch Fachpersonal gemäß den geltenden Vorschriften und dem Anwendungszweck installiert werden, wobei die Lagerungs-, Bedienungs- und Installationsanweisungen von
AVE S.p.A. einzuhalten sind. Zu beachten sind außerdem die allgemeinen Geschäftsbedingungen, Anmerkungen, allgemeinen Warnhinweise, Garantie- und Reklamationshinweise und technischen Hinweise für den
Installateur, die unter www.ave.it und im geltenden Verkaufskatalog zu finden sind.
WARNHINWEISE: Die Produkte sind sorgfältig zu handhaben und in Originalverpackung trocken und wettergeschützt bei einer für die Lagerung geeigneten Temperatur gemäß den Anweisungen im Produkthandbuch zu
lagern. Sollten sich die Produkte nicht in der Originalverpackung befinden, ist der Händler bzw. Installateur verpflichtet, die Bedienungsanleitung, die dem Produkt beiliegt, anzuwenden und an den Endkunden weiterzuge-
ben. Es wird empfohlen, Produkte nicht länger als 5 Jahre im Lager zu halten. Nach dem Öffnen der Verpackung ist das Produkt auf Unversehrtheit zu prüfen. Die Installation muss durch Fachpersonal gemäß den gelten-
den Vorschriften für elektrische Anlagen erfolgen.
ES WIRD DRINGEND EMPFOHLEN, VOR DEM INSTALLIEREN VON AUTOMATIONSSYSTEMEN EINEN ENTSPRECHENDEN LEHRGANG ZU ABSOLVIEREN SOWIE DIE ANLEITUNG
AUFMERKSAM ZU LESEN.
www.ave.it
800 015 072
International Trademark
registration n°
327040 - 942905 - 330600
www.ave.it
www.ave.it / /
AVE S.P.A AVE
www.ave.it
5 /
C0784 - 01 - 080923
This manual suits for next models
1
Table of contents
Languages:
Other AVE Intercom System manuals

AVE
AVE DOMINA Smart VI2F-PE1 User manual

AVE
AVE 45387C User manual

AVE
AVE smart domina VIIP-PE1 User manual

AVE
AVE domina smart TS-SMART7ALS User manual

AVE
AVE DOMINA TS10 V Series User manual

AVE
AVE smart domina VILLA User manual

AVE
AVE DOMINA Smart VI2F-PIT7B User manual

AVE
AVE DOMINA VIIP-PIT4B User manual

AVE
AVE DOMINA VI2F-PIT4B User manual

AVE
AVE DOMINA Smart VI-PEAUX User manual