manuals.online logo
Brands
  1. Home
  2. •
  3. Brands
  4. •
  5. Alcad
  6. •
  7. Intercom System
  8. •
  9. Alcad 980 Series User manual

Alcad 980 Series User manual

1Anote en las tarjetas los datos de código
de llamada (1) y nombre de vivienda
(2).
Note the information concerning the call
code (1) and the house or flat name (2)
directly on the cards.
Inscrivez sur les cartes les données des
codes dappel (1) et nom des logements
(2).
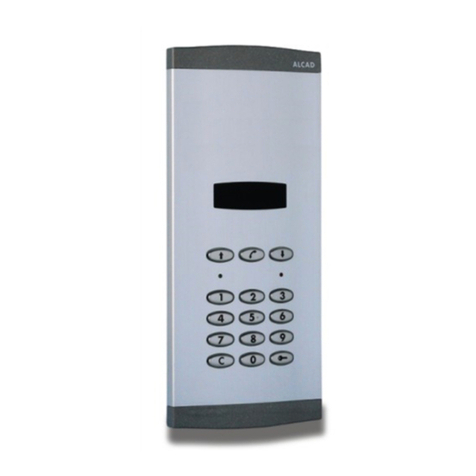
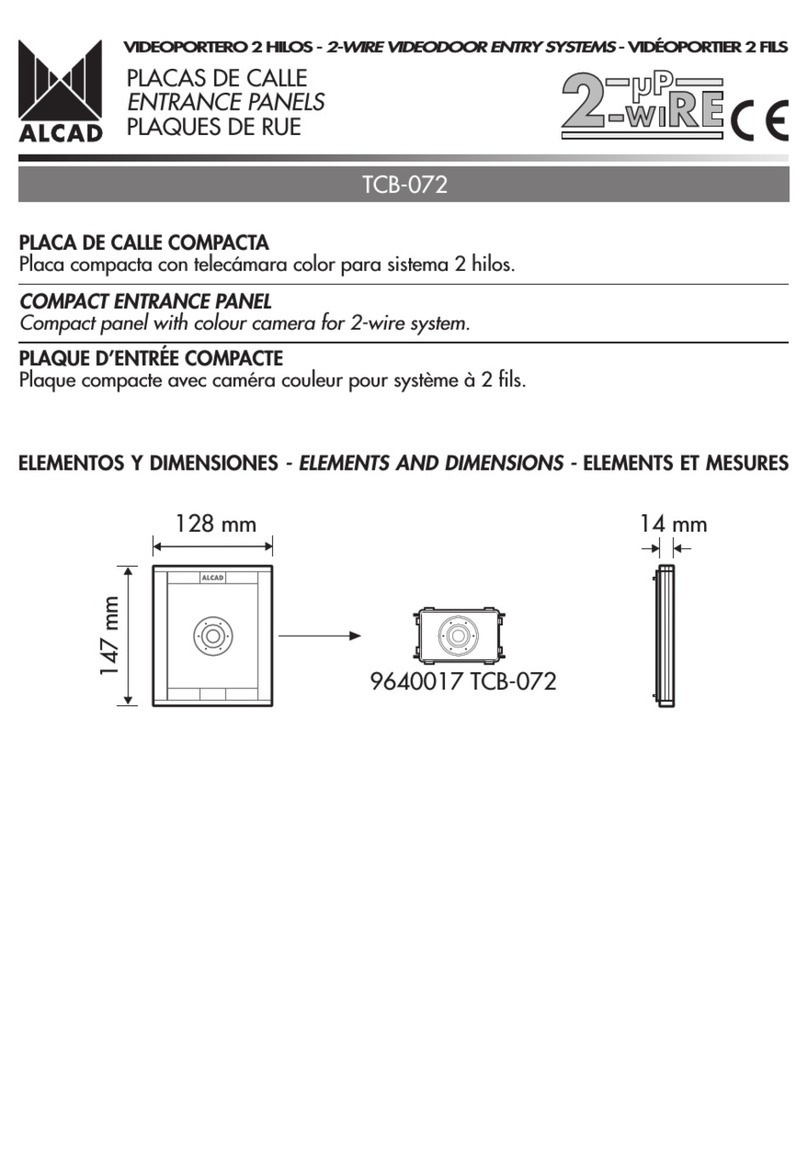
9800077 PTN-50000 PLACA DE CALLE CON DIRECTORIO
Placa de exterior que aloja un tarjetero informativo (1) de 3 mm x 2 6 mm.
De utilidad en instalaciones con placa de calle con teclado numérico para informar al visitante de los códigos de llamada
de las viviendas. Para facilitar la anotación de esta información, se suministran hojas con tarjetas en blanco y preimpresas
para colocar en cada uno de los tarjeteros.
Es posible alimentar esta iluminación con tensión alterna (12 Vac) o continua (15 Vdc)
UTILIZACIÓN DE LA TARJETA - USING THE CARD - UTILISATION DE CARTE
9800077 PTN-50000 ENTRANCE PANEL WITH DIRECTORY
utside panel which accommodates one informative cardholder (1), 73 mm x 276 mm.
Can be used in installations whose entrance panel has a numeric keypad to inform the visitor of the call codes of the
houses or flats. To make it easy to record this information, a series of sheets of blank and pre-printed cards is provided to
be placed in each of the cardholders.
Auxiliary lighting is build into the panel for situations where outside light is insufficient. The auxiliary lighting can be fed
with either alternating current (12Vac) or direct current (15Vdc).
9800077 PTN-50000 PLAQUE DE RUE AVEC DIRECTOIRE
Plaque extérieure avec une porte carte dinformation (1) de 3 mm x 2 6 mm.
Utilisés dans des installations avec plaque de rue à clavier numérique pour informer un visiteur des codes dappel de
logements. Pour faciliter lannotation de cette information, une série de feuilles avec cartes vierges ou pré-imprimées pour
les mettre chacune delles dans les portes cartes.
La plaque est pourvue déclairage auxiliaire pour des situations de faible luminosité extérieure. Il est possible dalimenter
cet éclairage par une tension alternative (12 Vac) ou continue (12 Vdc)
Tarje a en blanco - Blank ca d - Car e vierge
Tarje as preimpresas - P e-p inted ca ds - Car es pré-imprimées
Estas tarjetas se suministran con las casillas preimpresas para que anote los códigos de llamada y nombre de las viviendas. Utilíce estas tarjetas
cuando no vaya a utilizar la plantilla de nuestra página web.
These cards are provided with preprinted spaces to enable you to record the call codes and house or flat name directly. Use these cards when
you do not intend to use the template from our web page.
Ces cartes sont fournies avec des cases prévues pour inscrire les codes dappel et les noms des habitants.
1Descárguese la plantilla que encontrará
en la página web de Alcad:
www.alcad.net, dentro del apartado
Soporte técnico. Complete los datos de
código de llamada y nombre de
vivienda.
Download the template from the
Technical Support section of the Alcad
web page at www.alcad.net. Fill in the
information concerning the call code
and house or flat number.
Télédecharger le modèle présent sur la
page web dAlcad: www.alcad.net,
paragraphe: Support Technique.
Complétez les données du code dappel
et nom de logements.
1
339 mm
128 mm
14 mm
PTN-50000
MÓDULOS COMPLETOS
C MPLETE M DULES
MODULES COMPLETS
VIDEOPORTERO 2 HILOS - 2-WIRE VIDEODOOR ENTRY SYSTEMS - VIDÉOPORTIER 2 FILS
Para llamar eclee el número y pulse
1
2
Para llamar eclee el número y pulse
1
2Imprima el fichero en la hoja con tarjetas
en blanco (1) que se suministra.
Print the file on the blank cards sheet
(1) provided
Imprimez le fichier dans la feuille des
cartes vierges (1) qui est fournie.
INSTRUCCIONES DE MONTAJE - ASSEMBLY INSTRUCTIONS - INSTRUCTIONS DE MONTAGE
2
VIDEOPORTERO 2 HILOS - 2-WIRE VIDEODOOR ENTRY SYSTEMS - VIDÉOPORTIER 2 FILS
1
2
Retire el refuerzo de la caja de empotrar.
5
Remove the reinforcement of the flush-
mounted box.
Enlevez le renfort du boîtier encastrable.
Retirar en el momento de
instalar la placa de calle
Remove when installing the
entrance panel
Retirer lors de l'installation
de la plaque de rue
6Extraiga los tapones y las bisagras de la
caja de empotrar. Extraiga las dos bisagras
que requiera según quiera abrir la placa
hacia la derecha o hacia la izquierda.
Remove the caps and the fixing pins from
the flush-mounted box. Choose the two
fixing pins you want to hinge the panel on
to, so that it opens either to the right or to
the left.
Retirez les bouchons et les axes de fixation
du boîtier encastrable. Enlevez les deux
axes requis suivant si vous voulez ouvrir
la plaque vers la droite ou bien vers le
gauche.
The entrance panel is equipped with pivot
points to hold the fixing axle in place on
each of its sides (1). Attach the fixing axles
you have removed to the corresponding
pivot points (2) and (3). The unused pins
should be placed in their slots.
La plaque de rue dispose dun élément
pour tenir l'axe de fixation en place, de
chaque côté (1). Attachez les axes de
fixation que vous avez retirés sur les
éléments correspondants (2) et (3).
Introduisez complètement dans leurs
rainures les axes non utilisés.
7
Elemento de sujeción
Pivot point
Element de fixation
Bisagra
Pin
Axe
Elemento de sujeción
Pivot point
Element de fixation
CLICK!
2.1 2.2
La placa de calle dispone de un elemento
para sujeción de bisagra en cada uno de
sus vértices (1). Inserte las bisagras
extraídas en los elementos de sujeción
correspondientes (2) y (3). Introduzca
completamente en sus ranuras las bisagras
no utilizadas.
Suelte las 4 palomillas de la parte posterior
de la placa.
1Una vez colocado el rótulo informativo (1)
vuelva a poner el panel translúcido (2).
3
Vuelva a atornillar las palomillas.
4
Extraiga el panel translúcido.
2
Extract the transparent panel.
Extrayez le panneau transparent. After inserting the informative label (1),
put the transparent panel back in position
(2).
Ayant mis létiquette informative (1) en
place, remettez le panneau transparent
(2).
Tighten the wing nuts again.
Resserrez les écrous à ailettes.
Loosen the wing nuts at the rear of the
panel.
Desserrez les écrous à ailettes sur le revers
de la plaque.
Cierre la placa, presiónela contra la caja
de empotrar y fíjela a la misma mediante
los tornillos de sujeción.
Close the panel; press it against the flush-
mounted box and attach it using the fixing
screws.
Fermez la plaque en la poussant contre le
boîtier encastrable et en la fixant à celui-
ci avec les vis fournis.
10
INSTRUCCIONES DE CONEXIÓN - CONNECTION INSTRUCTIONS - INSTRUCTIONS DE BRANCHEMENT
BORNAS - TERMINALS - BORNES
Alimentación DC - DC Power supply - Alimentation DC
Alimentación AC - AC Power supply - Alimentation AC
Cierre las tapas frontales superior e inferior.
Close the top and bottom front covers.
Fermez les couvercles frontaux supérieurs
et inférieurs.
11
,
,
VIDEOPORTERO 2 HILOS - 2-WIRE VIDEODOOR ENTRY SYSTEMS - VIDÉOPORTIER 2 FILS
3
Abra las tapas frontales superior e inferior.
pen the top and bottom front covers.
Ouvrez les couvercles frontaux supérieurs
et inférieurs.
9
Alimentador
(AC o DC)
Power supply
(AC or DC)
Alimentation
(AC ou DC)
V
AC
DC
Realice las conexiones eléctricas. Vea
instrucciones de conexión.
Make the electrical connections. See
connection instructions.
Faites les branchements électrique comme
indiqué ci-après.
8
The product herewith complies with the requirements of the Low Voltage Directive 2006/95/EC and the EMC Directive 2004/108/EC.
Supplemen ary Informa ion:
To comply with these directives, do not use the products without covers and operate the system as specified.
Cod. 2635 0 - Rev. 02
ALCAD, S.L.
Tel. 943 63 96 60
Fax 943 63 92 66
Int. Tel. +34 - 943 63 96 60
[email protected]
Apdo. 455 - Pol. Ind. Arreche-Ugalde,1
20305 IRUN - Spain
www.alcad.ne
FRANCE - Hendaye
Tel. 00 34 - 943 63 96 60
CZECH REPUBLIC - Ostrovac
v
ice
Tel. 546 42 059
GERMANY - Munich
Tel. 089 55 26 48 0
UNITED ARAB EMIRATES - Dubai
Tel. 9 1 4 88 19 50
TURKEY - Istanbul
Tel. 212 295 9 00
CARACTERÍSTICAS TÉCNICAS- TECHNICAL CHARACTERISTICS - CARACTÉRISTIQUES TECHNIQUES
DECLARATION OF CONFORMITY
according to EN ISO/IEC 1 050-1:2004
Manufac urer's Address: Pol. Ind. Arreche-Ugalde, 1
Apdo. 455
20305 IRÚN (Guipúzcoa)
SPAIN
Manufac urer's Name: ALCAD, S.L.
declares that the product
PTN-50000
COMPLETE MODULES
INCLUDING ALL OPTIONS
Model Number(s):
Produc Descrip ion:
Produc Op ion(s):
EN 60065:2002
EN 61000-6-3:200
EN 61000-6-1:200
is in conformi y wi h:
Safety:
EMC:
Irún(SPAIN), 22 ct 2012
12 V
Alimentación DC
DC Power supply
Alimentation DC
BORNAS
TERMINALS
BORNES
CARACTER
Í
STICAS
CHARACTERISTICS
CHARACTÉRISTIQUES
12.5 - 18
V
Alimentación AC
AC Power supply
Alimentation AC
,
,
VIDEOPORTERO 2 HILOS - 2-WIRE VIDEODOOR ENTRY SYSTEMS - VIDÉOPORTIER 2 FILS
Temperatura de funcionamiento - perating temperature - Température de travail -10 .. +55
o
C
Xabier Isasa
General Manager
Especificaciones sujetas a modificación sin previo aviso
Specifications subject to modifications without prior notice
Les spécifications sont soumises à de possible modifications sans avis préalable

Other manuals for 980 Series

13

This manual suits for next models

2

Other Alcad Intercom System manuals

Alcad TCB-010 User manual

Alcad

Alcad TCB-010 User manual

Alcad GRF-400 User manual

Alcad

Alcad GRF-400 User manual

Alcad 4+N User manual

Alcad

Alcad 4+N User manual

Alcad 980 Series User manual

Alcad

Alcad 980 Series User manual

Alcad TED-002 User manual

Alcad

Alcad TED-002 User manual

Alcad GRF-003 User manual

Alcad

Alcad GRF-003 User manual

Alcad GRF-411 User manual

Alcad

Alcad GRF-411 User manual

Alcad 980 Series User manual

Alcad

Alcad 980 Series User manual

Alcad USOA User manual

Alcad

Alcad USOA User manual

Alcad iBLACK User manual

Alcad

Alcad iBLACK User manual

Alcad MVC-141 User manual

Alcad

Alcad MVC-141 User manual

Alcad GRF-001 User manual

Alcad

Alcad GRF-001 User manual

Alcad 980 Series User manual

Alcad

Alcad 980 Series User manual

Alcad 960 Series User manual

Alcad

Alcad 960 Series User manual

Alcad 972 Series User manual

Alcad

Alcad 972 Series User manual

Alcad 967 Series User manual

Alcad

Alcad 967 Series User manual

Alcad GRF-200 User manual

Alcad

Alcad GRF-200 User manual

Alcad ENARA User manual

Alcad

Alcad ENARA User manual

Alcad VIDEODOOR ENTRY SYSTEM User manual

Alcad

Alcad VIDEODOOR ENTRY SYSTEM User manual

Alcad CHC-042 User manual

Alcad

Alcad CHC-042 User manual

Alcad TCB-130 User manual

Alcad

Alcad TCB-130 User manual

Alcad CHC-041 User manual

Alcad

Alcad CHC-041 User manual

Alcad 972 Series User manual

Alcad

Alcad 972 Series User manual

Alcad KVS-44101 User manual

Alcad

Alcad KVS-44101 User manual

Popular Intercom System manuals by other brands

Contacta STS-K009-IP-L-B Installation & user guide

Contacta

Contacta STS-K009-IP-L-B Installation & user guide

Elvox PETRARCA 6000 operating instructions

Elvox

Elvox PETRARCA 6000 operating instructions

golmar 7W/G2+ quick guide

golmar

golmar 7W/G2+ quick guide

Zartek ZA-601 instruction manual

Zartek

Zartek ZA-601 instruction manual

Algo 8036 install guide

Algo

Algo 8036 install guide

Elvox 8879 Installation and operation manual

Elvox

Elvox 8879 Installation and operation manual

Commend C-GEC881S.C Service manual

Commend

Commend C-GEC881S.C Service manual

RTS MC-ADAM Hardware guide

RTS

RTS MC-ADAM Hardware guide

Radio Shack 43-3105A owner's manual

Radio Shack

Radio Shack 43-3105A owner's manual

Vega Q700 owner's manual

Vega

Vega Q700 owner's manual

Vidos Duo S1301D user manual

Vidos

Vidos Duo S1301D user manual

Slinex Shan user manual

Slinex

Slinex Shan user manual

Vimar ELVOX Videocitofonia 41017 Installer manual

Vimar

Vimar ELVOX Videocitofonia 41017 Installer manual

AES global CellCOM Prime 7 quick start guide

AES global

AES global CellCOM Prime 7 quick start guide

ViziT BVD-343R operating instructions

ViziT

ViziT BVD-343R operating instructions

Bell System bellissimo User instructions

Bell System

Bell System bellissimo User instructions

Telguard Hy-can Quick start manual

Telguard

Telguard Hy-can Quick start manual

Aiphone KB-3HRD installation manual

Aiphone

Aiphone KB-3HRD installation manual

manuals.online logo
manuals.online logoBrands
  • About & Mission
  • Contact us
  • Privacy Policy
  • Terms and Conditions

Copyright 2025 Manuals.Online. All Rights Reserved.